Garmin GPS Cup Holder Install
 Since
Since
I got the S2000 I’ve always wanted to install and fit a navigation
system. However I wanted it to look as much as OEM. We all know that
the space of the S2000 limits our options except the JDM dash screen
which I personally don’t like it. I was interested in the Alpine model
that includes radio-cd/mp3/navigation but unfortunately there are not
any Greek maps available yet for this model. So after checking around
the market I was not getting anywhere and options were really limited.
I decided to start looking around for the best possible position
that I could fit a Sat/Nav system (or something similar anyway) that
will look also OEM.
 In
In
the end after having installed the Muz Leather Console cover I realized
there was much room left in the area that the cup-holder fits. So…
apart of having my EDFC fitted for the Tein Flex (not yet installed)
behind the cupholder, I decided to search the market for a unit that
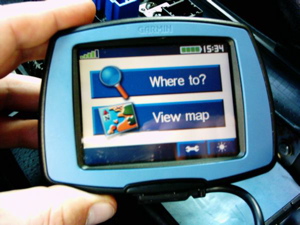
could fit there. So… I had a look at Garmin products and end up with
the Street Pilot c320 which covers all Europe and at last Greece. The
shape of the unit was just what I was looking for, apart from the blue
front cover that can be replaced (already ordered a black cover that
will look better with the console).
 The
The
first thing to do is to remove the center console which is done by
removing the shift-knob and pulling of the console by detaching it from
the cleats. You all know how to do that. Then I had to remove the whole
cupholder (no need for Starbucks coffee anymore in the S). At first I
wanted to trim the console in order to have the navigator fitted on the
same level with the console, but then I started thinking that this
could be a target for thieves. So I had a look at the console and then
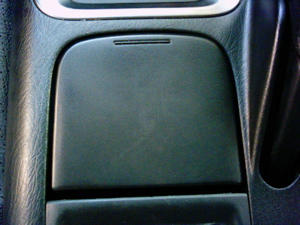
at the cupholder’s cover. I realized that it would be better to use the
cupholder cover to hide the navigator when the S is parked, and once on
the move to simply open the cover. So the next thing was to remove the
cover. This was an easy job to do so. I had to remove the brackets of
the cupholder cover and trim it in order to use it, since the navigator
is wider plus there are not of any use anymore. This was easily done by
using a sharp knife.
 Another
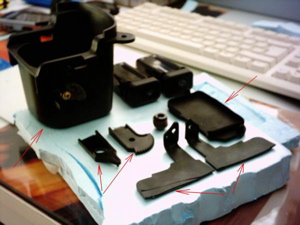
thing that needed to be cut off, were the brackets on the center
console that hold the cupholder on the console. This was necessary in
order to fit the unit underneath the console with no obstacles. Below
is the picture of the cupholder, its brackets, as well as the console
brackets removed. Please also note that I have removed the rubber
underneath the cupholder cover in order the cover to sit on the same
level (you will see what I mean later on).
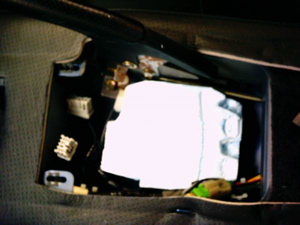 The
The
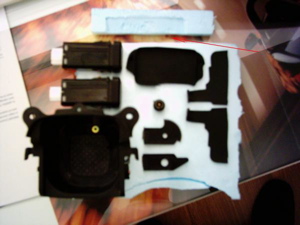
next thing to do was to fit the Garmin in the area cleared from the
cupholder removal. The space created there is really big. It can fit
more than you wish for. I really had to fit something there that could
support the unit from underneath as well as to lift the unit towards
the center console. This was done by using a material which I cannot
describe it exactly. Is like hard foamed plastic that can be trimmed
easily. It is the blue material that can be seen previously in the
pictures. Anyway here is the picture of the area cleared up before and
after fitting the relative material which was trimmed to fit in.
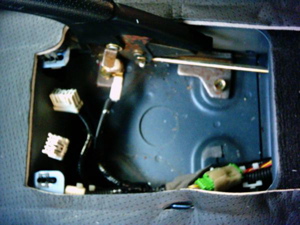
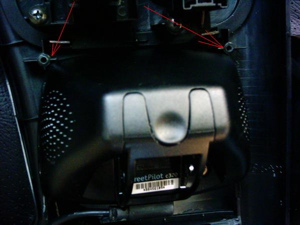 The
The
next step was to check how and where the unit would be supported on the
console. I was lucky with this one. The corners of the unit were
matched together exactly on the holes where the screws of the cupholder
are. Here is a picture to understand what I mean. A picture can tell a
thousand words someone said.
The rest was an easy job to do. I
had the unit supported on the console plus the cable that I guided
towards the lighter adaptor and plugged it in. I will have it connected
permanently with the relative wiring once I fit my EDFC for the Tein
Flex in the future.
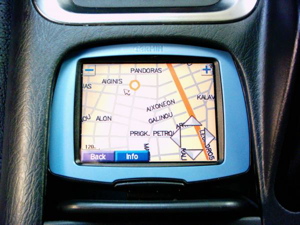
 So
So
I carefully fitted the unit together with the console and then put it
back in place. The final result is the following pictures shown the
whole deal which I really enjoyed the progress and completion. Once
again I will like to point out that am waiting for the replaceable
black front cover of the unit to be delivered in order to replace it
and look even more OEM. Don’t be shy, you can give it a try! 🙂