@S2KSean's Turbo AP1


 04-21-2013, 07:38 PM
#12

Thread Starter
Well I still don't have the bumper painted. Hoping to have it done in a couple weeks. Went on a small road trip and been too busy with my other project car as well as other things have been popping up with the S.
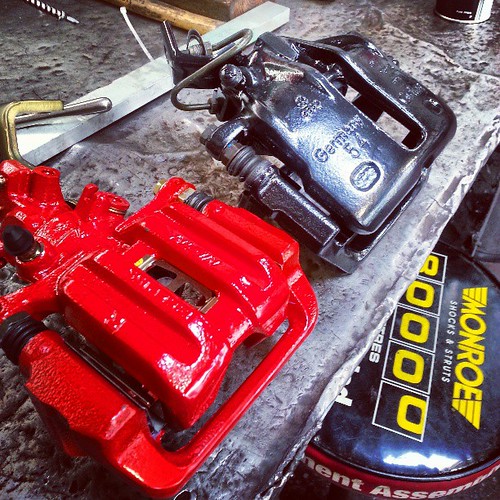
Right rear caliper slides and e-brake mechanism sticking. Passenger side pads were at 75% and the drivers side were at 40% so I opted to just do a full rear brake job including:
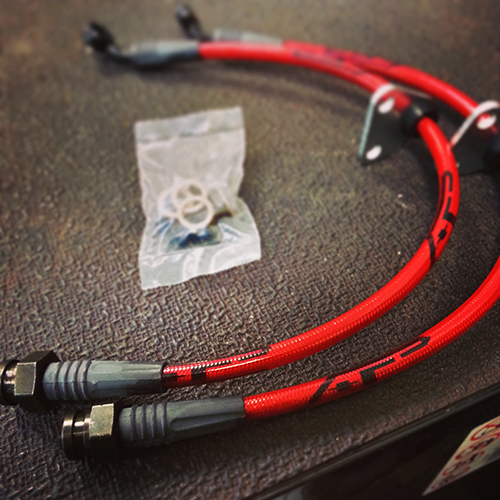
- Agency Power Braided Hoses
- New calipers (painted red)
- Power Slot rotors and new pads
These should go on this week when my hoses come in.
Red caliper is S2000 rear, black are the ones I rebuilt for the front of my project
Also the diff has me worried (I think I'm just paranoid) but I just bought a broken diff to rebuild to be on the safe side which should show up later this week.
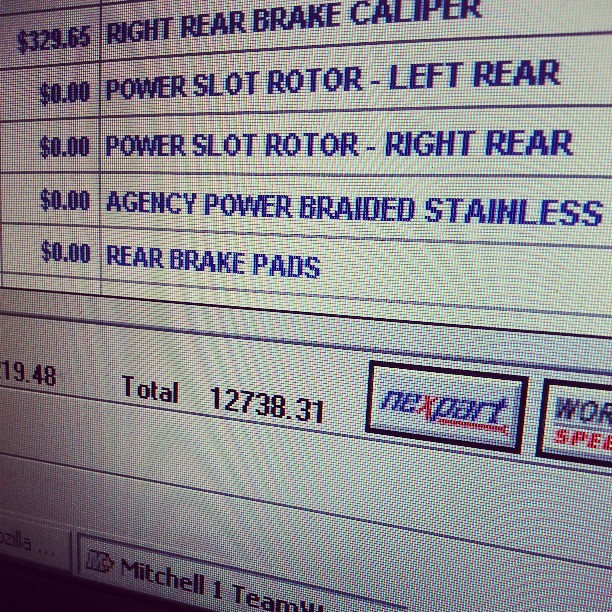
Since I do my own labour and get parts at cost through work, I don't really see how much things would cost if I didn't. I have a running tally of what's been done to my car since I bought it (less than 2 years ago) with totals of full parts costs with proper labour as if I was a paying customer. I looked at it for the first time in a while and nearly cried. After adding the bumper cost and some other items that hadn't been added I'm nearing the 15K mark.... Oh, and my car still appears stock. F me.
Right rear caliper slides and e-brake mechanism sticking. Passenger side pads were at 75% and the drivers side were at 40% so I opted to just do a full rear brake job including:
- Agency Power Braided Hoses
- New calipers (painted red)
- Power Slot rotors and new pads
These should go on this week when my hoses come in.
Red caliper is S2000 rear, black are the ones I rebuilt for the front of my project
Also the diff has me worried (I think I'm just paranoid) but I just bought a broken diff to rebuild to be on the safe side which should show up later this week.
Since I do my own labour and get parts at cost through work, I don't really see how much things would cost if I didn't. I have a running tally of what's been done to my car since I bought it (less than 2 years ago) with totals of full parts costs with proper labour as if I was a paying customer. I looked at it for the first time in a while and nearly cried. After adding the bumper cost and some other items that hadn't been added I'm nearing the 15K mark.... Oh, and my car still appears stock. F me.
04-24-2013, 03:02 PM
#13
Registered User

Join Date: Mar 2010
Location: Metchosin
Posts: 234
Likes: 0
Received 0 Likes
on
0 Posts
Nice thread Sean. Nice to see all the build threads from BC guys. You've done enough work on it that it might not be considered to be made in Japan anymore heh.
04-27-2013, 05:33 PM
#14
Thread Starter
^^ Haha you're telling me, James! Basically Made in Japan, rebuilt in BC.
Still waiting for my brake hoses to come in, and it was too wet outside for bumper prepping sooooo the used diff arrived Thursday so I started ripping it apart to see what was up.
http://www.flickr.com/photos/vwsean/8687778158/
Popped out the axle shafts.
http://www.flickr.com/photos/vwsean/8686661951/
Un-bolted and separated the cover from the housing. Dirrrrrty fuid.
http://www.flickr.com/photos/vwsean/8686661839/
http://www.flickr.com/photos/vwsean/8687777832/
Cleaned the cover out. I did remove the two 10mm bolts and clean in the breather area also.
http://www.flickr.com/photos/vwsean/8687777546/
On to the diff housing.
http://www.flickr.com/photos/vwsean/8686661595/
Marked and removed the caps.
http://www.flickr.com/photos/vwsean/8686661347/
http://www.flickr.com/photos/vwsean/8687777166/
http://www.flickr.com/photos/vwsean/8687777066/
Pulled out the business portion and set it aside for later.
http://www.flickr.com/photos/vwsean/8687776952/
Next, off came the input shaft locking nut, washer, and flange.
http://www.flickr.com/photos/vwsean/8686660729/
You're then able to pop out the pinion shaft.
http://www.flickr.com/photos/vwsean/8687776628/
Remove the input shaft seal so you can remove the outer bearing.
http://www.flickr.com/photos/vwsean/8687776482/
When disassembling the shaft, take note of the spacers.
http://www.flickr.com/photos/vwsean/8686660283/
http://www.flickr.com/photos/vwsean/8686660167/
Using a press I got the inner bearing off the pinion shaft.
http://www.flickr.com/photos/vwsean/8687775770/
I then knocked out the bearing races from the diff housing.... (Notice the pitting on the race. Hard to capture)
http://www.flickr.com/photos/vwsean/8686659807/
Then loosely reassembled the shaft for storage until new parts arrive.
http://www.flickr.com/photos/vwsean/8686659625/
http://www.flickr.com/photos/vwsean/8687776094/
This is where I ended today.
This obviously isn't necessary but I will be doing this job more than once so I made a quick stand to hold the diff while working on it.
http://www.flickr.com/photos/vwsean/8686659901/
04-29-2013, 07:22 PM
#15
Thread Starter
Built a quick bench in the garage at home so I don't have to work off the floor anymore. haha
http://www.flickr.com/photos/vwsean/8695071080/
Started cleaning up the diff gizzards today. As per the previous pictures, the bearing were staring to come apart, but I found the real cause of brokenness.
http://www.flickr.com/photos/vwsean/8693950321/
http://www.flickr.com/photos/vwsean/8695070868/
I was already planning to change gear sets in one of my diffs, but this just confirmed it will be this one.
On to more mods/repairs no one will be able to see
 :
:
http://www.flickr.com/photos/vwsean/8695071080/
Started cleaning up the diff gizzards today. As per the previous pictures, the bearing were staring to come apart, but I found the real cause of brokenness.
http://www.flickr.com/photos/vwsean/8693950321/
http://www.flickr.com/photos/vwsean/8695070868/
I was already planning to change gear sets in one of my diffs, but this just confirmed it will be this one.
On to more mods/repairs no one will be able to see
:
05-16-2013, 07:58 PM
#16
Thread Starter
Got bored so I thought I'd post an update.
Still waiting for my brake lines to do my rear brake job. (5 weeks now)
Still waiting for some free time to finishing fitting my front bumper. (possibly this weekend)
Deciding how far I want to go with this diff. I've got it all apart and painted, just putting off buying parts because I'm not sure if I want to get an LSD also... So expensive...
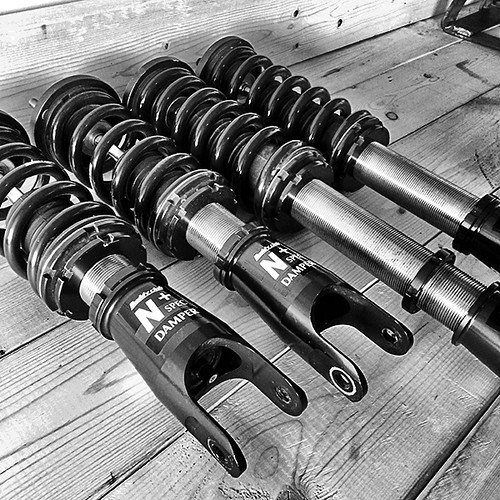
Just sent payment for some Buddy Club coilovers FINALLY! Been waiting 2 years to lower this thing haha.
Still waiting for my brake lines to do my rear brake job. (5 weeks now)
Still waiting for some free time to finishing fitting my front bumper. (possibly this weekend)
Deciding how far I want to go with this diff. I've got it all apart and painted, just putting off buying parts because I'm not sure if I want to get an LSD also... So expensive...
Just sent payment for some Buddy Club coilovers FINALLY! Been waiting 2 years to lower this thing haha.


 05-23-2013, 06:51 PM
#19
Thread Starter
Brake hoses finally made it in after a 6 week wait.
Agency Power brake lines will be getting installed with new Power Slot rotors, new calipers and pads.
After 2 years of owning her, I finally got coilovers to lower this B.
Got these used off a semi-local member "mcsinc". Look like new, good seller. Thanks!
Got some stuff to do this weekend!
Agency Power brake lines will be getting installed with new Power Slot rotors, new calipers and pads.
After 2 years of owning her, I finally got coilovers to lower this B.
Got these used off a semi-local member "mcsinc". Look like new, good seller. Thanks!
Got some stuff to do this weekend!

