AP1 GPW Turbo build!
 02-02-2016, 08:51 PM
#1


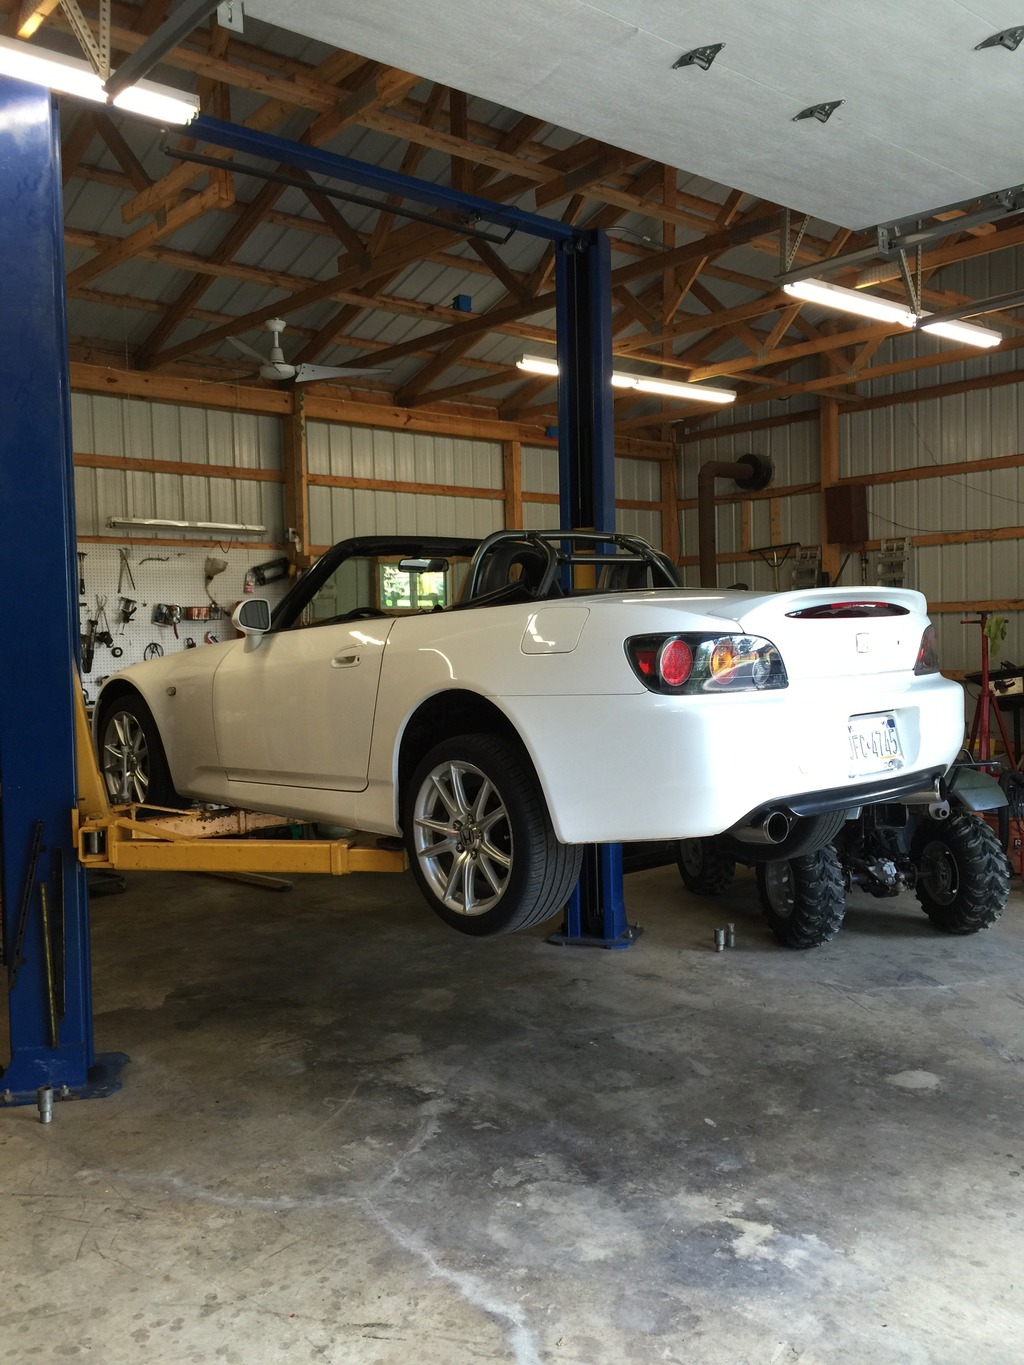
So I bought my 2003, s2000 3 years ago with 48,000 miles. Kept it stock for awhile then last summer the mod bug hit me… And also that summer at a car show I won a BW s200sx turbo, soooo the build then started lol. And since I now have a bunch of parts and started installing everything. Thought I'd make this thread to keep up and get advice 
Mods:
Exterior:
Wasp carbon fiber side diffusers
Clear side markers
Shaved front bumper
Ap2 Taillights
OEM Ap1 flush mount spoiler
OEM AP1 front lip
Interior:
Black window switches
Stitched door panels
Safety 21 roll bar
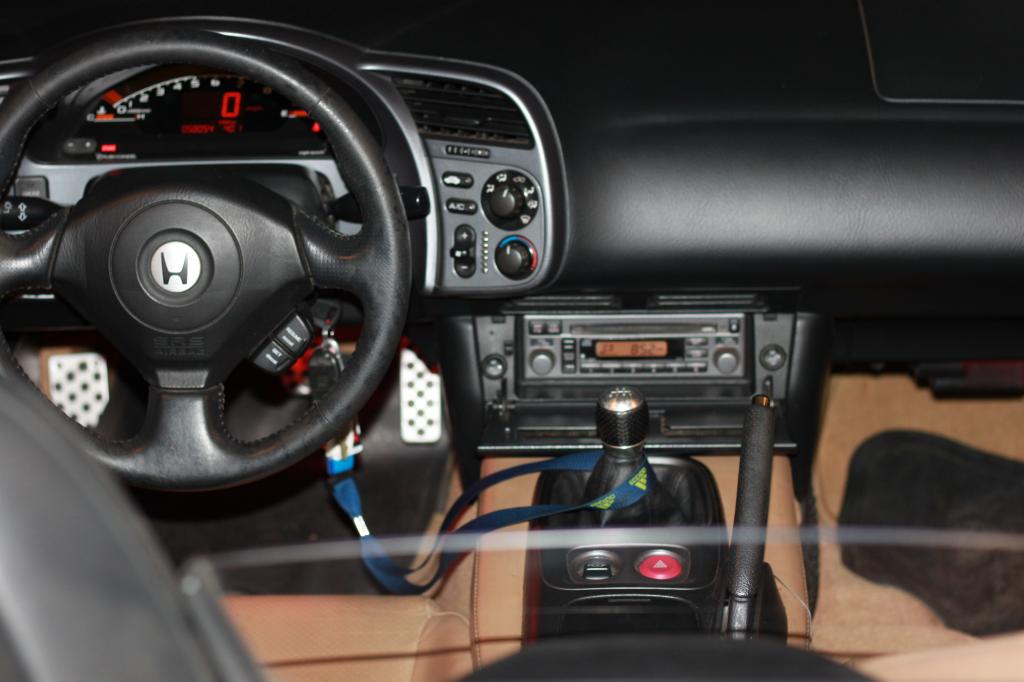
Mugen shift knob
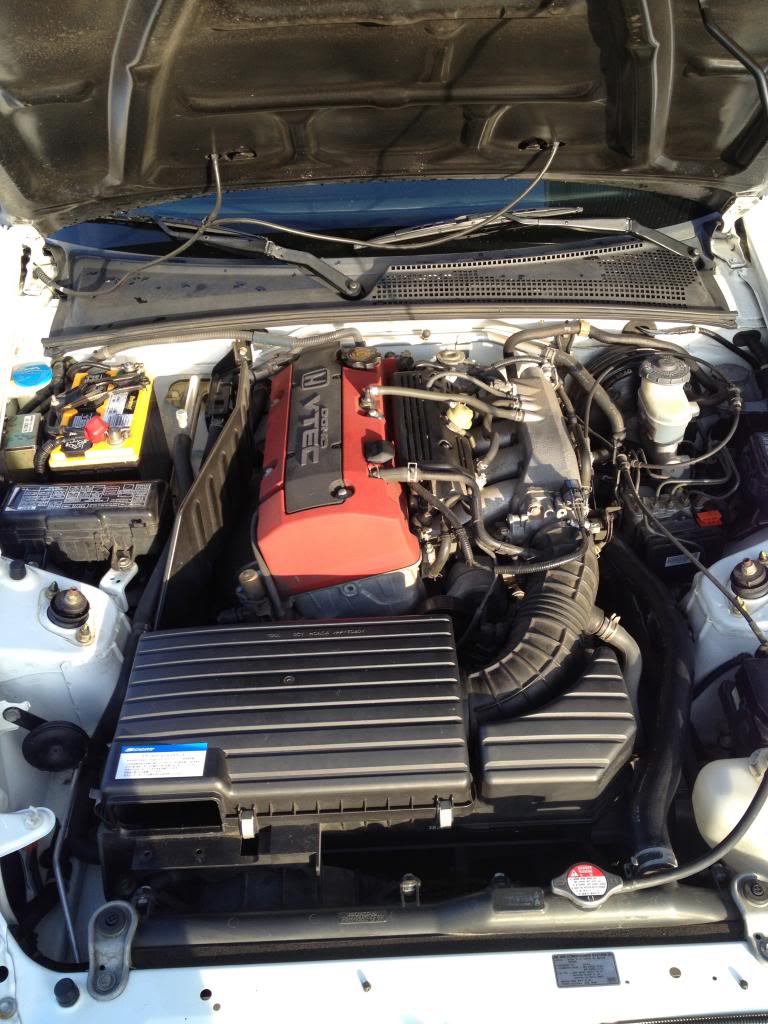
Turbo setup: 450whp 290wtq
Borg Warner s200sx
T4 twinscroll manifold
Treadstone intercooler
NGK brk8eix spark plugs
Mac boost solenoid
Oil feed/return setup
Heater bracket relocation
ID1000 fuel injectors
Dual Tial MVR 44mm wastegates
Fullblown 340 fuel pump
EGR block off
Aem series 1 EMS
SOS 3 bar map sensor
AEM boost gauge
AEM oil pressure gauge
AEM wideband
SOS gauge pod
Push lock metal fitting and vacuum hose
Tial BOV
Drivetrain:
ACT 6 puck clutch
Axial Flow short shifter
Wheels/Suspension:
RS*R I-Shock coilovers
Prodrive GC-07c 17x9 +50
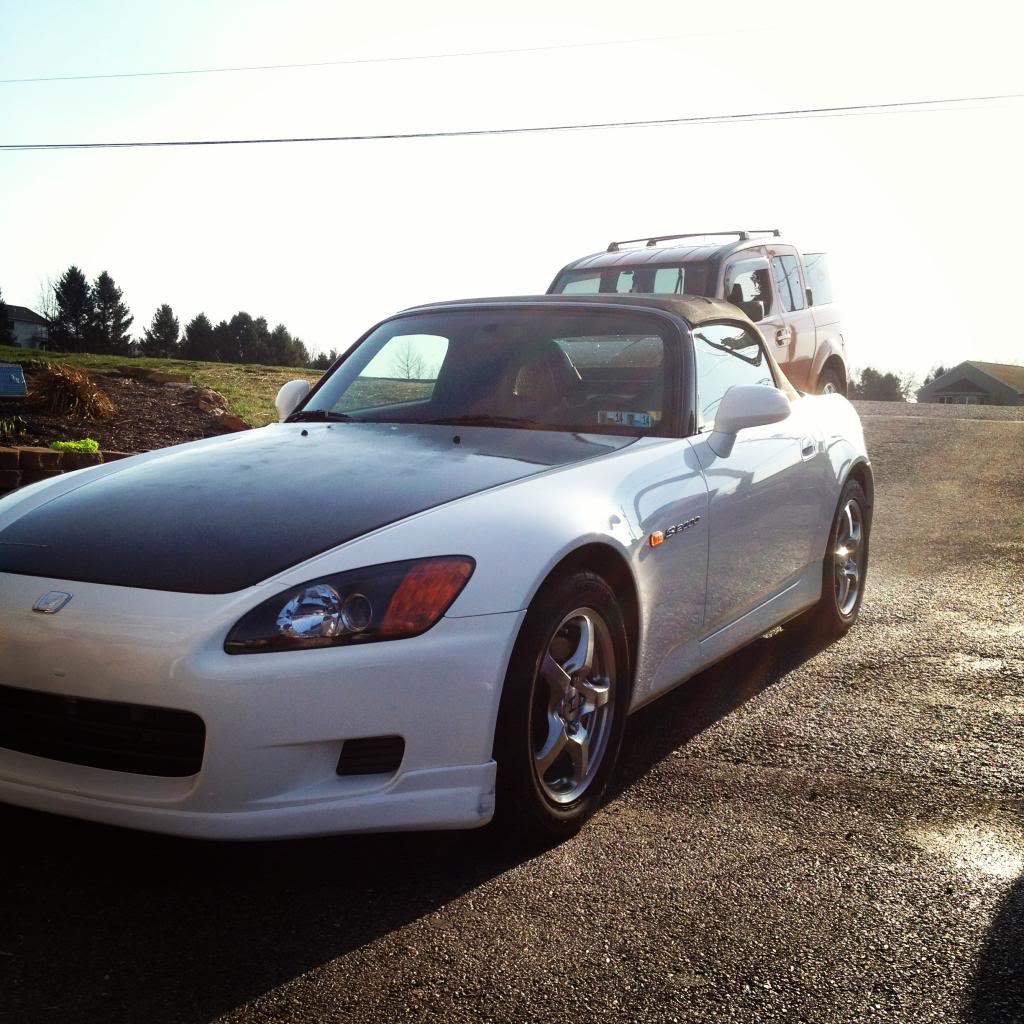
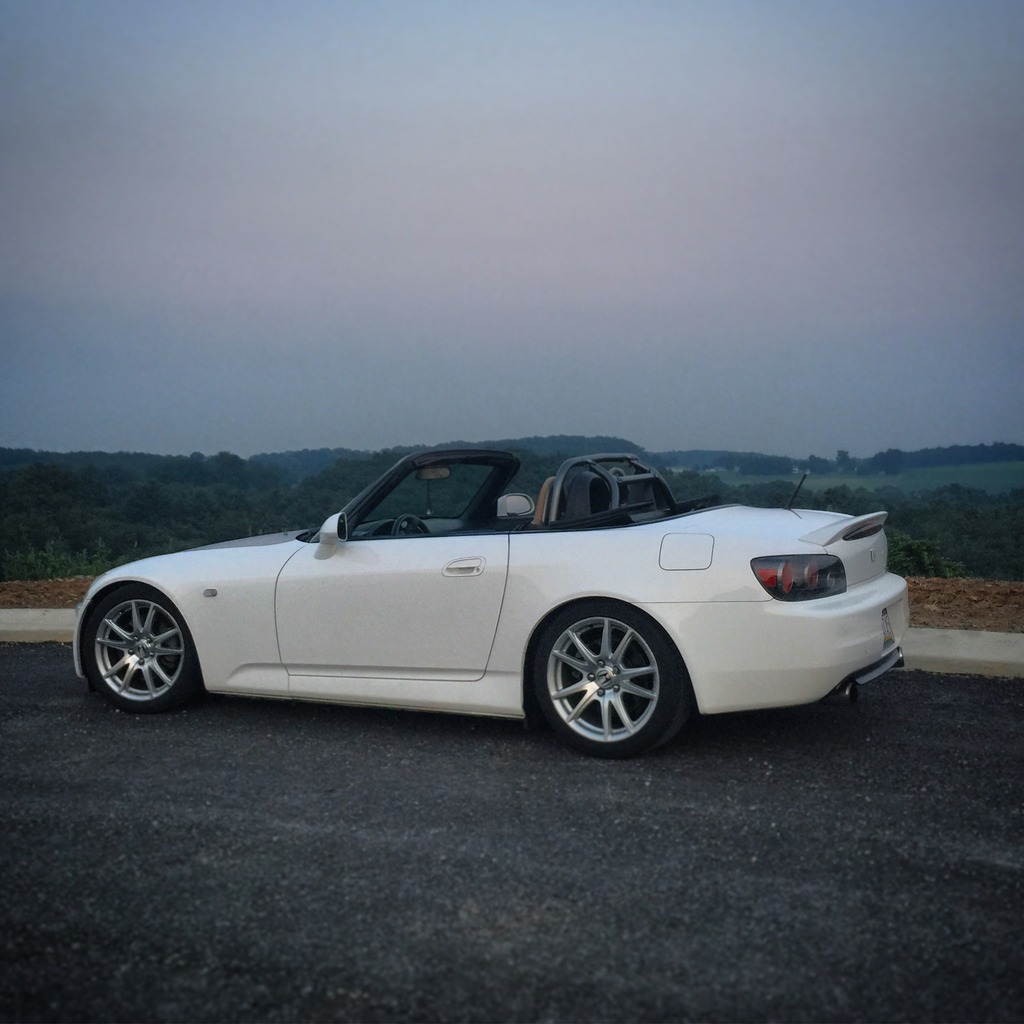
When I first bought it.
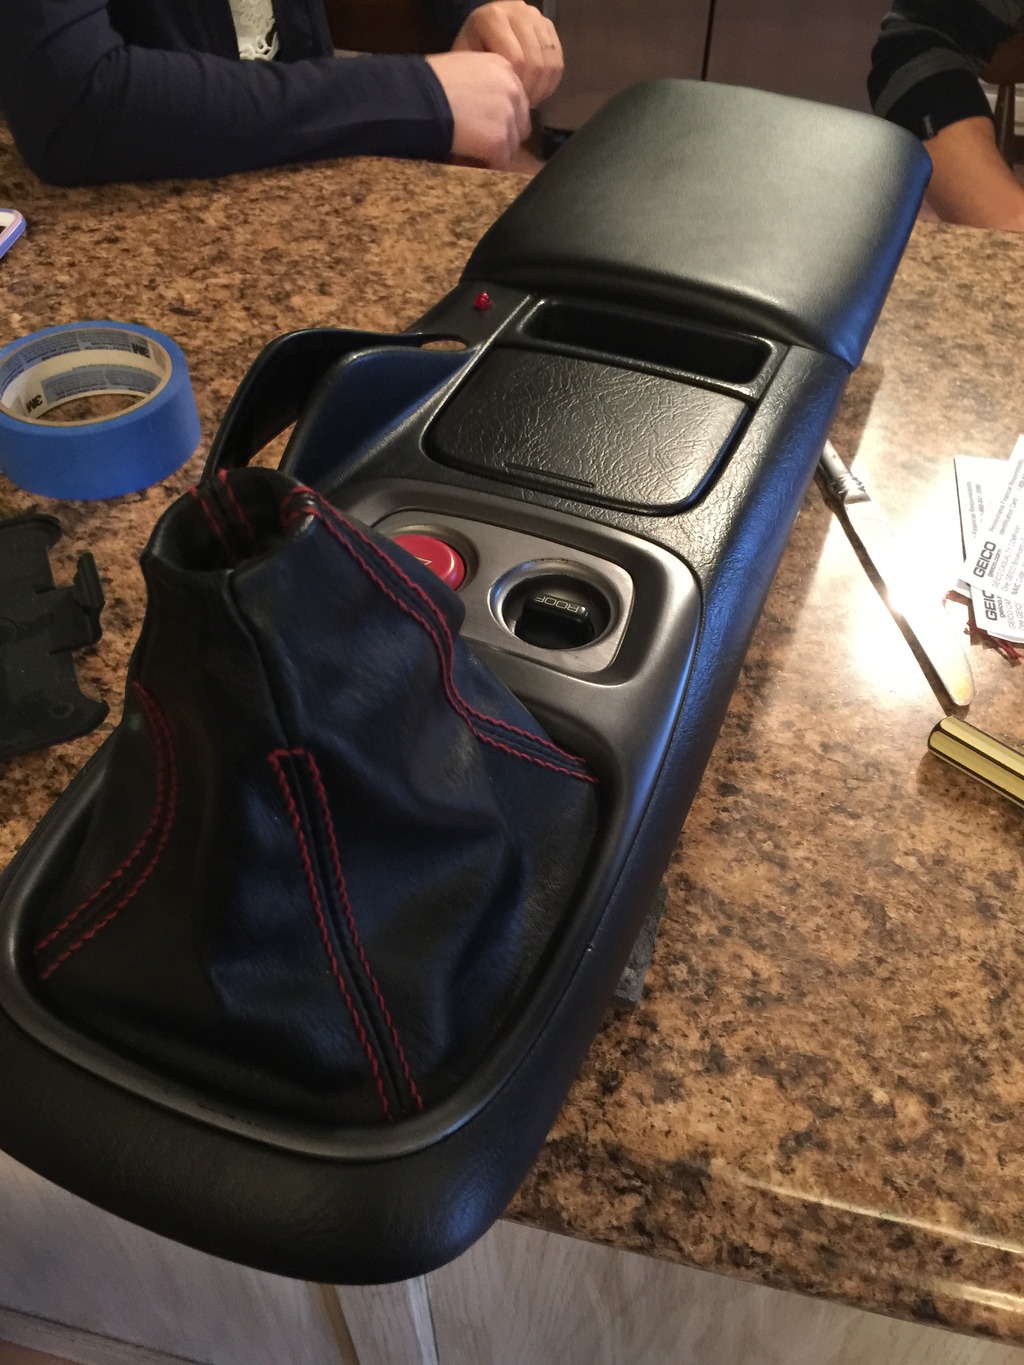
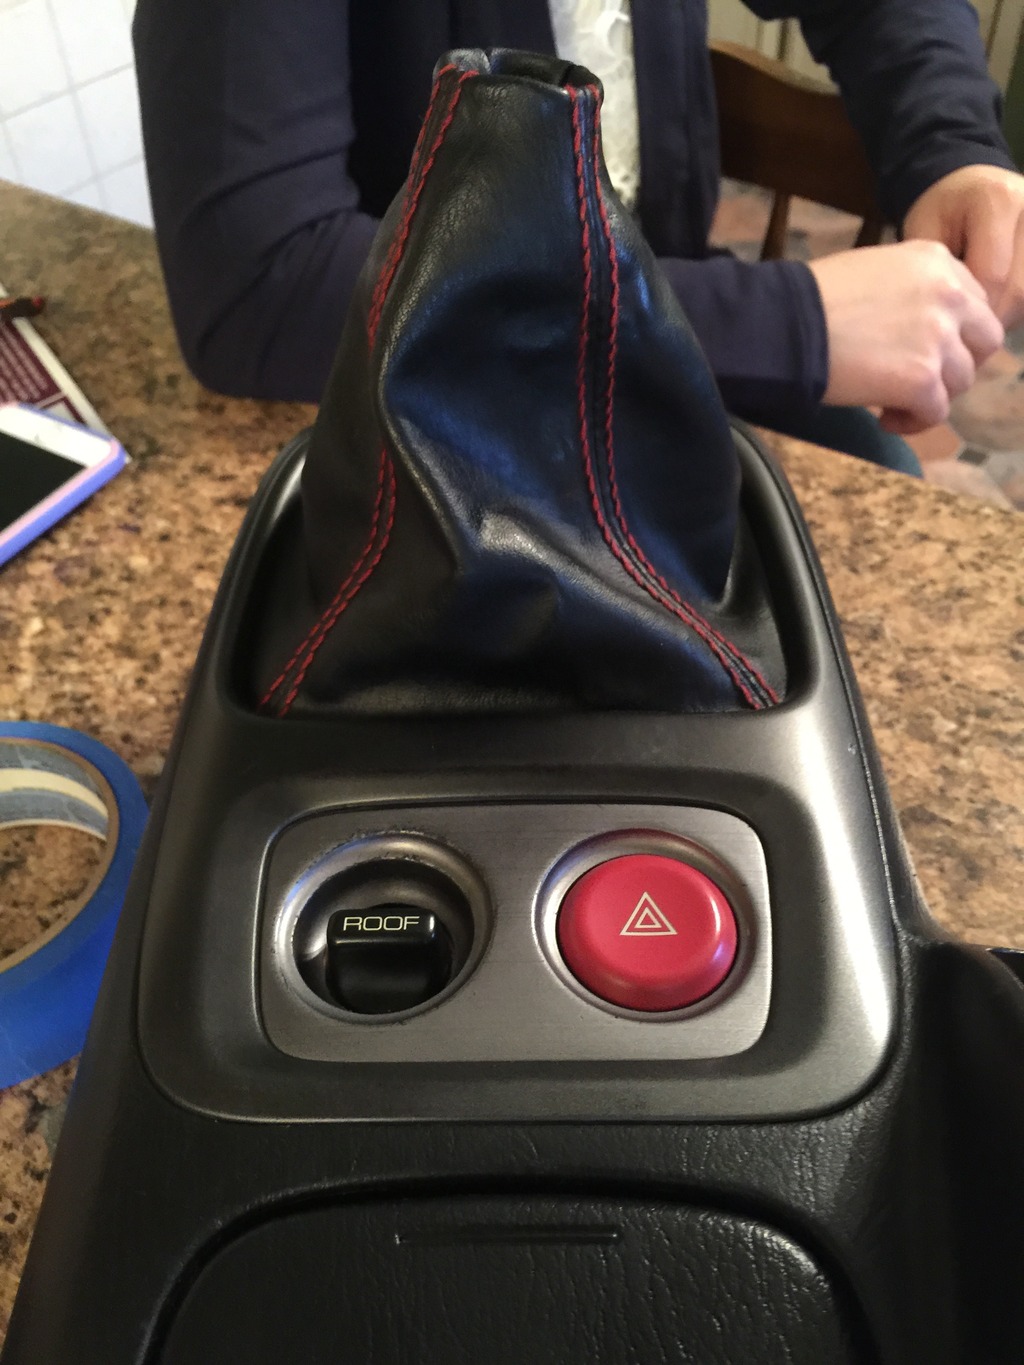
Then I did some interior work. Re-padded and covered the arm rest, stitched the OEM shift boot, and also stitched my door panels with black.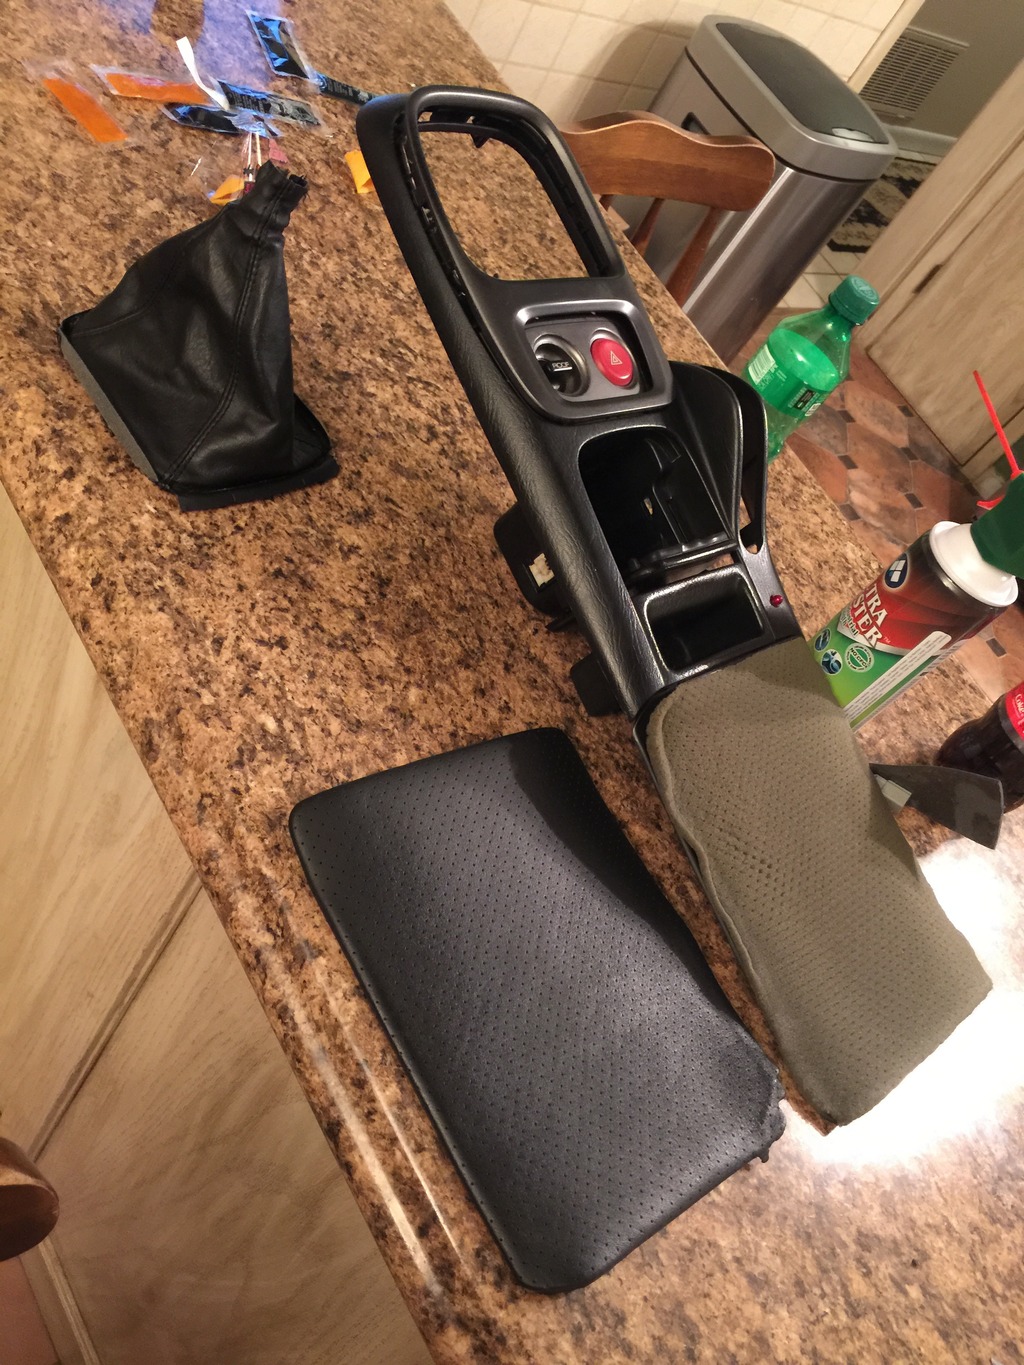
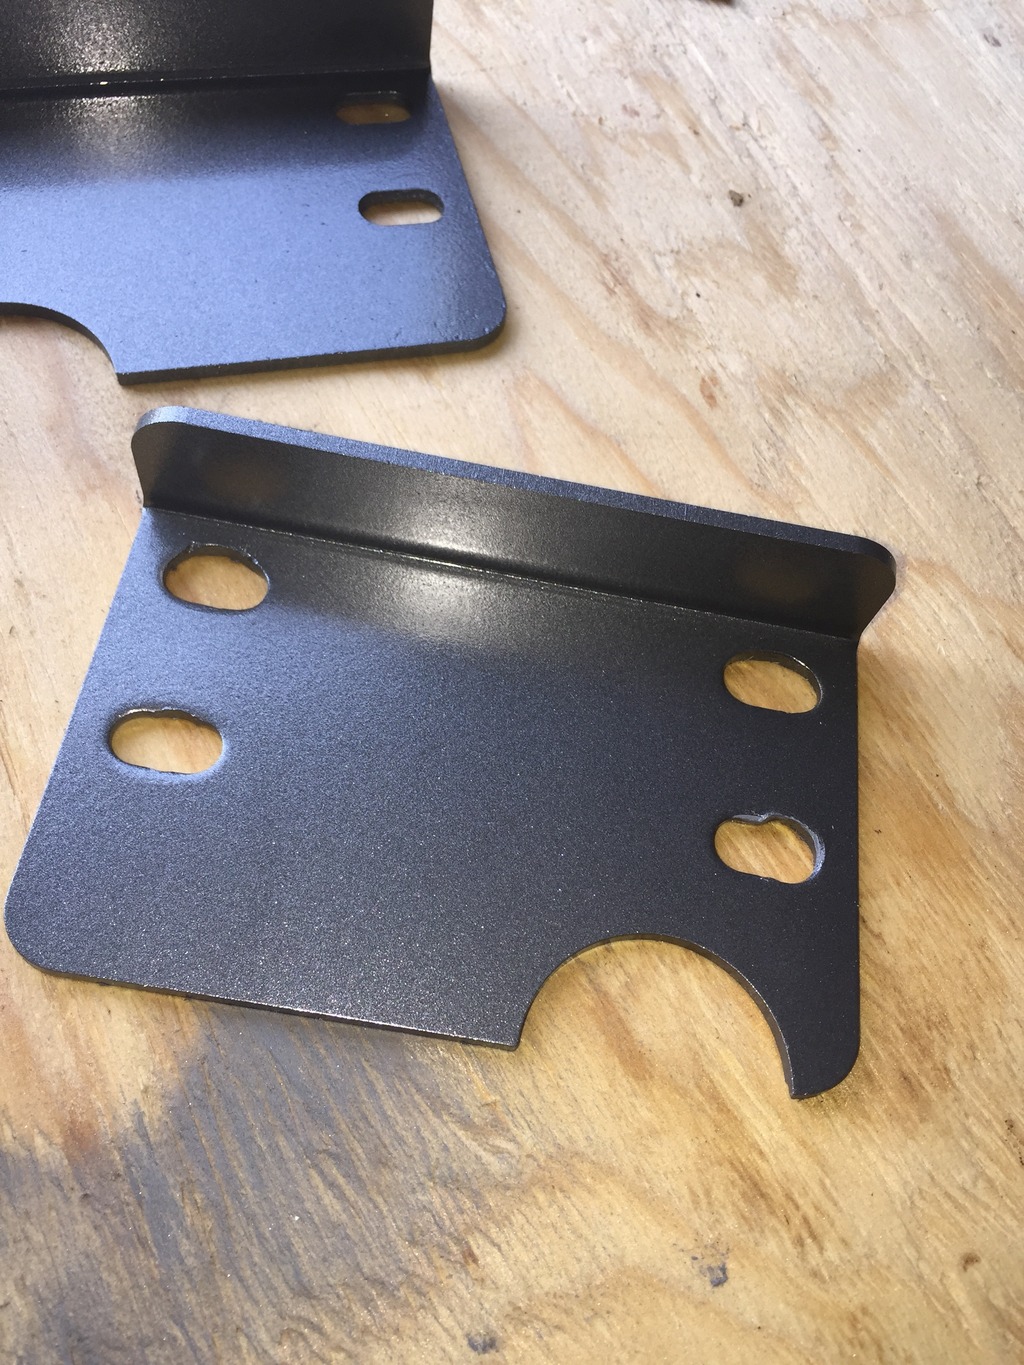
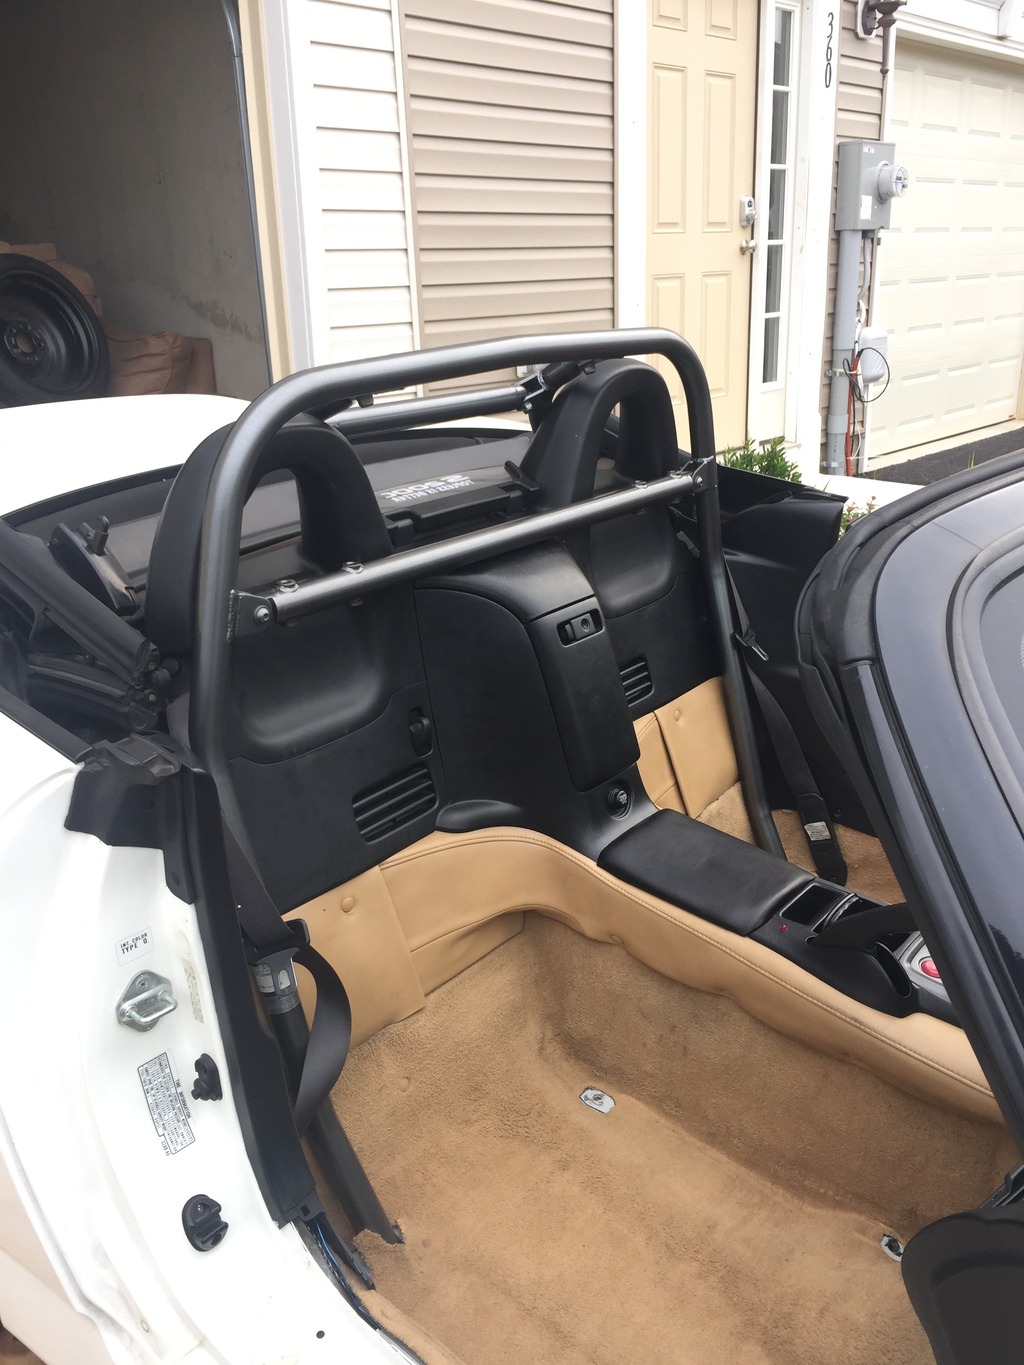
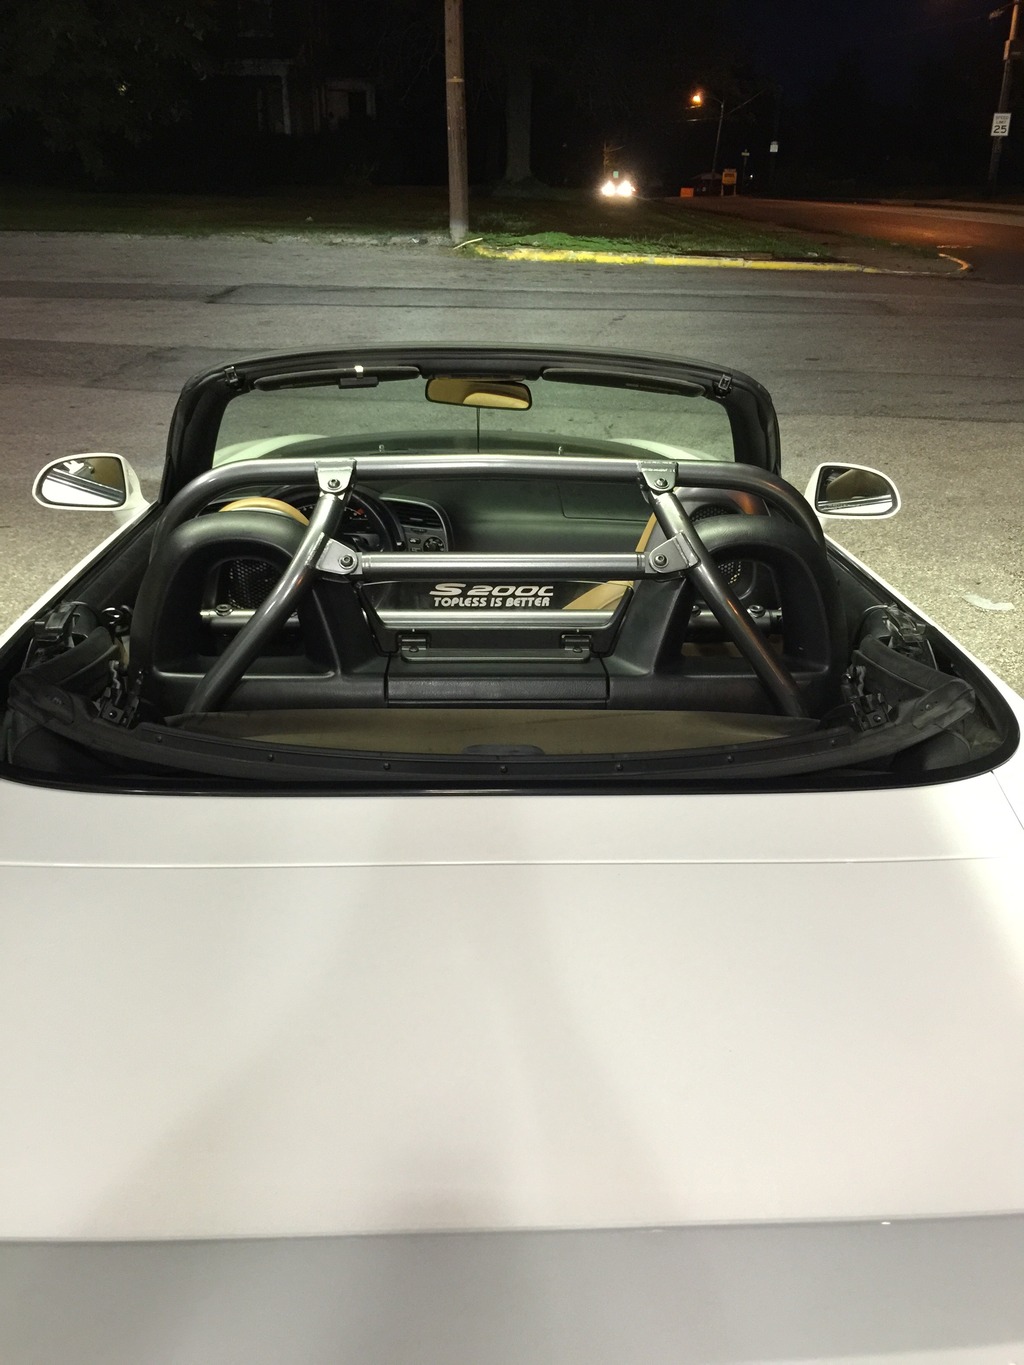
Next up I purchased a Safety 21 roll bar. I refinished this and painted it a gunmetal color.
The brackets
Installed
Coils were purchased.

And installed

I really really fell in love with these coils. When I am in the market for my next set I will for sure be hitting RSR up. Now comes all the turbo updates.
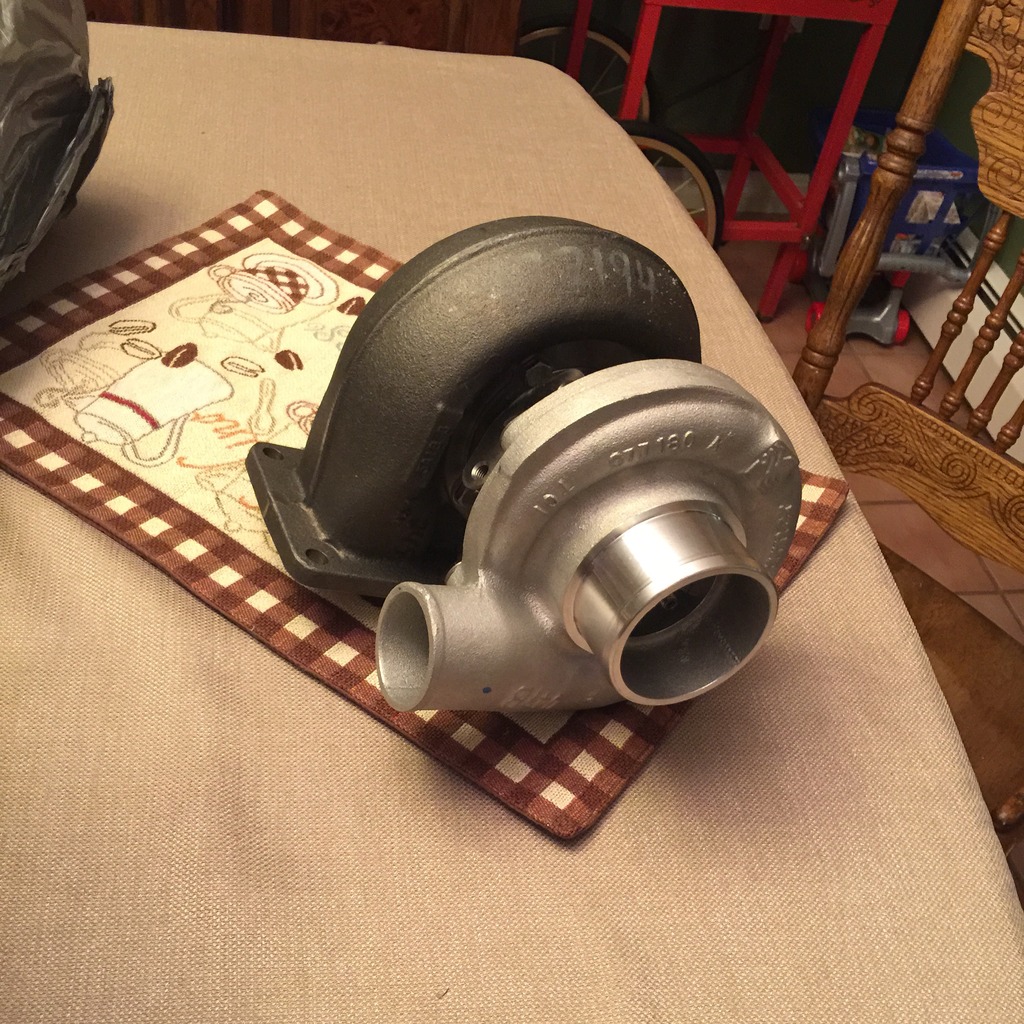
Turbo I won.
Then purchased this plm mani/downpipe
Mods:
Exterior:
Wasp carbon fiber side diffusers
Clear side markers
Shaved front bumper
Ap2 Taillights
OEM Ap1 flush mount spoiler
OEM AP1 front lip
Interior:
Black window switches
Stitched door panels
Safety 21 roll bar
Mugen shift knob
Turbo setup: 450whp 290wtq
Borg Warner s200sx
T4 twinscroll manifold
Treadstone intercooler
NGK brk8eix spark plugs
Mac boost solenoid
Oil feed/return setup
Heater bracket relocation
ID1000 fuel injectors
Dual Tial MVR 44mm wastegates
Fullblown 340 fuel pump
EGR block off
Aem series 1 EMS
SOS 3 bar map sensor
AEM boost gauge
AEM oil pressure gauge
AEM wideband
SOS gauge pod
Push lock metal fitting and vacuum hose
Tial BOV
Drivetrain:
ACT 6 puck clutch
Axial Flow short shifter
Wheels/Suspension:
RS*R I-Shock coilovers
Prodrive GC-07c 17x9 +50
When I first bought it.


Then I did some interior work. Re-padded and covered the arm rest, stitched the OEM shift boot, and also stitched my door panels with black.


Next up I purchased a Safety 21 roll bar. I refinished this and painted it a gunmetal color.
The brackets


Installed


Coils were purchased.

And installed


I really really fell in love with these coils. When I am in the market for my next set I will for sure be hitting RSR up. Now comes all the turbo updates.
Turbo I won.

Then purchased this plm mani/downpipe

Last edited by crxswap; 06-08-2017 at 02:32 PM.
 02-02-2016, 09:27 PM
#2
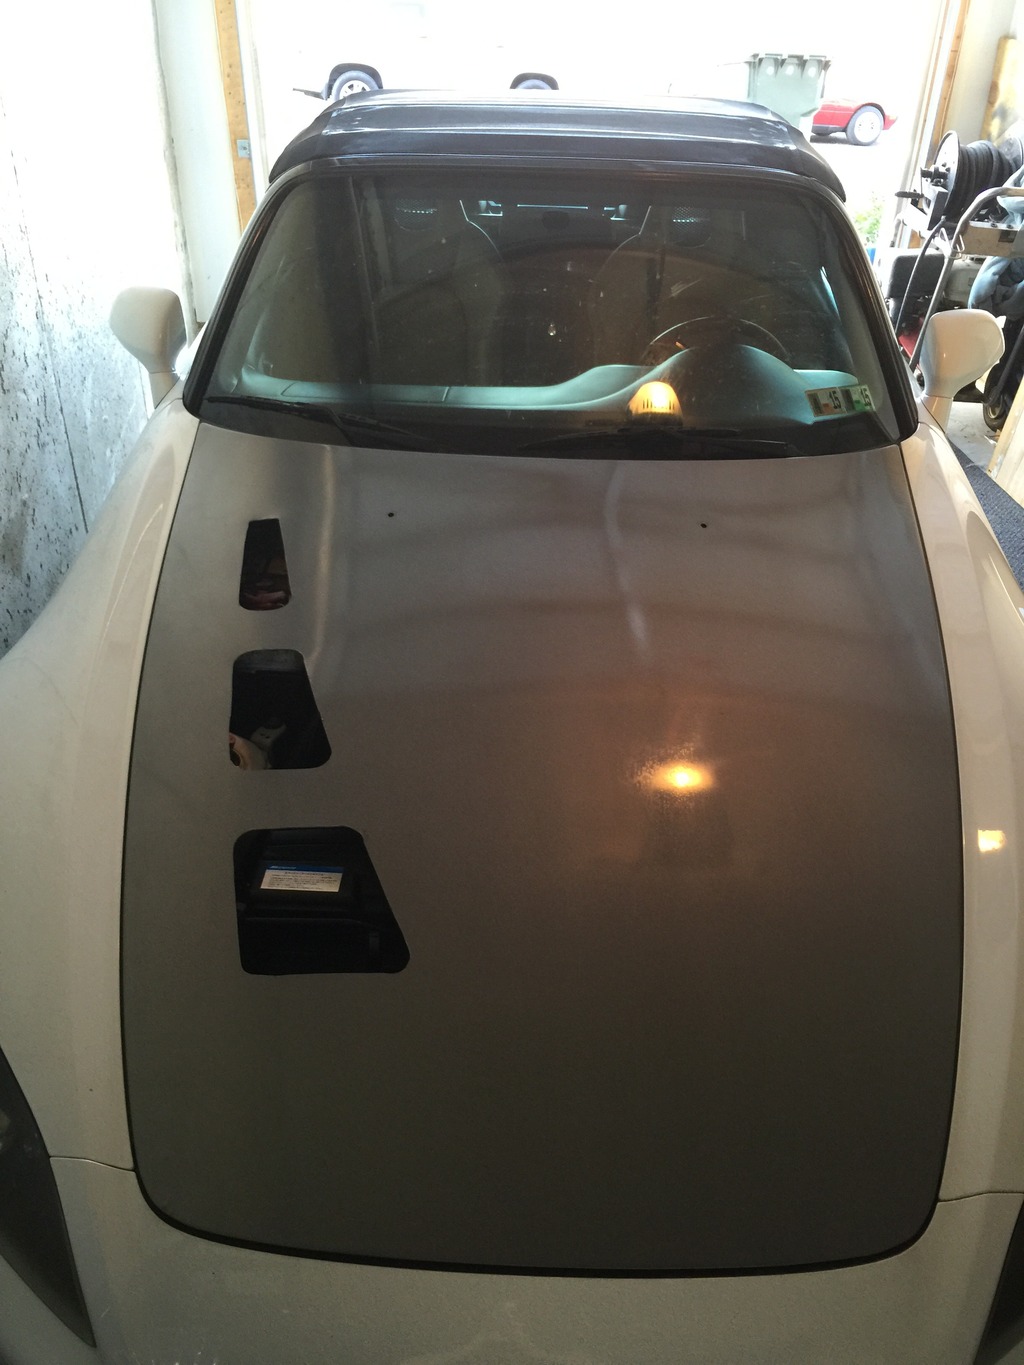
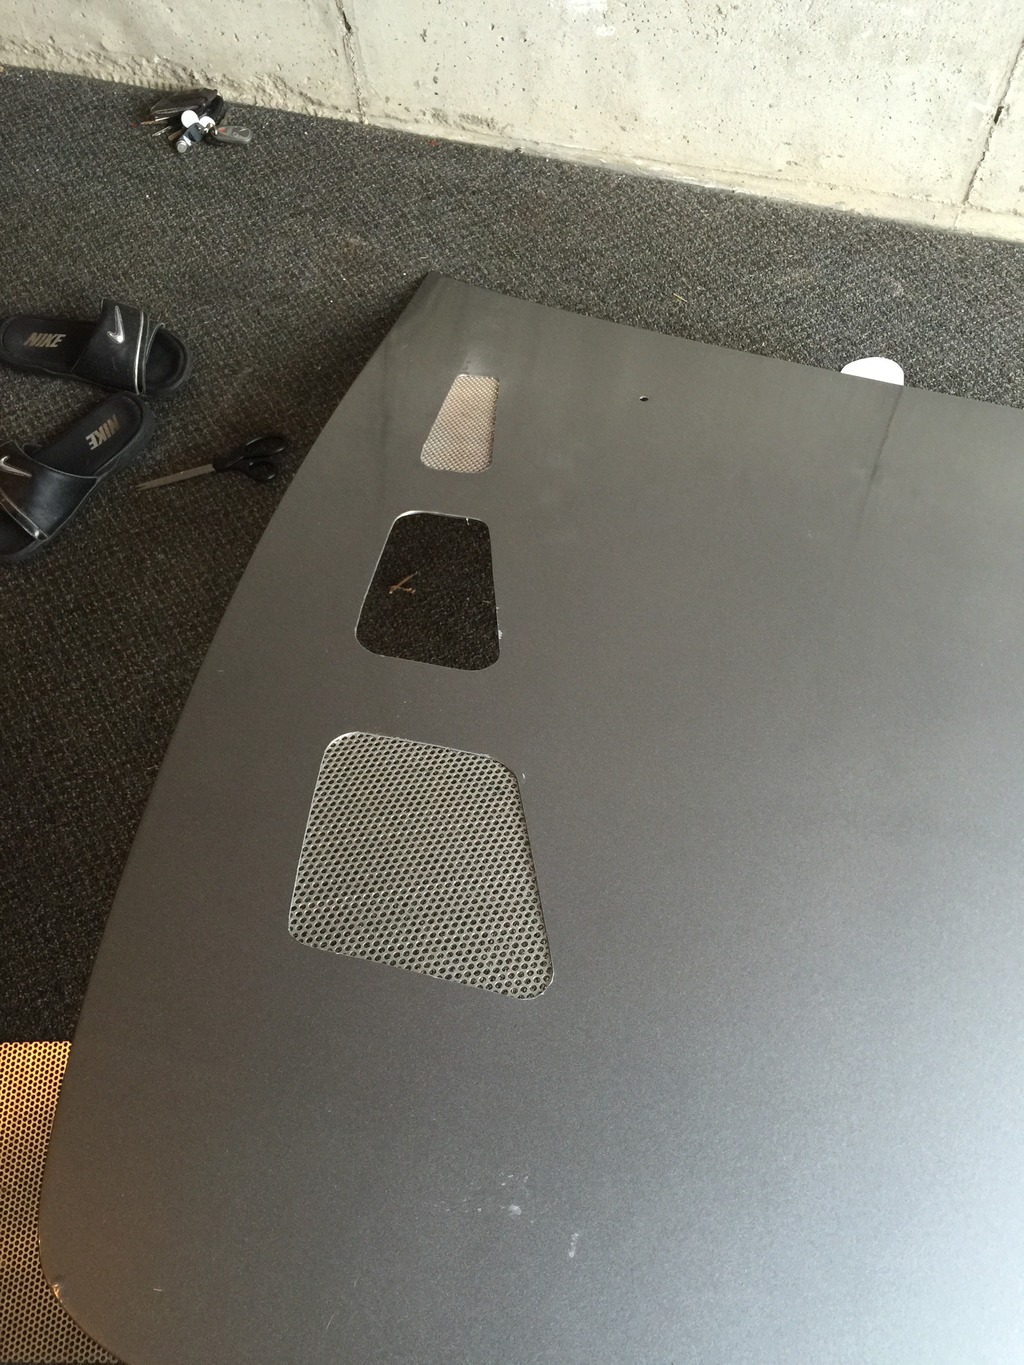
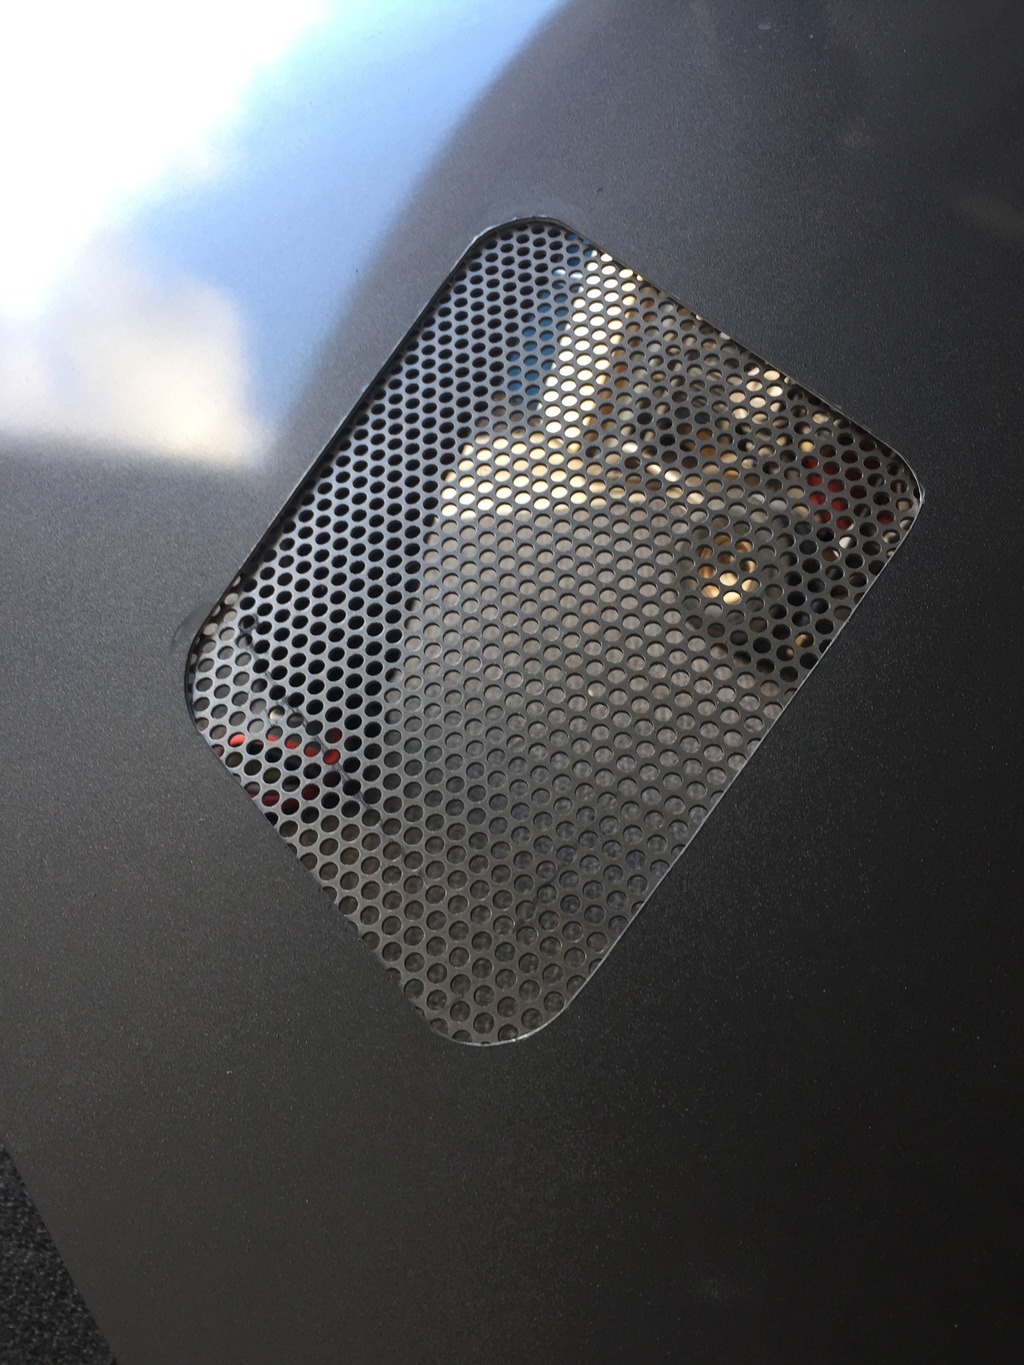
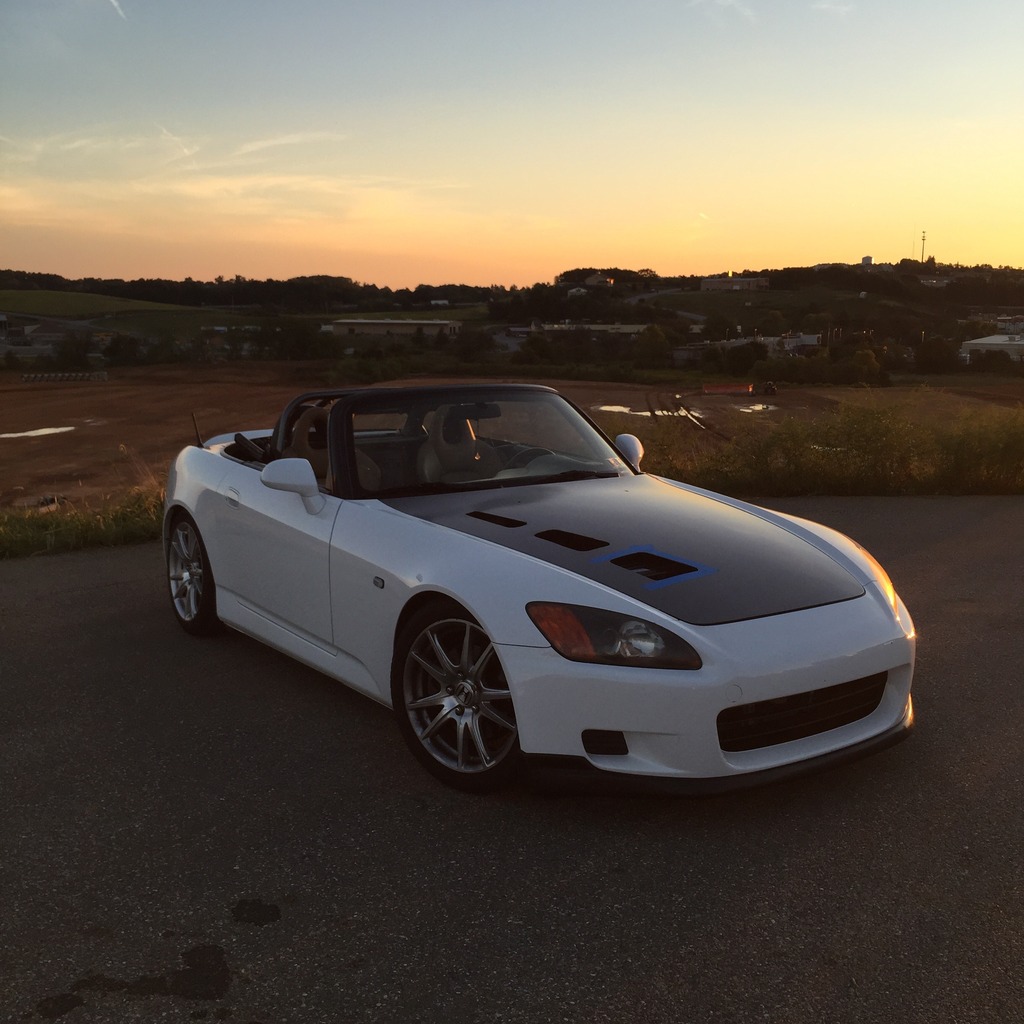
Decided to do the hood vent DIY to try and keep engine bay temps down.
Welded up a marmon flange to fit my dp to my BW turbo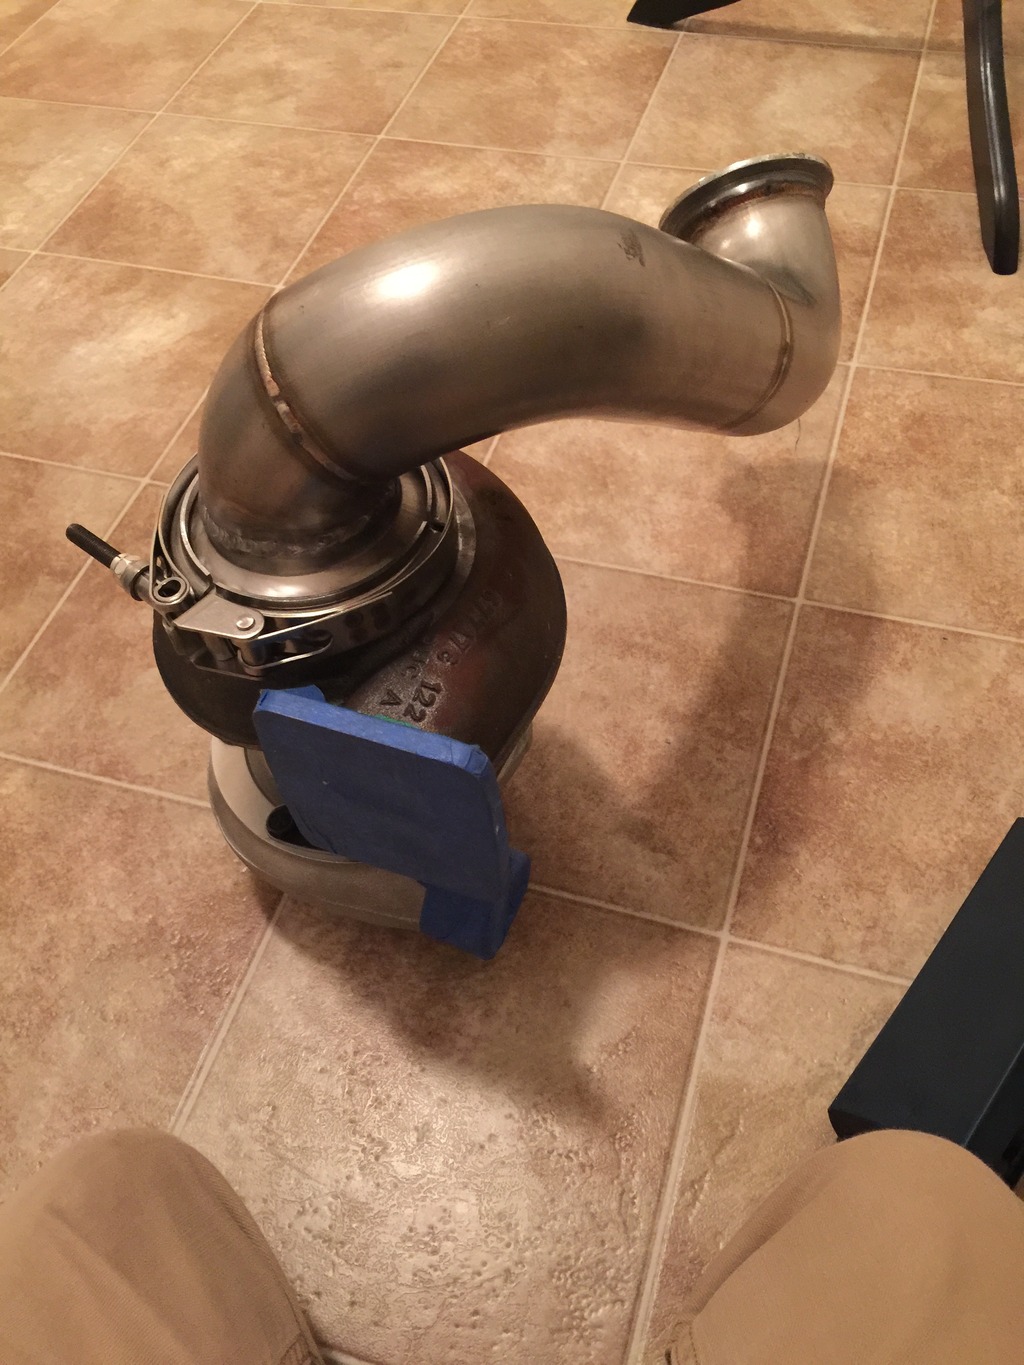
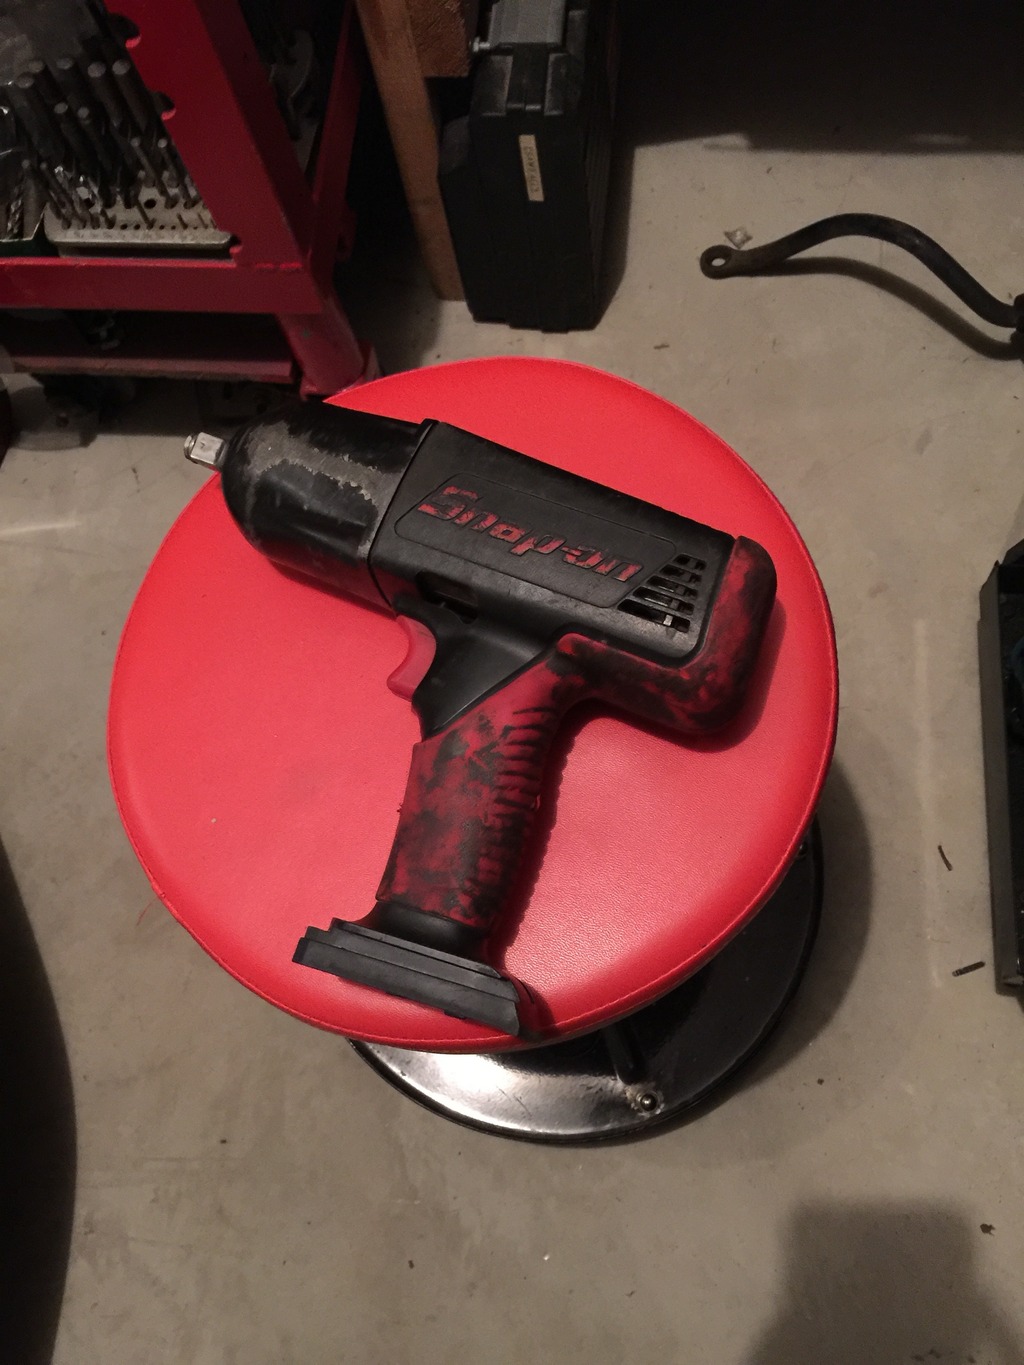
Mid process tool rehab lol
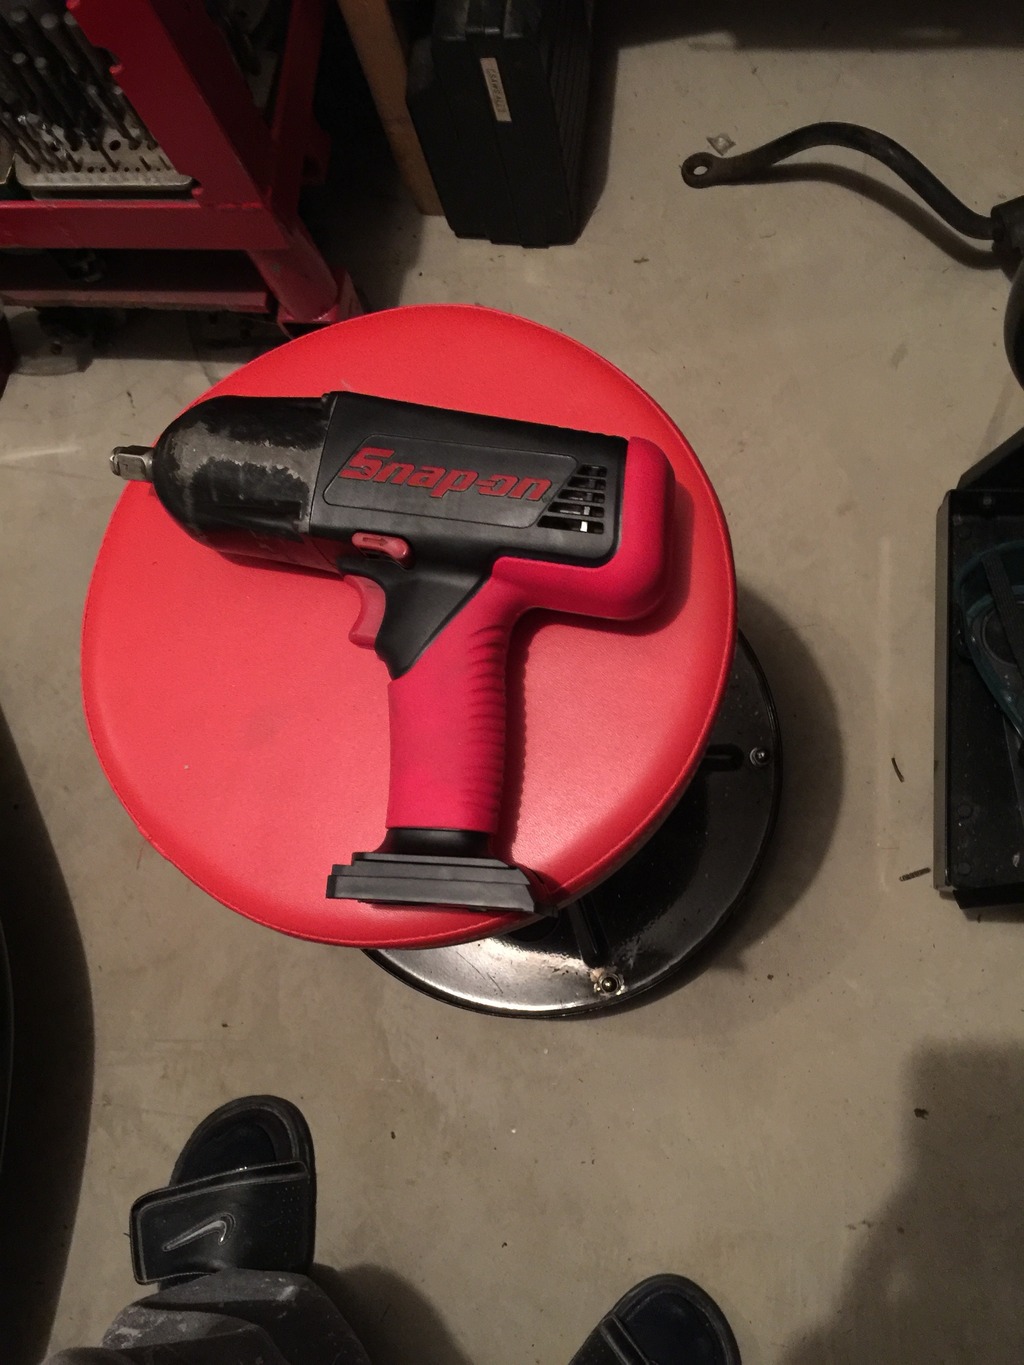
Before
After
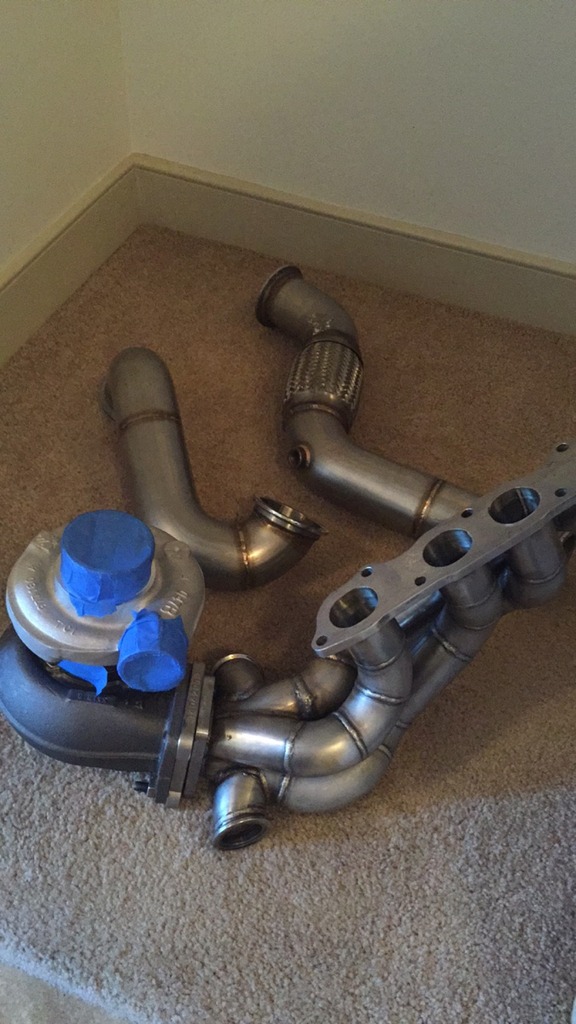
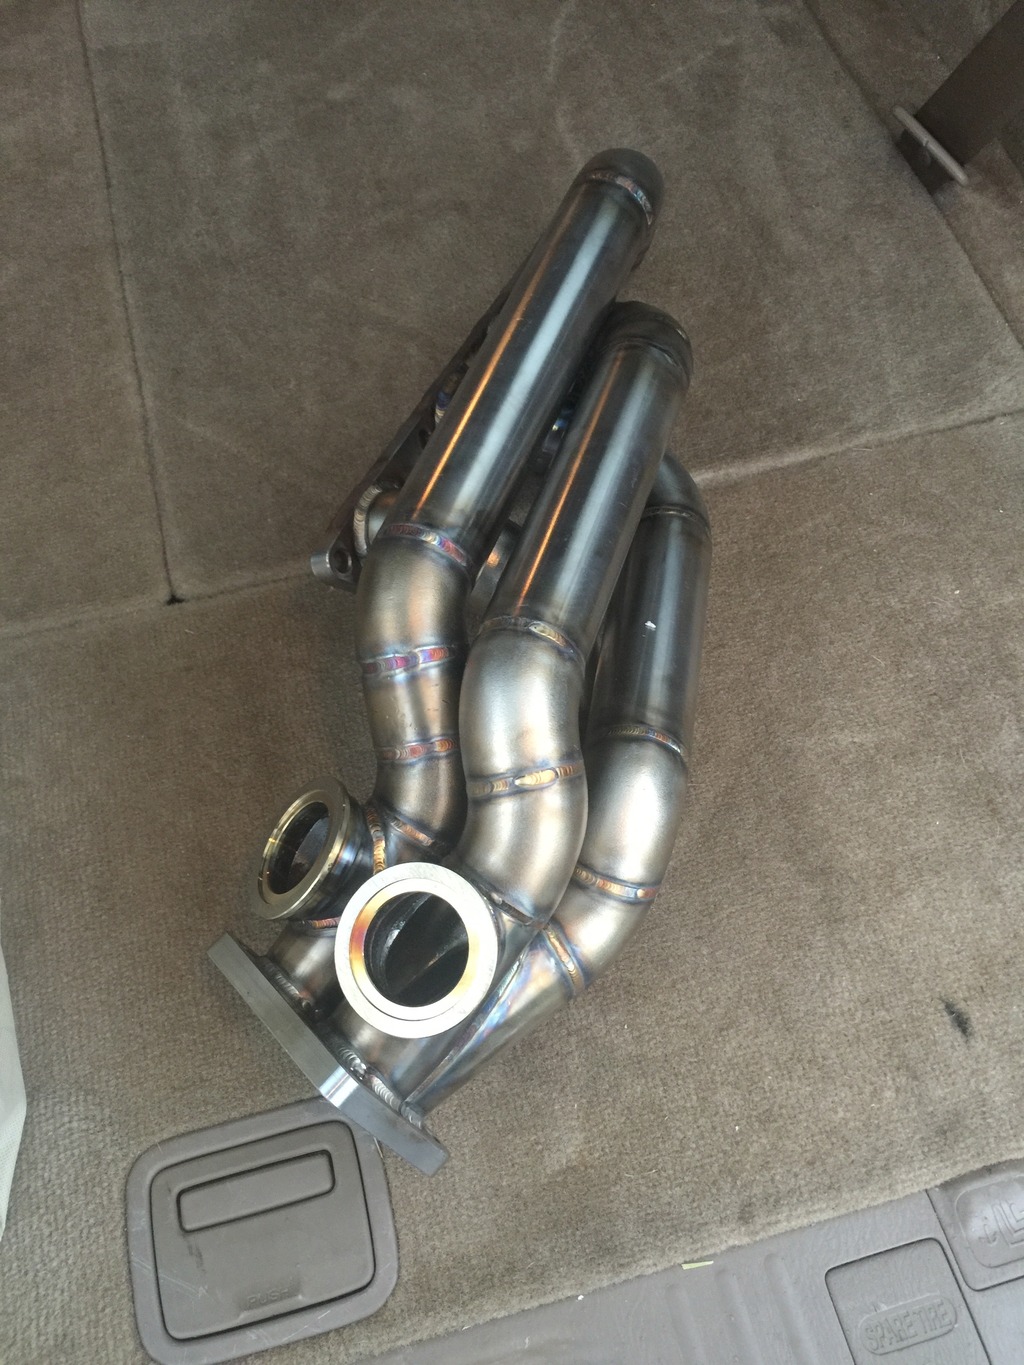
Then decided to ditch the plm manifold for a few reasons. The biggest being its t3 and my turbo is t4 divided and didn't like the adapter from t3-t4. So I bought this Straightline Motorsports manifold. This thing is AWESOME. Great quality and amazing welds! Also t4 twinscroll
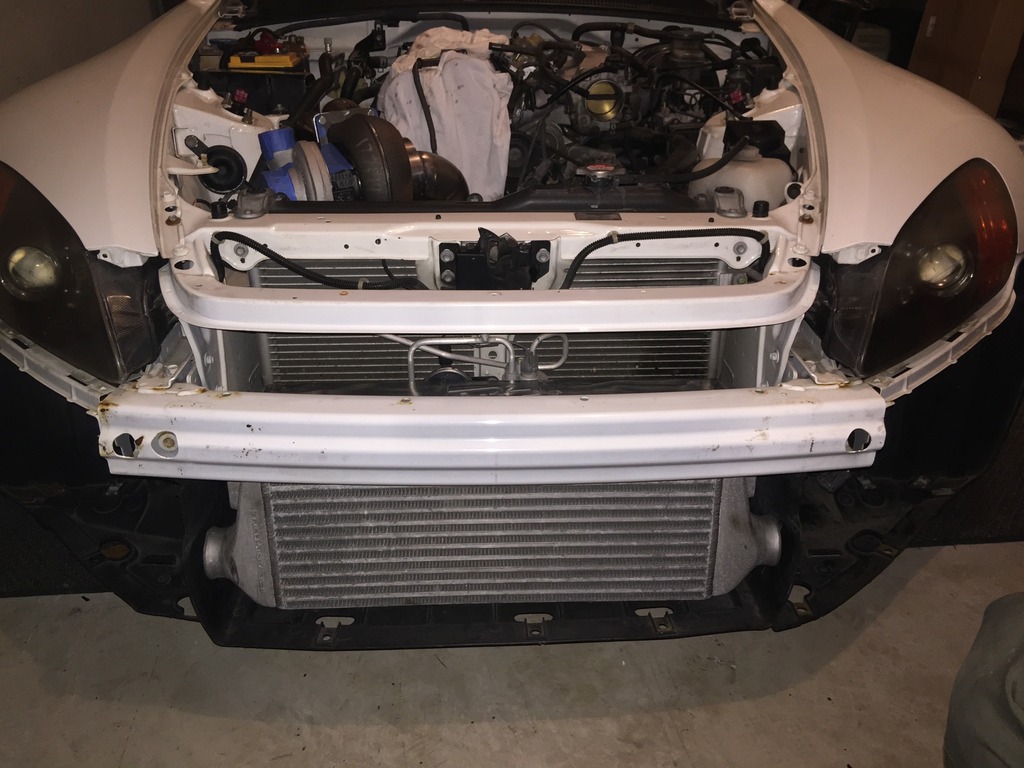
Got my intercooler mounted up.
Alloy craft heater bracket relocation. Which is another really nice piece!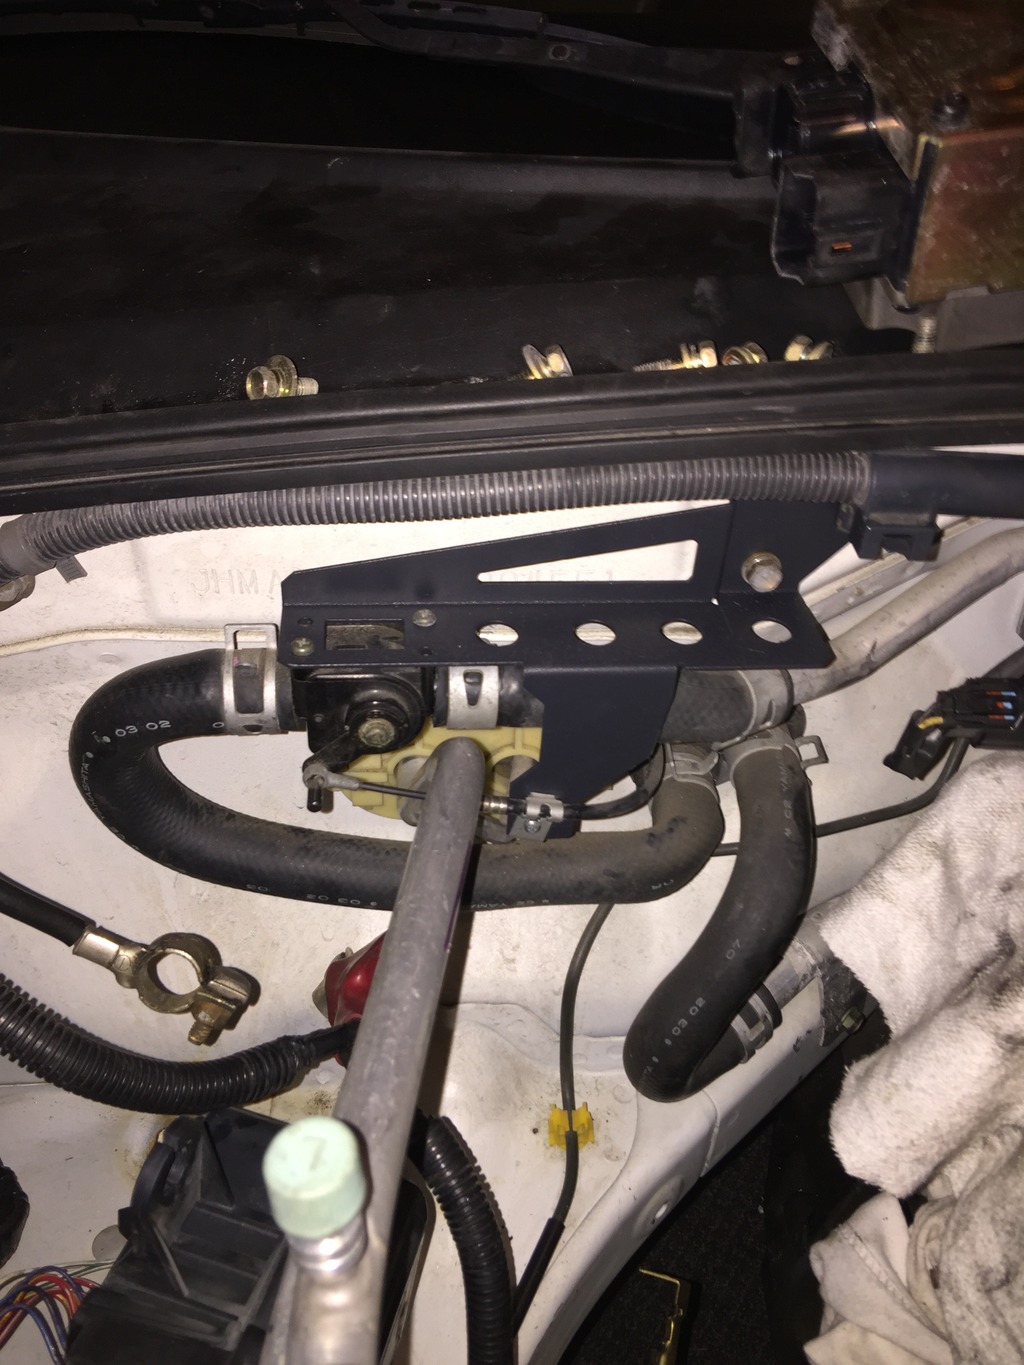
Just mocking some things up. I also wire-tucked the passenger side wires through the fender to keep away from the heat. And decided to keep my fusebox/EPS inside just turned and tucked further away from the mani. I don't like the thought of taking my fender off to look for a bad connection/blown fuse. And also want to keep it out of the weather. I'll make a heat shield eventually.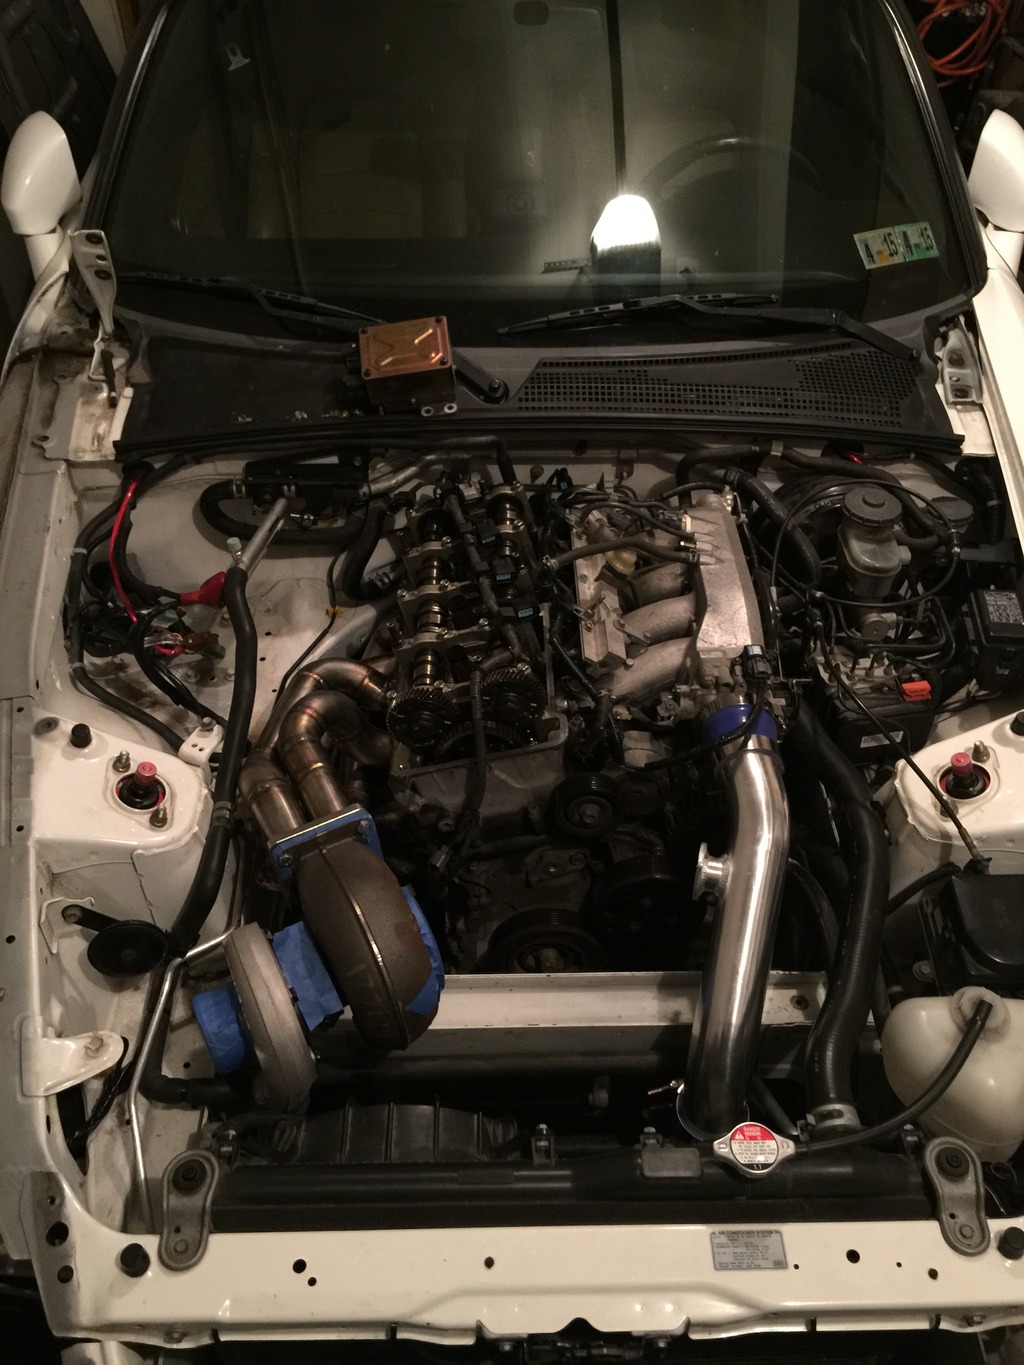
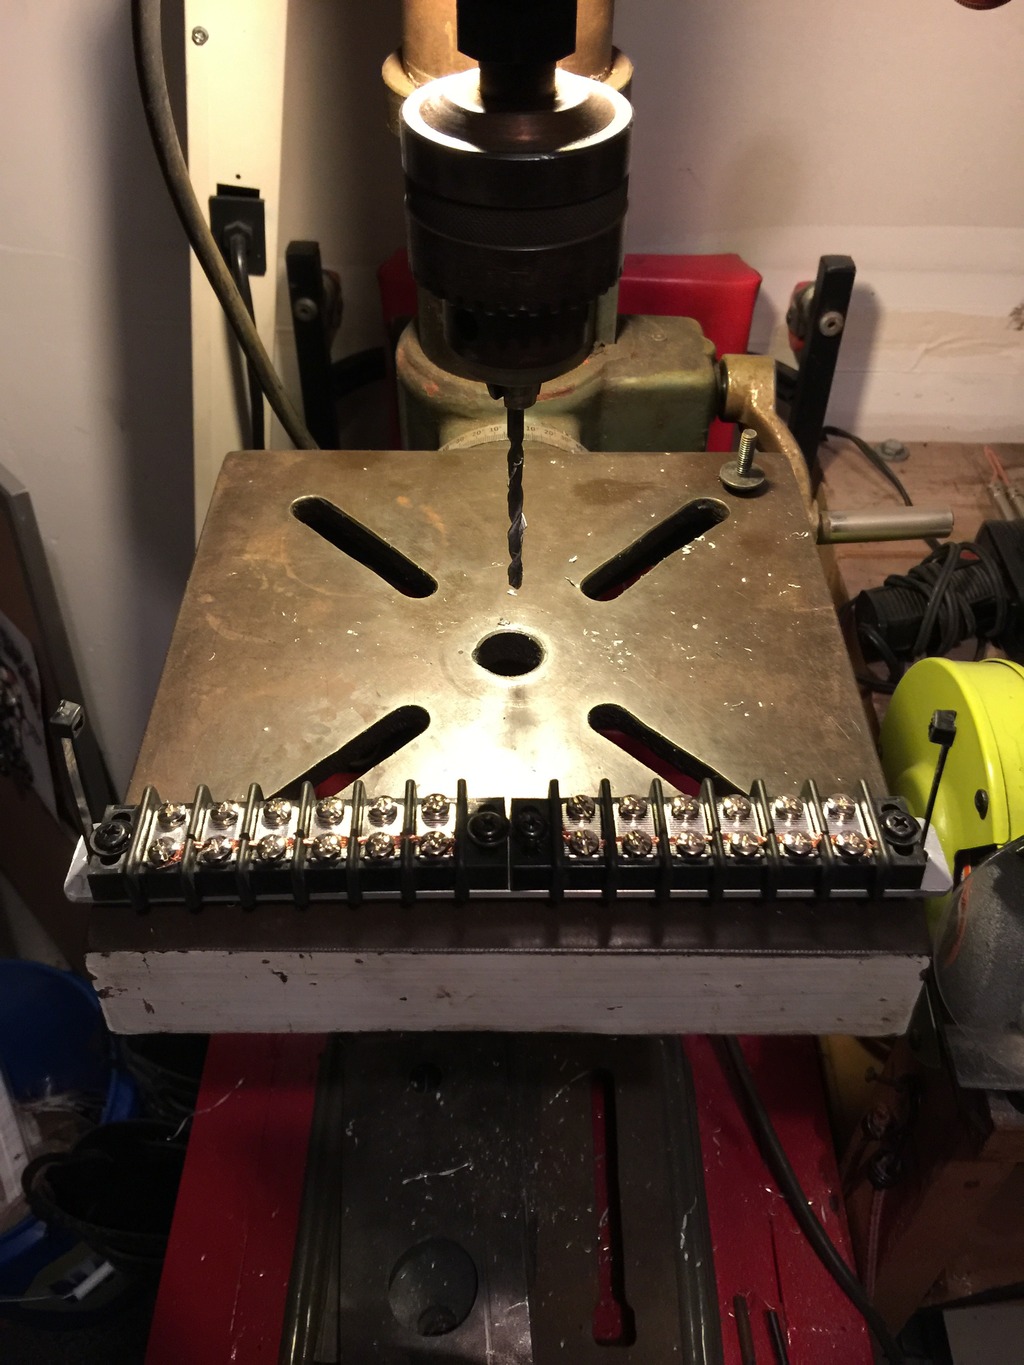
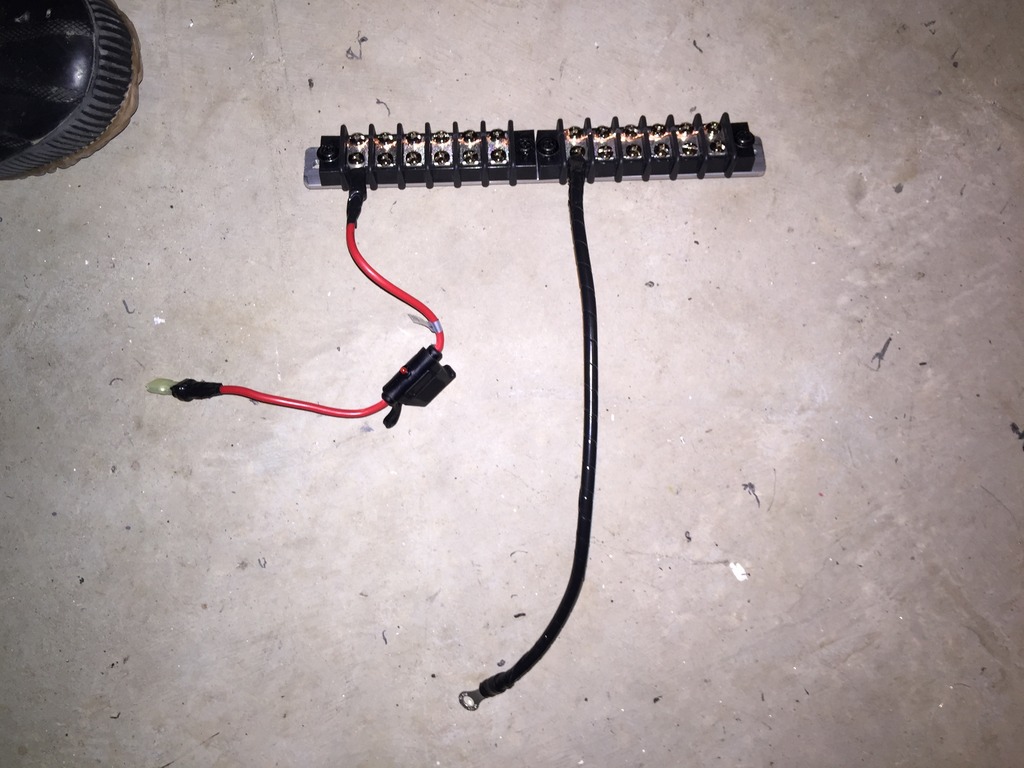
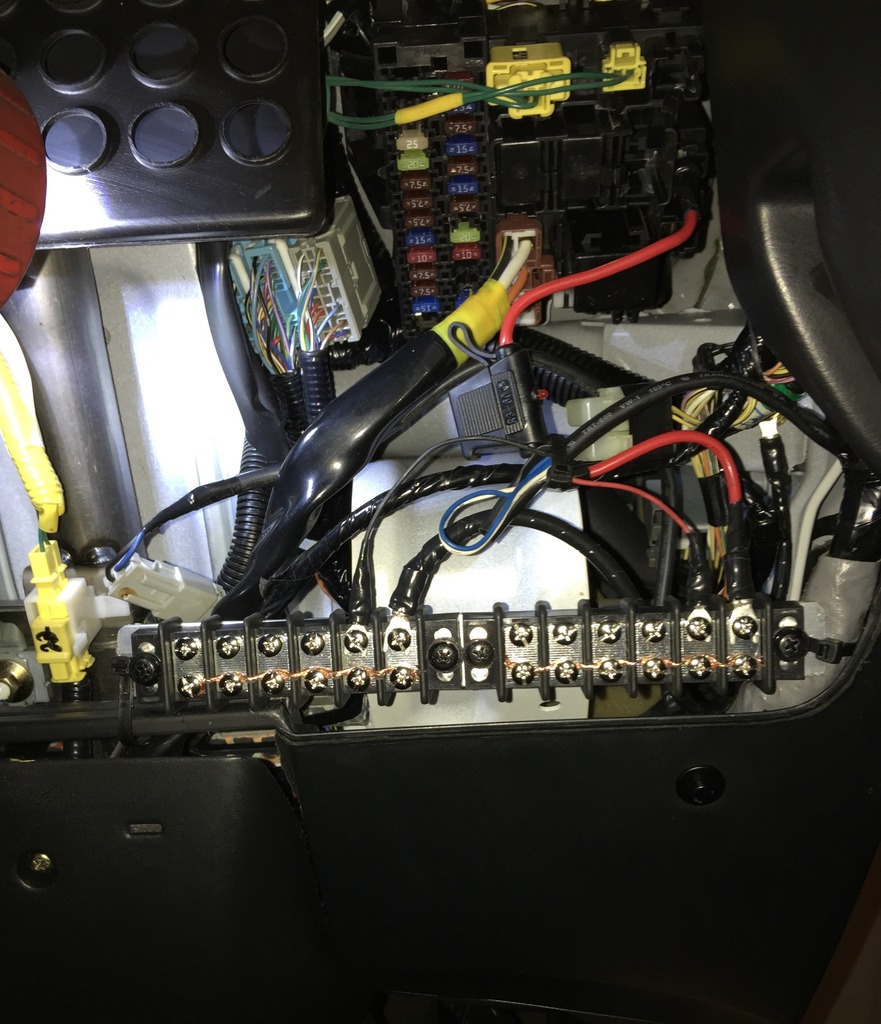
Just finished up my AEM wideband install tonight. And also wired up a terminal block to the spare 12v ignition on the fuse box for the rest of my gauges to get power. Made a mounting bracket out of some aluminum stock. Then wired a inline 30 amp fuse from the fuse box to the "hot" terminal block. And wired the "ground" terminal block to the stock dash grounds. Turned out perfect!
All hooked up and tucked in.


Welded up a marmon flange to fit my dp to my BW turbo

Mid process tool rehab lol
Before

After

Then decided to ditch the plm manifold for a few reasons. The biggest being its t3 and my turbo is t4 divided and didn't like the adapter from t3-t4. So I bought this Straightline Motorsports manifold. This thing is AWESOME. Great quality and amazing welds! Also t4 twinscroll

Got my intercooler mounted up.

Alloy craft heater bracket relocation. Which is another really nice piece!

Just mocking some things up. I also wire-tucked the passenger side wires through the fender to keep away from the heat. And decided to keep my fusebox/EPS inside just turned and tucked further away from the mani. I don't like the thought of taking my fender off to look for a bad connection/blown fuse. And also want to keep it out of the weather. I'll make a heat shield eventually.

Just finished up my AEM wideband install tonight. And also wired up a terminal block to the spare 12v ignition on the fuse box for the rest of my gauges to get power. Made a mounting bracket out of some aluminum stock. Then wired a inline 30 amp fuse from the fuse box to the "hot" terminal block. And wired the "ground" terminal block to the stock dash grounds. Turned out perfect!


All hooked up and tucked in.

Last edited by crxswap; 05-11-2017 at 09:09 PM.
 01-18-2017, 03:24 PM
#5
Well I haven't been on here in awhile! I've been super busy finishing my basement and working on my 4runner. But I'm going to have some big updates here soon. I'll drop a couple pictures of some progress/parts I've collected. I received my Tial 44mm wastegates, aem v1 and extension harness (I'll be updating this once I get the car tuned), also purchased a set of rpf1's in 17x9.5 +37 all around (which are now for sale!). Decided not to run these since I found a different set I'm picking up this weekend. And also I picked up my lines and fittings to run all my vacuum line to my wastegates.
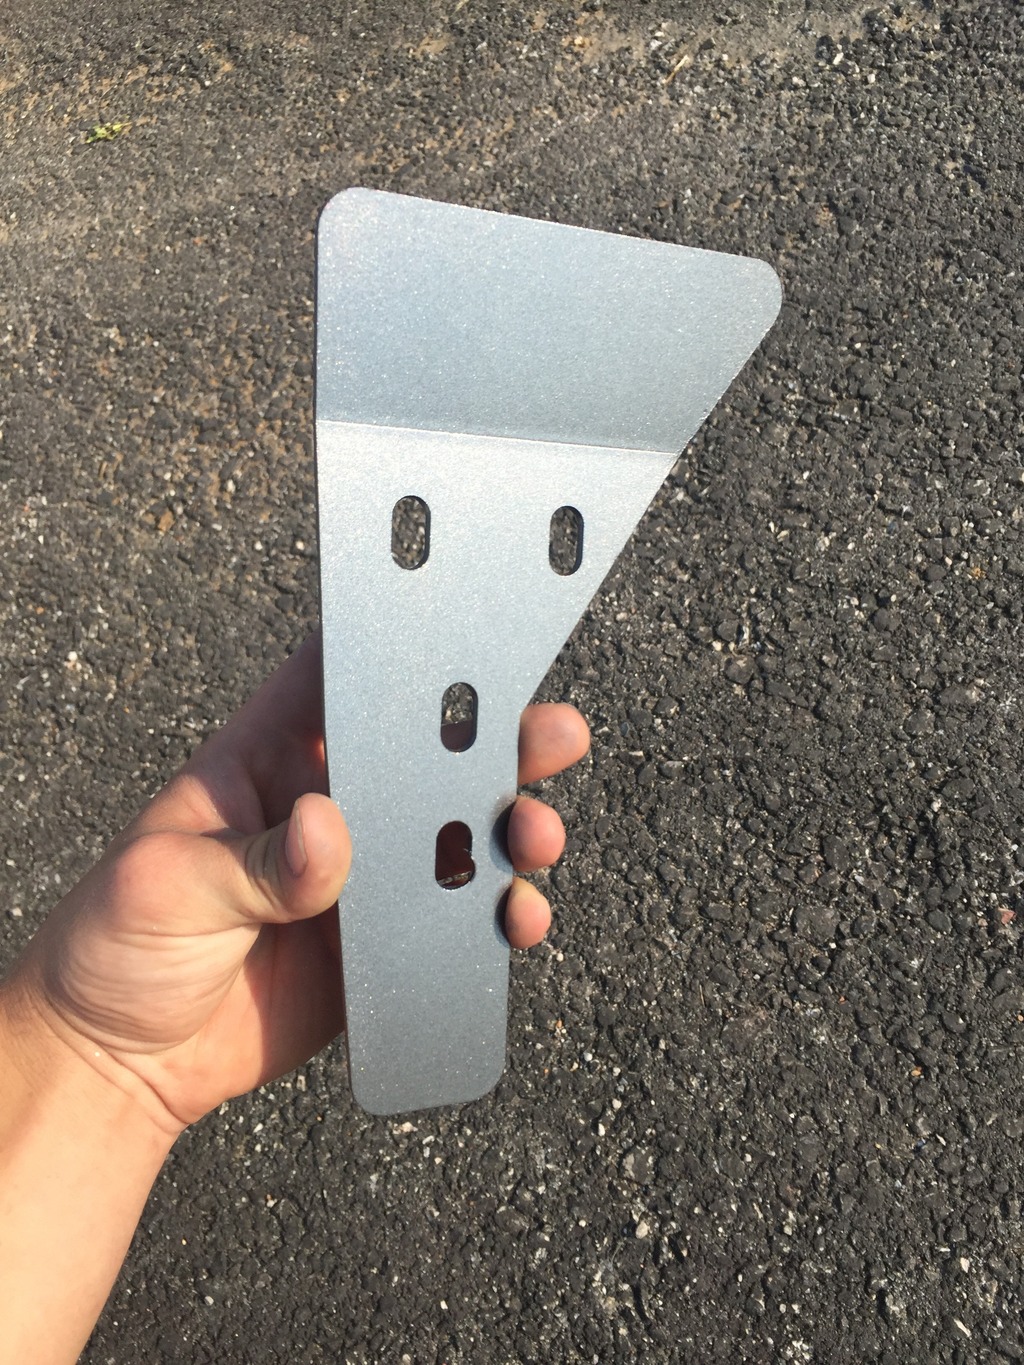
I dropped the oil pan to make sure I had the updated banjo bolts since I'm turboing the S. Collected some more parts for my setup. And picked up some WASP carbon fibre side diffusers. Seems like not many people run these. Or just don't post them up lol. Love these and the way they flow with the car. Also top notch workmanship on them. I'll have these installed soon. Need to buy rivnuts and the tool, since there is no way I'm just running self tappers into my car.
I dropped the oil pan to make sure I had the updated banjo bolts since I'm turboing the S. Collected some more parts for my setup. And picked up some WASP carbon fibre side diffusers. Seems like not many people run these. Or just don't post them up lol. Love these and the way they flow with the car. Also top notch workmanship on them. I'll have these installed soon. Need to buy rivnuts and the tool, since there is no way I'm just running self tappers into my car.


 01-18-2017, 04:48 PM
#8
I'll be installing all these parts this weekend and post some updates. I have everything just sitting around right now. But have everything to fire her up as soon as I put her back together.
01-18-2017, 04:50 PM
#9
