Kenny_Stang's build thread: GPW content inside!


The following users liked this post:
Kenny_Stang (03-03-2017)
 03-03-2017, 08:23 AM
#62


Thread Starter
 03-13-2017, 04:49 AM
#63
Thread Starter
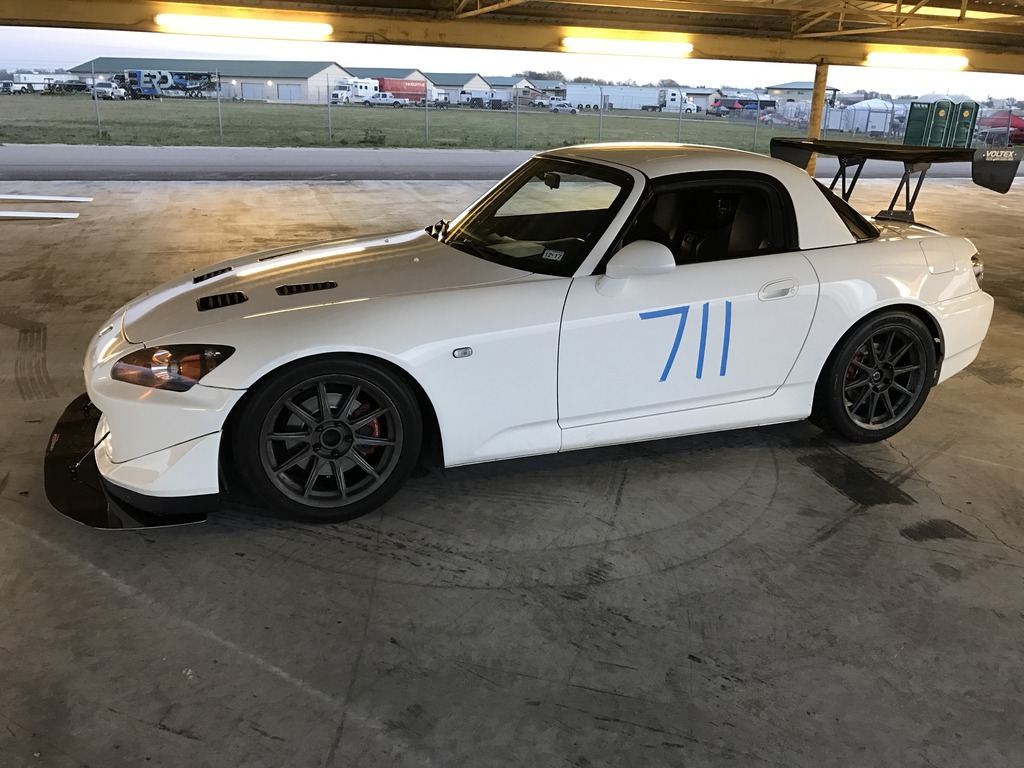
A few more updates from the last week or so
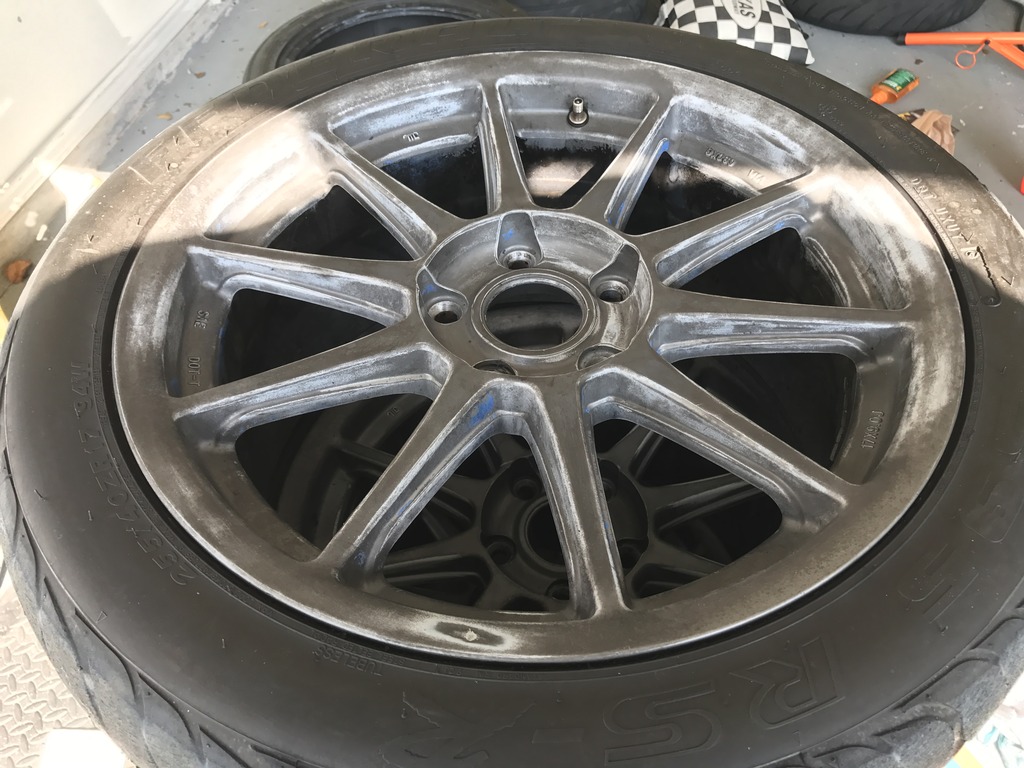
I finally got arround to getting my track wheels ready to go. When I bought them they had been plasti dipped black, and the dip was coming off. I decided to remove all of the dip, before getting my tires mounted on them. If you haven't had the opportunity to remove thin plasti dip before, it's a huge PITA. I did some research and people said that several products worked wonders on getting the stuff off, I tried 3 different things, WD-40 (made the dip "softer" but still requires significant elbow grease to remove), Goo Gone (worked slightly better than WD-40), and Brake Cleaner (really works, but have to spray a small area, wipe, repeat). My recommendation, if you are going to use Plasti Dip, make sure you lay it on very thick, and use 3-4 layers (a rattle can for each wheel).
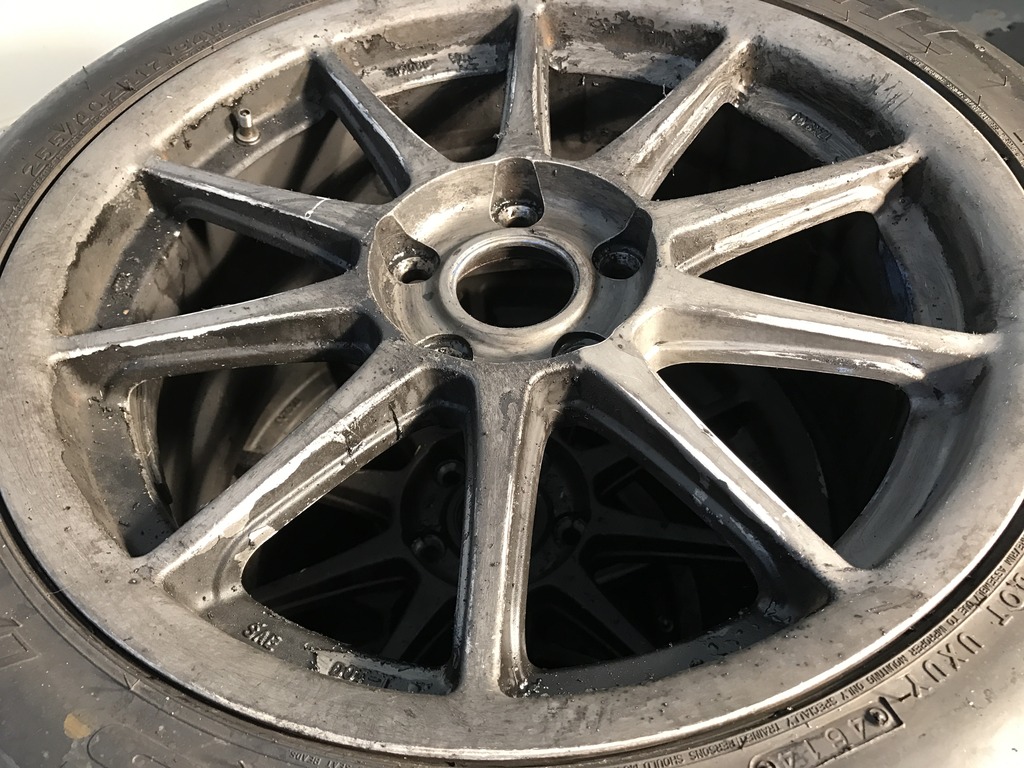
Eventually I got all of the Plasti Dip off and the wheels have definitley seen better days, but as they are just going to be covered in brake dust, I am not too concerned with their appearance.
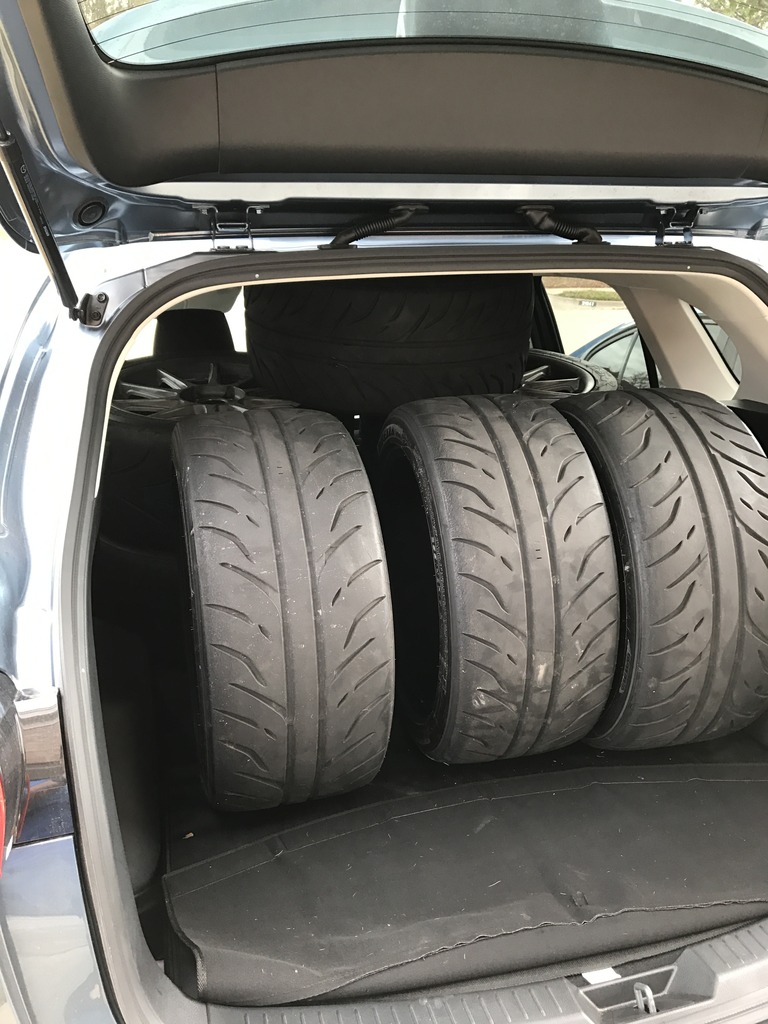
I did manage to get the 4 wheels with tires, and the 4 tires I was going to mount (Dunlop Z2SS I have been using since last year) in our new 2016 Mazda CX-5. Sure is nice owning a car with decent cargo capacity!
Next I went to work on the brakes. I had been running StopTech slotted rotors along with StopTech Street Performance pads for the last two years. They were good on the street, and adequate for a beginner at the track, but the more I improved, the pads were struggling to keep up. So I decided to upgrade the pads to G-Loc brake pads after reading about them and getting some input from Devin at TogueFactory.
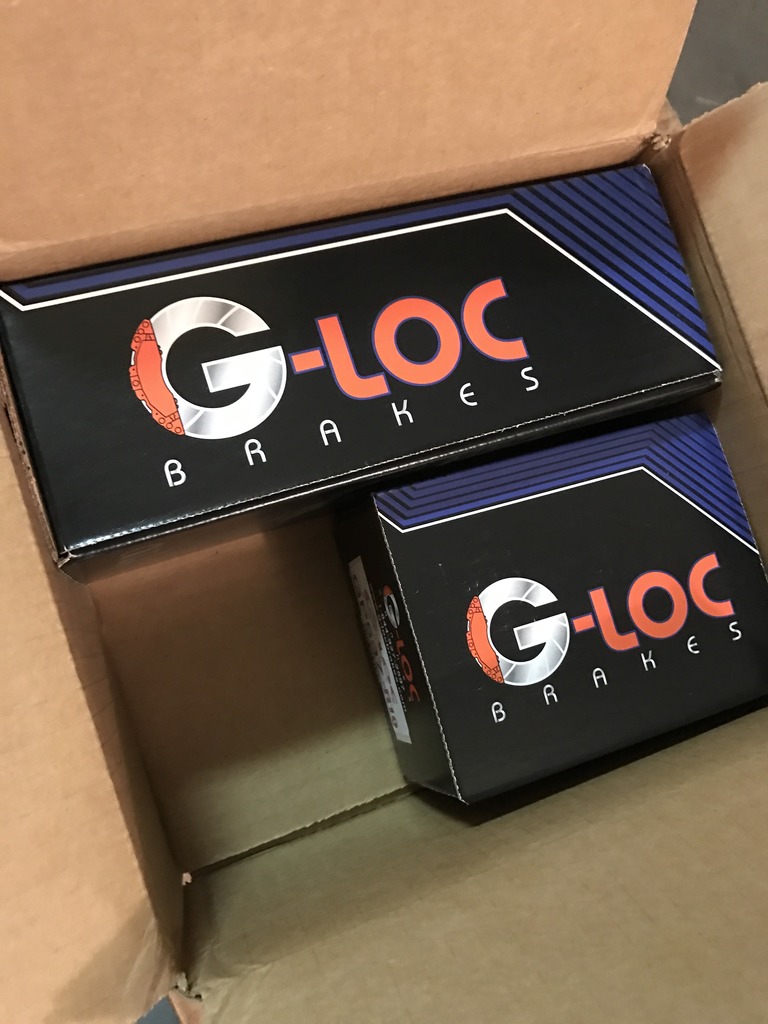
I went with the R12/R10 compunds, if you want to see which pads work best for you, I recommend you look at Devin's thread https://www.s2ki.com/forums/s2000-ra...t-you-1168625/ in the R&C forum, or reach out to him directly and he will work with you to make sure you get the pads that meet your need.
Along with upgrading the pads, I went ahead and replaced the rotors with Centric premiums from RockAuto, the StopTech slotted rotors still had plenty of life left, but I wanted a clean surface for the G-Loc pads to bed.
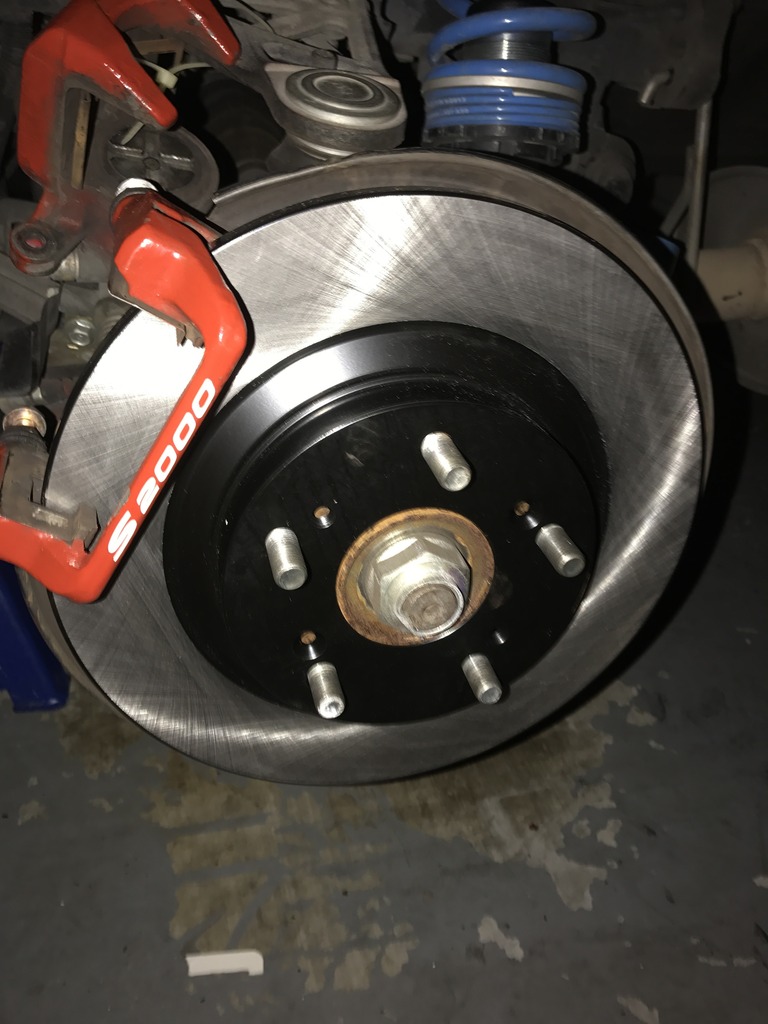
The pad install was a straight forward as any pad change on the S2000 is, the pads fit perfectly, and came from G-Loc pre-bedded, which is very helpful when trying to maximize your time on the track and not having to throw away a session to get your pads bedded.
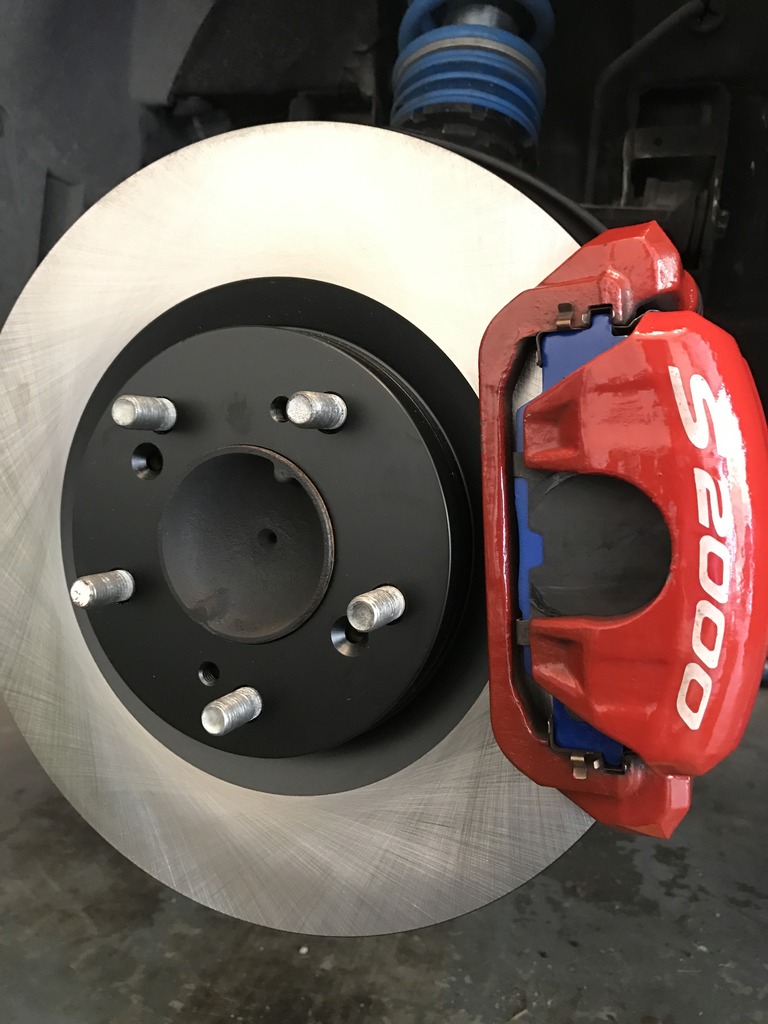
I ran the pads for two days with NASA Texas, and they were very good. They were a night and day difference from the StopTech Street Performance pads, which obviously were designed for a completely different set of circumstances versus the G-Loc pads. The initial bite, modulation, and clamping power of the G-Loc pads were much better than I even expected, I managed to run my personal best, in large part due to the confidence inspiring and consistent nature of the pads. Since I am a relative newbie to the track, your mileage and brake needs will likely vary from mine. Even on the street on the drive to and from the track, the pads were occasionally audible, but nowhere near annoying. Overall very satisfied with my purchase, as well as with TogueFactory, don't hesitate to reach out to them for your performance needs.
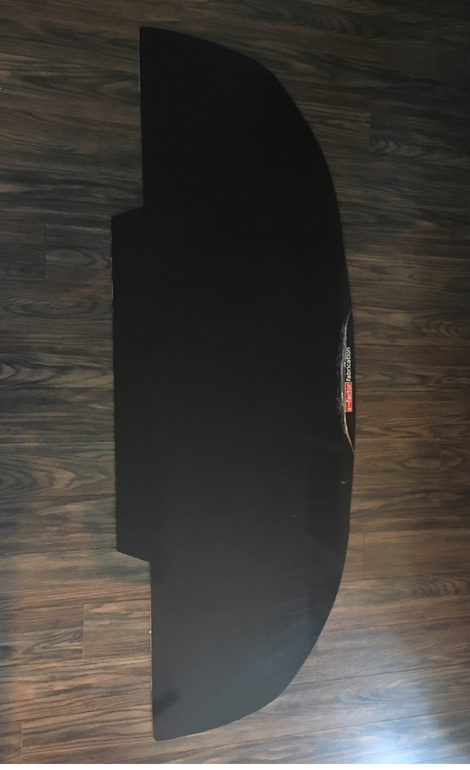
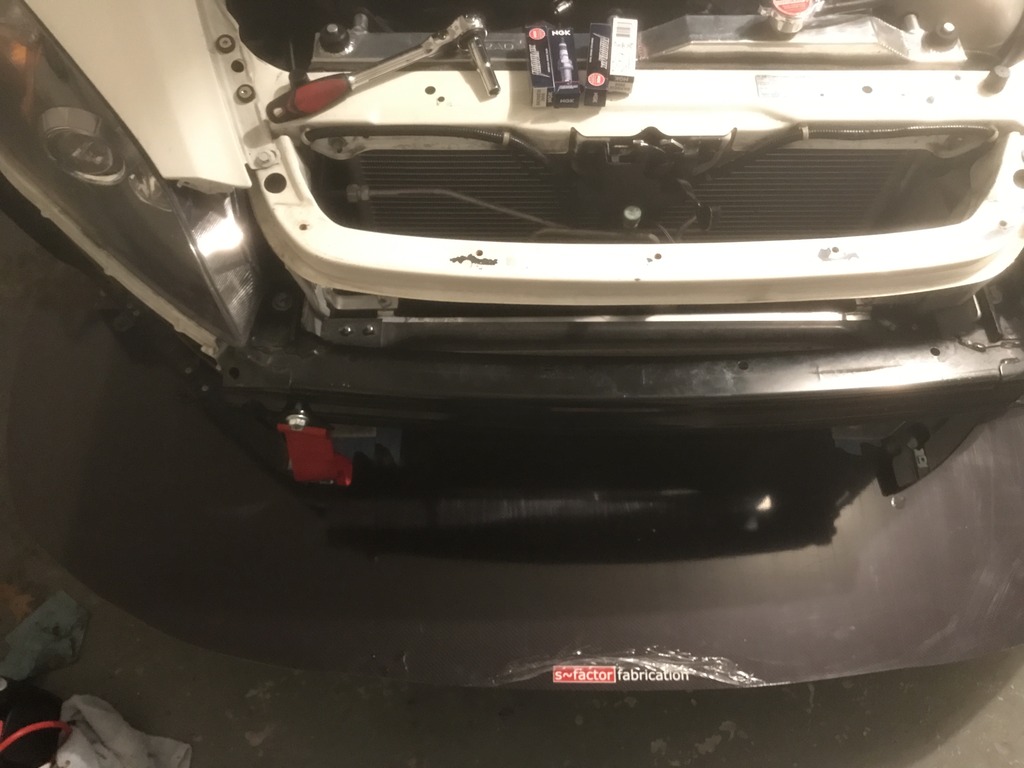
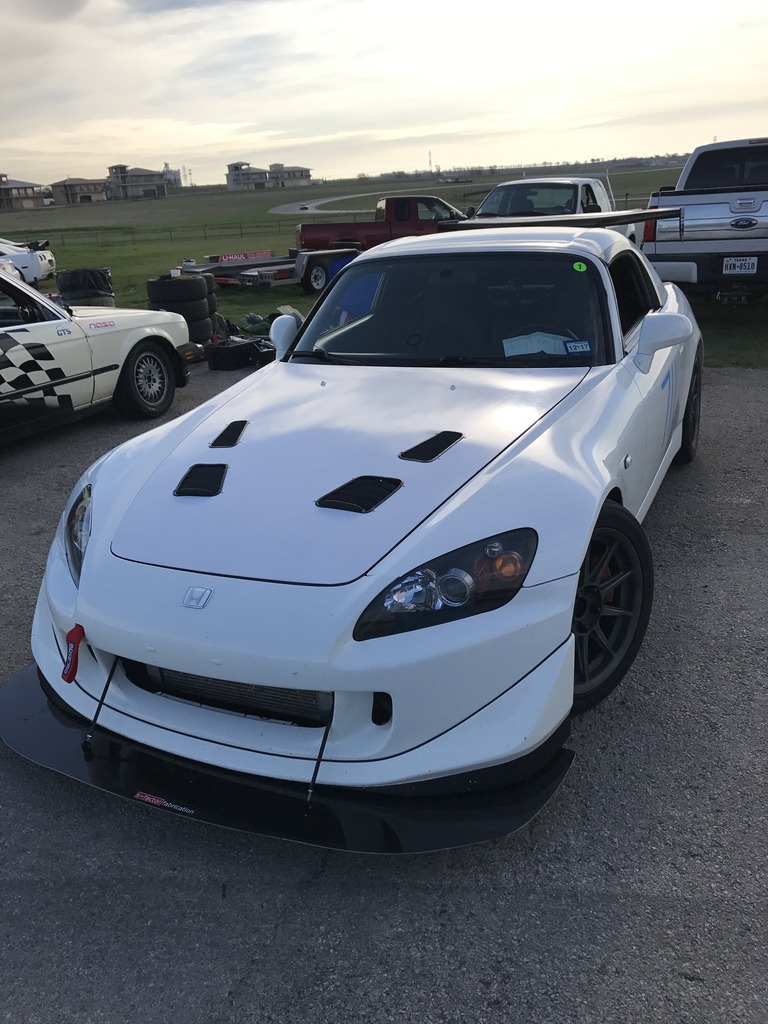
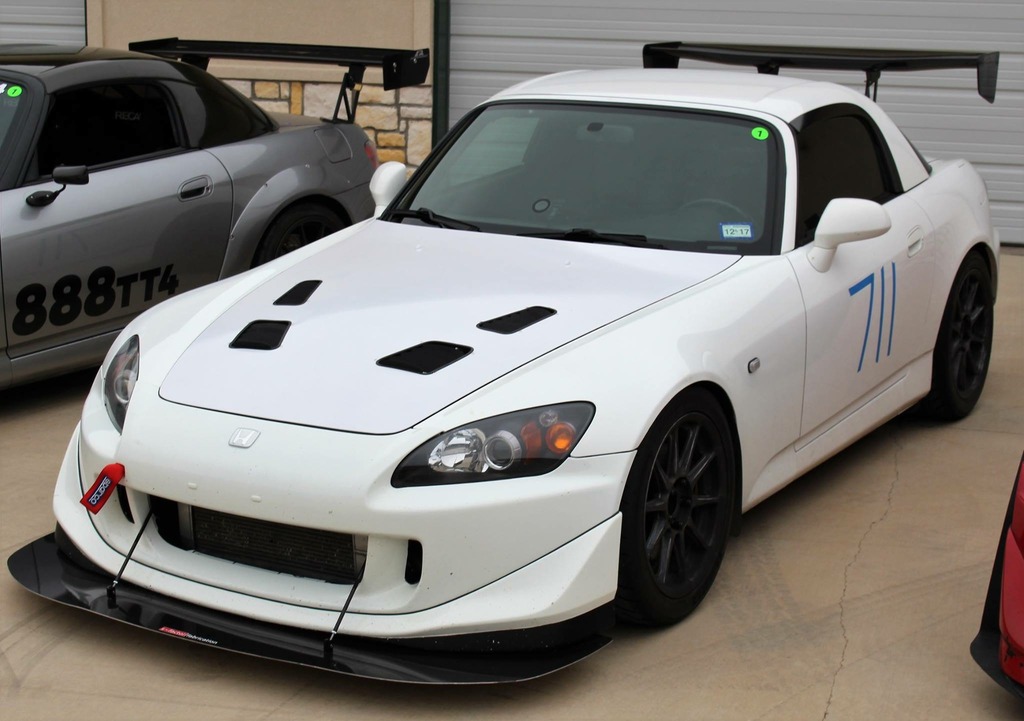
The next part that I wanted to address was the splitter. The Wasp splitter I had bought used came from an AP2 with a lip, but on my car with the CR bumper, it only stuck out about an inch and was flush on the sides. I didn't feel this was going to be sufficent to offset the downforce being generated by the Voltex Type-7 wing, so I decided to get a bigger splitter. With that in mind I reached out to S~Factor, and he worked with me to make sure I got exactly what I wanted, and got it to me with plenty of time for my NASA track weekend.
The S~Factor splitter is made of 12 guage aluminum (.0808" thick) and came with a carbon fiber wrap, it was exactly what I needed.
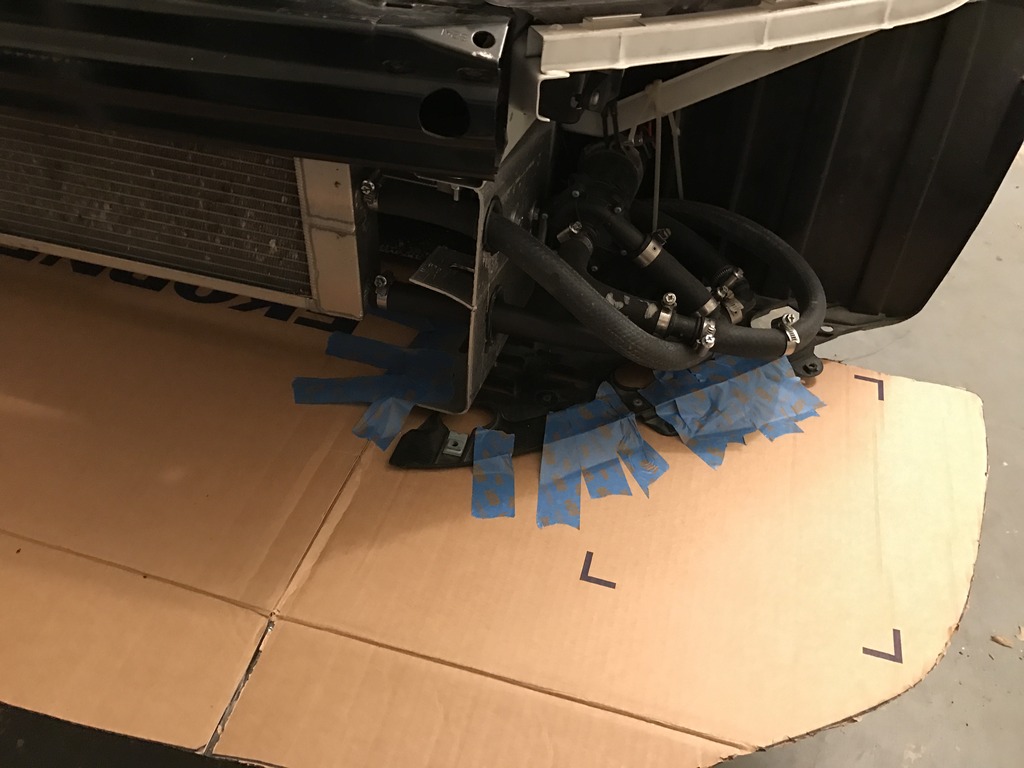
Since I was reusing the hardware from my Wasp splitter, I made a cardboard template to make sure I knew where to drill the new splitter.
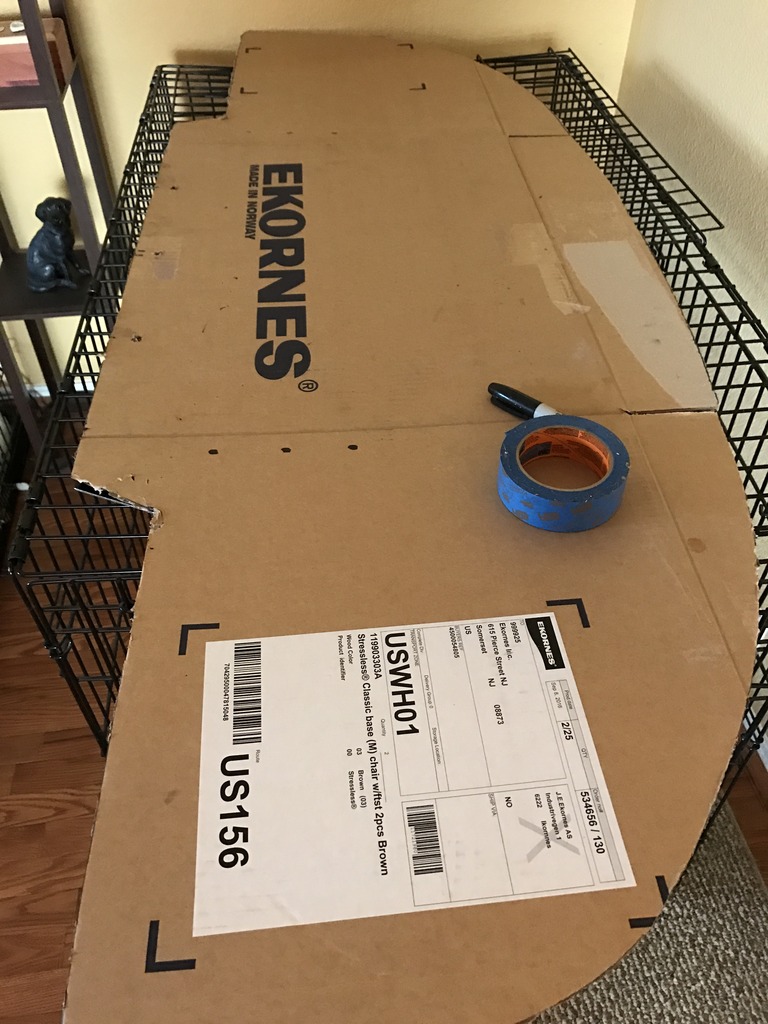
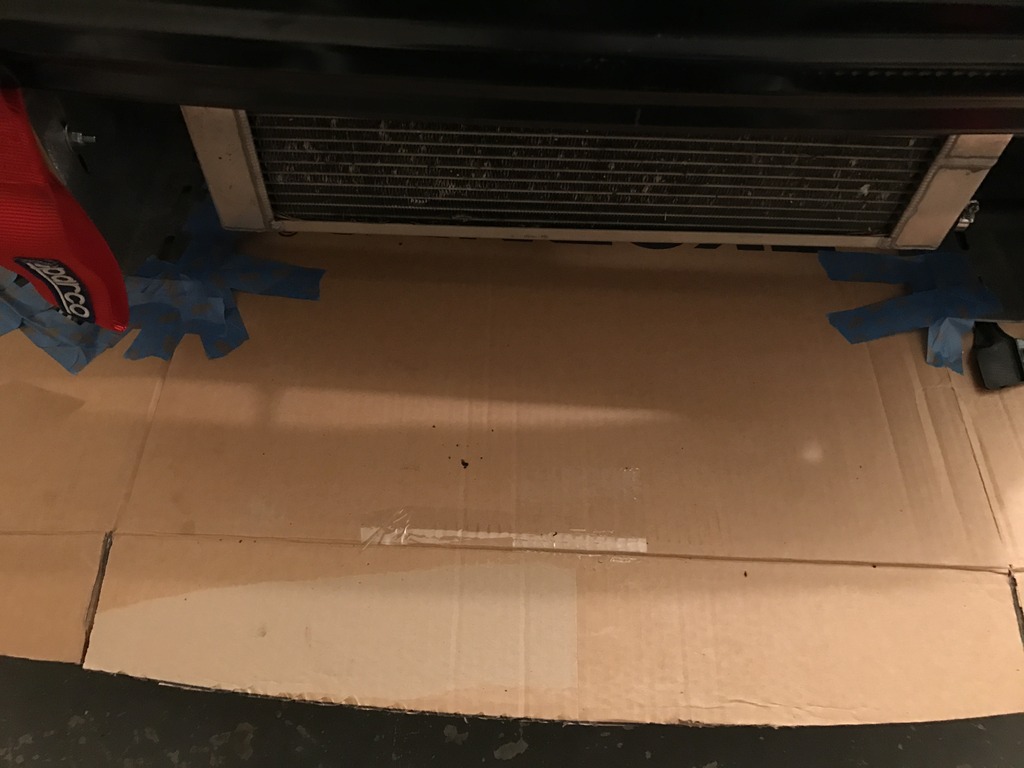
I then "mounted" the cardboard splitter using tape, to make sure everything was properly aligned, and fit how I wanted it to.
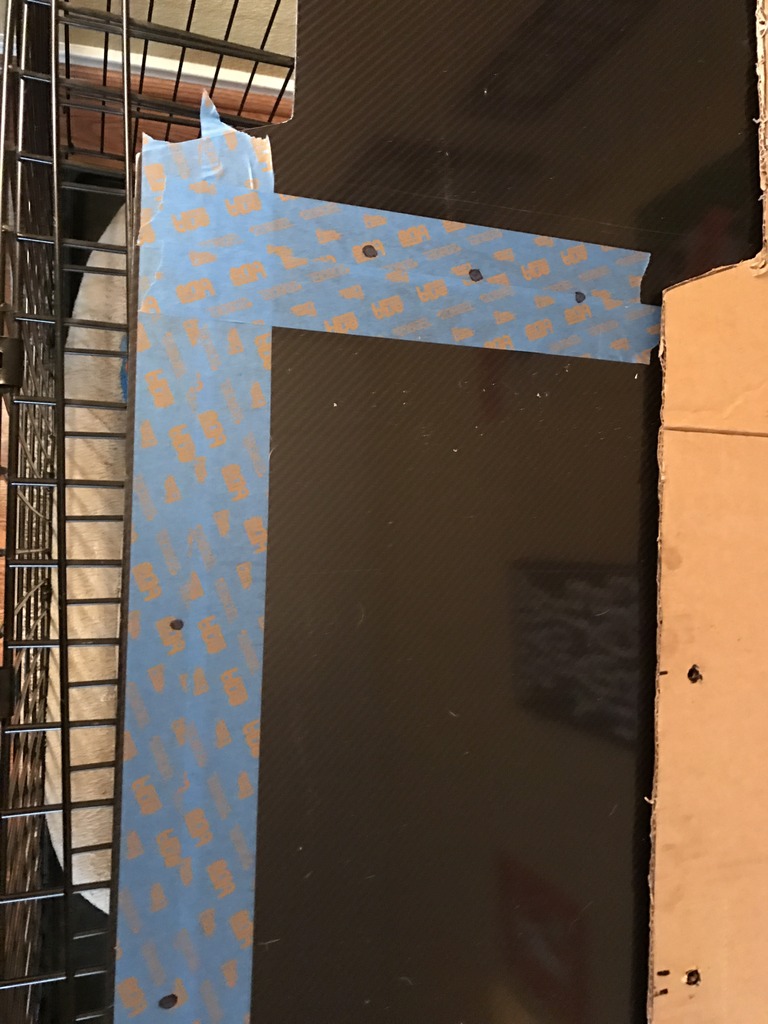
I then used the carboard template to mark on some painters tape where I needed to drill the splitter, and drilled away.

I then mounted the bumper using the existing hardware
Because the aluminum is not as stiff as the carbon fiber/kevlar Wasp splitter, I also decided to use the Wasp splitter rods to add some support to the sides of the splitter. I mounted them directly under the headlights, just to the outside of the fake vents in the AP2 bumper
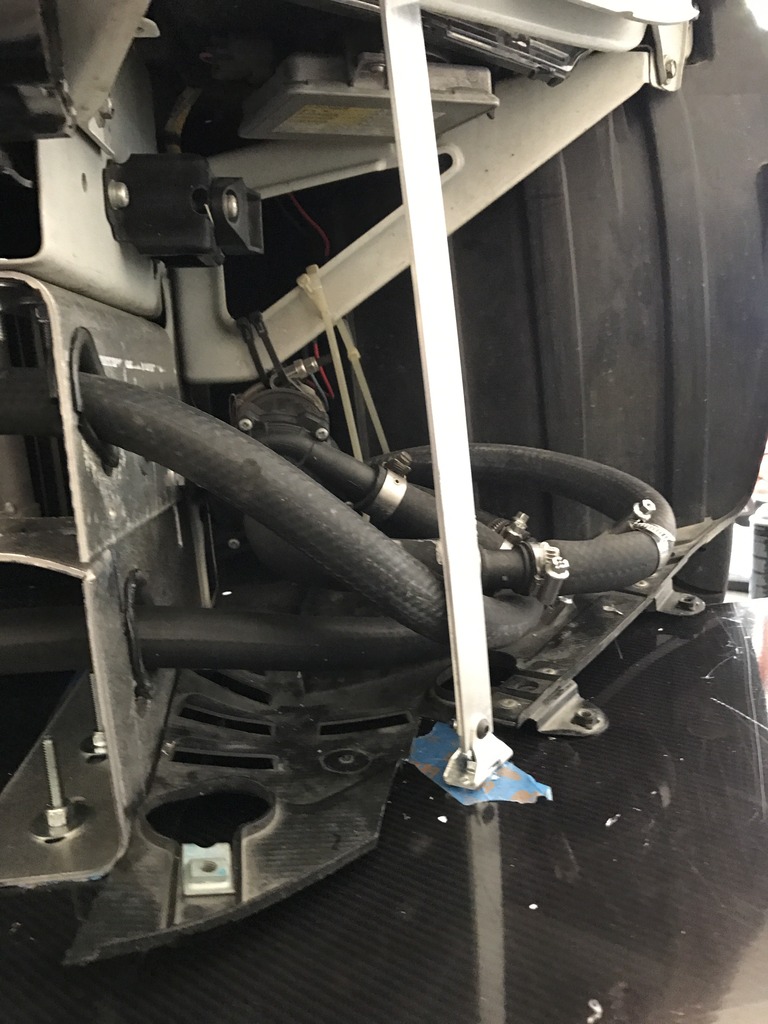
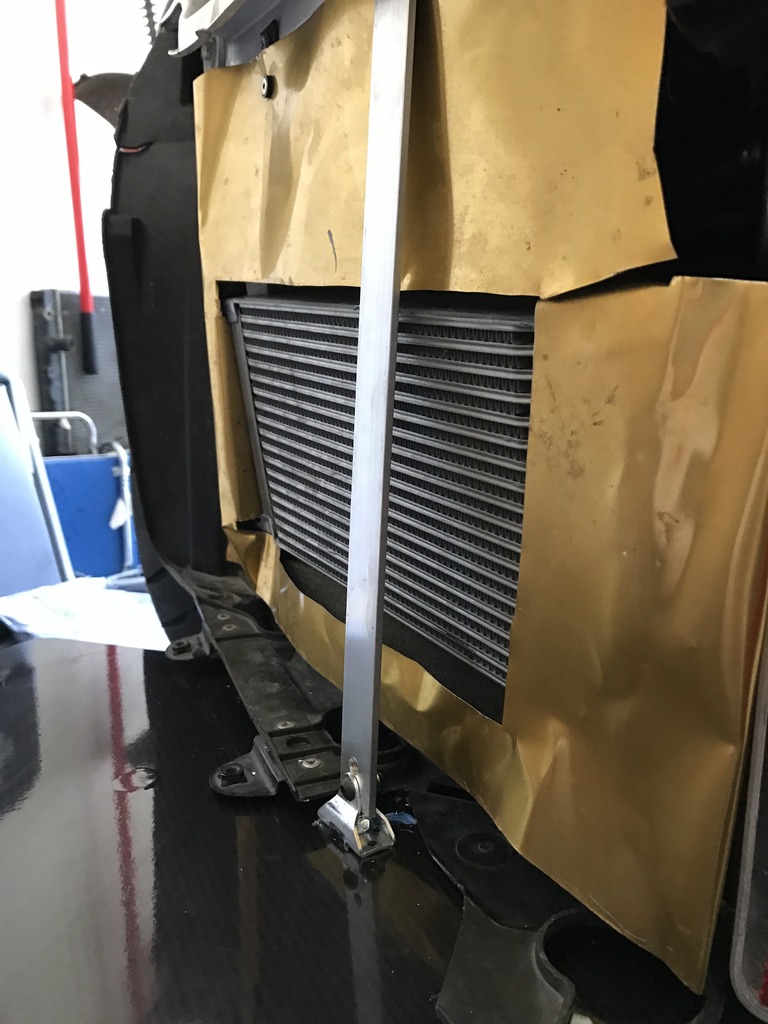
Lastly I used some Longacre Racing Products splitter rods to add some additional support to the front section of the splitter
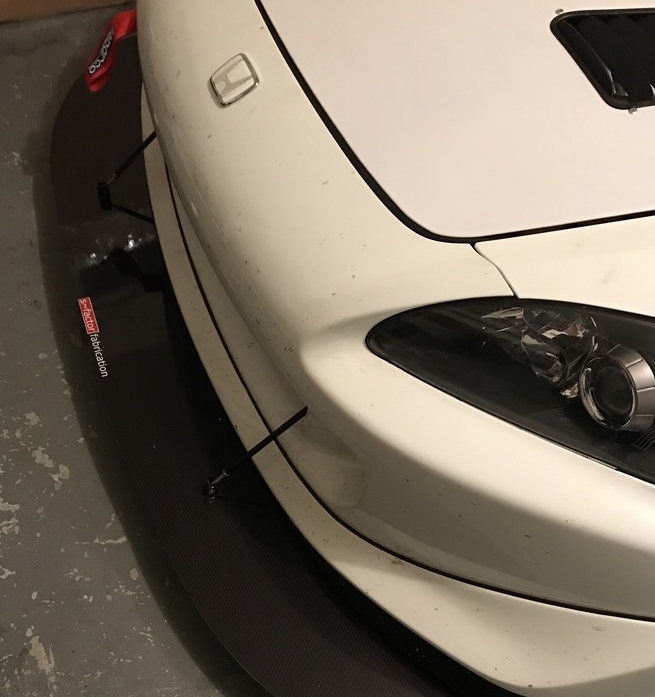
The splitter held up perfectly throughout the 2 day event and 8 sessions. I will likely be moving it back about an inch and reinforcing the sides a little more as the still have more flexibility than I would like, and would touch the track under heavy braking.
Overall the weekend was a huge success, the car ran great, and I also set a personal best on the last day. Very happy with everything so far, and can't wait to get back on the track and continue improving.

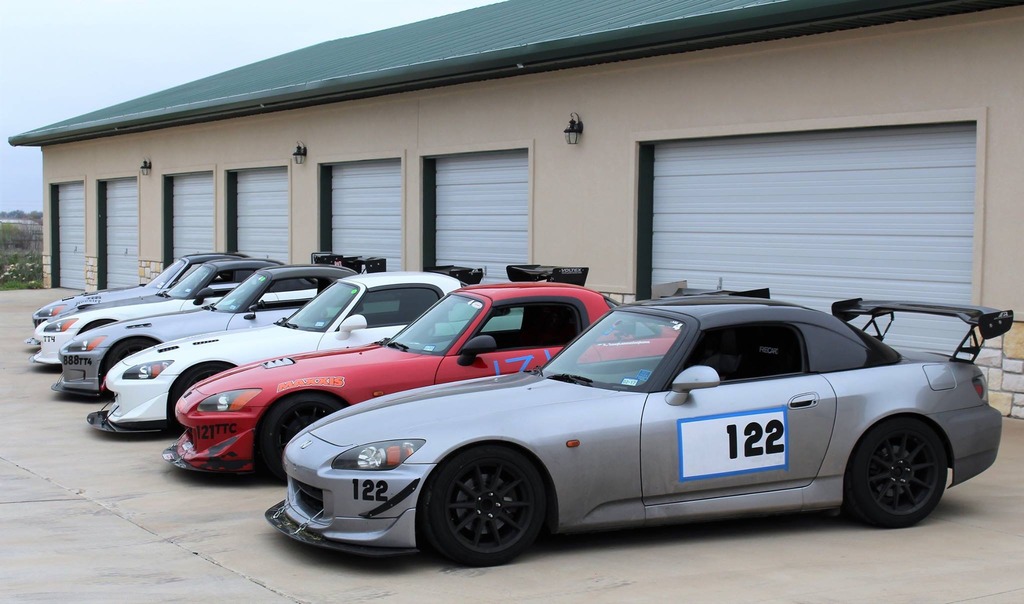
Managed to get some pictures with the rest of the local S2000 crew while we were out there, it was a very productive day for everyone, and 00MUGENS2/John Wallace even broke the NASA TTC track record by over 3 seconds!
Here's a crappy cell phone video of my last session, I forgot to switch out my GoPro battery before I went out, and it died halfway through.
I finally got arround to getting my track wheels ready to go. When I bought them they had been plasti dipped black, and the dip was coming off. I decided to remove all of the dip, before getting my tires mounted on them. If you haven't had the opportunity to remove thin plasti dip before, it's a huge PITA. I did some research and people said that several products worked wonders on getting the stuff off, I tried 3 different things, WD-40 (made the dip "softer" but still requires significant elbow grease to remove), Goo Gone (worked slightly better than WD-40), and Brake Cleaner (really works, but have to spray a small area, wipe, repeat). My recommendation, if you are going to use Plasti Dip, make sure you lay it on very thick, and use 3-4 layers (a rattle can for each wheel).

Eventually I got all of the Plasti Dip off and the wheels have definitley seen better days, but as they are just going to be covered in brake dust, I am not too concerned with their appearance.

I did manage to get the 4 wheels with tires, and the 4 tires I was going to mount (Dunlop Z2SS I have been using since last year) in our new 2016 Mazda CX-5. Sure is nice owning a car with decent cargo capacity!

Next I went to work on the brakes. I had been running StopTech slotted rotors along with StopTech Street Performance pads for the last two years. They were good on the street, and adequate for a beginner at the track, but the more I improved, the pads were struggling to keep up. So I decided to upgrade the pads to G-Loc brake pads after reading about them and getting some input from Devin at TogueFactory.

I went with the R12/R10 compunds, if you want to see which pads work best for you, I recommend you look at Devin's thread https://www.s2ki.com/forums/s2000-ra...t-you-1168625/ in the R&C forum, or reach out to him directly and he will work with you to make sure you get the pads that meet your need.
Along with upgrading the pads, I went ahead and replaced the rotors with Centric premiums from RockAuto, the StopTech slotted rotors still had plenty of life left, but I wanted a clean surface for the G-Loc pads to bed.

The pad install was a straight forward as any pad change on the S2000 is, the pads fit perfectly, and came from G-Loc pre-bedded, which is very helpful when trying to maximize your time on the track and not having to throw away a session to get your pads bedded.

I ran the pads for two days with NASA Texas, and they were very good. They were a night and day difference from the StopTech Street Performance pads, which obviously were designed for a completely different set of circumstances versus the G-Loc pads. The initial bite, modulation, and clamping power of the G-Loc pads were much better than I even expected, I managed to run my personal best, in large part due to the confidence inspiring and consistent nature of the pads. Since I am a relative newbie to the track, your mileage and brake needs will likely vary from mine. Even on the street on the drive to and from the track, the pads were occasionally audible, but nowhere near annoying. Overall very satisfied with my purchase, as well as with TogueFactory, don't hesitate to reach out to them for your performance needs.
The next part that I wanted to address was the splitter. The Wasp splitter I had bought used came from an AP2 with a lip, but on my car with the CR bumper, it only stuck out about an inch and was flush on the sides. I didn't feel this was going to be sufficent to offset the downforce being generated by the Voltex Type-7 wing, so I decided to get a bigger splitter. With that in mind I reached out to S~Factor, and he worked with me to make sure I got exactly what I wanted, and got it to me with plenty of time for my NASA track weekend.
The S~Factor splitter is made of 12 guage aluminum (.0808" thick) and came with a carbon fiber wrap, it was exactly what I needed.


Since I was reusing the hardware from my Wasp splitter, I made a cardboard template to make sure I knew where to drill the new splitter.

I then "mounted" the cardboard splitter using tape, to make sure everything was properly aligned, and fit how I wanted it to.


I then used the carboard template to mark on some painters tape where I needed to drill the splitter, and drilled away.


I then mounted the bumper using the existing hardware

Because the aluminum is not as stiff as the carbon fiber/kevlar Wasp splitter, I also decided to use the Wasp splitter rods to add some support to the sides of the splitter. I mounted them directly under the headlights, just to the outside of the fake vents in the AP2 bumper


Lastly I used some Longacre Racing Products splitter rods to add some additional support to the front section of the splitter

The splitter held up perfectly throughout the 2 day event and 8 sessions. I will likely be moving it back about an inch and reinforcing the sides a little more as the still have more flexibility than I would like, and would touch the track under heavy braking.


Overall the weekend was a huge success, the car ran great, and I also set a personal best on the last day. Very happy with everything so far, and can't wait to get back on the track and continue improving.

Managed to get some pictures with the rest of the local S2000 crew while we were out there, it was a very productive day for everyone, and 00MUGENS2/John Wallace even broke the NASA TTC track record by over 3 seconds!


Here's a crappy cell phone video of my last session, I forgot to switch out my GoPro battery before I went out, and it died halfway through.
03-13-2017, 05:03 AM
#64

Must be nice to be able to go to the track this time of year...They're calling for a massive snow storm up here tonight 
Car is coming along real nice. Did you end up re-spraying the wheels after you took the plasti-dip off?
Car is coming along real nice. Did you end up re-spraying the wheels after you took the plasti-dip off?
03-13-2017, 05:22 AM
#65
Thread Starter
I didn't have a chance to do anything with the wheels, I did call around to get some quotes to get them sandblasted and powder coated, but it was going to run me about $400 and that's what I paid for them, so not worth it. I will likely plasti dip them again, will just make sure I lay some thick coats on them so future removal should be easier. They are dedicated track wheels, so not too concerned with how they look, the Forgestars will be used for the street.
03-16-2017, 04:16 AM
#66
Thread Starter
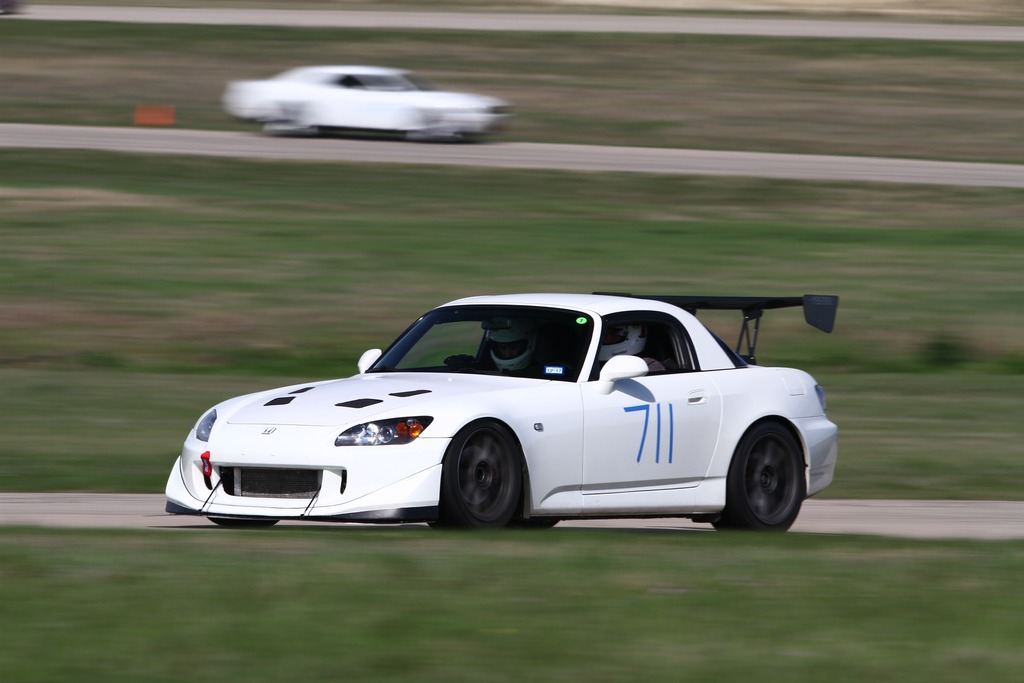
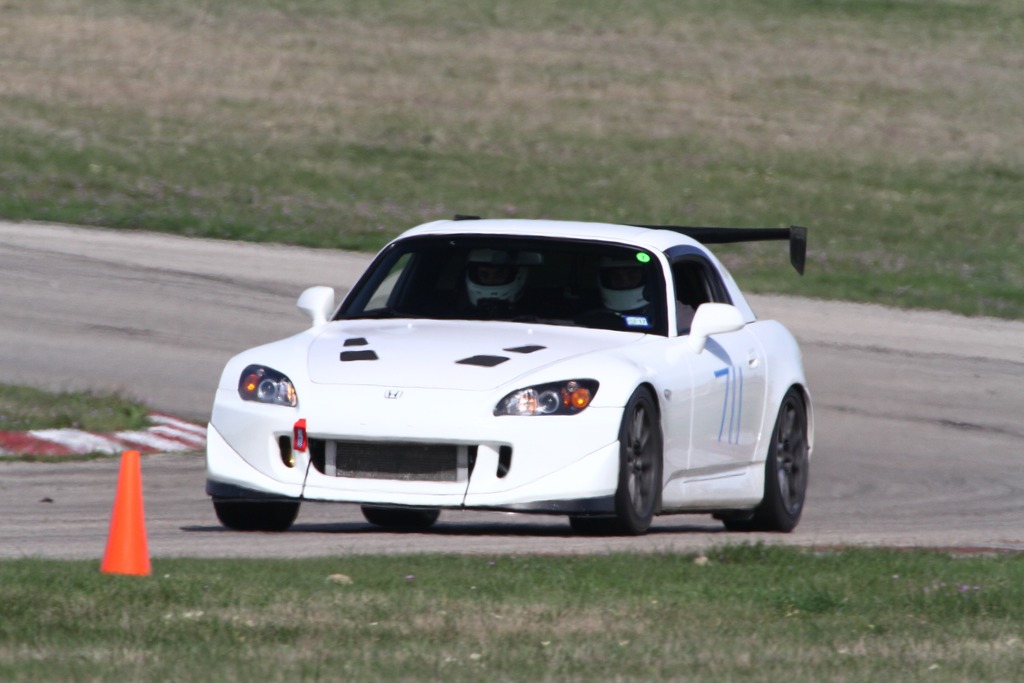
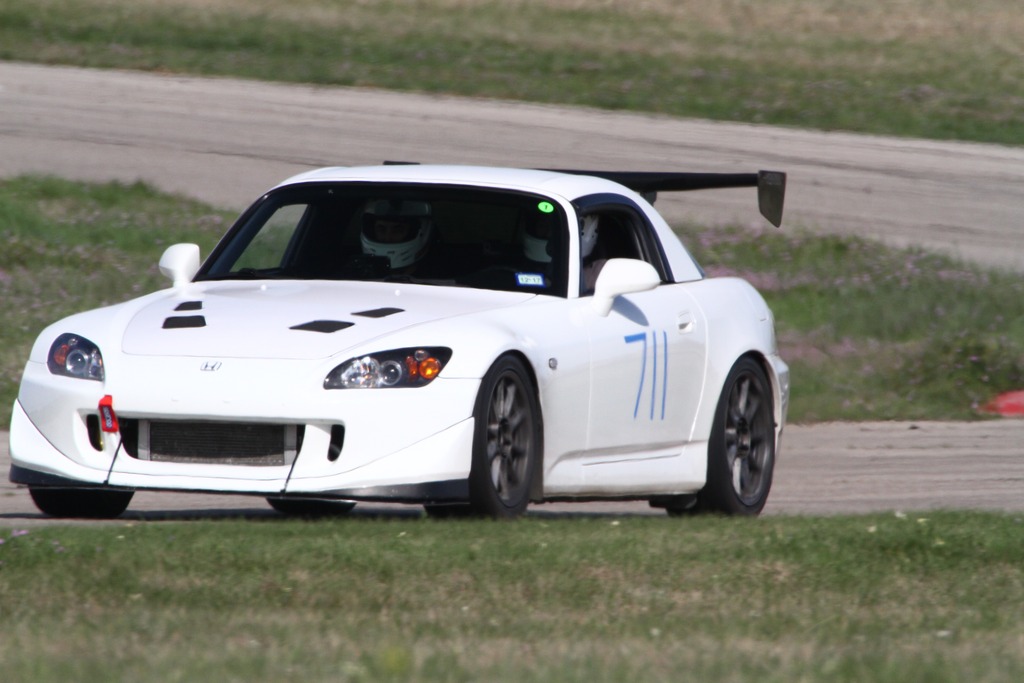
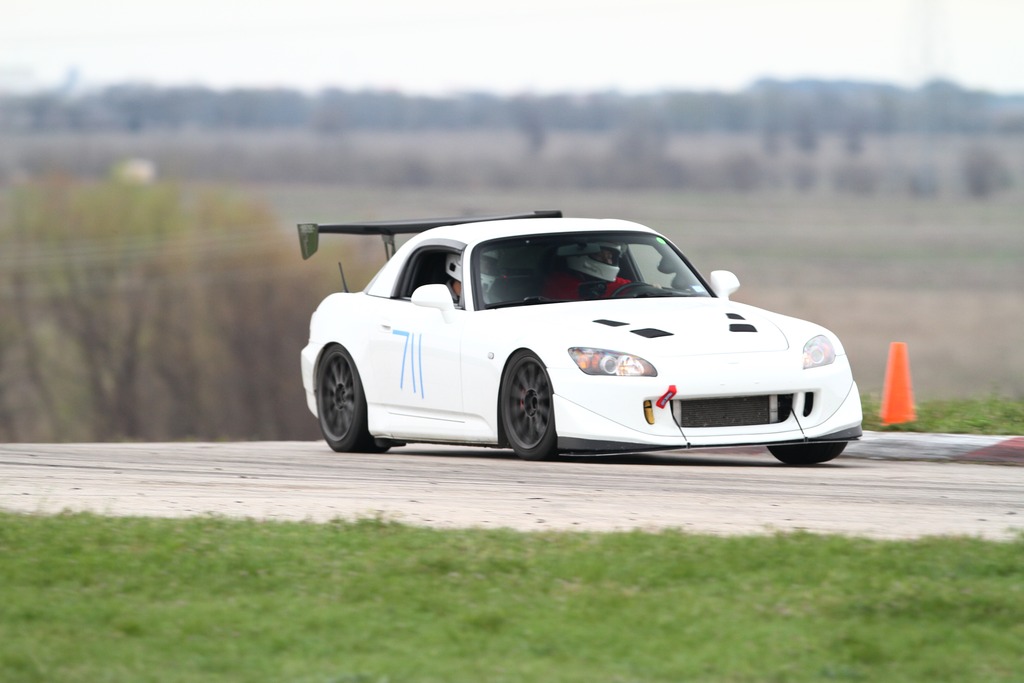
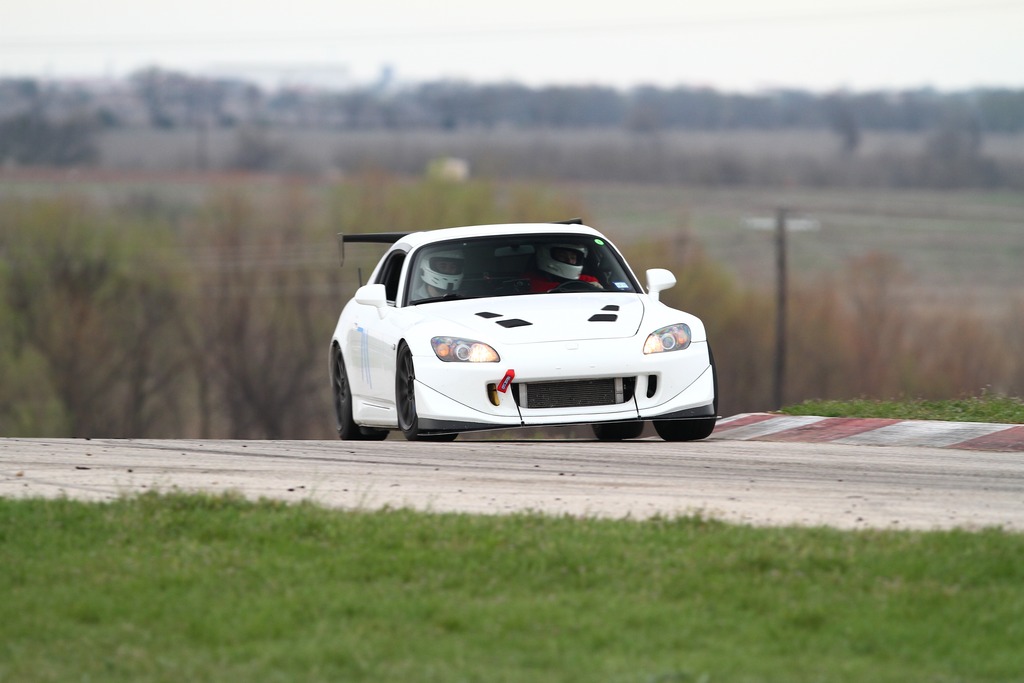
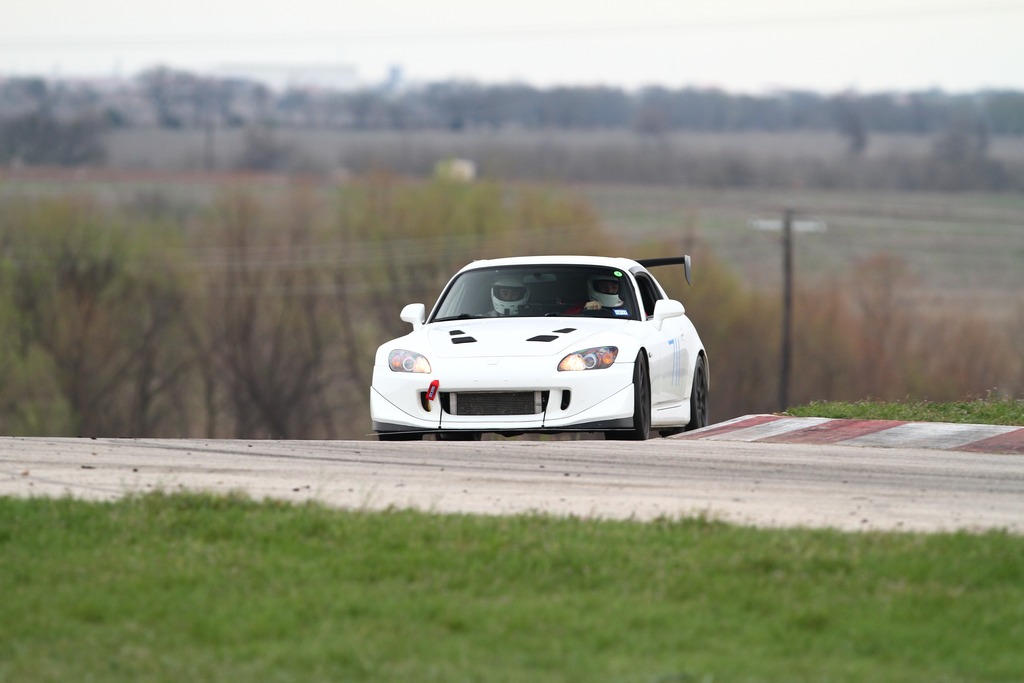
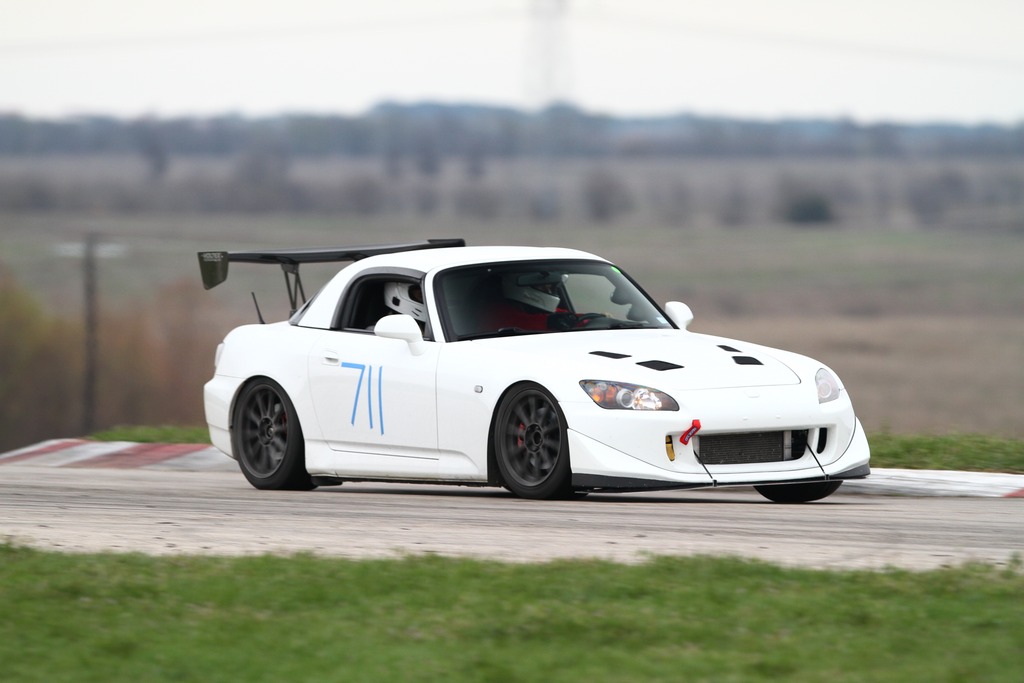
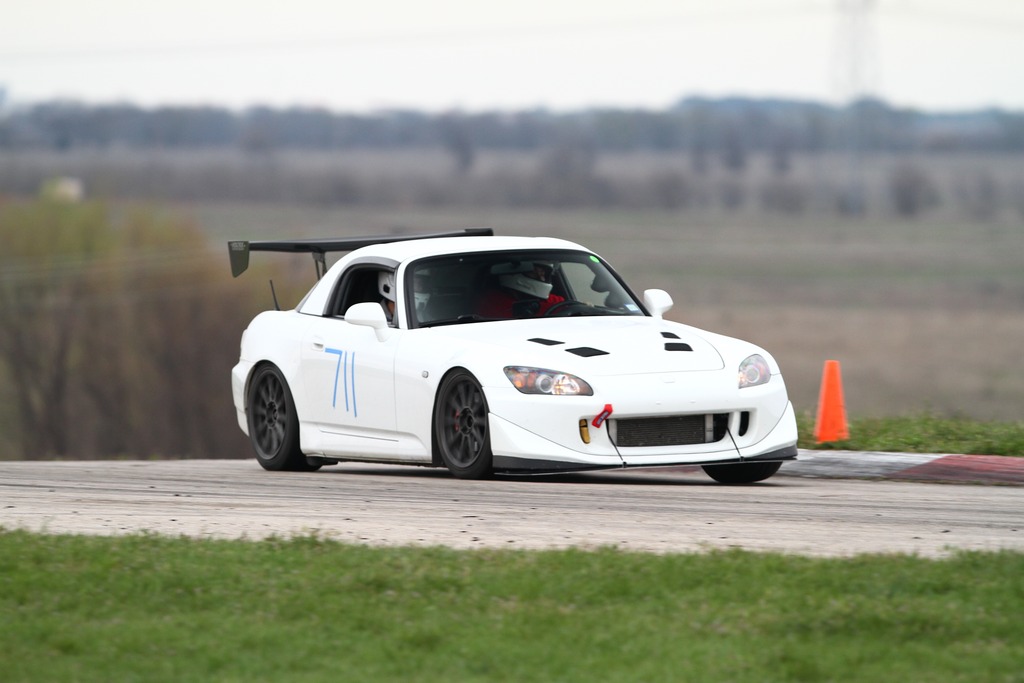
Some pictures on the track from the NASA March Madness event this past week. Pictures were taken by MohFlo Event Photography.


The following users liked this post:
S1 S2 (03-16-2017)
03-17-2017, 05:29 AM
#67
Thread Starter
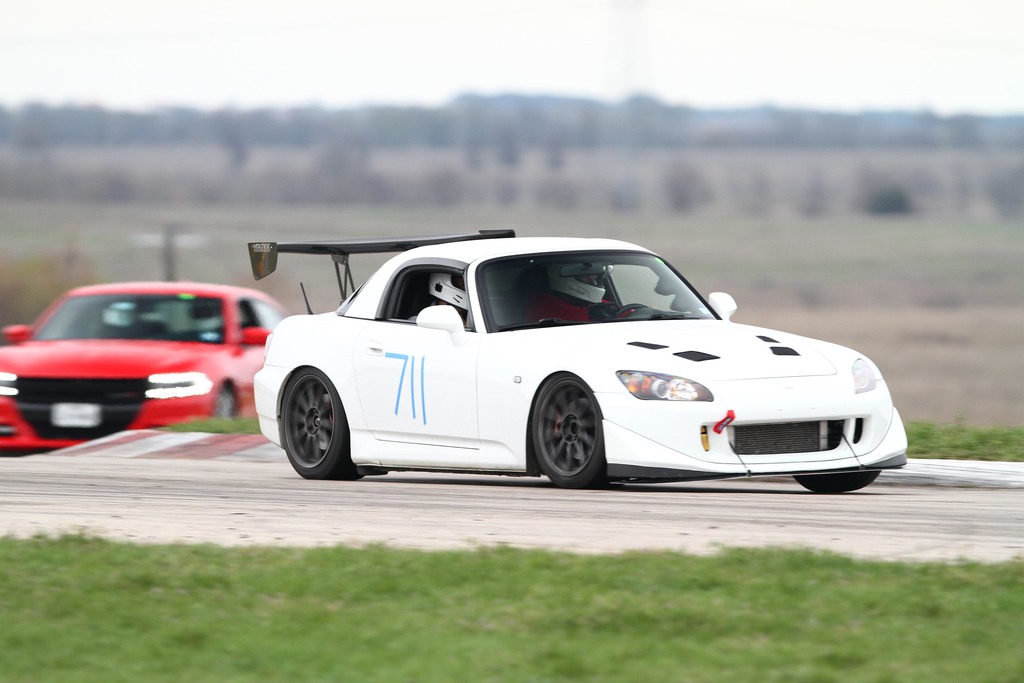
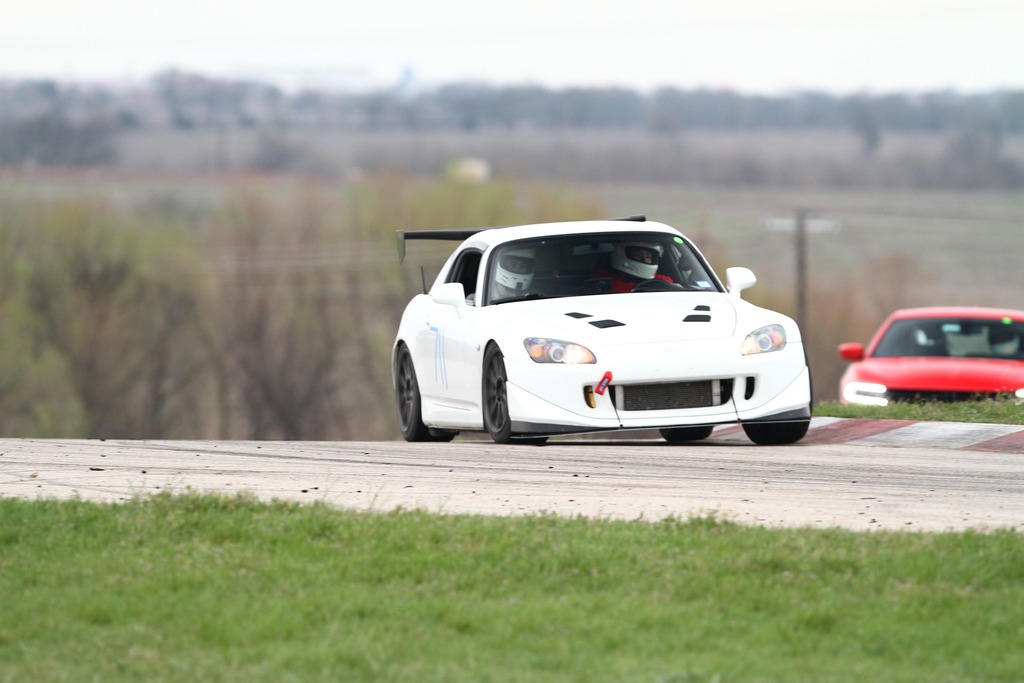
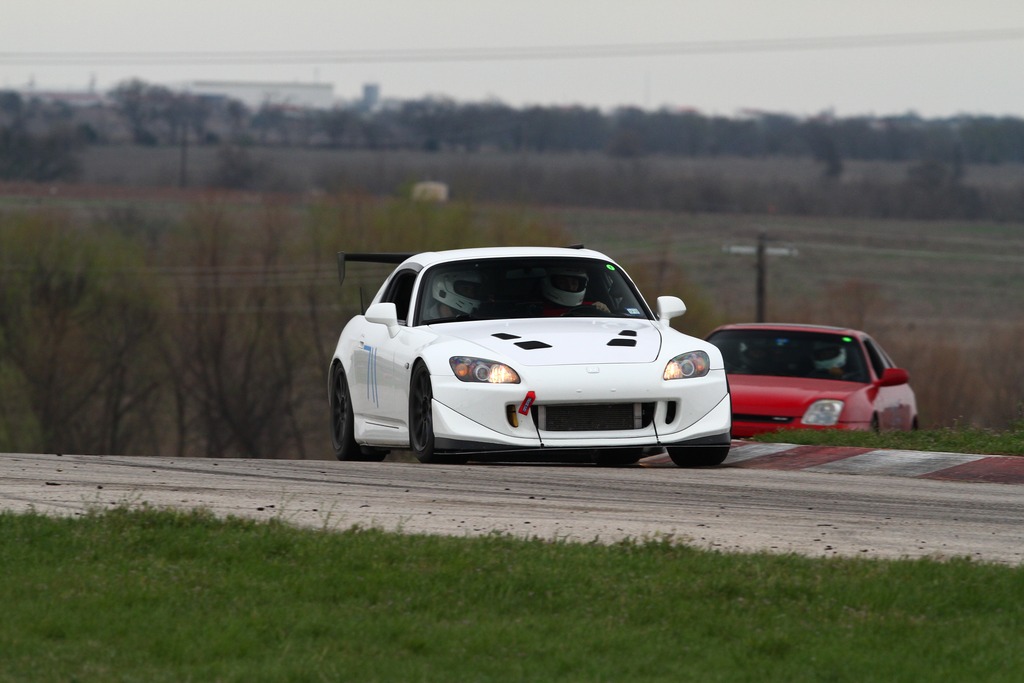
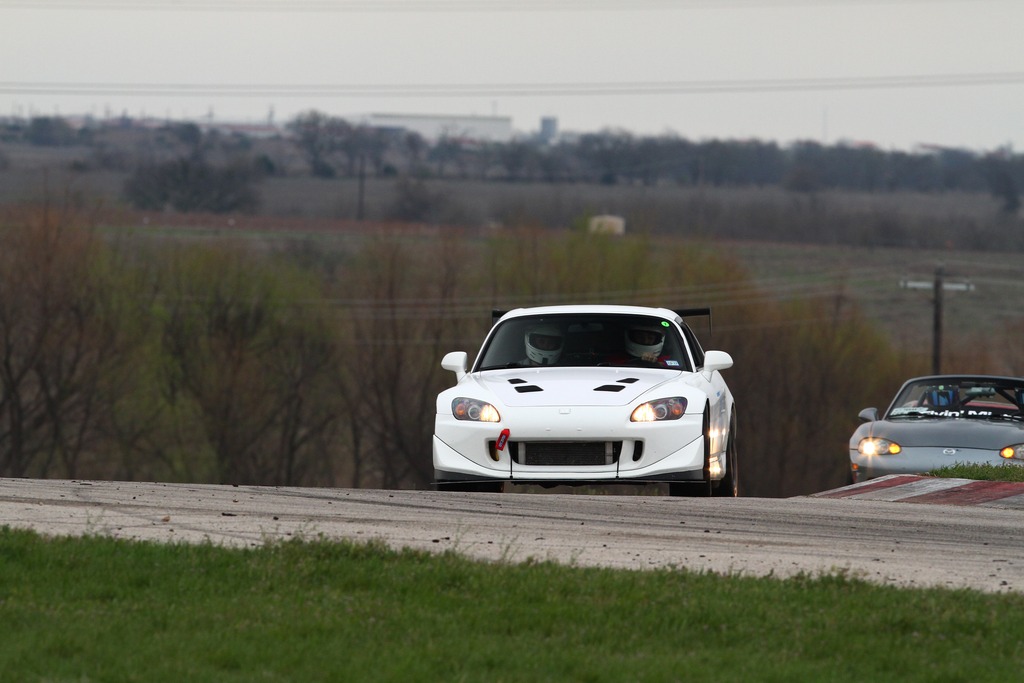
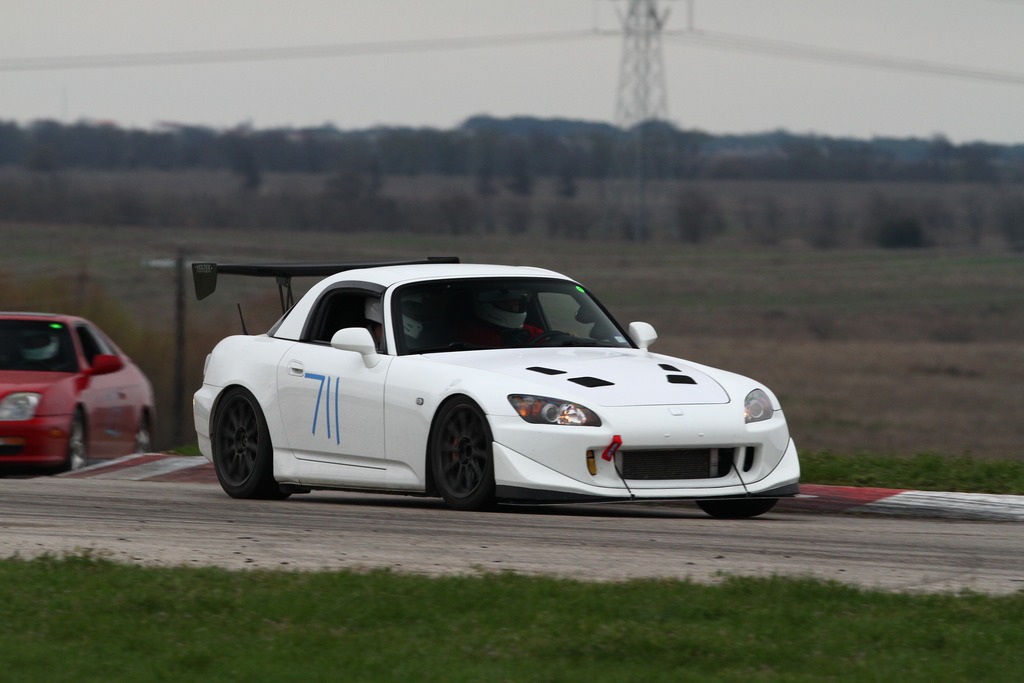
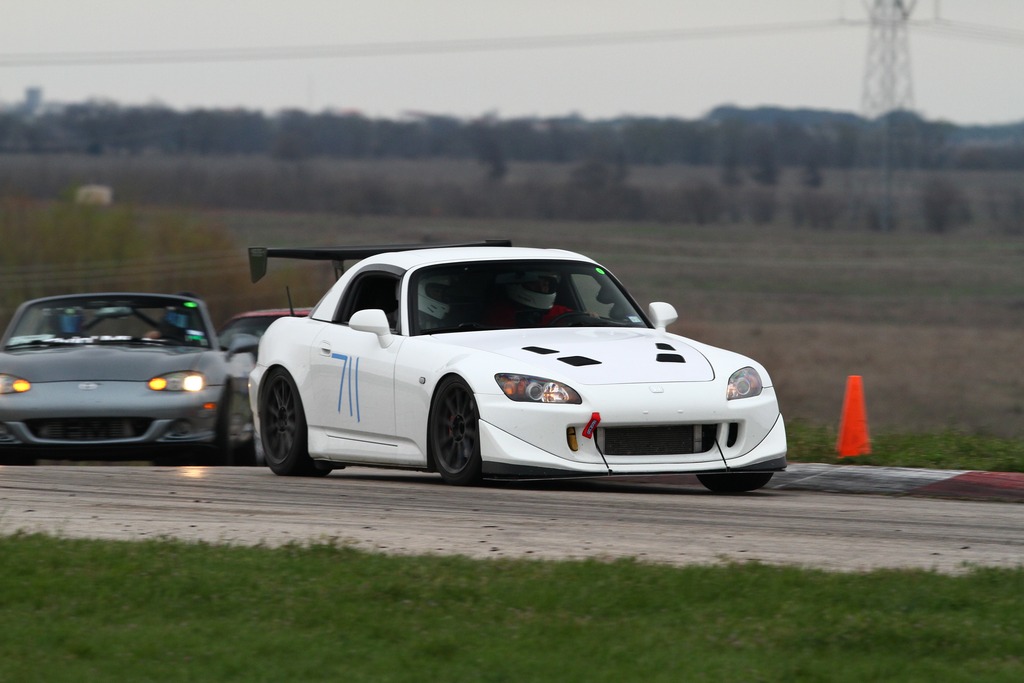
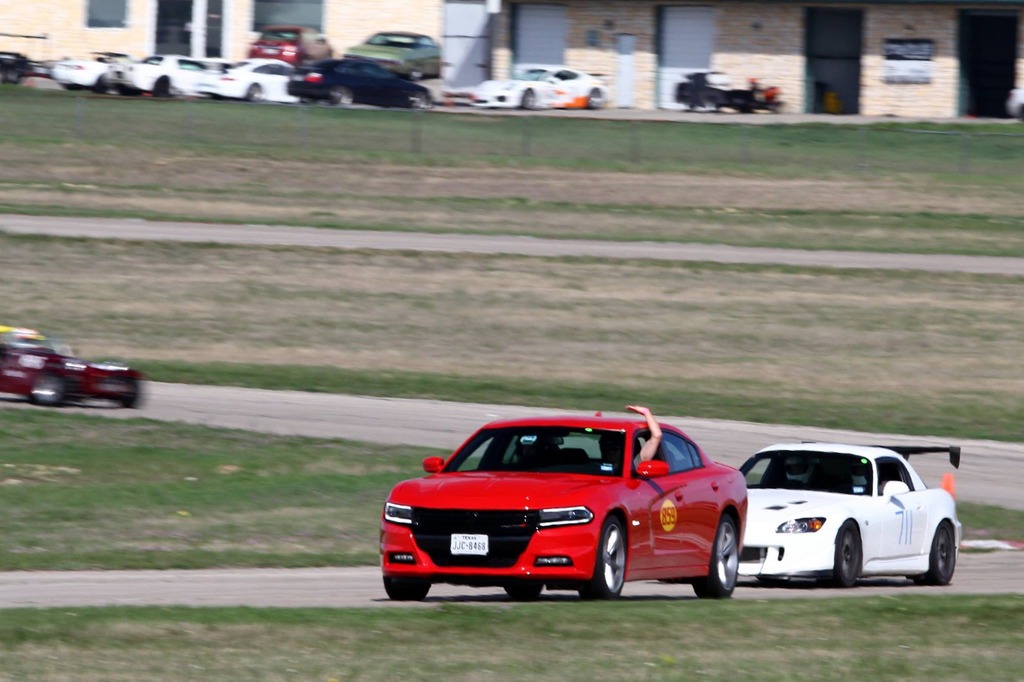
Couple more pictures passing some traffic:


 04-07-2017, 08:50 AM
#68
Thread Starter
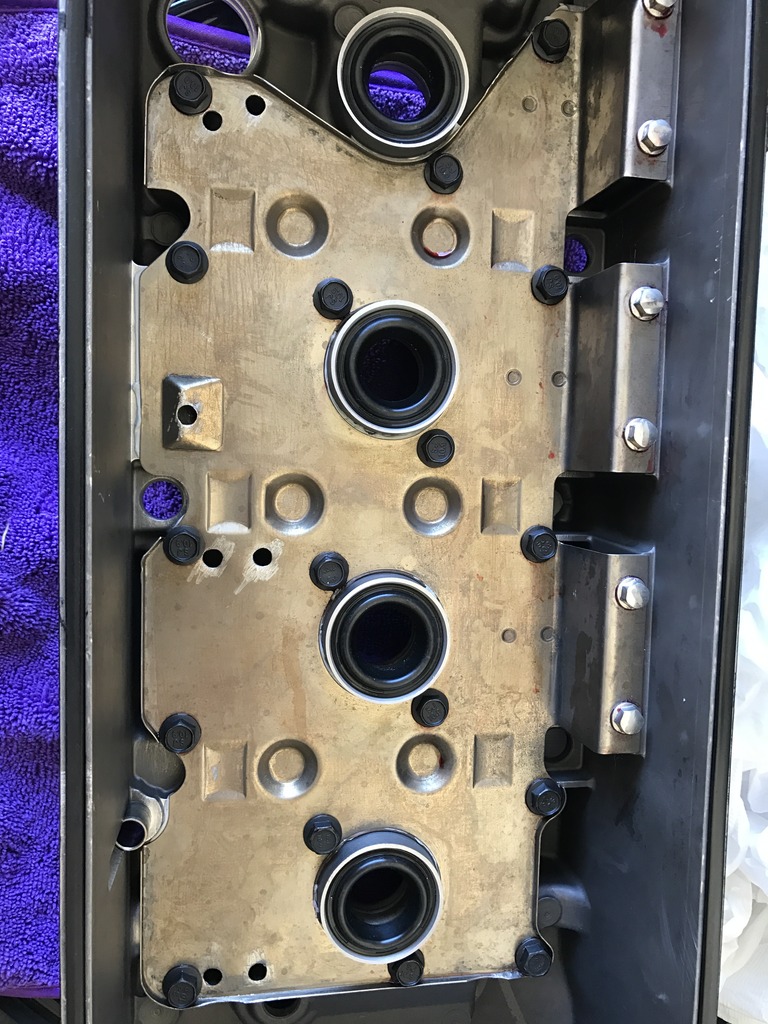
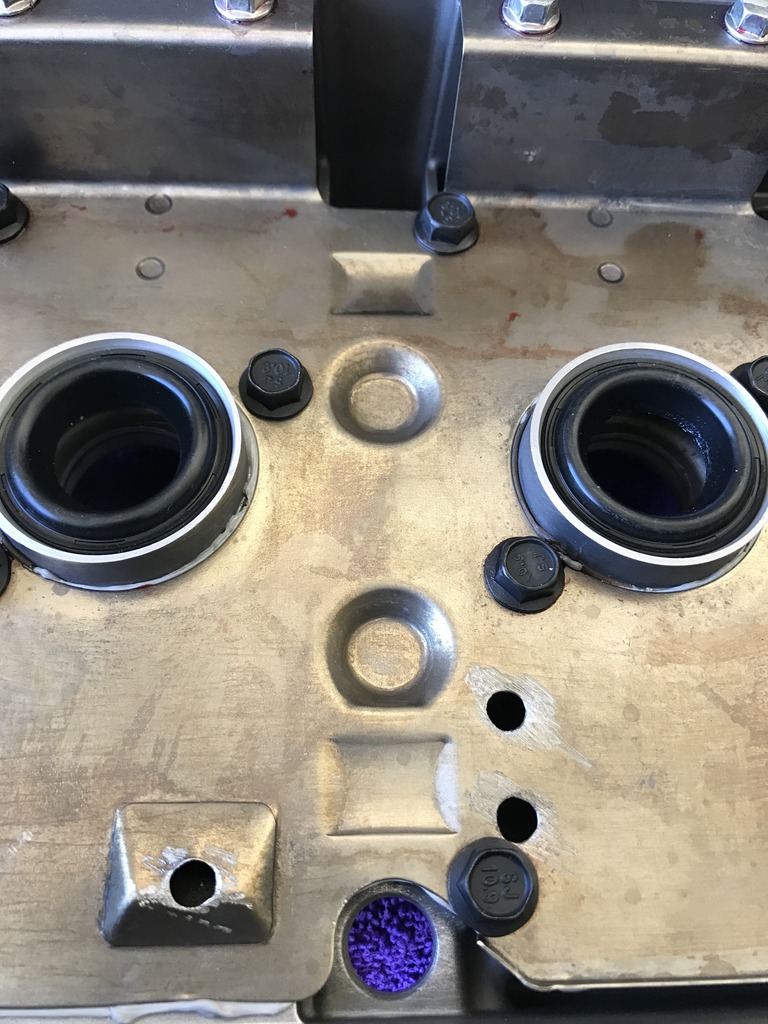
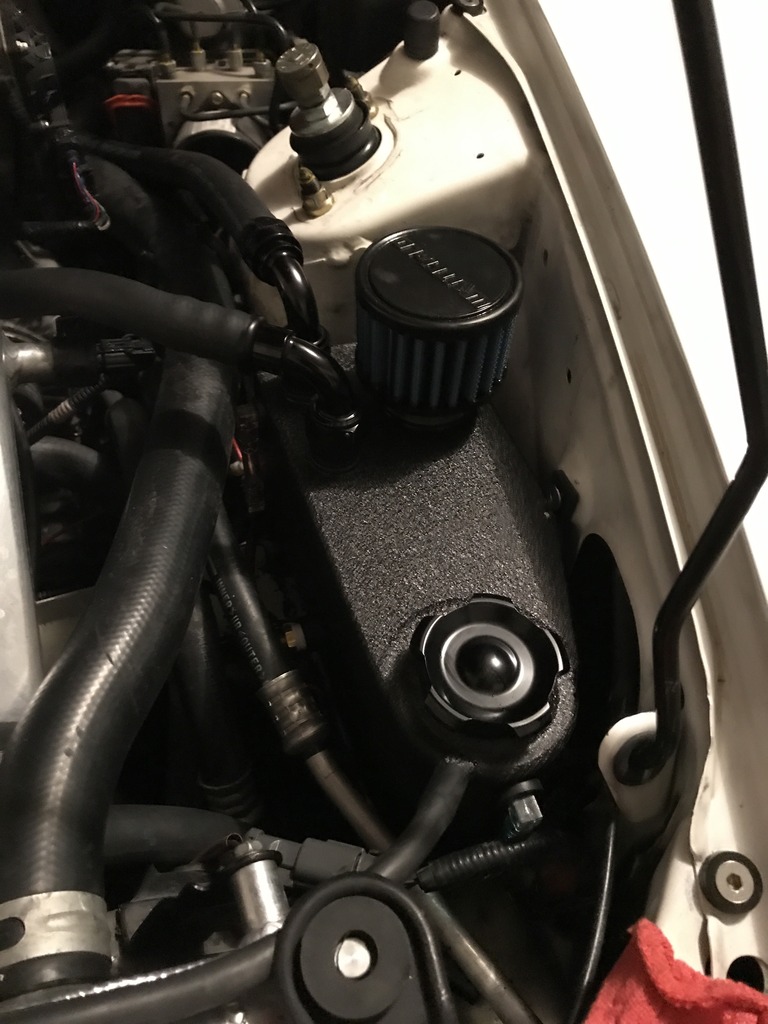
During my last track day with NASA I was getting quite a bit of oil coming out of the PCV port, and due to a cheap VTA catch can some of the oil was coming out of the filter and through the vents in the hood and getting on my windshield. I decided I needed to do a couple of upgrades, first thing up was sending the valve cover to Dustin/RAIN H8R to get the baffle plate drilled out. Dustin did a great job and got the valve cover back to me quickly, looking forward to having minimal oil in my catch can!
Next up was getting a better solution for the catch can, after doing alot of reading and research I decided to pick up the combo catch can/radiator overflow from SchmuckBuilt.
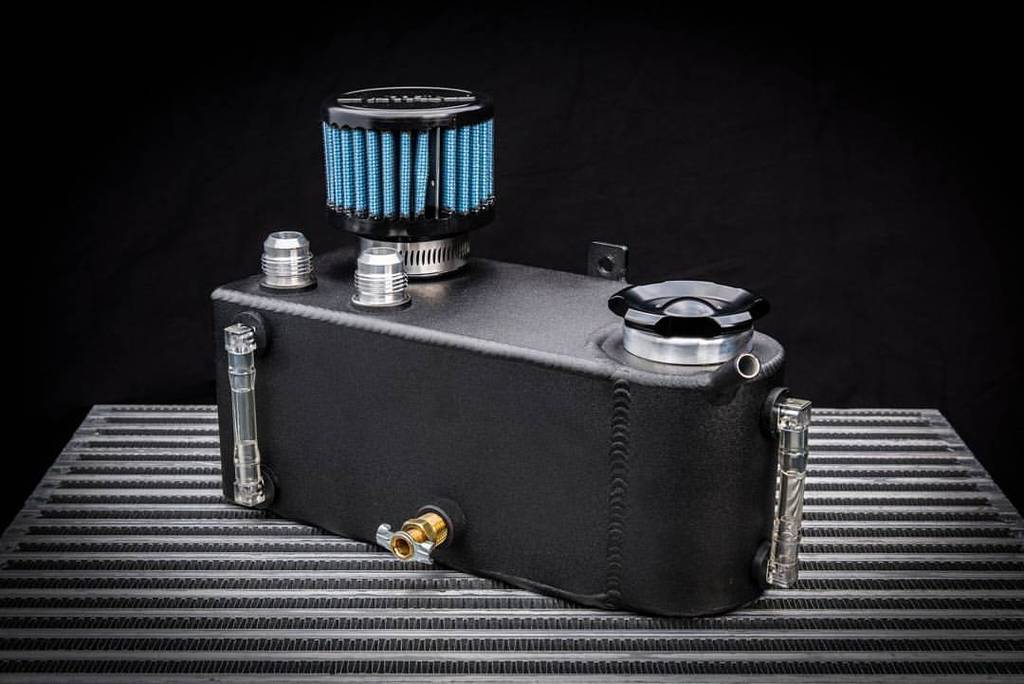
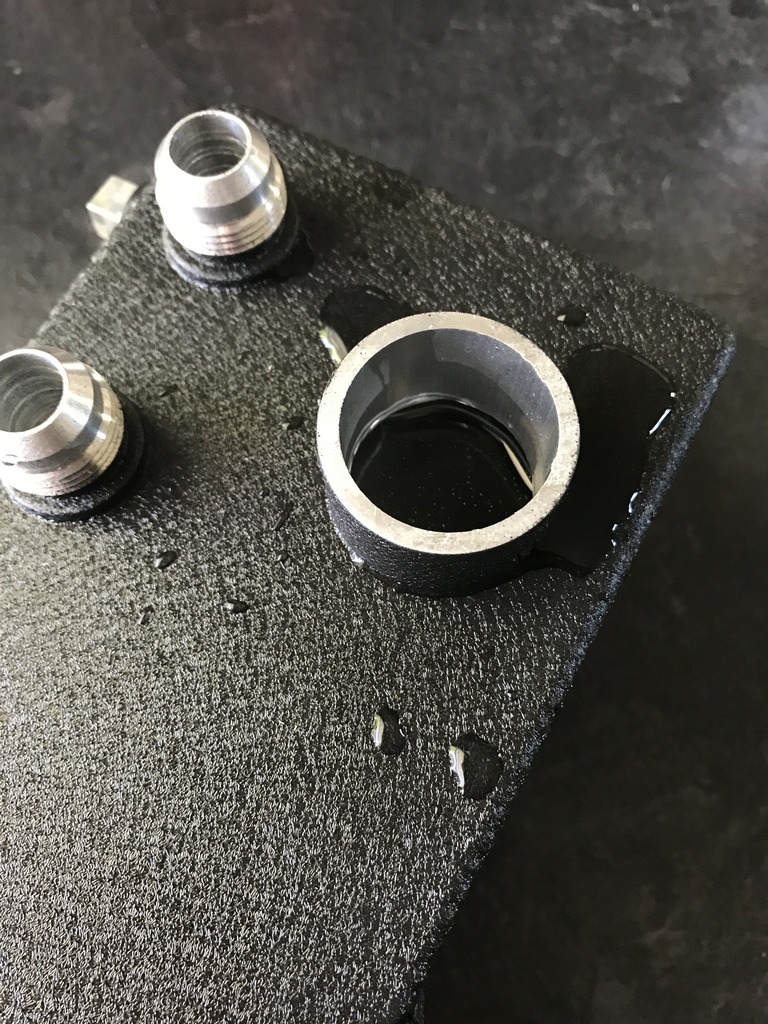
The combo can is incredibly well made, it includes two -10AN fittings and a 1600ml/1.7 quart capacity for the catch can side and 350ml for the coolant. The can also has some nice baffling built in to ensure that the oil and other gunk stays in the can and doesn't come out of the filter.
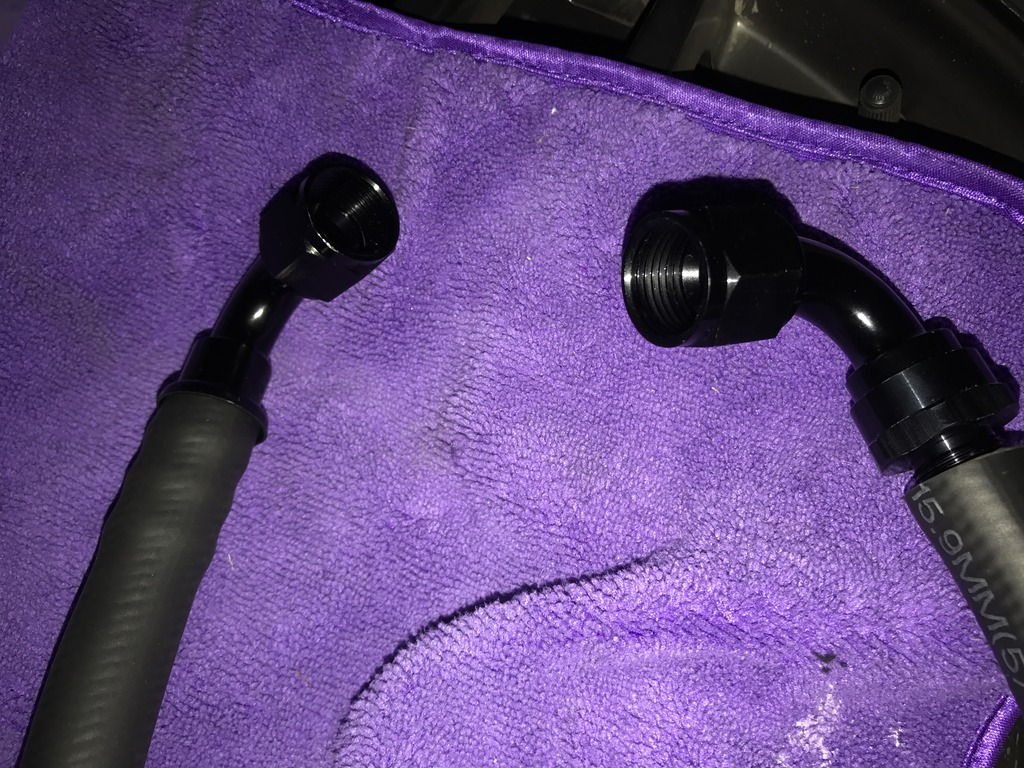
To improve the lines from the valve cover I ordered 5 feet of -10AN hose and push lock fitting for the front. Unfortunately Summit was back ordered on the -10AN to M14x1.5 fitting for the PCV port, so for the time being still running the gutted PCV and push lock hose till it arrives.
Everything is buttoned up and ready for my next track day on April 11th with Track Night in America


Next up was getting a better solution for the catch can, after doing alot of reading and research I decided to pick up the combo catch can/radiator overflow from SchmuckBuilt.

The combo can is incredibly well made, it includes two -10AN fittings and a 1600ml/1.7 quart capacity for the catch can side and 350ml for the coolant. The can also has some nice baffling built in to ensure that the oil and other gunk stays in the can and doesn't come out of the filter.

To improve the lines from the valve cover I ordered 5 feet of -10AN hose and push lock fitting for the front. Unfortunately Summit was back ordered on the -10AN to M14x1.5 fitting for the PCV port, so for the time being still running the gutted PCV and push lock hose till it arrives.

Everything is buttoned up and ready for my next track day on April 11th with Track Night in America


Last edited by Kenny_Stang; 04-07-2017 at 09:04 AM.


