Killercom's Turbo Build!
 03-02-2017, 07:26 AM
#41

Thread Starter
Originally Posted by BlakeJS2K
I can't wait to see it running again! Is it weird I'm getting excited for your build even tho I don't know you at all? You should make a YouTube cause I would watch it

 03-06-2017, 02:48 PM
#42
Thread Starter
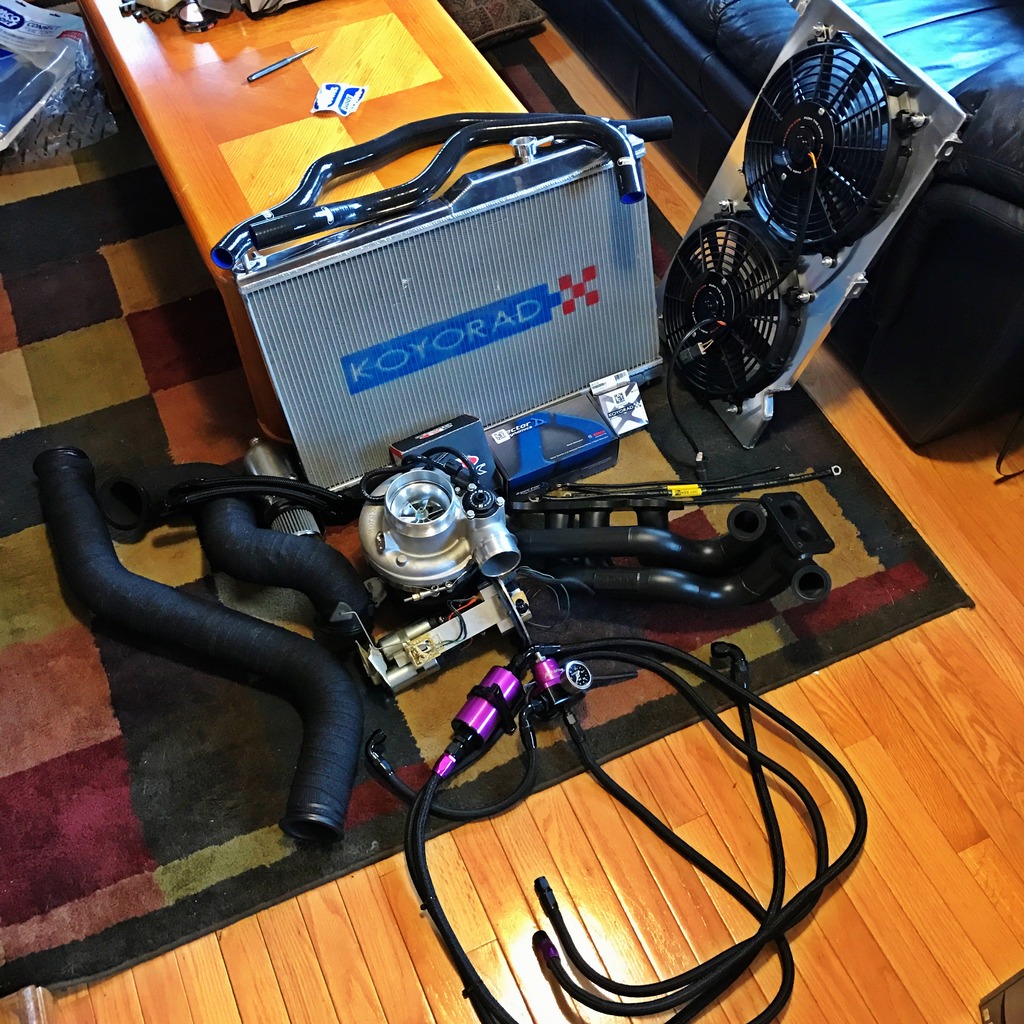
The pile of parts is growing! Koyo radiator, Injector Dynamics 2200's, Mishimoto slim fans with shroud, and Samco radiator hoses have arrived! Big thanks to Dewey at TH Motorsports for giving me some amazing deals!
The pile of boxes is pretty interesting as well!
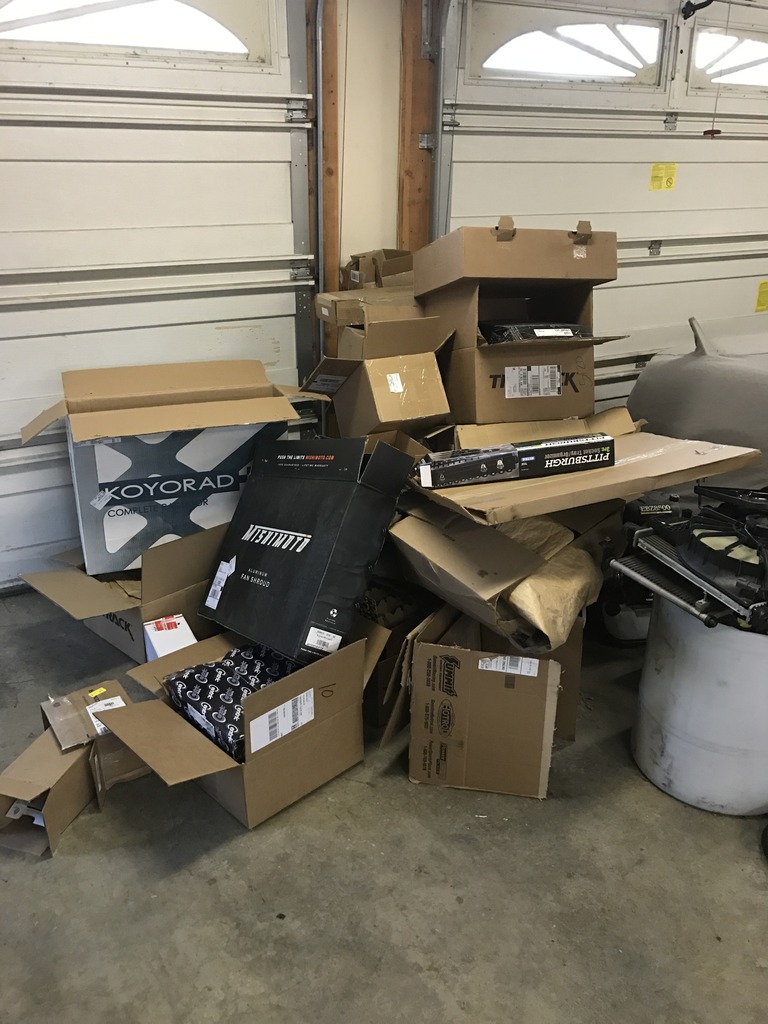

The pile of boxes is pretty interesting as well!
 03-25-2017, 06:11 PM
#43
Thread Starter
Some updates as of today! The bay is pretty much all prepped and ready for the shave job and paint. Did the best I could stripping down the bay. My buddy is going to take the car either April 1st or April 7th, so I have that to look forward to.
I also went ahead and took every bolt that I had, everything out of the bay, off the motor, and probably 200 spare pieces of s2000 hardware off old motors, etc, and sent those up to Rochester Plating to have everything zinc plated! Sent them 553 pieces total. I also went and finally dropped off everything at the powdercoating shop. Going to get everything done flat black. Intercooler piping, Carbing cooling plate, Moroso oil catch can, intake manifold, and a few other pieces. Also getting the Cusco sway bars I got coated also, but I'm doing candy blue on those guys.
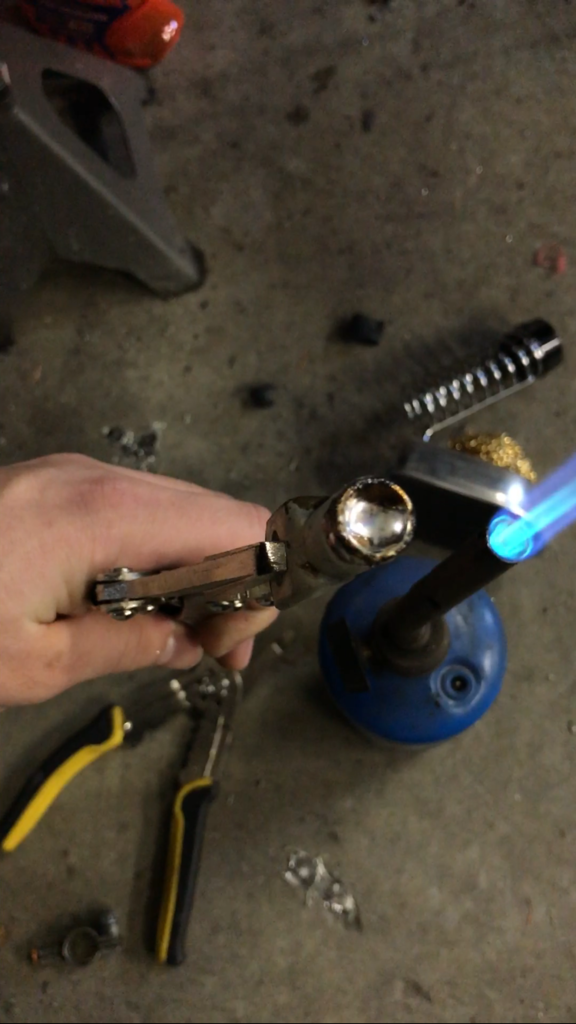
I also finished up my battery relocation kit. Got the line fed through the passenger footwell with the proper grommet. I was on the fence on how I wanted to get the new terminal attached to the car's harness, whether I wanted to crimp or solder it. I ended up going with the solder option. Melted solder into the terminal about halfway up and pressed the terminal over the wires. Came out perfect. Threw some shrink tubing over it and it looks like it came from the factory this way.
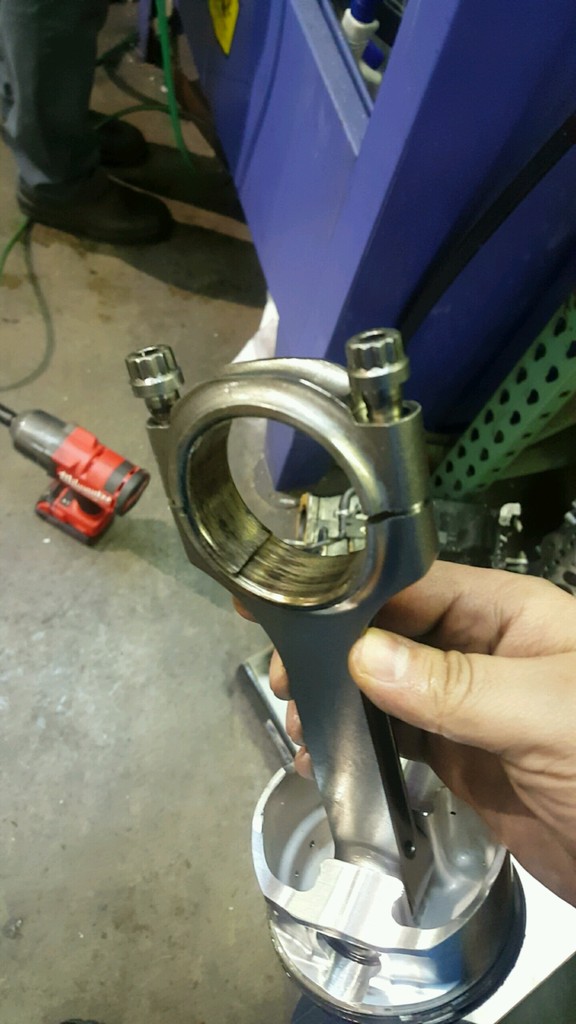
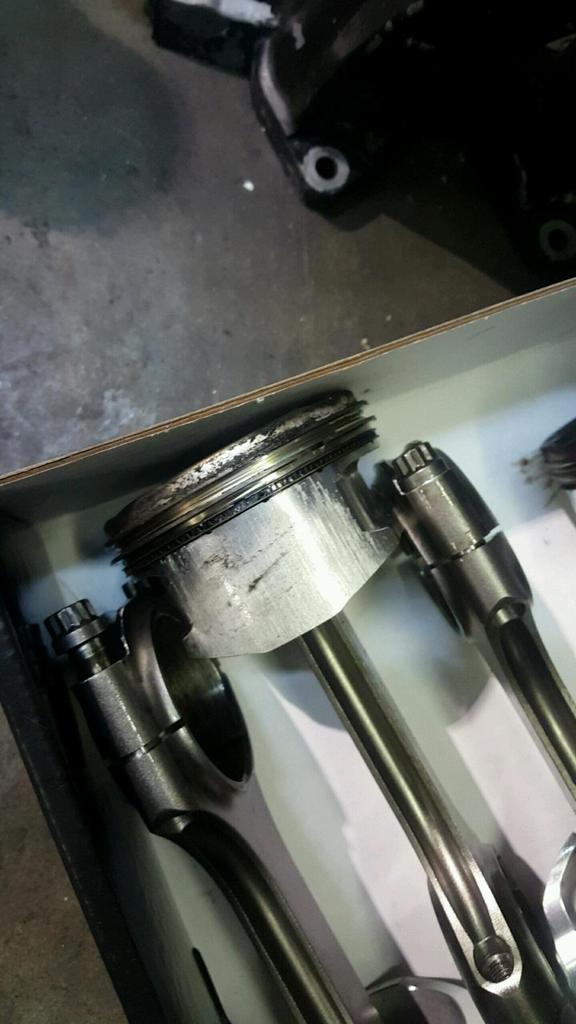
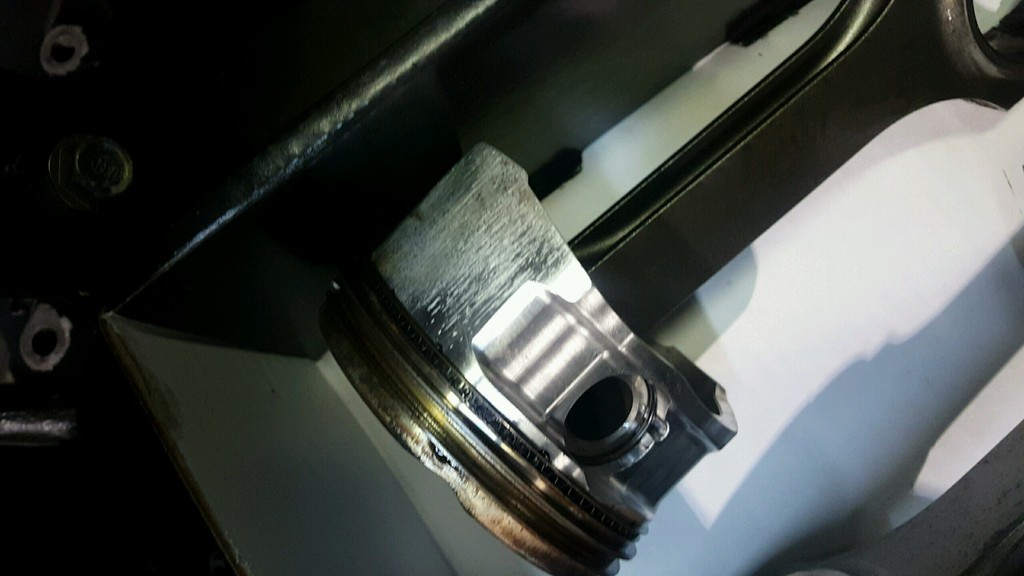
As for the motor down at Inline Pro, it ended up needing a full bottom end. Crank was no good along with one rod, one piston and one of the cylinder walls was scored up. We ended up needing all new rods and pistons since the pistons and rods that were in the motor were no longer made. I ended up getting a crank for free from a buddy of mine overseas, so that helped out a lot. Went with the CP 10:1 standard pistons, Inline Pro Xtreme power rods, ACL bearings, upgrades wrist pins, and a new OEM oil pump parts wise. The head and block were in great condition. I had the head completely disassembled, everything cleaned, inspected and reassembled. The block was in great condition but did need the bore in the one cylinder so we went ahead and did all that on all four cylinders to 87.25mm which lets us still utilize the stock head gasket. Purchased a complete gasket set from Honda for the entire motor also. So all in all, I should be getting the motor back from them within the next couple weeks.
Have to purchase a few more odds and ends as well. Needed to start thinking about a boost controller and my vacuum lines for the wastegates. Was looking into the push lock vac lines because of how clean they were but I was told not to look into that route because they supposedly like to melt around the hot side components. So I decided I'm going to run -3 AN lines throughout the setup and have the -3AN to 1/8" NPT fittings, seems pretty failsafe to me.
I also went ahead and took every bolt that I had, everything out of the bay, off the motor, and probably 200 spare pieces of s2000 hardware off old motors, etc, and sent those up to Rochester Plating to have everything zinc plated! Sent them 553 pieces total. I also went and finally dropped off everything at the powdercoating shop. Going to get everything done flat black. Intercooler piping, Carbing cooling plate, Moroso oil catch can, intake manifold, and a few other pieces. Also getting the Cusco sway bars I got coated also, but I'm doing candy blue on those guys.
I also finished up my battery relocation kit. Got the line fed through the passenger footwell with the proper grommet. I was on the fence on how I wanted to get the new terminal attached to the car's harness, whether I wanted to crimp or solder it. I ended up going with the solder option. Melted solder into the terminal about halfway up and pressed the terminal over the wires. Came out perfect. Threw some shrink tubing over it and it looks like it came from the factory this way.

As for the motor down at Inline Pro, it ended up needing a full bottom end. Crank was no good along with one rod, one piston and one of the cylinder walls was scored up. We ended up needing all new rods and pistons since the pistons and rods that were in the motor were no longer made. I ended up getting a crank for free from a buddy of mine overseas, so that helped out a lot. Went with the CP 10:1 standard pistons, Inline Pro Xtreme power rods, ACL bearings, upgrades wrist pins, and a new OEM oil pump parts wise. The head and block were in great condition. I had the head completely disassembled, everything cleaned, inspected and reassembled. The block was in great condition but did need the bore in the one cylinder so we went ahead and did all that on all four cylinders to 87.25mm which lets us still utilize the stock head gasket. Purchased a complete gasket set from Honda for the entire motor also. So all in all, I should be getting the motor back from them within the next couple weeks.


Have to purchase a few more odds and ends as well. Needed to start thinking about a boost controller and my vacuum lines for the wastegates. Was looking into the push lock vac lines because of how clean they were but I was told not to look into that route because they supposedly like to melt around the hot side components. So I decided I'm going to run -3 AN lines throughout the setup and have the -3AN to 1/8" NPT fittings, seems pretty failsafe to me.
Last edited by KillerCom; 03-25-2017 at 06:23 PM.

 04-07-2017, 04:53 PM
#46
Thread Starter

Thanks man, the plating was completed by Rochester Overnight Plating. The guy you want to deal with is Mike Spaziano.
04-07-2017, 05:20 PM
#47
Thread Starter
So got back into the car last night and got the passenger side headlight harness all extended and tucked. Fairly easy considering I assumed it'd be much more labor intensive. I still need to wrap the wiring in a wire loom for protection, but this is the finished product before the loom.

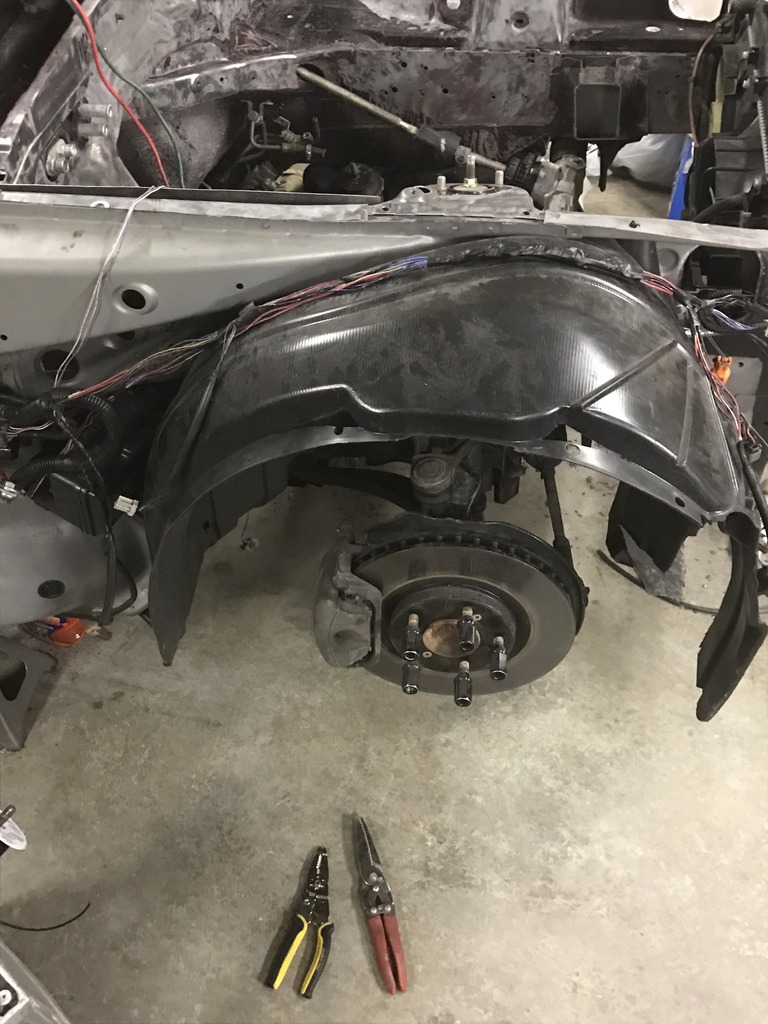
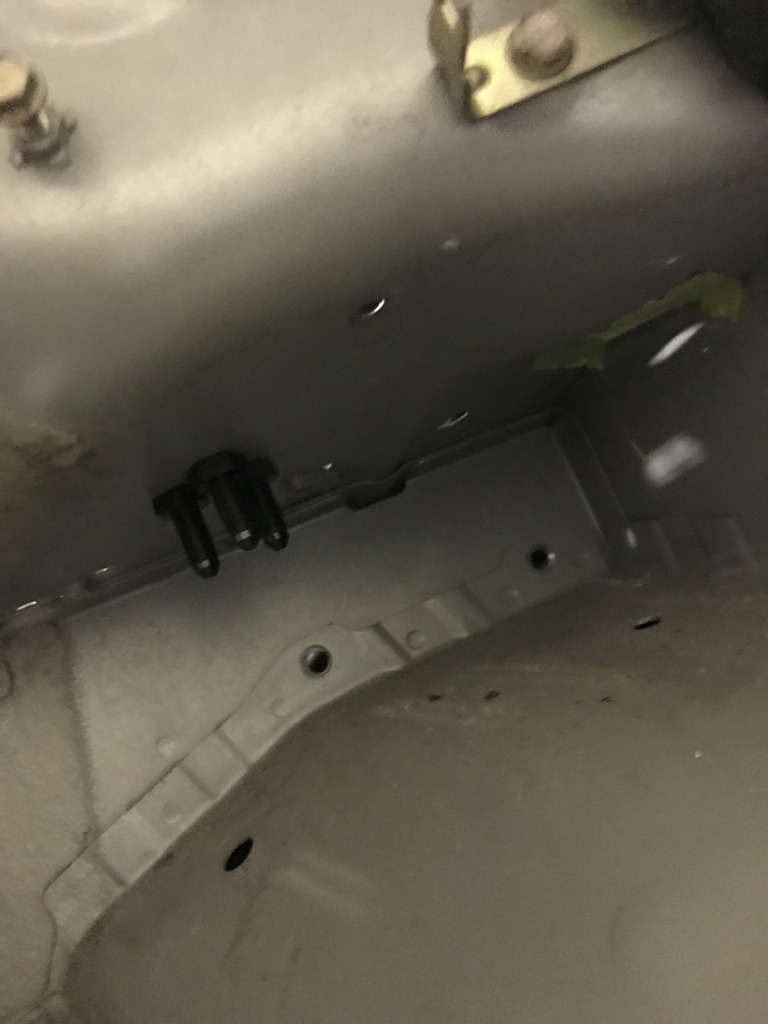
I then made my way over to the driver side to start working on that sides headlight harness. I realized that side is going to take more time since I need to run the harness from the cabin into the fender area, so there will be some very precise cutting and modification to the car's body. Instead of getting into the harness I decided to drill and mock up the brake and clutch lines that will be running through the body of the car into the fender area. I wanted these three lines to look factory and clean. After everything was measured, drilled, and mounted I was very happy with the outcome. Big thanks to Steve over at Hardcore Bays for making a clean kit for the ABS relocation!

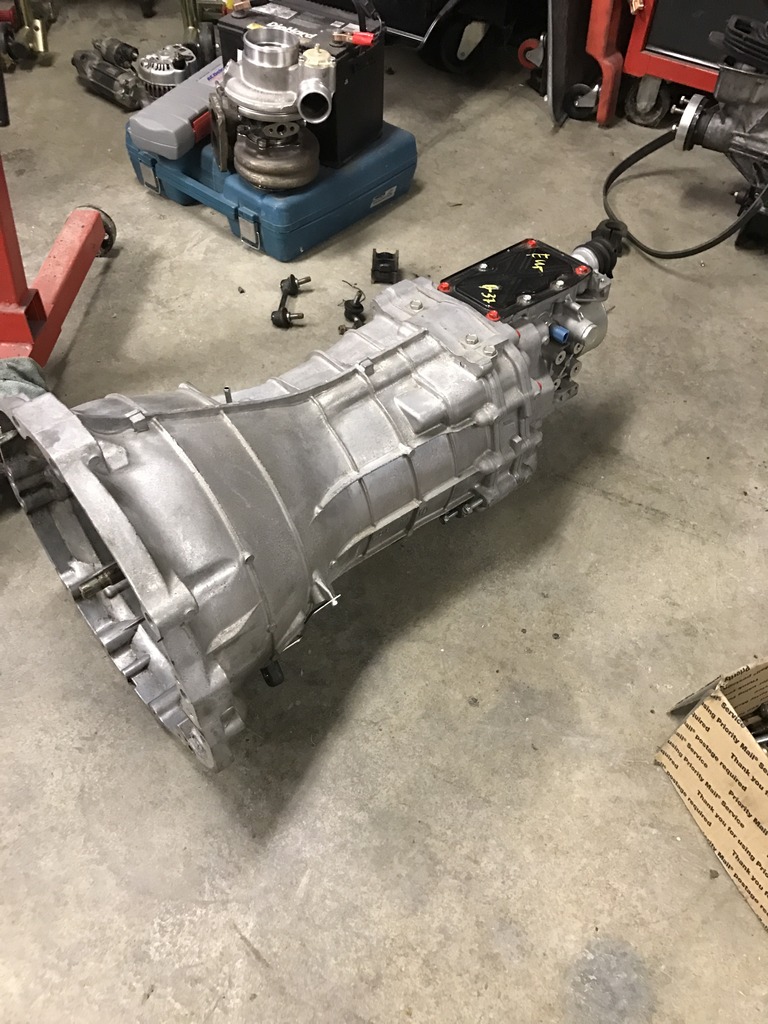
I also am going with the new transmission kit that Inline Pro just released utilizing the 370z transmission. There's still a few things in the works with the kit and we're still dealing with some of the driveshaft options from DSS. Just went and picked up a super clean 370z transmission today in New Jersey. Hopefully everything starts coming together soon to make this all come together!


Last edited by KillerCom; 04-07-2017 at 05:28 PM.


