When you click on links to various merchants on this site and make a purchase, this can result in this site earning a commission. Affiliate programs and affiliations include, but are not limited to, the eBay Partner Network.
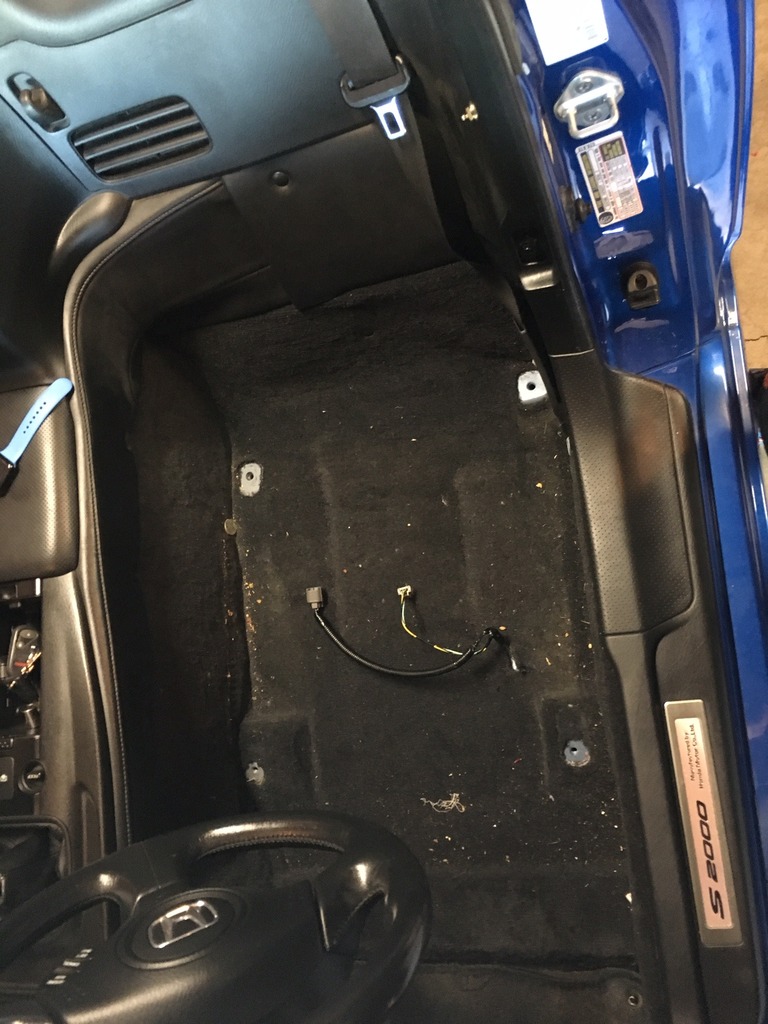
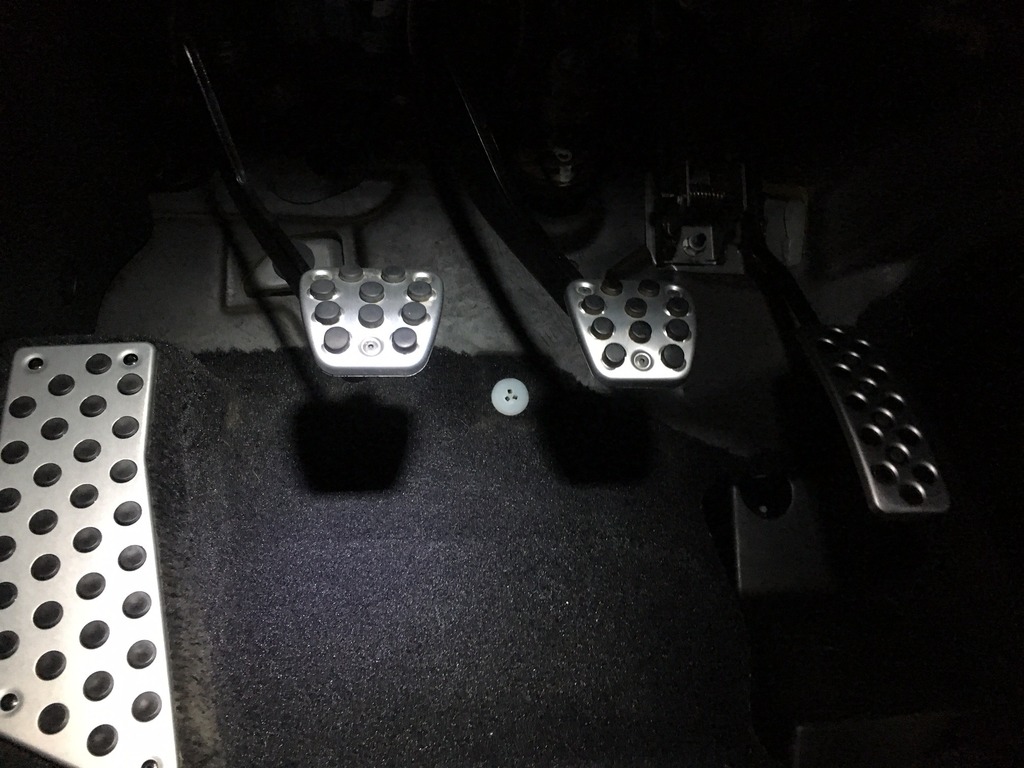
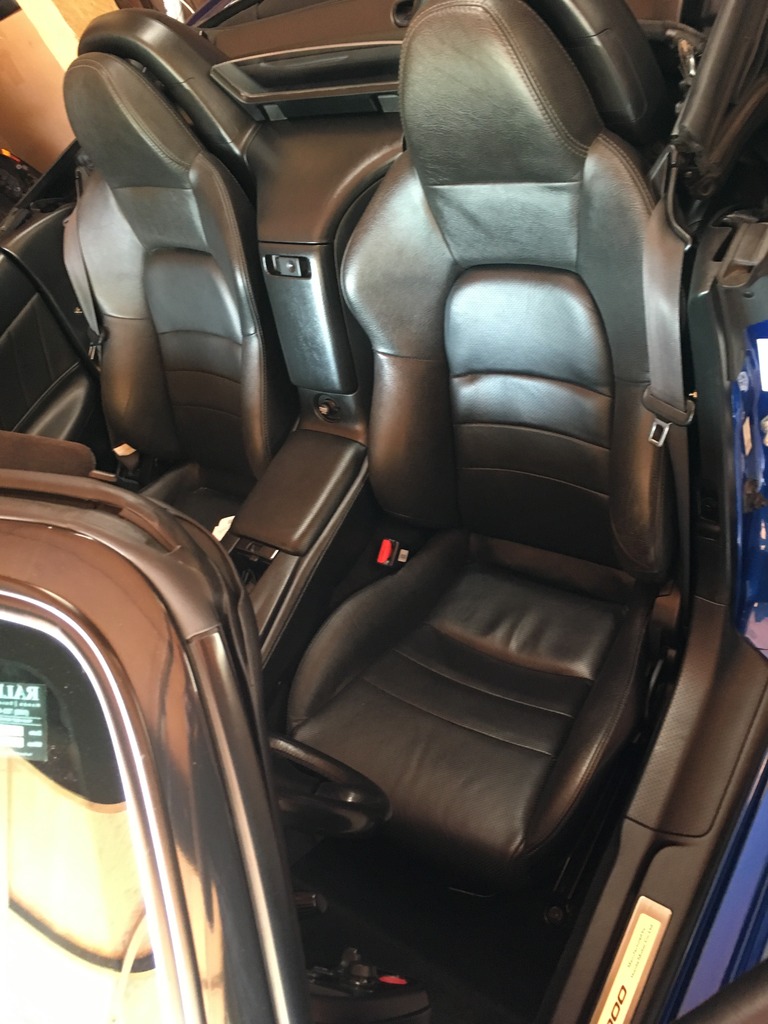
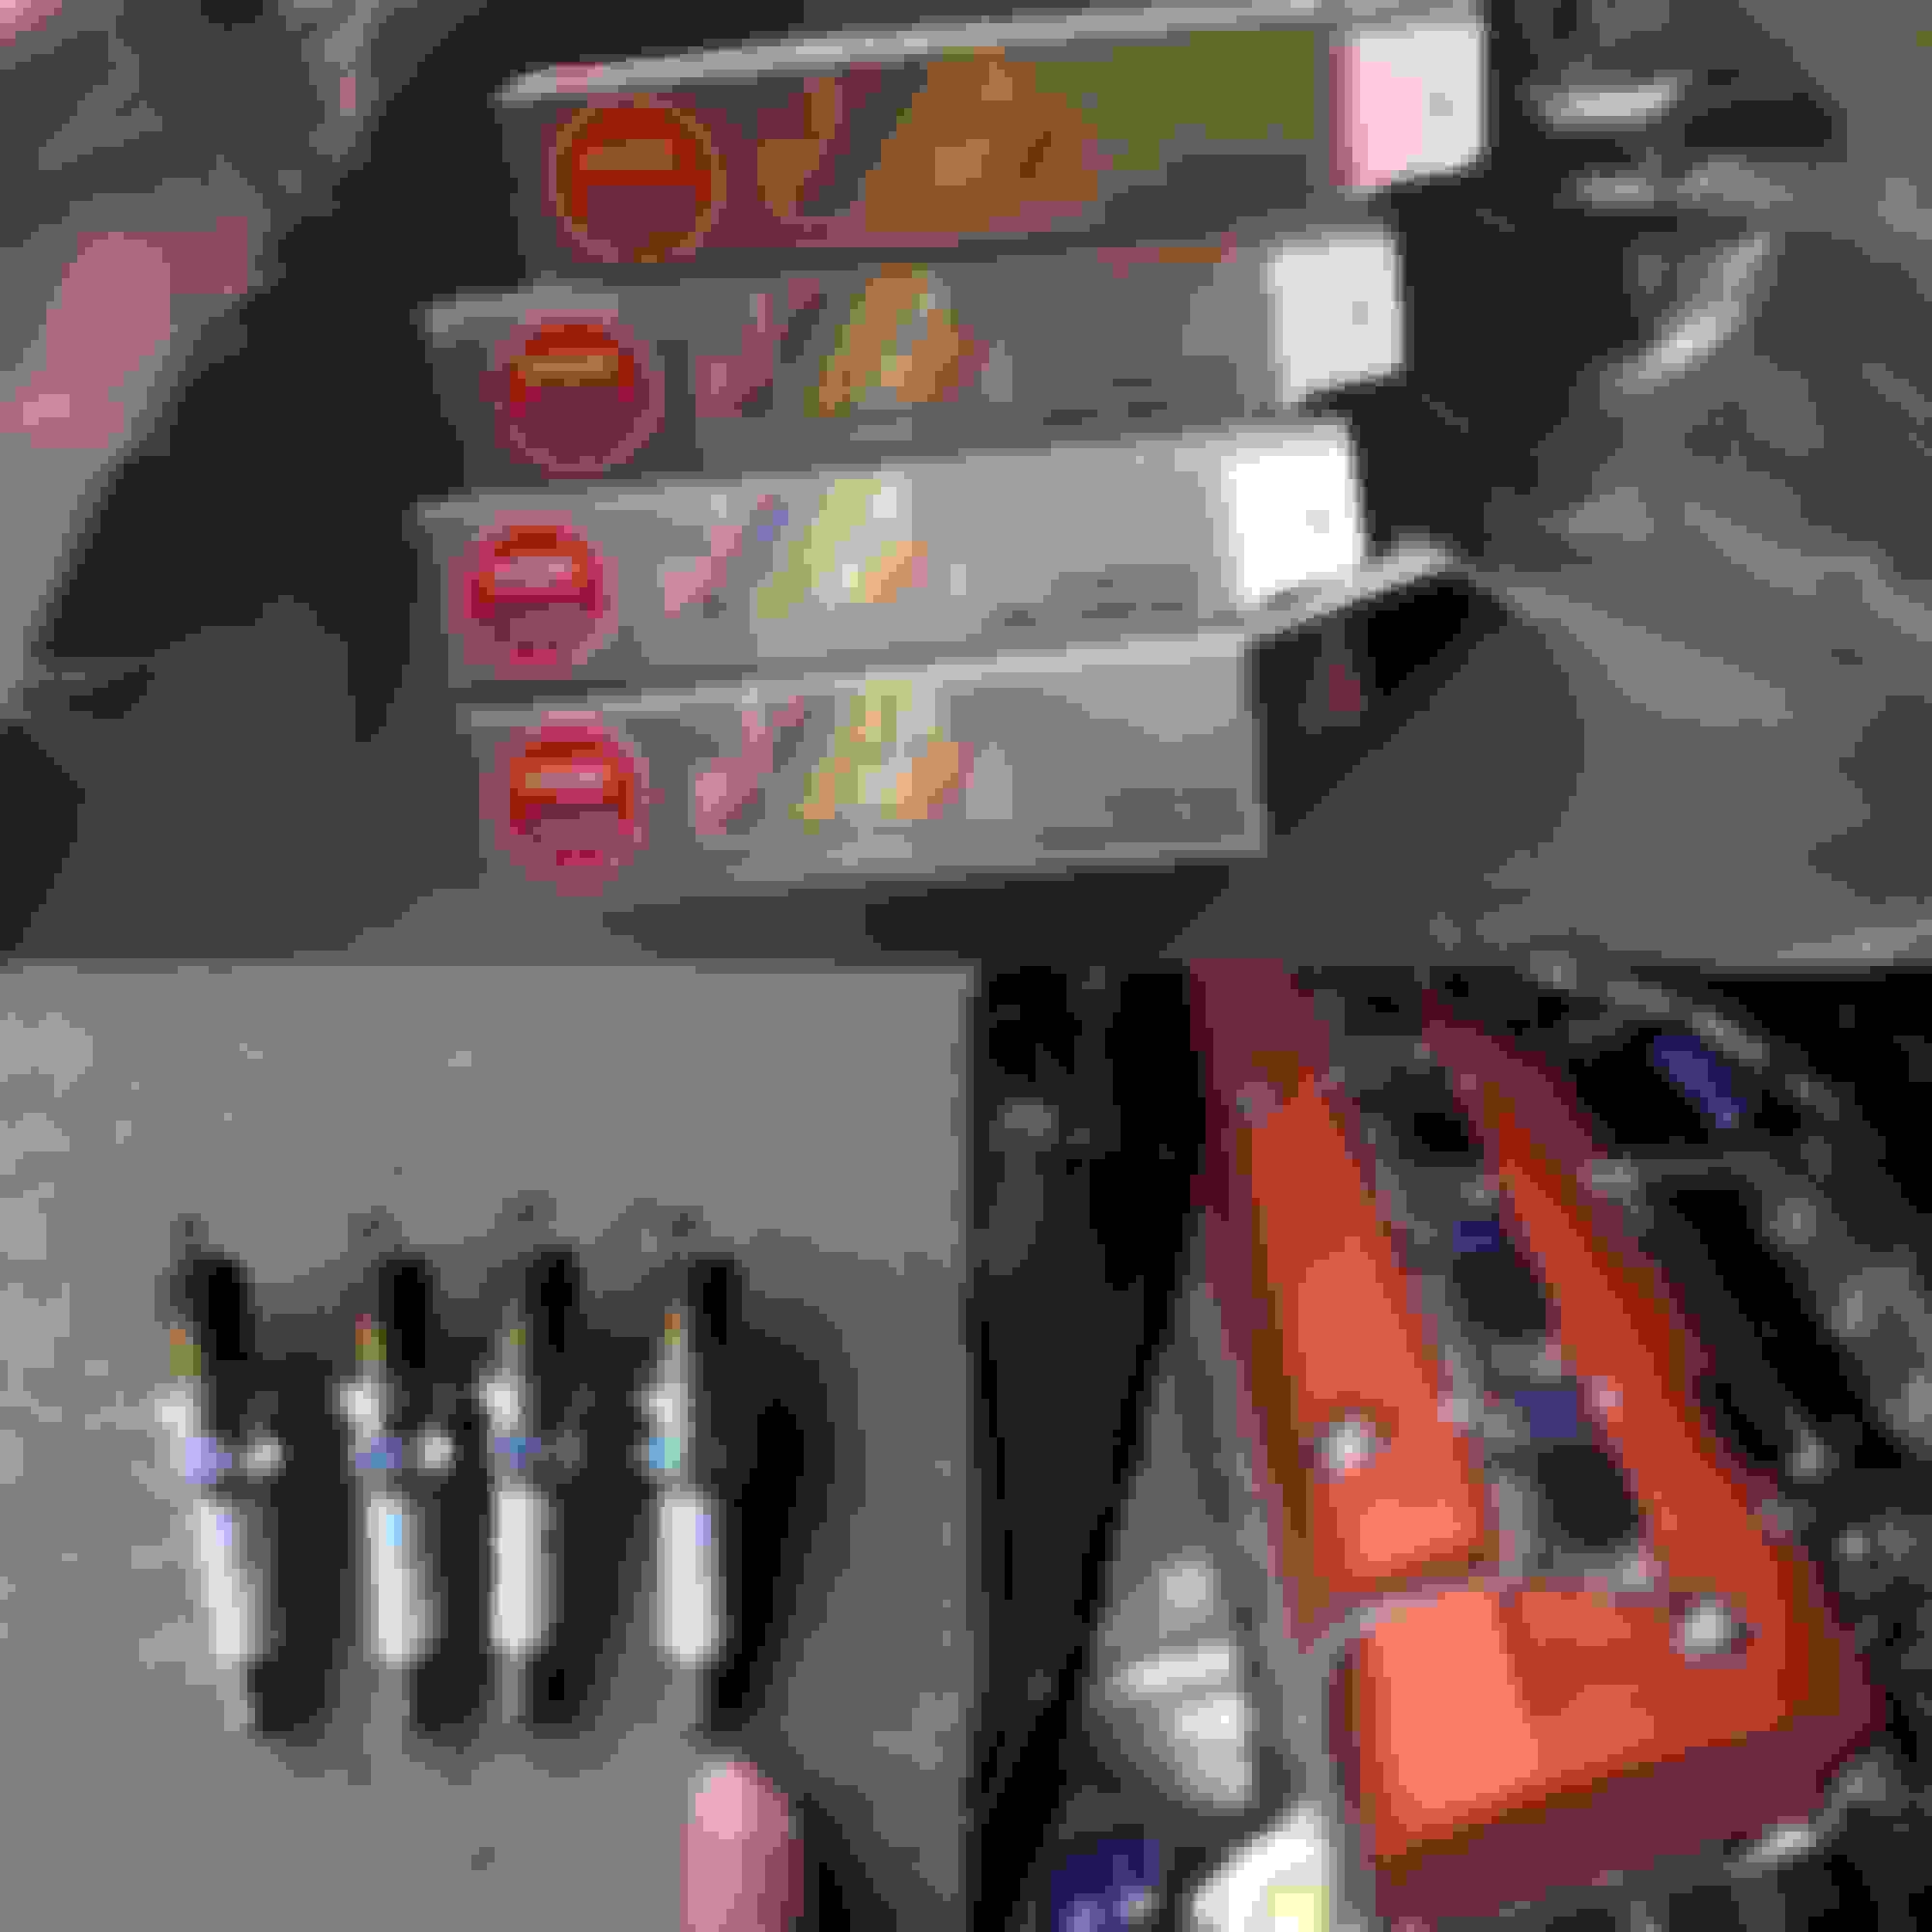
Next up was tackling the interior I felt like it needed some love. Started by removing both the seats and shop vacuuming all of the carpet. Seats weren’t hard to remove a couple of bolts and a few connectors. It was pretty dirty and only cool thing found was a 50 cents and a front bumper license plate plug. Then washed all of the plastics, seats and petals then protected it with 303 Aerospace Protectant to keep it safe from the California sun.
Revealed dirty carpet after seat removal
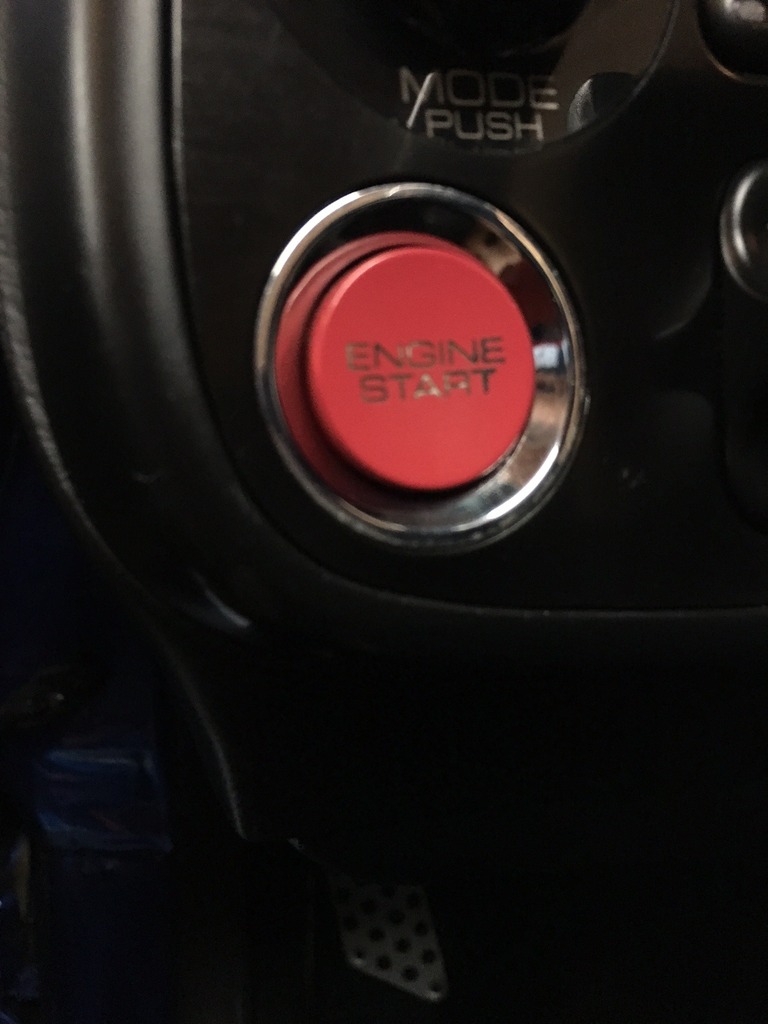
Dirty Controls. Sometimes its all in the details
There was a weird “white filling” in the perforation on the center of the driver seat. That had me questioning a lot so I highly motivated to clean them up. Luckily for me it came up pretty easy.
Cleaned interior, washed pedals, seats, and carpet
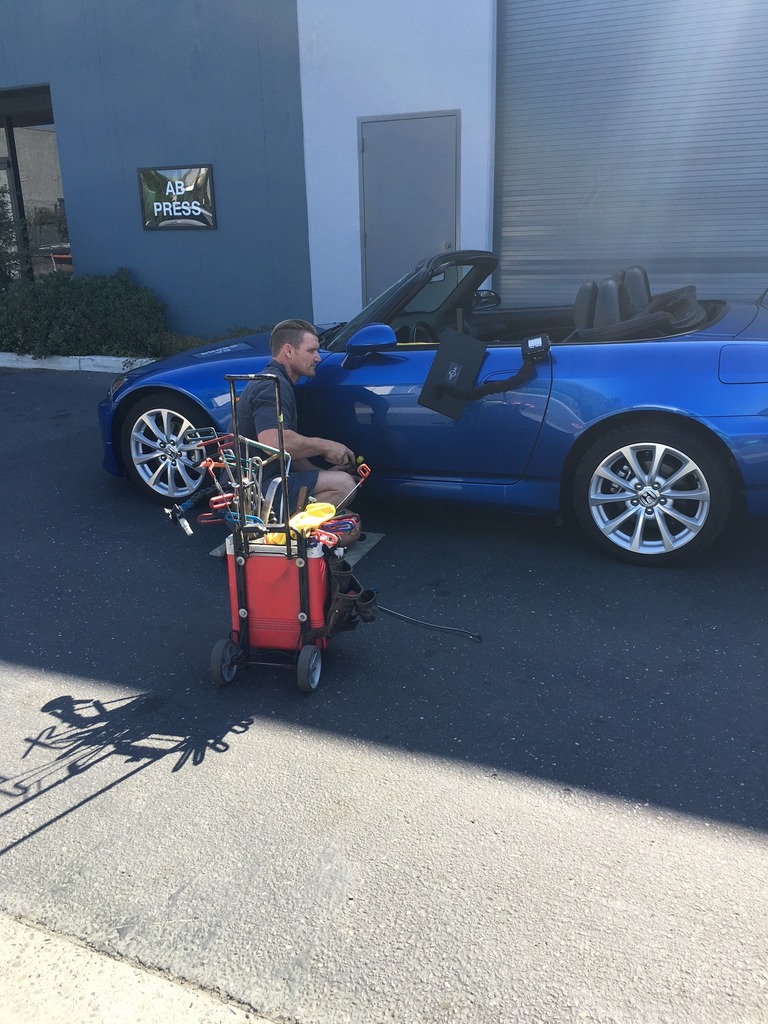
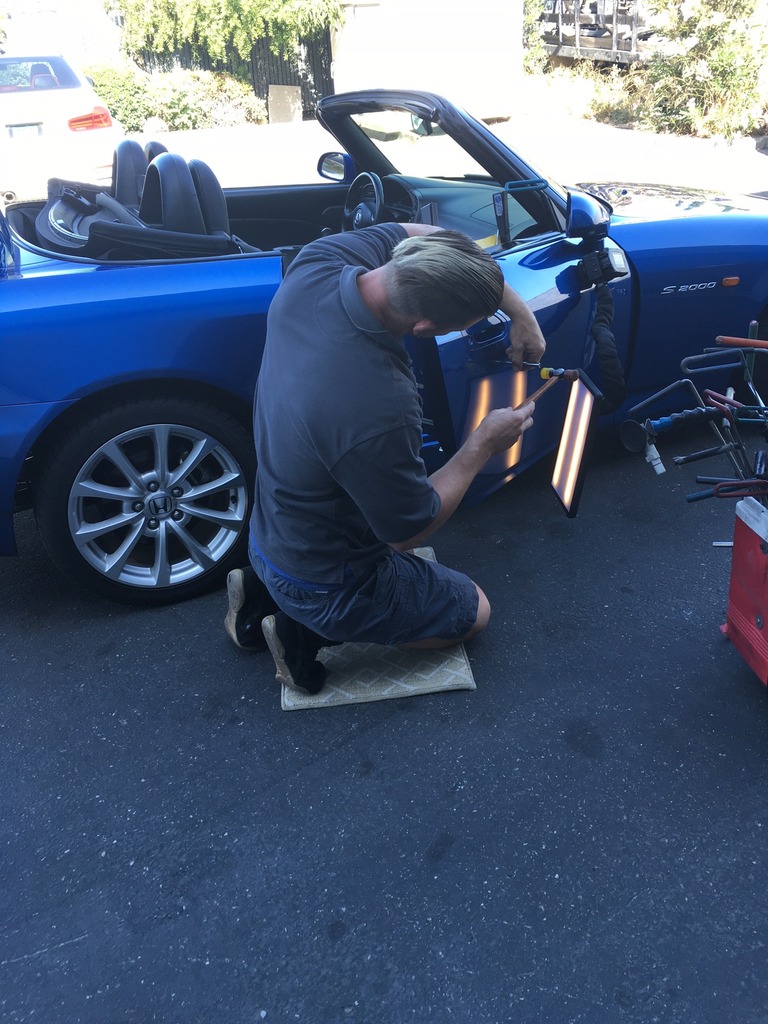
The guys down at Detail Addict in Santa Clara hosted a fender rolling and paintless dent repair day. They had Justin down at “West Coast Dents” to come down and remove customers dents. I jumped on the excellent group buy pricing and got some of the door dings the previous owner accumulated taken out of the car. I thought the car only had 3 very visible dents in the two doors. But after a through inspection with Justin we found a total of ten total dents from the doors, fenders, and hood. Justin worked fast, was very polite, great pricing and did a great job. I would recommended him for anyone in the Bay Area. It was also nice to get out and meet some other local owners.
Im pleased my car is one step closer to looking good. I'm enjoying it more and more as the car is starting to come together. There are a few more things I can do to clean it up more but I am happy where its at now.
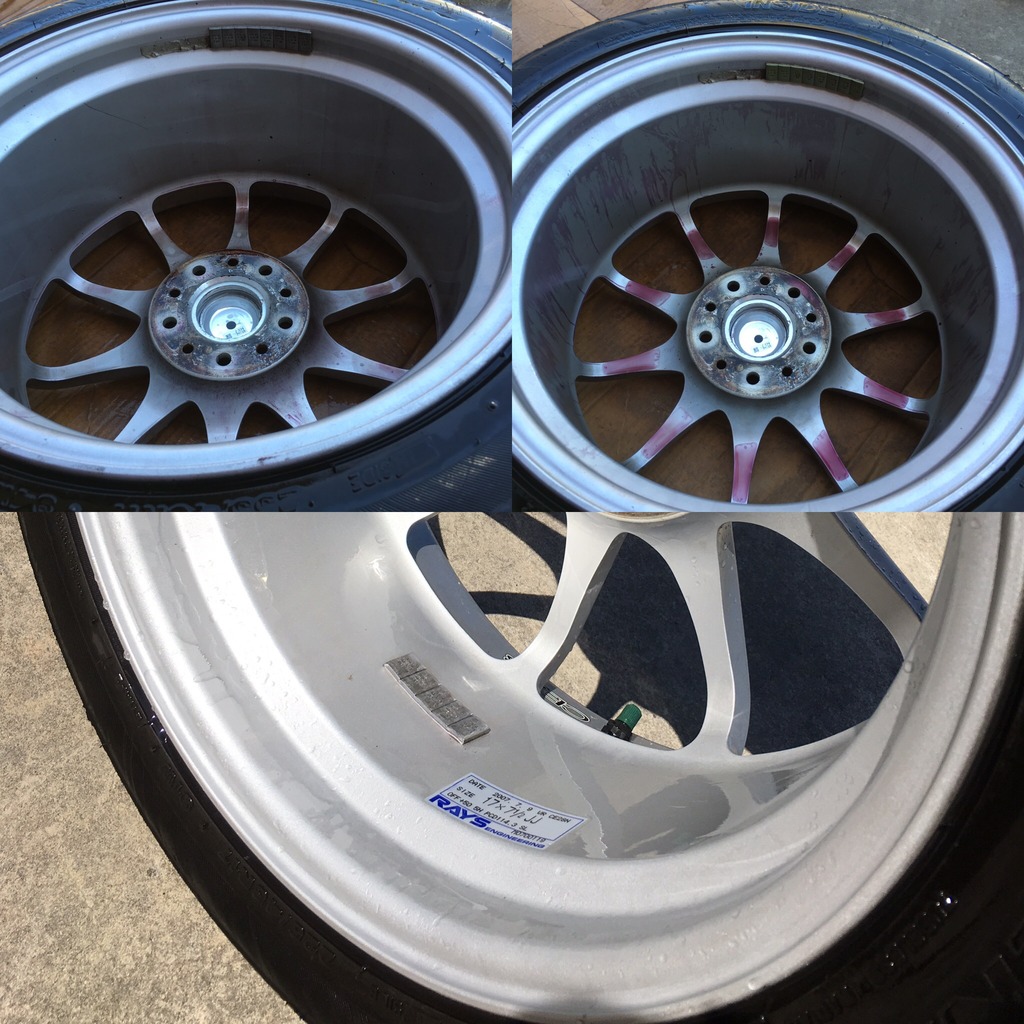
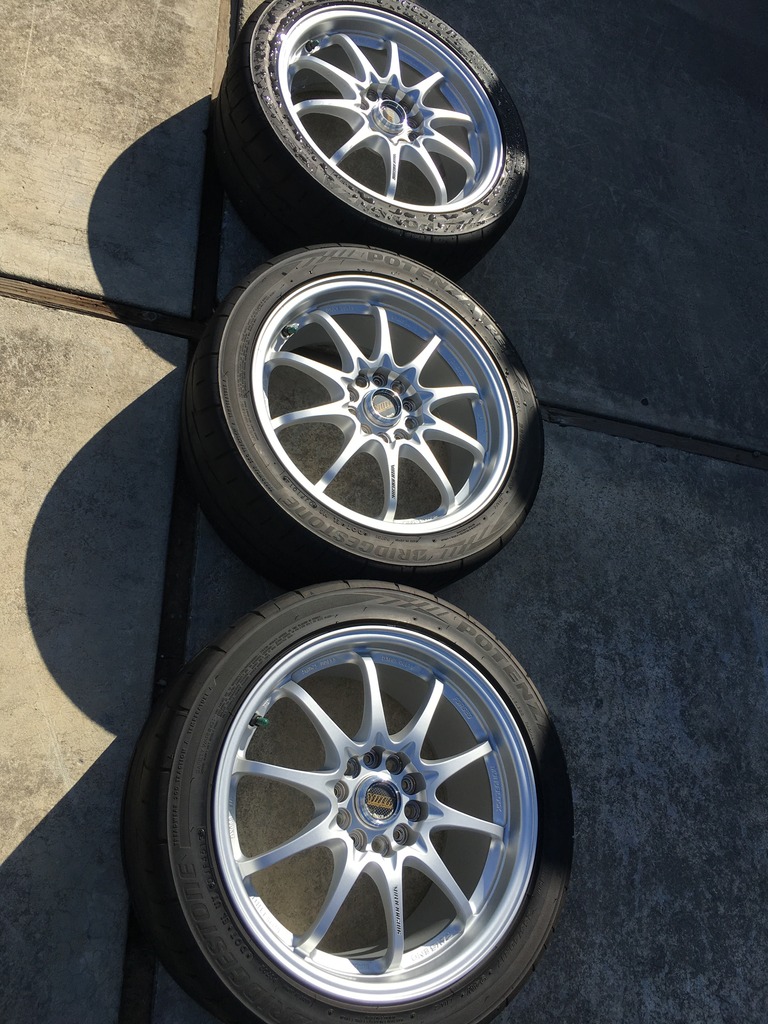
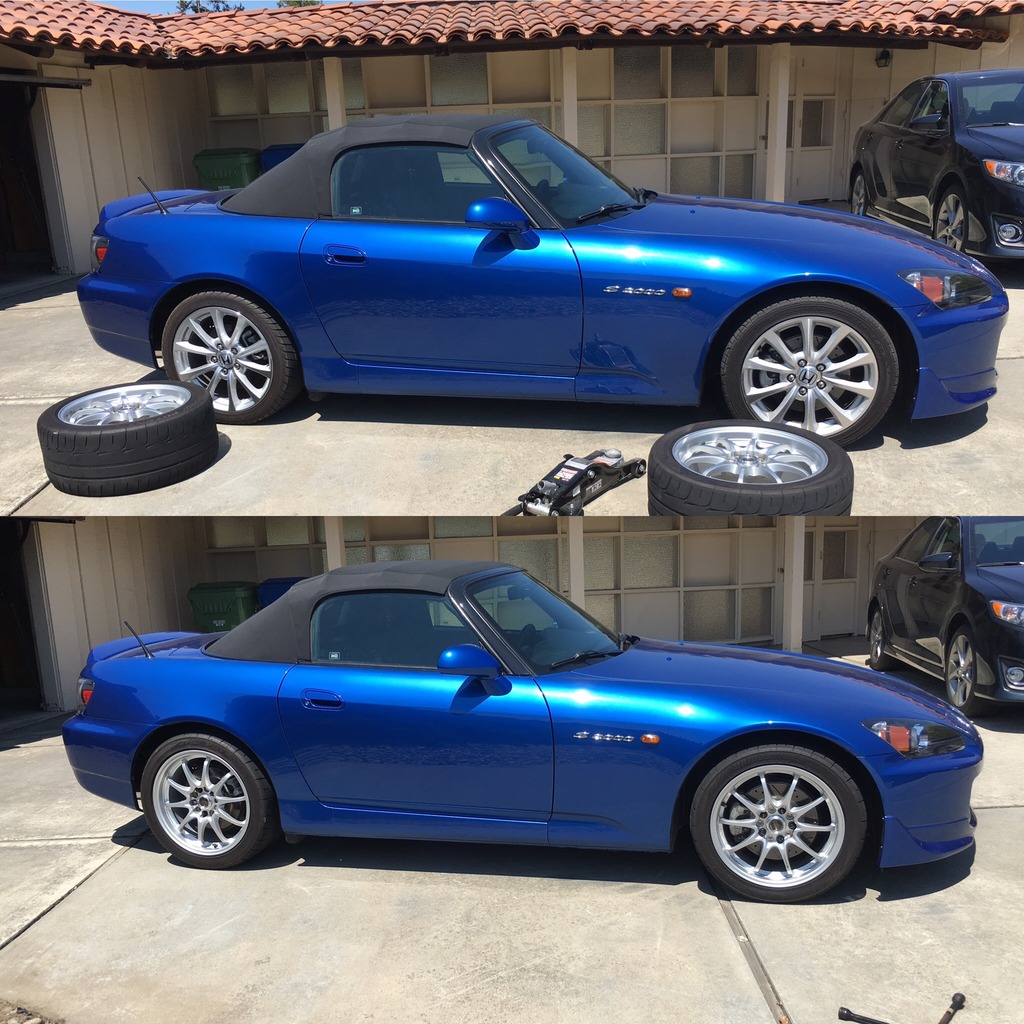
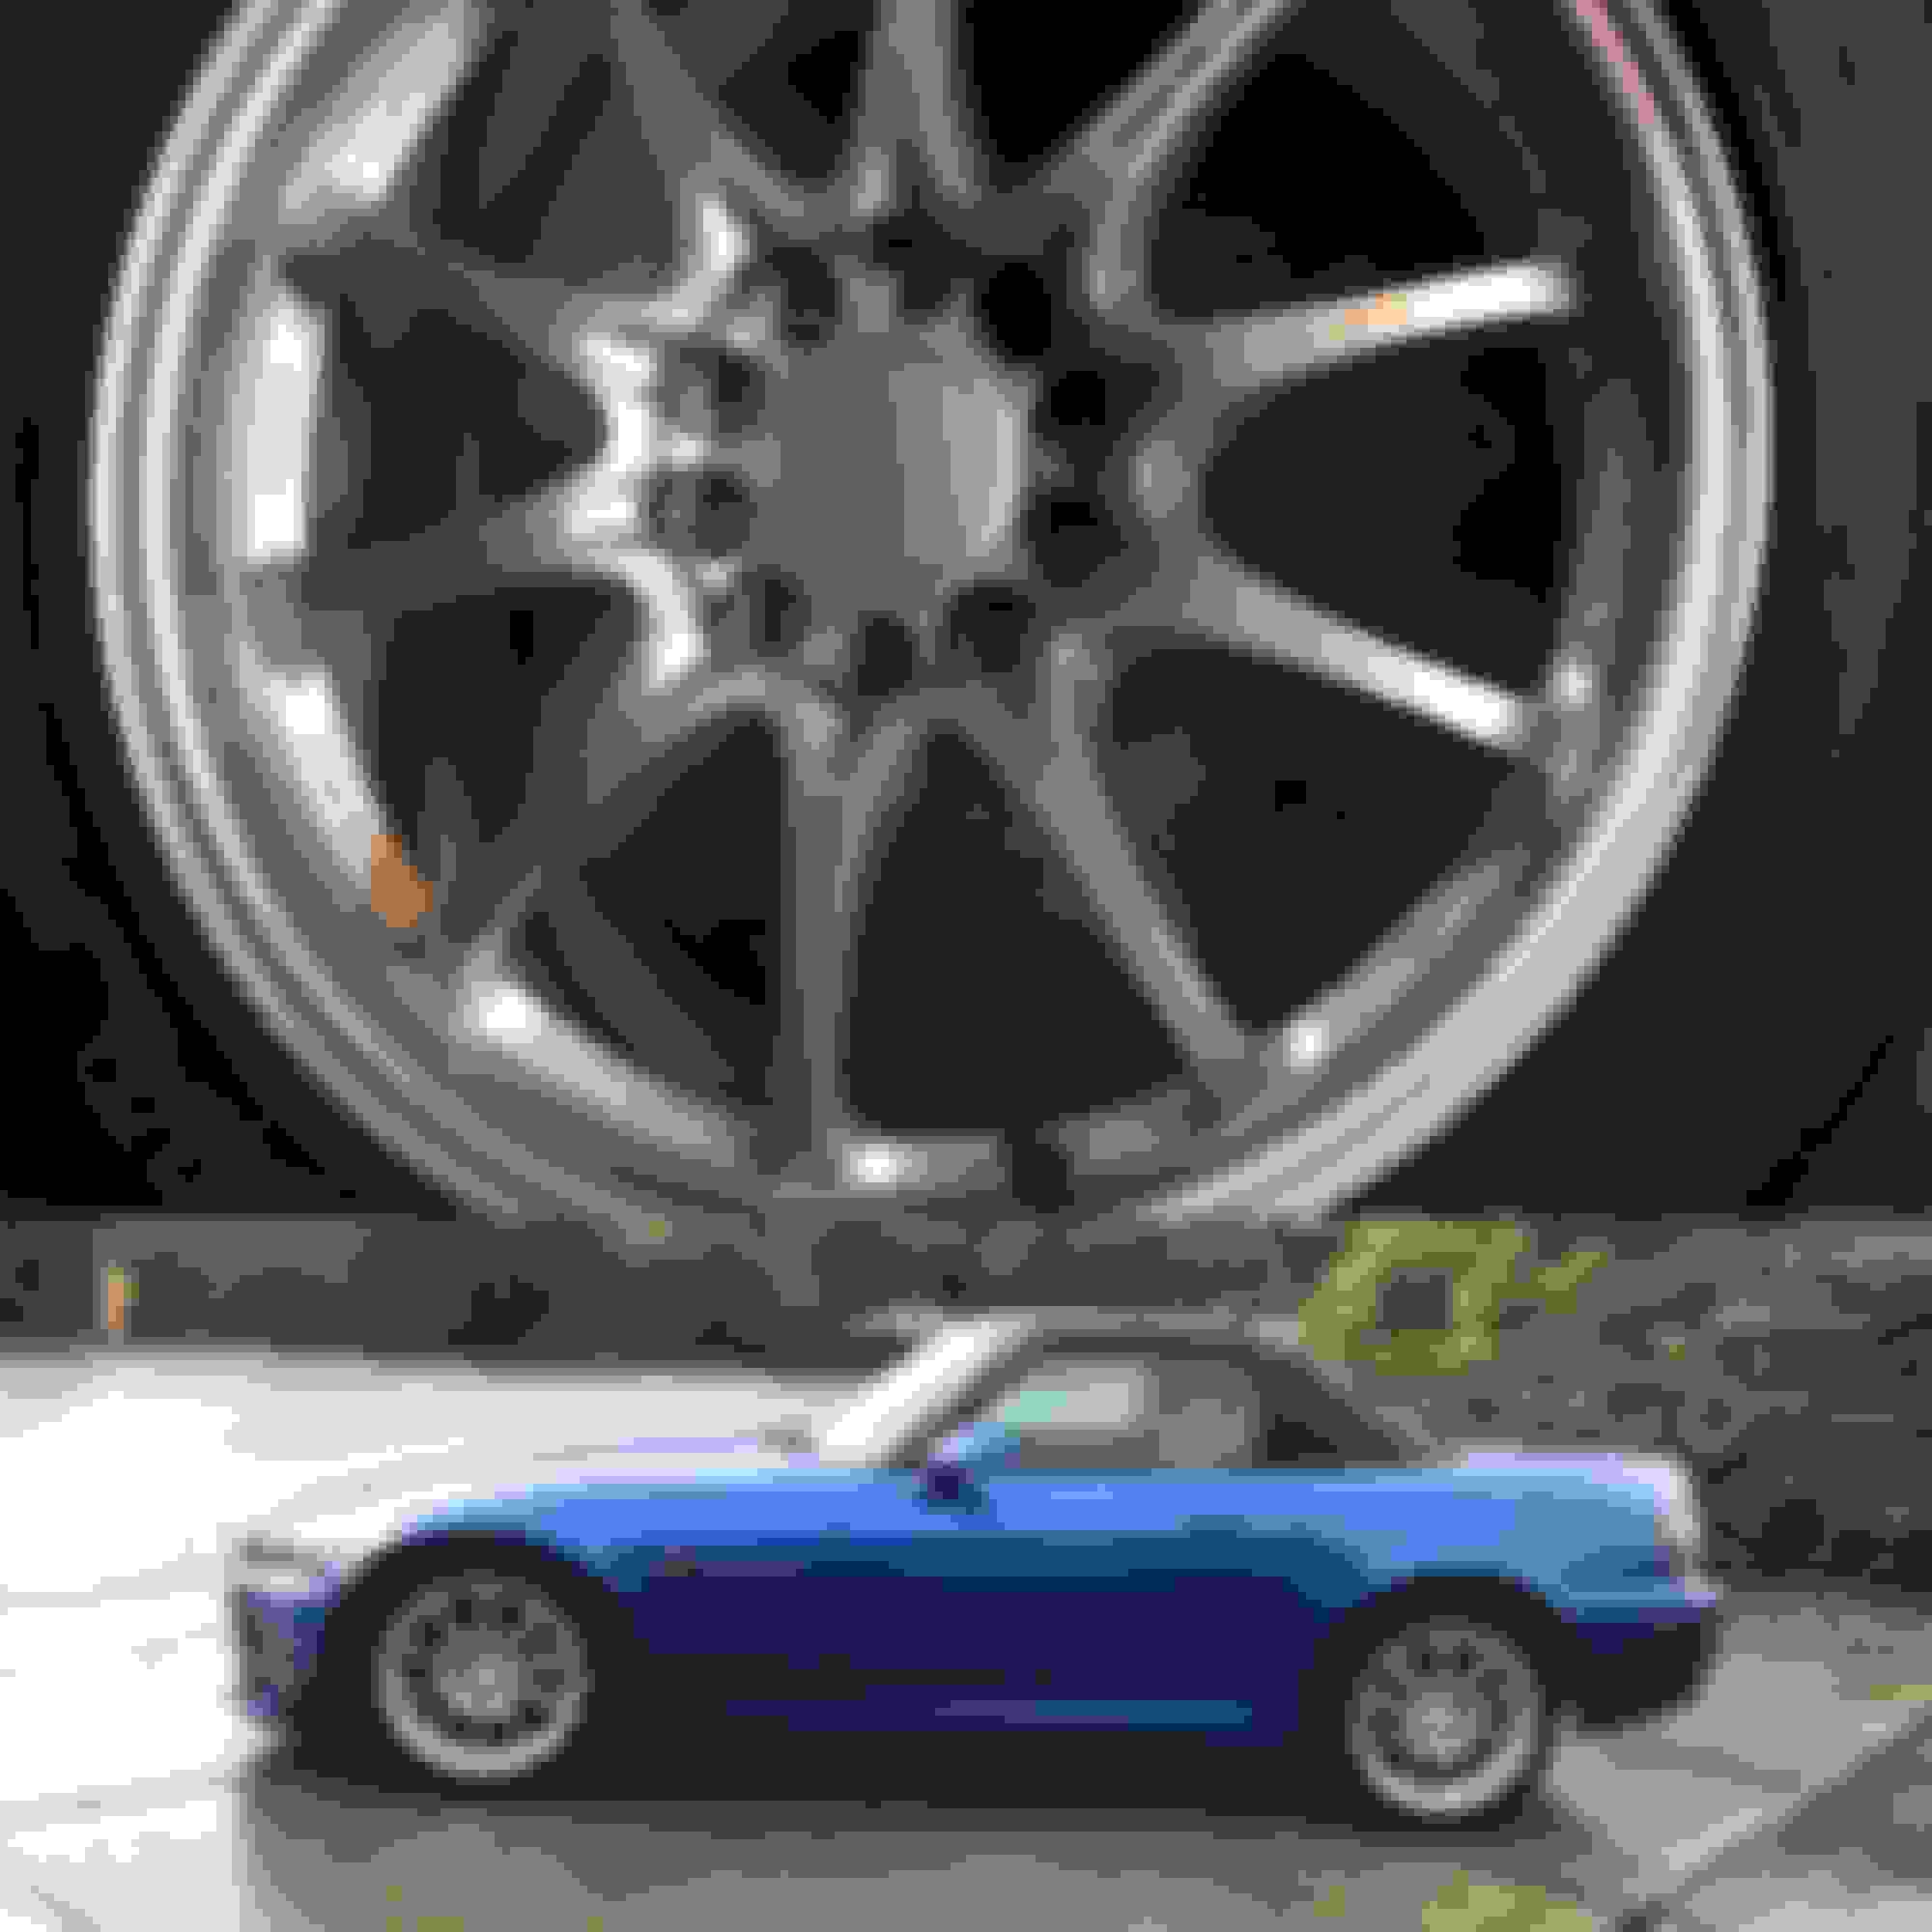
Finally now for some fun stuff. I picked up a used staggered sized Volk CE28ns in Titanium Silver wrapped in RE-11s. They are the common sized 17x7.5+50 and 17x9+63. Also since the stock lug nuts didn't fit I went and bought the Rays engineering anodized black lug nuts. I enjoy the look of the flat caps with the CE28ns so I put in an order but unfortunately they don't come in for another 3 months! The standard caps will have to do for now.
First steps with the used wheels were to clean them while I had a chance since they were off the car. Just a basic Rinse, Soap & Water, Iron x, Elbow Grease had them turning out looking good as new.
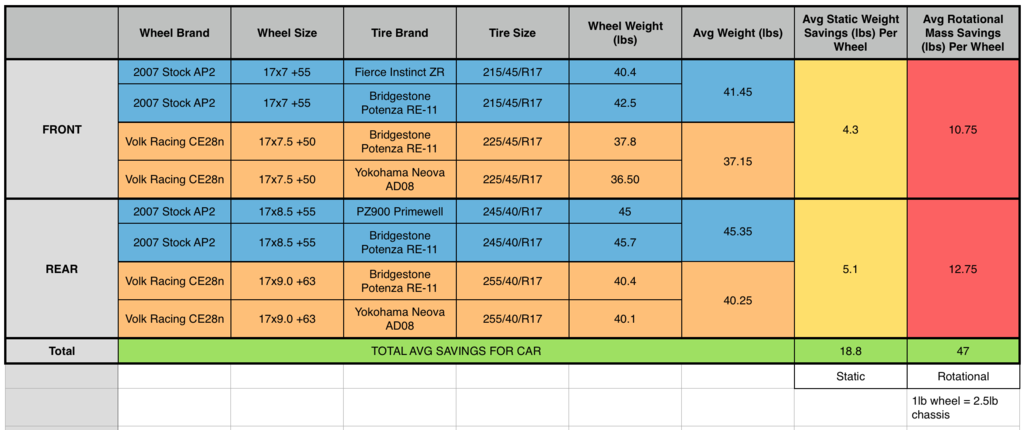
Next I decided to weigh everything just to get a idea of how much weight savings I actually gained by switching over to the CE28n. Then I was curious to see how that compared over to the same wheel set up but different tires with my roommates car. So i ended up measuring all the wheels in my garage and coming up with an average weight savings someone can kinda guesstimate they get when switching over to this wheel and tire package.
NOTE: all wheels had used tires and the amount of wear wasn't measured and all rims had balance weights attached.
If your wondering what Fierce Instinct and PZ900 Primewell your in the same boat as me. From what I could find online they are cheap all seasons my car came with.
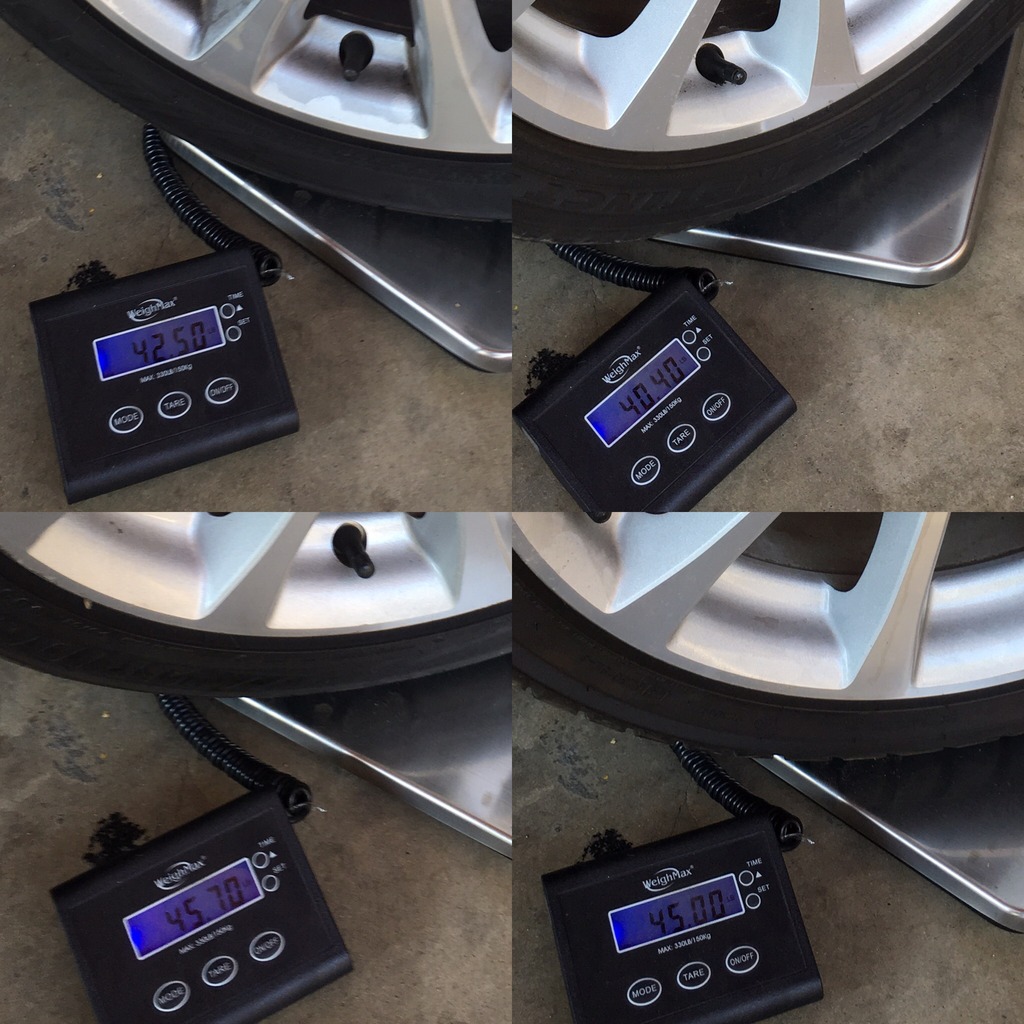
Measuring all stock wheels
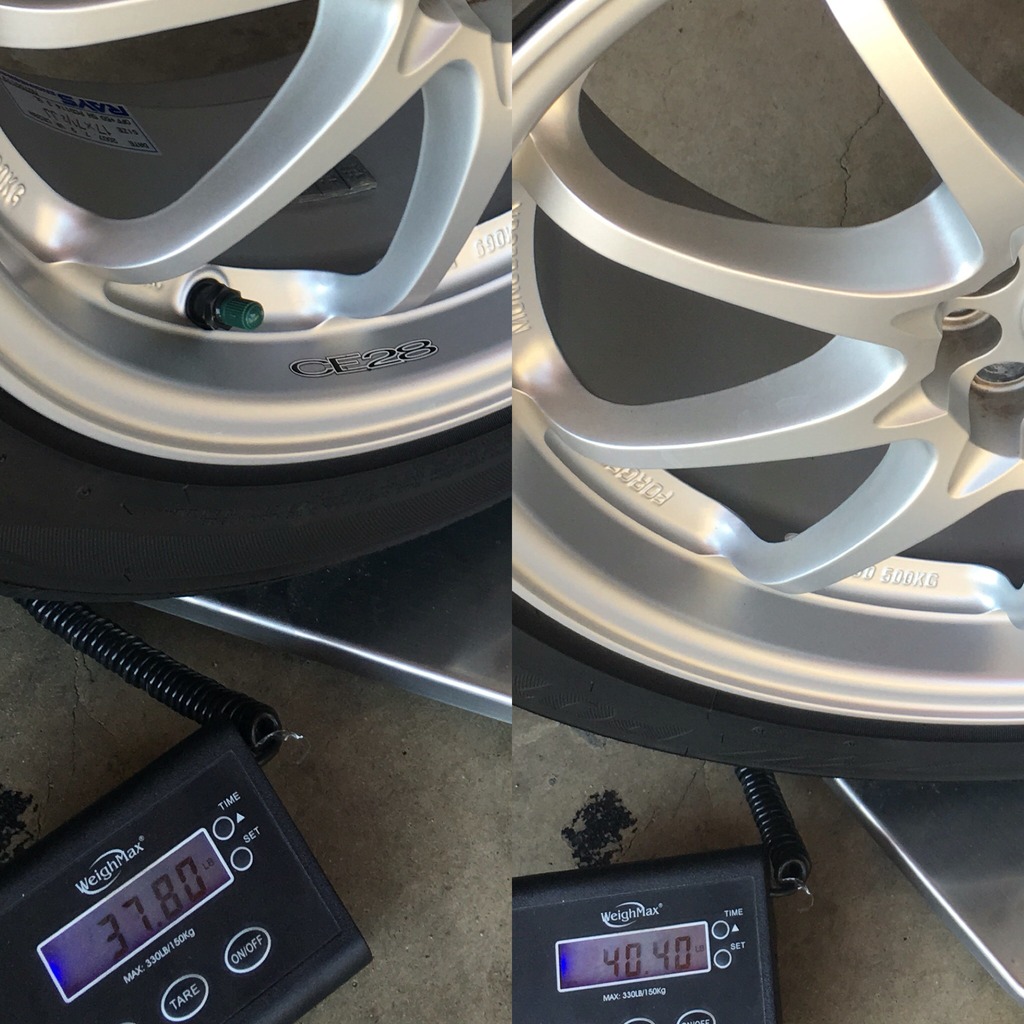
Measuring the Volks
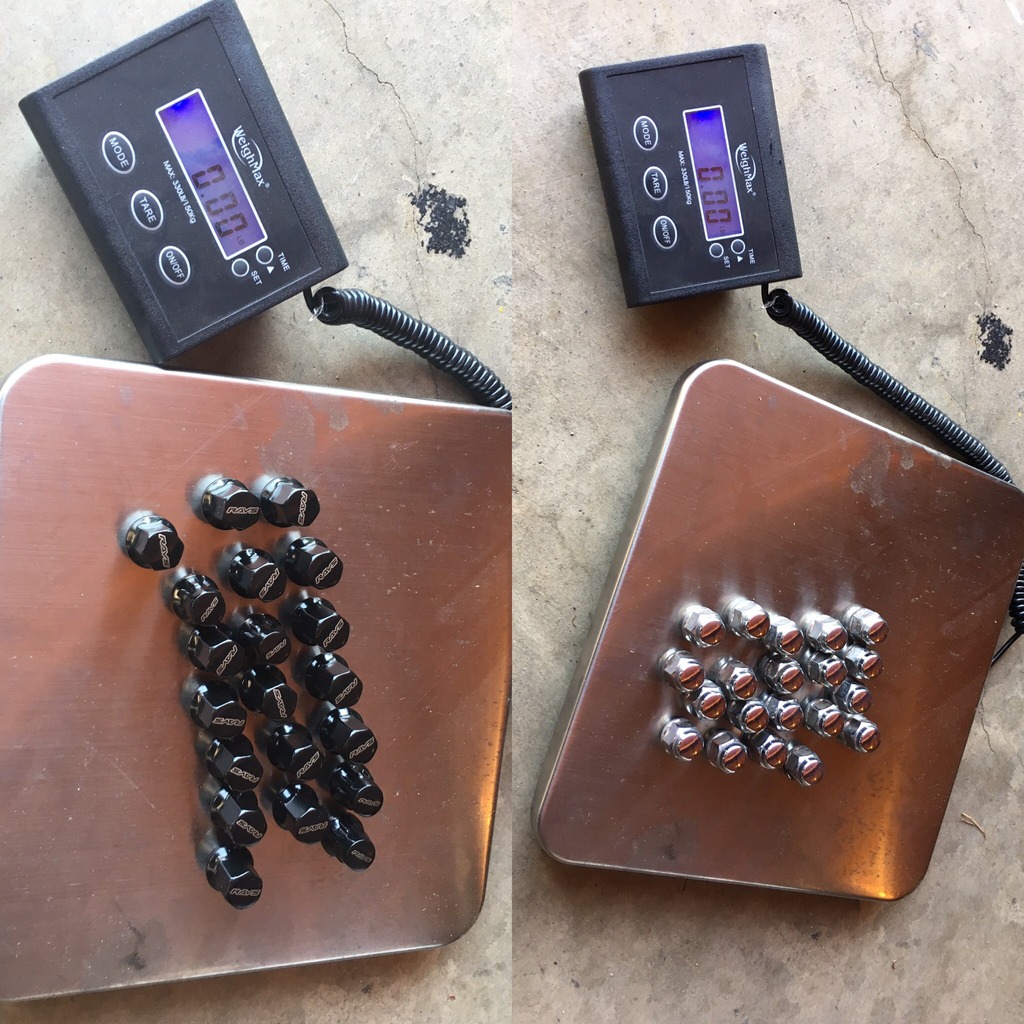
Then I looked at the lugs but they didn't even register on the scale so I will just assume they are equal.
The actual weight savings for just my car ended up being 14.4lbs static weight, 36 rotational depending on how you look at it.
A before and after pic of the car. Visually the car looks good to me I’m glad I went with the Volk CE28n in Titanium Silver because its a very close color and style to stock . Being a close color 10-spoke design doesn't scream modded to the untrained eye. It will look even better after the flat center caps come in.
Overall nice gain in weight savings, fun weighing everything, and seeing where the chips fall.
Noticed sometime has passed a few things happened to the car since the last time i updated this thread.
First things first was just changing the oil, I did the first oil change with Castrol EDGE Extended Performance 10W-30 Full Synthetic Motor Oil with Honda OEM filter.
Blacktrax was throwing its annual track day here at Thunderhill Raceway. I had the time off and I always wanted to do a track day. No better time than the present, so I went for it. Inspected my car, removed center caps, added tow hooks and drove to the track. Couldn’t have been any more happier with my decision. I had a blast and I'm definitely hooked, the s2k was a lot more capable than I ever imaged. Not to mention you can push the car 10x more than you can on any street. Just in that one day I got a great feel for the car and where things were at. Shameless plug Blacktrax did a great job on running the trackway cant wait to go back next year.
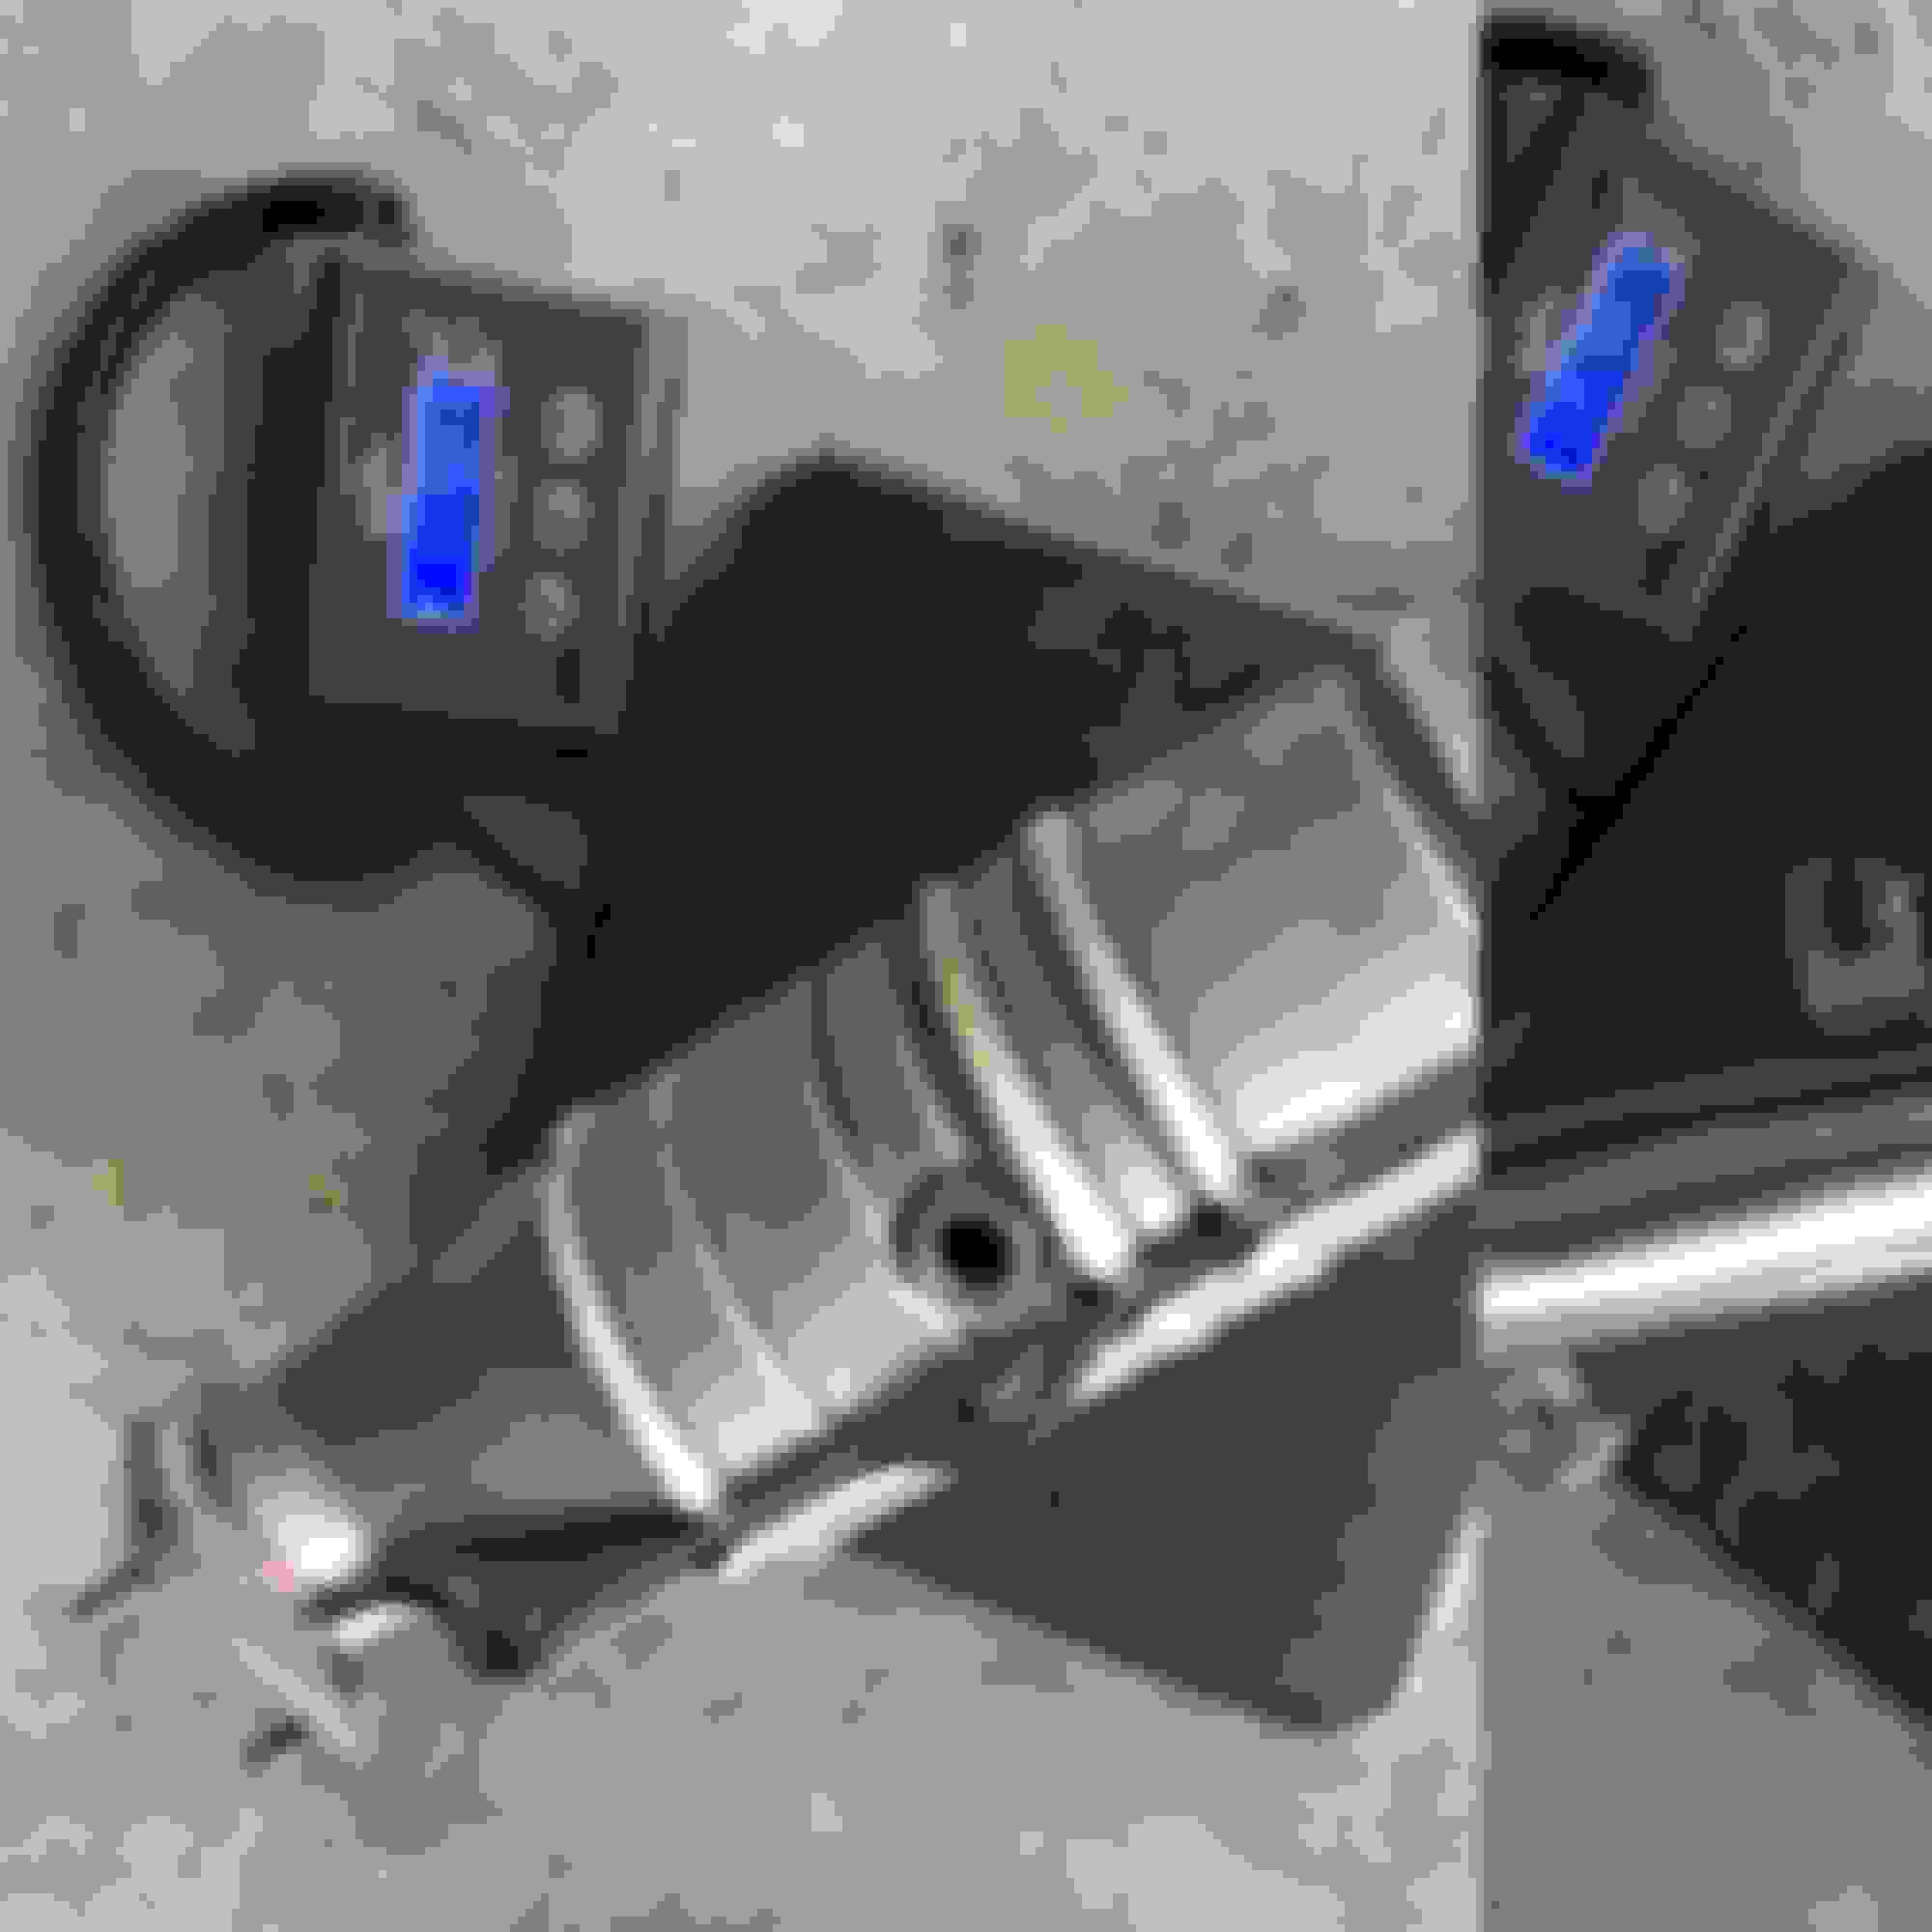
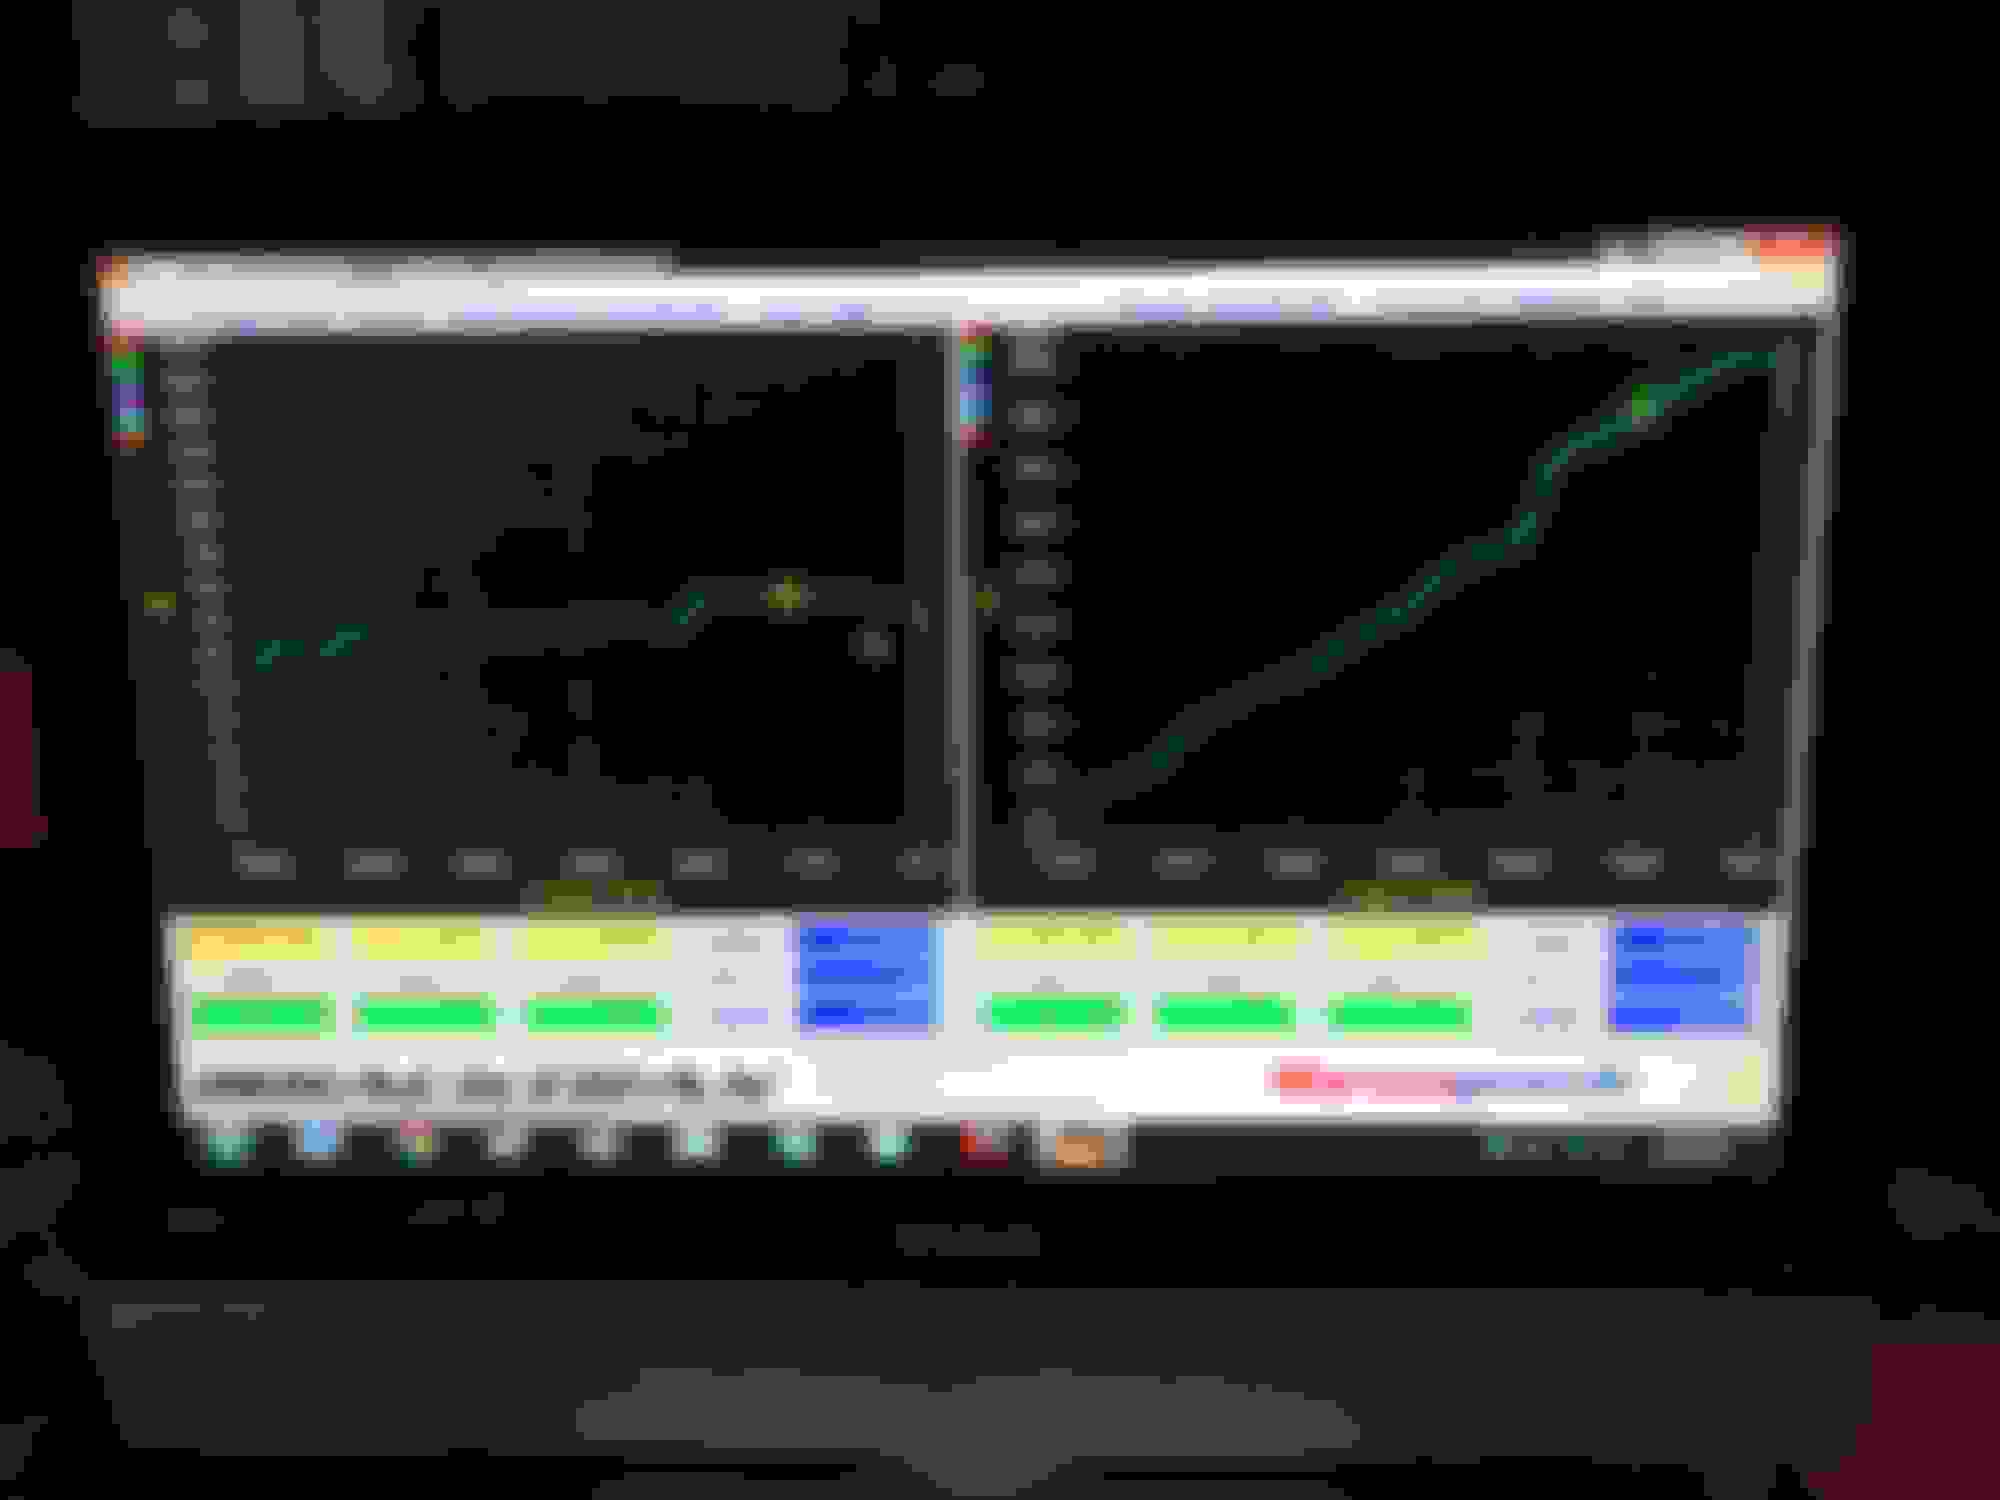
Before I do any serious modding and wanting to know where my car stood after 10 years and 54k miles. I scheduled a dyno day at Blacktrax to see where the car was at. My only mods are a invidia catback and a FPIK intake, but to get a clearer view of where the car was for stock comparison I put the stock airbox back on just to eliminate an added variable of the intake.
This was my first time on a dynapack , I have used a mustang dyno in the past so it was cool learning about the benefits of a dynapack while at Blacktrax. But at the end of the day the car made really good power I was very impressed with 219Hp/155TQ. Nothing better than knowing you have a healthy motor.
Now with having a baseline and knowing where the car is at I can mod and have something to compare to. But first I went through the car’s service history in more detail I noticed the 60k mile service has been done by the dealer. But I wanted to ensure some basic maintaince was done right and on my schedule before I did any modifications. So time to get my hands dirty.
Replaced the old/worn serpentine drive belt with a new OEM one. If you look at the tensionometer it was time to change the belt. It went on very easy
Put the K&N FPIK back on
Replaced the old spark plugs, they all looked good and the new NGKs went in easy.
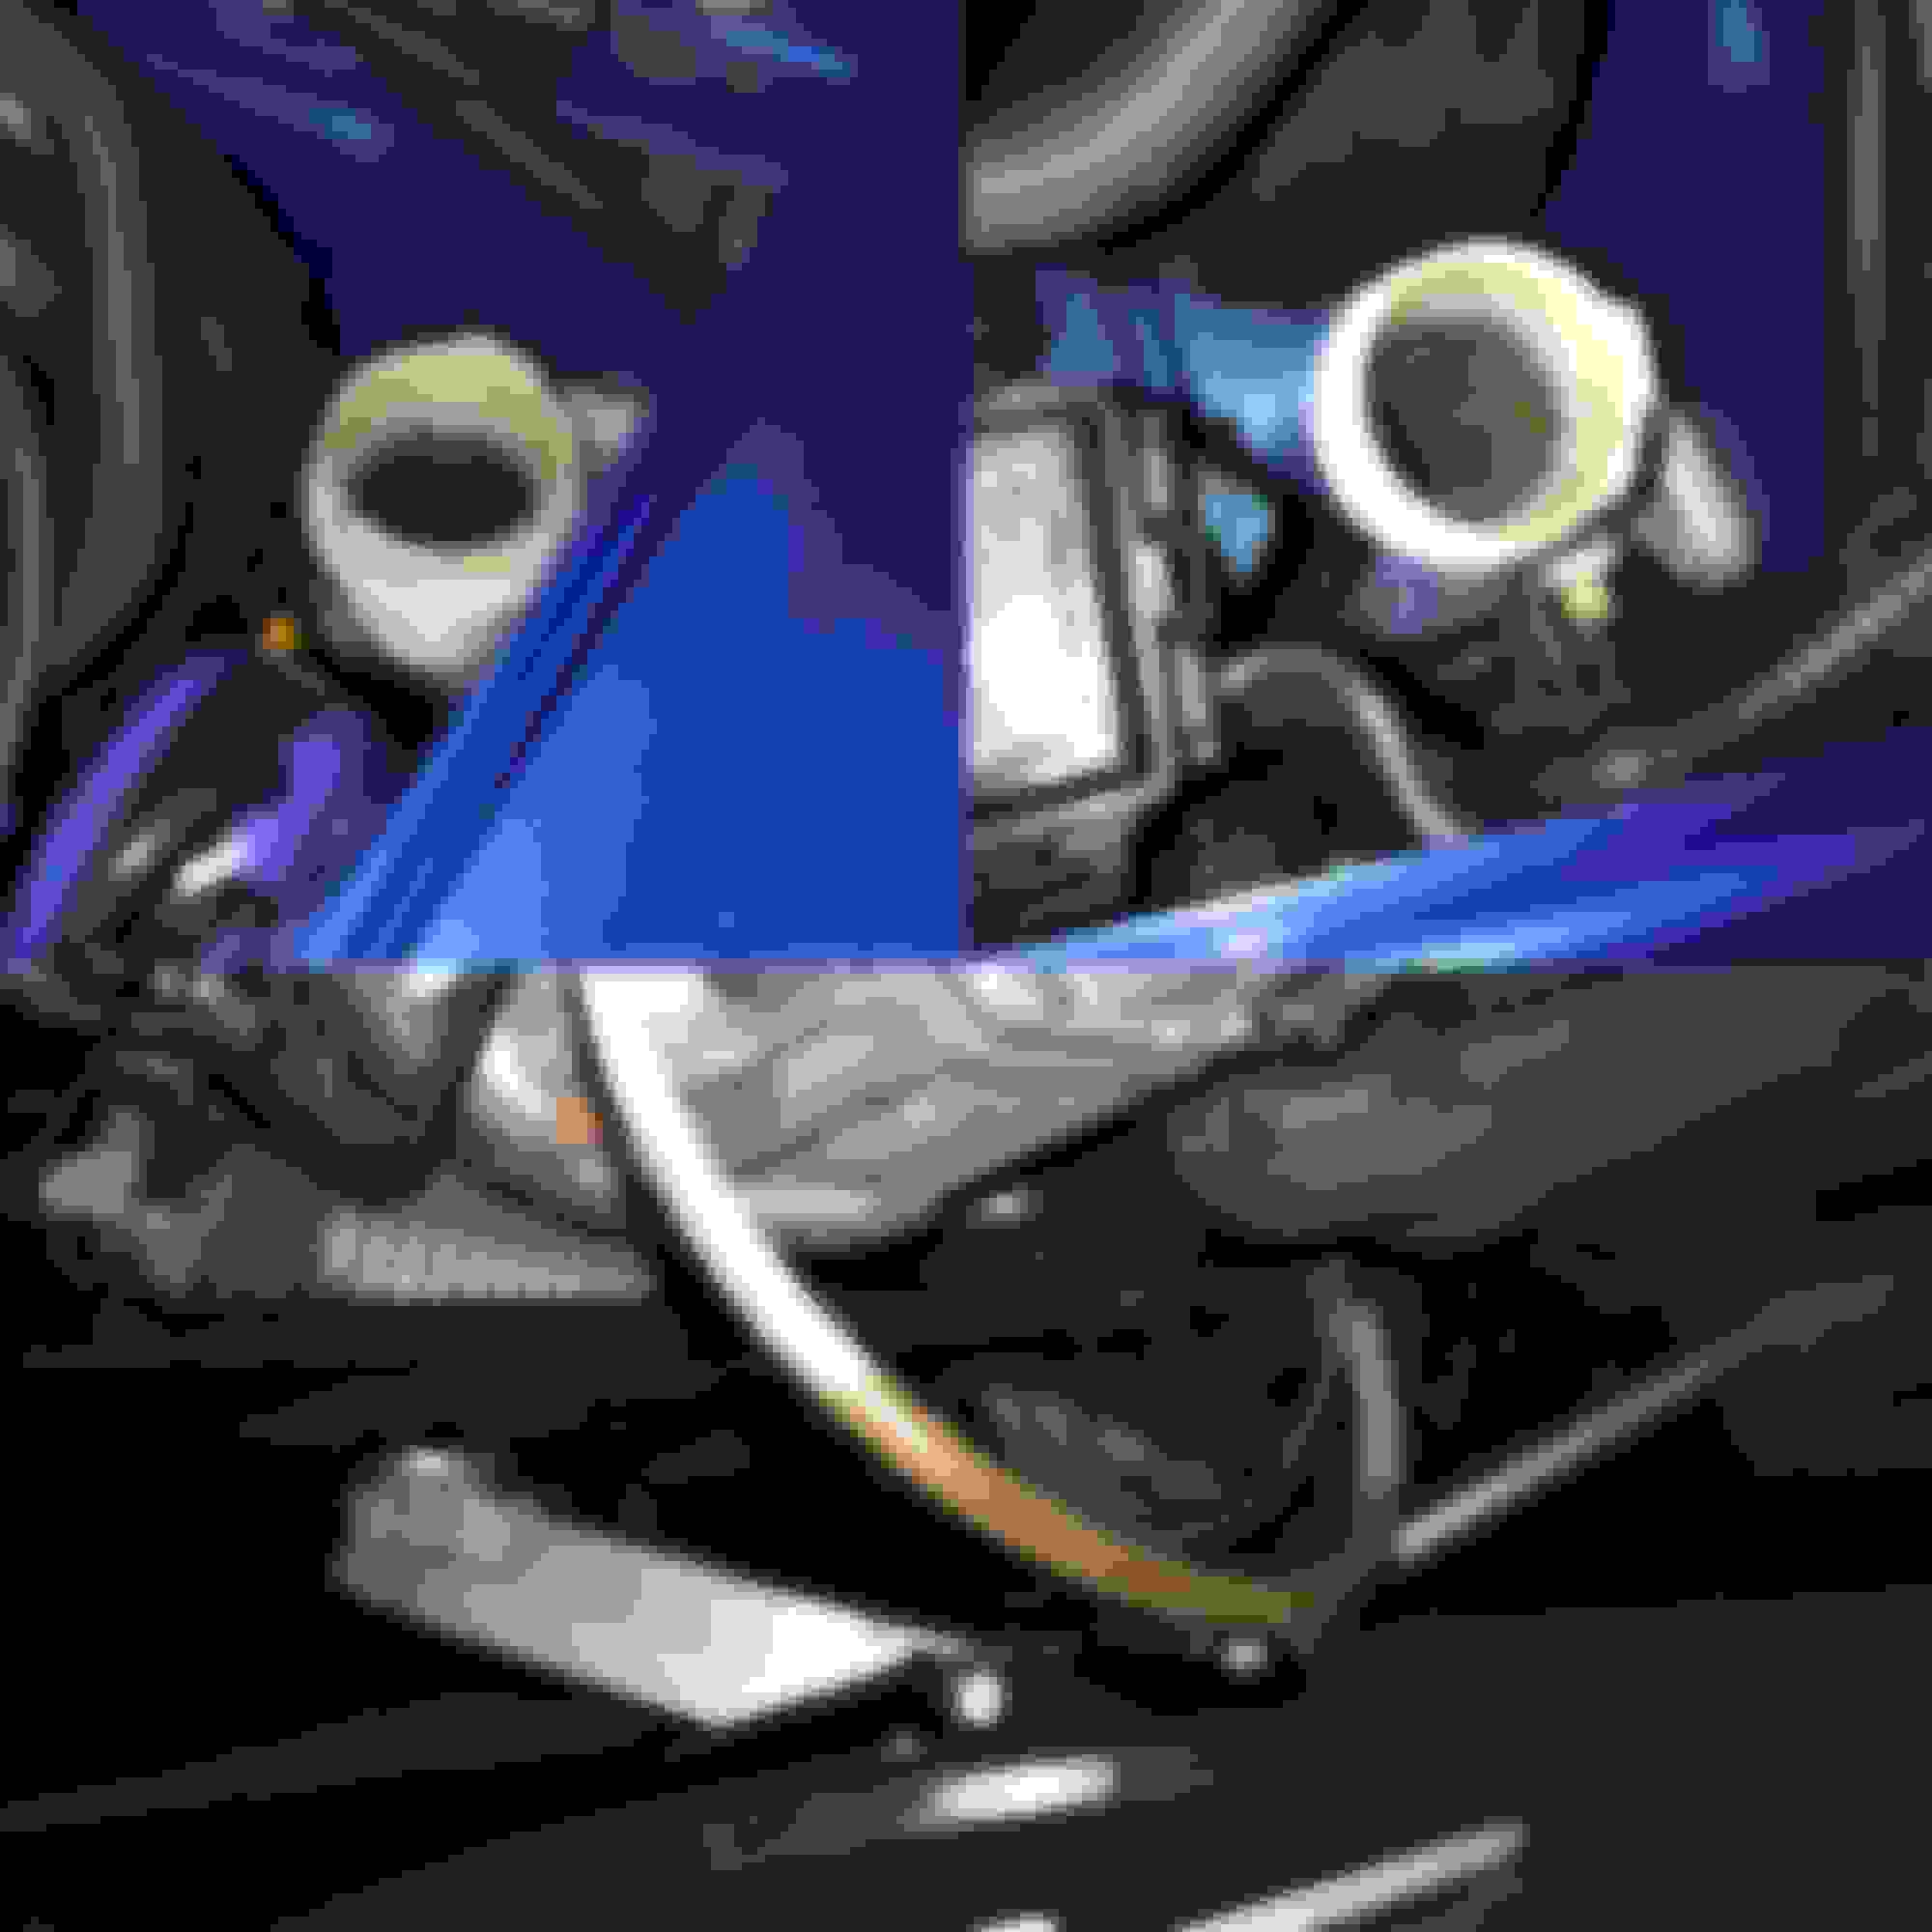
Starting at the rear of the car replaced the rear differential fluid with Amosil Severe Gear 75W-110 and put in new crush washers on the bolts. My goodness did the old fluid reek it stunk my garage up.
Worked my way to the transmission replaced it with Amsoil Synchromesh Transmission Fluid. Im glad I know I have Amsoil in the the transmission but the old fluid looked brand new.
Onto the clutch fluid, it was pretty nasty it didn't look like it got changed in changed in 10 years. But I did a gravity bleed and put in Motul RBF 600
Continuing with fluids I did a coolant flush with Honda blue type 2 coolant then “burped” the system with a spill free funnel to get all the air out of the system. The funnel makes things so easy.
With some maintenance out of the way I jumped back onto modding a bit. The car was purchased with an Invidia Q300 exhaust with titanium tips. The catback exhaust system was really nice I loved the way it sounds, nice growl without being obnoxious. Although the titanium tips matched the blue paint perfect the exhaust tips made it a little too flashy for my taste. Not to mention I was looking for something a little bit lighter. I was looking for the most stock looking exhaust system, that was light, and not overly loud to attract every cop in town. So after some research I found the Milltek exhaust system it met all my needs and the coolest part its the only exhaust system that has oval exhaust tips that match the stock style just a bit wider/bigger so cool. Bad news is they have been discontinued but I lucked up and found a solid forum member on here selling his Millek used so I immediately pulled the trigger.
The catback install was pretty straight forward only issue was the rubber hangar swap. The milltek rubber hangar tabs are way too big. With some wd40, heat and muscle they popped on. All in all the exhaust looks great, sounds good, and is a tad bit lighter than the invidia.
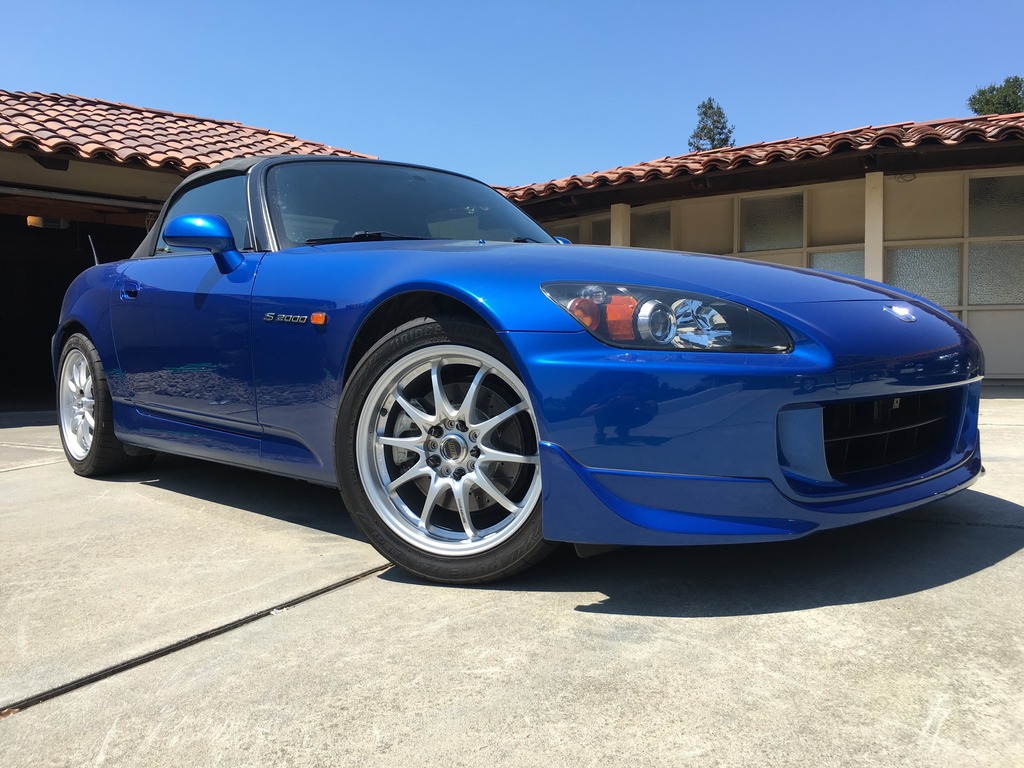
My titanium silver Volk center caps came in to complete my wheels. They snapped right in and its just another subtle key to makes the car look more complete but still ….. stock.
Im currently sourcing a test pipe then looking to get a tune. Also I plan to go stainless still brake lines soon which is why I didn’t change the brake fluid yet. Not to bad for a ten year old car I'm happy she is healthy and coming together nicely
Cars looking good! Can't wait to pick up a set of ce28's. Also the spill free antifreeze system is amazing makes doing flushes/top offs a breeze!
Thanks man. Yea the ce28s are nice they mount with no spacers and are light. I must say I have been looking into the benefits of running a squared set up. Maybe in the future I'm still looking into the whole grip vs weight debate.
The no spill funnel works wonders I can have the coolant changed in an hour with only maybe 10min of actual work. Draining and getting rid of air bubbles take time but your not doing anything
Ok I am back again this has been a wild but fun last few days. So I figure a test pipe is just a pipe with flanges what can go wrong. I am not into buying expensive JDM parts if its not needed I just get what works. With that mentality I will admit I went cheap. I ordered a test pipe off Ebay (company who will remain nameless because they still owe me something) and went to install. It lined up great, I thought until….. I turned on my car and noticed the big exhaust leak. The test pipe flange did not mate to the doughnut gasket from the header and it was just leaking. After through discussion with the Ebay test pipe vendor I returned it. I went on the hunt for another test pipe but this time something with a proven track record of actually working. I landed with the invidia test pipe, I loved the quality of my previous Invidia exhaust and the flange materials always stood out. Also no one on the boards seemed to have problems with it. So thanks to Evasive for getting the test pipe out to me quickly. The pricing was pretty much the same as the Ebay one so that was a great waste of time.
For the weight guys out there. Stock Cat 12.3lbs - Test Pipe 4lbs = 8.3lbs weight savings.
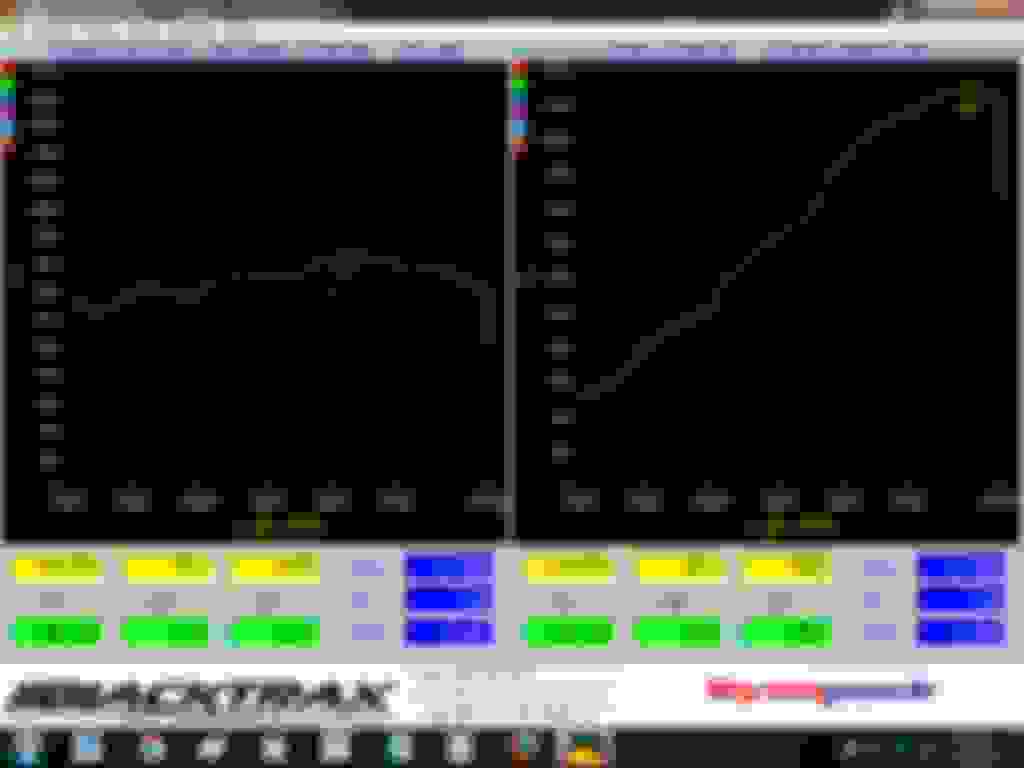
Next up was heading down to BlackTrax for some time on the dyno. Before I start I know there are a lot of other variables at play when comparing dyno graphs. But it was the same dyno, the same weather conditions outside, and only maybe 300 miles on the car between tests.
First up was to see the effect/change made from the maintenance items done ,K&N FPIK intake, milltek catback exhaust, an invdia test pipe to the baseline.
The biggest delta between the baseline and [no tune+bolt ons+ maintenance] is an increase of 7HP/5TQ.
Next up was having Jei at Blacktrax tune my car. He was very informative, walked me through every step and took great care of my car. I couldn’t be any happier vtech engages at 4K smooth and final numbers were 230HP/168TQ . 11HP/14TQ peak power increase over my baseline.
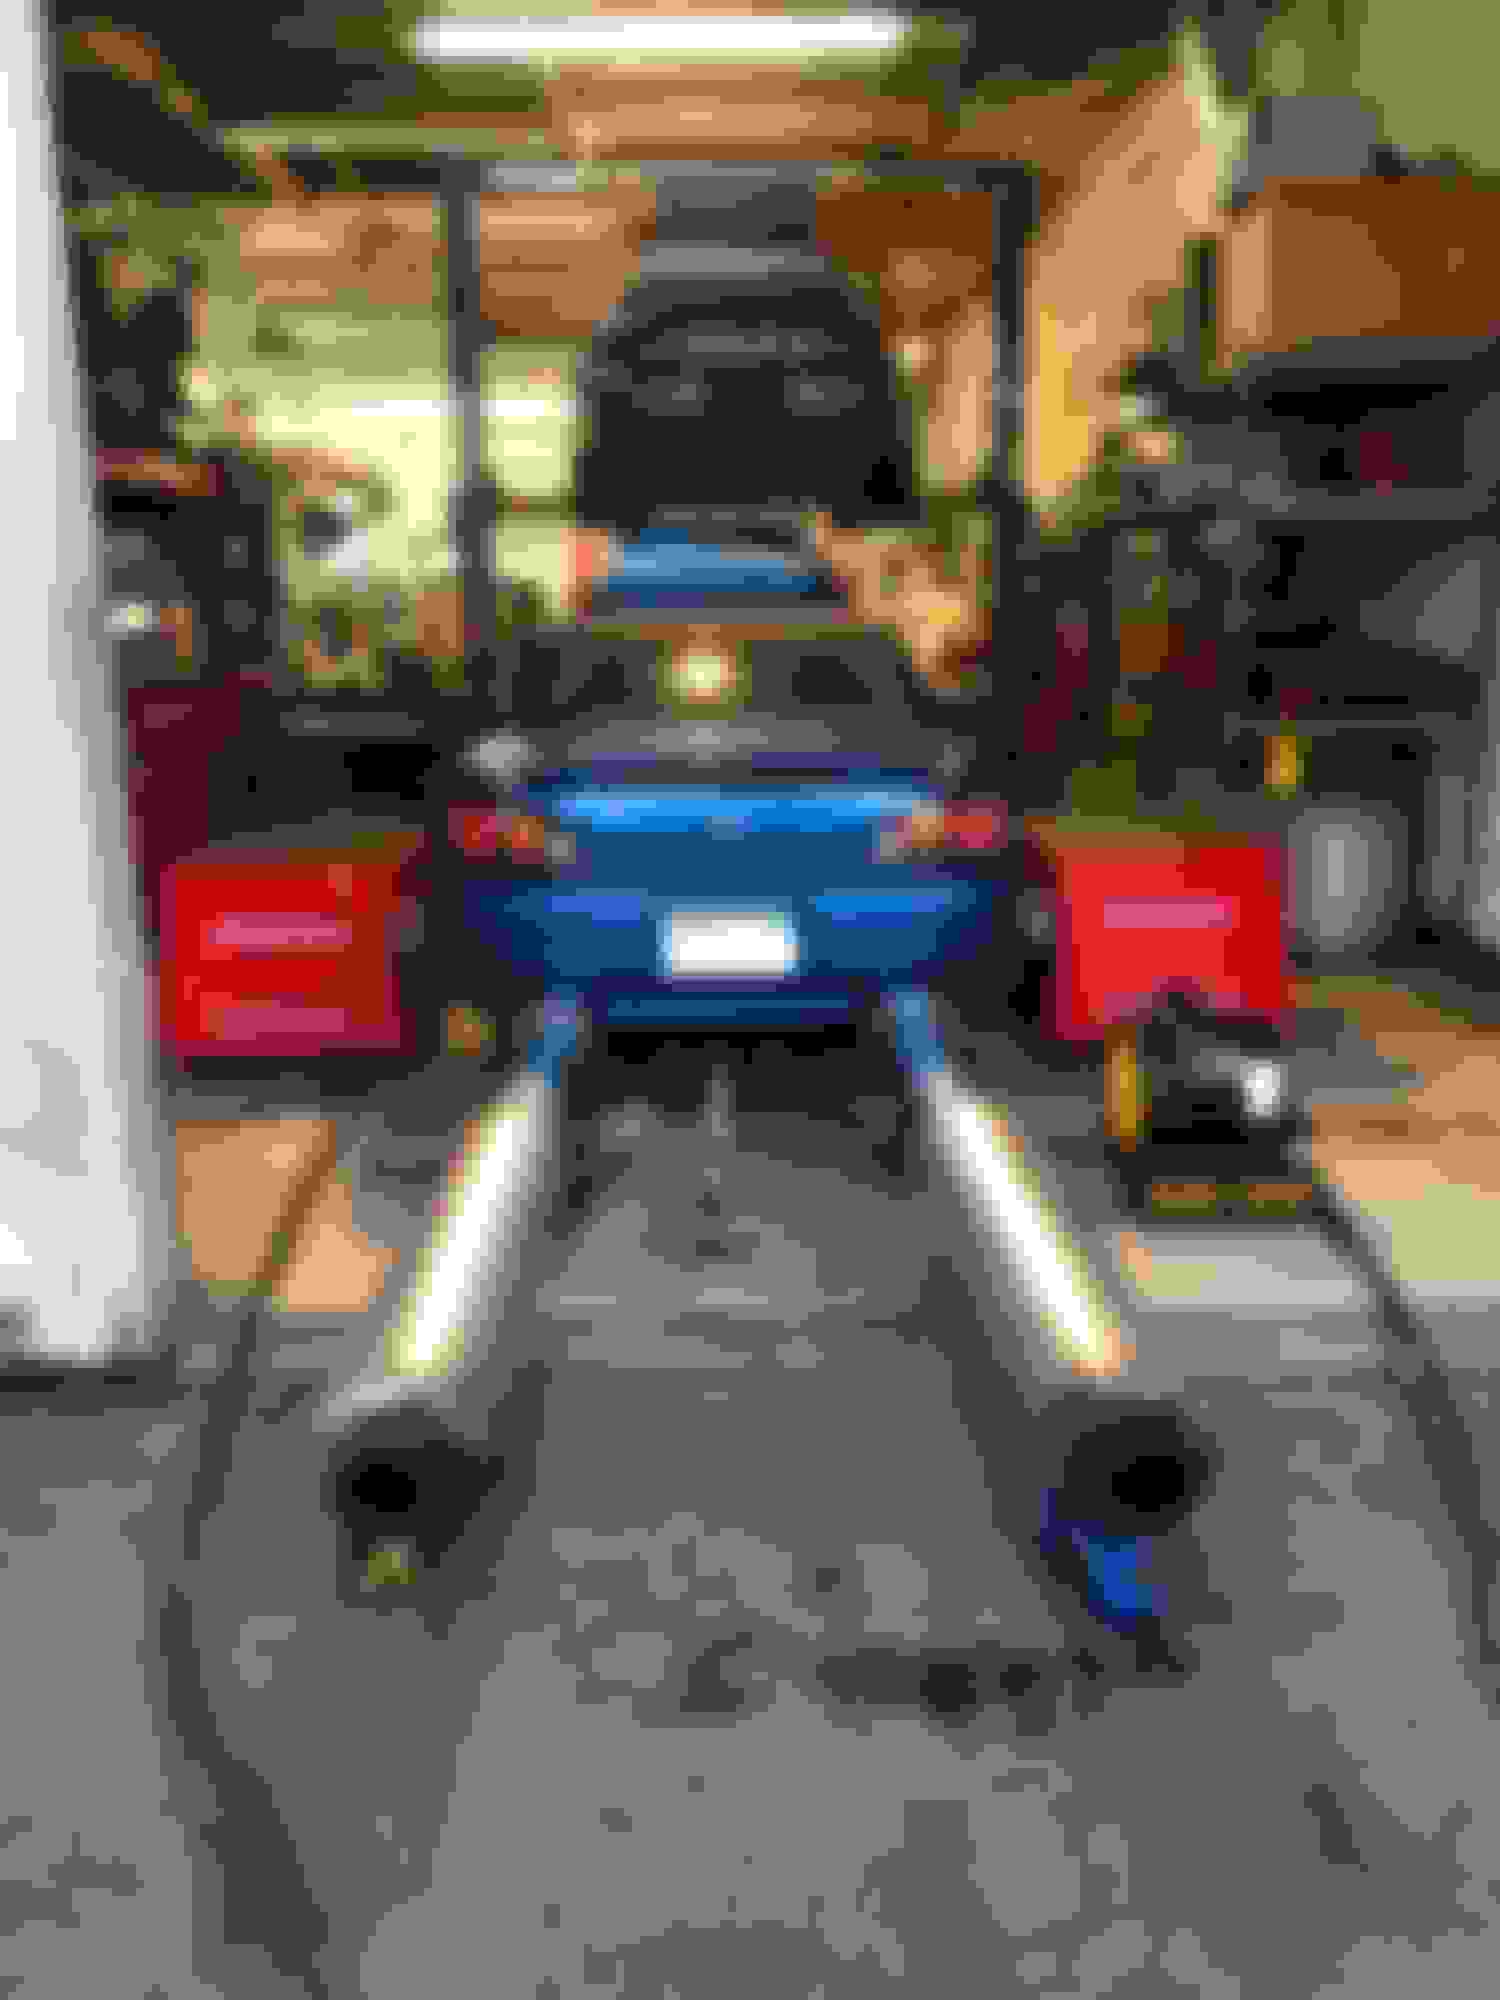
To end my day cool photo of my car on the dyno packs and as you can tell by my face I was happy with the results. Until next time guys.
Its the small things.. my friend got a new shift knob in his S2K and he hooked me up with his old OEM one. It was in much better condition than mine, easy to put on and not to mention...free. Why not go aftermarket because.. Honda made it right the first time.
BTW it doesn't look as scratched up as the pictures portray. Just the flash picks up every micro scratch
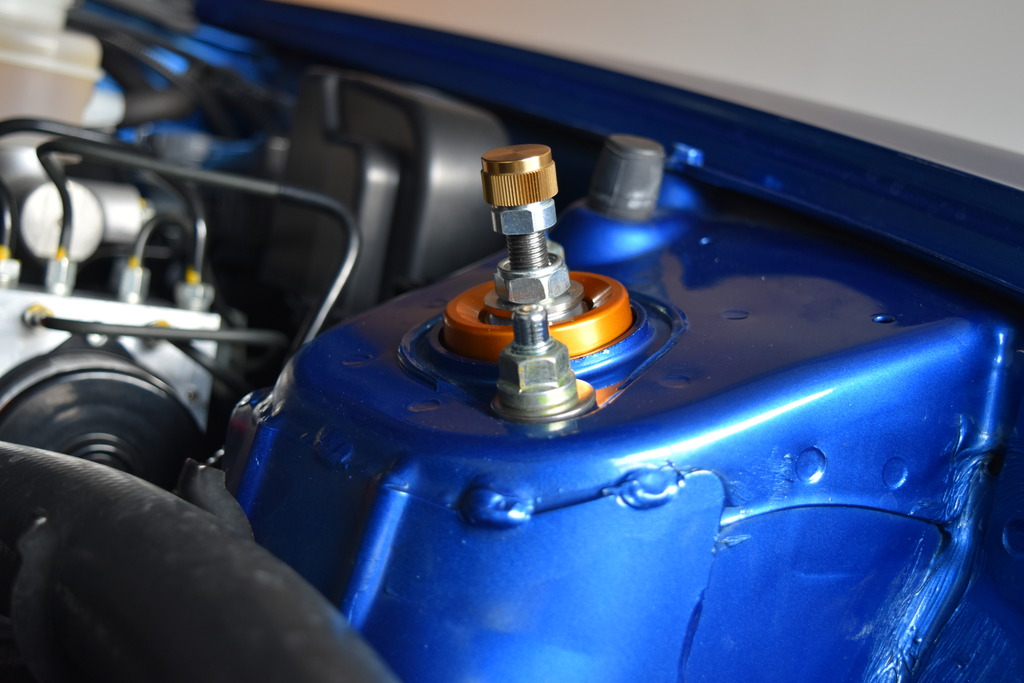
Ditched the stock brake lines this weekend, added SakeBomb Garage stainless steel brake lines with Motul RBF600 fluid. Brakes pedal feels great, install was straight forward, gravity bleed took forever. But now every fluid in the car has been swapped by me so there is peace of mind everything is fresh.
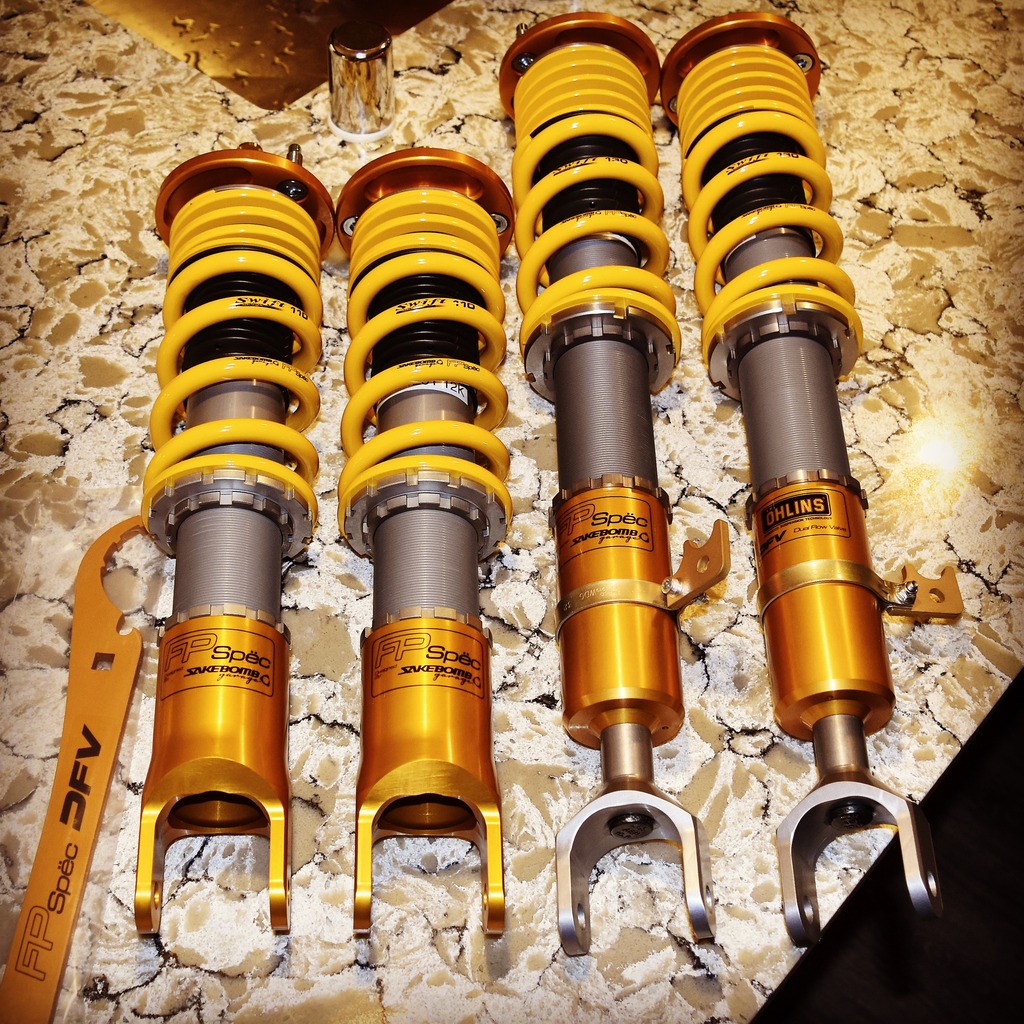
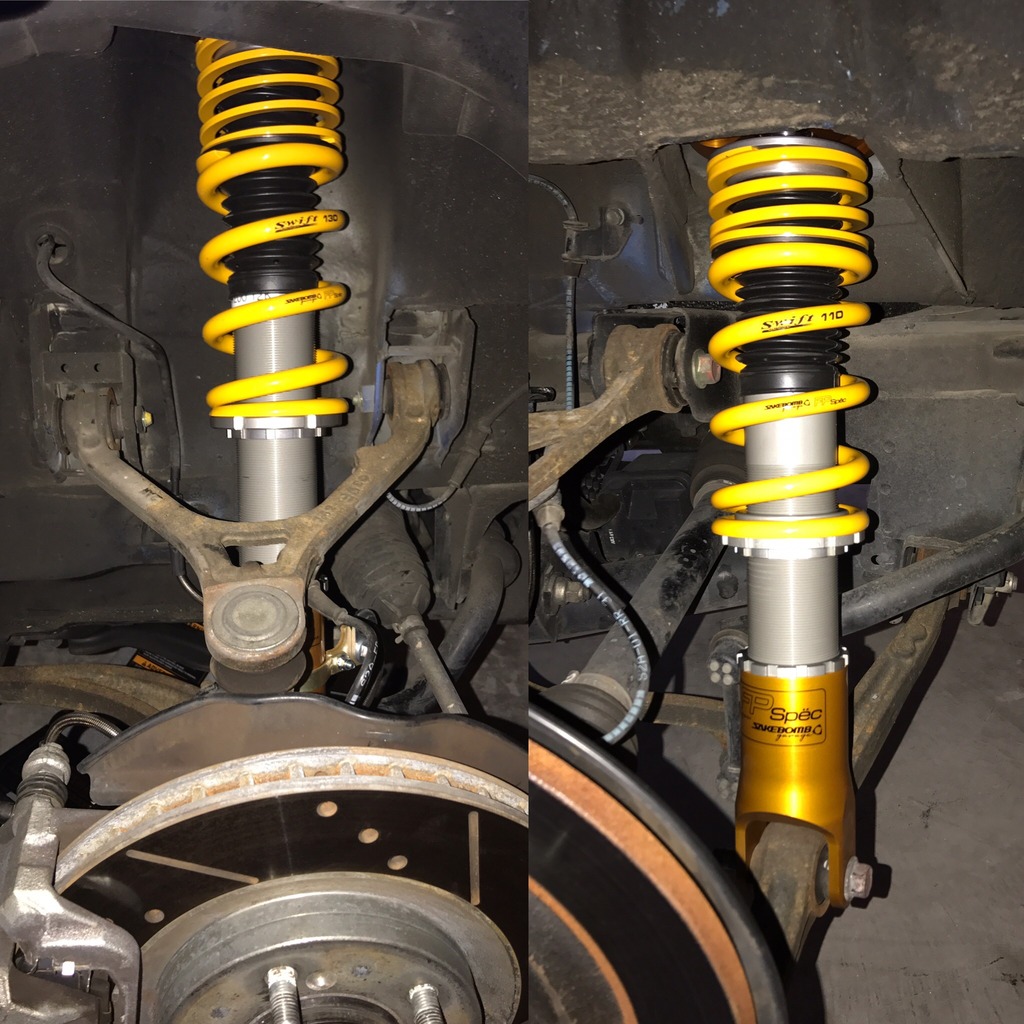
So I wanted to upgrade the stock suspension to improve the handling so I decided to get some coilovers. I only heard good things about the Ohlins DFVs on the forums so when I started to shop around. I contacted a local shop SakeBomb garage and they told me about their new FP Spec Ohlins Long Stroke DFVs. After hearing the benefits of not hitting the rear bumpstops and being able to have a firmer suspension with a smooth ride I was sold. Contact them for more technical details if your interested they are a great group of guys.
So I received my FP Spec Ohlins Long Stroke DFVs and threw them on. These things are so baller in person it was constructed very well with high quality materials. Install was a breeze everything lined up and went in smooth. I was even happier to find out during the install with my uncalibrated arm the coils were about 5lbs lighter than stock per corner.
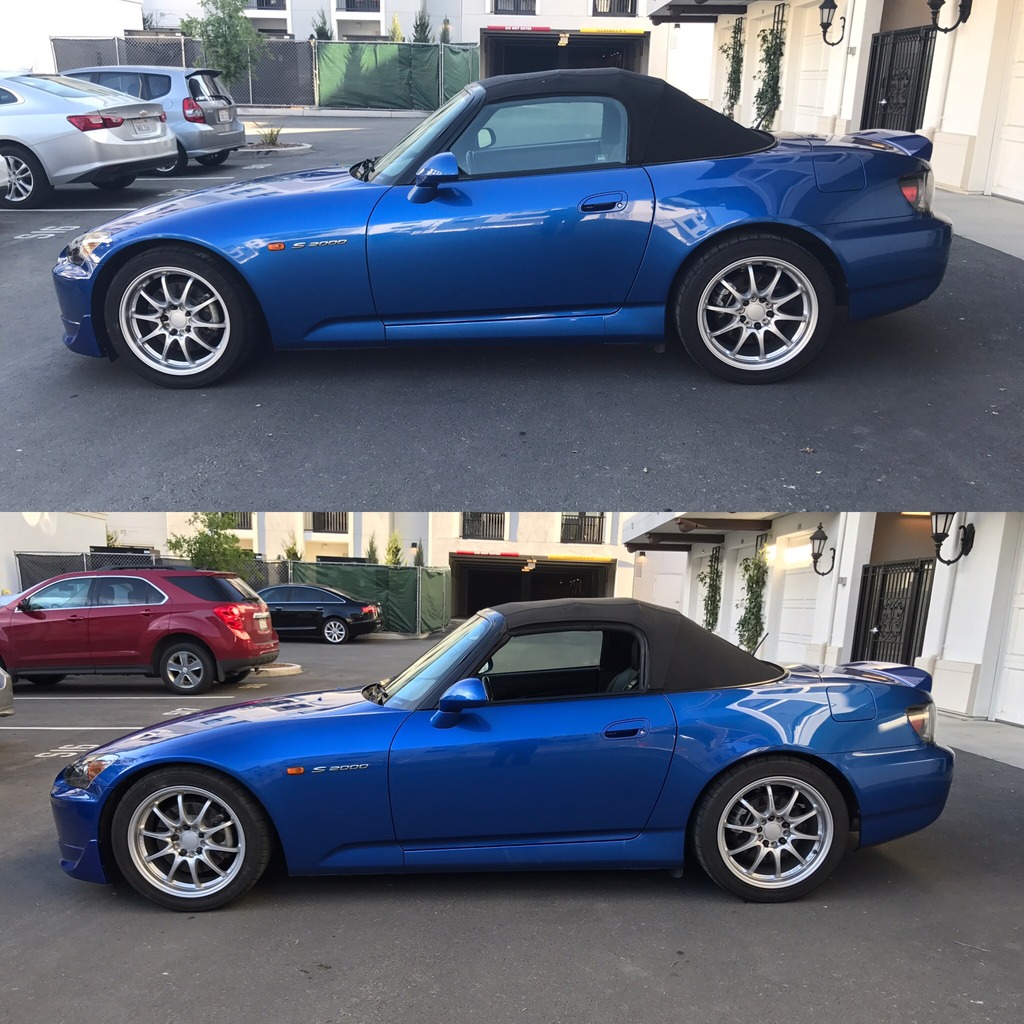
Here is a before and after of the drop. I am into functionality not a hella flush slam so the stance to me is perfect
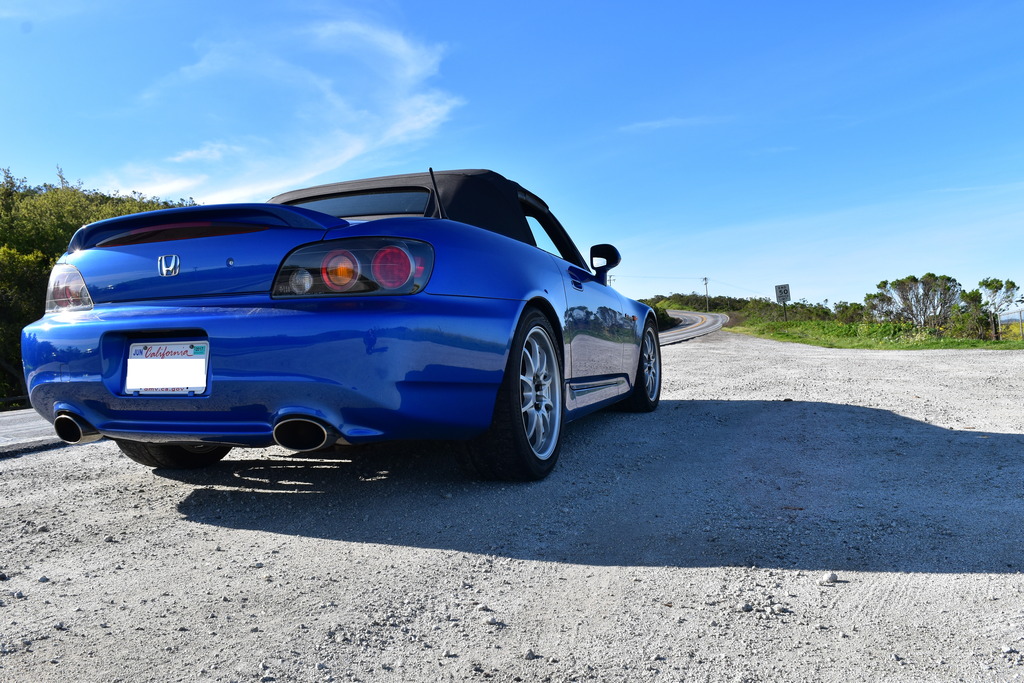
Now I set the coils overs 10 clicks from full stiff and let her rip on a mountain run. The S2K felt so smooth and flat through the corners. I was shocked it could be such a night and day difference. I stayed out out for another 4 hours I was addicted. I will continue to play with damper settings to figure out how the car reacts. I'm dying for another track day of when I can really push it to the limits.
 08-07-2016, 06:03 PM