Sirbikealot7's Auction car rebuild and Function>Form quest for Lap times
 09-26-2016, 03:29 PM
#11

Thread Starter

Made an oil filter safety today, no way in hell am I about to pay $100 for some kit with $5 of parts and 15 minutes. Brought a touch of my aviation background to the car and drilled a 10mm bolt on the front cover of the engine and ran some safety wire up to a T bolt clamp. Ran it a little long so it will still fit once the sandwich plate is installed. #1 rule on safety wire is to make sure that bolt the end points have tension in a tightening direction. It's a very common mistake that people run it over the top of the bolt head or in the loosening direction.


 09-26-2016, 07:08 PM
#12
Thread Starter
Figured I'd make a current mod list
Engine:
AP2 retainers w/fresh valve seals
Valve cover baffle drilled
Saiko Michi dual catch can
Billman cam chain tensioner
Moroso Oil pan baffle
Gutted airbox with K&N filter
Fumoto oil drain valve with lock
Berk 3" headerback with additional Vibrant resonator
DIY Oil filter safety clamp
Handling:
KW V3 with 8k springs
Eibach front sway bar
APR GT250 67" wing with 270mm stands
Custom front splitter 1/2" birch
Megan front bump steer kit
Megan front roll center adjusters
Megan rear bump steer kit
Megan axle spacers
Megan Diff collars
949 Racing 6UL 17x10 +52
Nitto NT01 255/40/17
Mutuki SR48 lugs
Winmax W4 pads
Centric blank rotors
Goodridge stainless brake lines
Motul 600 fluid
Interior:
Ballade V2 Roll bar
NRGclockspring retaining hub
NRG quick release
OMP Corsica 330mm Suede wheel
Sparco EVO 2 seats with custom mounts
Crow 6 point camlock harnesses
AEM X series Oil pressure, Oil temp, Water temp gauges
Ortiz custom pod
Kenwood stereo
Every mod on the car serves a purpose to make it more reliable, faster and handle better. I'm not spending money on frivolous shit.
 09-27-2016, 06:03 PM
#14
Thread Starter
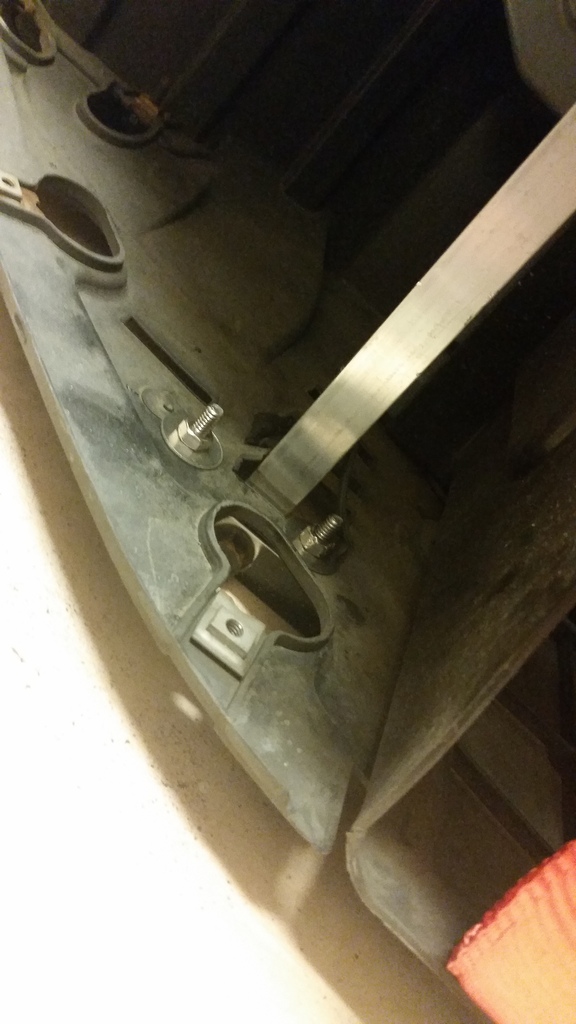
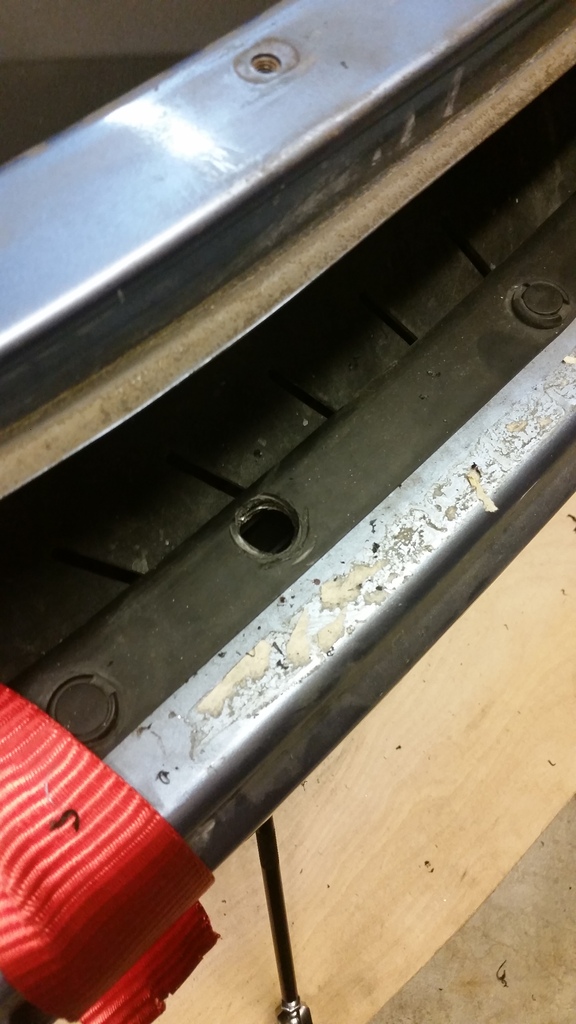
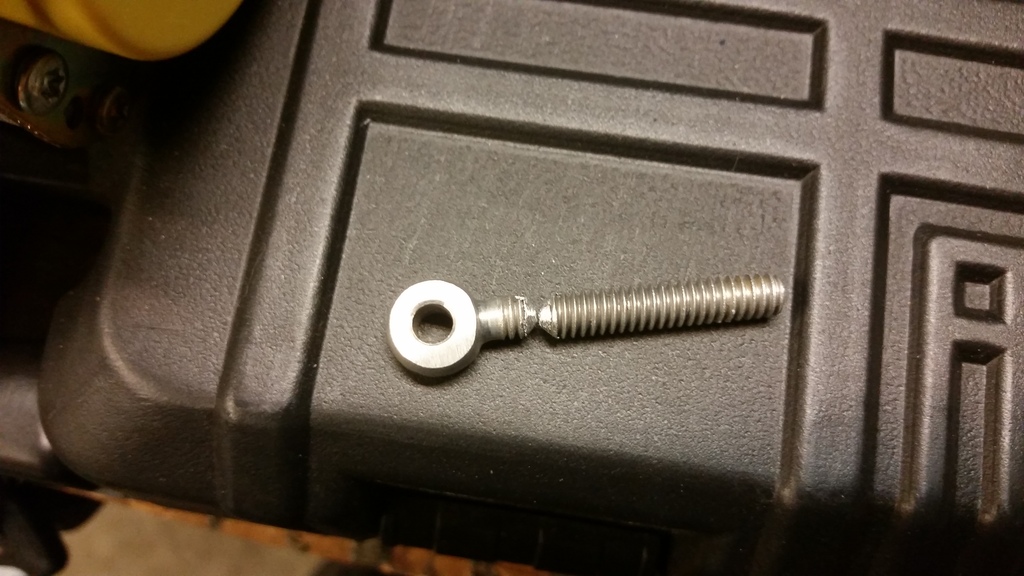
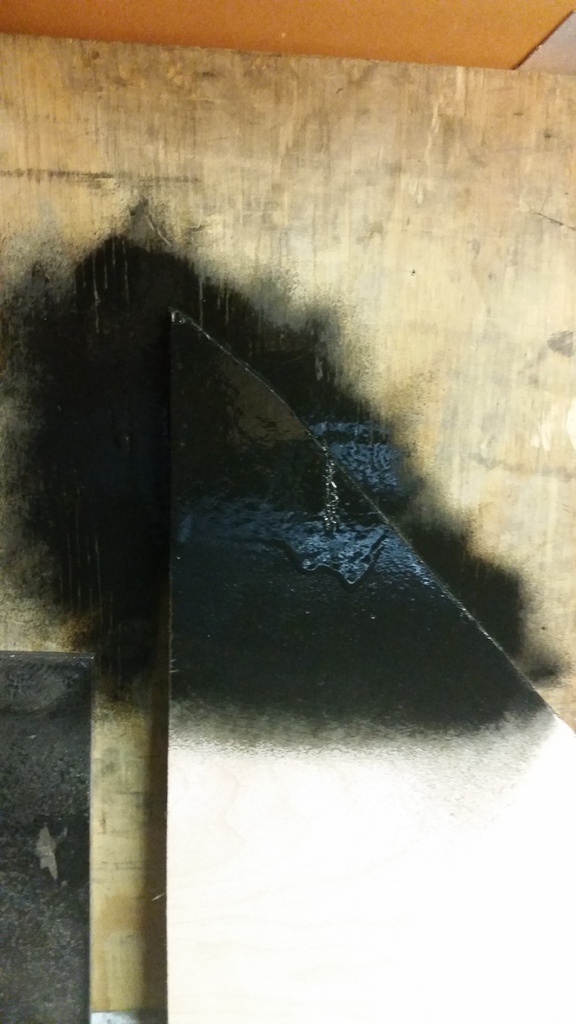
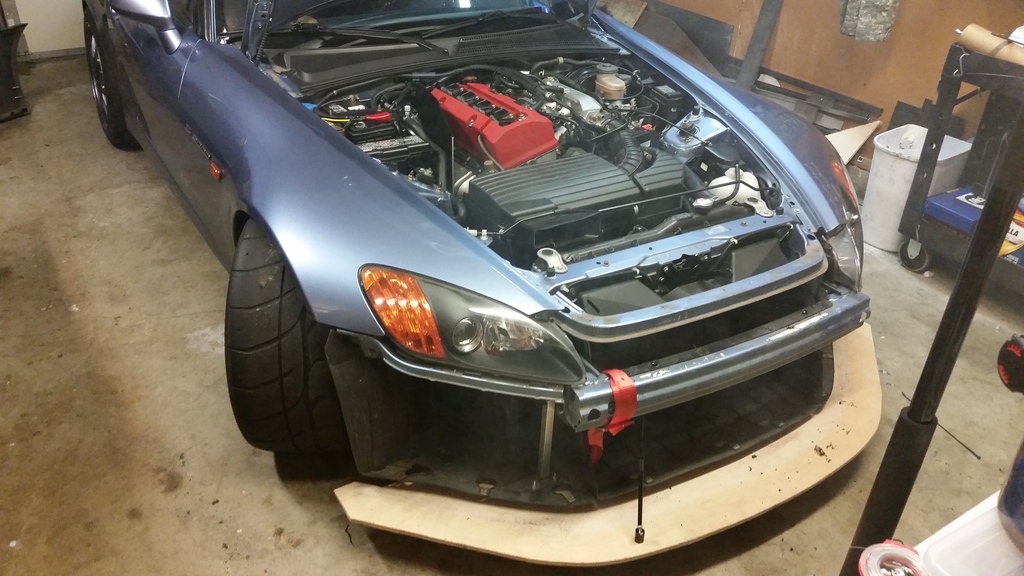
Started working on the splitter tonight, here is a couple pictures of the front mounts, drilled some holes in the bumper beam to drop the allen screws into the Longacre turnbuckles. Unfortunately I was playing with the angle and snapped the LH thread rod end. Luckily Longacre is only 30 minutes from my house, I'll have them ship a replacement tomorrow. I decided I'm going to plasti dip the plywood. I think it will cover the wood grain and it should be waterproof. Easy.
Moved the little solenoid on the air recirc on the drivers side. Used that mount and welded a 10mm nut into the box tubing for the passenger side.
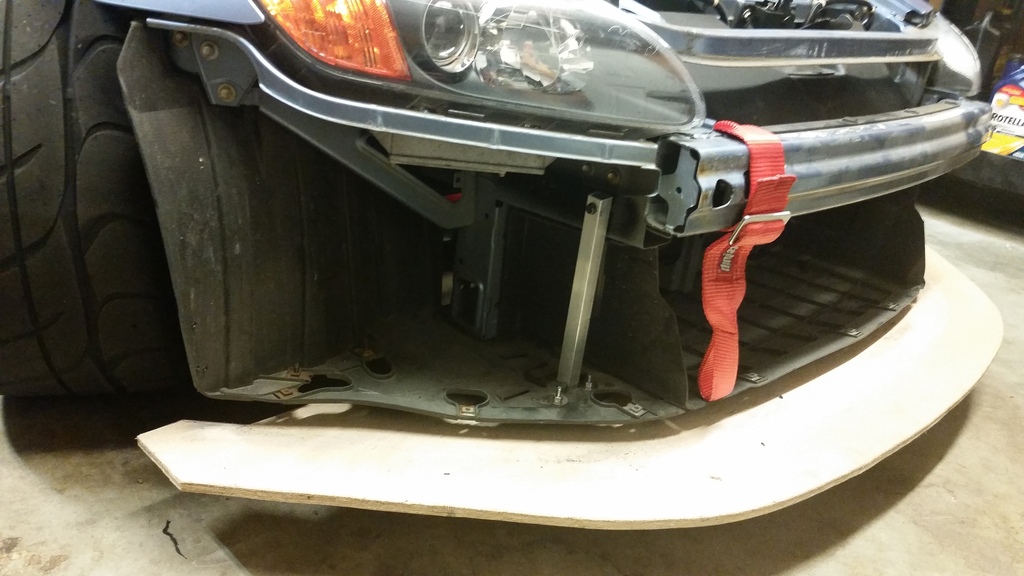
Super simple mounting but it stops it from moving forward and coming off the rear mounts
Bumper beam
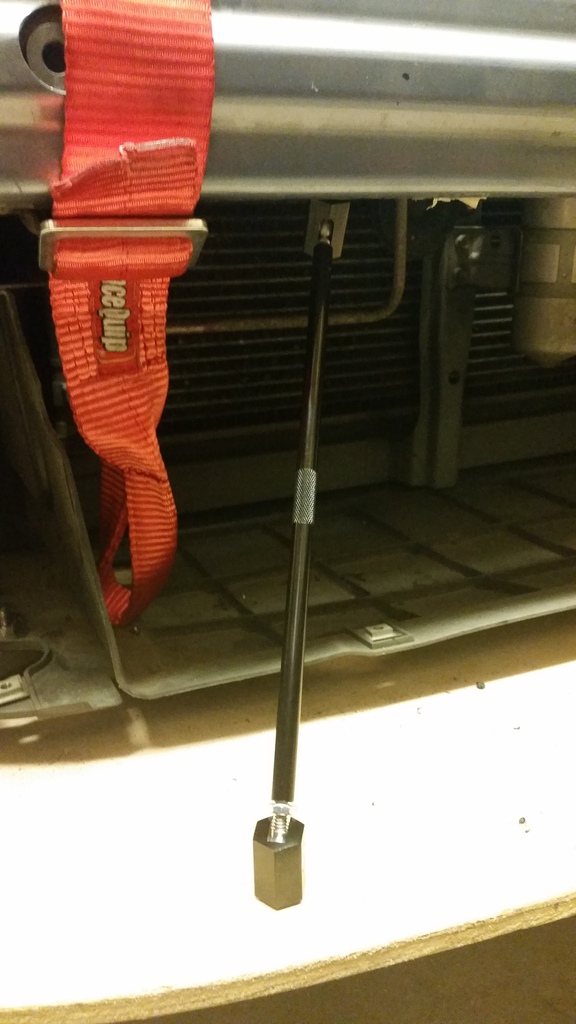
f@#k. Out of Argon for my tig welder, so I can't repair it.
Laid the plastidip down way to thick up top on the test, but should be fine when I do the splitter.
Gotta love the space of a 1 car garage. I miss having my parents shop with a lift lol.
Moved the little solenoid on the air recirc on the drivers side. Used that mount and welded a 10mm nut into the box tubing for the passenger side.

Super simple mounting but it stops it from moving forward and coming off the rear mounts

Bumper beam


f@#k. Out of Argon for my tig welder, so I can't repair it.

Laid the plastidip down way to thick up top on the test, but should be fine when I do the splitter.

Gotta love the space of a 1 car garage. I miss having my parents shop with a lift lol.

 09-28-2016, 01:02 PM
#18
Thread Starter
Didn't work, and somehow I don't have an edit button on my posts anymore??
In other news, I ordered some replacement turnbuckles from Longacre today, and I got another sheet of plywood to make a template, I'm thinking about hitting the ridge again on Friday for the last session of the year.
In other news, I ordered some replacement turnbuckles from Longacre today, and I got another sheet of plywood to make a template, I'm thinking about hitting the ridge again on Friday for the last session of the year.
09-28-2016, 11:37 PM
#19
Nice build and interesting follow your splitter installation. I really need to do one on mine as well.
You also need to use the youtube.com address to get a working embedded video.
http://www.youtube.com/watch?v=mj5o8L2zK1o
You also need to use the youtube.com address to get a working embedded video.
http://www.youtube.com/watch?v=mj5o8L2zK1o
09-29-2016, 08:02 PM
#20
Thread Starter
Nice build and interesting follow your splitter installation. I really need to do one on mine as well.
You also need to use the youtube.com address to get a working embedded video.
http://www.youtube.com/watch?v=mj5o8L2zK1o
You also need to use the youtube.com address to get a working embedded video.
http://www.youtube.com/watch?v=mj5o8L2zK1o
Ahh great, thanks for the tip.
Got the splitter painted, and the turnbuckles installed, passed the 215 lbs standing test. Bled the brakes and got the car packed up. Headed to the Ridge again tomorrow.
