Automotive builds Got an automotive build you want to want to document? Post it here!

SoHonda Garage. S2000 Build

Thread Tools
 
Old 03-21-2014, 05:04 AM
  #121  
Registered User

 
goofy's Avatar
 
Join Date: Oct 2010
Location: Netherlands
Posts: 560
Received 3 Likes on 3 Posts
Default

nice color!
Old 03-24-2014, 04:31 AM
  #122  

 
flybikeslee's Avatar
 
Join Date: Jul 2012
Location: Liverpool
Posts: 2,528
Received 4 Likes on 4 Posts
Default

been dying to see a s2000 on the TD rims for a while now, can't wait to see it dropped back down.
Old 03-24-2014, 04:54 AM
  #123  

 
rockstar143's Avatar
 
Join Date: Nov 2013
Posts: 868
Received 21 Likes on 19 Posts
Default

Your attention to detail and execution of mods never ceases to amaze me, Mike. My jaw is on the ground.
Old 03-24-2014, 05:34 AM
  #124  
Registered User

Thread Starter
 
SHG_Mike's Avatar
 
Join Date: Jun 2009
Posts: 591
Likes: 0
Received 10 Likes on 7 Posts
Default

Originally Posted by flybikeslee
been dying to see a s2000 on the TD rims for a while now, can't wait to see it dropped back down.
No one wants to see this bad boy on the ground more than I do!

Originally Posted by rockstar143
Your attention to detail and execution of mods never ceases to amaze me, Mike. My jaw is on the ground.
thank you thank you

Some updates from this weekend.

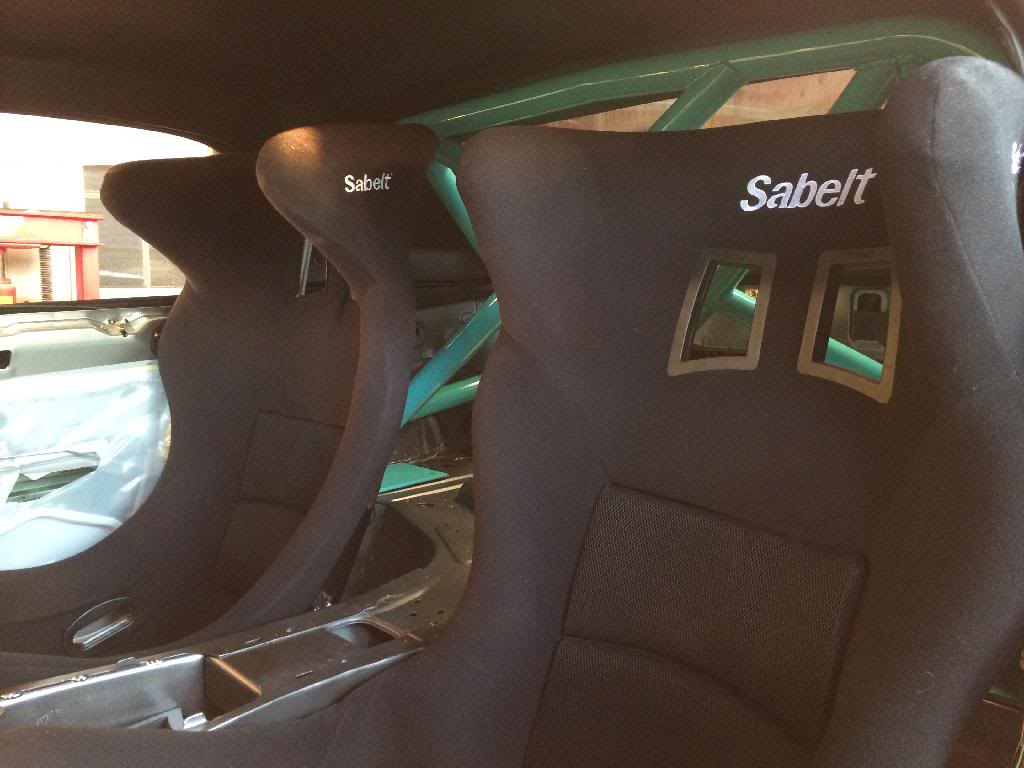
I Placed the roll bar back in the car, and got a quick preview of the Gears lip...

Name:  07E93484-78E2-4694-9233-18B05EBEDC1A_zpsswidfavg.jpg
Views: 625
Size:  112.8 KB

Name:  AD5EA546-BA3F-4285-82C7-E1DB4EA976B5_zpsjewgddaf.jpg
Views: 621
Size:  95.0 KB

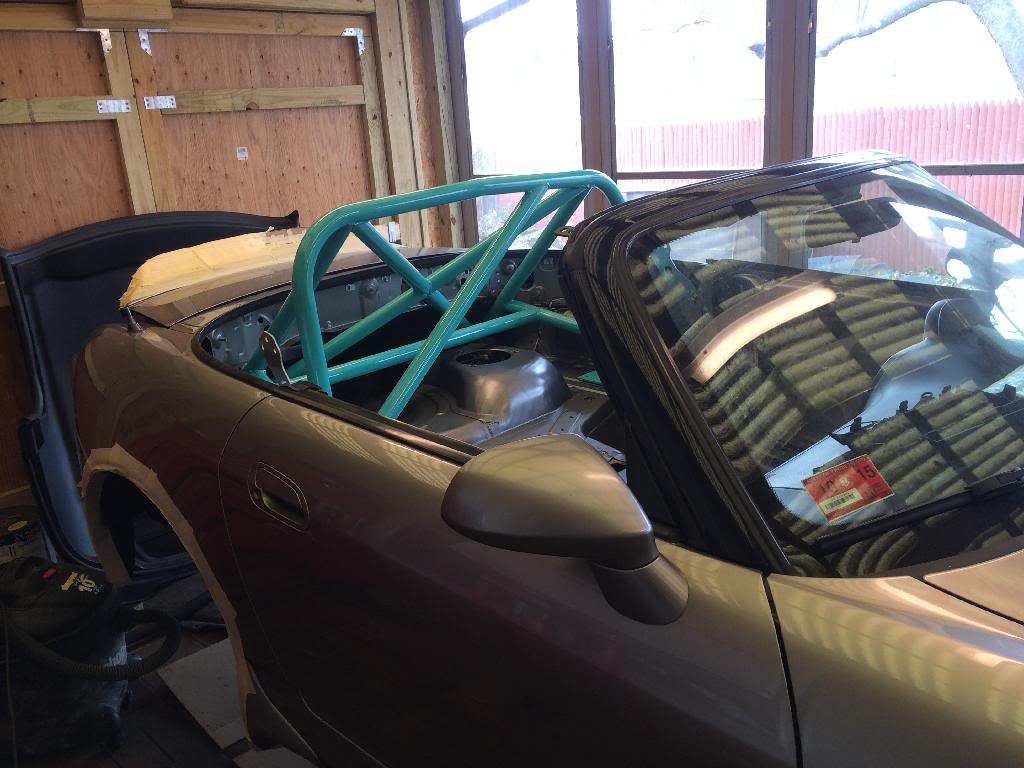
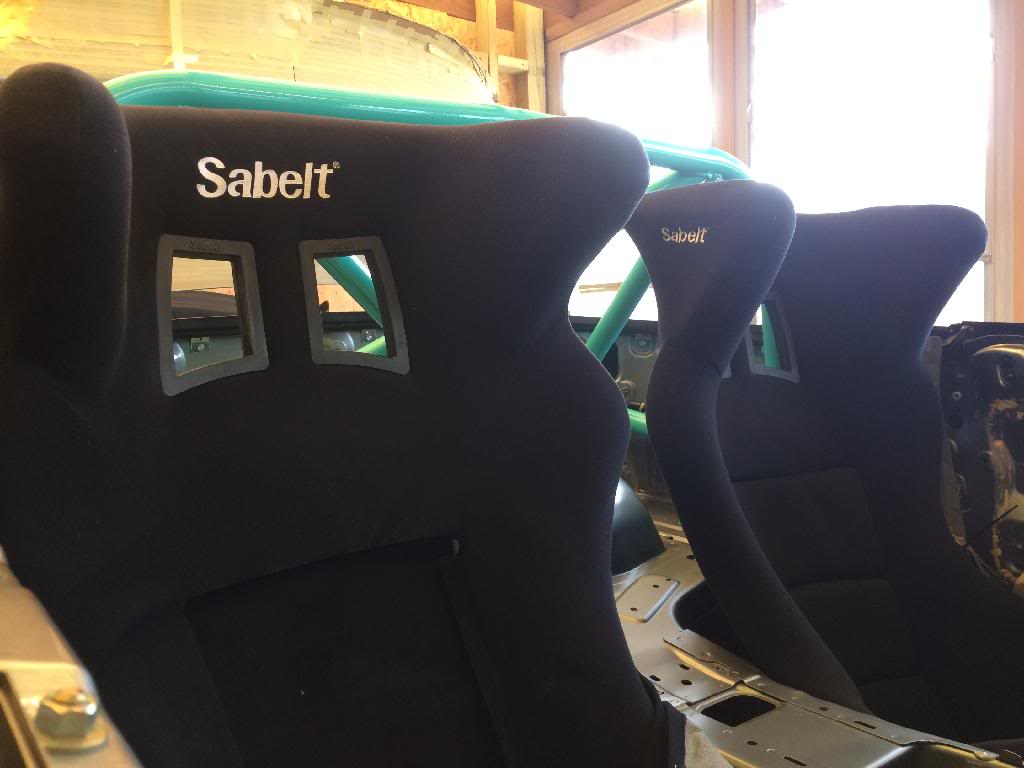
My passenger seat arrived on thursday So I spent the rest of the day fabricating the seat mounts and notching the seat to fit the tunnel. I ordered a size Large for this side to not have to notch the tunnel. It turns out I could have fit in this seat okay, though I am more comfortable in the XL.

Name:  A69F8E27-F11E-4D00-9820-D0424158AA8D_zpsg7cuhm2a.jpg
Views: 623
Size:  49.8 KB

HT on...

Name:  C674F21D-9C6C-4611-9604-9BFB6641E5F0_zpshwodpoa3.jpg
Views: 619
Size:  47.3 KB

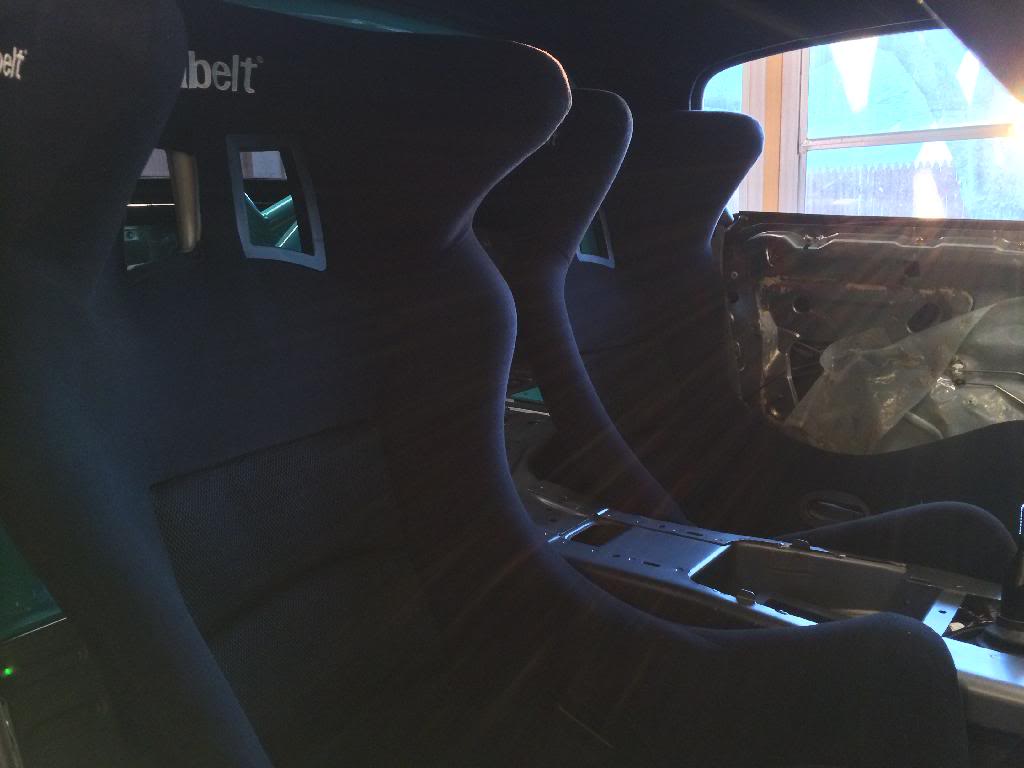
I am going to lean the passenger side back one notch as well to have it sit lower and match the driver a bit better.
Name:  EAF4E594-CF9F-4676-9F9B-D0AFA832600A_zps9sduuj77.jpg
Views: 633
Size:  73.5 KB

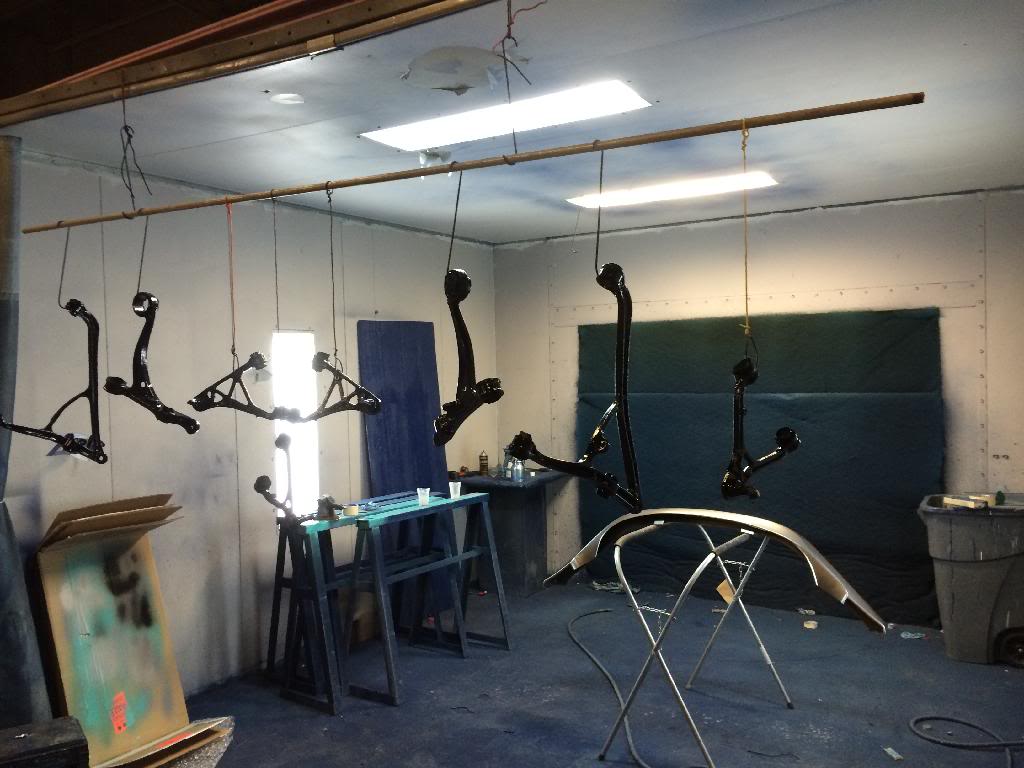
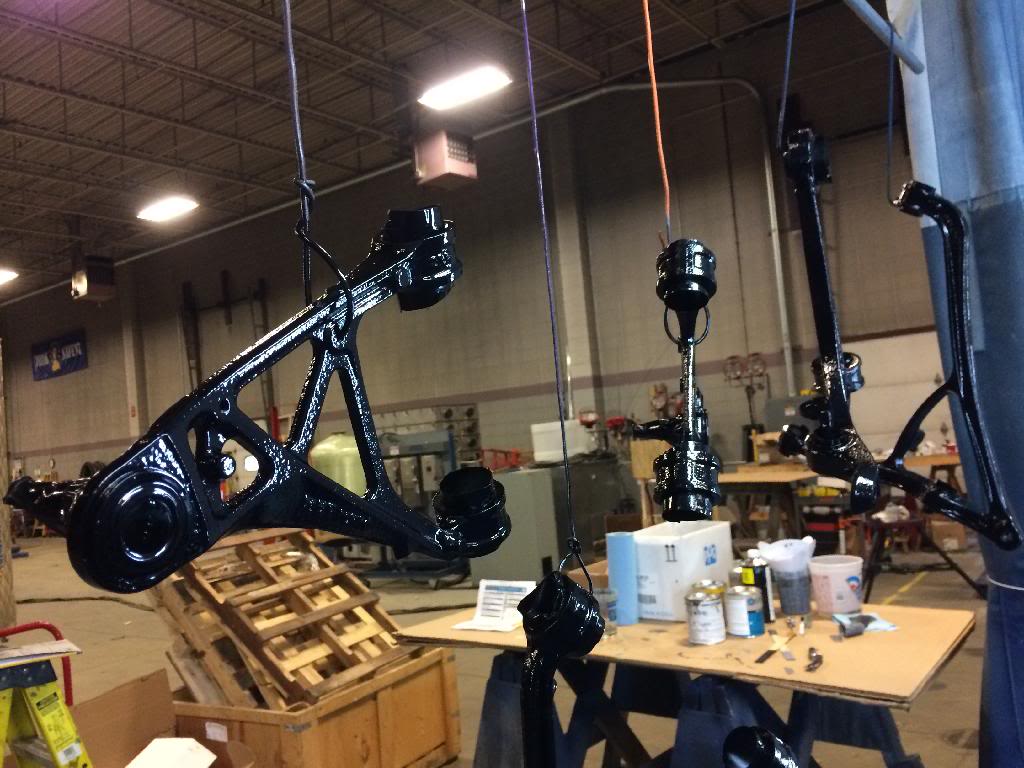
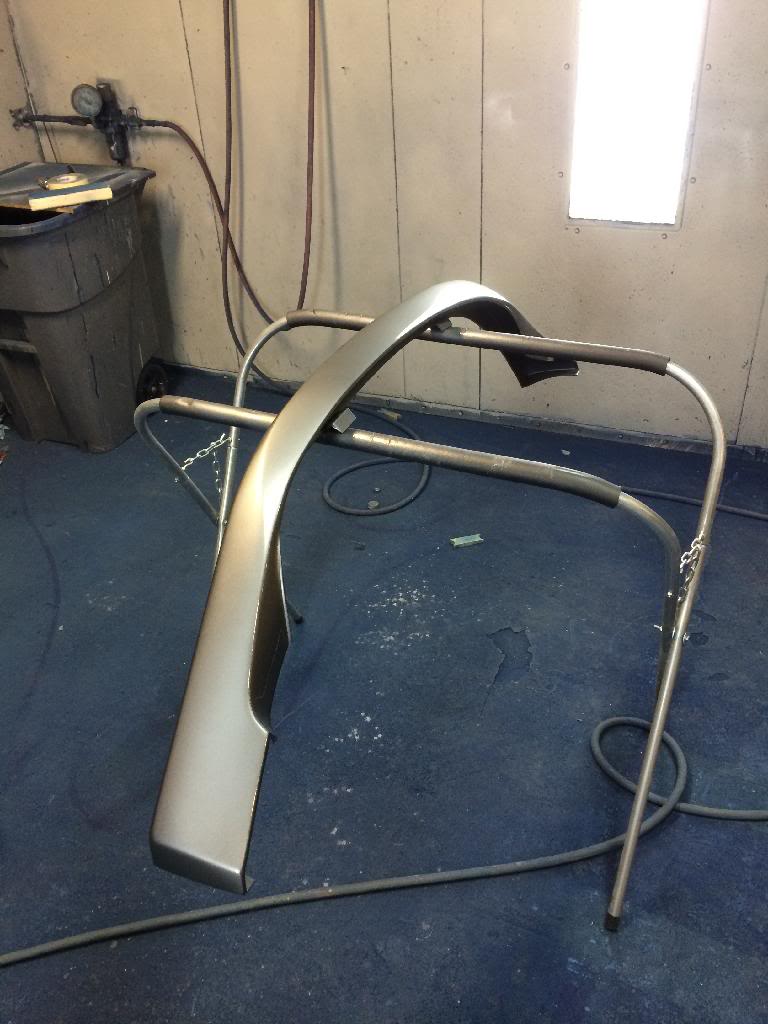
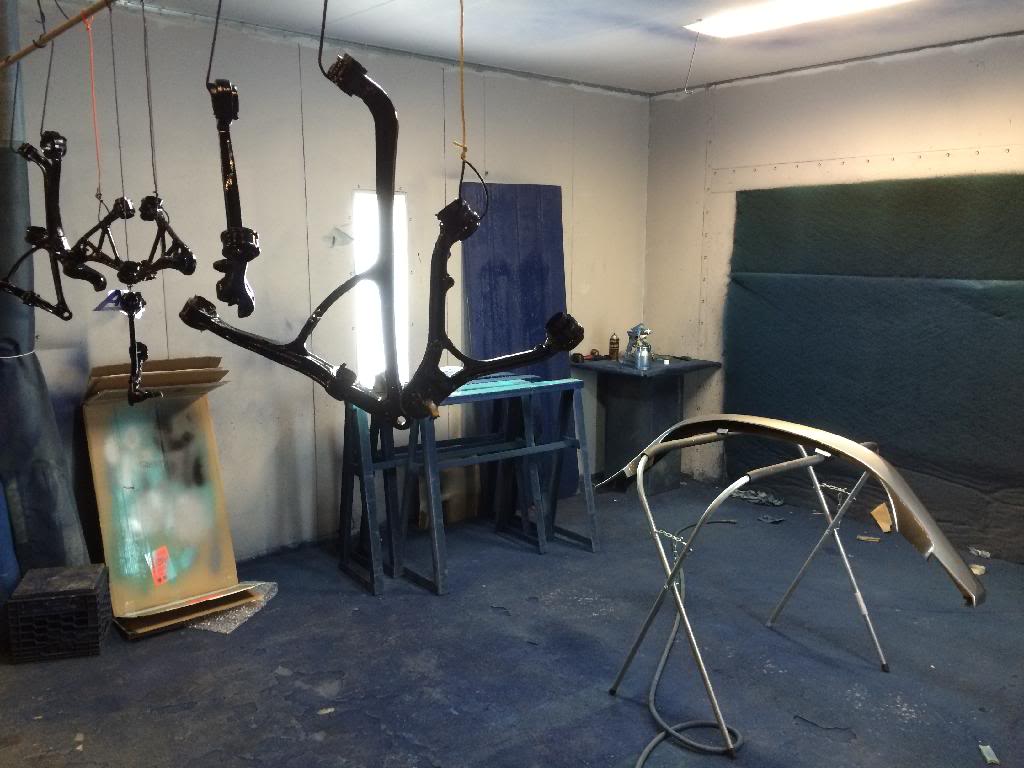
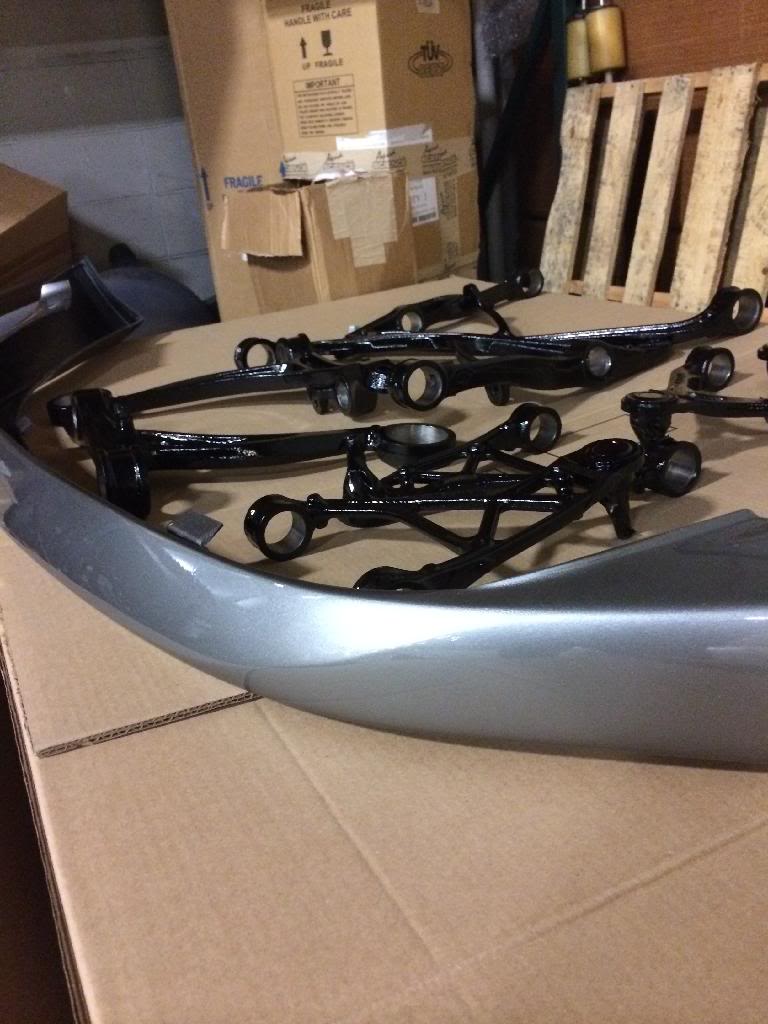
Sunday was on to the business of painting the suspension arms and Gears lip...

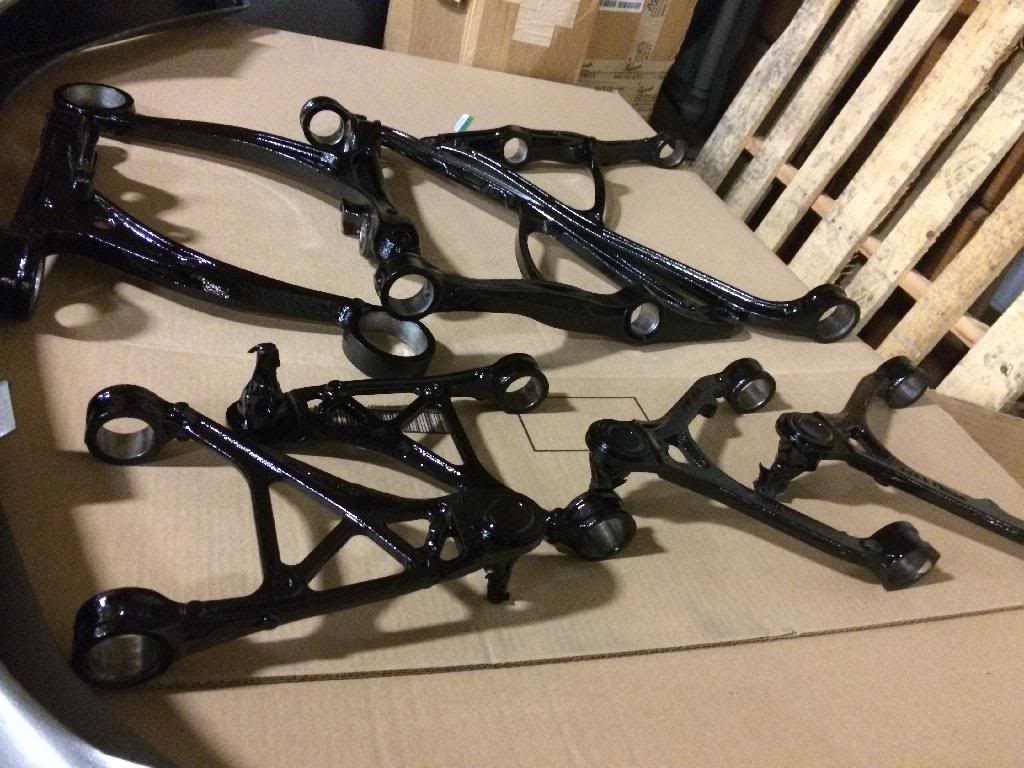
Here they are after the wire wheel acid and parts cleaner wash...
Name:  A8E57812-8F3F-4EFA-9FE7-12E8137AC005_zpsx0s2zecq.jpg
Views: 615
Size:  96.2 KB

Name:  C0EF45ED-6E9E-4411-85DB-1EA207CC6D14_zpsy99fopsu.jpg
Views: 610
Size:  100.2 KB

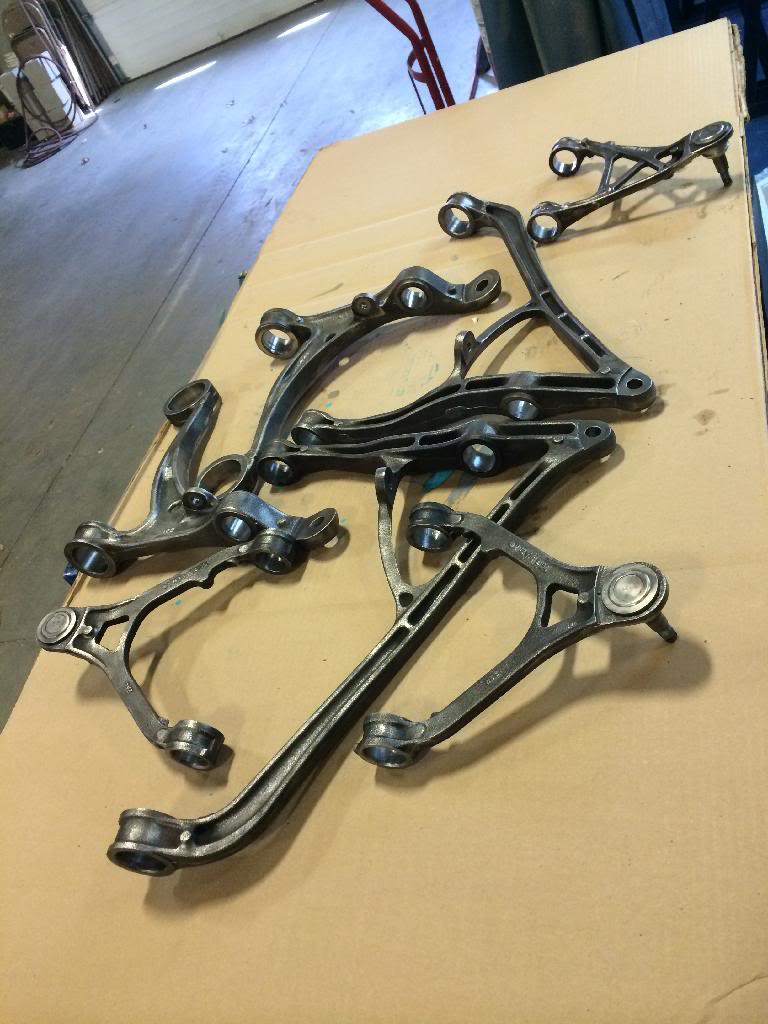
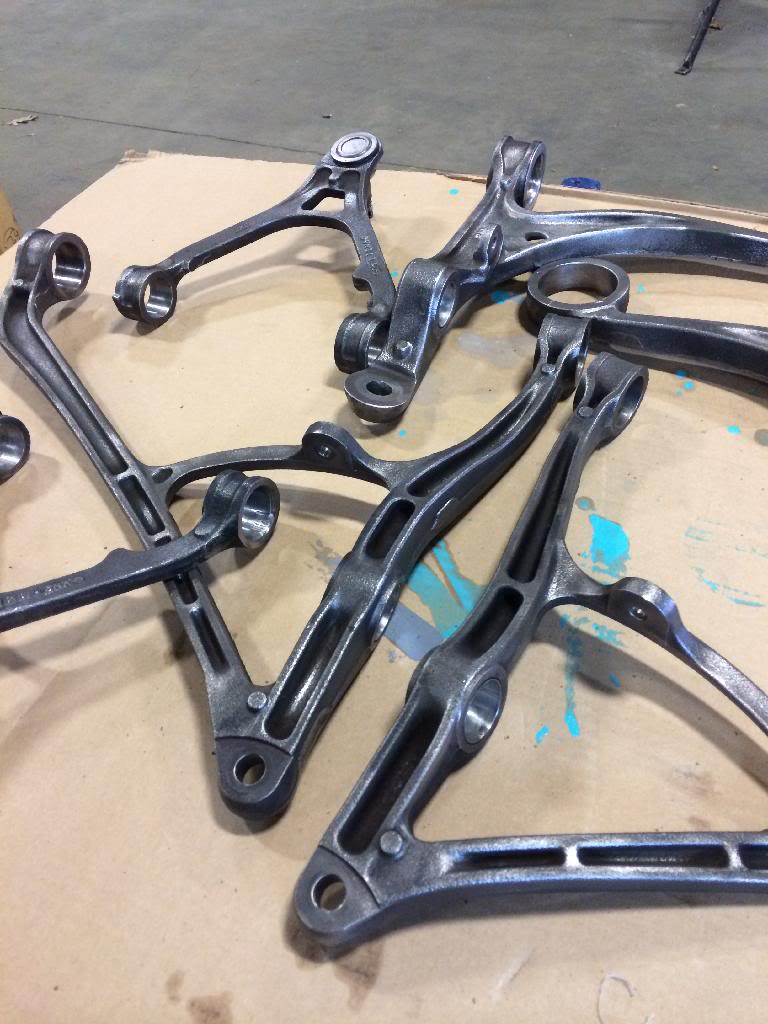
Each bushing bore was masked to keep the ID the same dimension allowing for a smoother bushing install.
Name:  E01426ED-1A6B-459E-A498-85BF85EC3FBA_zpsbuwczhbk.jpg
Views: 619
Size:  81.1 KB

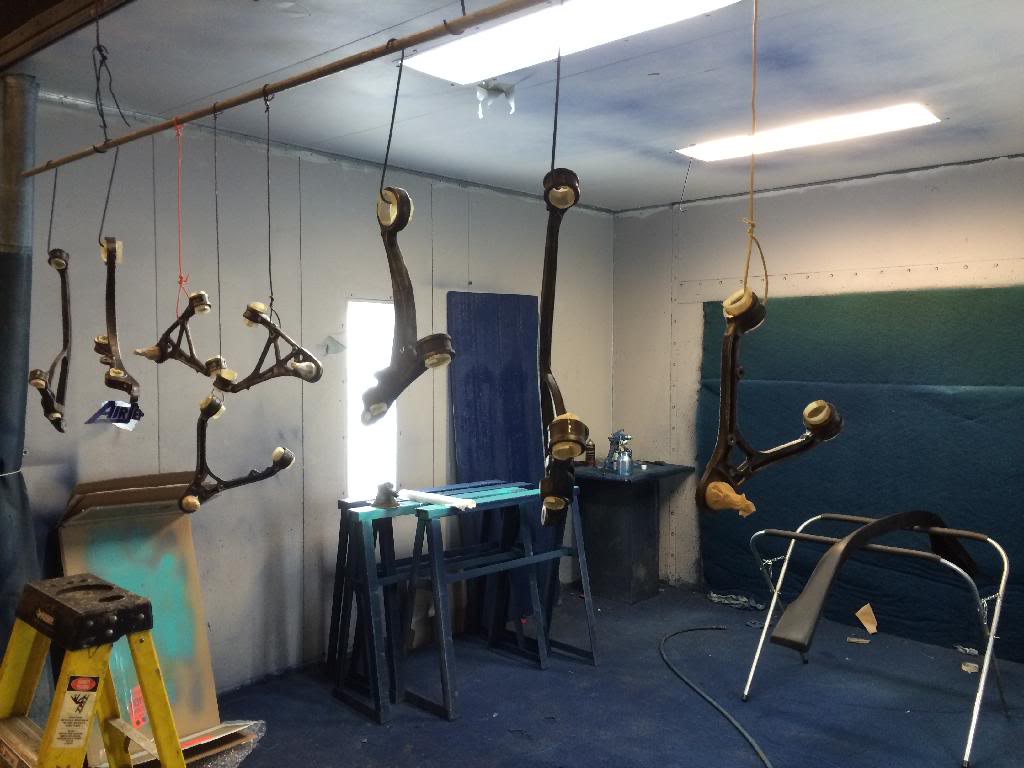
I laid 2 coats of primer then 3 coats of single stage black
Name:  B6F7B0FE-A796-4C89-B0D7-373EB77F96BB_zpspxpgoti7.jpg
Views: 614
Size:  85.7 KB

Name:  ED0E891F-67F3-4D7E-A0D9-E21A556F51BA_zpsvxzlvtdd.jpg
Views: 642
Size:  110.8 KB

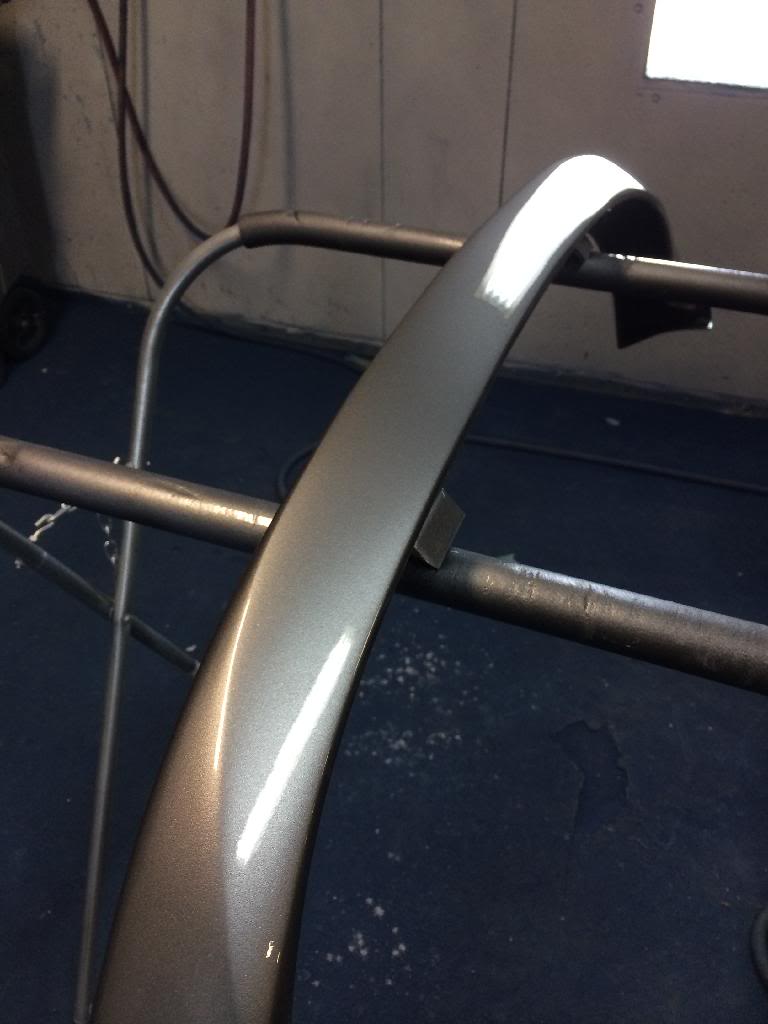
Next was the lip. I laid primer then the silver...
Name:  8F548ACC-07D6-4B47-A3B5-691E3733A681_zps7we4d2p1.jpg
Views: 617
Size:  82.3 KB

then of course clear...
Name:  635E599D-B2AF-4FBD-B04B-0A6A385F0BAF_zpswvevhbxe.jpg
Views: 615
Size:  53.4 KB

Name:  30B81420-D6BA-42C8-BE4B-252986F08081_zpsojggfwfz.jpg
Views: 619
Size:  84.9 KB

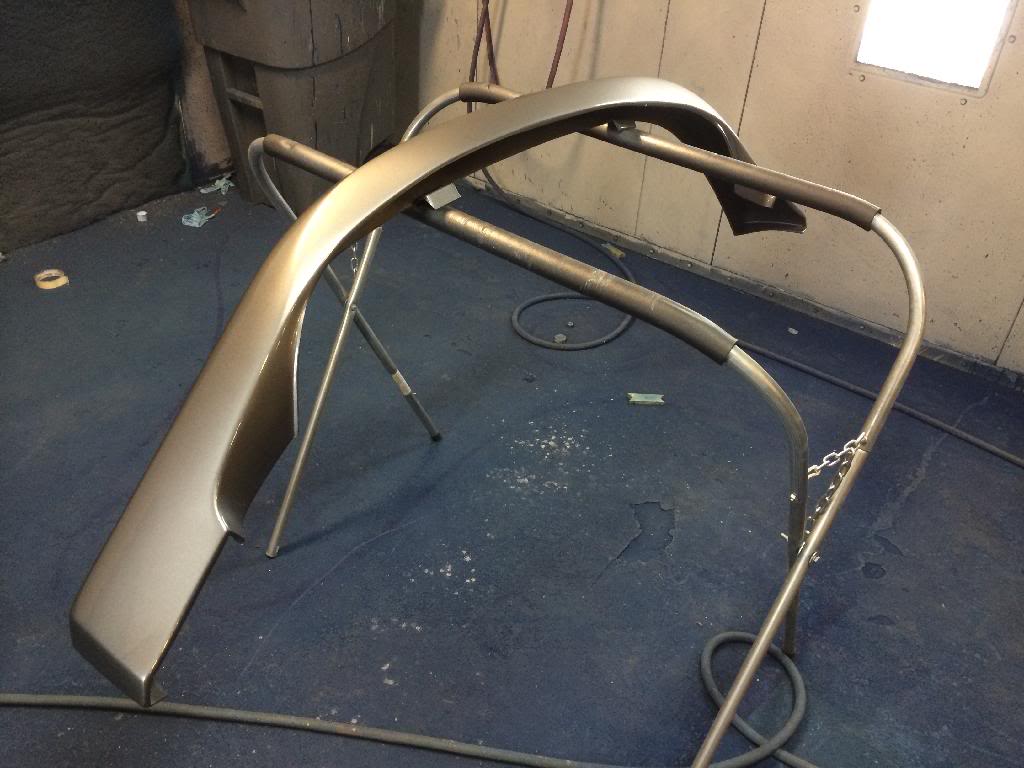
then let it all sit and wait to dry...
Name:  39A5354B-A334-445E-951E-1791AA5B77ED_zpsa9umtpzt.jpg
Views: 606
Size:  87.9 KB

Looking good this morning
Name:  913A9B44-6458-4B0C-905D-36700E5D462E_zps89sgxq89.jpg
Views: 612
Size:  91.2 KB

Name:  4171E5FB-74B6-4525-8D9A-8E43D7274386_zpswvi8vbms.jpg
Views: 614
Size:  108.6 KB

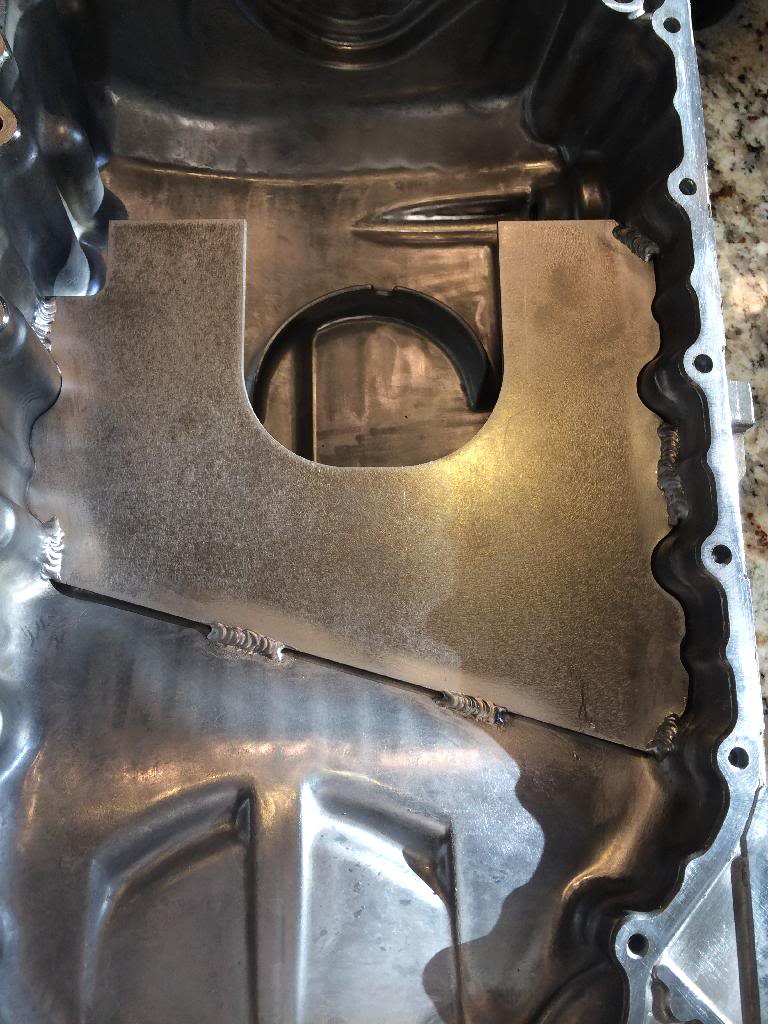
Oil pan baffle is getting welded today and I will start work on pressing the bushing in this week.

getting closer and closer to assembly!
Old 03-24-2014, 08:59 AM
  #125  
Registered User
 
s2sik's Avatar
 
Join Date: Dec 2006
Posts: 7,195
Likes: 0
Received 0 Likes on 0 Posts
Default

awesome progress. gears lip is my fav setup for the ap1 bumper.

you should color match the engine bay to the cage!
Old 03-24-2014, 09:01 AM
  #126  

 
matt96ex's Avatar
 
Join Date: Aug 2010
Location: Erie, PA
Posts: 343
Received 3 Likes on 3 Posts
Default

Wow, so awesome! Great work so far! Will be keeping an eye on this.
Old 03-25-2014, 01:37 AM
  #127  
Registered User

 
goofy's Avatar
 
Join Date: Oct 2010
Location: Netherlands
Posts: 560
Received 3 Likes on 3 Posts
Default

nice updates!
Old 03-25-2014, 07:36 AM
  #128  
Registered User

Thread Starter
 
SHG_Mike's Avatar
 
Join Date: Jun 2009
Posts: 591
Likes: 0
Received 10 Likes on 7 Posts
Default

Originally Posted by s2sik
awesome progress. gears lip is my fav setup for the ap1 bumper.

you should color match the engine bay to the cage!
I'm not fancy enough for that...


Originally Posted by matt96ex
Wow, so awesome! Great work so far! Will be keeping an eye on this.

Originally Posted by goofy
nice updates!


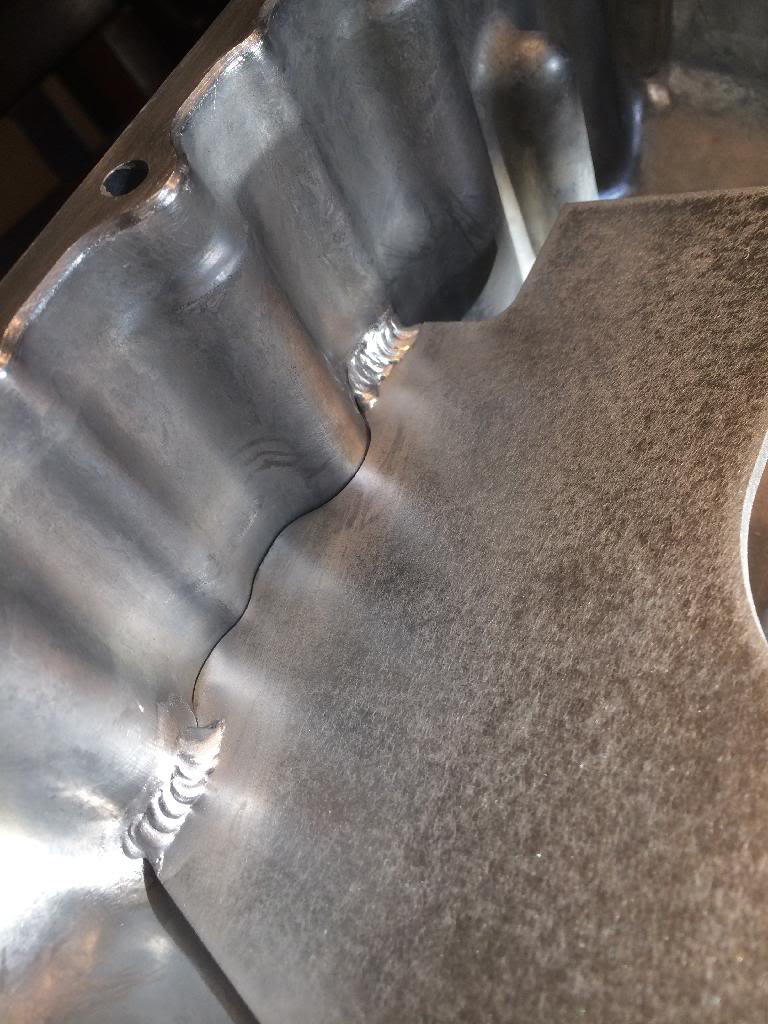
So after quite a lengthy delay from trackforged I got my oil pan baffle in.
Name:  347D8144-5E77-4E0E-8299-1EE0FA0301D3_zpsrxwmtaxt.jpg
Views: 619
Size:  119.8 KB

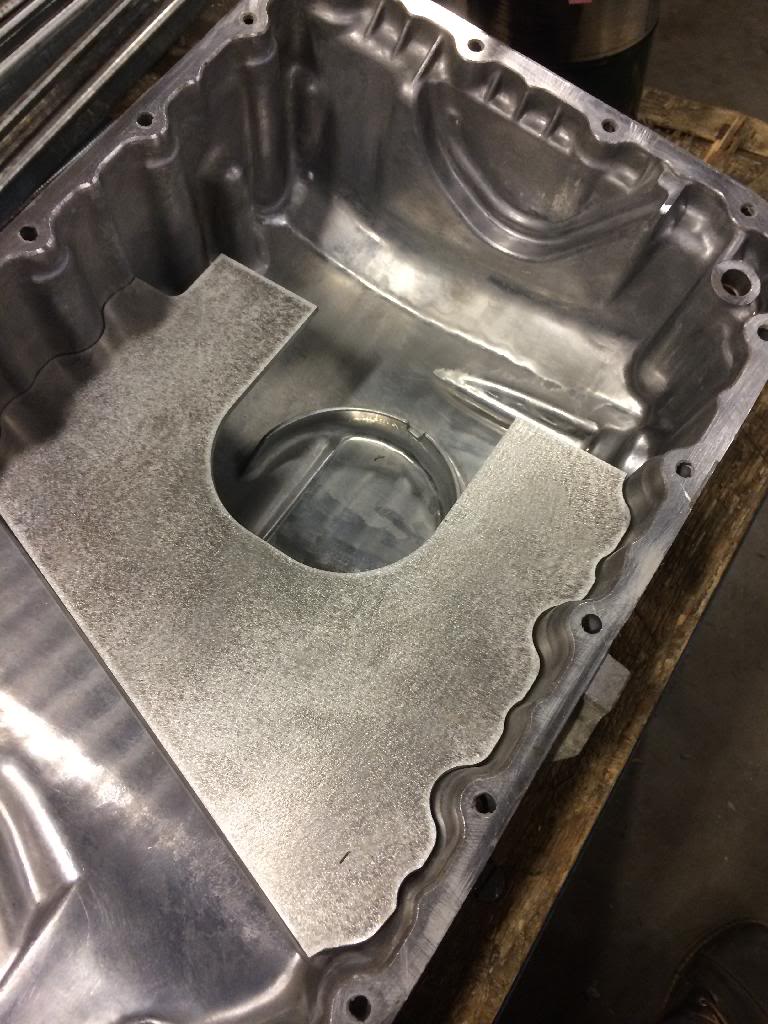
I had SHG EasyE over and he laid some beads

Name:  1A4843BD-73CD-47C3-986F-615808E3C555_zpsmocmnjik.jpg
Views: 620
Size:  120.4 KB

Name:  F1EAF4D1-2A2D-401E-9142-A2617CCF1ED5_zpshina8cys.jpg
Views: 612
Size:  106.8 KB
Old 03-25-2014, 07:56 AM
  #129  

 
//steve\\'s Avatar
 
Join Date: Sep 2006
Location: ATL
Posts: 10,465
Likes: 0
Received 49 Likes on 36 Posts
Default

Did you start with a brand new pan?
Old 03-25-2014, 08:00 AM
  #130  
Registered User

Thread Starter
 
SHG_Mike's Avatar
 
Join Date: Jun 2009
Posts: 591
Likes: 0
Received 10 Likes on 7 Posts
Default

Nope, thoroughly cleaned with solvent and then torched for 10-15 mins. Have used this method on 2-3 race cars with zero issues.


Quick Reply: SoHonda Garage. S2000 Build


All times are GMT -8. The time now is 09:28 AM.