When you click on links to various merchants on this site and make a purchase, this can result in this site earning a commission. Affiliate programs and affiliations include, but are not limited to, the eBay Partner Network.
I've gotten a number of PM's about the "HeCash Brake Ducts" listed in my signature, so I thought I'd post a thread on it. First off, Harry's not in the business of making or selling a brake duct kit. He was, however, a source of a great deal of useful advice to me when I was making my own brake ducts (thanks, Harry). In addition, I borrowed ideas from Tedster and The Reverend (thanks, guys).
The basic approach involves running 3" silicone ducting, using NACA ducts attached to the back of the faux brake ducts, routed into the wheel-well and down the lower control arm -- as described in Tedster's thread:
The parts for this included 2 small NACA bumper ducts and silicone ducting from Racer Parts Wholesale (http://www.racerpartswholesale.com/), stainless steel clamps, zipties, and some miscellaneous hardware (to attach the NACA ducts to the faux ducts) from my local hardware and autoparts stores, and one part, as described below, from Wick's Aircraft Supply.
The last part I picked up from The Reverend's thread which suggested using aluminum flanges from Wick's Aircraft Supply to attach the ducting to the dust shields:
In terms of installation, it's pretty straightforward. To remove the bumper, go to Rick's website and check out the instructions for installing clear-corners. That's the best guide for the bumper removal -- and it's REALLY easy (thanks, Rick!).
The rest of the steps and a few tips include:
1. Open the faux brake ducts with a dremel tool (or a drill with a grinder wheel, which is how I did it). Be careful not to muck up your paint.
2. Cut the NACA ducts using a SAW (they'll split if you try to trim them with sheetmetal scissors!) such that they overlap the outer lip of the faux inlets by an inch or so. Unlike HeCash, I attached mine using nuts and bolts where the NACA duct pushed onto the faux opening lip from BEHIND the bumper, as opposed to trying to get them to match up exactly at the lip of the faux ducts. That gives a more secure connection, is more forgiving in terms of tolerances, and doesn't require HeCash's degree of skill. You can paint your nuts black or silver if you don't want them to show.
3. Routing the ducting through the nosecone is a bit tough, but flex the wheelwell liner a bit and you'll get it to fit. It's easier to partially remove the liner, compress the duct behind the triangular brace, and then reattach the liner once the duct's been run behind the triangular brace That also seems to minimize volume loss in terms of compressing the ducting.
4. Be absolutely sure to enter the wheelwell as far INboard as possible. I also went as "high" as possible and then compressed the duct into an oval shape in order to clear my 225 front tires. I get about a half inch of clearance with me in the car, and I don't have any rubbing problems, but it's necessary to ziptie the ducting to the sway bar and to pull is as far DOWN as possible. Were I to do it over again, it might have been better to enter the wheelwell lower, but my setup works, and I didn't want to cut more than one hole in the liner.
5. Cut the dust shields to a full three inch opening. Unlike the Revered, I mounted my flanges with the lip on the INSIDE of the shield, which seems to offer the possibility of being a more secure attachment (if the rivets come loose, the tension of the ducting will keep them snug). Also, I think it's important to open the shield to a full 3" to allow ALL the air to flow into the vent. Attaching the flange to the existing holes in the dust shield probably results in a large loss of airflow, but I don't have any data to make a clear-cut case for it.
6. Cut the ducting with just enough length to extend to the shield at full lock with the tire jacked up without being pulled too tightly. Once the car is lowered, it'll have the right amount of tension in the ducting.
7. I only had to ziptie the ducting in one place -- to the sway bar -- as it sits nicely along the lower control arm as it runs to the dust shield. I found it easier to attach two zipties to the sway bar brace (on each side -- two for safety) and then to attach two zipties from those to the duct itself.
That's about it. Good luck to those of you who hoe this row. I'll try to post some pictures, but I've got a lot going on and may not get to it for a while. The Reverend's thread has a link to some good snaps.
CB
Here are the shots I promised to post....
Shot of the nosecone removed with the driver's side ducting visible:
Shot of the ducting routing through the passenger-side wheel well:
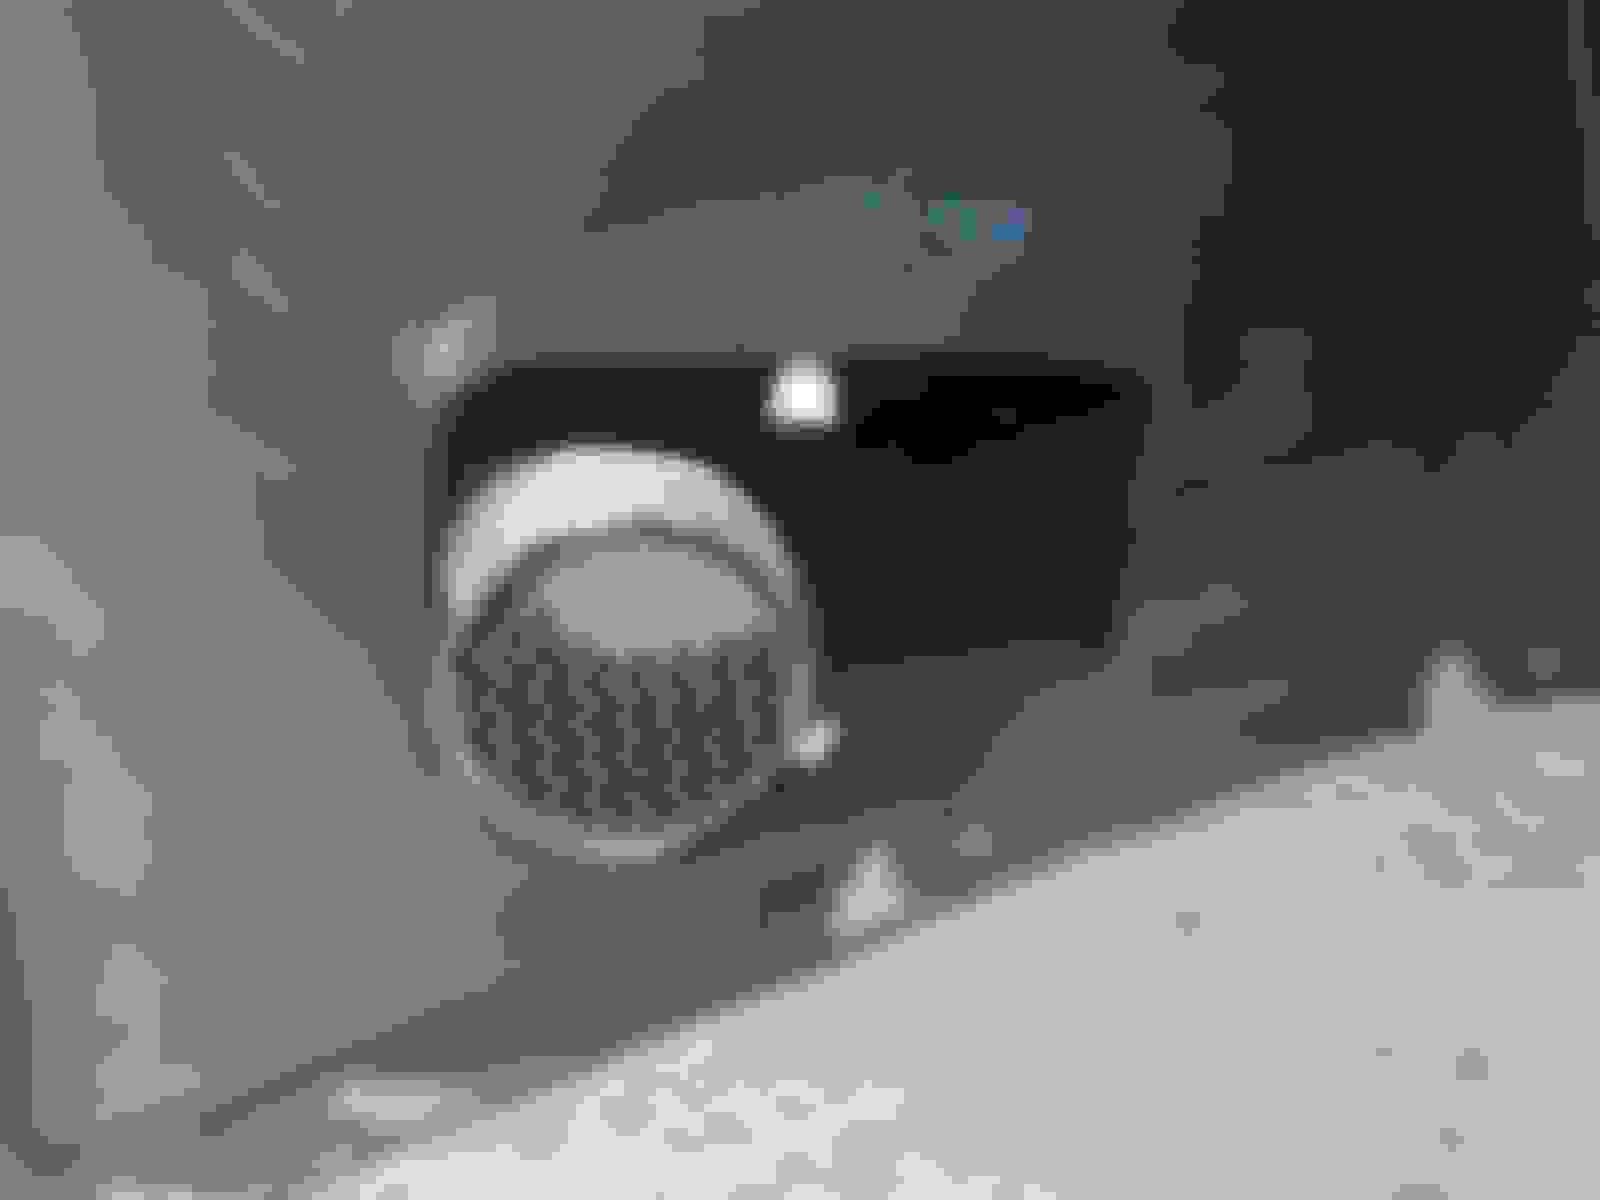
Shot of the inside of the nosecone. Note that I later removed the wire screens because it was not possible to install the ducting over top of them (but it was a nice idea):
Shot of the front bumper with the NACA ducts installed:
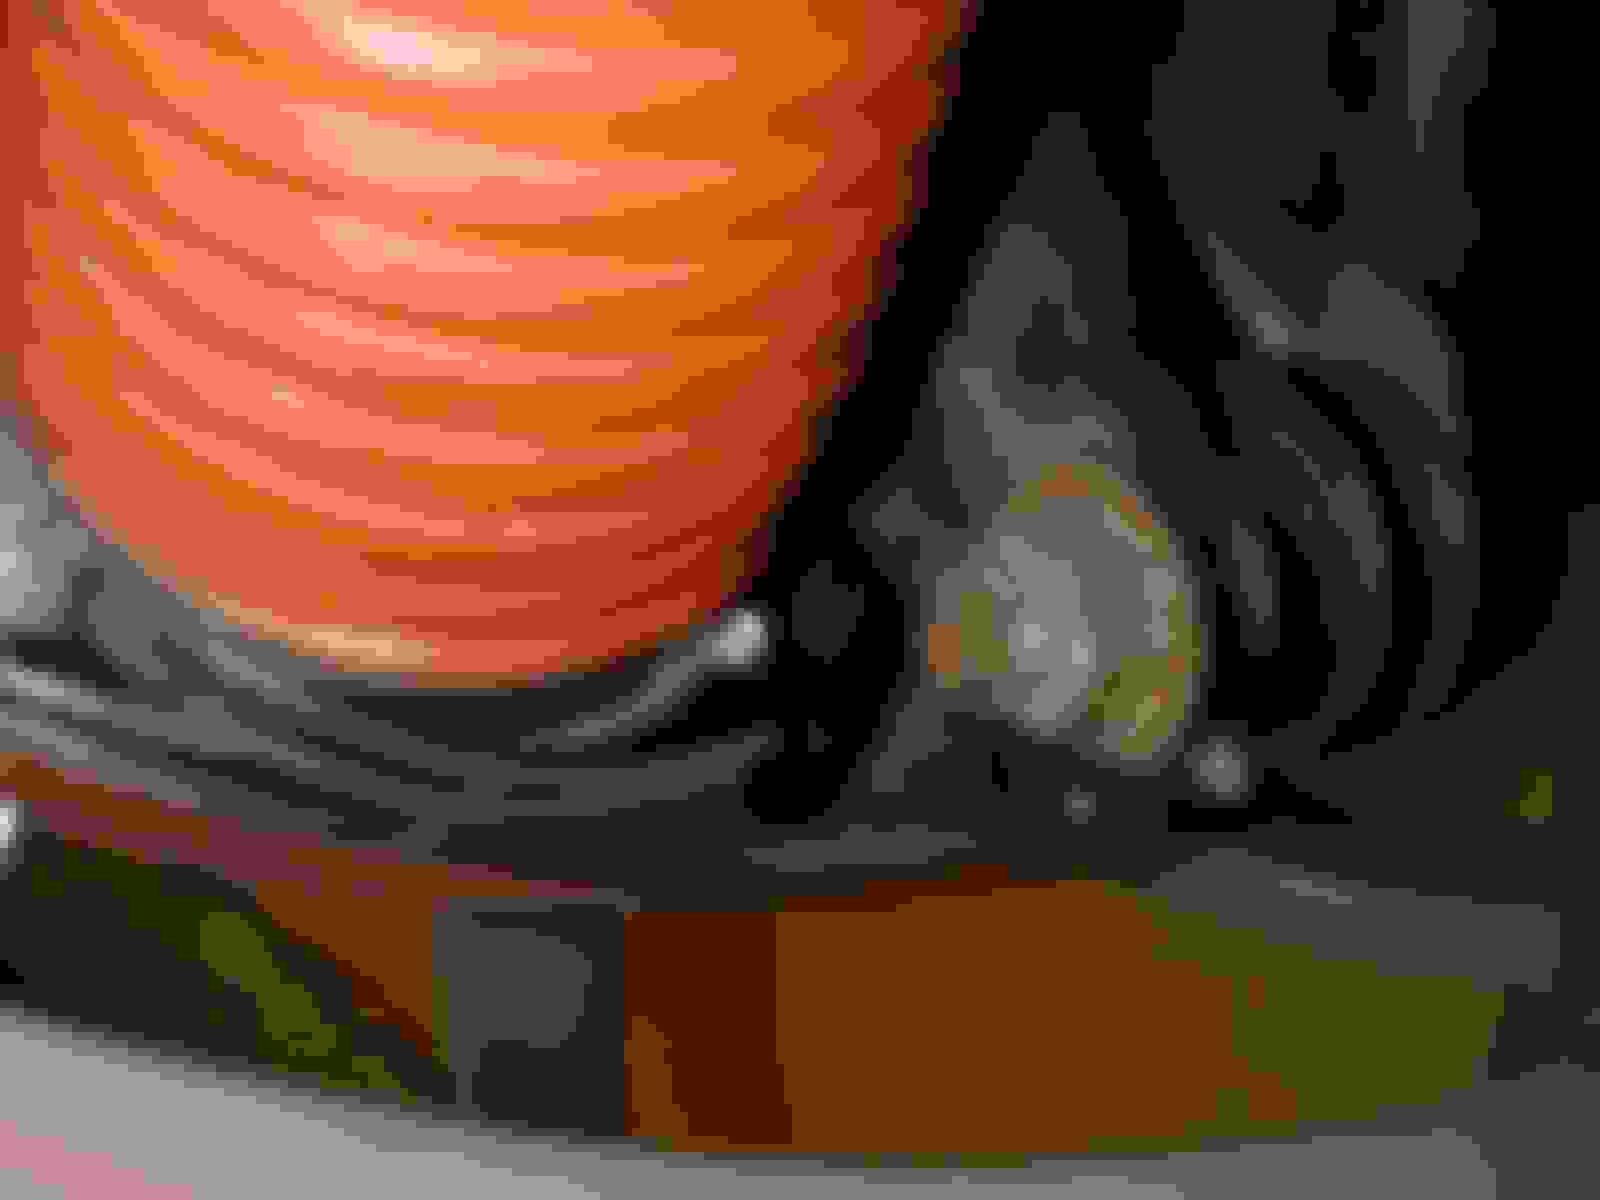
Shot from inside the wheel well showing the duct attached to the dustshield:
Shot through the wheel showing the duct attached to the dustshield:
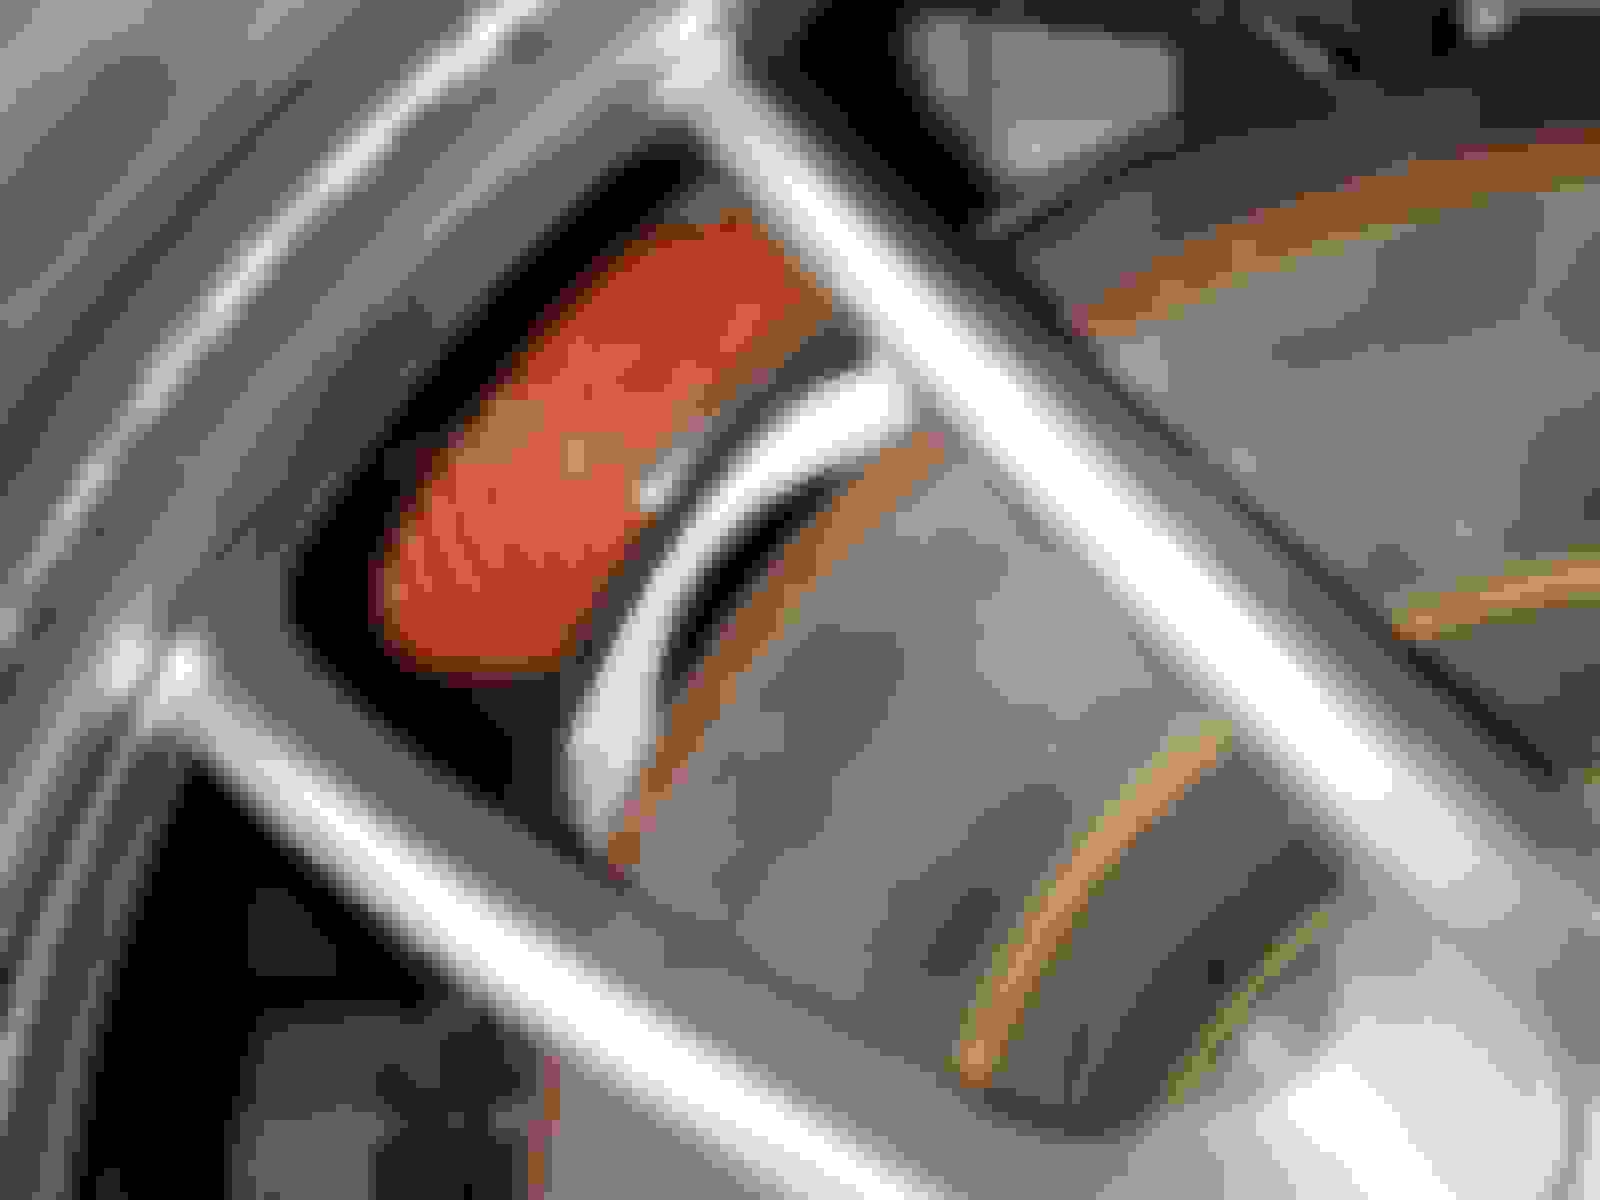
Shot of the ducts installed (and my cool new stainless grill that I installed to protect in the intercooler):
And a final beauty shot just 'cause it looks nice:
I've been meaning to do a full write-up on my website for some time now, but I've just been too busy. But I did snap a few pics when I did mine, so you can refer to those as illustrations to what CB just posted...
BTW, I finally did install some brake ducting. I went with 2" hose, on the theory that I'm not really overheating my brakes, and some cooling is better than none.
I used a 2" hole saw on the faux brake duct panels in the bumper and on the dust shields, and a 2.5" hole saw on the fender liner. I found some 2" aluminum vent duct flanges that were a perfect fit through the 2" holes and into the hose, and used worm-gear hose clamps to hold the hose onto them.
It took quite a bit of work to route the hoses just right to clear my 235 RA-1s; 3" hose might have been impossible for me. The right and left sides were slightly different.
I think I will eventually get a NACA duct to fill the entire faux brake duct openings and funnel more air into the hose.
Thanks again to everyone who posted ideas, tips, and pictures.
Great idea to compile this in one location. Thanks to all who contributed- cbender, Reverend, Harry, and Tedster. I was hoping there might be a little more info on Harry's rear ducting configuration. The air inlet nozzle for the rear that he created was very ingenious. A few pics and parts used would be very helpful. Not that I think it is an absolute necessity, but since the rear disks are solid, I figure they could do with all the help they can get.
Harry may disagree, but there seems to be consensus that provided you're not among the very most serious track junkies running ducting to the rears isn't really necessary. If you're overheating your rears, you might want to contact DavePK about switching to vented rear rotors or Soeren about his kit for getting air to the rear rotors.
I don't think I'm overheating them, but I had some hose left over and I thought it couldn't hurt to run a little more cooling back there. Davepk was using the Pinnacle 'wave' rotors. I am sceptical about using less surface area, but I suppose I shouldn't knock it until I have tried it.
I thought he was trying to adapt vented rotors in the rear. To my mind, vents will make the most difference, but that's more than I want to get into (and something I don't see a need for). But Soeren has a nice kit for sale for the rears. You might PM him about it. Just my two cents.
Davepk was using the wave rotor on his previous set up. The new rear system he has spawned will indeed have the vented 2-piece rear rotors. I shall PM Soeren, thank you.
 07-17-2003, 06:22 PM