My DIY homemade splitter
 11-20-2008, 06:16 AM
#1
Registered User
Thread Starter

Join Date: Nov 2007
Posts: 1,252
Likes: 0
Received 0 Likes
on
0 Posts
PM ME FOR DETAILS ON GETTING A TEMPLATE OF THIS DESIGN!
So i always looked at the APR splitter and it just seemed like alot of money for such a simple/small amount of product your getting and decided to try and make my own.
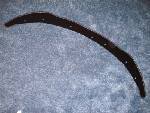
I used a big piece of cardboard to make my template. I jacked the car way up and set it on jackstands, propped the carboard under the front bumper with a jackstand in the middle and painters tape to hold up the edges. Using a black marker i traced the front bumper line onto the cardboard, kinda visualized how far i wanted the splitter to stick out from that line and did a few simple measure ments and cut it up, this is what i had when finished cutting.
poor quality blackberry pic

i then traced that onto a sheet of wood paneling. I got a huge sheet of it at Lowe's for 11 bucks i think. You want to get the kind thats painted white on one side and just plain on the other side(painted white on both sides would be better for water resistance, but id paint it black either way).
I cut my first one with a rotozip and that is garbage! Heres how the first came out. You cant really tell but the edge is terrible(im sure its easier if your a rotozip master technician)

My Second try i used a reciprocating saw/jig saw and it worked perfectly and took 1/2 the time the rotozip took.

After you cut it up, just smooth ur edges, i used a low grit belt sander for the edges and a orbital sander for the surfaces just to ruff them up for paint. I then put the splitter on the car using the jackstand and painters tape and started to mark/drill my holes. Im going to be attaching the front of the splitter to the OEM lip and the back part of the splitter will just be randomly bolted in using huge washers and longer than original 10mm bolts into the original 10mm holes for the splash guards. Im not putting to much care into attaching it because i dont know how long this wood will last.
So at the moment im waiting for my paint to dry so i can apply my polyurethane sealer.
Once thats dry im putting one of those door protecter trim kits around the front of the lip for more protection against rocks/water/debri.
 [SIZE=14]<span style='font-size:21pt;line-height:100%'><span style='font-family:Courier'></span></span>
So i always looked at the APR splitter and it just seemed like alot of money for such a simple/small amount of product your getting and decided to try and make my own.
I used a big piece of cardboard to make my template. I jacked the car way up and set it on jackstands, propped the carboard under the front bumper with a jackstand in the middle and painters tape to hold up the edges. Using a black marker i traced the front bumper line onto the cardboard, kinda visualized how far i wanted the splitter to stick out from that line and did a few simple measure ments and cut it up, this is what i had when finished cutting.
poor quality blackberry pic
i then traced that onto a sheet of wood paneling. I got a huge sheet of it at Lowe's for 11 bucks i think. You want to get the kind thats painted white on one side and just plain on the other side(painted white on both sides would be better for water resistance, but id paint it black either way).
I cut my first one with a rotozip and that is garbage! Heres how the first came out. You cant really tell but the edge is terrible(im sure its easier if your a rotozip master technician)
My Second try i used a reciprocating saw/jig saw and it worked perfectly and took 1/2 the time the rotozip took.
After you cut it up, just smooth ur edges, i used a low grit belt sander for the edges and a orbital sander for the surfaces just to ruff them up for paint. I then put the splitter on the car using the jackstand and painters tape and started to mark/drill my holes. Im going to be attaching the front of the splitter to the OEM lip and the back part of the splitter will just be randomly bolted in using huge washers and longer than original 10mm bolts into the original 10mm holes for the splash guards. Im not putting to much care into attaching it because i dont know how long this wood will last.
So at the moment im waiting for my paint to dry so i can apply my polyurethane sealer.
Once thats dry im putting one of those door protecter trim kits around the front of the lip for more protection against rocks/water/debri.
[SIZE=14]<span style='font-size:21pt;line-height:100%'><span style='font-family:Courier'></span></span>


 11-20-2008, 06:33 AM
#4
Registered User
Thread Starter
Join Date: Nov 2007
Posts: 1,252
Likes: 0
Received 0 Likes
on
0 Posts
so i got the black base on, now to sand and seal with clear polyurethane!

Im actually thinking about using this one as a mold, and remaking a few in fiberglass/carbon, i could crank out 2 or 3 of these a day....hmmmmmmmm
Im actually thinking about using this one as a mold, and remaking a few in fiberglass/carbon, i could crank out 2 or 3 of these a day....hmmmmmmmm
11-20-2008, 07:00 AM
#6
Registered User
Thread Starter
Join Date: Nov 2007
Posts: 1,252
Likes: 0
Received 0 Likes
on
0 Posts
well, i saw a picture in a magazine of skunk2's shop and a guy working on a rsx i believe it was, and in the background were 2 or 3 wooden (plywood) front splitters so i was like wow! if skunk2 does it...why not? lol
but we will see how long this lasts...if it lasts ill keep it, if not, the next will be made out of a plastic sheet/sign material or fiberglass.
Lip protector installed, definitely looks legit now lol

but we will see how long this lasts...if it lasts ill keep it, if not, the next will be made out of a plastic sheet/sign material or fiberglass.
Lip protector installed, definitely looks legit now lol
11-20-2008, 07:16 AM
#7
Registered User

How rigid is that stuff? If the splitter is actually adding any downforce, I would expect wood panelling to flex too much to be effective/consistent. I'd definitely want a fiberglass/CF/aluminum one.
Trending Topics
 11-20-2008, 07:32 AM
#9
Registered User
Thread Starter
Join Date: Nov 2007
Posts: 1,252
Likes: 0
Received 0 Likes
on
0 Posts
yea its alittle flimsy but only if u hold out say 2 feet then its gonna bend, but it sticks out 1 1/2 inch, it definitely wont flex that small amount coming out unsupported. The only reason it makes downforce is because it smooths out the air flow underneath the car, creating a suction of sorts...as long as its firmly attactched to the car it will do its job.
I prefer wood because once it breaks i can just replace it, aluminum is more expensive and will bend and just look bad, i'd rather it break off all together than drive around with a bent up aluminum sheet under my bumper...but to each his own.
Thats nice BTW Blacknot! really subtle too
I prefer wood because once it breaks i can just replace it, aluminum is more expensive and will bend and just look bad, i'd rather it break off all together than drive around with a bent up aluminum sheet under my bumper...but to each his own.
Thats nice BTW Blacknot! really subtle too