My naked S2000 (PICS, 56k should avoid)
 03-24-2008, 05:41 AM
#1

Thread Starter
Join Date: Sep 2005
Location: Montreal, Qc
Posts: 452
Likes: 0
Received 0 Likes
on
0 Posts
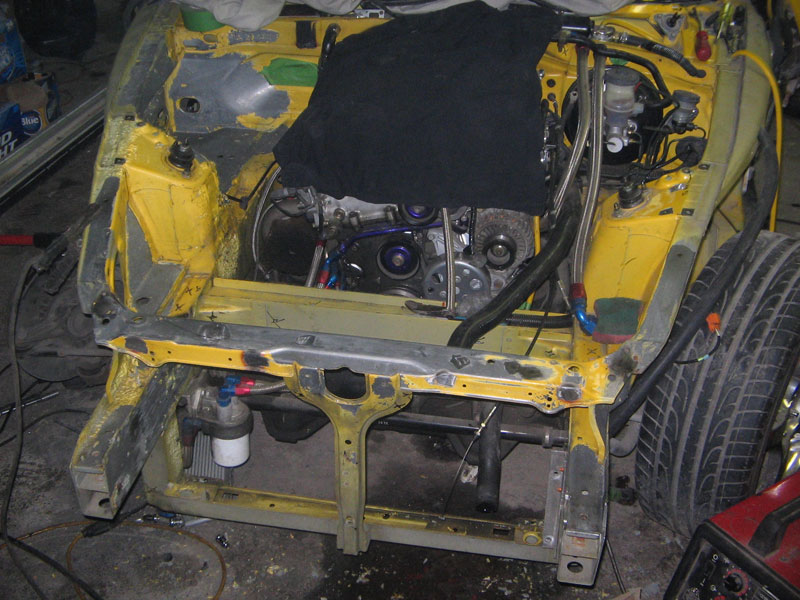
This is our latest project on the S2000. It's a GT35R bottom mounted custom turbo kit with a PWR water-air intercooler. This is the engine bay when presented at the NOPI Nationals (Atlanta, GA) in September 2007:
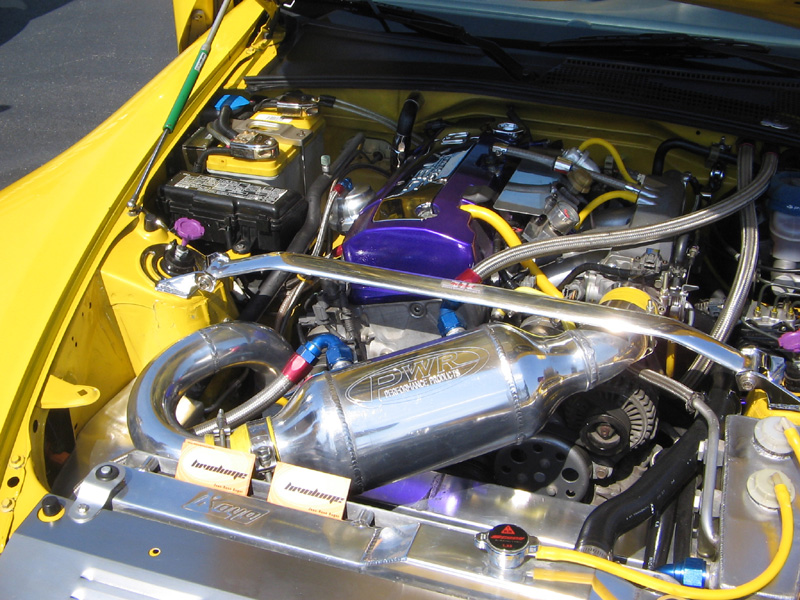
For spring, we're completing the wire tuck, relocating the ABS, the fuse boxes, the battery, the P/S controller and A/C lines.
Not a project for the weak hearted.
(more photos to come)
For spring, we're completing the wire tuck, relocating the ABS, the fuse boxes, the battery, the P/S controller and A/C lines.
Not a project for the weak hearted.
(more photos to come)
 03-24-2008, 05:56 AM
#2
Thread Starter
Join Date: Sep 2005
Location: Montreal, Qc
Posts: 452
Likes: 0
Received 0 Likes
on
0 Posts
The initial tear down.
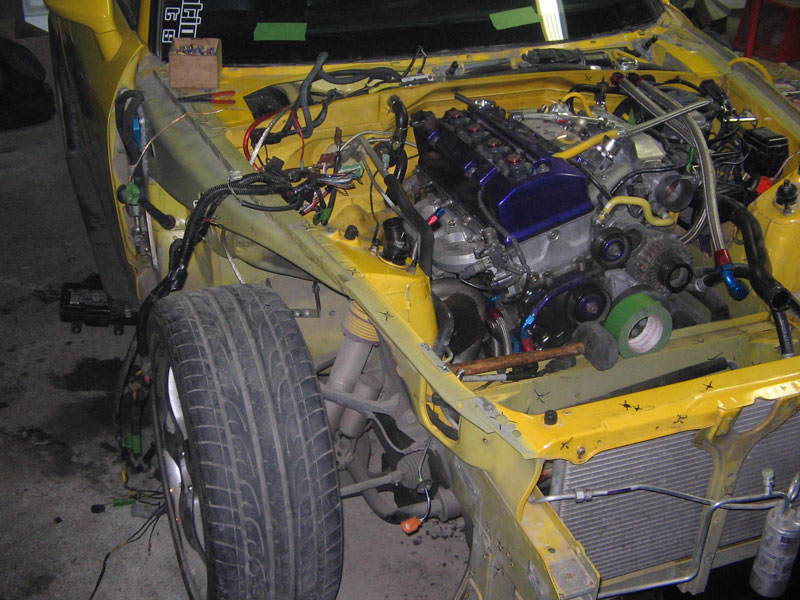
No more ABS (will be relocated):
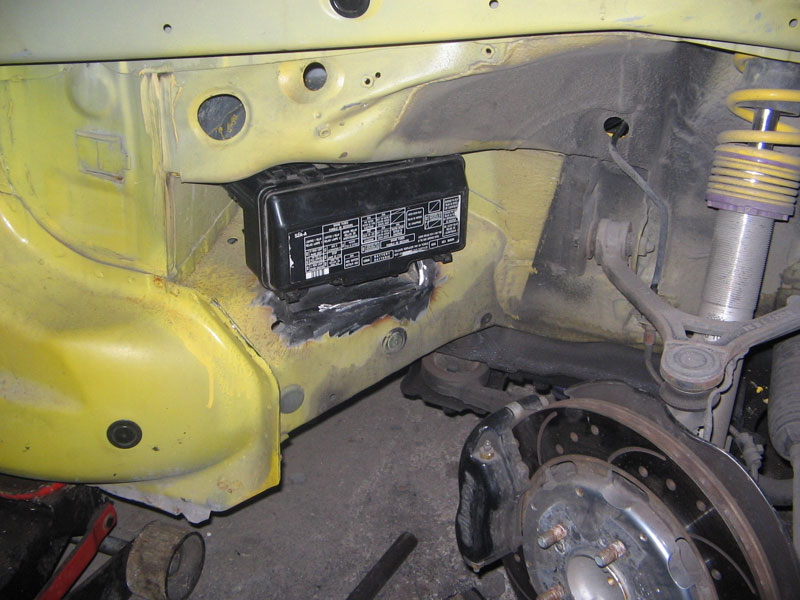
The frame was notched slightly to place the fuse box on the passenger side. This is the first fitment.
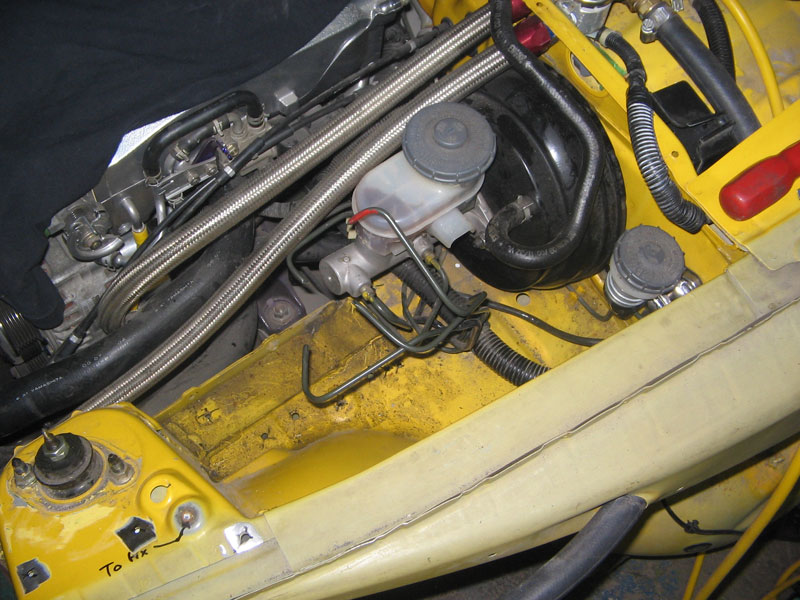
The paint stripping process has been started.
No more ABS (will be relocated):
The frame was notched slightly to place the fuse box on the passenger side. This is the first fitment.
The paint stripping process has been started.
03-24-2008, 06:03 AM
#3
Thread Starter
Join Date: Sep 2005
Location: Montreal, Qc
Posts: 452
Likes: 0
Received 0 Likes
on
0 Posts
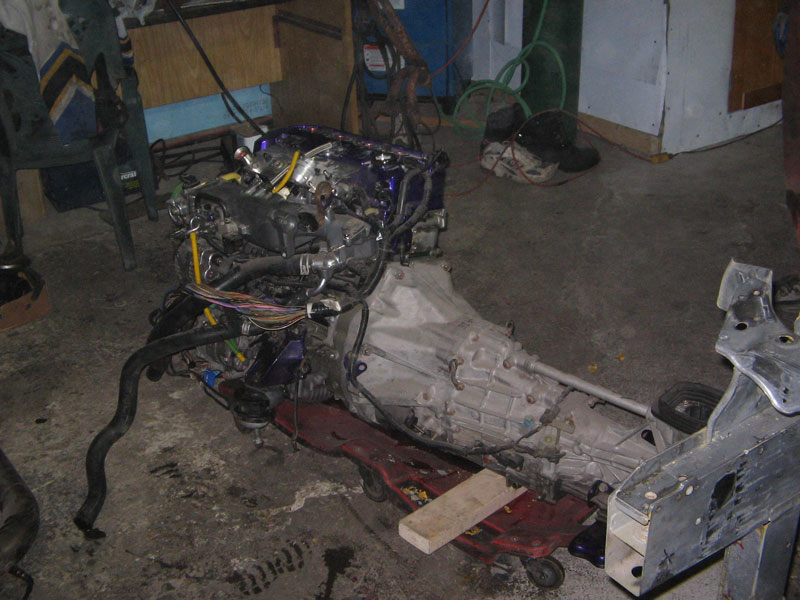
We dropped the crossmember subframe to pull the engine out from under the car rather than from the top. Turned out to be a time saver.
The majority of the paint is stipped from the engine bay. Note that all the useless holes will be welded. Some already are welded as seen on the upper radiator subframe.
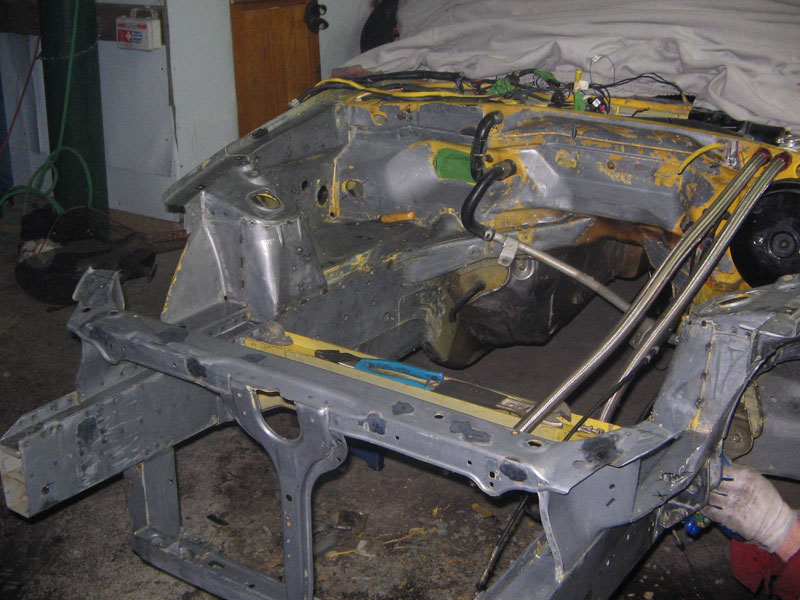
The majority of the work is scraping the the glue and undercoating to get to the bare metal. The suspension brackets are a pain to clean up.

The majority of the paint is stipped from the engine bay. Note that all the useless holes will be welded. Some already are welded as seen on the upper radiator subframe.
The majority of the work is scraping the the glue and undercoating to get to the bare metal. The suspension brackets are a pain to clean up.


Trending Topics
 03-24-2008, 06:16 AM
#9
Thread Starter
Join Date: Sep 2005
Location: Montreal, Qc
Posts: 452
Likes: 0
Received 0 Likes
on
0 Posts
Your comments on this phase of the project are welcomed. We have a few ideas/goodies to show this weekend's progress, but I left the camera at the shop.
All the stripping was done with
Mar-Hyde (part #3711) Tal-Strip II. Steel wool and a scraper tool come also quite handy.
We considered sandblasting, but the masking time and sand cleanup outweighed the advantages. Plus Honda uses treated metal to limit oxydization (rust).
Once down to the bare matal, we treat the chassis with metal conditioner from Dupont (part #5717S). This is followed by a metal treatment by Dupont (part #5718S) primarily targetting areas which have been scratched or grinded.
We used a combination of MIG and TIG welding, whichever most appropriate. We TIG welding, avoid using paint stripper, power tools or even steel wool on the chassis. We've had sparks! Note that the EMS and battery should also be disconnected for obvious reasons!