Annual Berlina Detail - Finally get to use the stuff I bought from Detailer's Domain
 03-21-2013, 04:41 AM
#11
Moderator


Thread Starter
thanks bro 
 03-21-2013, 05:38 AM
#12
Community Organizer


Nice work. 
03-21-2013, 06:40 AM
#13
Moderator
Thread Starter
I try...it aint perfect, but it's a damn site better than it was
03-21-2013, 10:04 AM
#14
Community Organizer
Well, that's all you can ask for. Besides, if you drive the car (at all) it will never be perfect. The only way to have the paint be perfect is to keep it as a trophy. And that would be nothing short of S2000 blasphemy. 
03-21-2013, 10:36 AM
#15
Great work, I'm about to start on my second ever detail this weekend, just got some stuff in the mail today. Bought the car at the end of December and simply haven't bothered doing anything but a quick wash here and there. A couple 10+ hour trips and daily driving have really beaten on the paint over the last couple month, I really wish I had polished and waxed the car as soon as I bought it.
03-21-2013, 11:55 AM
#16
Moderator
Thread Starter
Woohoo! Red looks so good when polished. My buddy just picked up a red FRS...can't wait to get him hooked on the 
03-21-2013, 04:40 PM
#17
i hate black sooooo much. Told myself after my first black car "never again"(before I got into detailing) and now my S2000 is my 3rd. Even though it looks better than the day it was on the showroom, I want to paint it another color(apex blue)
03-22-2013, 06:44 PM
#19
Moderator
Thread Starter
Day 3 - Headlights and 2nd coat of wax
Work time: 3.5 hours
Taped up the car and got her prepped. Started off with 800 grit wetsanding, used the leftover Glide lube from the autoscrub kit
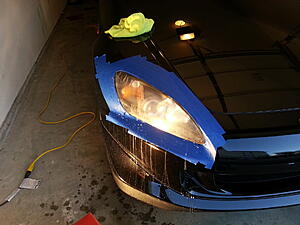
Moved to 1500 grit
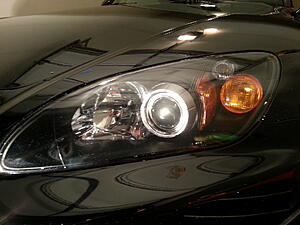
Realized that I didn't have any more 2000 grit, so I ran to Oreilly's and picked up some 2000 and 3000 grit paper and a Mother's headlight restoration kit to get into the tough areas. I usually will just use an aggressive pad with the porter cable and some Megs. Plast-X, but wanted to do the S right and get good into where the headlight notches into the front bumper...this turned out to be a poor choice...
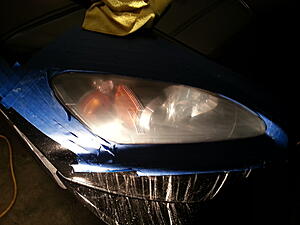
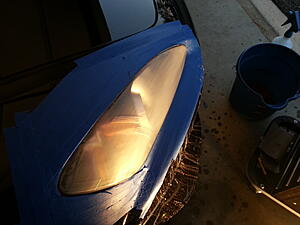
Thankfully, what looks like haze in the pic is just a reflection, but using the Mother's buffer with a corded drill turned out to be a bad choice. I put three small burn marks into the passenger side headlight by turning the polishing ball on its side to get the bottom edge of the headlight. This in turn required me to start all over, 800 grit all the way up to the 3000, then buff again. There were some residual sanding marks, so again, had to redo the whole headlight for a 3rd time. I finally was able to get an adequate finish by using my uber green pad and the mother's polish that was included in the kit
Running on fumes and fear, I opted out of going aggressive with the sanding again and stuck with a 1500/2000 sanding on the top portion of the drives highlight and then buffed it out with the green pad. It aint perfect, but it aint burnt either. I might try to reattempt when it warms up some.
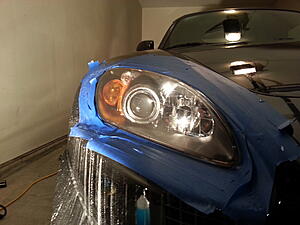
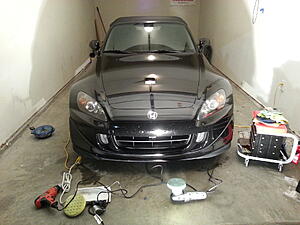
As she sits at 10PM EST
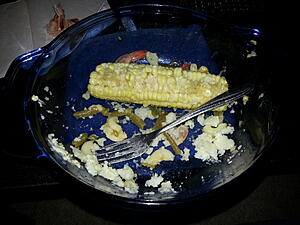
My wonderful fiance decided to bring me dinner. How awesome is she?! Shrimp and grits...southern style
Time to get back out there and put another coat of wax on her.
Work time: 3.5 hours
Taped up the car and got her prepped. Started off with 800 grit wetsanding, used the leftover Glide lube from the autoscrub kit

Moved to 1500 grit

Realized that I didn't have any more 2000 grit, so I ran to Oreilly's and picked up some 2000 and 3000 grit paper and a Mother's headlight restoration kit to get into the tough areas. I usually will just use an aggressive pad with the porter cable and some Megs. Plast-X, but wanted to do the S right and get good into where the headlight notches into the front bumper...this turned out to be a poor choice...

Thankfully, what looks like haze in the pic is just a reflection, but using the Mother's buffer with a corded drill turned out to be a bad choice. I put three small burn marks into the passenger side headlight by turning the polishing ball on its side to get the bottom edge of the headlight. This in turn required me to start all over, 800 grit all the way up to the 3000, then buff again. There were some residual sanding marks, so again, had to redo the whole headlight for a 3rd time. I finally was able to get an adequate finish by using my uber green pad and the mother's polish that was included in the kit

Running on fumes and fear, I opted out of going aggressive with the sanding again and stuck with a 1500/2000 sanding on the top portion of the drives highlight and then buffed it out with the green pad. It aint perfect, but it aint burnt either. I might try to reattempt when it warms up some.

As she sits at 10PM EST

My wonderful fiance decided to bring me dinner. How awesome is she?!
Shrimp and grits...southern style
Time to get back out there and put another coat of wax on her.
03-22-2013, 08:09 PM
#20
Moderator
Thread Starter

Only took an hour to hand wax her to perfection...the hood is like a liquid mirror

Don't forget to get in there! hehe

Interior to come...I'll check under the hood when she's freed from the garage tomorrow sometime.