Bonding rear number plate holder?
 10-27-2016, 01:22 PM
#1

Thread Starter
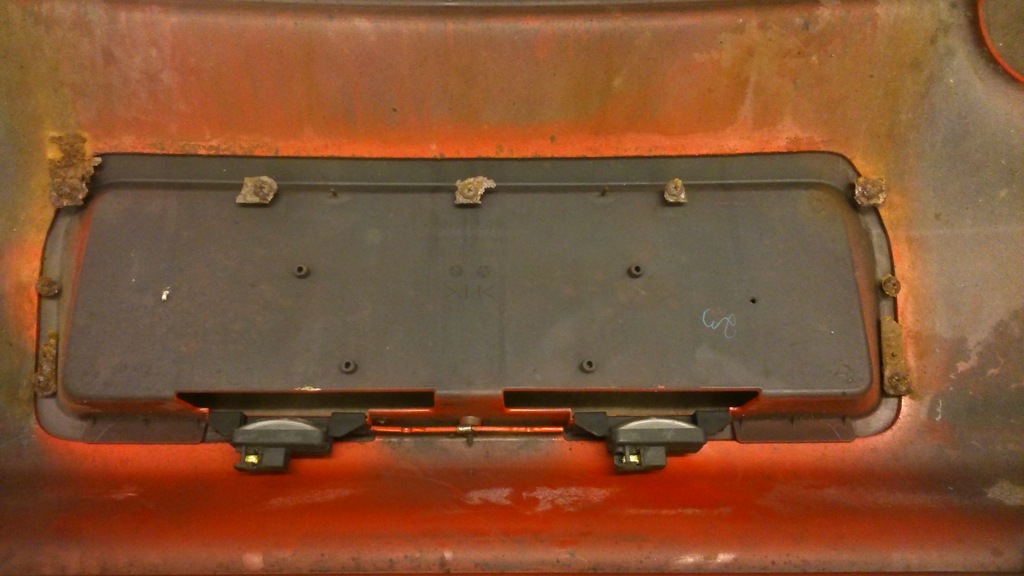
So my rear number plate has been loose for years now, thought I'd tackle the job this evening. I was thinking I would bond the non broken sections for additional support, read plenty of people doing this. However, I have NO bracket left, bottom or sides  The only think holding it on was the single screw at the top.
Has anyone successfully bonded on the holder with no brackets?
I successfully removed some of the screws so I could potentially fit new brackets, but some pulled the plastic tabs off, so may not be very effective, plus it's expensive!
Any suggestions?
The only think holding it on was the single screw at the top. Has anyone successfully bonded on the holder with no brackets?
I successfully removed some of the screws so I could potentially fit new brackets, but some pulled the plastic tabs off, so may not be very effective, plus it's expensive!
Any suggestions?

 10-27-2016, 02:02 PM
#2
P40 works well

 10-27-2016, 11:07 PM
#5
Thread Starter
Thanks guys, will give it a go tonight.
Which method did you use?
1) Apply sealant to holder and fix to bumper (I'm worried sealant will then squish out the sides onto the exterior facing of the bumper and look a right mess!!
2) Apply sealant to bumper and press on holder (potential for same problem)
3) Fix holder in places using duct tape on the ouside and apply sealant from inside, will the sealant get in-between the two mating surfaces though??
10-28-2016, 03:10 AM
#7
Registered User

Think this is what I'd do. Put a line on the bezel all the way round, thin enough that it won't come out when you press it on the bumper.
Trending Topics
10-28-2016, 01:17 PM
#8
Registered User

I would suggest
Lay the bezel in place using the one screw left that works.
mask around the bezel on the bumper so you line it back up and you have some protection from any sealant that oozes out.
Remove screw and apply sealant, then stick bezel the in place.
trim excess dry sealant with a sharp knife and then remove the masking tape for a clean finish

Thread
Thread Starter
Forum
Replies
Last Post
crazyspacepanda
UK & Ireland S2000 Community
6
09-13-2011 07:03 AM
s2000tim
UK & Ireland S2000 Community
7
03-28-2009 12:40 AM

