Matt's S2K Project Thread
 03-11-2017, 05:14 PM
#1

Hey Guys  Welcome to my S2K Project thread! As some of you may have spotted I came into S2K ownership last week and already I've become determined that a) this is going to be my project over the next couple of years to try and get it as mint as I can and b) I'm going to document the progress
So first of all the car:
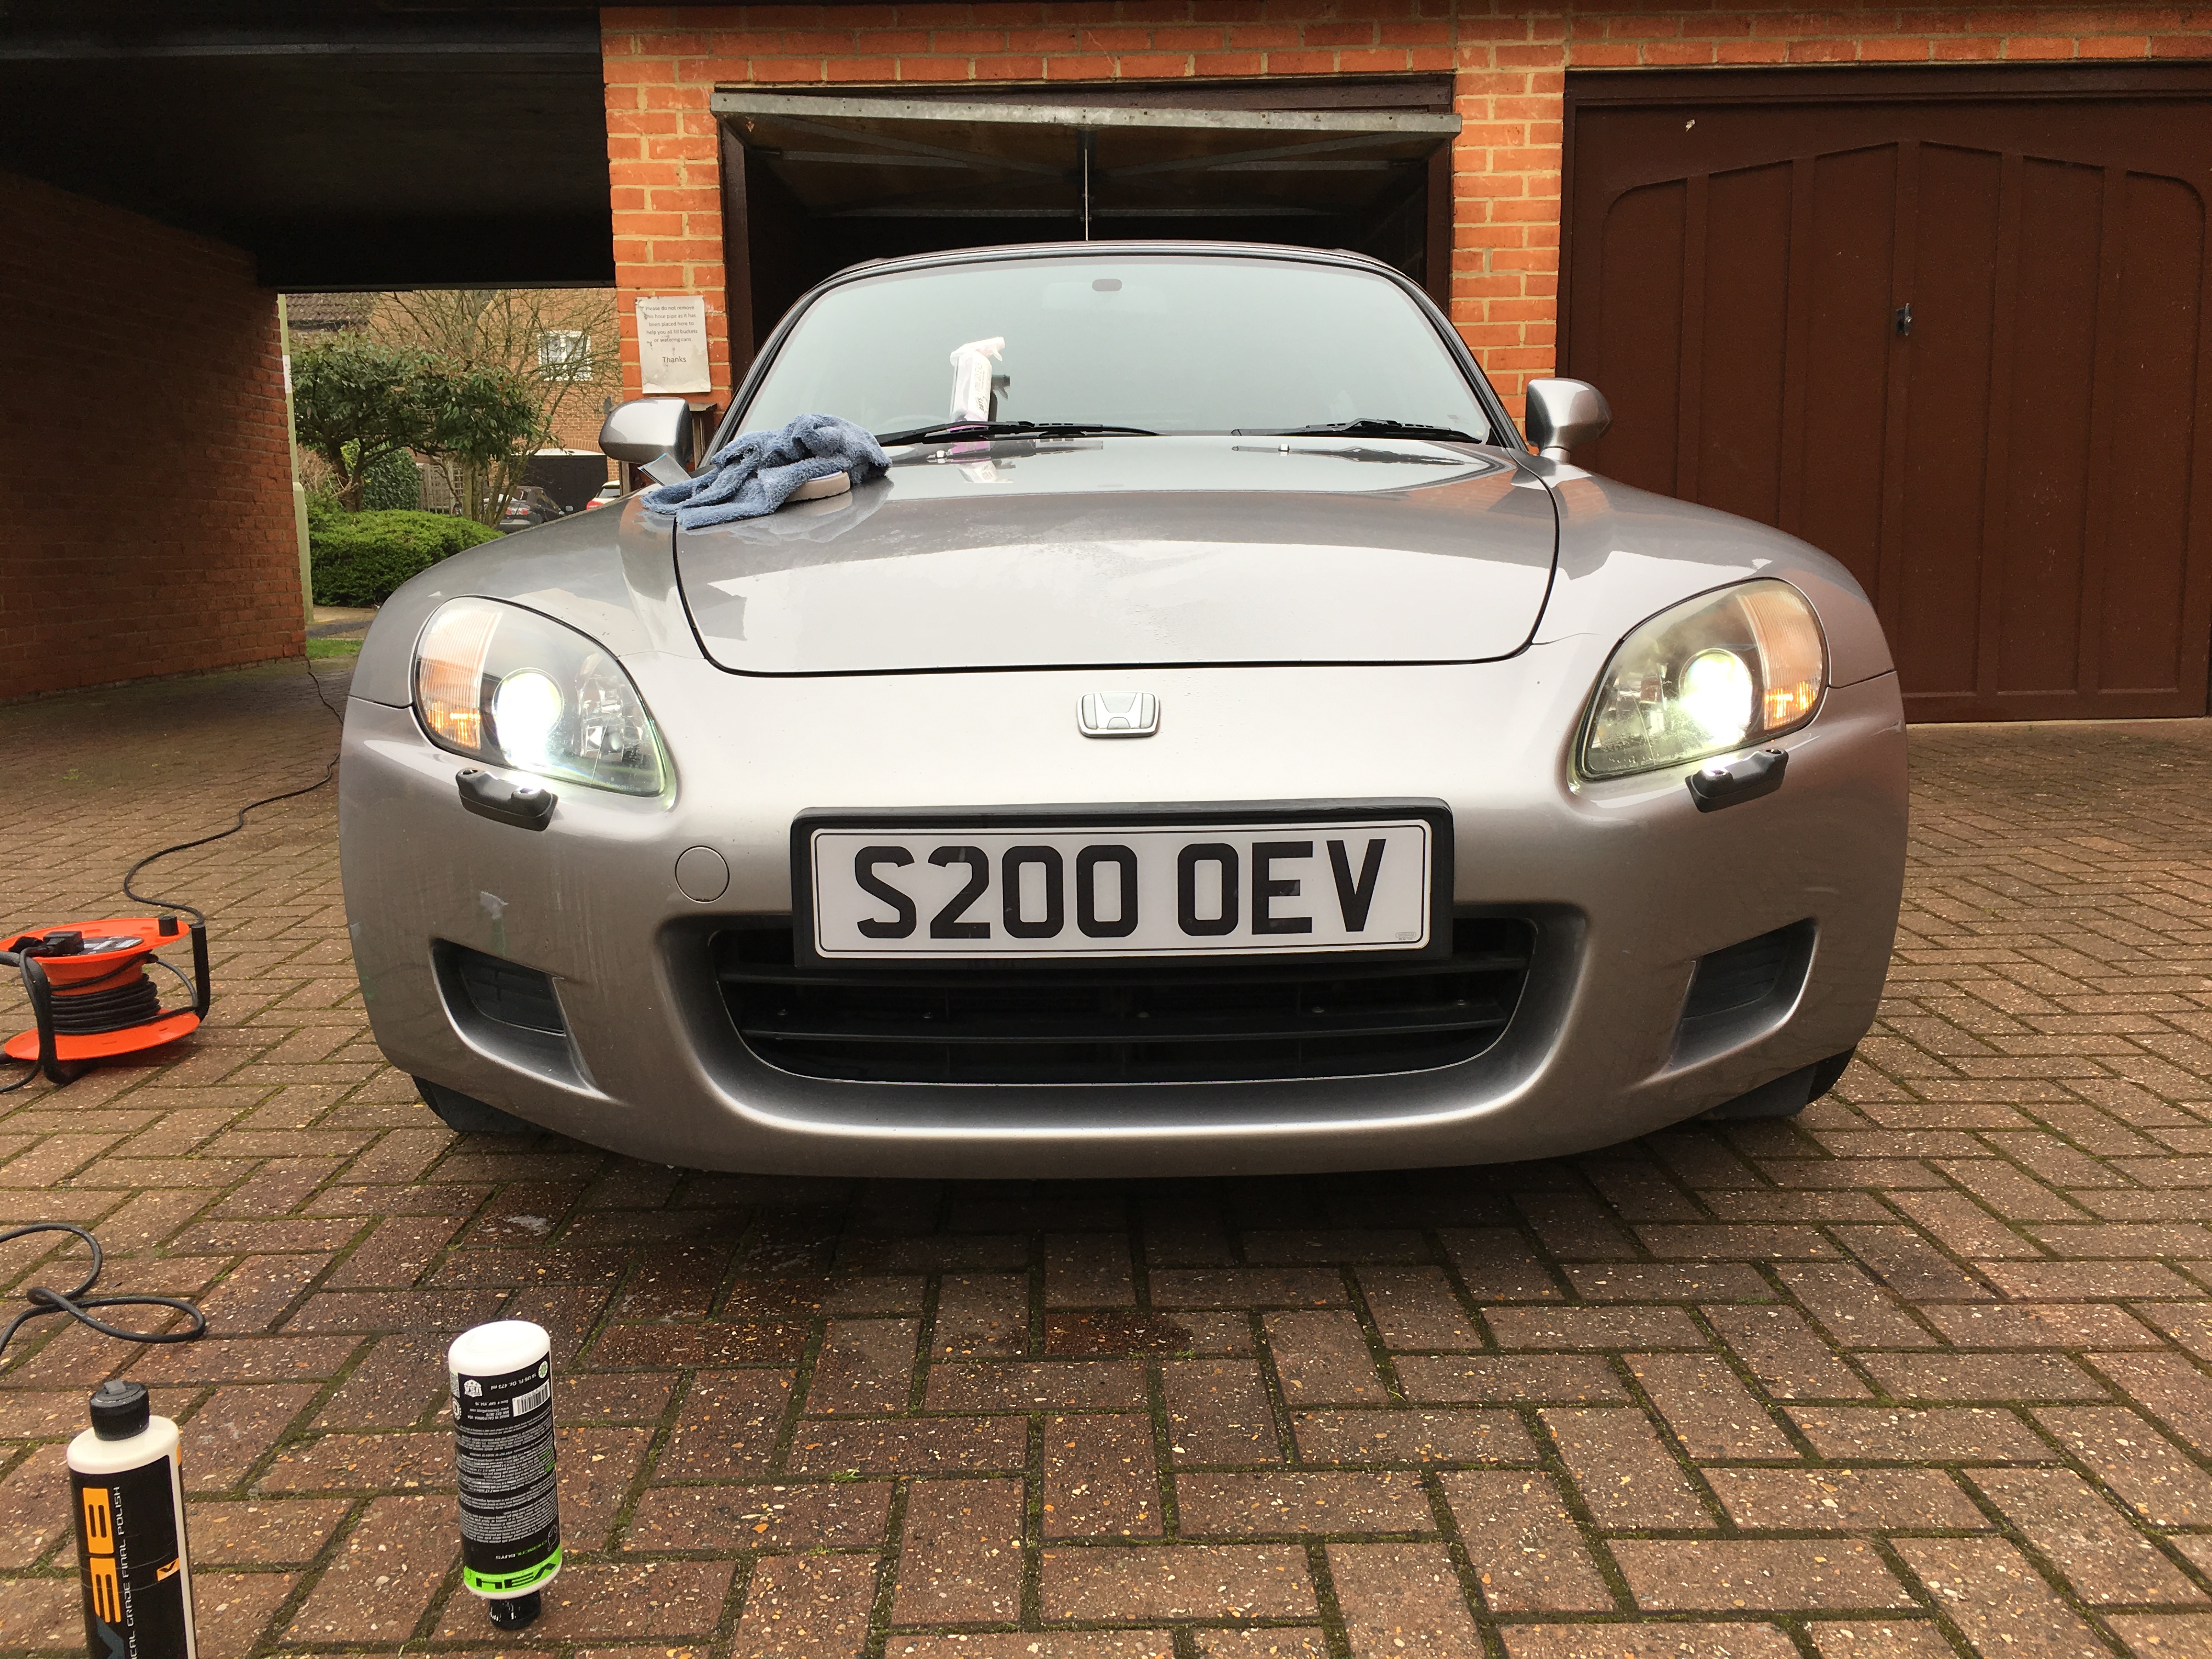
2001, 98K miles, 2 owners with a full service history, a hard top and a nice plate, in Silverstone. Awesome!
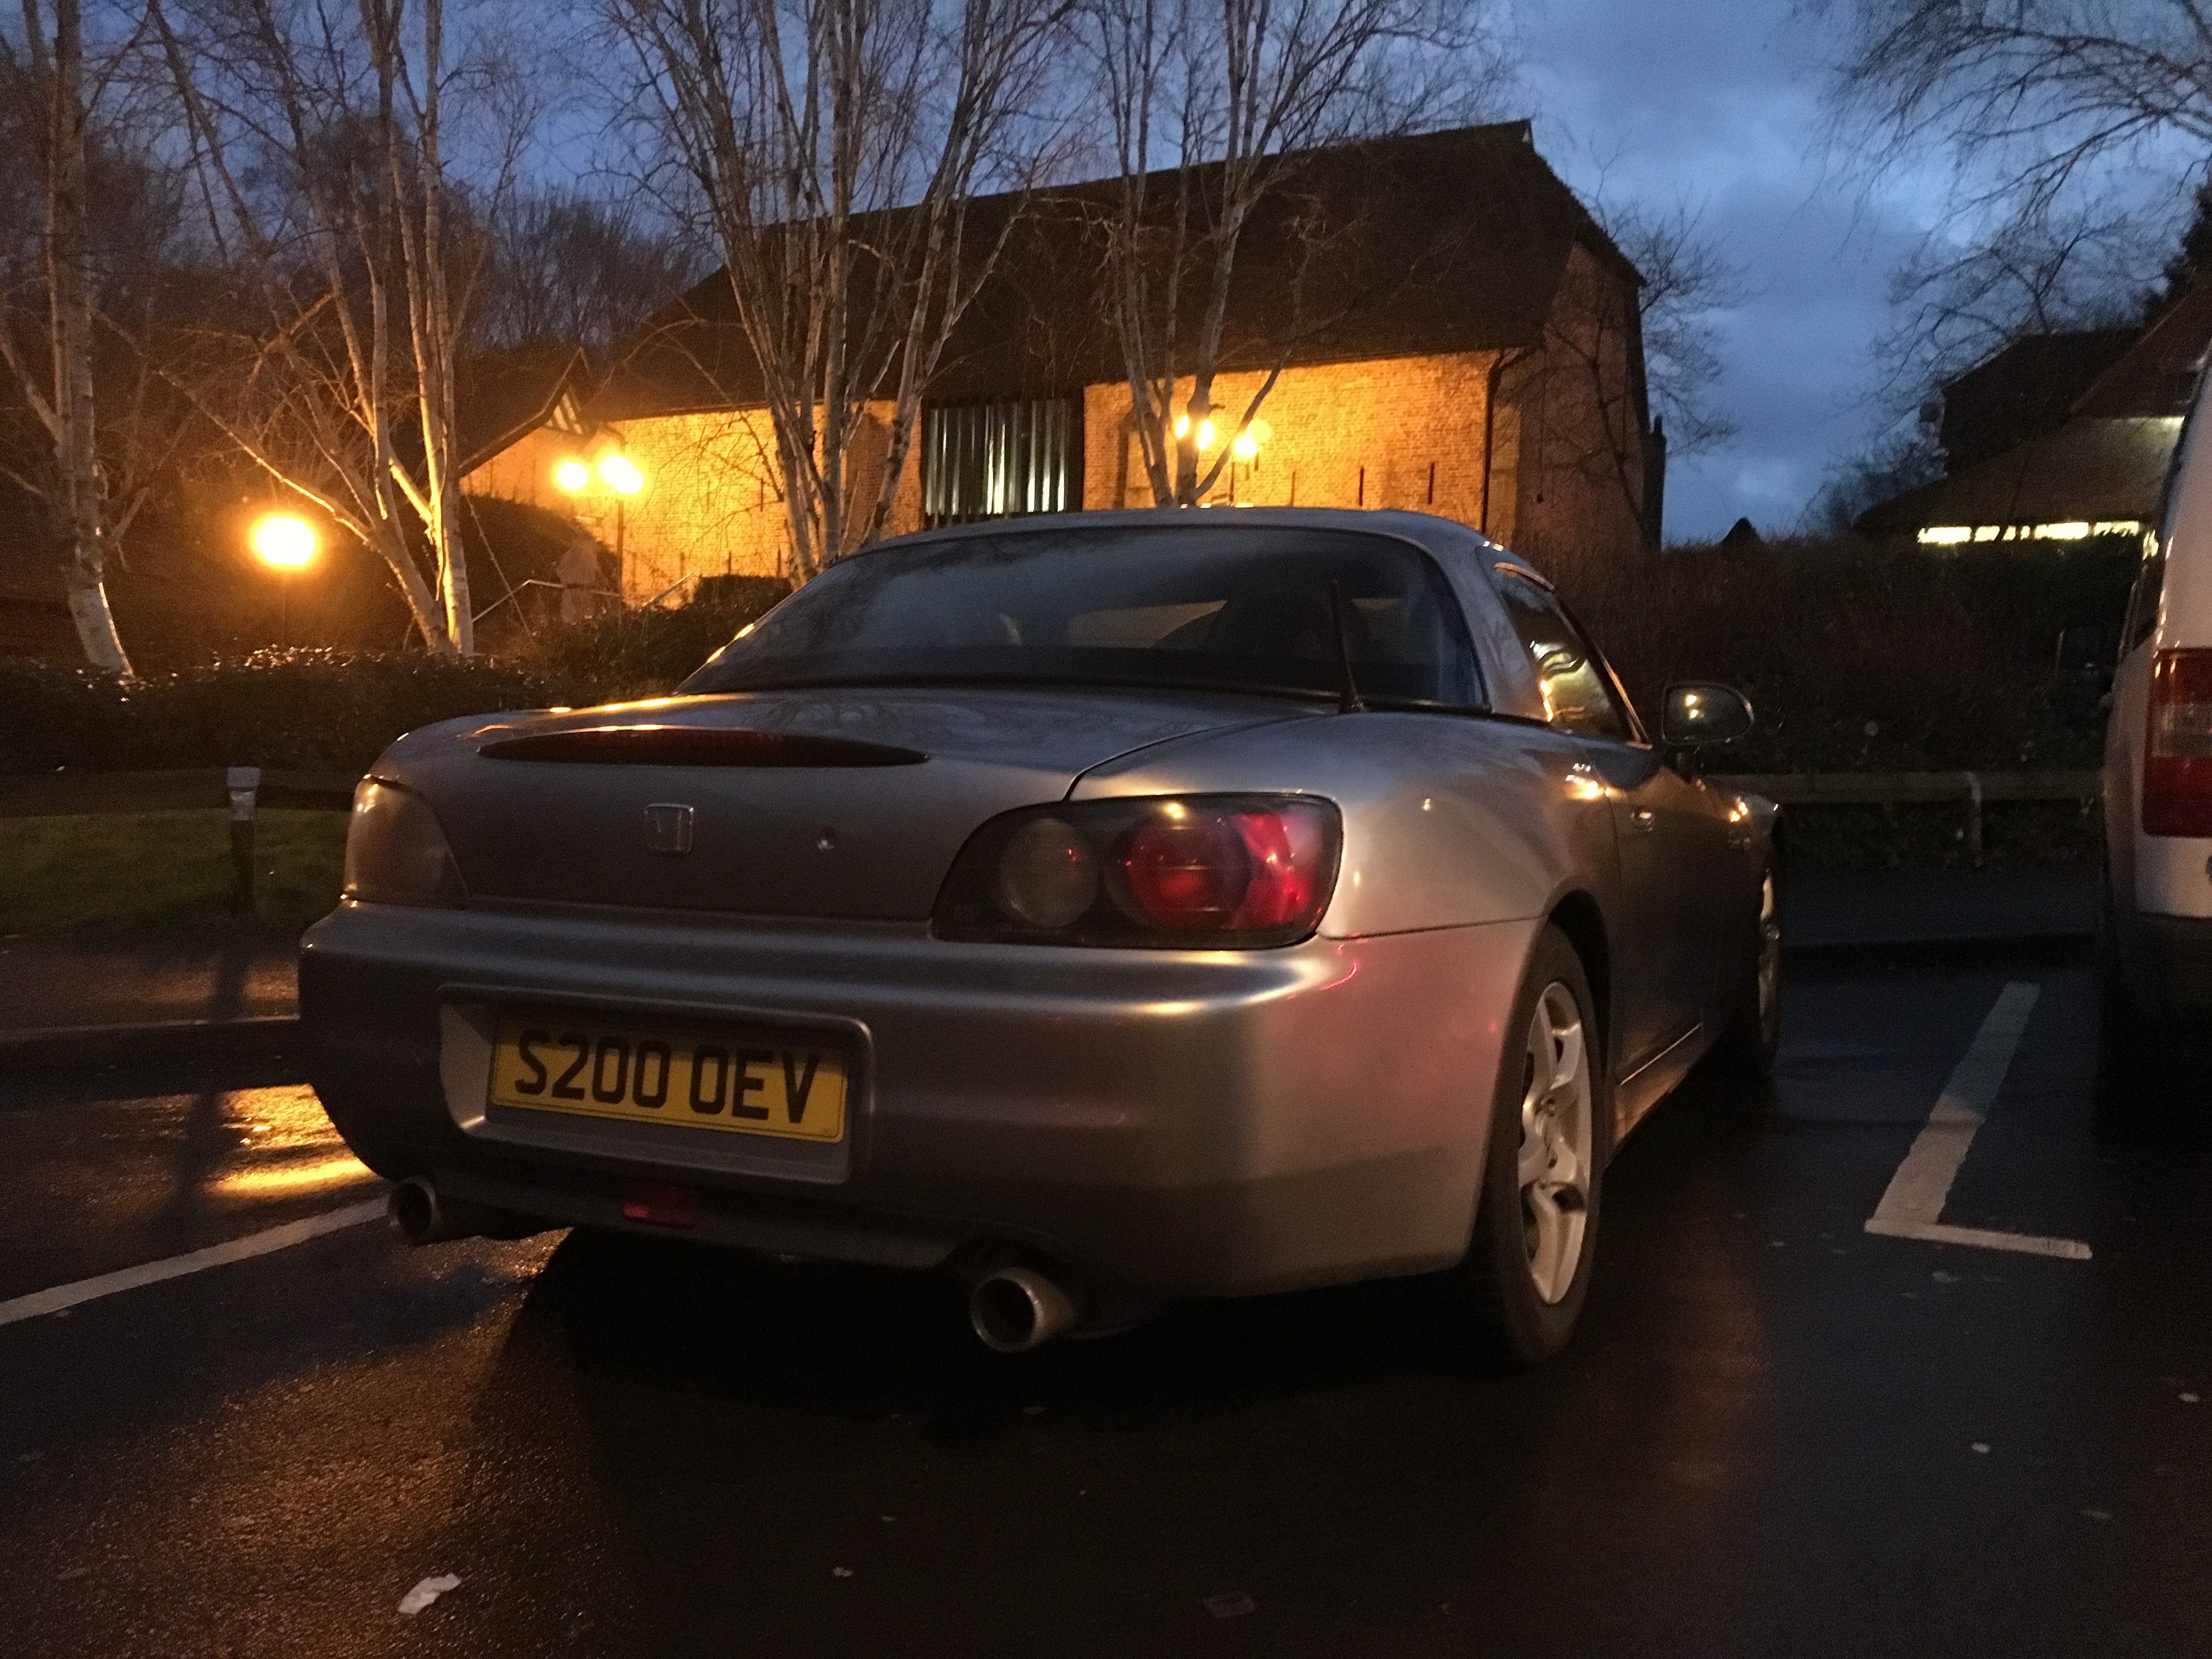
This was the evening it came back, and this was my VTEC face:

When I picked it up I knew I'd have a few things to do to it, and today I spent the morning ferreting around the car hunting out other niggles.
- The air filter is the dirtiest thing ive ever seen working on cars to date
- The bolster wear is very unusual on this particular car
- The roof is in worse condition than I thought
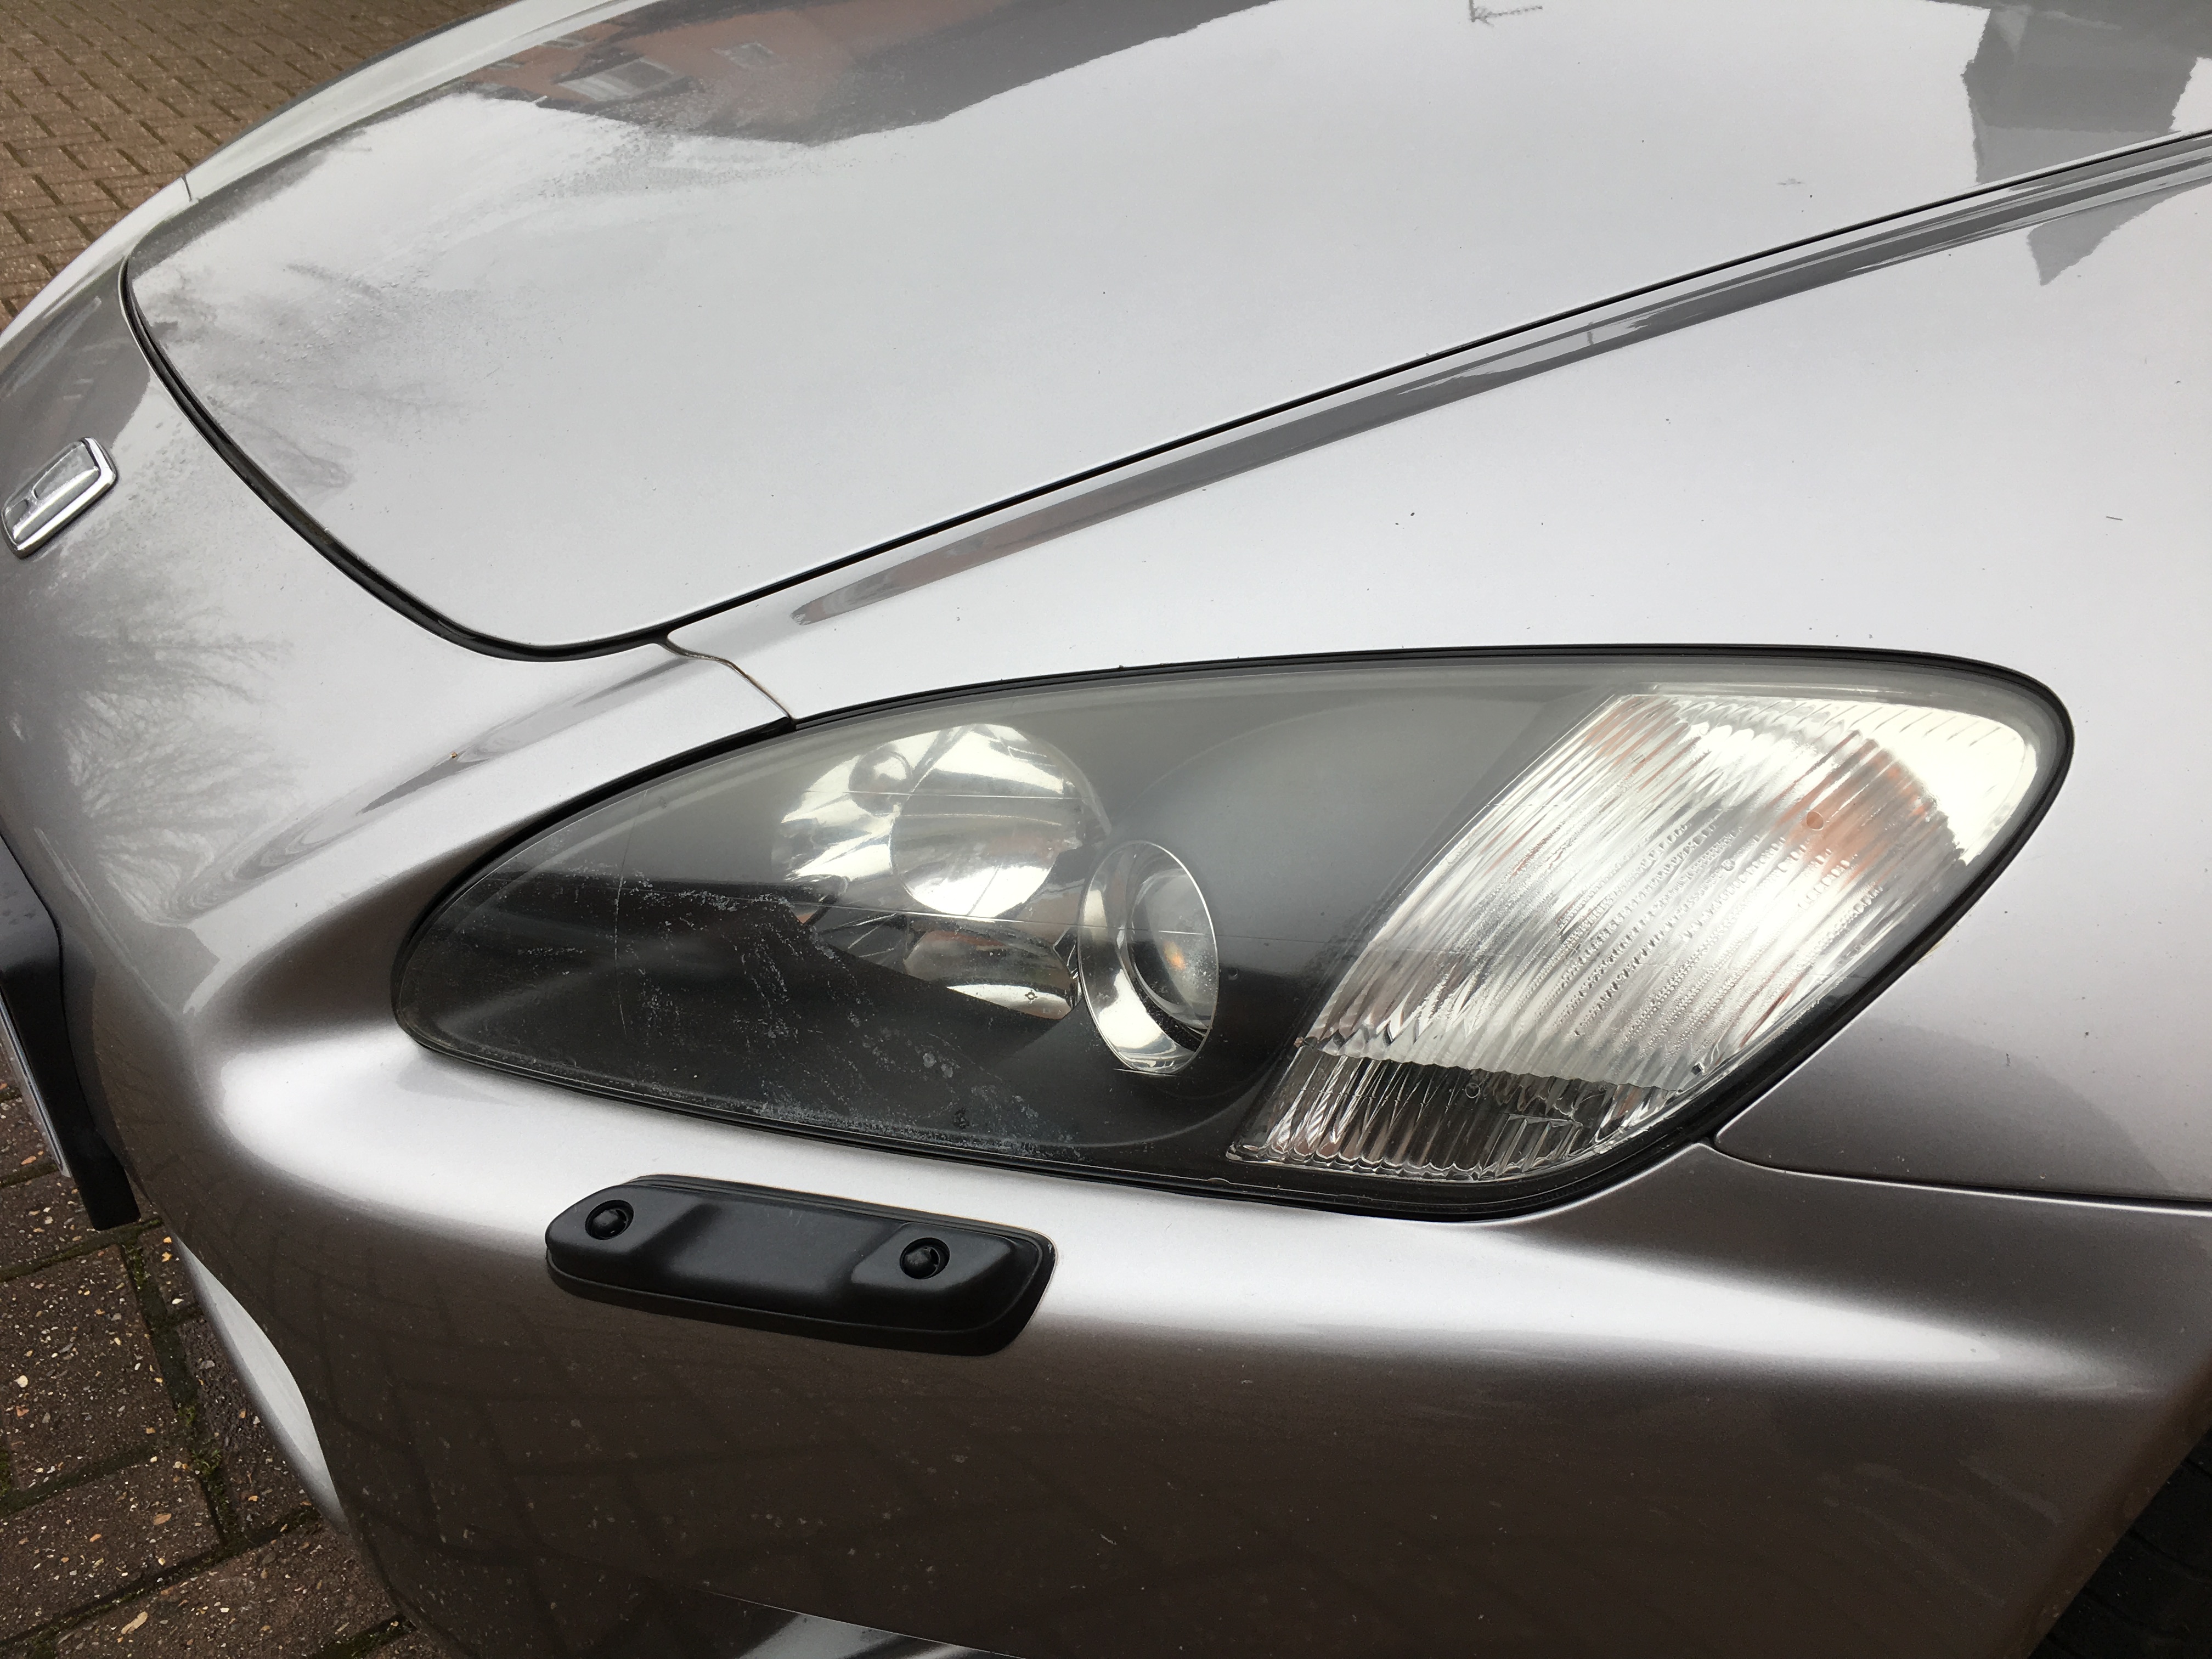
- The headlights are super faded
- Both heatshields needs replacing on the manifold due to cracks
- The front wing has had a TERRIBLE respray.. I had hoped it was just clearcoat failure... But the paint is thin, off-colour and just awful... Someone had an off-day on the spray gun / paint mixing that day.
- The worst bit by far... There was a swimming pool underneath the toolkit in the boot:

Having found some of these items out I've already set a list of things to tackle, with the main goal being to get the car in to a presentable condition for Japfest, where she'll be on stand. Here's my list of tasks:
Servicing:
- Major Plus service
- Bleed brake and clutch fluid
- Change gearbox and diff oil
- Shinetsu all rubber seals
- Adjust window seals
- Patch roof up as best I can
Cosmetics
- Paint brake calipers
- 2 step polish
- Fix faded lights (done)
- Sort the poor paint on the right wing
- Re-paint cam cover
- Clear side repeaters
I am pretty sure I've missed loads but I'll come back and add to the list as I go
Welcome to my S2K Project thread! As some of you may have spotted I came into S2K ownership last week and already I've become determined that a) this is going to be my project over the next couple of years to try and get it as mint as I can and b) I'm going to document the progress So first of all the car:
2001, 98K miles, 2 owners with a full service history, a hard top and a nice plate, in Silverstone. Awesome!
This was the evening it came back, and this was my VTEC face:
When I picked it up I knew I'd have a few things to do to it, and today I spent the morning ferreting around the car hunting out other niggles.
- The air filter is the dirtiest thing ive ever seen working on cars to date
- The bolster wear is very unusual on this particular car
- The roof is in worse condition than I thought
- The headlights are super faded
- Both heatshields needs replacing on the manifold due to cracks
- The front wing has had a TERRIBLE respray.. I had hoped it was just clearcoat failure... But the paint is thin, off-colour and just awful... Someone had an off-day on the spray gun / paint mixing that day.
- The worst bit by far... There was a swimming pool underneath the toolkit in the boot:
Having found some of these items out I've already set a list of things to tackle, with the main goal being to get the car in to a presentable condition for Japfest, where she'll be on stand. Here's my list of tasks:
Servicing:
- Major Plus service
- Bleed brake and clutch fluid
- Change gearbox and diff oil
- Shinetsu all rubber seals
- Adjust window seals
- Patch roof up as best I can
Cosmetics
- Paint brake calipers
- 2 step polish
- Fix faded lights (done)
- Sort the poor paint on the right wing
- Re-paint cam cover
- Clear side repeaters
I am pretty sure I've missed loads but I'll come back and add to the list as I go
 03-11-2017, 05:37 PM
#2
DIY - Fixing Faded Headlights
So, first task for me today was meant to be sorting the clearcoat on my messed up drivers wing... However after a little bit of wet sanding and polishing, I can see that it's more than clearcoat failure, the whole wing is a different colour to the car!

So, I had my polisher, sanding gear and everything else out so I decided to attack the headlights which were seriously faded.
Passenger side before:
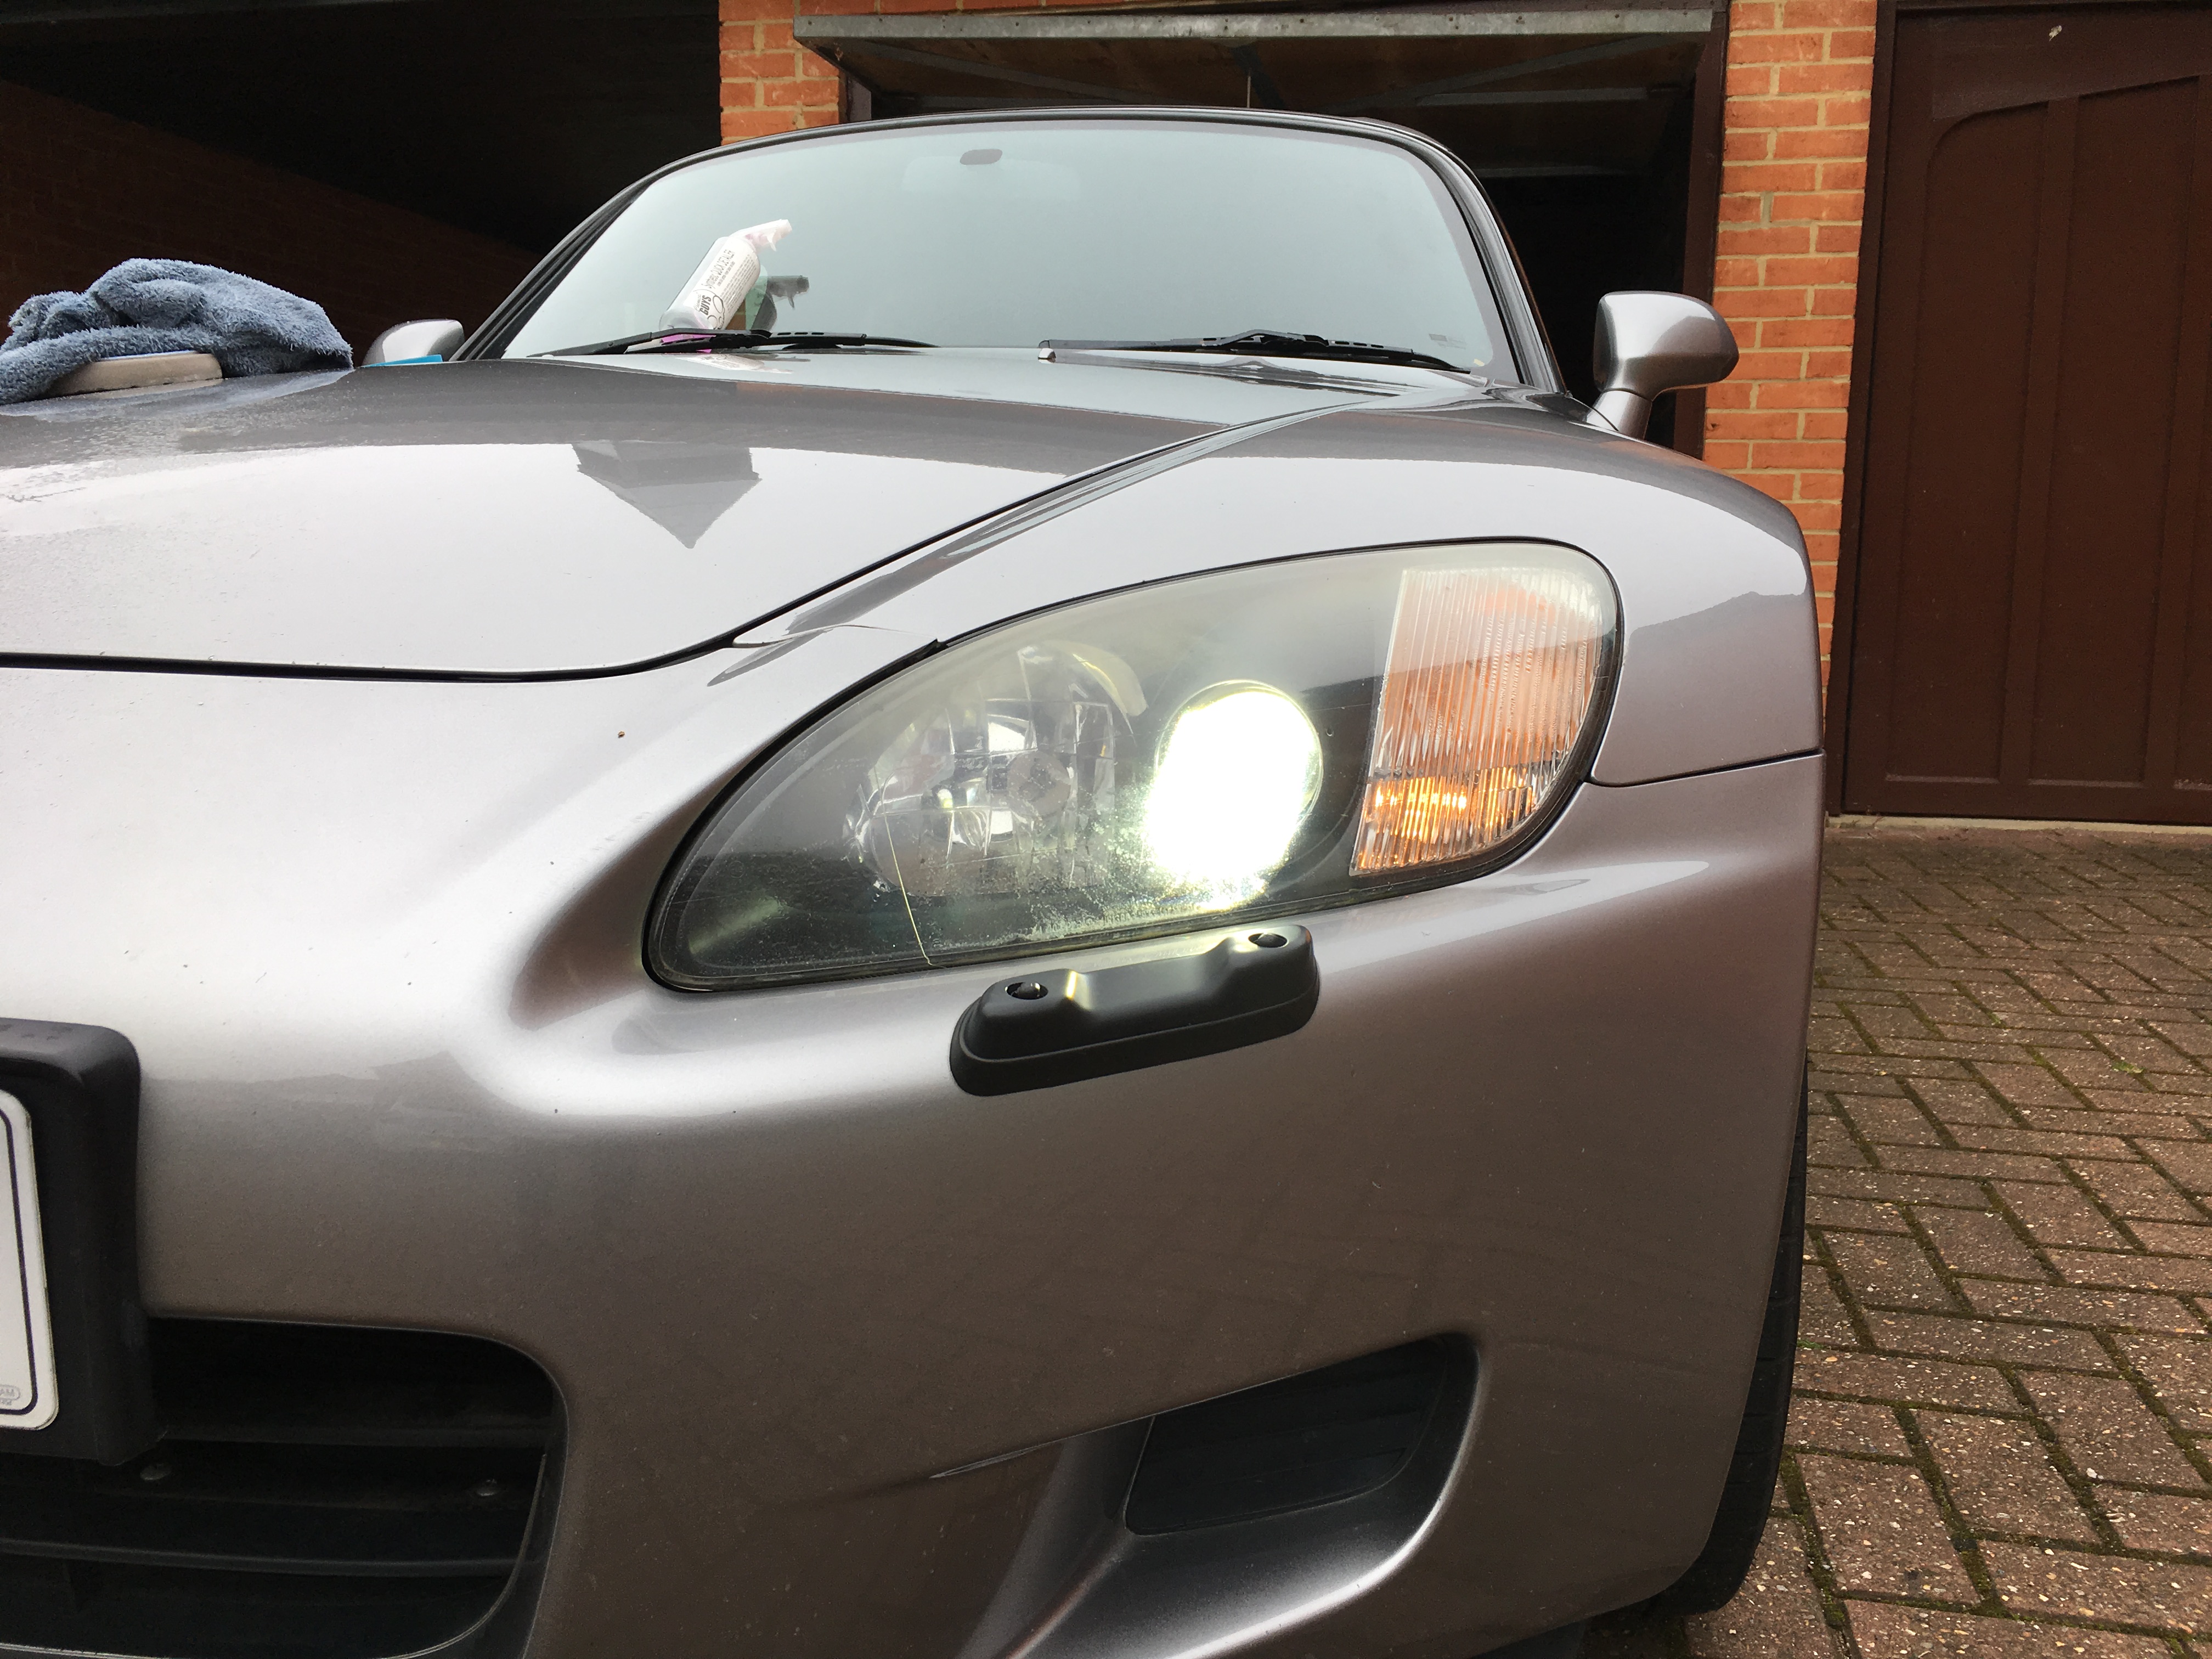
The camera doesn't really pick up just how yellow the lens is... But here's the drivers side after:
Muuuuch clearer and cleaner!
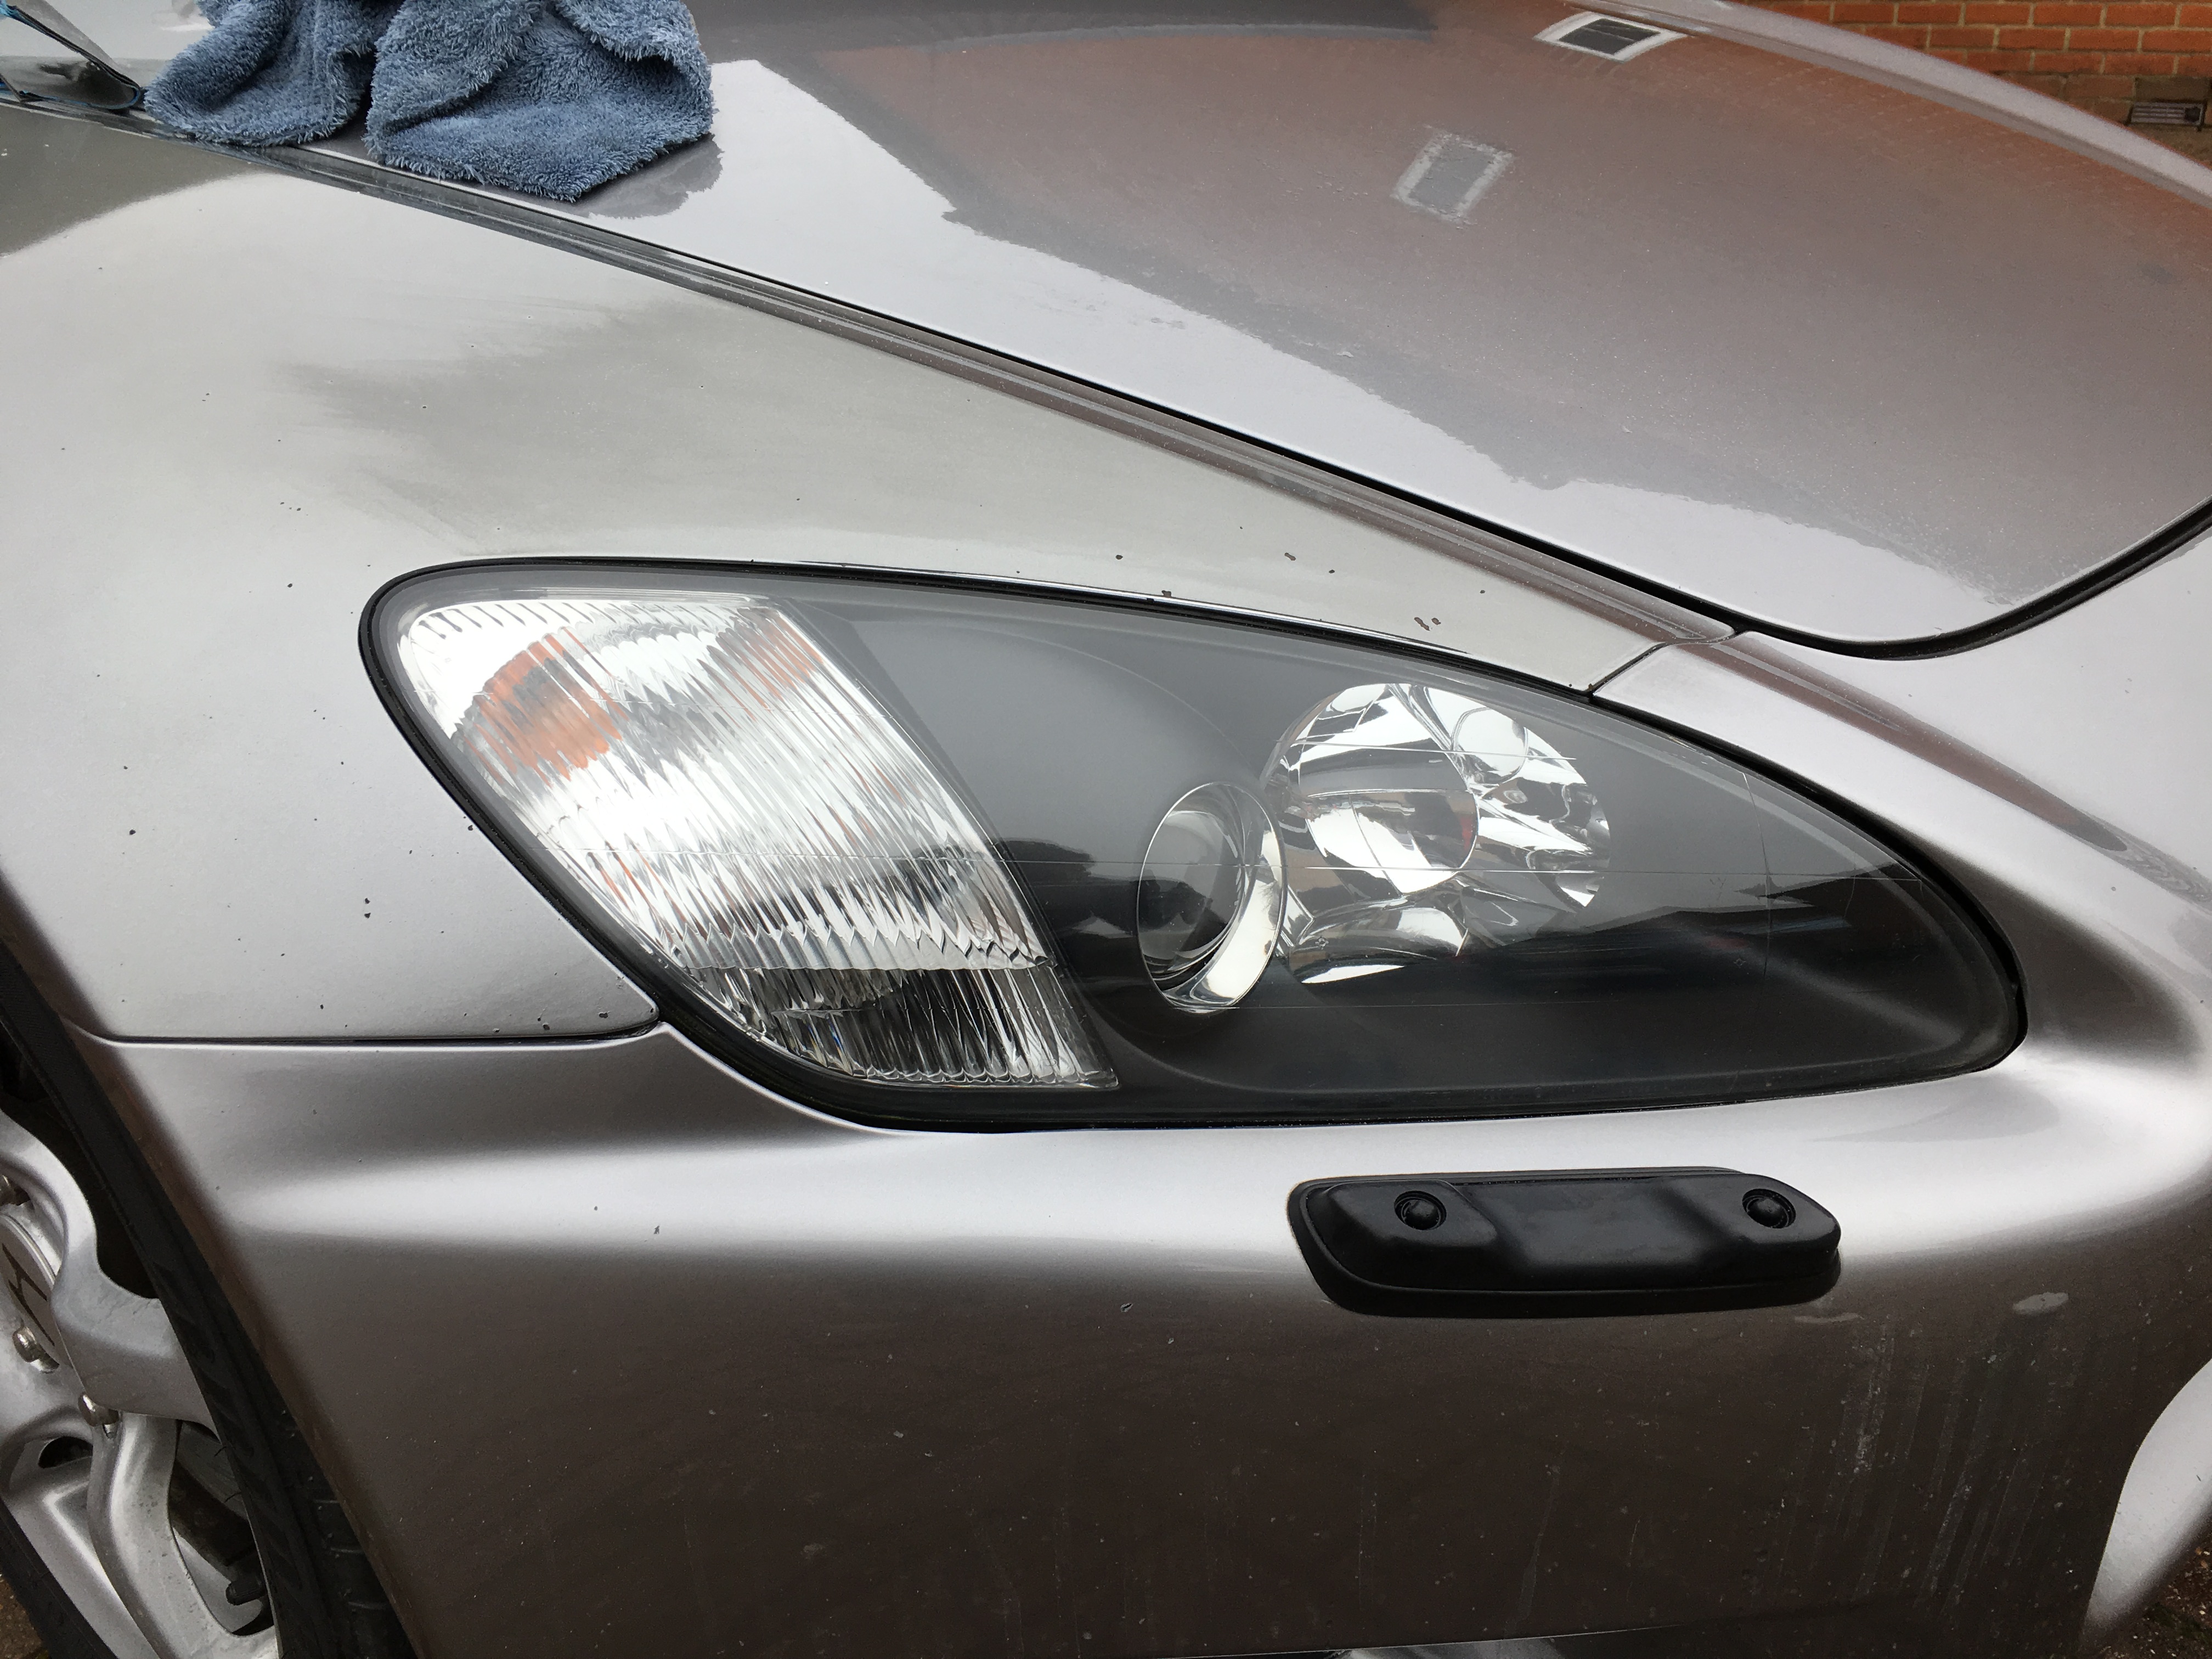
Comparison between the right side (done) and the left side (not done)

Damage like this can be caused by a variety of things; but the most common is the suns UVA and UVB rays which gradually wear the factory applied protective agent on the plastics down, causing discolouration and light distortion in severe cases.
If you want to do this yourself here is a quick write up:
Tools:
2000 and 2500 grit WetNDry sandpaper (monogrit if you can get it)
Detailing tape
Spray bottle full of water
DA polisher (you may be able to achieve this by hand, but you'll need to add 3000 grit sandpaper, and some serious elbow grease.. I wouldn't attempt it)
Cutting compound
Polishing compound
Heavy cutting pad
Light buffing pad
Jet seal / other brand of sealant
Method:
1. Thoroughly soak your sandpaper in water and soak the headlight you will be working on
2. Fold the 2000 grit sandpaper into a square which fits nicely across three fingers and is the length of your middle knuckle to middle finger tip (1/3rd of a sheet should do it)
3. Mask off the wing and bumper near the headlight
4. Applying light and even pressure make nice long, smooth back and forward strokes over the light. Keep misting the light with water, you should see murky gunk coming off of the lens as you're doing this
5. Eventually the water will start running clear, indicating you have the worst of the gunk off. I usually keep going for another 30 seconds or so past this, to ensure all of the damaged plastic is removed
6. Move on to your 2500 grit sandpaper and fold it in the same way. This will remove the scratches imparted by the 2000 grit paper. Usually about 2-3 minutes of sanding is enough.
7. Dry the headlight. You should now have what looks like a foggy hazey even consistency across the lens. If you see any scratches you were pressing too hard, go back again with the 2500 grit paper until it's all nice and even.
8. Get your polisher out and the cutting compound with the cutting pad. Buff the sanding scratches out, this usually takes me 2-3 passes.
9. Get your buffing pad and polish combo out and then begin buffing the lens until the level of clarity you desire is reached. around 5-6 passes usually gets them looking lush.
10. Finally, get your sealant and apply to the lens as directed. Jet seal works really well. The light will need re-sealing after 6-12 months depending on mileage and conditions.
If anyone in the Hampshire area has this issue and wants me to sort it for them happy to do so for beers / cups of tea
Annnnnnd I also forgot to mention I did give the car a quick clean last night... So here's an obligatory snow foam shot (pre headlight restoration!)
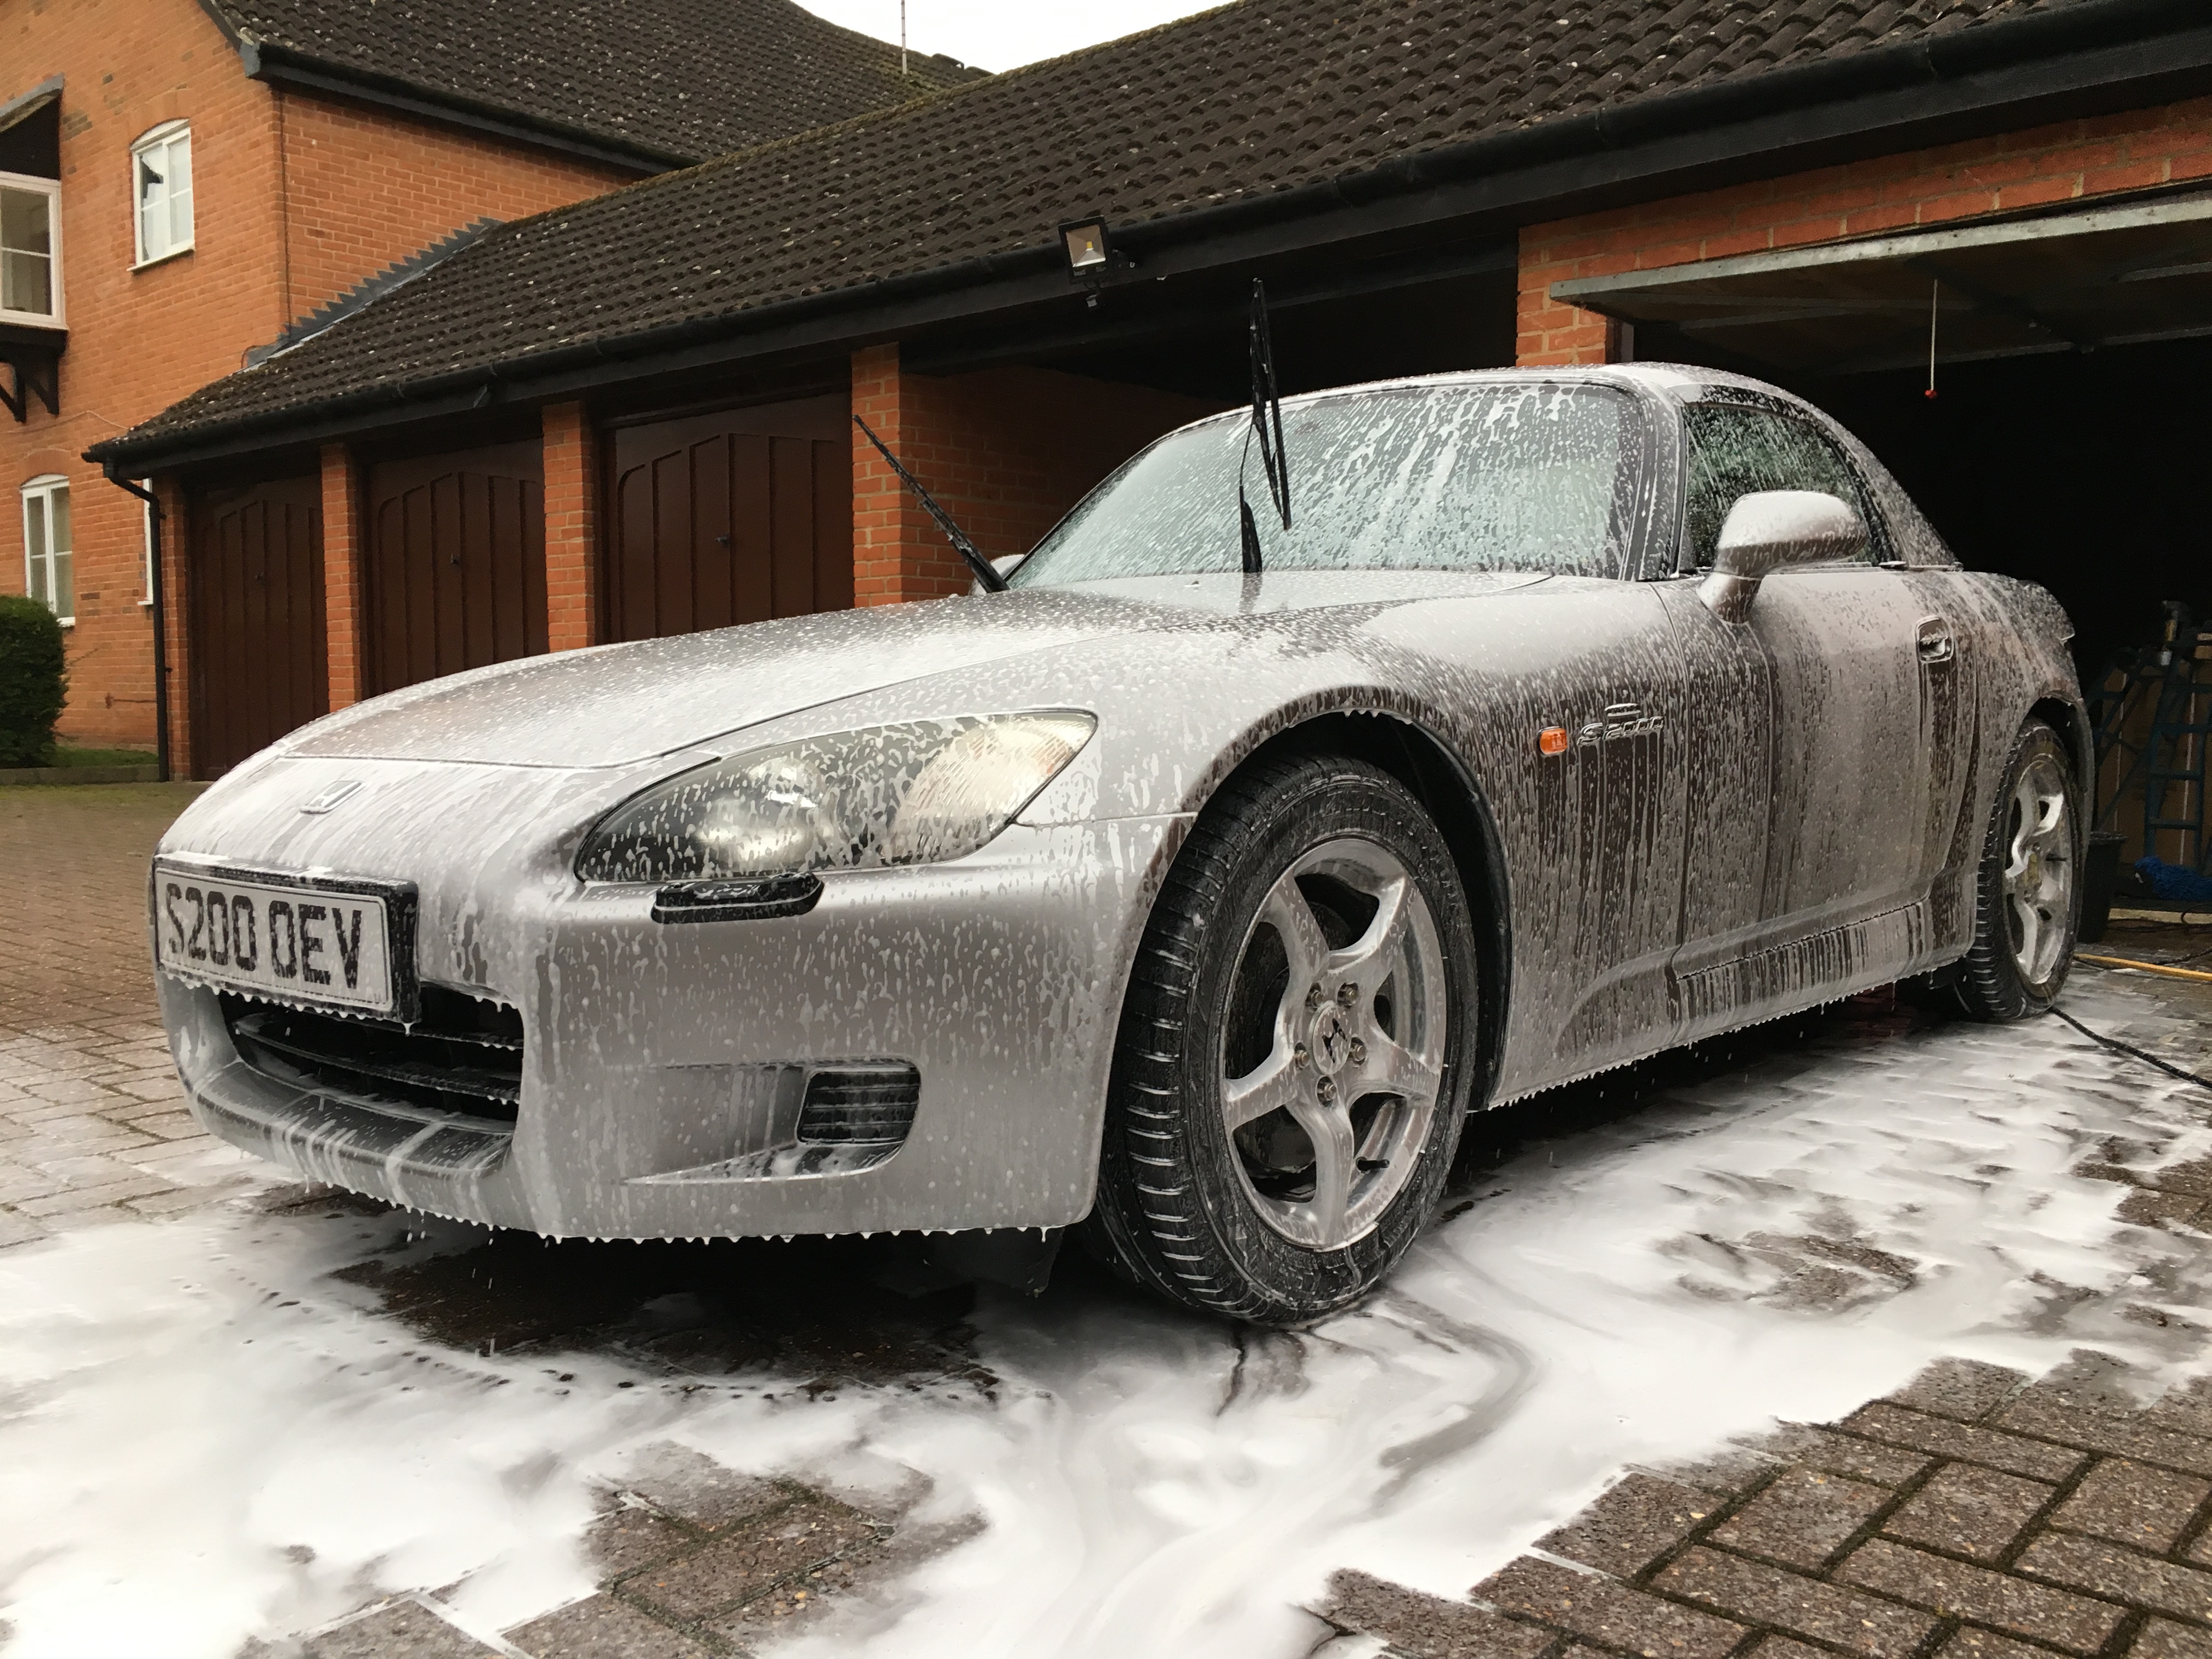
MMMMMM Foamy

Next job on the list is to get all the service items next weekend...
Cheers! Matt
So, first task for me today was meant to be sorting the clearcoat on my messed up drivers wing... However after a little bit of wet sanding and polishing, I can see that it's more than clearcoat failure, the whole wing is a different colour to the car!
So, I had my polisher, sanding gear and everything else out so I decided to attack the headlights which were seriously faded.
Passenger side before:
The camera doesn't really pick up just how yellow the lens is... But here's the drivers side after:
Muuuuch clearer and cleaner!
Comparison between the right side (done) and the left side (not done)
Damage like this can be caused by a variety of things; but the most common is the suns UVA and UVB rays which gradually wear the factory applied protective agent on the plastics down, causing discolouration and light distortion in severe cases.
If you want to do this yourself here is a quick write up:
Tools:
2000 and 2500 grit WetNDry sandpaper (monogrit if you can get it)
Detailing tape
Spray bottle full of water
DA polisher (you may be able to achieve this by hand, but you'll need to add 3000 grit sandpaper, and some serious elbow grease.. I wouldn't attempt it)
Cutting compound
Polishing compound
Heavy cutting pad
Light buffing pad
Jet seal / other brand of sealant
Method:
1. Thoroughly soak your sandpaper in water and soak the headlight you will be working on
2. Fold the 2000 grit sandpaper into a square which fits nicely across three fingers and is the length of your middle knuckle to middle finger tip (1/3rd of a sheet should do it)
3. Mask off the wing and bumper near the headlight
4. Applying light and even pressure make nice long, smooth back and forward strokes over the light. Keep misting the light with water, you should see murky gunk coming off of the lens as you're doing this
5. Eventually the water will start running clear, indicating you have the worst of the gunk off. I usually keep going for another 30 seconds or so past this, to ensure all of the damaged plastic is removed
6. Move on to your 2500 grit sandpaper and fold it in the same way. This will remove the scratches imparted by the 2000 grit paper. Usually about 2-3 minutes of sanding is enough.
7. Dry the headlight. You should now have what looks like a foggy hazey even consistency across the lens. If you see any scratches you were pressing too hard, go back again with the 2500 grit paper until it's all nice and even.
8. Get your polisher out and the cutting compound with the cutting pad. Buff the sanding scratches out, this usually takes me 2-3 passes.
9. Get your buffing pad and polish combo out and then begin buffing the lens until the level of clarity you desire is reached. around 5-6 passes usually gets them looking lush.
10. Finally, get your sealant and apply to the lens as directed. Jet seal works really well. The light will need re-sealing after 6-12 months depending on mileage and conditions.
If anyone in the Hampshire area has this issue and wants me to sort it for them happy to do so for beers / cups of tea
Annnnnnd I also forgot to mention I did give the car a quick clean last night... So here's an obligatory snow foam shot (pre headlight restoration!)
MMMMMM Foamy
Next job on the list is to get all the service items next weekend...
Cheers! Matt
03-11-2017, 09:27 PM
#3


You need to get the boot carpets out pronto. Leak could be soft top drains or a split in the rubber rain channel that runs around the base of the soft top.
Former is easy - latter is not. If the roof is fubar then factor in replacing that at the same time.
Former is easy - latter is not. If the roof is fubar then factor in replacing that at the same time.
03-11-2017, 10:35 PM
#4


Beat me to it. Clean out your drains!


Trending Topics
03-12-2017, 03:35 PM
#8
Thanks for the replies Going to check the drain holes and various seals in the week and report back! Pulled the carpet out for now and towelling it out when it gets wet!
Going to check the drain holes and various seals in the week and report back! Pulled the carpet out for now and towelling it out when it gets wet!
03-12-2017, 11:10 PM
#9
If the sound deadening panel on the boot floor has wrinkles in it that the water might have got under - you need to remove that ( royal pain to do) and dry under that too otherwise the boot floor rusts out. Once you sort the leak, you can replace that stuff with dynamat or something similar

