Matt's S2K Project Thread
 03-13-2017, 03:23 PM
#11

Okay so didn't get a whole lot done other than inspection of the boot leak this evening... I did a little leak test and water appears to be collecting on the right hand side of the boot, so that's a start. I also have two suspect holes in my roof, one each side of the car in the same spot, where the edge of the wing meets the hood essentially:

I thought this may be the cause of the problem however, upon a little further inspection directly behind where this little rip is there is in fact a drain area:

So even if water was coming in through that hole, essentially is should be passing straight into that drain which veers down and then to the left, into what looks like an even bigger drainage duct which I have tried to picture at an angle from the back of the car to the front:
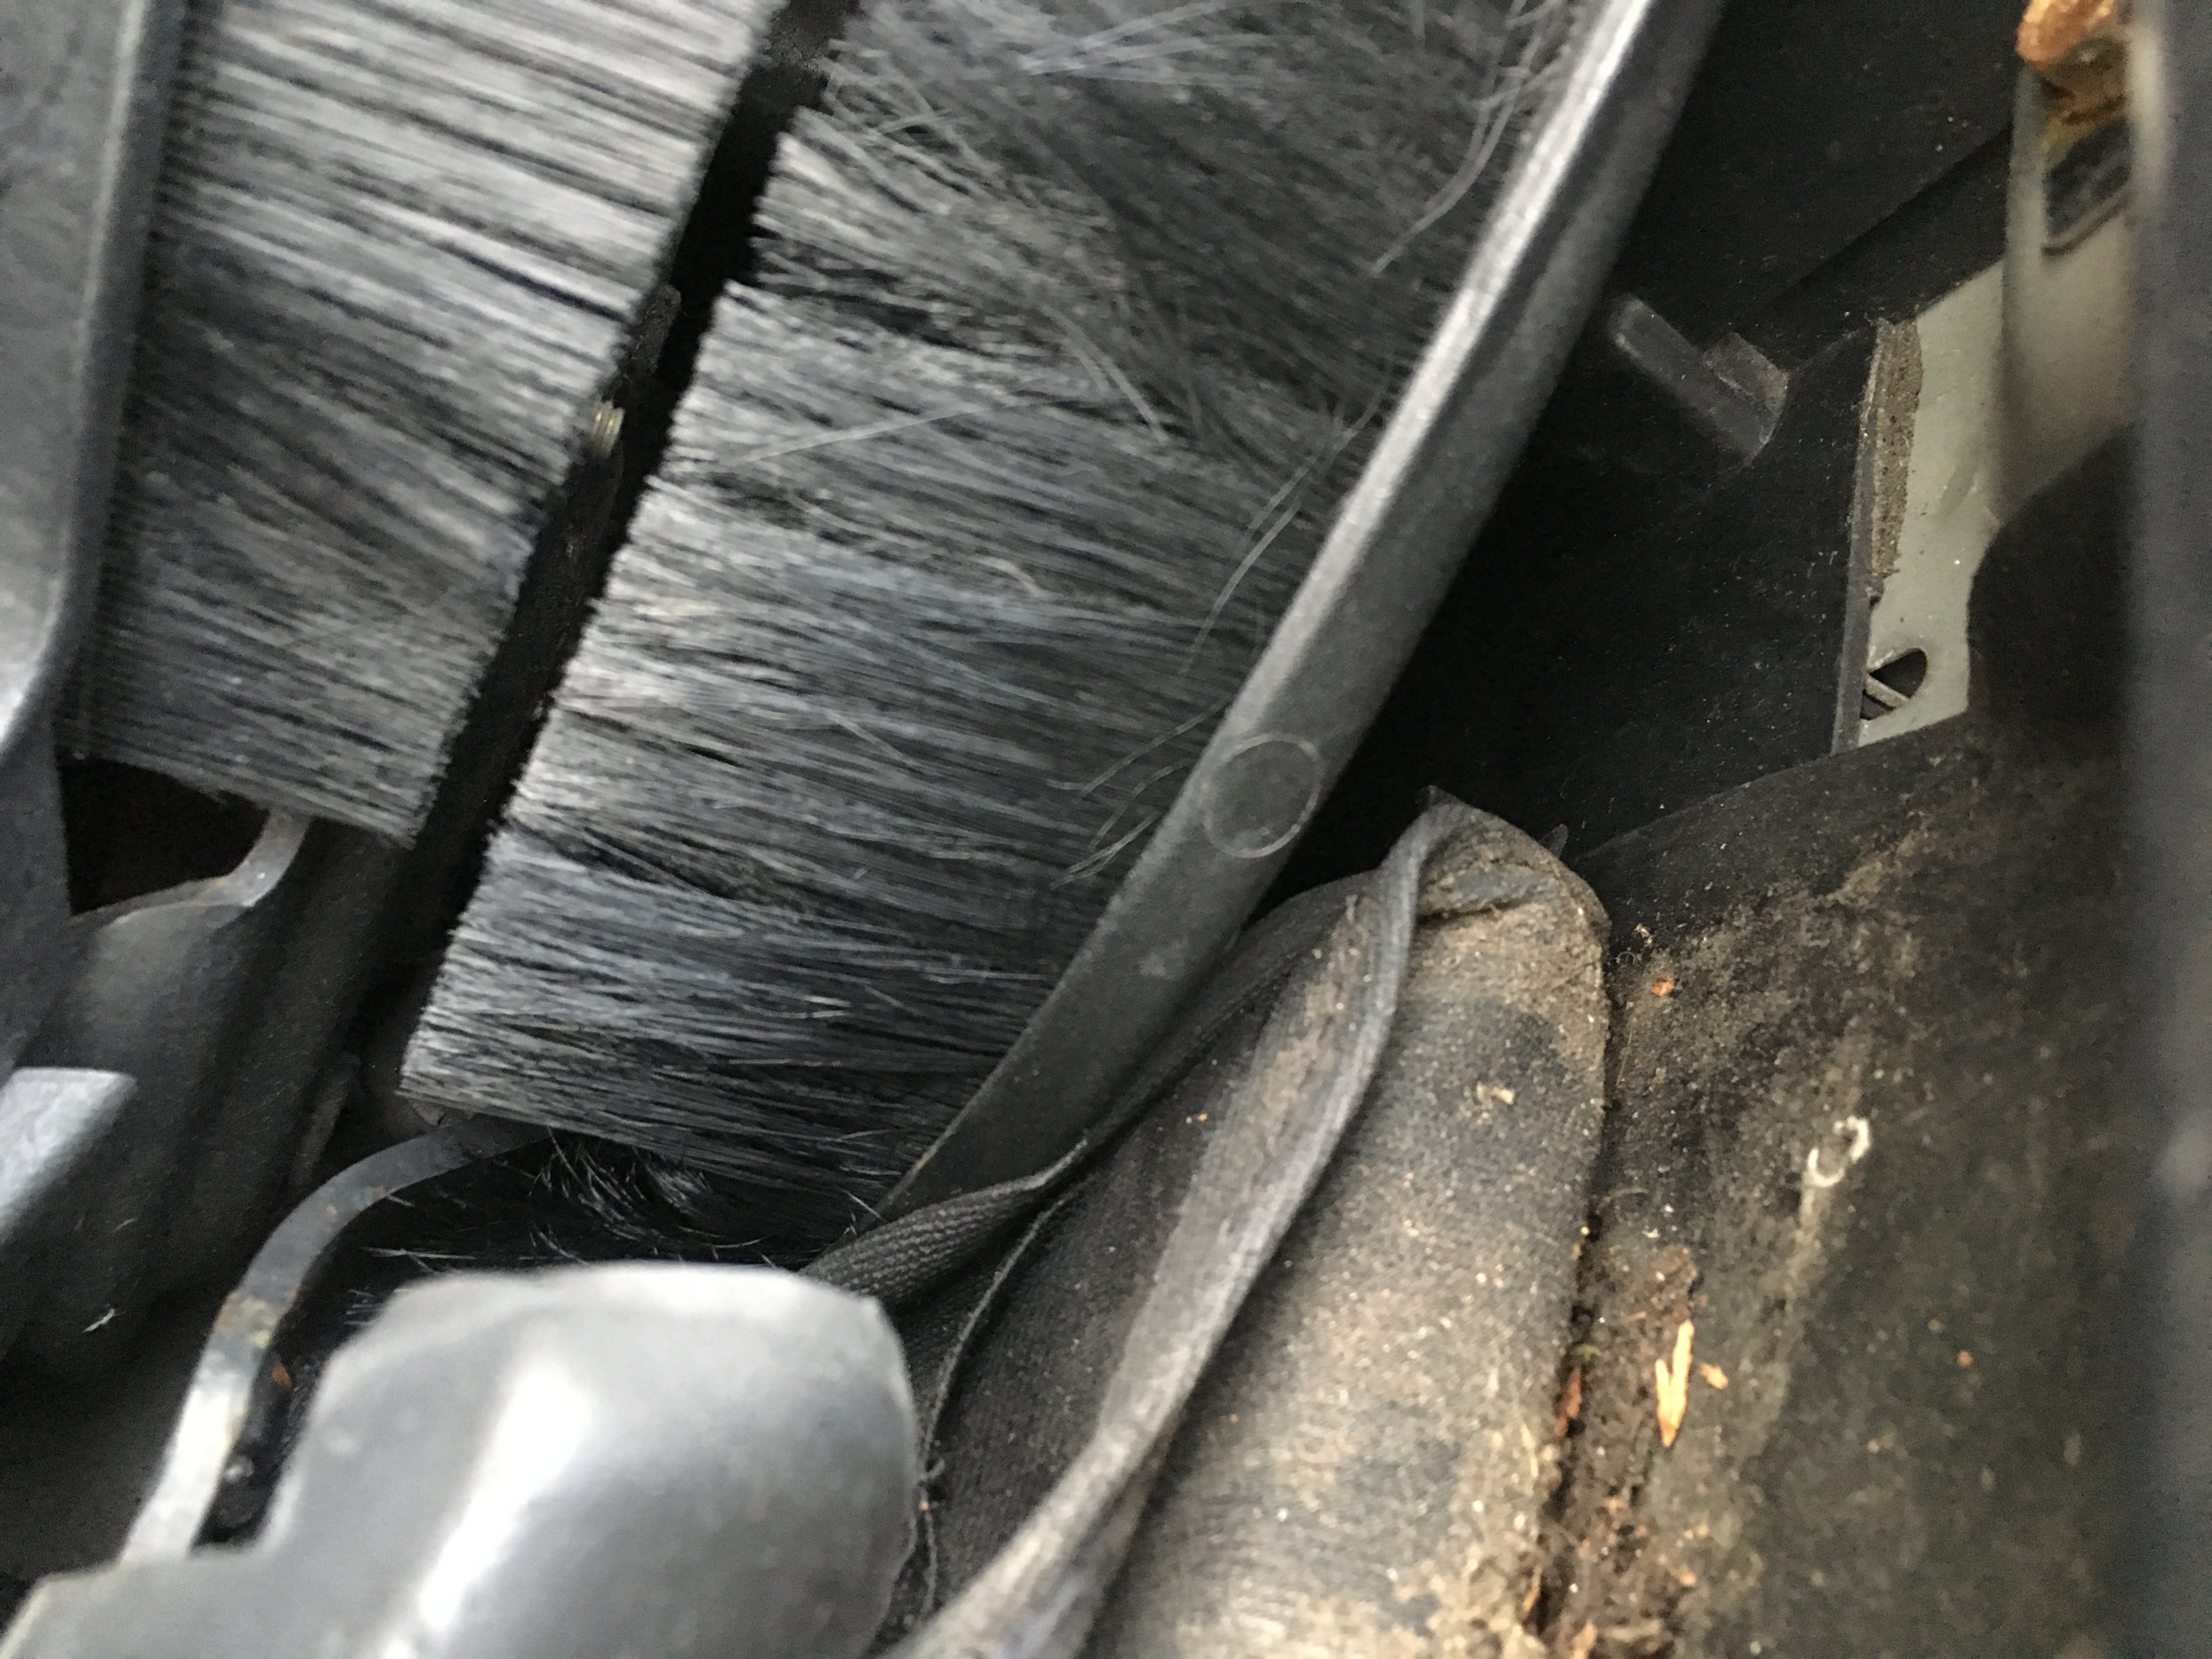
The duct i'm talking about can be seen on the right hand side, top right ish just in front of the hood. The rain rail which the hood sits in also appears to lead to here, where I suspect it should drain to the bottom right hand side of the car somewhere (in front of the rear wheel if my research is correct...)
So i'm guessing either A: that duct is blocked or B: the leak is coming from elsewhere.
The piece of failed hood is way to close to all the mechanical doo-hickery for me to want to disk duck taping it; if the tape falls into the hood mechanism it may cause unwanted issues.. So any suggestions on somehow bodging that dodgy piece of roof up in the meantime?
I thought this may be the cause of the problem however, upon a little further inspection directly behind where this little rip is there is in fact a drain area:
So even if water was coming in through that hole, essentially is should be passing straight into that drain which veers down and then to the left, into what looks like an even bigger drainage duct which I have tried to picture at an angle from the back of the car to the front:
The duct i'm talking about can be seen on the right hand side, top right ish just in front of the hood. The rain rail which the hood sits in also appears to lead to here, where I suspect it should drain to the bottom right hand side of the car somewhere (in front of the rear wheel if my research is correct...)
So i'm guessing either A: that duct is blocked or B: the leak is coming from elsewhere.
The piece of failed hood is way to close to all the mechanical doo-hickery for me to want to disk duck taping it; if the tape falls into the hood mechanism it may cause unwanted issues.. So any suggestions on somehow bodging that dodgy piece of roof up in the meantime?
 03-13-2017, 11:44 PM
#12

Fester already suggested the hood drains they are a collecting box just below the ripped area and can get blocked quite easily and judging by the build up of crud in the hood channel which can also degrade through a build up of muck then a good clean out is in order, also check the ariel sealing rubber and the seam where the quarter panel meets the rear scuttle covered by the plastic trim look under and upwards where the spare wheel is
03-14-2017, 03:13 AM
#13
Hey Dave, Thanks for the reply. The aeriel sealing rubber; do you mean the rubber on the outside of the car? Or is there another rubber grommit or similar beneath the aerial which is only accessible within the boot itself? Had a quick check around the seam you mentioned, it's not been siliconed unlike the rest of the boot, which appears to have already had a bit of a treatment from the previous owner!
Are the drain holes at the back easier access from the top-down or bottom up? I can't seem to find a definitive answer. My old MX-5 had a one-way valve in the drain holes which you had to rod out from the top down, else you risked wrecking the valve and causing problems.
Cheers!
Are the drain holes at the back easier access from the top-down or bottom up? I can't seem to find a definitive answer. My old MX-5 had a one-way valve in the drain holes which you had to rod out from the top down, else you risked wrecking the valve and causing problems.
Cheers!
03-14-2017, 09:00 AM
#14

Roof drain holes ALWAYS clean top down - if you clean bottom up you risk moving the drains out of position and then you really will have a leak.
That said, some trim removal to check some ot her eejit hasn't done that for you might be in order.
edit: Convertible top drains will not leak with the hard top on though. So if you've done the leak test with the HT on then the water is coming from elsewhere.
That said, some trim removal to check some ot her eejit hasn't done that for you might be in order.
edit: Convertible top drains will not leak with the hard top on though. So if you've done the leak test with the HT on then the water is coming from elsewhere.
03-15-2017, 02:04 AM
#15
Thanks unclefester,
Actually the water was found in the boot whilst the hardtop was still on the car - my father and I had only taken it off that morning! Guess i'm going to have to go on a serious leak hunt!
Actually the water was found in the boot whilst the hardtop was still on the car - my father and I had only taken it off that morning! Guess i'm going to have to go on a serious leak hunt!
03-15-2017, 10:26 AM
#16
03-21-2017, 07:54 AM
#17
Hey Guys!
Had a very productive weekend working on the S with a little help from my mate Viv. We haven't addressed the leak yet, however we have managed to get the car feeling SOOOO much nicer! Didn't realise how off the boil it was feeling until it was serviced.
The day started with some serious unboxing duty and making sure we had all of the necessary bits and pieces, oils, seals, washers, etc. all lined up and ready to go:

Thanks Opie Oils and Cox Motor Parts
Once I had verified all the bits were present and correct, I first stuffed the car up on my ramps to try and fix the heatshield rattle which had been bugging me!
And then I got underneath andddd...

There is literally nothing left holding that heatshield in place! So the entire thing just came off in my hand. Unfortunately the bolts I had purchased were M8's, were too long and a bit too fat for the aperture. So it has had to remain off the car for now. Any adverse effects to this?
Next I gave the car a fresh oil and filter, the oil that came out STANK! Christ knows when the previous owner actually last changed it.. However, it got worst when I got to the air filter and the spark plugs...

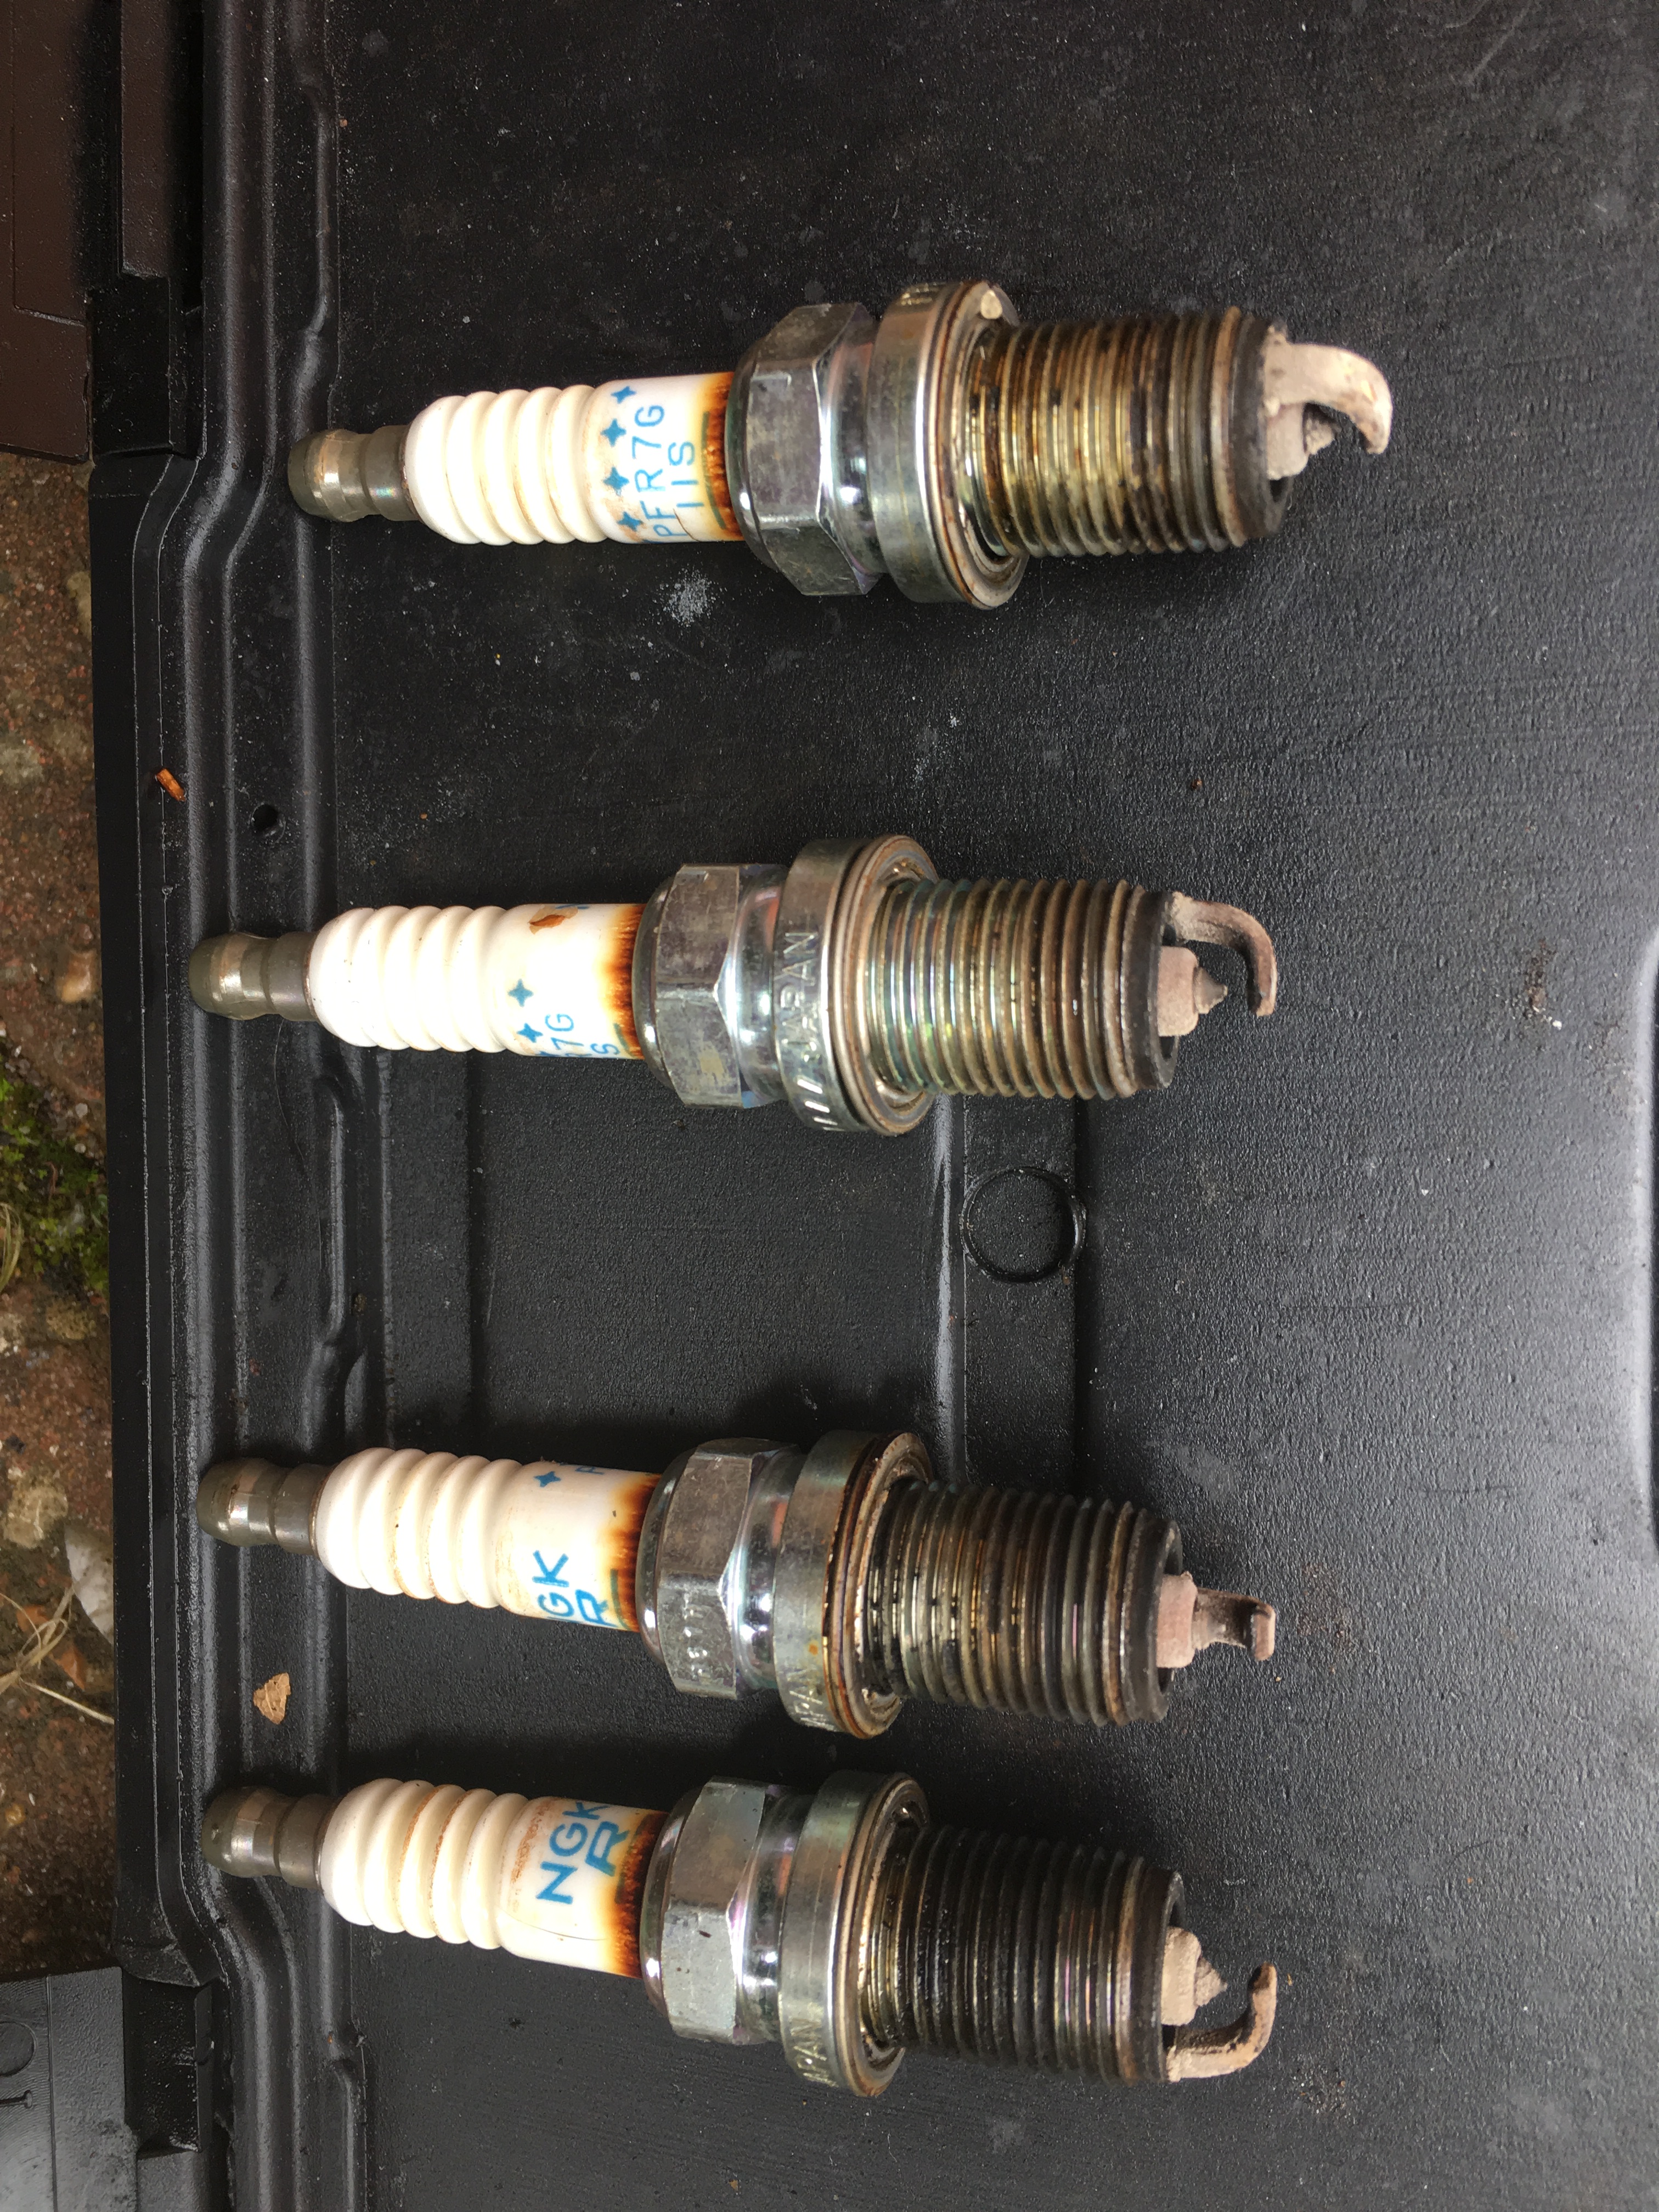
I have no idea who had been doing the work on this guys car, but I don't think they were actually doing the work they were charging him for....
Once that was done we changed the diff oil, bled the brakes, bled the clutch and tightened up the throttle cable to eliminate a bit of free play. I've now got a wonderfully idling, much better running car! And the butt-dyno definitely thinks the midrange pickup is immensley better since all the servicing!
Moral of the story? Make sure your car is thoroughly maintained, because it honestly doesn't feel like its the same car anymore!
Had a very productive weekend working on the S with a little help from my mate Viv. We haven't addressed the leak yet, however we have managed to get the car feeling SOOOO much nicer! Didn't realise how off the boil it was feeling until it was serviced.
The day started with some serious unboxing duty and making sure we had all of the necessary bits and pieces, oils, seals, washers, etc. all lined up and ready to go:
Thanks Opie Oils and Cox Motor Parts
Once I had verified all the bits were present and correct, I first stuffed the car up on my ramps to try and fix the heatshield rattle which had been bugging me!
And then I got underneath andddd...
There is literally nothing left holding that heatshield in place! So the entire thing just came off in my hand. Unfortunately the bolts I had purchased were M8's, were too long and a bit too fat for the aperture. So it has had to remain off the car for now. Any adverse effects to this?
Next I gave the car a fresh oil and filter, the oil that came out STANK! Christ knows when the previous owner actually last changed it.. However, it got worst when I got to the air filter and the spark plugs...
I have no idea who had been doing the work on this guys car, but I don't think they were actually doing the work they were charging him for....
Once that was done we changed the diff oil, bled the brakes, bled the clutch and tightened up the throttle cable to eliminate a bit of free play. I've now got a wonderfully idling, much better running car! And the butt-dyno definitely thinks the midrange pickup is immensley better since all the servicing!
Moral of the story? Make sure your car is thoroughly maintained, because it honestly doesn't feel like its the same car anymore!

 good job...
03-23-2017, 11:49 AM
good job...
03-23-2017, 11:49 AM
#19
So! A little more progress was made on the car tonight. I firstly took it to a spray shop in Basingstoke and asked for a quote to get my front wing resprayed.... £400 + the dreaded! Wow! I knew it was going to be more than I wanted to pay, but nearly £500 quid seems very excessive for one panel to me! The quest for a spray shop continues.
In my exciting news, the latch rattle that has been driving me MENTAL whenever the roof has been up got the DIY described here: pg_0001
Only instead of using the packing foam advised, I had a couple of old business cards I saw another forumer use to great effect... And to my initial surprise, success! The rattle has gone
I also addressed the leak in my boot, but I need to wait for daylight to take some more pictures before the next update!
03-23-2017, 12:07 PM
#20

In reply to the heat shield on the exhaust, i noticed mine was missing when i took my exhaust off to change the clutch, i imagine it was taken off because of a similar rattle. Or just flew off on the motorway.
Anyway got a price from Si and it was over £100 for a replacement Yeah needless to say mine hasn't made its way back on the car.
Remove it and leave it off, on the plus side it makes the drives footwell warm up quick in the winter
Anyway got a price from Si and it was over £100 for a replacement
Yeah needless to say mine hasn't made its way back on the car.Remove it and leave it off, on the plus side it makes the drives footwell warm up quick in the winter