Time to repair the damage
 10-29-2016, 08:24 AM
#1

Well the seasons over iv'e bought the rear quarter the pounds at a low against the dollar so the parts for the engine rebuild can wait a bit so might as well repair the damage done by the twit in a 4X4,,hmm i was going to do a write up with pics but can't seem to post pics from flickr like i could with the old site oh well you'll just have to imagine then i hacked off the damaged rear wing
Last edited by Daytona-Dave; 11-01-2016 at 10:07 AM. Reason: Tittle
 10-29-2016, 12:08 PM
#2
ooh i think i've sussed it,
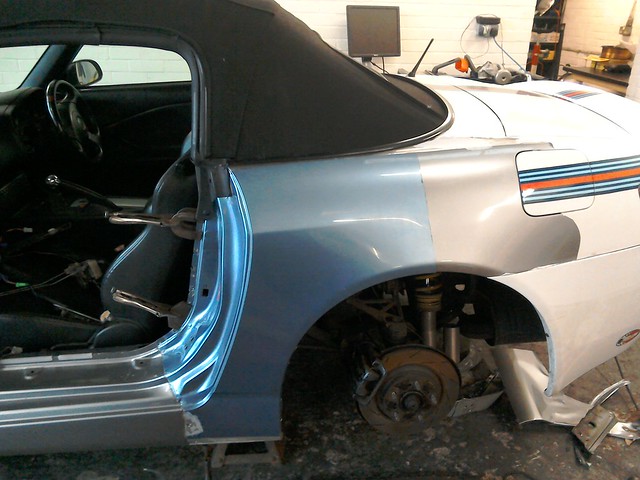
Anyway this is how it's looked for the last 6 months,
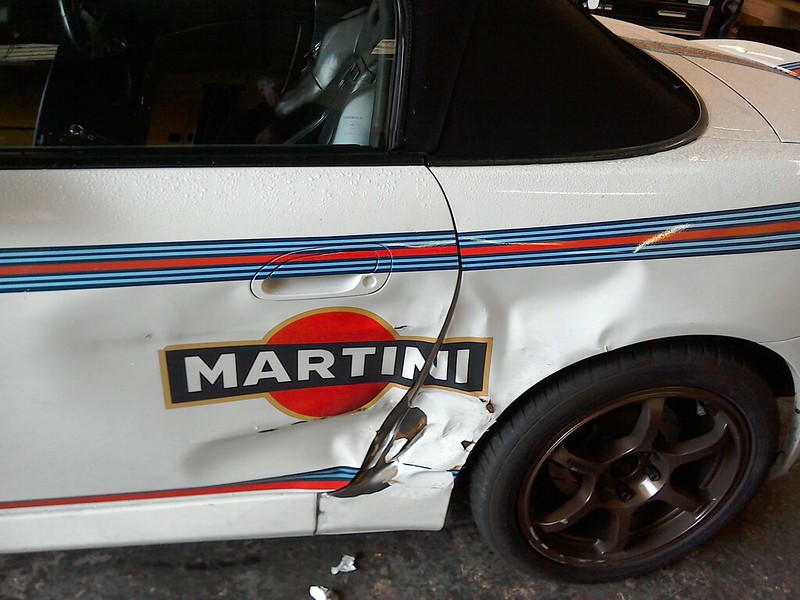
So first job was to peel back the wrap to see just how bad it was,
Then drill out the spot welds
Then cut out the part panel that i will be replacing, i won't be fitting the full panel as (a) it save's stripping the whole of the interior and (b) so as to not disturb the rest of the panel which is still in perfect condition with all the seams still intact,

I can now access how much damage there is on the internal panels and wheel arch which suprisingly had stood up quite well and can be easily repaired.
Anyway this is how it's looked for the last 6 months,
So first job was to peel back the wrap to see just how bad it was,
Then drill out the spot welds
Then cut out the part panel that i will be replacing, i won't be fitting the full panel as (a) it save's stripping the whole of the interior and (b) so as to not disturb the rest of the panel which is still in perfect condition with all the seams still intact,
I can now access how much damage there is on the internal panels and wheel arch which suprisingly had stood up quite well and can be easily repaired.
 10-30-2016, 12:08 AM
#5

These cars are keeping you busy mate!
i'm interested to watch this, cant imagine how good the weld has to be finished to look good
painting it yourself?
i'm interested to watch this, cant imagine how good the weld has to be finished to look good
painting it yourself?
 10-30-2016, 01:39 AM
#6
cool,  they just seemed big to the old site maybe it resized them
Yeah i'll paint it myself as it won't have to be to perfect as i will be doing a different wrap when it's all repaired
they just seemed big to the old site maybe it resized themYeah i'll paint it myself as it won't have to be to perfect as i will be doing a different wrap when it's all repaired
10-30-2016, 02:04 AM
#7
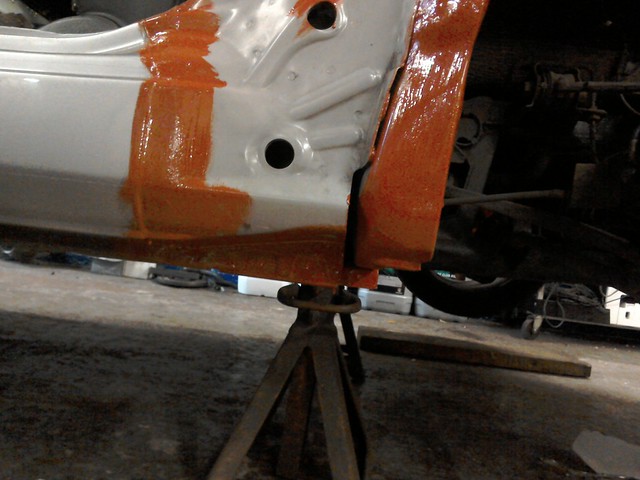
The next few pics are for those with corrosion problems around the arch and sill area or just need to know how best to stop it happening.
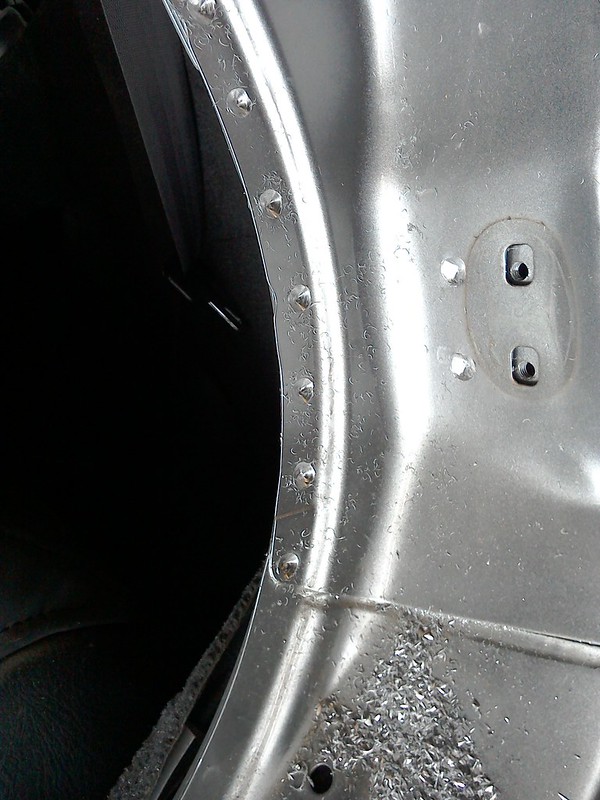
As you can see in this pic of the top sectionof the outer wing where it joins the inner arch the panels are very close together this traps dust and grime then when it gets any moisture in there the dirt acts like a sponge and holds water in there for long periods of time eventually causing the corrosion from the inside out and not as is sometimes posted because of the rubber arch protector these actually help stop stone chips and prevent the start of external corrosion provided they are removed and cleaned once a year, luckily mine has no signs of any corrosion in this area which is why i'm leaving this section well along and will only need a cavity protection applied once the job is done.
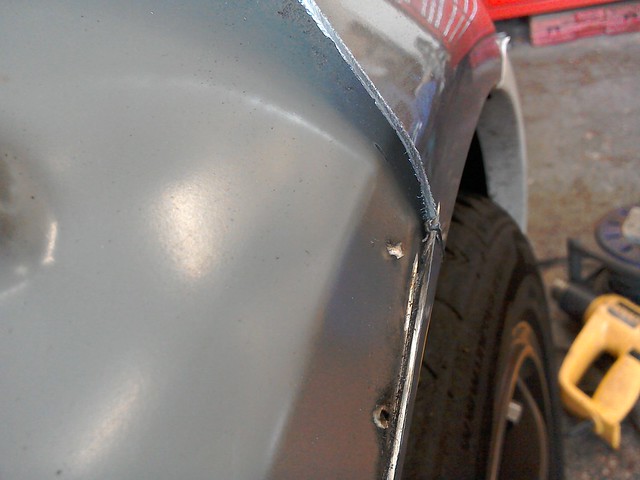
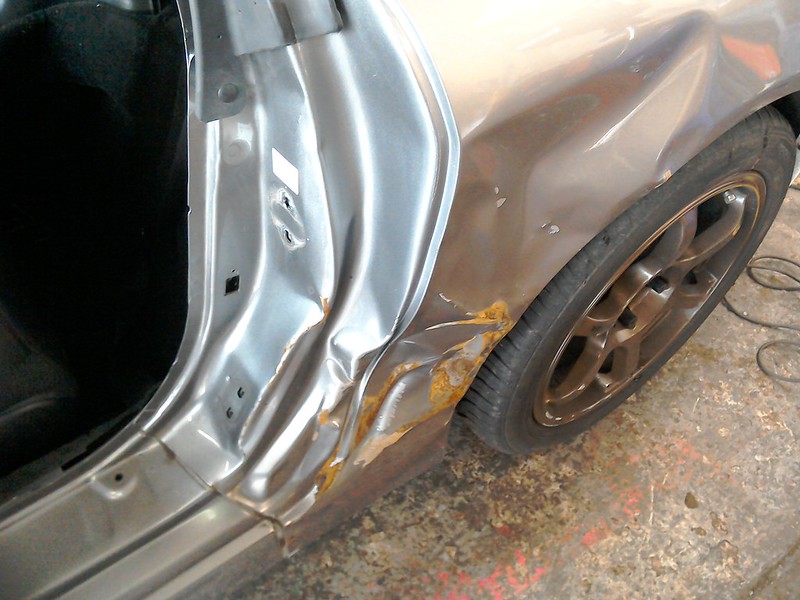
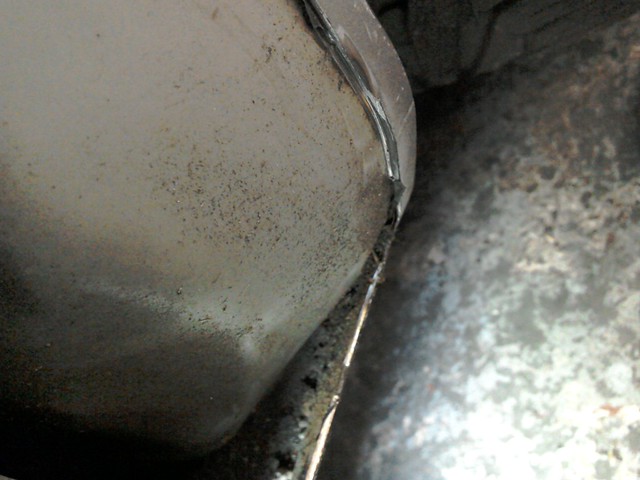
The next few pics are the lower part of the wing and sill area and as you can see there is the start of the build up of dust and road grime which is holding water and starting the corrosion process at the lower part of the rear sill area and if left unchecked will eventually rot the panel out as we have started to see a few S2000 on the furom
I'll post a few more up in a bit when i have finished removing the rest of the lower sill section
As you can see in this pic of the top sectionof the outer wing where it joins the inner arch the panels are very close together this traps dust and grime then when it gets any moisture in there the dirt acts like a sponge and holds water in there for long periods of time eventually causing the corrosion from the inside out and not as is sometimes posted because of the rubber arch protector these actually help stop stone chips and prevent the start of external corrosion provided they are removed and cleaned once a year, luckily mine has no signs of any corrosion in this area which is why i'm leaving this section well along and will only need a cavity protection applied once the job is done.
The next few pics are the lower part of the wing and sill area and as you can see there is the start of the build up of dust and road grime which is holding water and starting the corrosion process at the lower part of the rear sill area and if left unchecked will eventually rot the panel out as we have started to see a few S2000 on the furom
I'll post a few more up in a bit when i have finished removing the rest of the lower sill section
The following users liked this post:
Rich 3 (10-30-2016)
Trending Topics
10-30-2016, 12:34 PM
#8
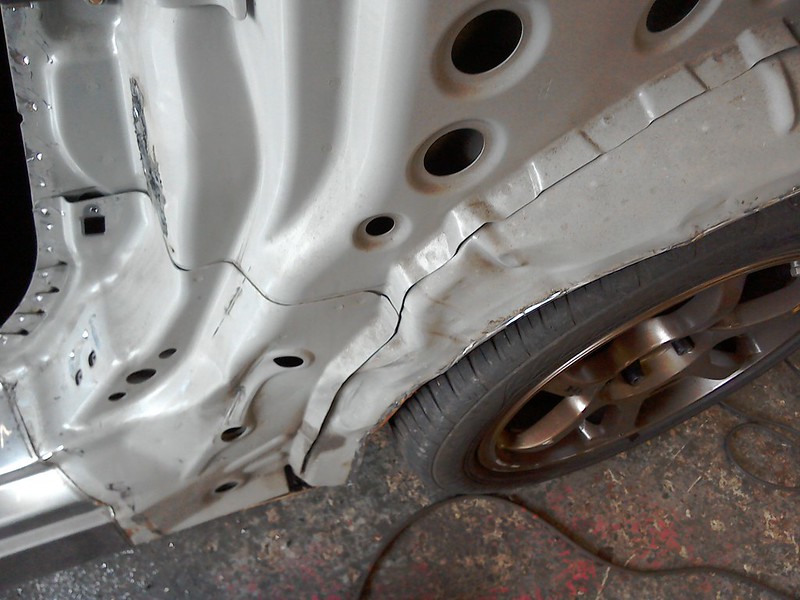
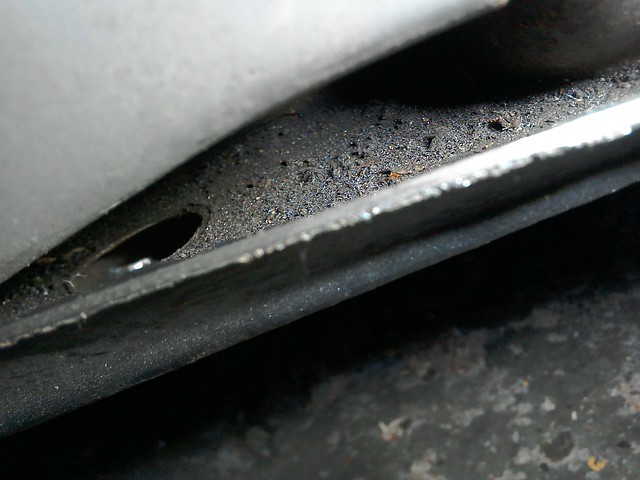
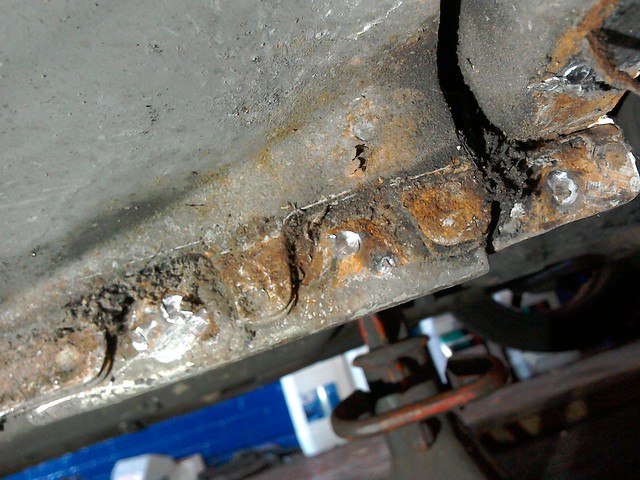
This next pic shows the small drain holes at the rear of the sill it's important to keep these clear, i've poked mine clear a a couple of times but the photo after this will show the debris collecting so next time i might stick the air line in there to blow it clear, ignore the big round hole for now that's where a rubber grommet fits which is handy for injecting cavity wax when finished
 ,
,
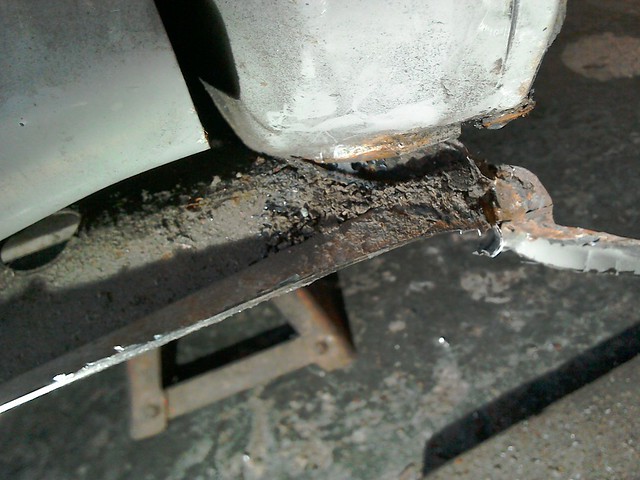
This one after the lower part of the sill section has being removed clearly shows the dirt trapped behind that blocks up the drain holes and holds the damp in, considering it's being relatively dry and i ain't washed my car for a few weeks it's still quite quite moist in there,
 ,
,
,This one after the lower part of the sill section has being removed clearly shows the dirt trapped behind that blocks up the drain holes and holds the damp in, considering it's being relatively dry and i ain't washed my car for a few weeks it's still quite quite moist in there,
,
10-30-2016, 12:54 PM
#9
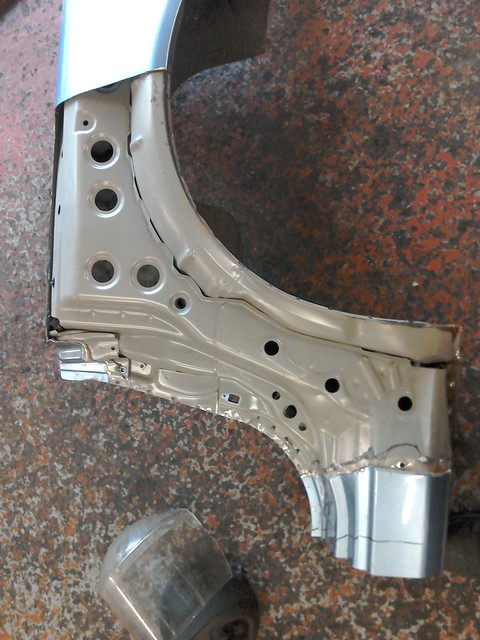
Next up was to carefully unpick the section of wing from the s/h rear quarter i'll be using for the repair and a quick trial fit onto mine,
 ,
,
The next job was to panel beat the inner arch back to shape to suit the wing section then coat everything with zinc primer.
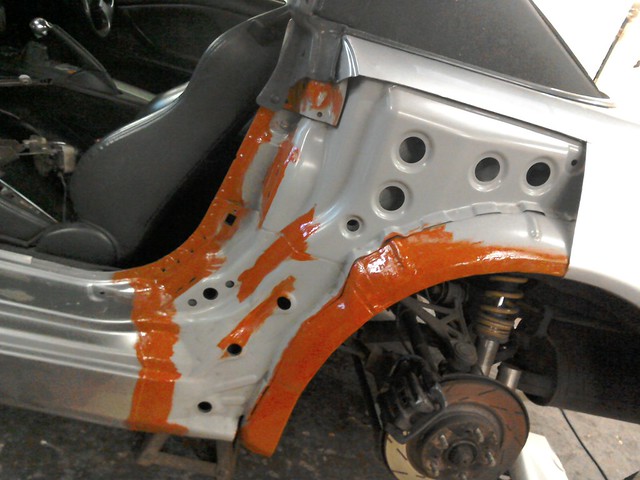
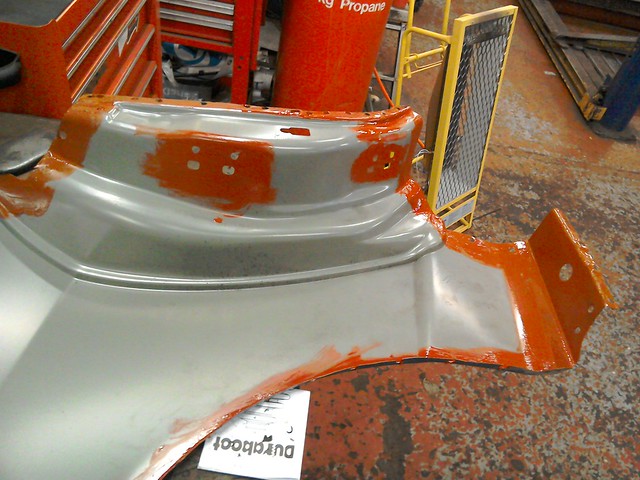
,The next job was to panel beat the inner arch back to shape to suit the wing section then coat everything with zinc primer.
10-30-2016, 01:03 PM
#10

I'm calling for a guest slot on Car SOS!