DIY Oil Change
Originally by bat711
My little attempt to give something back to everyone I’ve learned something from on this board. First, let me say my method is based off of XViper’s previous how-to. For whatever reason, that one no longer seems to be available so I took some pictures while doing my oil change this evening.
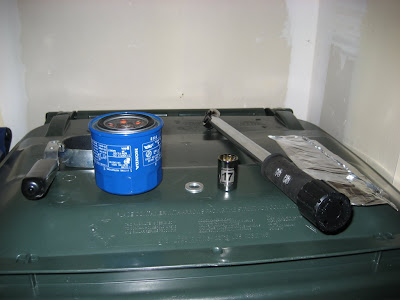
Start off by getting everything you will need together. For the way I do it my list includes:
- 17mm socket
- Filter wrench
- Ratchet
- Funnel
- Oil catch pan
- Honda oil filter (Part #15400-PCX-004)
- New crush washer
- 5.1 qts. of your preferred 10w-30 motor oil (or 5w-40 if you will be seeing regular -0F temps)
- Floor jack
- Jack stands
- Wheel chocks
- Torque wrench
Additionally I use a few things that are optional but might help someone else out as well:
- 4 pieces of 1ft. 2x4s for “ramps” (assists in getting jack under car)
- Some aluminum (aluminium if you prefer) foil to act as a “bib” around the oil filter (helps keep things somewhat cleaner during removal)
- Section of pipe to act as an extension for your ratchet (sometimes the bolt doesn’t break free easily.)
Some of the tools I use:
OK, now that we have our tools and supplies let’s get to work. I do this with a mildly warm engine on the theory that this will help the oil drain better. Generally I check to see that 3 bars or less are showing on the temp gauge (AP2 anyways). First lay two of the 2×4 sections in front of the front wheels. Then get in the car and ease the front wheels onto the “ramps”. This will help make jacking the car a bit easier.
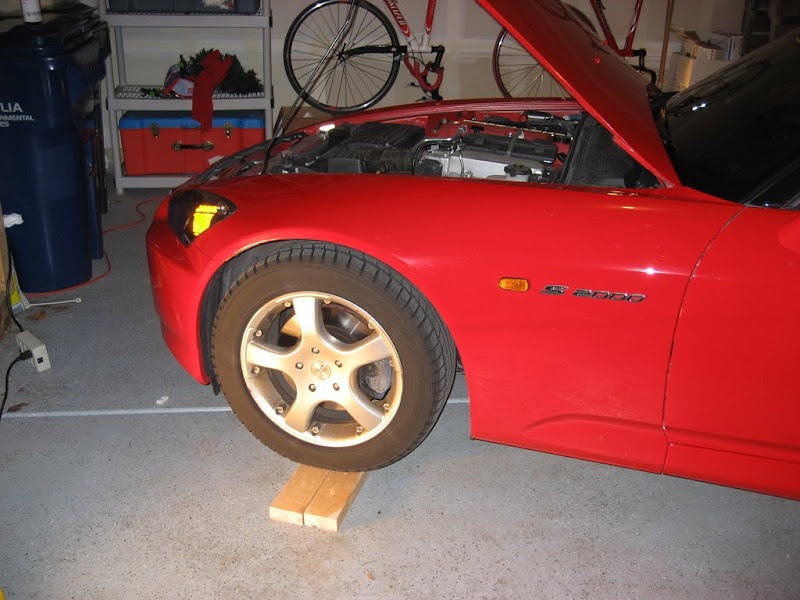
Once the front wheels are on our improvised ramps, set the parking brake and put the vehicle in 1st gear. Then go put your wheel chocks in place behind the rear wheels. At this point you should have enough clearance to reach your floor jack under the front-center jacking point. This is the black metal crossmember with the semi-circle indentation on it. With your jack in place raise the car up. I raise mine as high as it will go (~15 in.) and then place my jack stands on the front side jacking points.
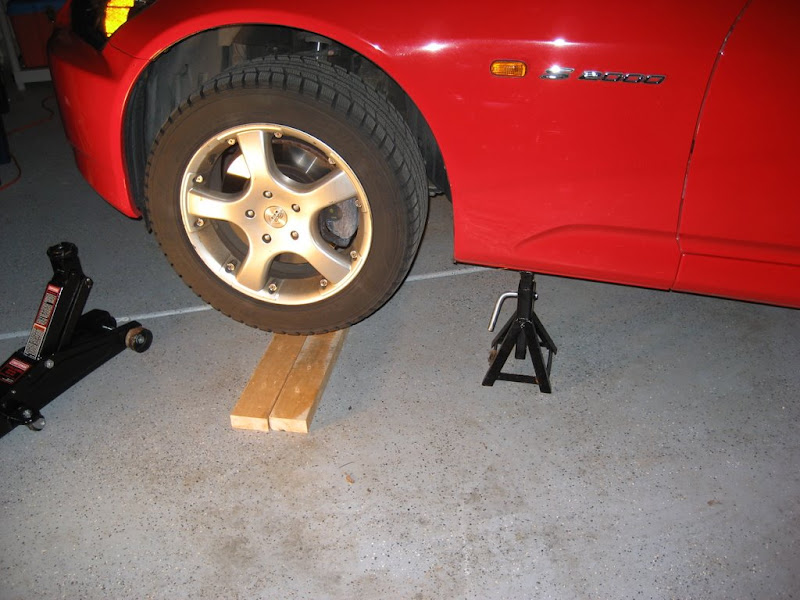
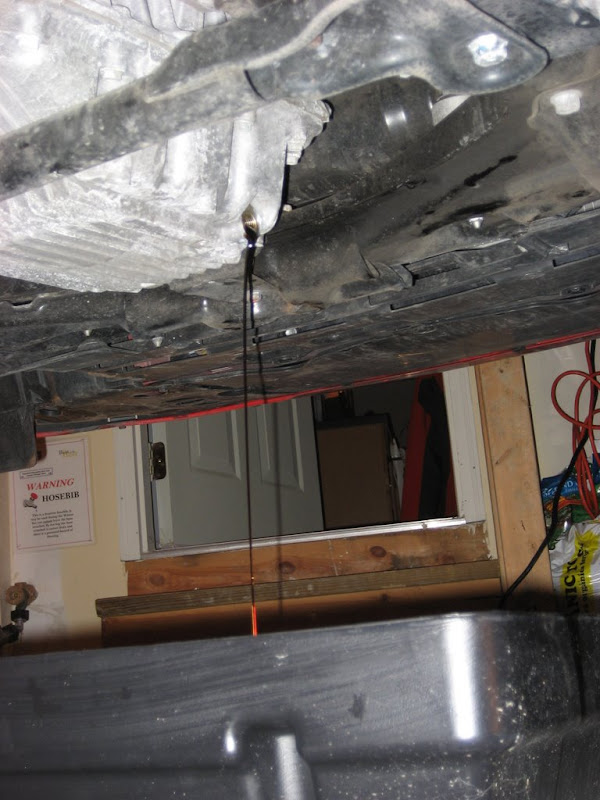
With the car now safely raised, slide your catch pan underneath. Then shimmy underneath with your 17mm socket attached to your ratchet. The oil pan is the bare metal piece of the motor hanging down. The oil drain bolt is located on the passenger side of the oil pan near the front. Here is what it looks like while looking up from the ground after a good coat of road salt is applied.

Get your oil catch pan in place. Oil will shoot out about 6-12 inches so place accordingly. Now we need to get the drain bolt off. Take your 17mm socket and ratchet seat it fully on the bolt and turn counter-clockwise (lefty loosey for some). If it doesn’t readily turn (mine never does) you can try slipping a pipe over the ratchet handle to apply some more torque. Another method I’ve heard of is knocking it with something like a rubber mallet, but I’ve never tested how well this works. Once it breaks free I back out the bolt the rest of the way by fingers so I don’t have to fish it out of the catch pan later. Adjust the catch pan as necessary so that as the flow slows it won’t be going all over the floor.
Note — Some people at this point would jack the car back down so that it is level and drains more completely. However, even without lowering it I add approximately the 5.1 qts that are specified. If you are the anal type go ahead and do it will give you some peace of mind.
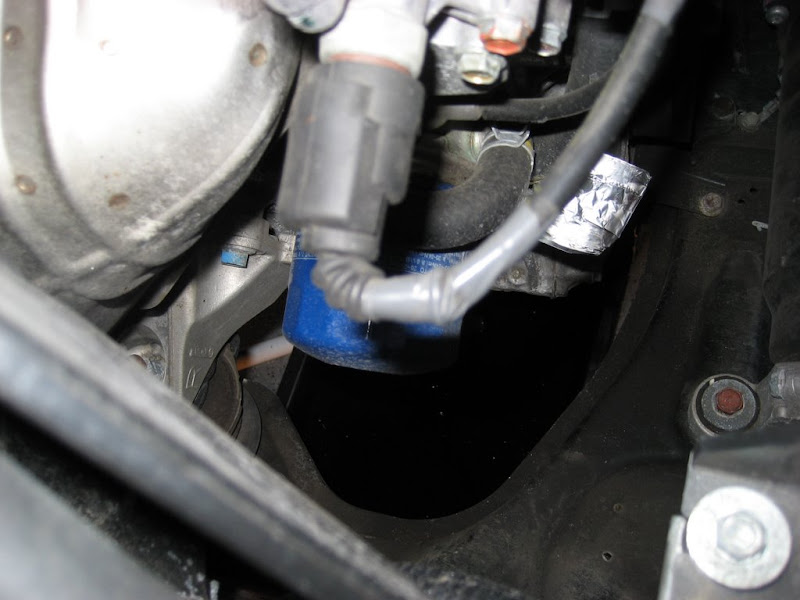
Now you’ll have some free time. Come back and check on it in 20 minutes or so. It should be down to a slow drip at this point. At this point I remove the old filter. I normally remove from underneath, but it is possible if you’ve got some small nimble hands to remove it from above. Just watch the sensor that’s in the way. Below you can see the filter – this is the blue Honda OEM one. I “attach” some aluminum foil around the bottom of the filter to help guide any oil drips off of the engine block. Just sort of fold this into place.
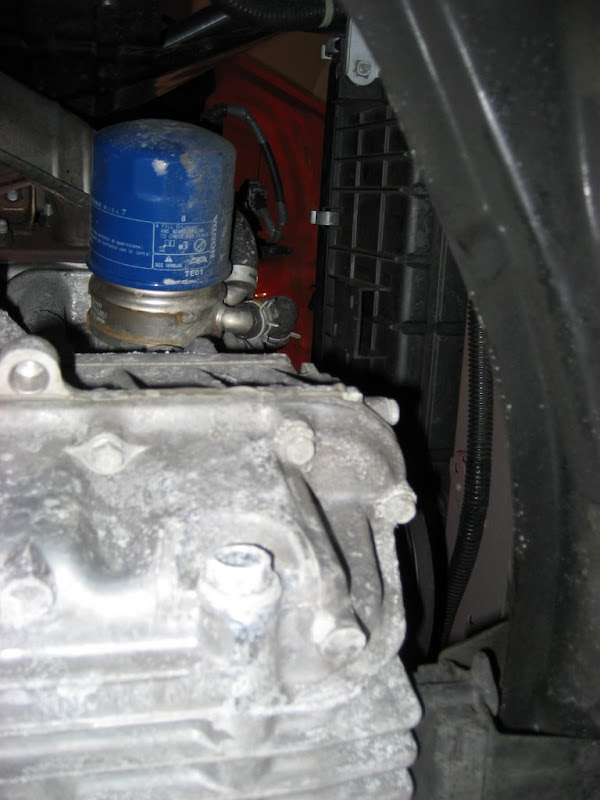
This is the view from below. It’s a bit more unobstructed.
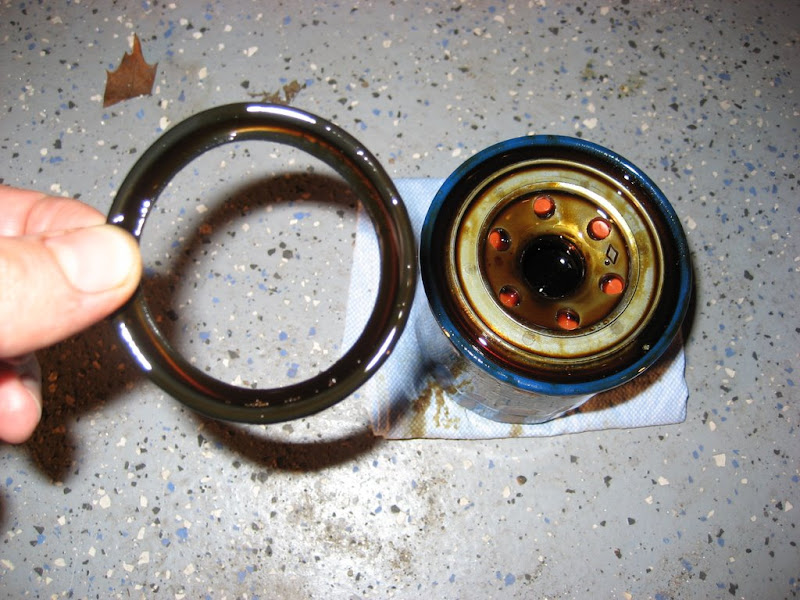
Now, get your filter wrench and remove the old filter by turning counter-clockwise (left). Once it is loosened with the filter wrench I do the rest of the way by hand to keep from dropping it and the used oil all over. When your old filter is removed you should technically have two pieces, a filter and a gasket. Make sure you have both or the old gasket may be stuck to the block still. If so, remove it.
One of the things I do at this point is pour a couple tenths of new oil in as a way to flush out any remnants. So, unscrew the oil fill cap and put it somewhere safe and then drop in some of the new stuff. While this is flowing through (it may take a minute or two to slow to a drip) I prep the new filter and gasket. I fill the filter about half full and then wet the rubber gasket with new oil on my finger.
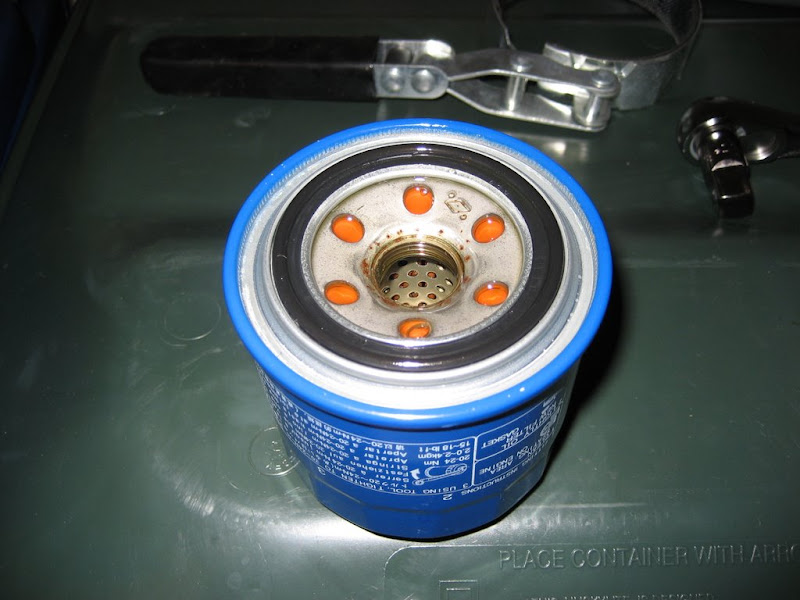
Now that the drain flow is back to a drip we can start reinstalling stuff. I start with the filter. Remove the foil (if it stayed in place) and clean up where the filter attaches if you’ve got a mess. Now install the new filter by turning clockwise (righty tighty). The Honda OEM filter shows to tighten 15-18 lb-ft, but I don’t have a torque wrench that goes that low or the proper attachement. Lucky for us it also has handy markings showing 1/8 turns (you can see 2 and 3 in the photo above). The filter instructions say to tighten 7/8 of a turn once the gasket makes contact with the block.
Once that is done it is time to reinstall the drain bolt. Get your new washer and identify which side is the “pan facing” side. One side of the washer will have a “rounded” edge and the other a “sharper” edge. The “sharp” edge mates to the oil pan. I start it out by hand until it is finger tight and the torque wrench it the 29 lb-ft specs. Once this is in place we can jack the car back down and begin to refill the engine oil.
Get your funnel out and stick it in the oil fill. At this point I generally put in about 4.5 qts. and then check my level. Do this by removing the dip stick, cleaning it, place it back in for a few seconds, and then remove and check. As you can see below I’m in the lower 1/3 of the “good range” cold. This is where I aim for the cold level to leave room for expansion.

At this point I would replace the oil fill cap and dip stick. Start the car up and let it idle for a few seconds, and then take a leisurely drive to get the engine up to temp. Return home let the car sit for a few minutes to let the oil drain into the drain pan and then check the hot level. I aim for the center of the “good range”, others try to get closer to the high end. The important thing is to just make sure you don’t overfill. This is bad for the engine and a pain in the ass because you will need drain some oil. If everything checks out at this point you are ready to go. I’m a bit neurotic about checking the oil level after a change, so generally I also check it cold and hot the next day (assuming I’m not driving again until then).
Last step clean up your mess, and let me know if I’ve missed anything…
Bonus credit – get your oil analyzed.