Installing a JDM Undertray For Better Aero (Photos)
JDM's latest is the world's first production undertray made just for the S2000. And it's super easy to install.


1. Why Do You Need an Undertray or Diffuser, Anyway?
You might be asking yourself, "why the heck do I need an undertray or diffuser on my S2000?" Well, the answer is simple - your car's factory aero is incomplete. Air hits your car from every side, including the bottom. But while the rest of the car is covered in nice, slippery sheet metal, the bottom, well, isn't.
An undertray diverts air that might otherwise cause drag as it hits the chassis. As an added bonus, it also keeps high-pressure air underneath the car moving, which in turn allows the downforce created by your front lip and rear wing to be more effective. So while front and rear splitters are nice, what you really need is a front-to-back undertray that's as flat as possible to keep that air moving efficiently.
Enter Password: JDM. Their revolutionary undertray for the S2000 is a direct bolt in, designed to work with either the factory exhaust or most aftermarket setups. The piece is also lightweight thanks to its carbon fiber construction. And with a price tag of $3,000, it's a relative bargain as well.
2. Installing a Password:JDM Undertray
If you're wondering just how easy it is to install a JDM's undertray, look no further than this detailed step-write-up by Super Street Online. The kit comes with all the hardware you'll need for installation, including laser cut mounting brackets, rubber inserts, fender washers, and other necessary fasteners. The undertray is also designed to work with pretty much any aftermarket exhaust and front lip/spoiler. If modifications are necessary for clearance, shaving away excess carbon fiber is a piece of cake.
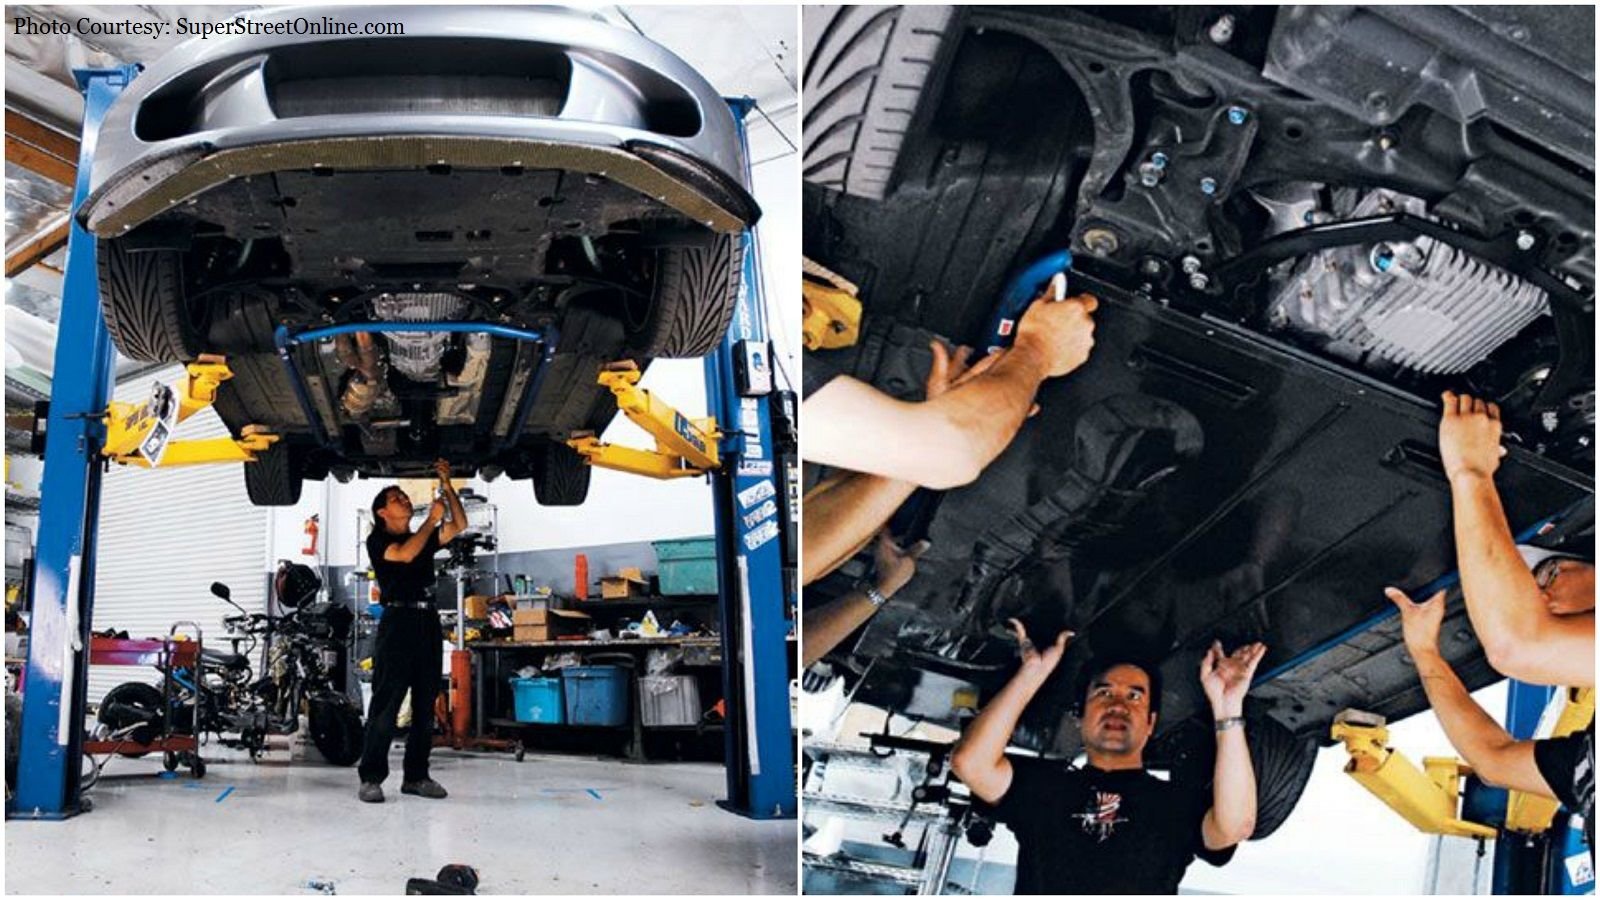
3. Preparing for Installation
You can install the undertray by yourself, but it helps to have a couple of buddies on hand if possible. If you can't recruit a friend or two, a lift and a transmission jack make the job more convenient. But if you don't have such fancy equipment, you can still bolt the undertray in using basic ramps or a floor jack and jack stands. Repeat after me everyone, safety first!
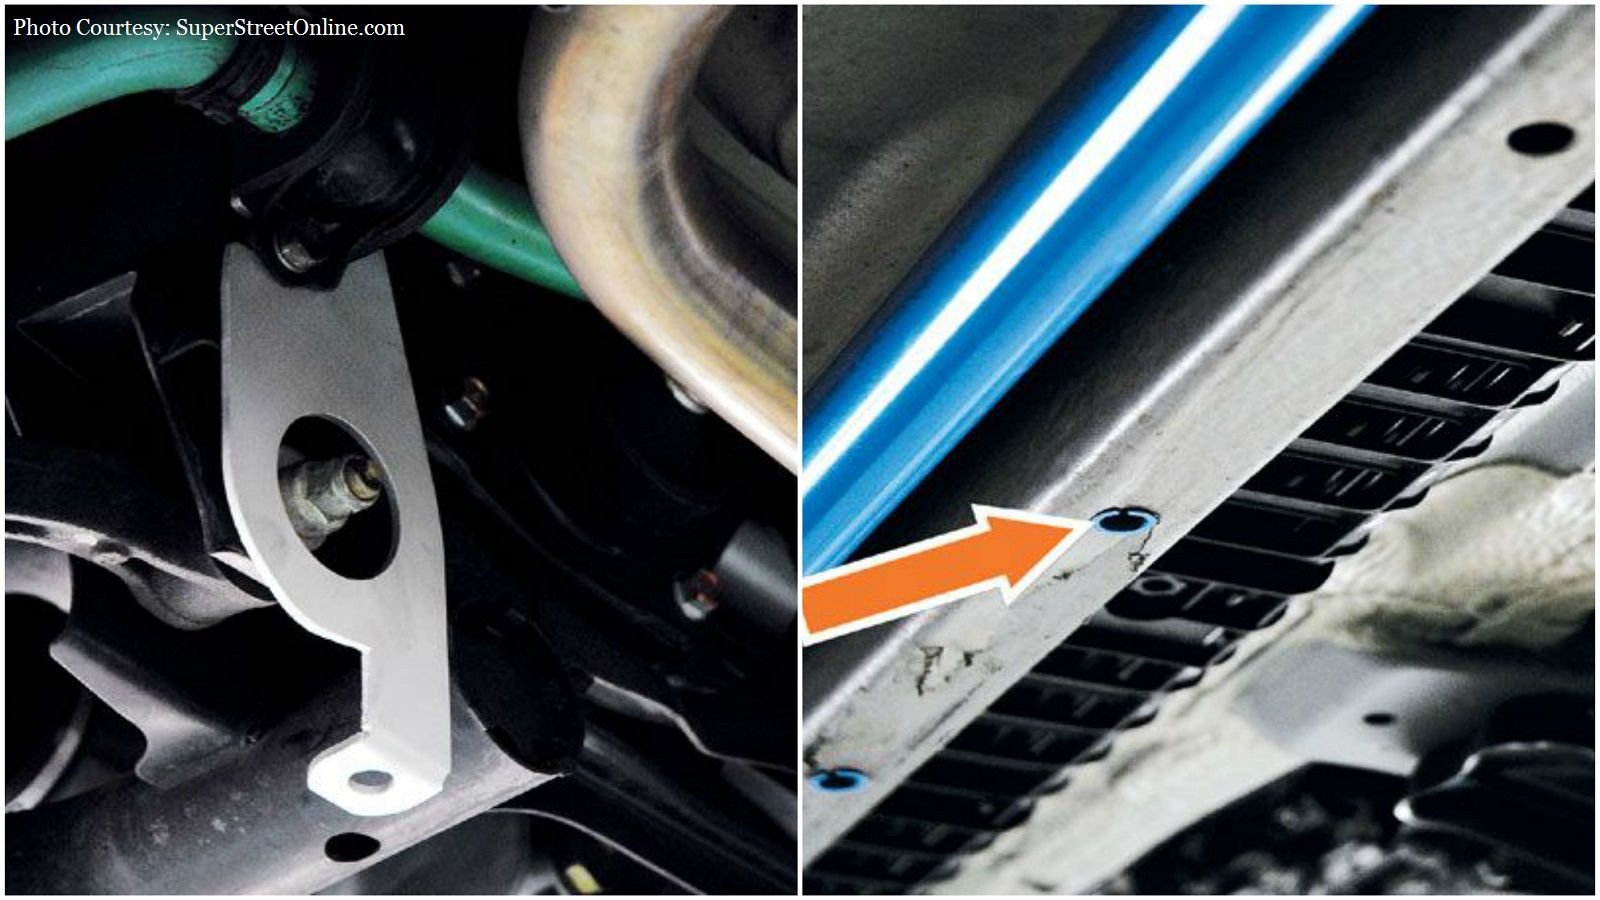
4. Install the Mounting Brackets and Rubber Nuts
The first step is to install all of the aluminum mounting brackets and the rear frame brace, which also serves as a mounting point for the panels. Nothing needs to be removed, but you will need to loosen the rear anti roll bar mounts to slide the brackets in between them. Next, slide the rubber inserts into the existing holes in the chassis.
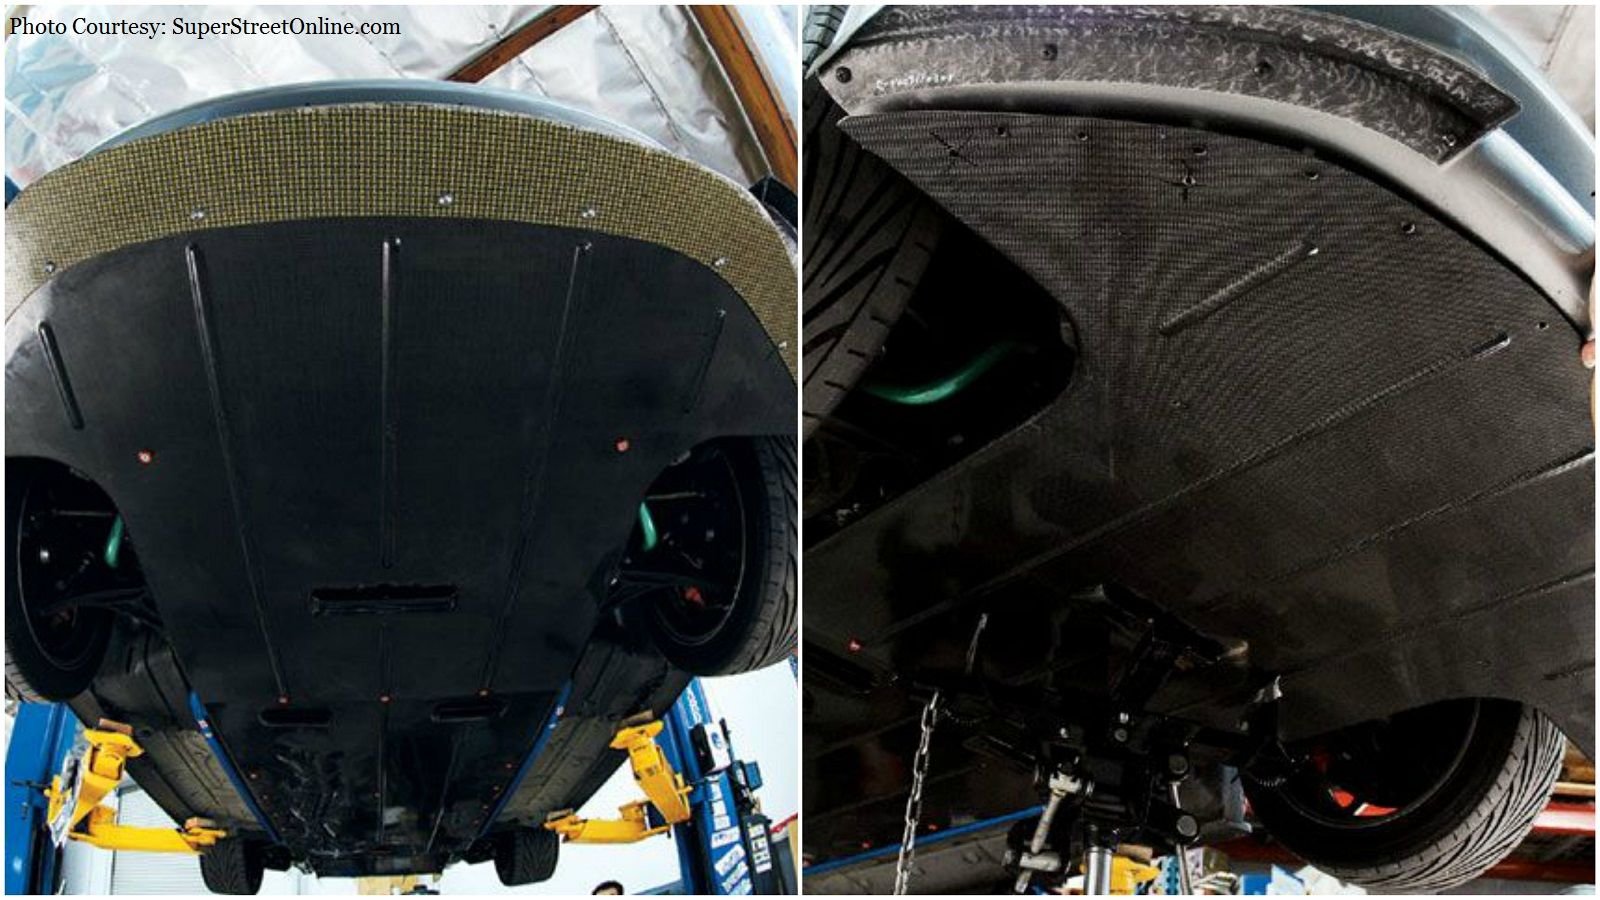
5. Install the Undertray Panels
Next, install the panels starting with the rear piece. Move your way forward from there, fastening each panel in place with the included rubber adapters and fasteners. Align and install the center section next. Once you hit the front plate, you'll secure it to the front bumper. Finally, make sure all the Allen bolts are nice and tight. And just like that, presto! (Almost) instant aerodynamic advantage.