3M Paint Defender Application and Review
 05-10-2014, 08:41 PM
#1

Thread Starter
I have used 3M products for over 12 years- i have been a big proponent of the 3M Paint Protection Film and used the first gen stuff on the leading edge of my civic's hood. As recently as a few years ago, a friend told me of development work being done on a spray on protection film. Once it became commercially available, i had to try it. It was released in Canada about 4 weeks before RTD 2014.
Here is my story.
First wash the car and allow it to dry. I then used the special wax in the kit- this is a critical step so the film removes easily when its worn.
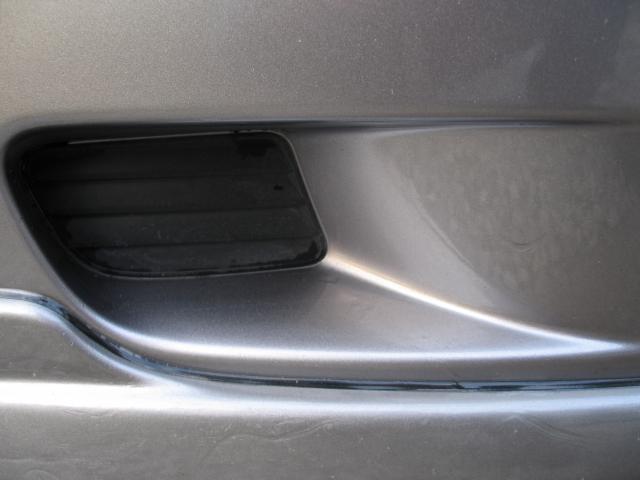
Second, mask everything that you don't want to get hit with the spray film. This took about 2 hours with the longest time spent on the bumper cut outs. I used 3M tape with the plastic film already attached. You create the first line of tape, then tape over the leading edge of that.
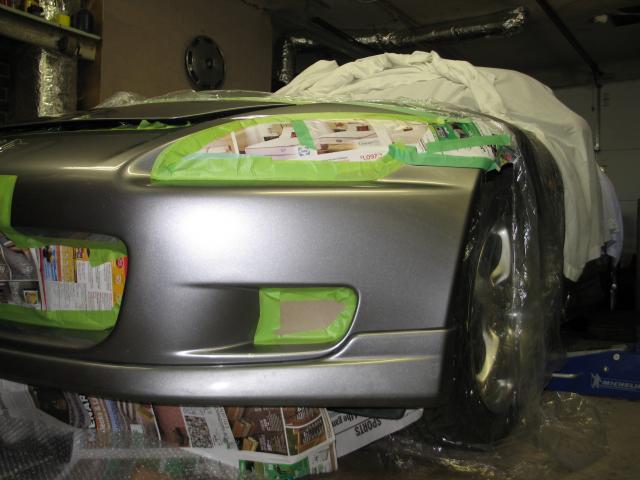
Shake the can up real good. Follow the instructions closely for application paying attention to the spray time- one foot of spray coverage every 2 seconds. work on only 1/2 of the hood to start. Go side to side to fully cover, then up and down, then side to side again.
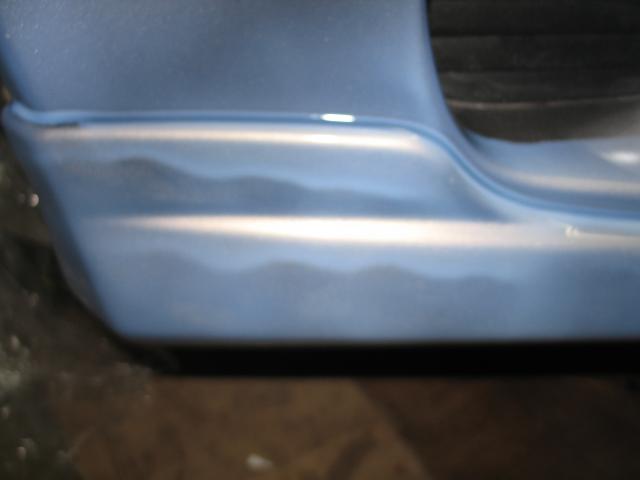
The film will be a milky white colour with an orange peel surface reflection.
do the other half with the same technique. DO NOT STOP SPRAYING ONCE YOU START EACH HALF. once entirely sprayed down, remove your leading tape edge. I had some trouble with removing the finicky parts around the bumper cutouts and i accidentally dragged the tape across the wet film. It will leave a slash mark through the film. I ended up shooting the slashed areas with a little extra spray film.
here is an area i accidentally touched the wet film. The film is somewhat amorphous when its wet and these spots will fill in on their own.
after it cured, this is what it looked like.
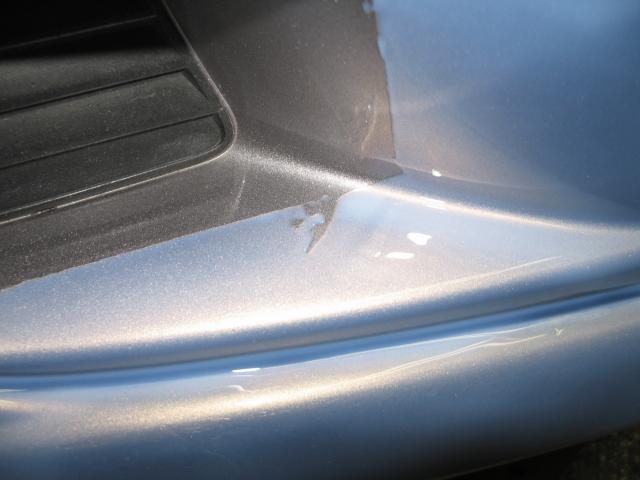
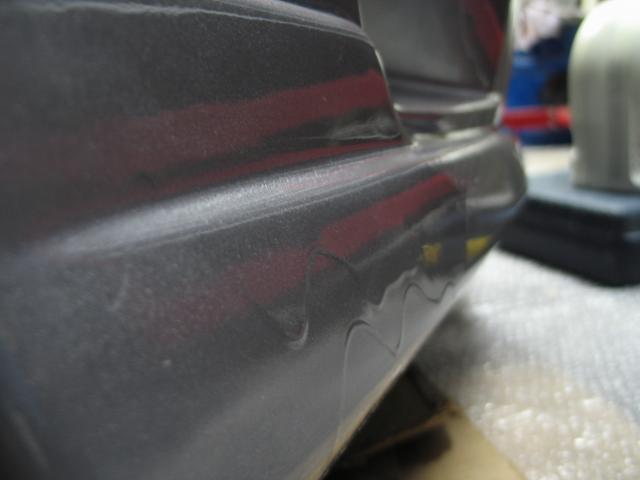
As it dries, it will develop inconsistent runs/waves.
This shot shows the film very nearly dry, except for the thicker material in the runs.

any runs will cause a thicker area of the protective film. for these vertical surfaces, it will be near impossible to not get these inconsistencies. It does not affect the performance of the film.
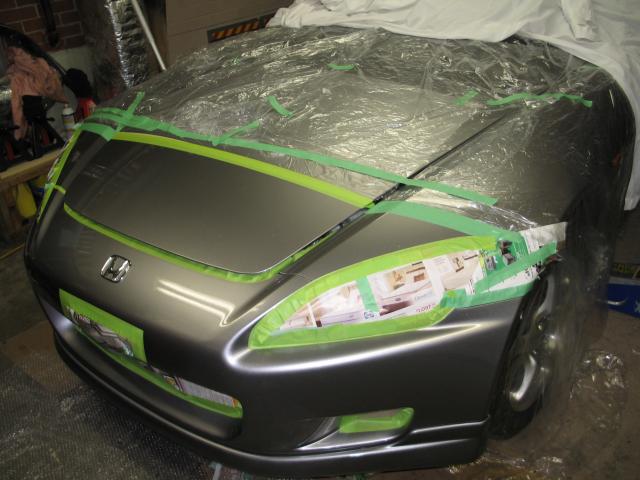
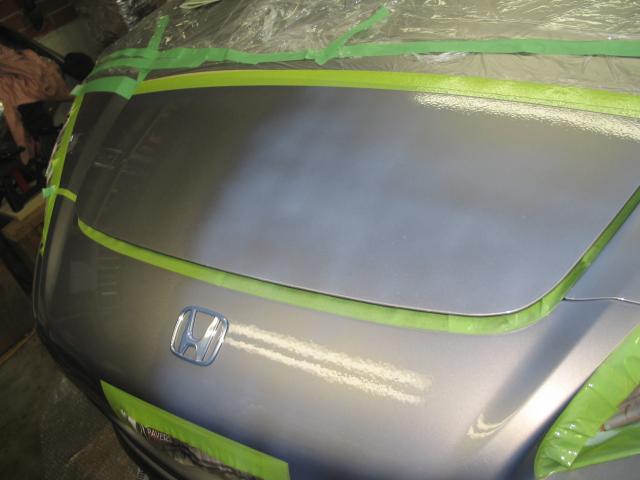
Once the film dries, the rest of the tape can be removed. I put the car in the direct sun to help speed the curing process. Once cured, the film can be gently washed and waxed- it shines like paint and looks nearly invisible apart from the tape line. During the trip, we washed the cars at a DIY car wash- i was just cautious with shooting the film directly with the high pressure wash.
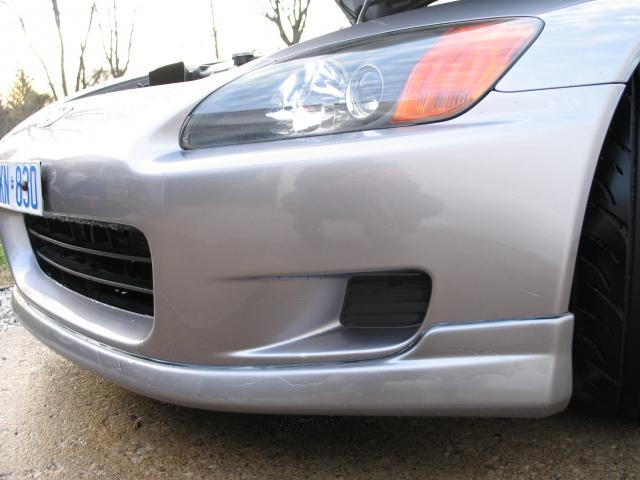
After 2500 miles of driving last year, my lower lip was pock marked and the paint chips made the lower lip look like the milky way. this year was a another story. Definitely fewer chips.

I am impressed with this product and give it my full recommendation. 2 cans covered the leading edge of my hood, the entire front bumper, front fenders, and mirrors. I even did the mirrors as an afterthought and even still, the can did not clog. It has very low VOC's and a mask is not needed, although i used one anyway.
darcy
Here is my story.
First wash the car and allow it to dry. I then used the special wax in the kit- this is a critical step so the film removes easily when its worn.
Second, mask everything that you don't want to get hit with the spray film. This took about 2 hours with the longest time spent on the bumper cut outs. I used 3M tape with the plastic film already attached. You create the first line of tape, then tape over the leading edge of that.


Shake the can up real good. Follow the instructions closely for application paying attention to the spray time- one foot of spray coverage every 2 seconds. work on only 1/2 of the hood to start. Go side to side to fully cover, then up and down, then side to side again.
The film will be a milky white colour with an orange peel surface reflection.

do the other half with the same technique. DO NOT STOP SPRAYING ONCE YOU START EACH HALF. once entirely sprayed down, remove your leading tape edge. I had some trouble with removing the finicky parts around the bumper cutouts and i accidentally dragged the tape across the wet film. It will leave a slash mark through the film. I ended up shooting the slashed areas with a little extra spray film.
here is an area i accidentally touched the wet film. The film is somewhat amorphous when its wet and these spots will fill in on their own.

after it cured, this is what it looked like.

As it dries, it will develop inconsistent runs/waves.

This shot shows the film very nearly dry, except for the thicker material in the runs.

any runs will cause a thicker area of the protective film. for these vertical surfaces, it will be near impossible to not get these inconsistencies. It does not affect the performance of the film.

Once the film dries, the rest of the tape can be removed. I put the car in the direct sun to help speed the curing process. Once cured, the film can be gently washed and waxed- it shines like paint and looks nearly invisible apart from the tape line. During the trip, we washed the cars at a DIY car wash- i was just cautious with shooting the film directly with the high pressure wash.

After 2500 miles of driving last year, my lower lip was pock marked and the paint chips made the lower lip look like the milky way. this year was a another story. Definitely fewer chips.

I am impressed with this product and give it my full recommendation. 2 cans covered the leading edge of my hood, the entire front bumper, front fenders, and mirrors. I even did the mirrors as an afterthought and even still, the can did not clog. It has very low VOC's and a mask is not needed, although i used one anyway.
darcy
 05-11-2014, 07:09 AM
#3
Thread Starter
 05-12-2014, 06:42 PM
#5
Thread Starter
I thought the runs would bug me, but i'd rather them than chips. I think if i did it again, i would go a little lighter with the spraying.
darcy
05-13-2014, 06:23 PM
#6
Registered User


Intresting product. If you can get chance, i'd like to see the top of the hood between the non-protected vs protected.
Also, does it only run like that on vertical surfaces or everywhere?
Also, does it only run like that on vertical surfaces or everywhere?


Trending Topics
05-14-2014, 01:05 PM
#8
Thread Starter
any horizontal surface will not run like the bumper did. On my leading hood edge there is a very small thickness difference- but it is a consistent difference- ie. no actual drip type runs like on the lip.. The hood is excellent with no new paint chips etc.
The wax I used prior to application came with the kit- it is the most important step- don't use your favourite wax, use 3M's. I had enough left over to wax the surface after it had cured. It can be washed and waxed as normal after curing for 4-7 days. Mine cured in 4.
darcy
The wax I used prior to application came with the kit- it is the most important step- don't use your favourite wax, use 3M's. I had enough left over to wax the surface after it had cured. It can be washed and waxed as normal after curing for 4-7 days. Mine cured in 4.
darcy
05-14-2014, 11:07 PM
#9
Registered User

Join Date: Mar 2010
Posts: 1,350
Likes: 0
Received 0 Likes
on
0 Posts
Finally a very clear review. Might do it on my front end once its back from the body shop. I will probably take the bumper off for cleaner application and no runs hopefully. Thank you very much for spending the time to do the review 
