DIY: Custom Interior Stitching
 09-06-2015, 10:34 AM
#1
Registered User

Thread Starter

Join Date: Sep 2008
Posts: 35
Likes: 0
Received 0 Likes
on
0 Posts
hey guys. i recently came across a s2ki post from Facebook about some interior stitching and was willing to give it a try of my own.
please note. this is only what i did and i am not to be held liable if something brakes or goes wrong if you decide to do this on your own!
ok first you will need to decide what color you want to go with. Sense i have a Laguna Blue Pearl with all black interior i decided to go with a metallic blue!
i just went to a local hobby shop or fabric shop and went to the thread isle and looked at all the colors(as you can see in the background there is about 1,000 different colors to pic from) The kind that i picked was like 90cents each but the regular thread at 40cents will do also (i just wanted the slightly shiner thread)
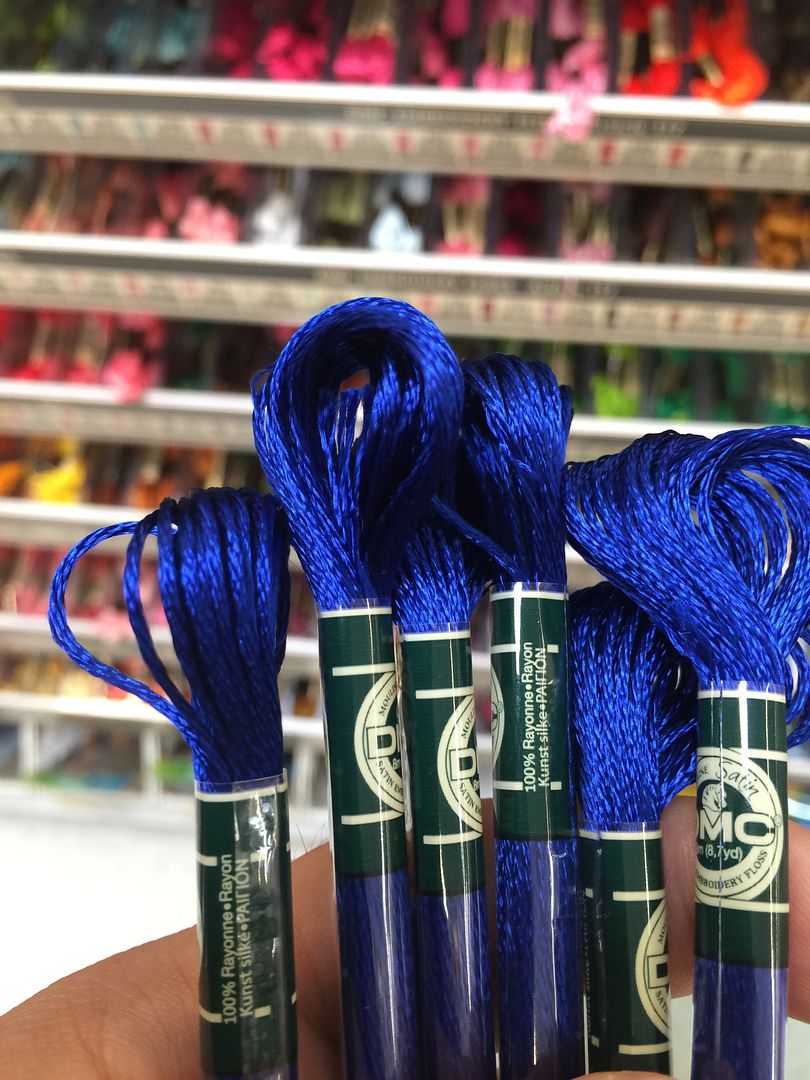
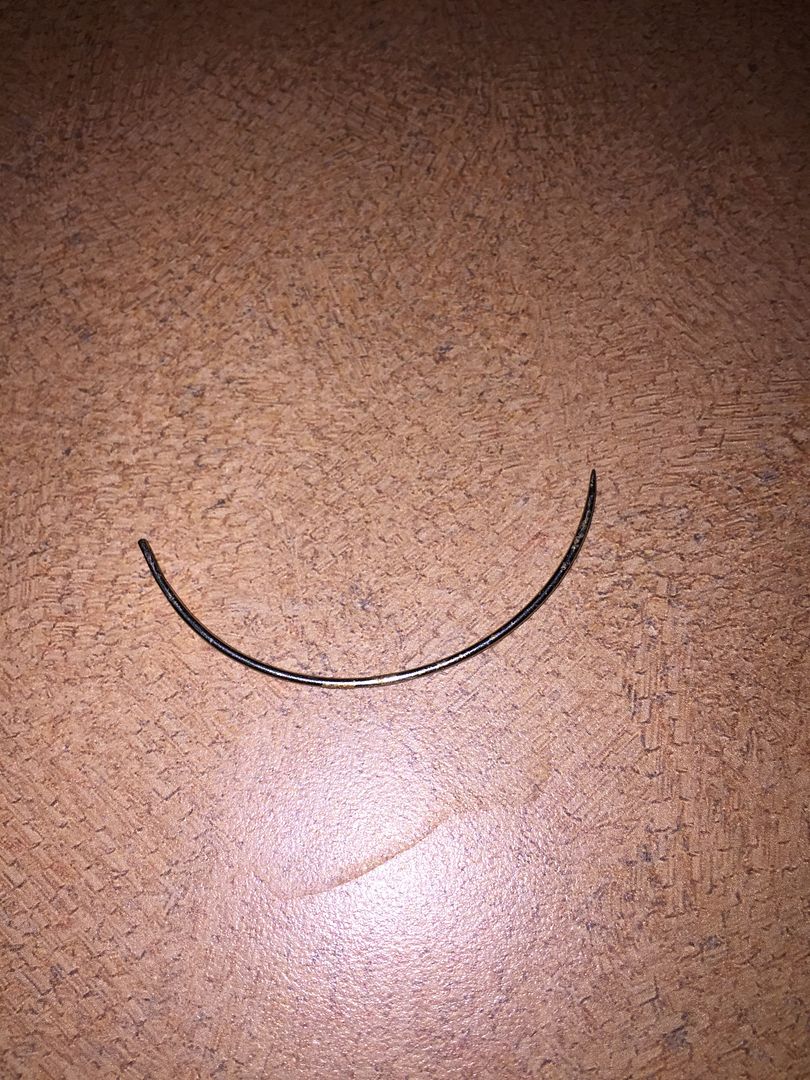
while you are on that isle it would be wise to look for a hook needle if you don't have one already
once you have these two items you are ready to start the disassembly/getting car part ready. In this example i an doing to shift boot for the shifter.
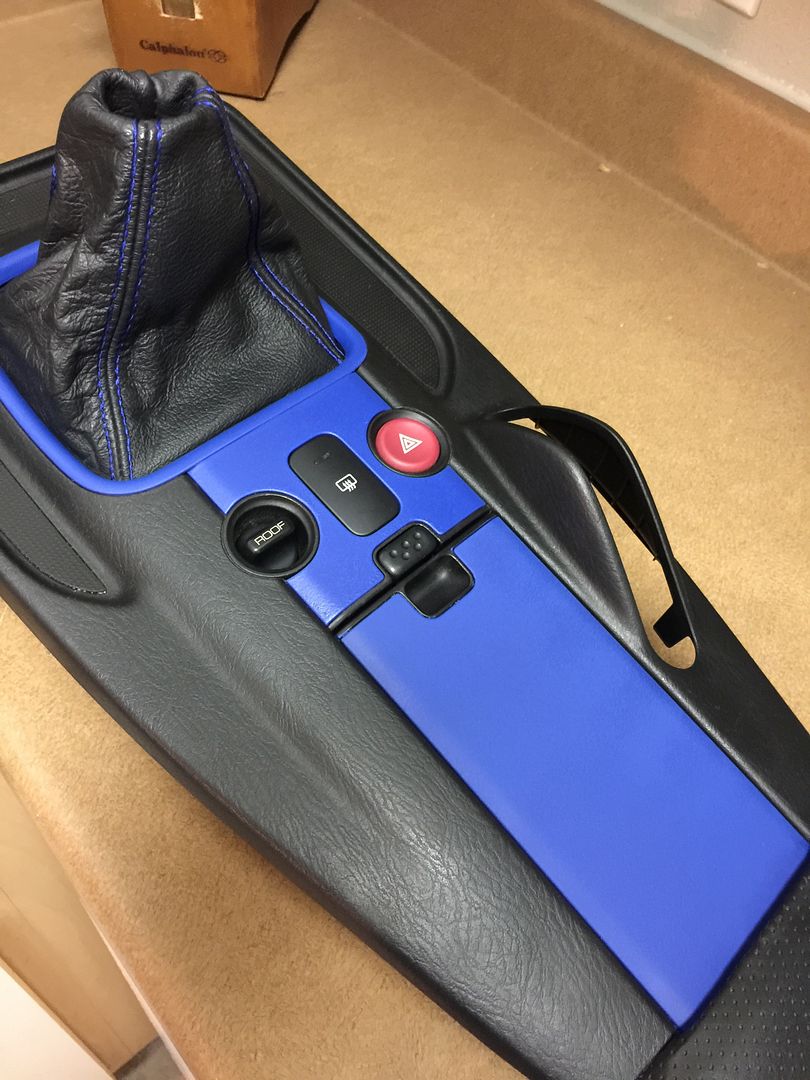
start by removing the center console. this can be done by taking off your shift knob and pulling the e-brake pretty hight up and pull gently (might need a little force) up, this is because the center console is held in with metal clips. Once you have the console off the car BE SURE to DISCONNECT the cables that go to it. this my include the defroster, ragtop switch and hazard lights. after that you can gently maneuver the console off the e-brake and then set aside for further disassembly.
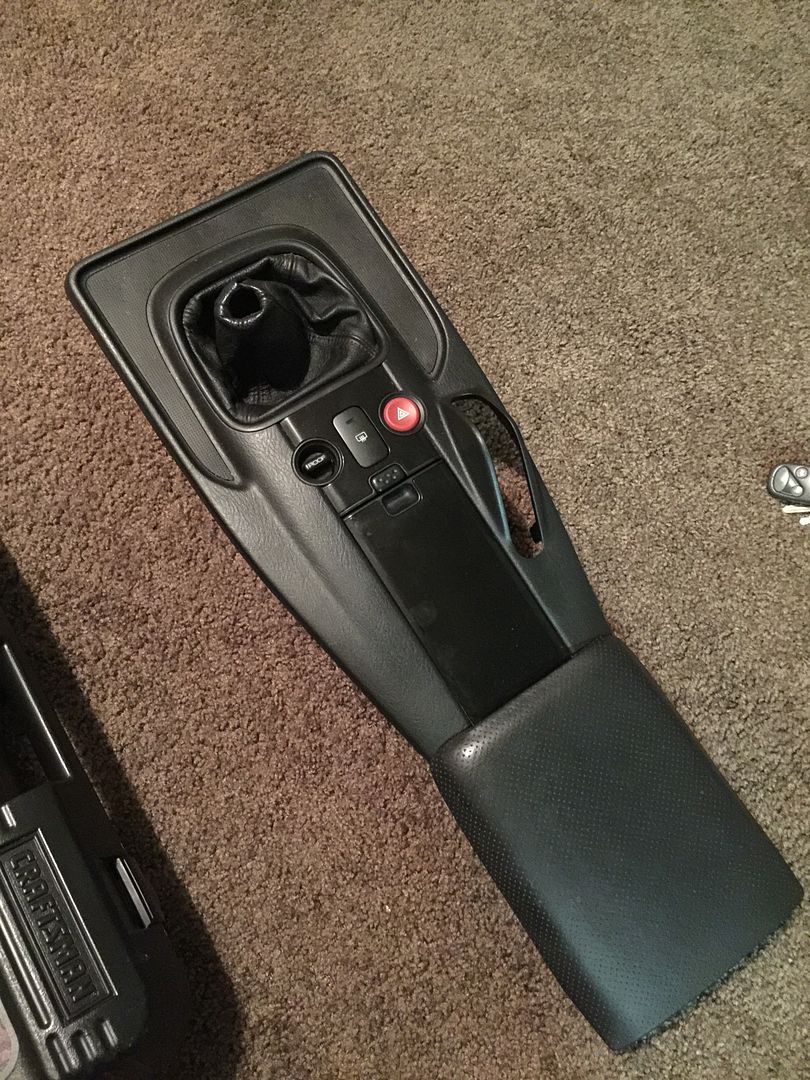
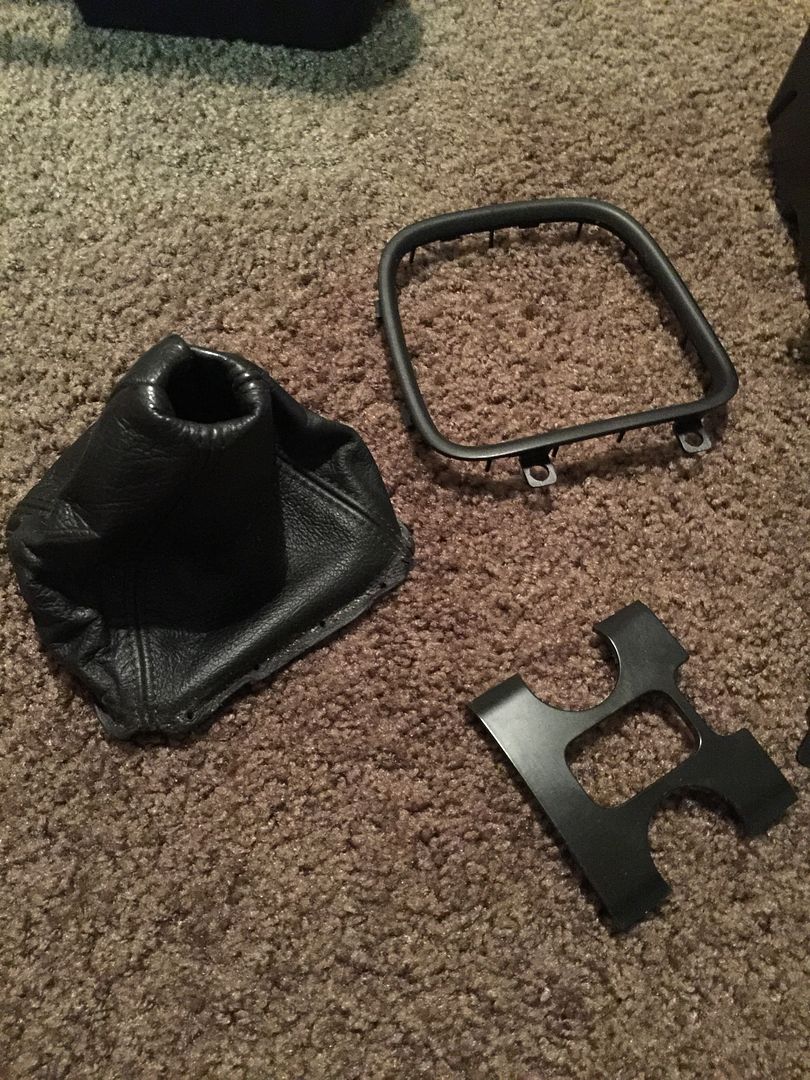
at this point you can place the console upside down on something soft so not to scratch it. You will see several different screws holding everything in place. take out the appropriate screws and set them in a safe place (i just used a plastic bag) and the shift book plastic trim is also held in place by little push tabs. Gently push the trim off the center console after removing the two screws that hold it in place and it will then come free. Now i did notice that the plastic piece next to the shift book wanted to come out also because they share 2 screws. i did have to remove the rag top switch to find the other 2 screws holding that piece in.
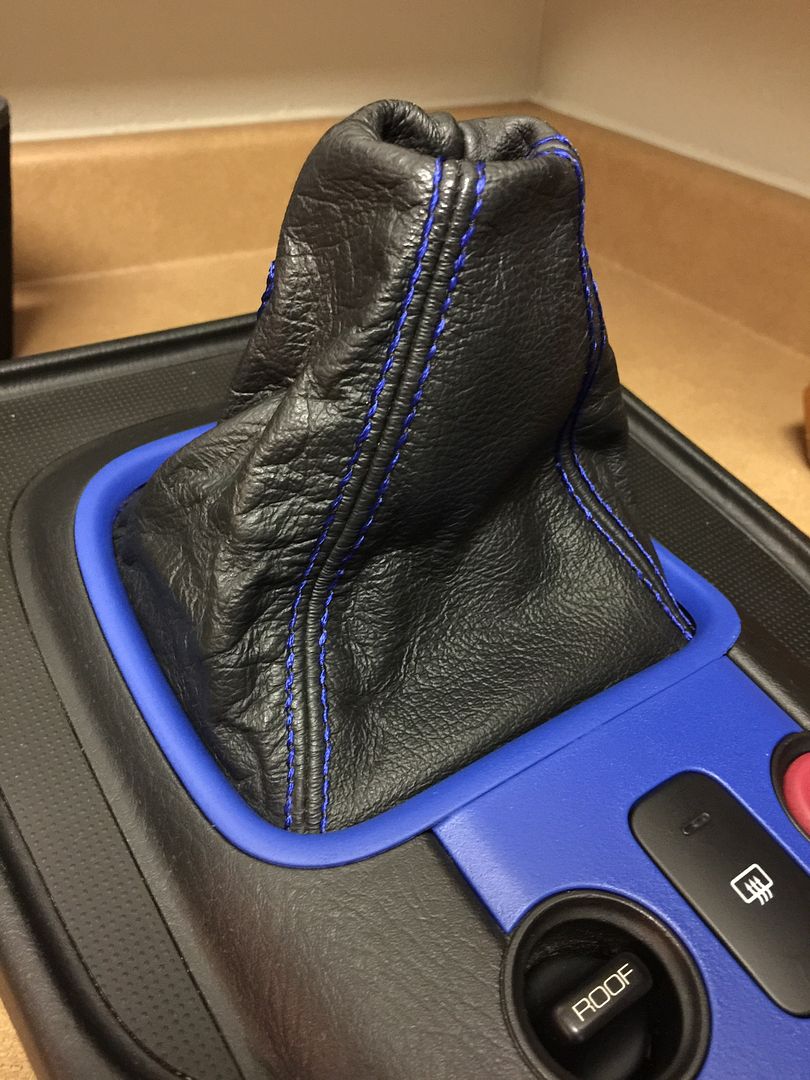
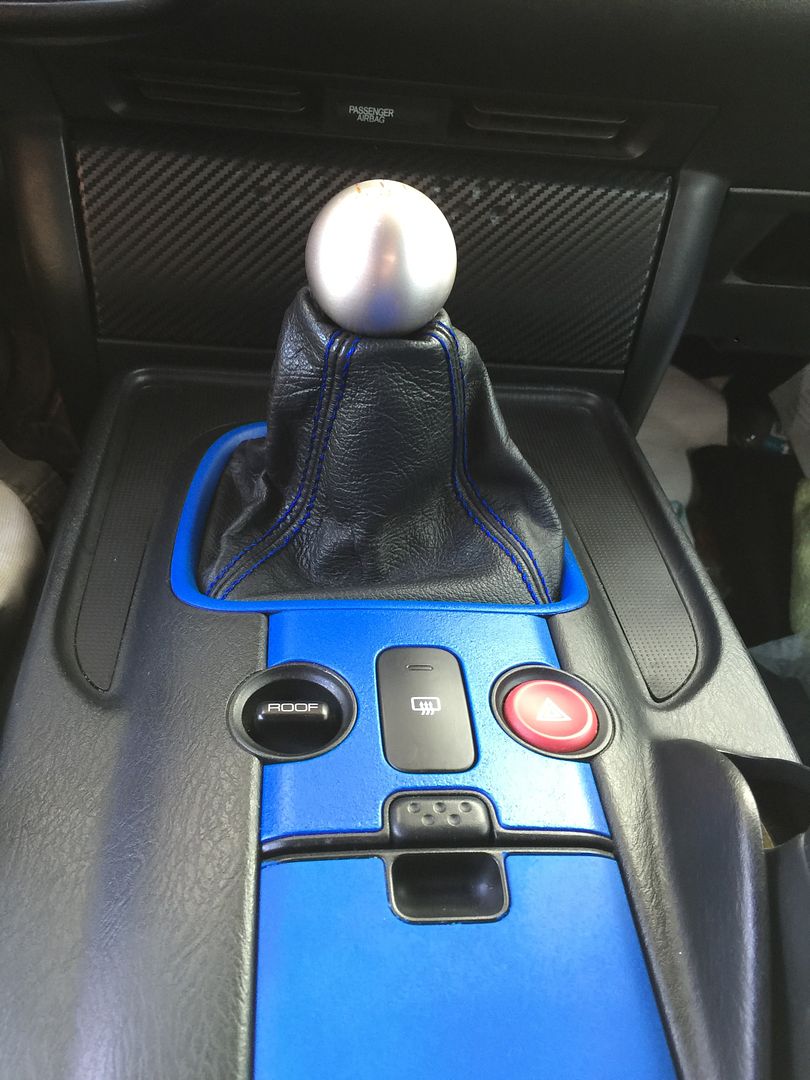
once this is done you will notice the shift boot in held in place with just little plastic pieces punched throughout the leather. Gently remove the leather boot from these plastic pieces.
now we can get to the sticking process. we are NOT removing the factory stitching, we are simply going through the open part of the OEM stitch with our hook needle and thread. Start off by seeing how much thread you need this is really just the length, in a straight line, of what you are stitching. you will not actually be weaving in and out of the leather. after you have the length of string, tie ONE end in a knot and cut the appropriate length. then feed the non knotted end through the needle and do your FIRST STITCH! yay! you just started!!
Start at one end of the boot. I decided to start on the side facing the radio door just in case I messed up. Also you will want to "unroll" the shift boot before you get to far.
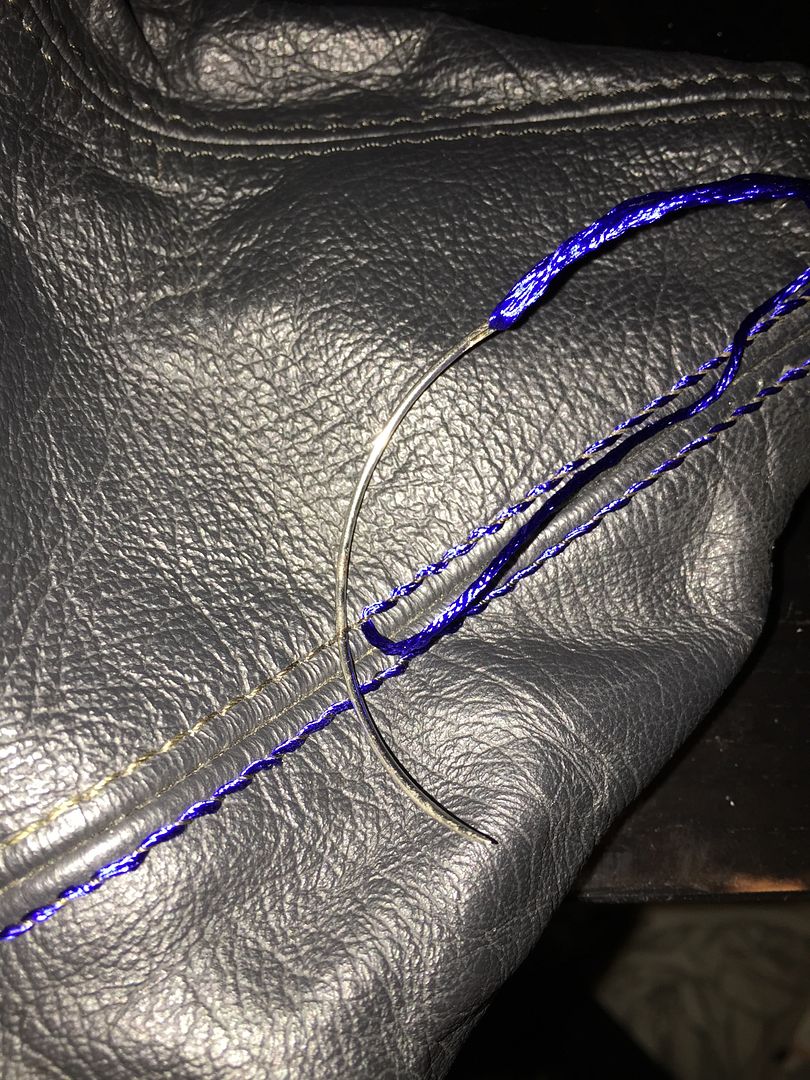
Keep stitching and be sure to pull the thread tight after every stitch.
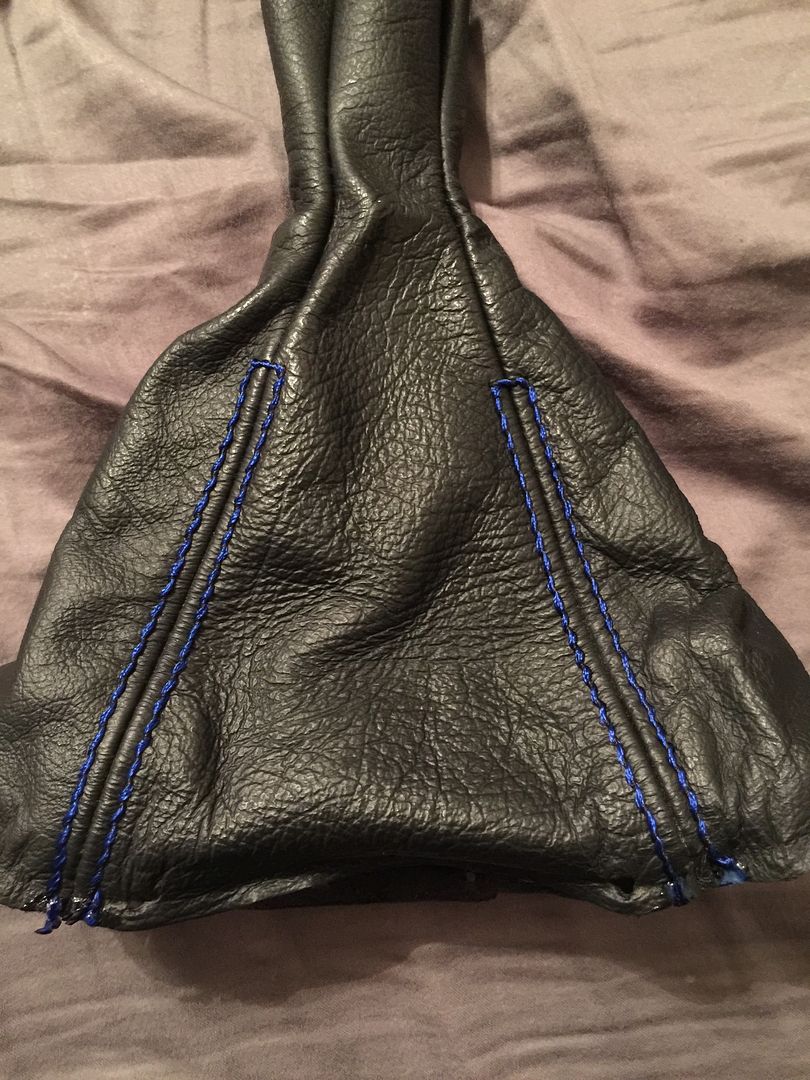
This is what the front facing stitches look like. I just kept the thread going from side to side.
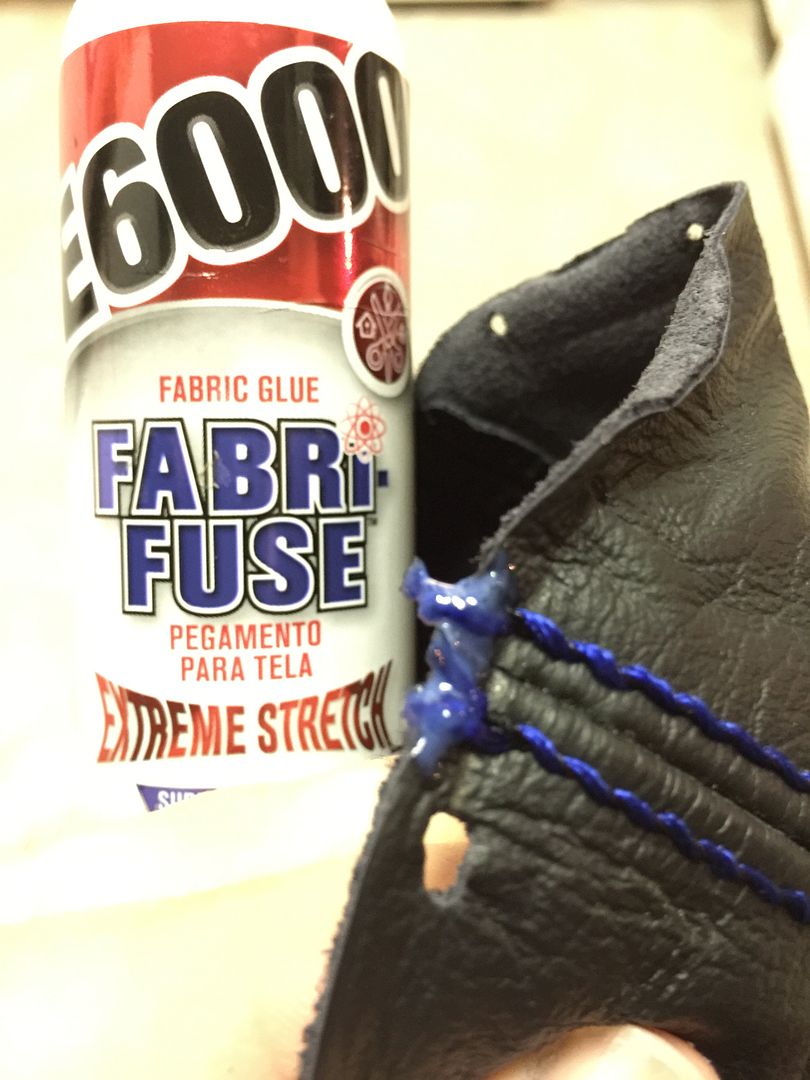
After you finish with the stitching tie a knot and end the stitch. I decided to put some fabric glue on the ends so they wouldn't come undone.
This process doesn't take too long. Just takes some patients. Keep going and keep tightening after each loop till you finish.
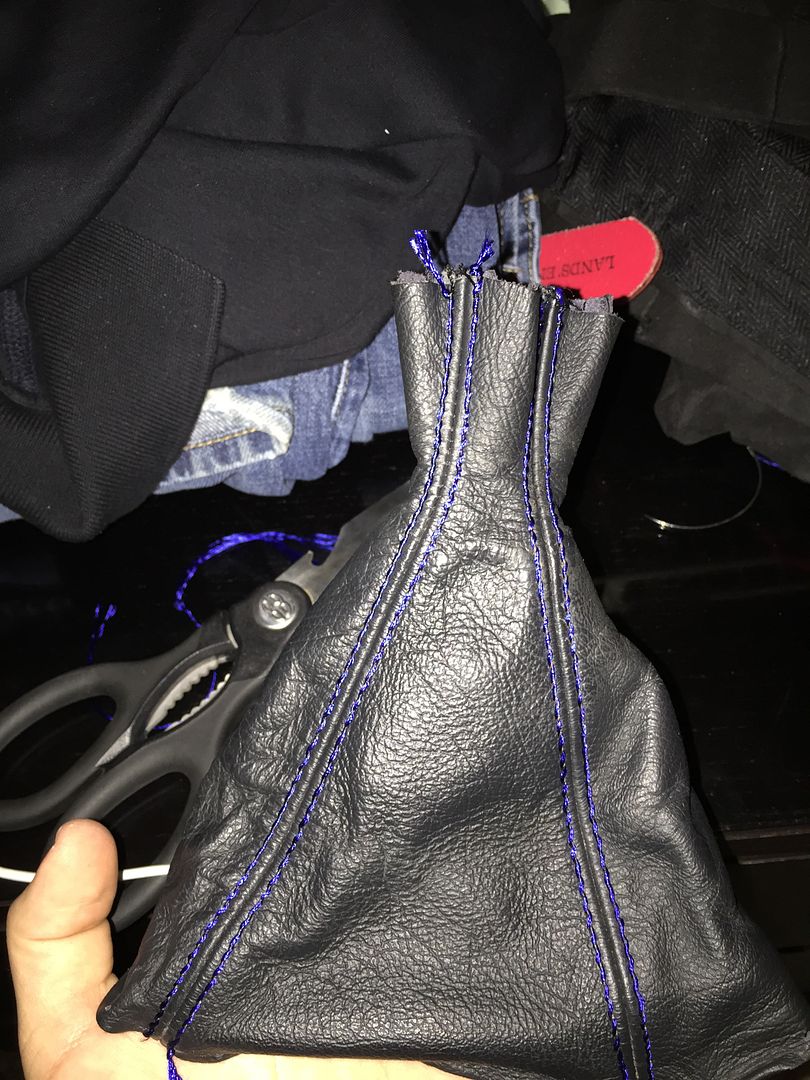
You can stop here and just put it all back together. But sense I had everything taken apart already I decided to take it to another level and do some more custom work.
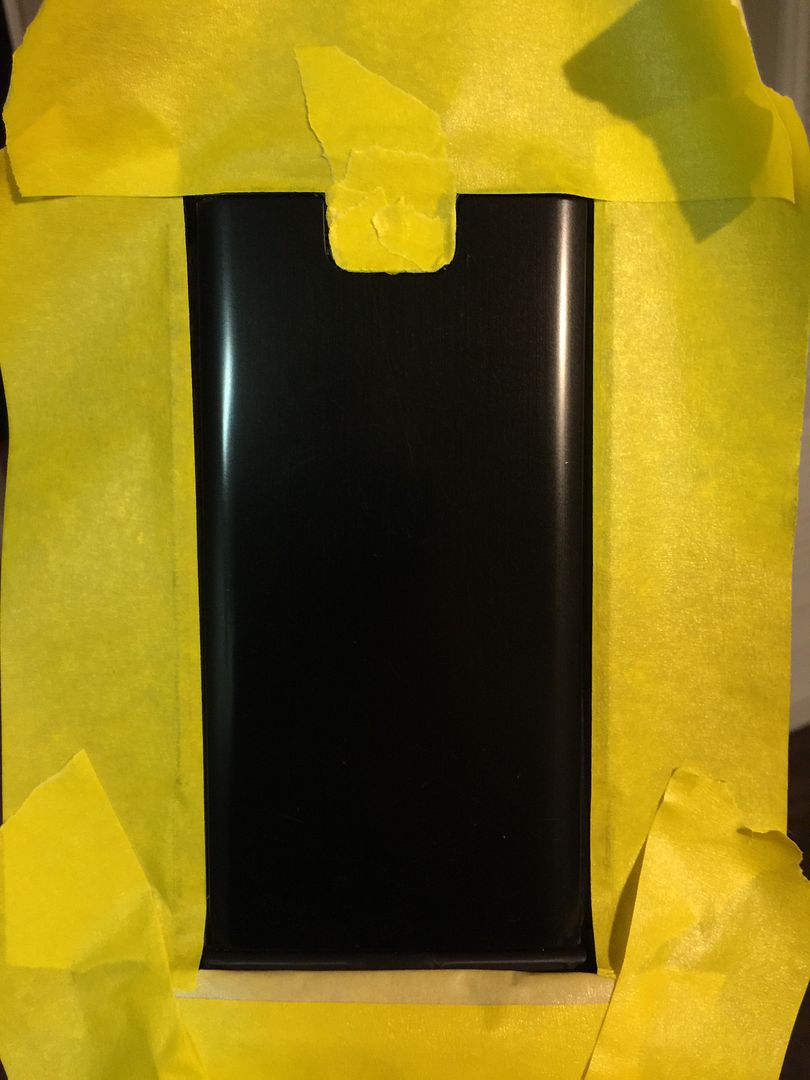
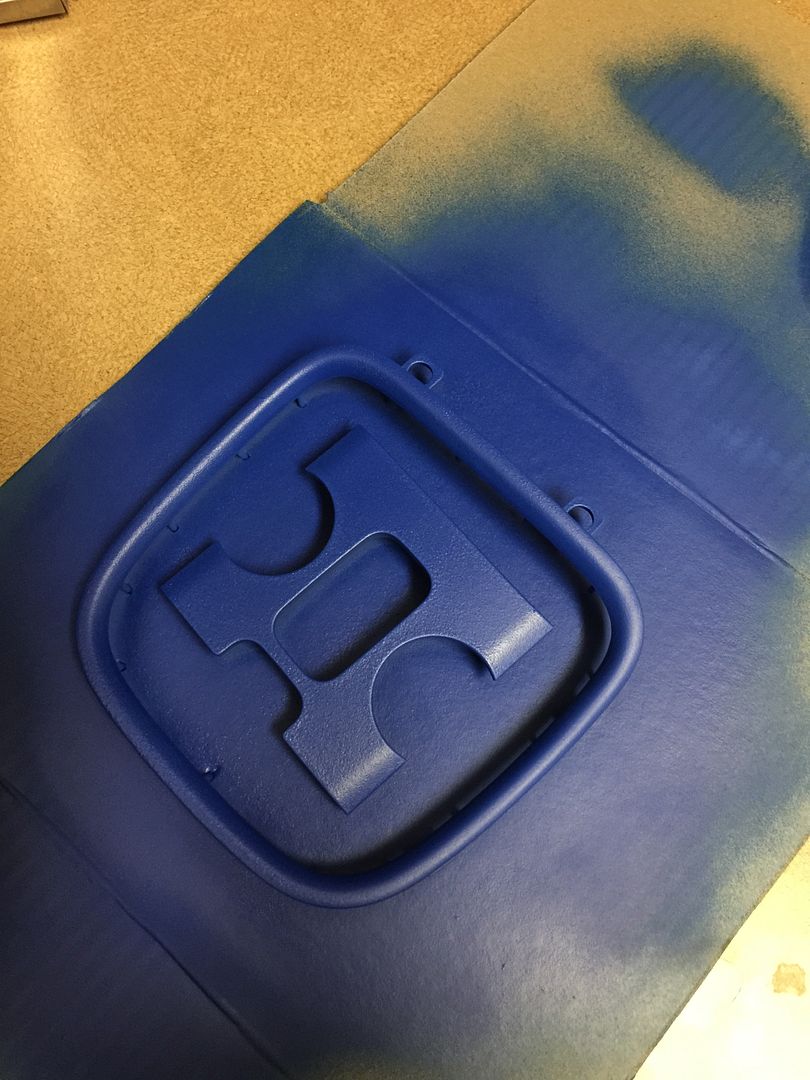
Tapped off the cup holder/tray thing for ap2
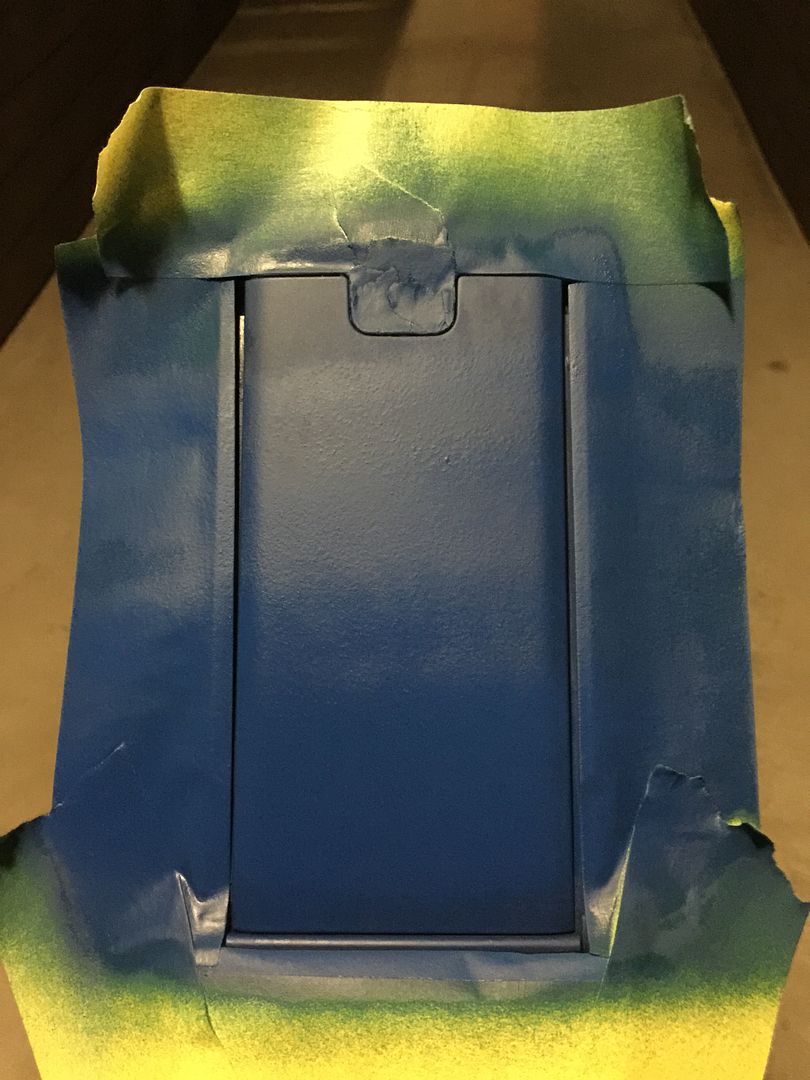
Sprayed it with like 4 coats of blaze blue plasti dip
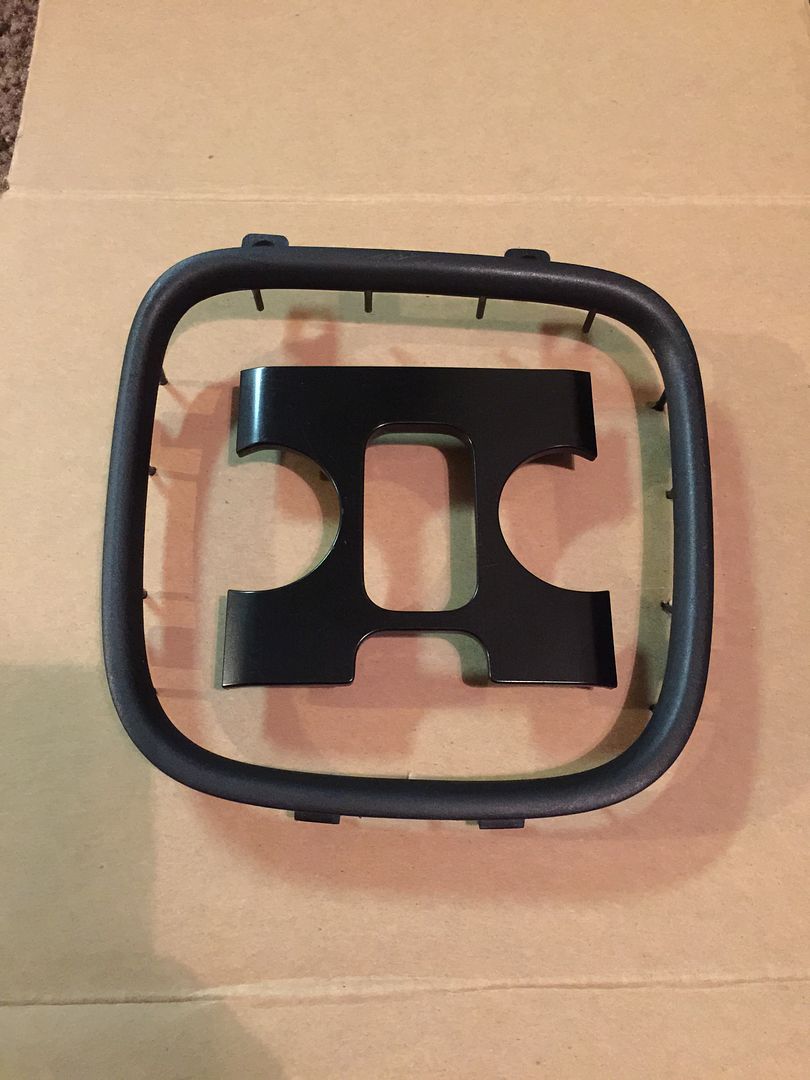
Also decided to do some other pieces. Here I put guide holes in a cardboard box and then pushed all the plastic prices GENTLY into them to secure the outer trim and put one of the screws through the box to hold the other in place.
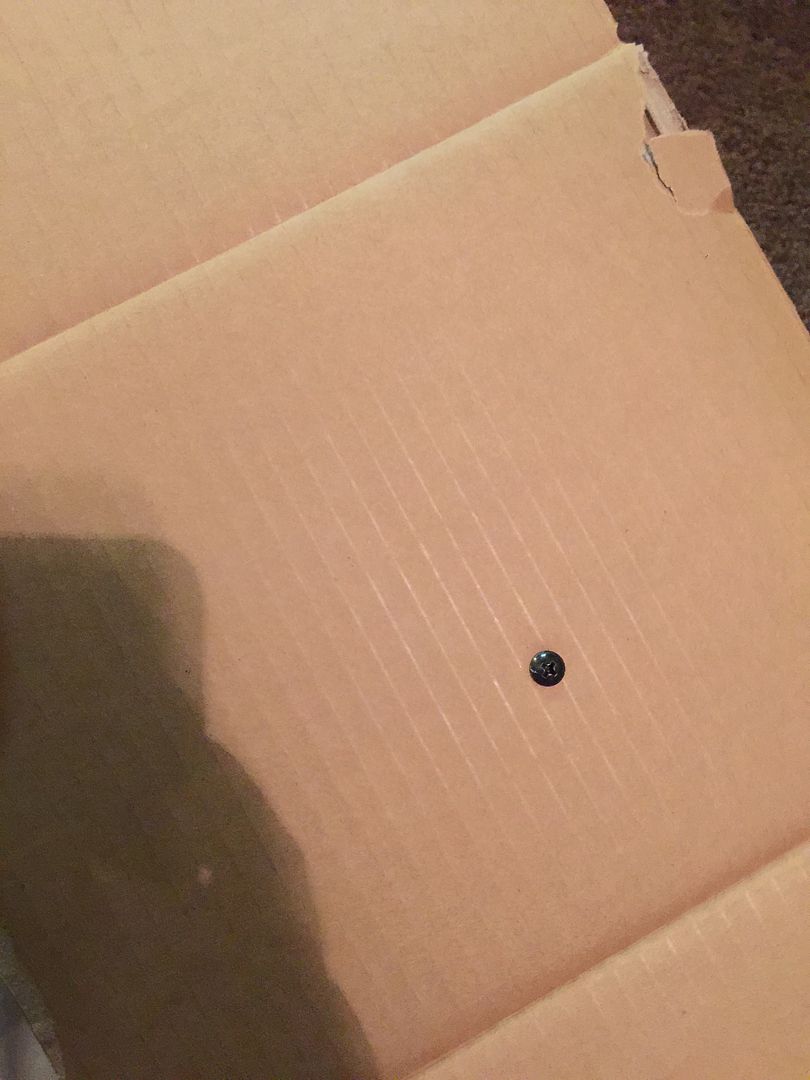
Sprayed them down also with about 5-4 coats.
Then it's time to reinstall everything. Simply so the same steps to remove everything but in reverse.
please note. this is only what i did and i am not to be held liable if something brakes or goes wrong if you decide to do this on your own!
ok first you will need to decide what color you want to go with. Sense i have a Laguna Blue Pearl with all black interior i decided to go with a metallic blue!
i just went to a local hobby shop or fabric shop and went to the thread isle and looked at all the colors(as you can see in the background there is about 1,000 different colors to pic from) The kind that i picked was like 90cents each but the regular thread at 40cents will do also (i just wanted the slightly shiner thread)

while you are on that isle it would be wise to look for a hook needle if you don't have one already

once you have these two items you are ready to start the disassembly/getting car part ready. In this example i an doing to shift boot for the shifter.
start by removing the center console. this can be done by taking off your shift knob and pulling the e-brake pretty hight up and pull gently (might need a little force) up, this is because the center console is held in with metal clips. Once you have the console off the car BE SURE to DISCONNECT the cables that go to it. this my include the defroster, ragtop switch and hazard lights. after that you can gently maneuver the console off the e-brake and then set aside for further disassembly.

at this point you can place the console upside down on something soft so not to scratch it. You will see several different screws holding everything in place. take out the appropriate screws and set them in a safe place (i just used a plastic bag) and the shift book plastic trim is also held in place by little push tabs. Gently push the trim off the center console after removing the two screws that hold it in place and it will then come free. Now i did notice that the plastic piece next to the shift book wanted to come out also because they share 2 screws. i did have to remove the rag top switch to find the other 2 screws holding that piece in.
once this is done you will notice the shift boot in held in place with just little plastic pieces punched throughout the leather. Gently remove the leather boot from these plastic pieces.

now we can get to the sticking process. we are NOT removing the factory stitching, we are simply going through the open part of the OEM stitch with our hook needle and thread. Start off by seeing how much thread you need this is really just the length, in a straight line, of what you are stitching. you will not actually be weaving in and out of the leather. after you have the length of string, tie ONE end in a knot and cut the appropriate length. then feed the non knotted end through the needle and do your FIRST STITCH! yay! you just started!!
Start at one end of the boot. I decided to start on the side facing the radio door just in case I messed up. Also you will want to "unroll" the shift boot before you get to far.

Keep stitching and be sure to pull the thread tight after every stitch.
This is what the front facing stitches look like. I just kept the thread going from side to side.

After you finish with the stitching tie a knot and end the stitch. I decided to put some fabric glue on the ends so they wouldn't come undone.

This process doesn't take too long. Just takes some patients. Keep going and keep tightening after each loop till you finish.

You can stop here and just put it all back together. But sense I had everything taken apart already I decided to take it to another level and do some more custom work.
Tapped off the cup holder/tray thing for ap2

Sprayed it with like 4 coats of blaze blue plasti dip

Also decided to do some other pieces. Here I put guide holes in a cardboard box and then pushed all the plastic prices GENTLY into them to secure the outer trim and put one of the screws through the box to hold the other in place.


Sprayed them down also with about 5-4 coats.

Then it's time to reinstall everything. Simply so the same steps to remove everything but in reverse.


 09-06-2015, 08:56 PM
#5
Registered User


Join Date: Jul 2007
Location: LA
Posts: 1,192
Likes: 0
Received 0 Likes
on
0 Posts
Should look nice with your shift boot. Let us know how the steering wheel goes. The stitching is pretty tight on the wheel so I am curious how it goes. I want to eventually do this too.
09-08-2015, 10:28 PM
#7
Registered User
Thread Starter
Join Date: Sep 2008
Posts: 35
Likes: 0
Received 0 Likes
on
0 Posts
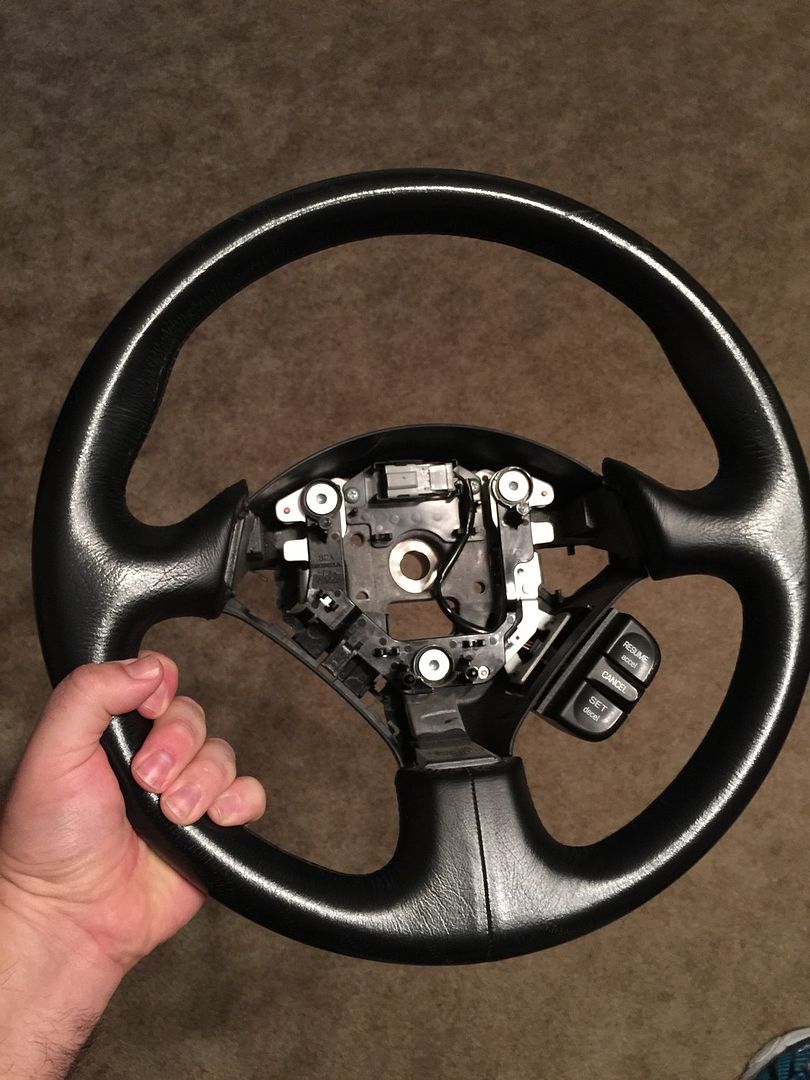
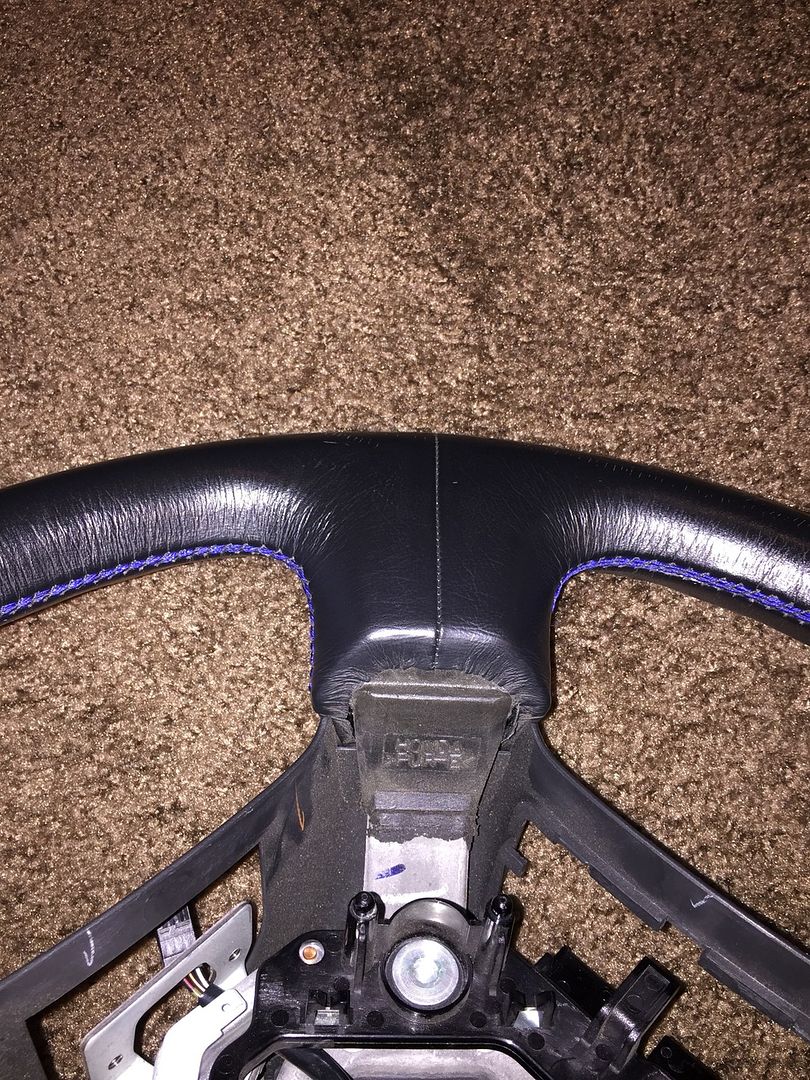
Here we go all!!!
So the wheel wasn't as bad as I thought it would be. But I must say if I hadn't done the boot stitches first I would have def failed at the wheel!! The stitching from Honda looks really tightly done and it was surprisingly easier then it looks to get the hook needle into the threads.
Enjoy
Off comes the wheel!!!
Starting the stitching.
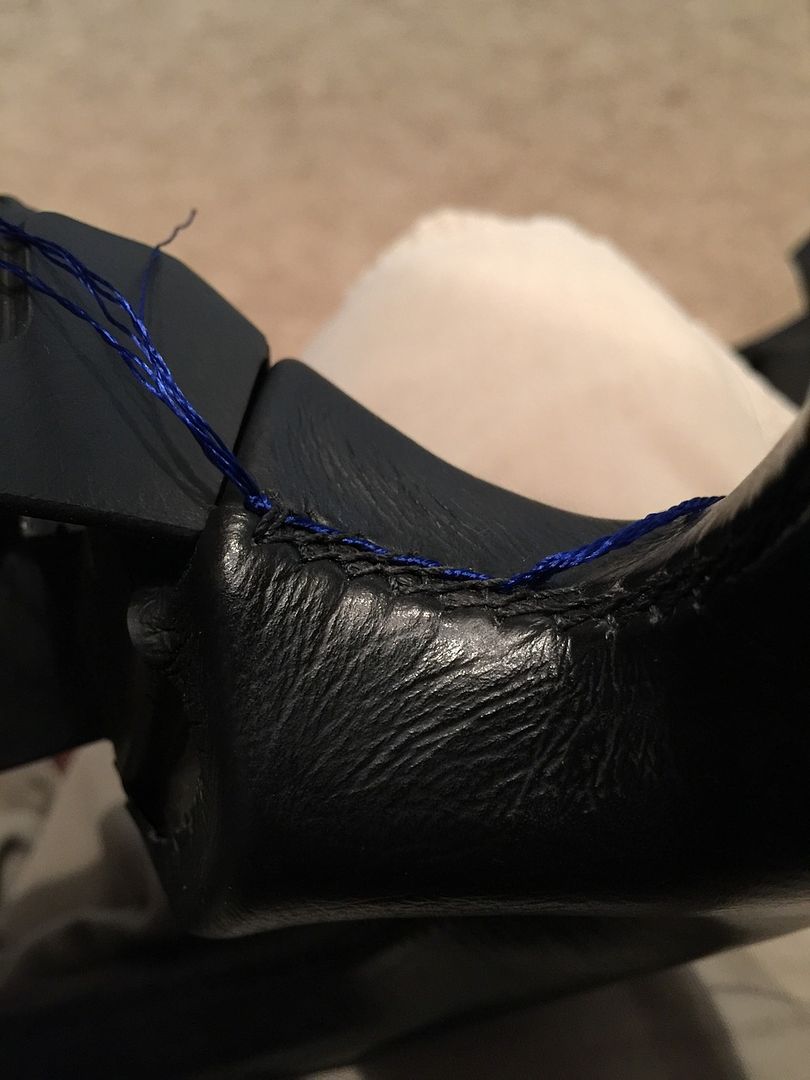
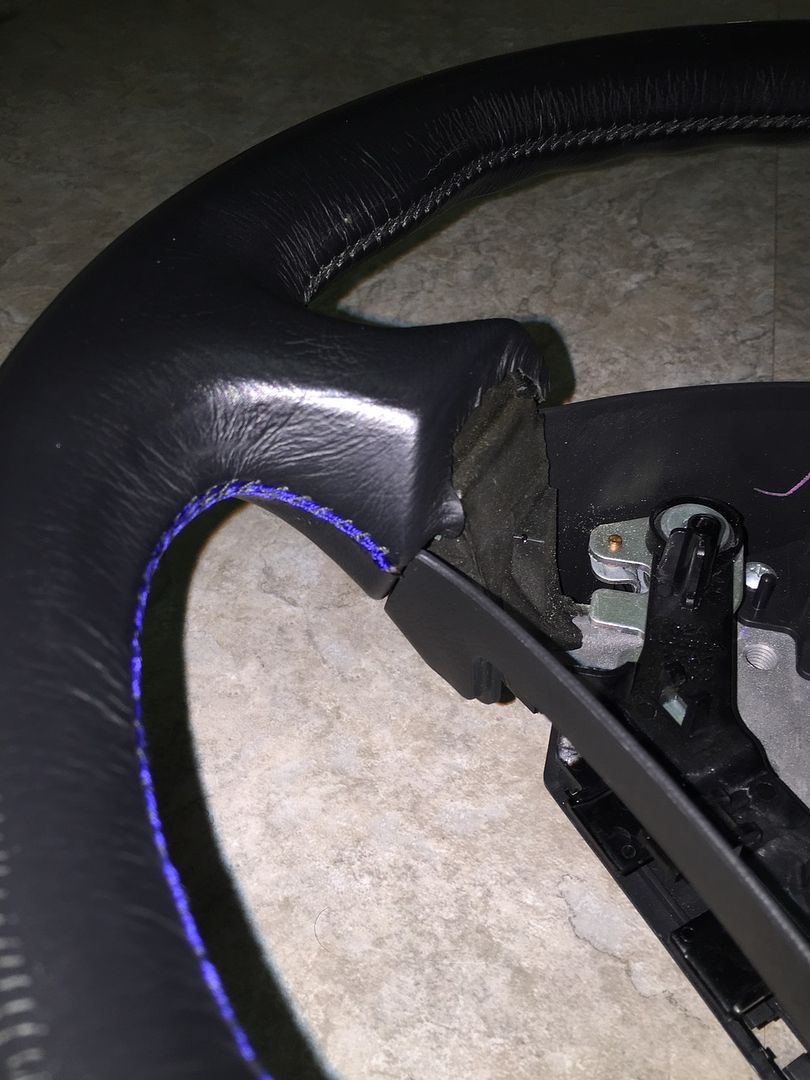
Made it to the turn around point (this is on the lower part of the wheel). Started at the center of the wheel and working my way down and then came back up to center.
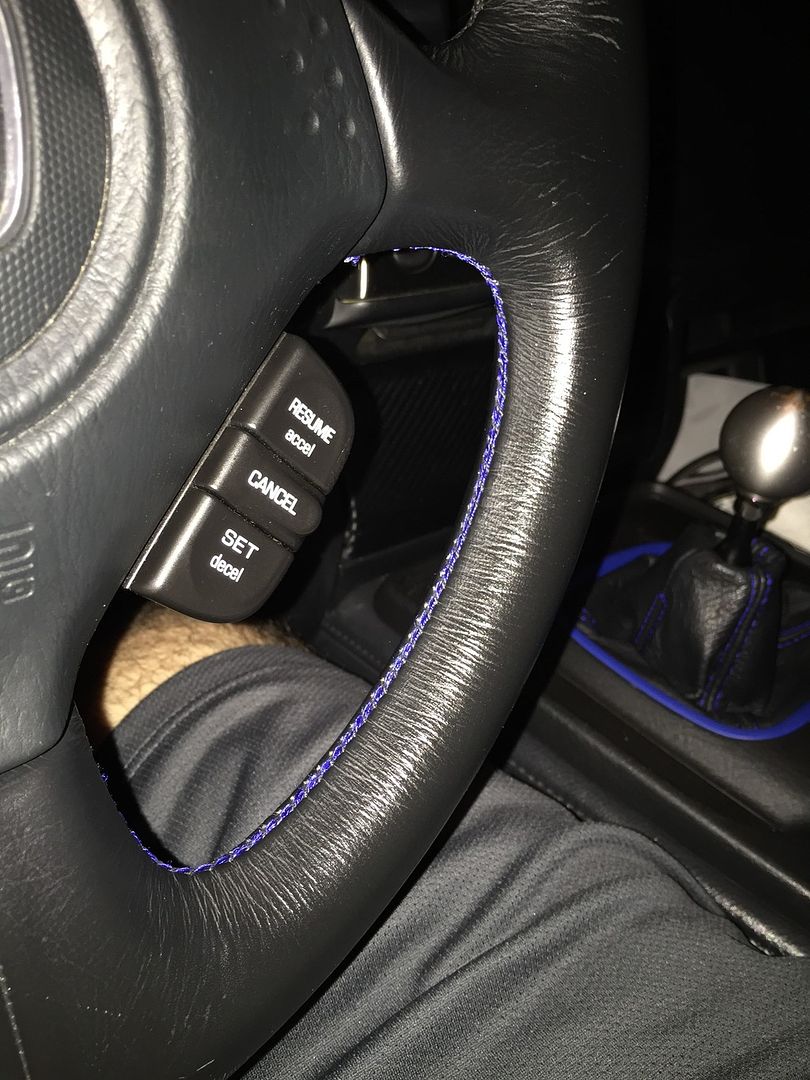
One side done! At this point I had to put the wheel back on the car. It is my daily driver so......
Another night. Took the wheel off!!
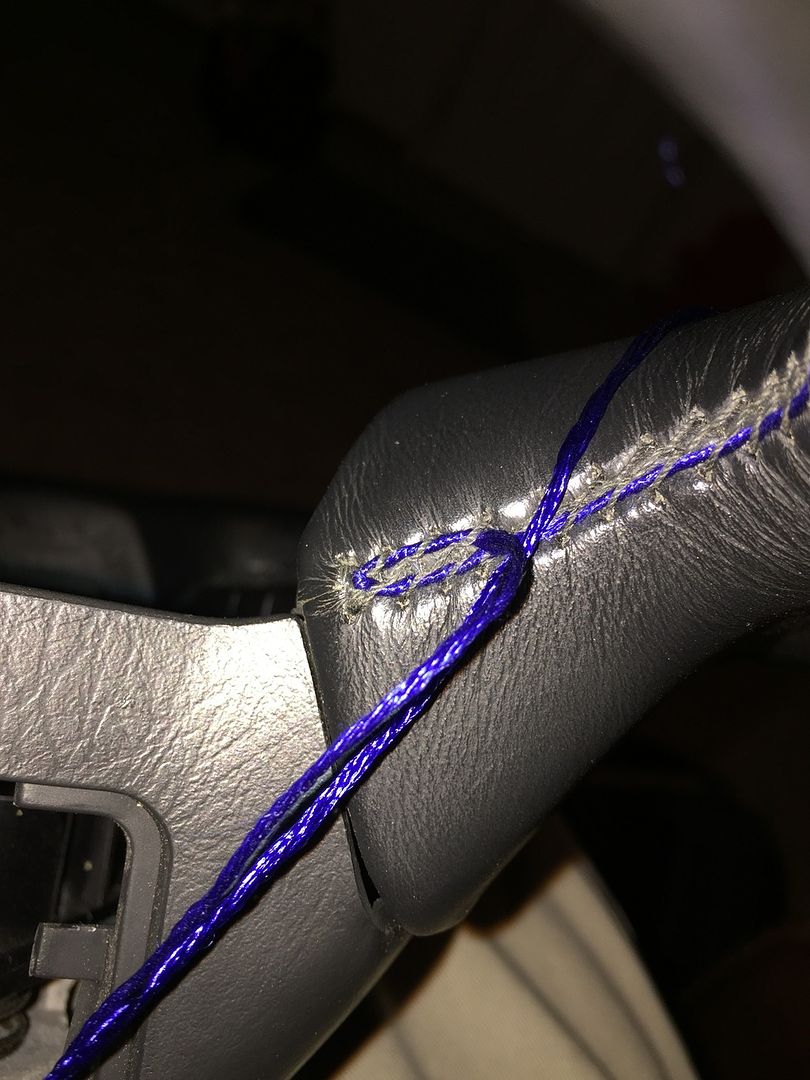
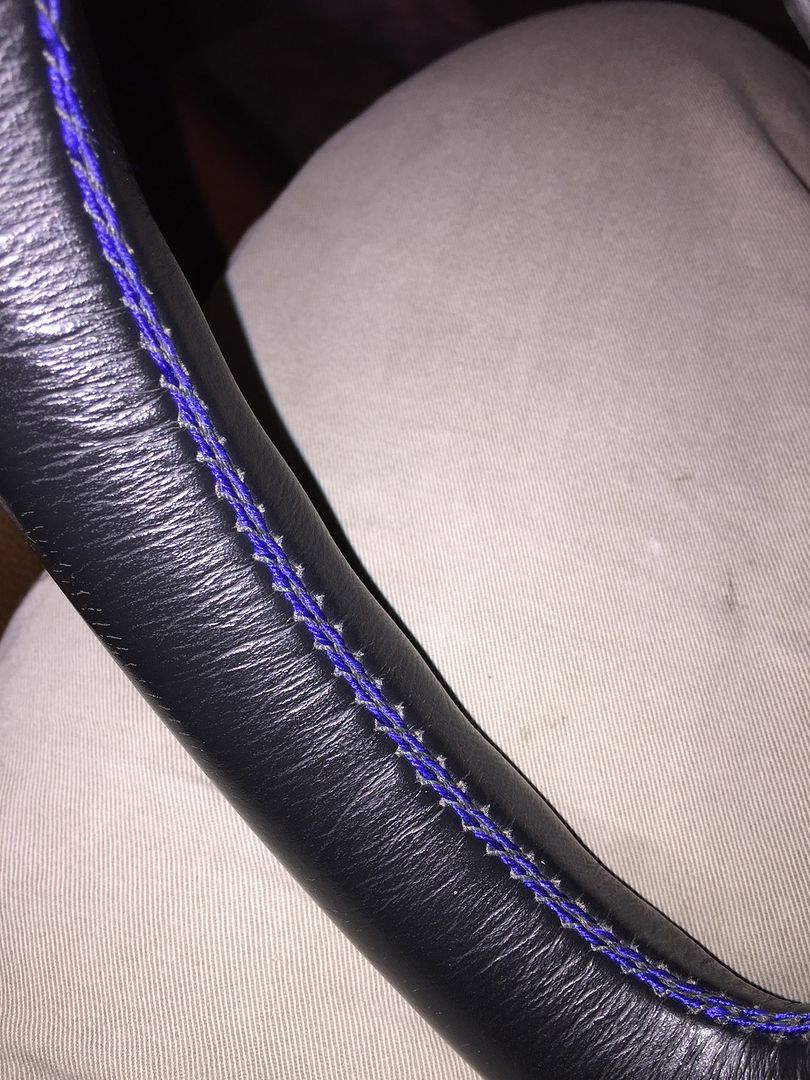
Finished the other side. This completing the lower half of the wheel (this is from above the wheel. This is where I turned the thread back around to come back up the other side to give it the double stitch
Start and stop points for each side

1am night pic after install!!
So the wheel wasn't as bad as I thought it would be. But I must say if I hadn't done the boot stitches first I would have def failed at the wheel!! The stitching from Honda looks really tightly done and it was surprisingly easier then it looks to get the hook needle into the threads.
Enjoy
Off comes the wheel!!!

Starting the stitching.

Made it to the turn around point (this is on the lower part of the wheel). Started at the center of the wheel and working my way down and then came back up to center.

One side done! At this point I had to put the wheel back on the car. It is my daily driver so......

Another night. Took the wheel off!!
Finished the other side. This completing the lower half of the wheel (this is from above the wheel. This is where I turned the thread back around to come back up the other side to give it the double stitch

Start and stop points for each side


1am night pic after install!!

Trending Topics
09-10-2015, 08:20 AM
#10

I have been looking for a clean cr steering wheel and I think this is something I'd consider doing on a regular 08-09 steering wheel. Anybody knows color that matches cr stitching color best ?