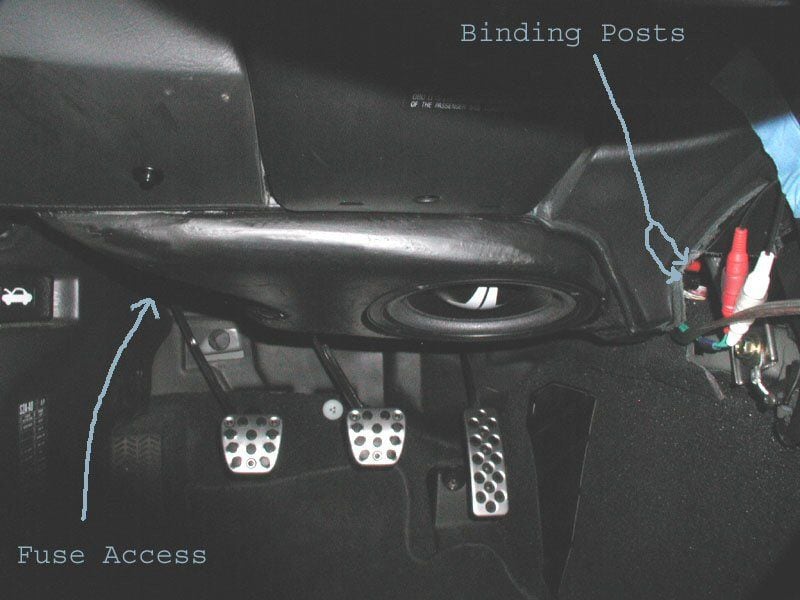
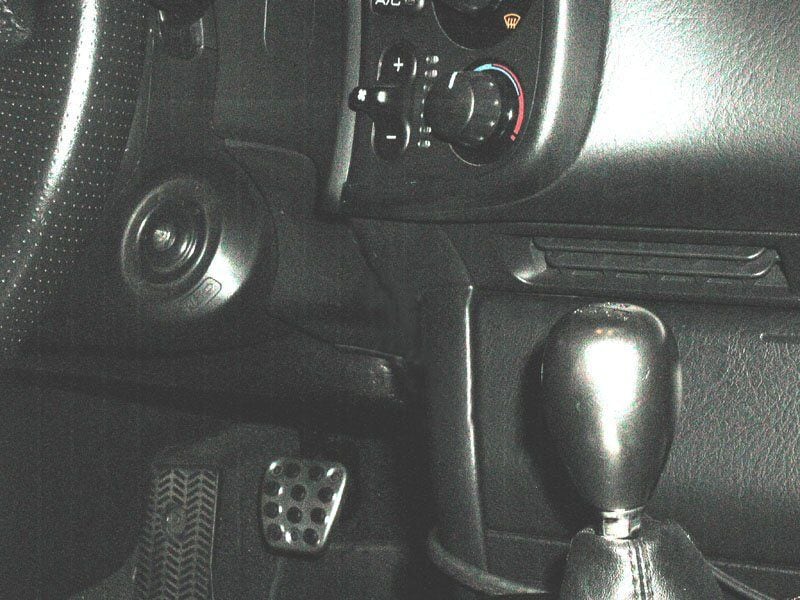
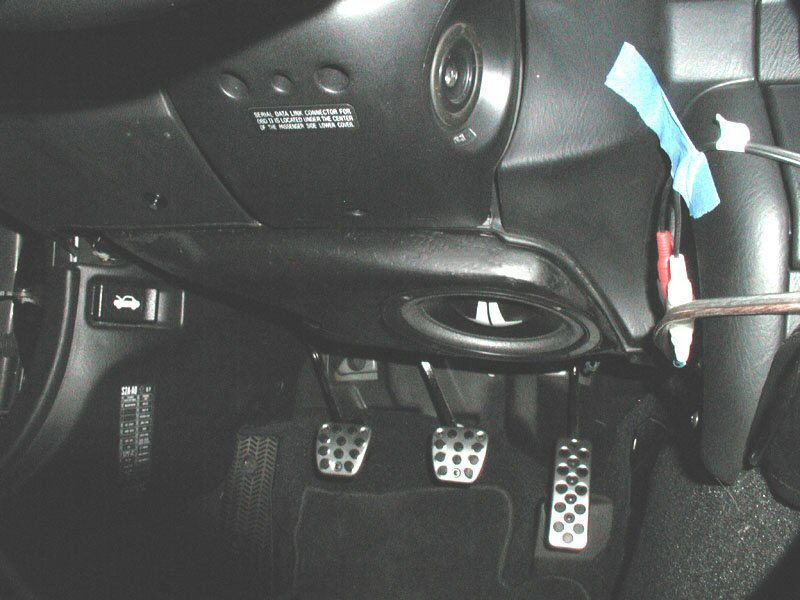
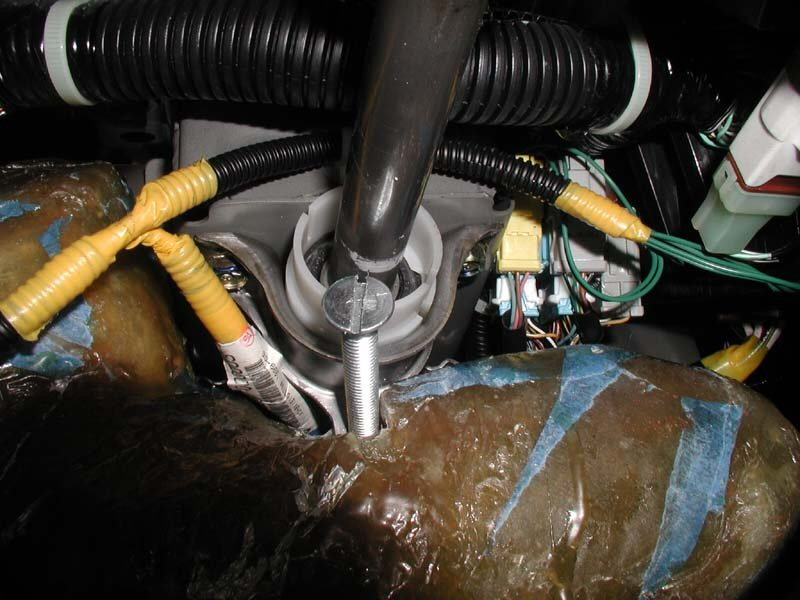
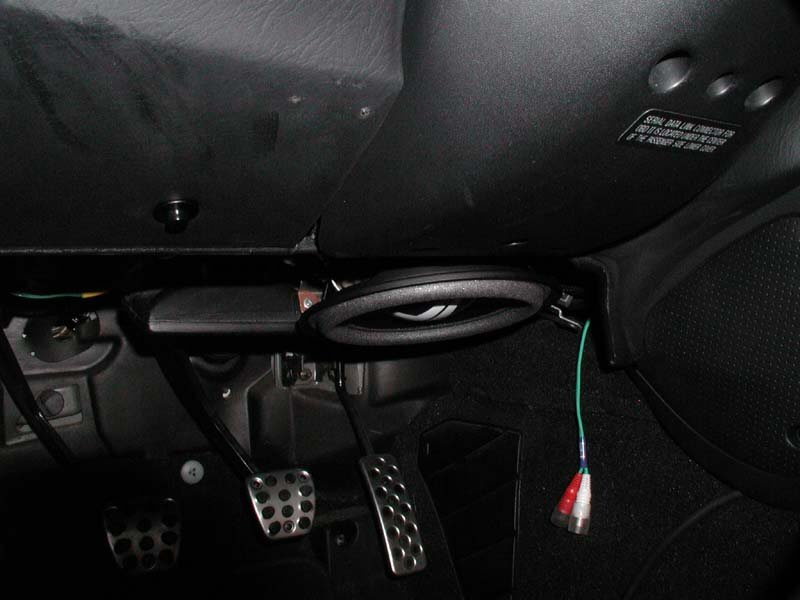
NEW In-Cabin Subwoofer Install Location! Pics!
#13
Registered User
Join Date: May 2004
Location: Austin
Posts: 159
Likes: 0
Received 0 Likes
on
0 Posts
It does look very nice, but as you pointed out it is a bit of a safety hazard. Of course, most of us probably remember riding around on the rear-window speaker deck of our dad's Oldsmobile when we were younger. I definitely don't think it is that dangerous. As a comparison, some newer family vehicles come with an airbag right where you put a giant hard surface. Without regard to safety, however, it is a perfect location.
Cheers
Cheers
#16
Registered User
Join Date: Nov 2001
Location: San Francisco
Posts: 383
Likes: 0
Received 0 Likes
on
0 Posts
Thanks for the inside look at your install.
I want to glass in the spare tire cavity. I was hoping to fill a plastic bag with Great Stuff to make a plug but you had problems doing this. Did the problems have more to do with working upside down? Is there any other reason the Great Stuff/plastic bag approach shouldn't work?
I'm also wondering why the mold from the plug. Can't I just wrap matt soaked in resin around the plug? Anyway, you have me rethinking this part and that's a good thing.
Thanks again for the detailed and helpful information.
#17
Registered User
Thread Starter
Join Date: Oct 2000
Location: SF Bay Area
Posts: 718
Likes: 0
Received 0 Likes
on
0 Posts
Originally Posted by dierk,Nov 11 2004, 06:08 AM
Thanks for the inside look at your install.
I want to glass in the spare tire cavity. I was hoping to fill a plastic bag with Great Stuff to make a plug but you had problems doing this. Did the problems have more to do with working upside down? Is there any other reason the Great Stuff/plastic bag approach shouldn't work?
I'm also wondering why the mold from the plug. Can't I just wrap matt soaked in resin around the plug? Anyway, you have me rethinking this part and that's a good thing.
Thanks again for the detailed and helpful information.
I want to glass in the spare tire cavity. I was hoping to fill a plastic bag with Great Stuff to make a plug but you had problems doing this. Did the problems have more to do with working upside down? Is there any other reason the Great Stuff/plastic bag approach shouldn't work?
I'm also wondering why the mold from the plug. Can't I just wrap matt soaked in resin around the plug? Anyway, you have me rethinking this part and that's a good thing.
Thanks again for the detailed and helpful information.
As far as the Great Stuff goes I think there were two problems.
One was gravity. I had completely lined that cavity with plastic bags, but they didn't exactly "cling" to the outlines of the underdash cavity--they were only attached at all the points I taped them. They would have needed "pressure" from the foam expansion to fill all of the voids and fill that space properly. Then, the foam would not stick to the inverted plastic bags. Some would shoot out of the nozzle, temperarily stick to the plastic, then roll off down my arm.

Two was expansion and curing in a plastic bag. I think that particular foam needs air and moisture to expand and cure, and it doens't work very well in a plastic bag. I think that when I pulled those goopy, messy bags out of my car they took DAYS to cure and they never really expanded much. But you can see it worked just fine in the cardboard box when I made the mold.
You might have more success in a more open, less inverted cavity like the spare area. If you did it in 2-4 inch thick layers it might help too. Make sure you protect everything very well. That goo sticks to EVERYTHING (except inverted plastic bags...) and cannot be removed without agony, pain and cursing.
Another thing I looked into were something called InstaPack Quick LINK. They are expandable foam shipping packs, and they are completely self-contained. You activate them and throw them in a box with whatever you are shipping and they expand to fill the voids (you probably have recieved those before in shipments.) I was thinking of getting a few of those, putting them up there, letting them cure and bingo. The reason I didn't was that I couldn't buy less than an entire case of them, plus they were expensive, plus I didn't want to wait.
 You might be able to order them from Office Max or something. (Or talk to your friendly shipping/recieving guy...)
Regarding the mold from the plug. This is a VERY important point and an excellent question. If you just make a plug that fits the shape of your cavity, THEN fiberglass around it, you will make a chamber that is slightly LARGER than the cavity for which it is intended. And your chamber will be completely rigid and noncompressible. It won't fit. Even though fiberglass can be much more thin than wood, if it is a custom fit situation, even an eighth- or quarter-inch thick fiberglass shell will be too much. You could try to be shy on the dimensions of your plug, but you would have to make a pretty good guess.
Good luck!
#18
Registered User
Thread Starter
Join Date: Oct 2000
Location: SF Bay Area
Posts: 718
Likes: 0
Received 0 Likes
on
0 Posts
ideugene,
Thank you so much for your help with the images! Yahoo and Geocities were driving me NUTS! I appreciate your help.
pikkashoe and Smooth,
Thanks for the feedback. I had thoughts of making a better mold from the final chamber so I could kick out a few more of these. It's funny though, after all the hours of cutting and pasting and filing and gluing when I got towards the end all I was thinking about was getting finished! I suppose that is still poassible to de-install it and make a mold, but...
Psycho,
Yeah, I wish I would have taken some pictures of it out of the car... Next time I take it out I will do so.
Oatnet,
Yep!
"No matter where you go, there you are..."
Thank you so much for your help with the images! Yahoo and Geocities were driving me NUTS! I appreciate your help.

pikkashoe and Smooth,
Thanks for the feedback. I had thoughts of making a better mold from the final chamber so I could kick out a few more of these. It's funny though, after all the hours of cutting and pasting and filing and gluing when I got towards the end all I was thinking about was getting finished!
 I suppose that is still poassible to de-install it and make a mold, but...
Psycho,
Yeah, I wish I would have taken some pictures of it out of the car... Next time I take it out I will do so.
Oatnet,
Yep!
"No matter where you go, there you are..."

#19
Registered User
Join Date: Jun 2003
Location: Lethbridge, AB
Posts: 417
Likes: 0
Received 0 Likes
on
0 Posts
Looks good! Wish I could hear it.
I'd be a bit nervous without a grille on the sub - you as the driver know that it's there, but if the car ever makes it in for service work at the dealership, I can bet the technician would find a way to plant a foot in the sub!
I'd be a bit nervous without a grille on the sub - you as the driver know that it's there, but if the car ever makes it in for service work at the dealership, I can bet the technician would find a way to plant a foot in the sub!
#20
Registered User
Thread Starter
Join Date: Oct 2000
Location: SF Bay Area
Posts: 718
Likes: 0
Received 0 Likes
on
0 Posts
Originally Posted by ws2000,Nov 11 2004, 12:15 PM
Looks good! Wish I could hear it.
I'd be a bit nervous without a grille on the sub - you as the driver know that it's there, but if the car ever makes it in for service work at the dealership, I can bet the technician would find a way to plant a foot in the sub!
I'd be a bit nervous without a grille on the sub - you as the driver know that it's there, but if the car ever makes it in for service work at the dealership, I can bet the technician would find a way to plant a foot in the sub!
Excellent point about service techs.
 I'll have to keep that in mind. Maybe cover it with something rigid...


