DIY: Spring and Shock Installation
 01-11-2007, 12:46 PM
#21
Registered User


Join Date: Jan 2006
Posts: 1,132
Likes: 0
Received 0 Likes
on
0 Posts
Originally Posted by jonam,Aug 30 2005, 09:05 PM
some more additional tips..
I put back the OEM shocks in...which are longer than aftermarket ones.
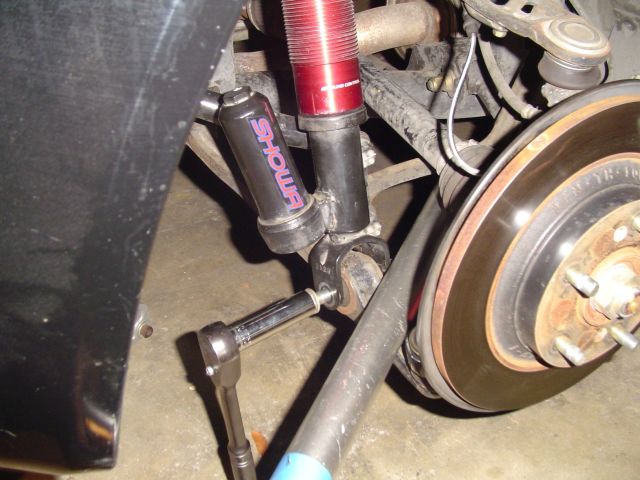
For the fronts: disconnecting lower link of the sway makes the job so easy...when you re-connect the sway bar link. use a jack to level the holes of sway links.


For the rear: it was really PITA...as suggested I used OEM jack to push the suspension down...put a wet cotton glove(or something) b/w the jack and wheel well to prevent slipping of the jack. Once the suspension is lowered, I used to pryers to match the holes..one side took long long time..but for the other side, it was a piece of cake..
oh, and the top two nuts on the driver's side rear shock, I used some electric tape which can hold the nuts until it bolted down...worked really good... using this method you don't even need to disconnect rear strut bar(?).


I put back the OEM shocks in...which are longer than aftermarket ones.
For the fronts: disconnecting lower link of the sway makes the job so easy...when you re-connect the sway bar link. use a jack to level the holes of sway links.
For the rear: it was really PITA...as suggested I used OEM jack to push the suspension down...put a wet cotton glove(or something) b/w the jack and wheel well to prevent slipping of the jack. Once the suspension is lowered, I used to pryers to match the holes..one side took long long time..but for the other side, it was a piece of cake..
oh, and the top two nuts on the driver's side rear shock, I used some electric tape which can hold the nuts until it bolted down...worked really good... using this method you don't even need to disconnect rear strut bar(?).
 im planning on doing this, this weekend
thanks so much

 08-12-2007, 01:34 PM
#25
Registered User

Join Date: Jun 2007
Posts: 219
Likes: 0
Received 0 Likes
on
0 Posts
I have a quick question.. what happends if u dont put the bump stop under the thick weld?? i know i have one right in the middle of it .. will that matter at all ? i dont see how it could..
10-06-2007, 02:11 PM
#26
Registered User


I followed this writeup today to put new springs on my OEM shocks. Very simple procedure. I started on the front, and the first one took some time as I was pausing to think, looking for the right sockets, trying to remember torque specs, etc, etc. After that, it went very quickly.. about 20-30 minutes per corner. I didn't have much difficulty lining anything up. I didn't need to remove any sway bar links, and I didn't need to use a jack. A rubber hammer is useful to bang the upper A-arms in and to line them up with the mounting brackets. I would never have been able to do it by hand.
10-08-2007, 05:06 AM
#28
Registered User
Originally Posted by FF2Skip,Oct 7 2007, 10:31 AM
To preload the suspension, yes, you do.

I didn't have much difficulty lining anything up. I didn't need to remove any sway bar links, and I didn't need to use a jack.
One suggestion I will make for everyone: buy a 14mm deep socket to use on the upper mounts so you can clear the threaded studs. You can get away with a standard shallow socket on three corners, but for the rear drivers side, it will save you a lot of time.
10-15-2007, 10:41 AM
#29
Registered User


Join Date: Mar 2006
Location: Gurenderu
Posts: 2,649
Likes: 0
Received 0 Likes
on
0 Posts


and because i think its worth repeating:
1. preload the suspension and retorque EVERY bushing at the new ride height. its even in the HELMS manual.
2. get an alignment immediately afterwards. the camber AND the toe changes in respect to changes in ride height. and toe must be corrected in order to prevent uneven tire wear. thats right, its not the camber, its the toe that wears tires.
10-15-2007, 10:58 AM
#30
Registered User
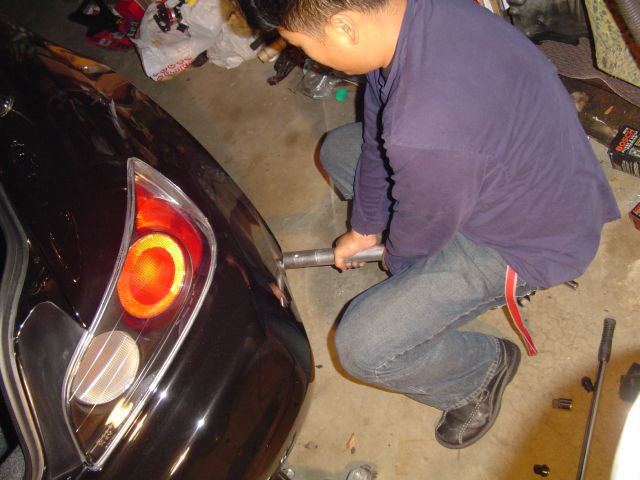
Originally Posted by S2Koupe,Oct 15 2007, 02:41 PM
instead of standing on the suspension, i use the "HUNTEREZ" method. stick a long pole in the suspension to leverage it down and SIT on it... lol. it works. puts you in perfect position to feed the bolt and wrench it on too. just dont have TOO much fun...

