Best DIY Battery Relocation
 07-14-2009, 07:32 PM
#1
Registered User


Thread Starter
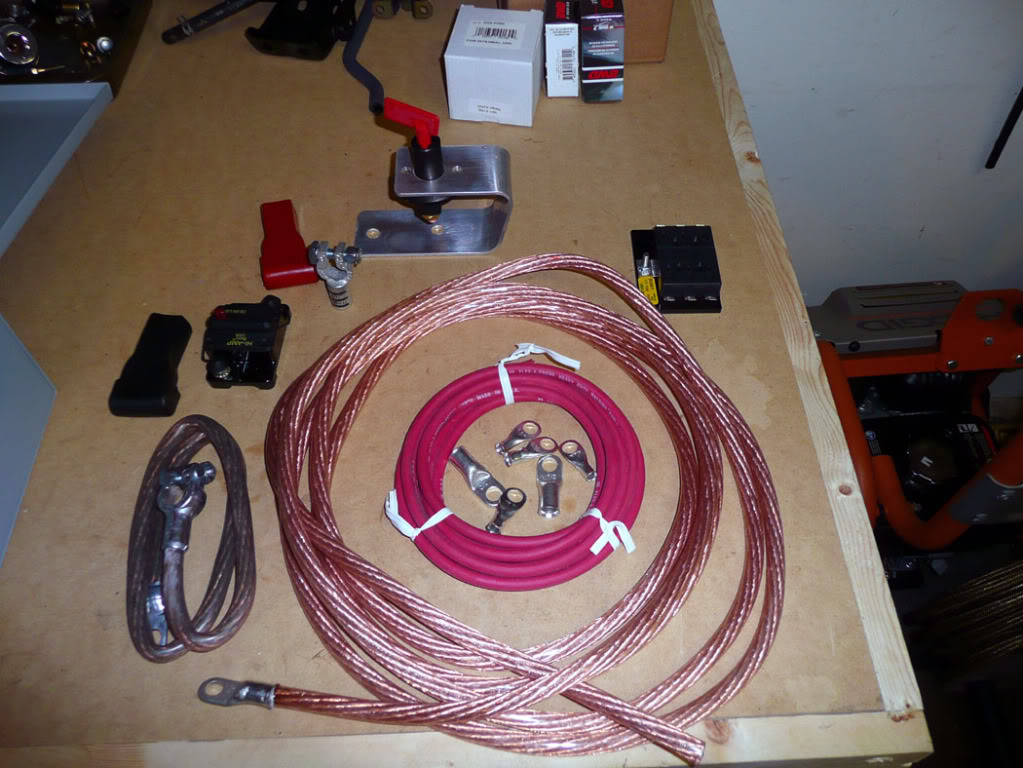
Okay here is a very easy and simple way to properly relocate your battery for those with a hot turbo or manifold in the way. All the parts but the breaker and kill switch were purchased from McMaster Carr for app. $100.
Basically I took the following steps:
(1) Cut off the factory Positive battery terminal and soldiered on ,not crimped, ring terminals.
(2) Removed the Negative cable all together
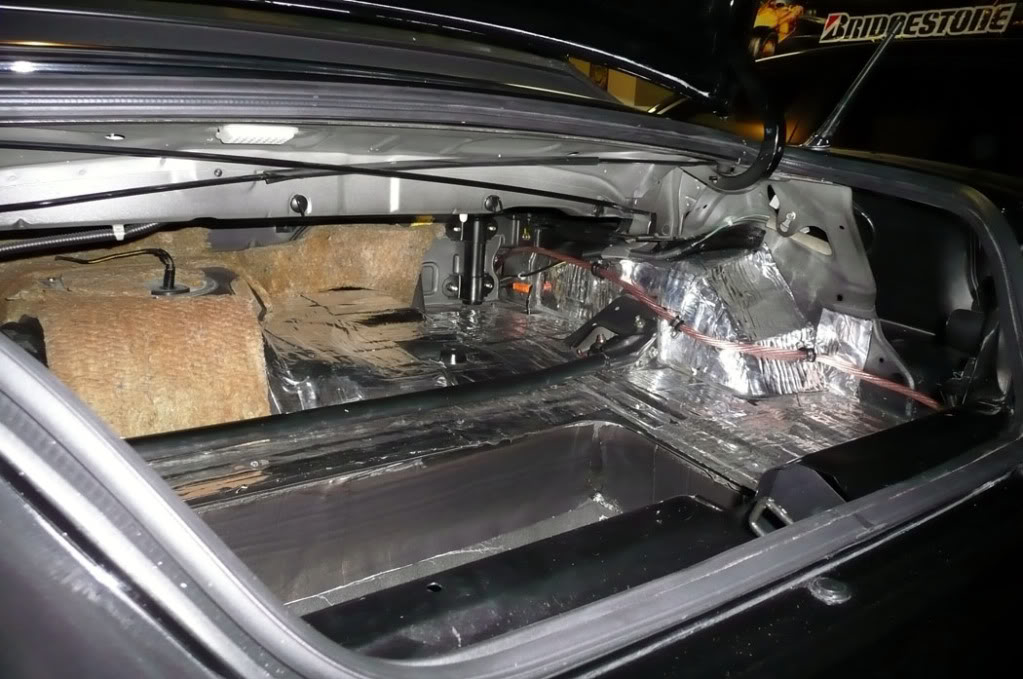
(3) Removed the passenger front kick panel, door sill, and rear upright cover.
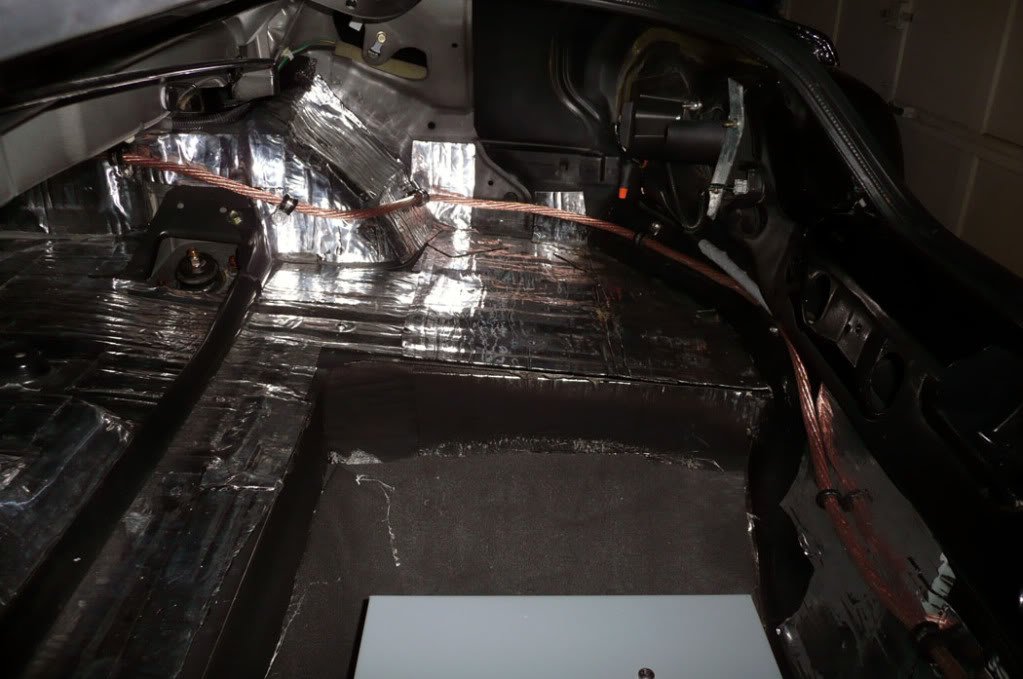
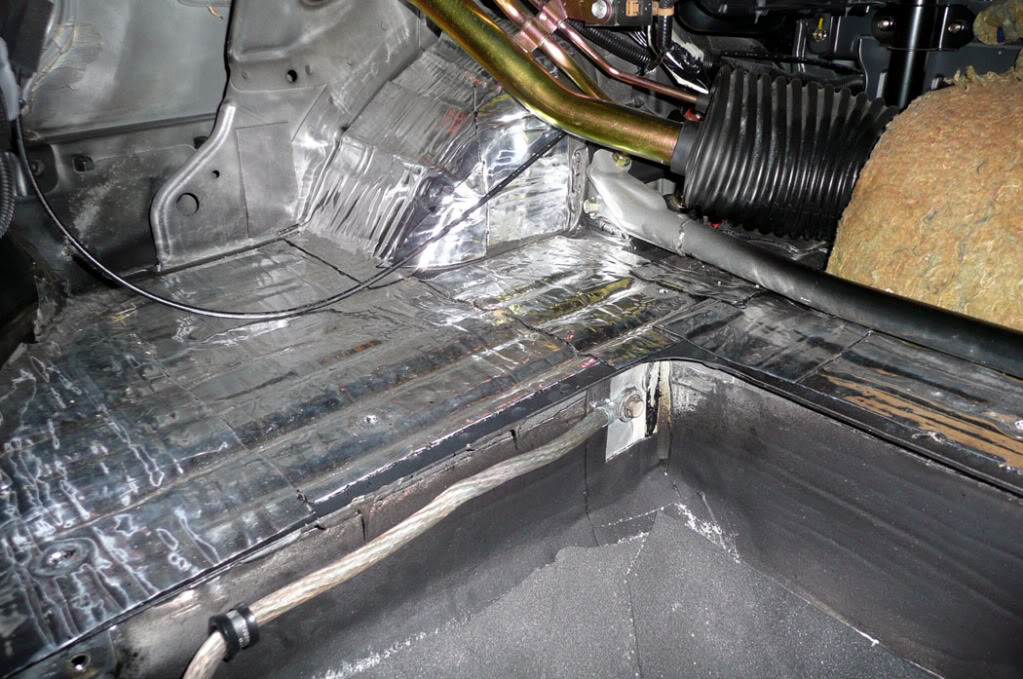
(4) Drilled a hole and installed a rubber grommet in the firewall on the passenger side 1" to the right of the factory grommet and fed 1 gauge cable into the passenger compartment.
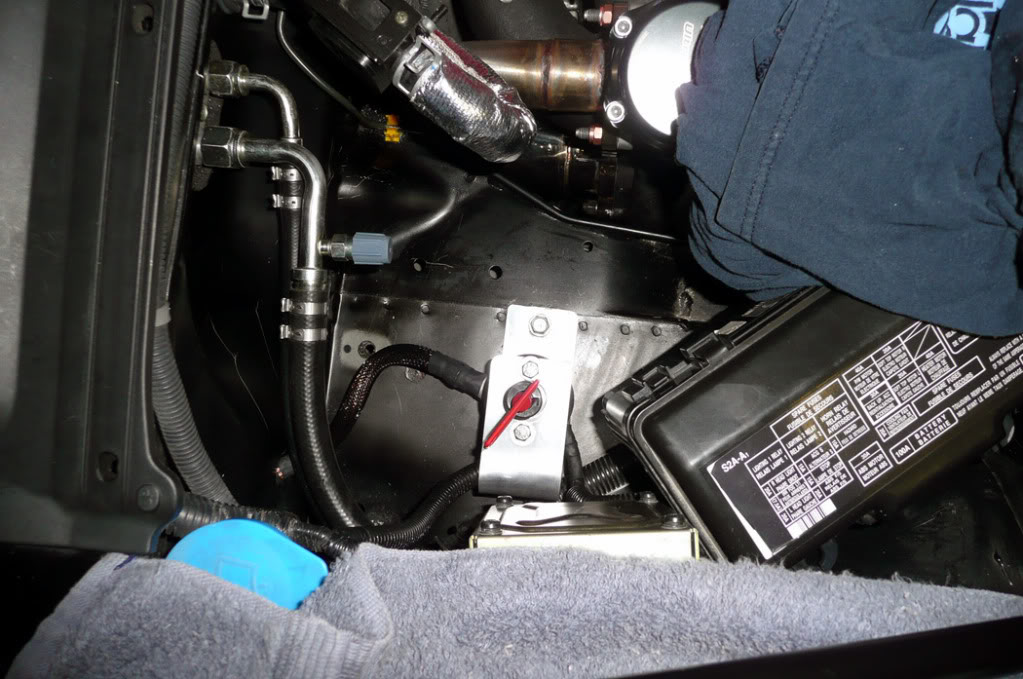
(5) After installing a ring terminal on the relocation cable it and the factor cables were attached to a kill switch were the factory battery was originally. This switch allows you to disconnect power without entering the trunk.
(6) Using Stainless loop clamps with EPDM rubber inserts ($10 for bag) I ran the cable through the factory openings being careful to avoid and metal edges or potential areas that may cause wear.
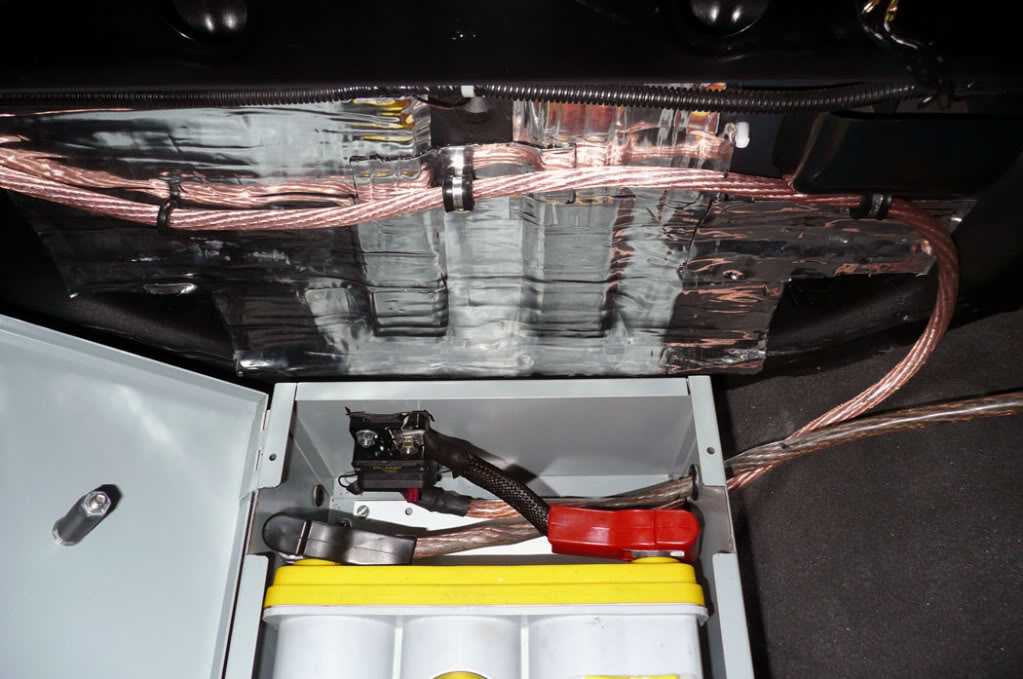
(7) Using a body bolt the premade negative cable was mounted after the paint was removed from the body at the attachment point.
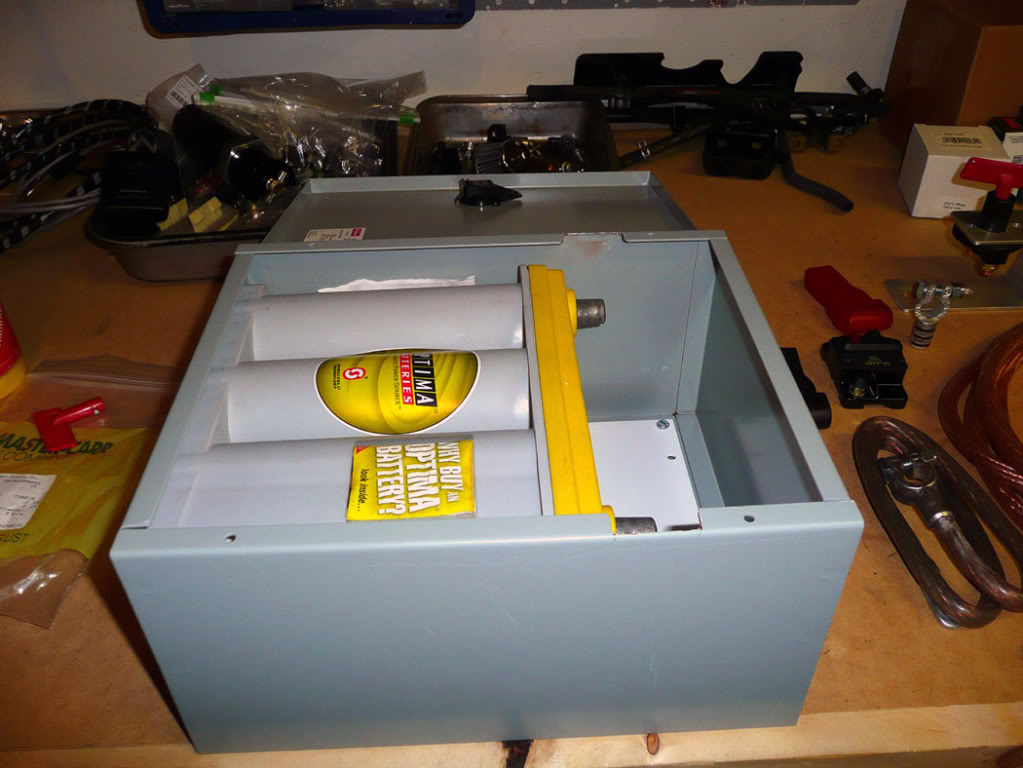
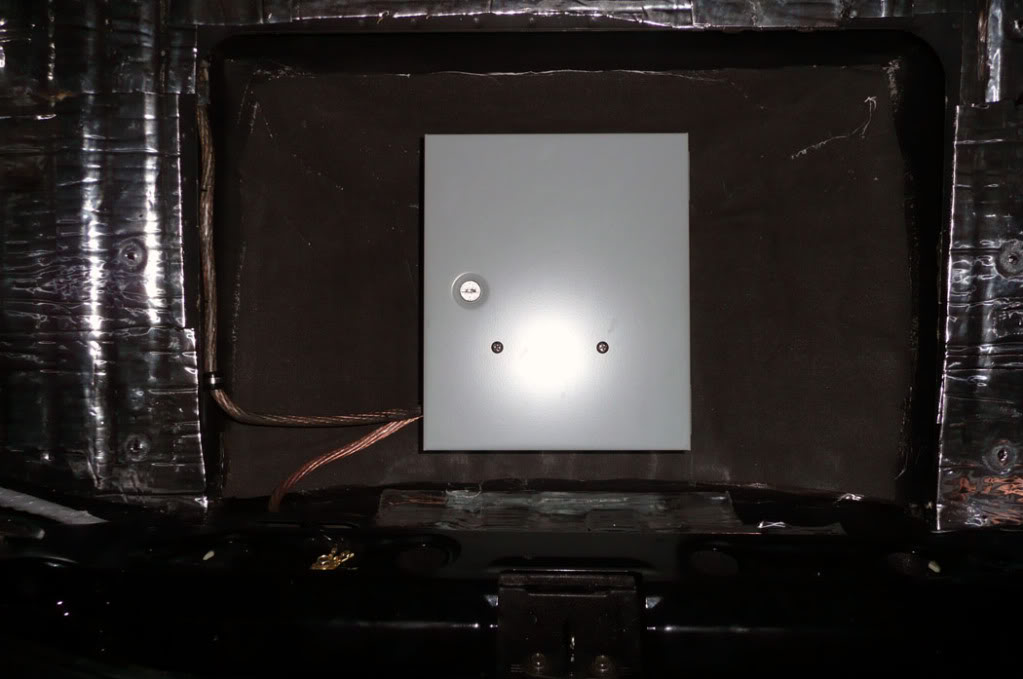
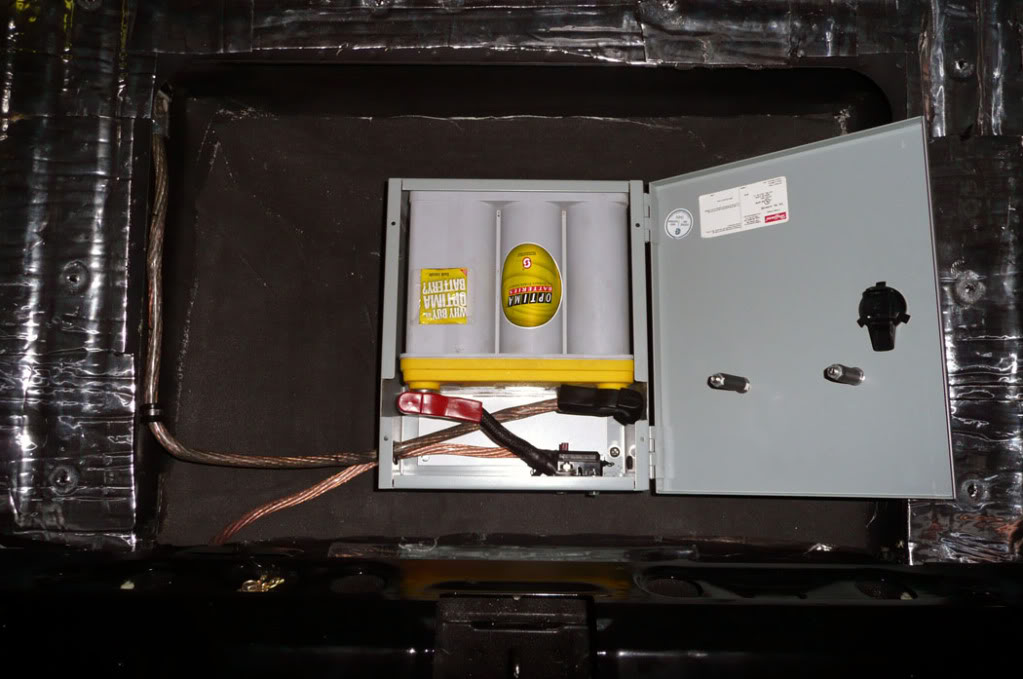
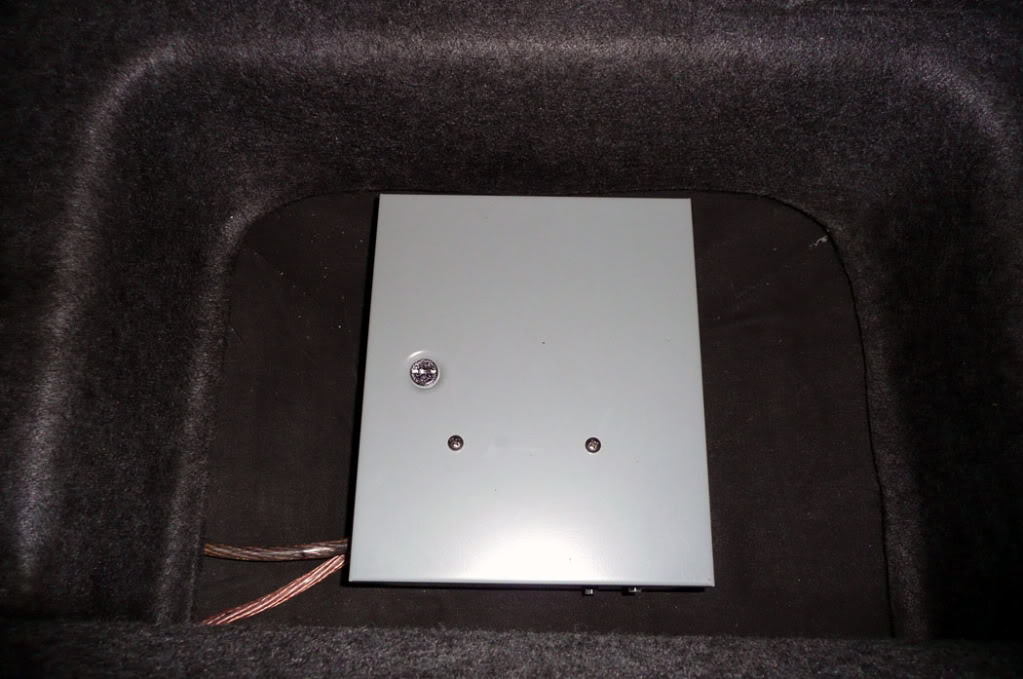
(8) Holes were drilled and grommets installed for the cables to enter the box as well as the 100 Amp breaker mounted in the box.
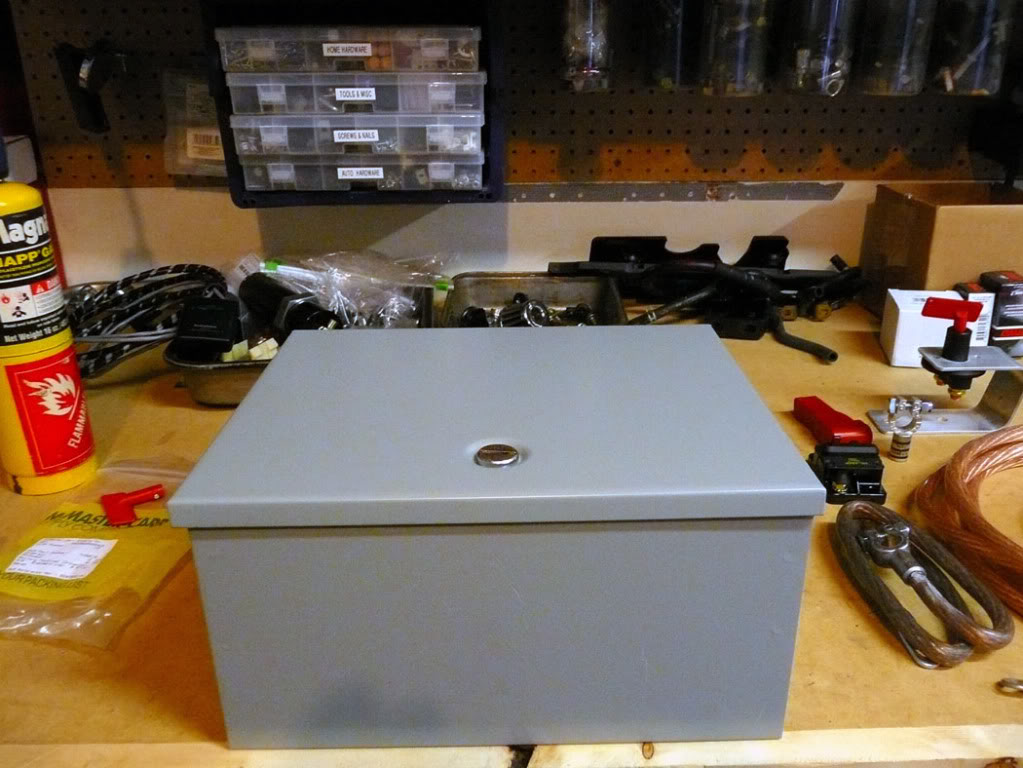
(9) The NEMA rated enclosure was mounted to the floor pan with (4) 2" bolts using 3/4" thick rubber isolation bushings as standoffs.
(10) A 4" long positive cable was fabricated to go between the positive terminal and breaker
(11) Bolts were installed in the lid wrapped in rubber hose to keep the battery in place.
I cut the liner up to the plate that covered the factory tools and will be making my own plate to recover the hole. This is not for everyone but I thought it was the best.
I have been asked to provide links to some of the parts I was using. Though the below is not exactly what I used the parts are actually better.
Battery Junction Box
(Used in place of the kill switch)
http://www.casperselectronics.com/st...roducts_id=681
Battery Kill Switch
(If the kill switch is used the terminal must be completly sheilded. Unfortunaly I found this out the hard way )
)
http://www.summitracing.com/parts/TAY-1037
Hoffman Electrical Boxes
http://www.mcmaster.com/#electrical-enclosures/=hb10i4
Stinger SGP901501 Breaker
http://www.sonicelectronix.com/item_...SGP901501.html
Battery Lugs
http://www.mcmaster.com/#battery-terminal-lugs/=hb11xy
Battery Cables
http://www.mcmaster.com/#battery-cable/=hb124n
Tips
When soldiering the ends use plenty of flux, wear some gloves to prevent getting burned from the spatter and be careful not to use too much heat.
The trick to soldiering is to buy plenty of soldier and tin the wire first then heat the head and fill it 1/2 of the way with liquid soldier. After that simultaneously heat the fitting and wire and combine.
Unibits make it very easy to get a perfect hole for your grommets
Have someone help feed the cable it is a PIA by yourself.
Remove the passenger seat for easy access to the interior panels and running the cable.
Get some good self drilling screws to accompany the loop clamps
Don't use a fuse b/c the first time you blow one and you don't have a spare you wont be happy. Breakers are the only way to go, especially when they are nearly the same price.
Hope this inspires you
Basically I took the following steps:
(1) Cut off the factory Positive battery terminal and soldiered on ,not crimped, ring terminals.
(2) Removed the Negative cable all together
(3) Removed the passenger front kick panel, door sill, and rear upright cover.
(4) Drilled a hole and installed a rubber grommet in the firewall on the passenger side 1" to the right of the factory grommet and fed 1 gauge cable into the passenger compartment.
(5) After installing a ring terminal on the relocation cable it and the factor cables were attached to a kill switch were the factory battery was originally. This switch allows you to disconnect power without entering the trunk.
(6) Using Stainless loop clamps with EPDM rubber inserts ($10 for bag) I ran the cable through the factory openings being careful to avoid and metal edges or potential areas that may cause wear.
(7) Using a body bolt the premade negative cable was mounted after the paint was removed from the body at the attachment point.
(8) Holes were drilled and grommets installed for the cables to enter the box as well as the 100 Amp breaker mounted in the box.
(9) The NEMA rated enclosure was mounted to the floor pan with (4) 2" bolts using 3/4" thick rubber isolation bushings as standoffs.
(10) A 4" long positive cable was fabricated to go between the positive terminal and breaker
(11) Bolts were installed in the lid wrapped in rubber hose to keep the battery in place.
I cut the liner up to the plate that covered the factory tools and will be making my own plate to recover the hole. This is not for everyone but I thought it was the best.
I have been asked to provide links to some of the parts I was using. Though the below is not exactly what I used the parts are actually better.
Battery Junction Box
(Used in place of the kill switch)
http://www.casperselectronics.com/st...roducts_id=681
Battery Kill Switch
(If the kill switch is used the terminal must be completly sheilded. Unfortunaly I found this out the hard way
)http://www.summitracing.com/parts/TAY-1037
Hoffman Electrical Boxes
http://www.mcmaster.com/#electrical-enclosures/=hb10i4
Stinger SGP901501 Breaker
http://www.sonicelectronix.com/item_...SGP901501.html
Battery Lugs
http://www.mcmaster.com/#battery-terminal-lugs/=hb11xy
Battery Cables
http://www.mcmaster.com/#battery-cable/=hb124n
Tips
When soldiering the ends use plenty of flux, wear some gloves to prevent getting burned from the spatter and be careful not to use too much heat.
The trick to soldiering is to buy plenty of soldier and tin the wire first then heat the head and fill it 1/2 of the way with liquid soldier. After that simultaneously heat the fitting and wire and combine.
Unibits make it very easy to get a perfect hole for your grommets
Have someone help feed the cable it is a PIA by yourself.
Remove the passenger seat for easy access to the interior panels and running the cable.
Get some good self drilling screws to accompany the loop clamps
Don't use a fuse b/c the first time you blow one and you don't have a spare you wont be happy. Breakers are the only way to go, especially when they are nearly the same price.
Hope this inspires you

 07-14-2009, 08:05 PM
#4
Banned


Join Date: Apr 2008
Location: Buffalo Grove
Posts: 1,698
Likes: 0
Received 0 Likes
on
0 Posts
Awesome! Could not have been better timing as I am in the process of doing a battery and fuse box relocation. Cannot wait to see the fuse relocation write up. Get on it.

Trending Topics
07-15-2009, 05:16 AM
#8
Registered User
Thread Starter
Originally Posted by sbrodacz,Jul 14 2009, 08:59 PM
The kill switch is suppose to be on the outside of the car.
The underhood switch is mearly a covienvence and good alternative to a post to connect all the cables.
07-15-2009, 05:17 AM
#9
Registered User
Thread Starter
Originally Posted by kawi10r998cc,Jul 15 2009, 05:11 AM
Off topic but who did your AC lines? I need some like that BAD
07-15-2009, 06:33 AM
#10

Originally Posted by sbrodacz,Jul 15 2009, 12:59 AM
The kill switch is suppose to be on the outside of the car.
it all depends on how strict your local track is for a test and tune night. but if you go to a sanctioned event, yeah, they will go ape shit over that.
i love the way it turned out. looks clean
 will work no prob for everyday driving. yellow tops are dry cell sealed batteries, so i dont think it matters that the box is not vented.