When you click on links to various merchants on this site and make a purchase, this can result in this site earning a commission. Affiliate programs and affiliations include, but are not limited to, the eBay Partner Network.
DIY to replace/repair your timing chain tensioner.
Sooner or later, your timing chain tensioner, or TCT, is going to go bad, and you will be left with four options;
• Replace it with a new TCT from Honda that will also eventually go bad - around $160 for the part
• Replace the TCT with a Billman250 / SpitfireS -modified TCT that will last - around $240-$250 for the part. Note that Billman250's GenX TCTs are guaranteed for life and are an easy "plug and play" solution to this problem: https://www.s2ki.com/s2000/topic/537...air-thread-iv/
• Replace it with a new TCT and take it apart to sandblast the worm gear so the new TCT will last longer - the cost of the part plus sand
• Repair the TCT you have on the car by sandblasting the worm gear in the assembly - $10 for sand, plus any other parts you'll need to buy to complete the work
TCTs go bad as early as 20k mi and the symptom is a metallic rattle or raspy noise when starting a warm/hot engine. Some people experience "baseball card in the spokes" sounds as well. Since there is no comprehensive DIY on this, nickp and I decided to make one when repairing a TCT.
Below are the instructions for getting to the TCT and for removing and replacing it depending on whether you repair or replace the whole unit. My TCT went bad starting at 50k mi, but other owners have reported problems as early as 10k mi. Dealerships can charge anywhere from $200-800 for this simple fix, so its worth doing yourself.
How do I know if my TCT is bad?
Start the car in the morning when the engine is cold and it will sound fine, but start it after you've been driving and the engine is warm/hot, and there is a metallic raspy rattle that rises and falls with the gas, but will eventually go away as you drive. This is typical, but you can get the rattle on any startup cold or hot.
If you don't replace/fix the TCT, the rattle will become constant and your risk of the timing chain jumping will increase. Then the engine will possibly be ruined and you'll have a much larger bill.
There are six parts to this DIY:
• Removing the stock air box
• Removing the TCT
• Repairing the TCT (sandblasting)
• Replacing the TCT with a repaired one
• Replacing the TCT with a new one
• Replacing the air box & cleaning up
Fyi, right and left are as you are facing the engine bay, front is the front of the car. Replacing the TCT with the airbox should take around one hour to complete. Repair will take a bit longer.
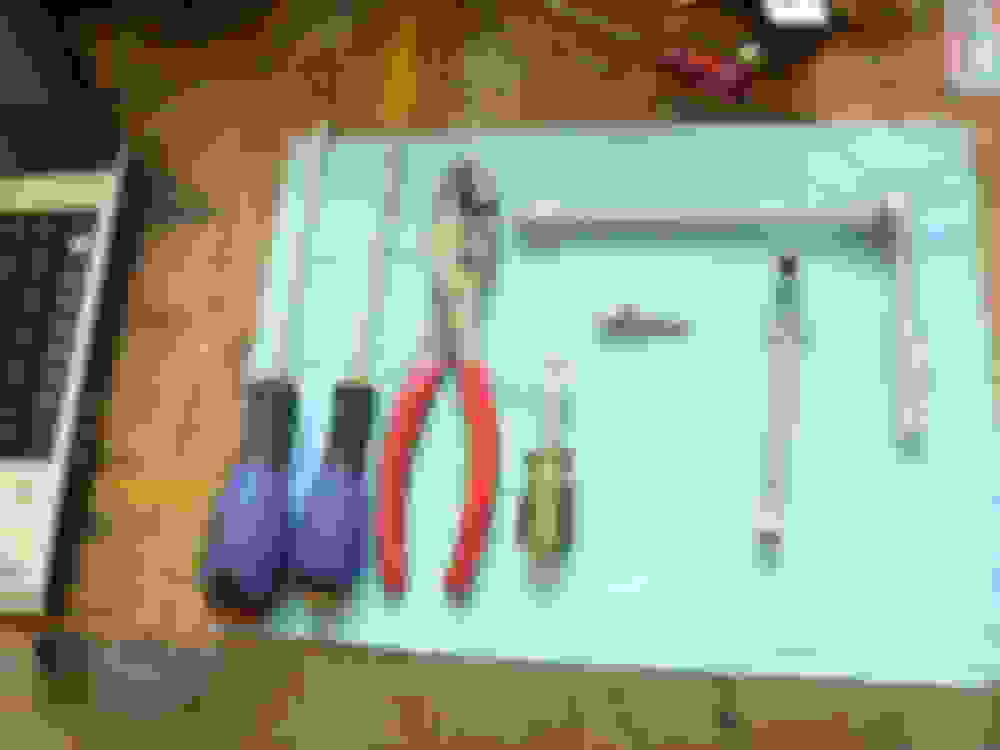
The parts you'll need to replace the TCT:
• 3/8" drive socket
• 10 mm socket
• 8 mm socket
• 8 mm crescent wrench
• short socket extension
• long socket extension
• Phillips screwdriver
• pliers
• paper towels
• motor oil
• cleaner
If you are replacing your TCT with a new one, you'll also need:
• needle nose pliers
• 8mm or 5/16 hex
• A new TCT - Honda part # 14510-PCX-005 OR - buy a modified TCT from Billman250 that is modified to not fail - you can PM him for details.
If you are repairing your existing TCT, you'll also need:
• short flathead screwdriver
• 5 mm bolt, 50-70 mm long, .80 pitch, with a nut and washer
• sandblasting equipment and 70-90 grit material - like aluminum oxide
• masking tape Note - if you don't have sandblasting equipment(air compressor, gun, etc) - chances are a local bodyshop can sandblast the parts for you - call around and see if they can help you out. If so, just take the worm gear (and piston if you want) to them and make sure they use the correct range grit (and do not sand the exterior of the piston, only the interior).
Luckily for me, nickp has a gun and compressor and we got ahold of some sand.
Removing the stock air box
To get to the TCT, it helps to remove the stock airbox. If you don't have a stock airbox anymore, you can got to part two.
To remove the stock airbox it helps to remove the air filter. Just pull it off and set it aside. If you want to, you can remove the assembly to the intake by loosening the two clamps pictured below. Push the assembly to the side so its out of your way.
After you remove the air filter/assembly, you need to loosen the three 10 mm bolts that secure the airbox to the car. There are two easily seen on the left and one recessed on the right. Use the long socket extension to get to these.
Before you can pull the airbox out, you have to detach three lines that are clipped to the back of the box, unscrew the sensor on top of the box, and detach the air hose that clips to the right side of the box. Use the photo below as reference - simply pull them loose. Once all the bolts are off and the wires are free, pull the airbox out and set it aside.
Removing the TCT
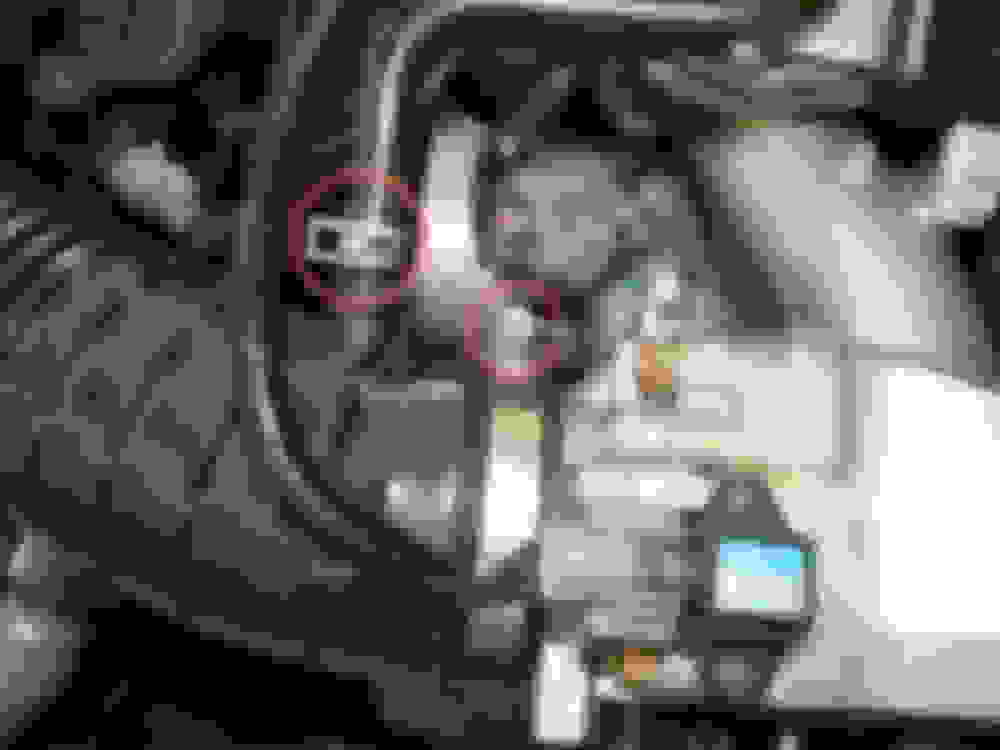
With no airbox in the way you can easily see the TCT - it is on the left side of the engine, just ahead of the exhaust manifold and just under some sensors (VTEC solenoid). Place some folded paper towels over the oil filter and the wires just above it - when you pull the TCT out some oil will seep out as well and you want to catch it.
The TCT (outlined below) is held onto the engine with two 10 mm brass bolts (marked with red paint in the pic), and it has an inspection cover with two silver 10 mm bolts - be sure you loosen the correct bolts, mainly to save time. Use the 10 mm socket to loosen and remove the brass bolts.
Once the bolts are off, you will need to pry the TCT out. It is tightly secured thanks to internal o-rings, so twist and pull to pop it off, but be careful about pulling too aggressively since you don't want to drop the assembly parts once you get the TCT out. Gently prying with a flathead screwdriver near where the 10 mm bolt goes can help - just be mindful not to damage the metal.
Billman tip: If you'd like to add an extremely easy way to get the TCT out once the 2 bolts are removed, simply pry on it THROUGH the maintenance hole. Takes 0 effort Note - you will have to have removed the hex bolt to do this.
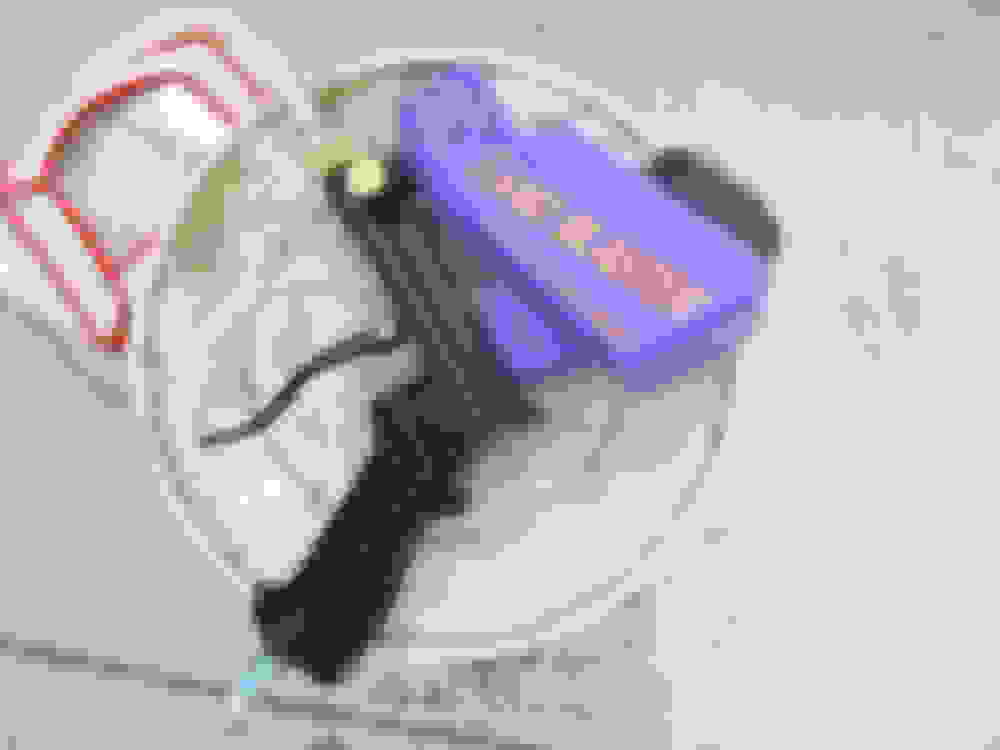
When the TCT finally comes out, it will look like this:
And the engine will look like this:
Replacing the TCT? You will also need to remove the inspection cover so you can later pull the cotter pin out. If you are repairing the TCT, you do not need to do this step. Use the 8mm or 5/16 hex to unscrew the maintenance cover from the front of the engine.
Repairing the TCT (sandblasting)
If you are replacing the TCT with a new one, you can skip this part. If you want to repair the worn part in the TCT, you will need to disassemble the TCT and have access to sandblasting equipment. The TCT easily comes apart (unscrew the piston) and looks like this exploded:
Remove the two 10 mm silver bolts from the TCT body and remove the cover plate. (far left part in the pic above) Unscrew the oil bolt from the body and place it aside for now.
The worm gear is what needs to be sandblasted. As well, you can sandblast the inside of the piston - just be careful not to sand the outside of it! Use masking tape to fully protect the piston and then sandblast the inside of it and the outside of the worm gear.
The sandblasted worm gear will have a dull finish now.
Clean the worm gear and piston of sand using the engine cleaner. Now you are ready to reassemble the TCT, but you will need to compress the TCT internals to reinstall the assembly.
Replacing the TCT with a repaired one
Take the 5 mm bolt and thread the 5 mm nut onto it 90% up. If you have a metal washer, slide it onto the bolt as well.
Reassemble the TCT piston and internal springs and worm gear. Note that the worm gear has a small opening and a large opening - the small opening needs to face the TCT body.
Insert the 5mm bolt where the oil bolt normally goes and thread it into the assembly - this will pull the piston down into the TCT body. Tighten it hand tight - no need to vise it down. The piston doesn't need to be fully compressed, just enough to seat into the engine. Use a 8 mm wrench to work the bolt if needed and secure the nut against the TCT body so the tension is held in.
Apply a thin coat of oil to the o-rings. Push the TCT back into the engine - it will pop in and seat tightly. Reattach the TCT to the engine using the two brass 10 mm bolts. Torque to 8.7-9 lbft.
Unscrew the 5mm nut and bolt from the TCT. Thread the oil bolt into the TCT until tight, using the short flathead screwdriver. Replace the cap with the two 10 mm silver bolts. Congratulations - the TCT is repaired and back in place - skip down to the reassembly instructions for the airbox if necessary.
Replacing the TCT with a new one
If you bought a new TCT, once you have the old one out, all you need to do is bolt in the new one and pull the cotter pin once the new one is installed.
To install the new TCT, apply a thin coat of oil to the o-rings, press the TCT into place, and bolt it in with the brass 10 mm bolts to 8.7-9 lbft. The TCT only fits in one way, but pay attention and save yourself any hassle.
Once the TCT is bolted in, pull the cotter pin from the assembly through the maintenance hole you opened with the 8mm or 5/16 hex.
Once you pull the pin free, the piston will pop into place. Replace the hex bolt.
Final Steps
Remove the towels from on top of the oil filter. Replace the airbox, reattach the three lines to the back of it, the sensor to the top, and the air line on the right side. Replace the air filter. Check that the engine bay is clear of tools and there is nothing touching the belts and pulleys. Start the engine and listen - you should hear nothing but a running engine.
Originally Posted by CarbonCrew,Aug 8 2010, 10:20 PM
What exactly is the mode of failure of the TCT?
I think billman once stated that the TCT operates using an oil hydrolock, spring tension, and oil pressure, so three possible ways for a TCT to go bad, but the most common seems to be oil hydrolock failure as the worm gear and piston become too smooth to "catch" the oil - like a stone in a river it wears smooth with time.
By sandblasting the worm gear and interior of the piston you enable the friction necessary to keep the worm gear pushing out the piston, which supplies the needed pressure.
Also fwiw, many people that run Mobil 1 claim that that oil causes TCT failure early - likely due to its fluidity characteristics. I don't run M1 and my TCT went bad at ~50k mi.
Originally Posted by Bingoig11,Aug 9 2010, 05:19 AM
What a great DIY topic! Placed in favorites directly.
One question: Does someone have a photo of the cotter pin that we have to pull once the new TCT is in place? Is it easy to pull?
Thanks
Here is a photo of an old and new TCT (upside down though) - the new one has the pin in place to hold the piston back:
- the pin is part 13.
david1 states:
Make sure the set pin is facing the maintenance hole and the bend on the set pin is facing [front]. Grab the set pin and pull it out a little at first then get a better grip on it and pull it all the way out. You will hear a "pop" when the piston extends.
 08-08-2010, 04:35 PM


 Note - you will have to have removed the hex bolt to do this.