Ap2 door panel stitching diy **Pics up**
 05-12-2011, 12:06 AM
#1
Registered User
Thread Starter

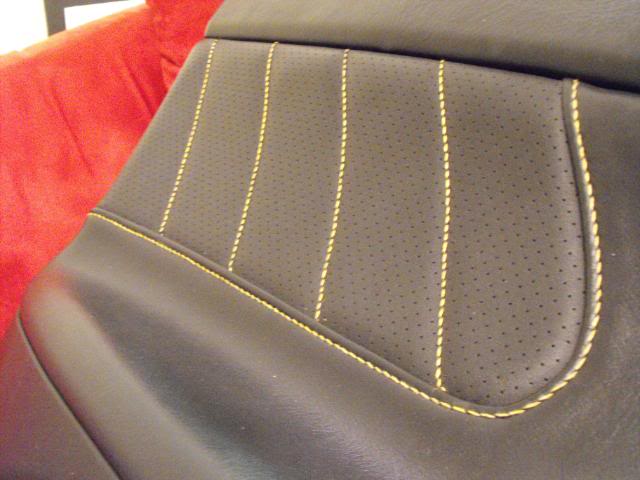
Below is the diy process of stitching your oem door panels. I saw a similar write-up on Nsx Prime a month or so back and have since wanted to try it.(Sorry Nsx prime but its S2ki for life!  ) I chose to go with a yellow/gold colored thread similar to the CR/Go Tuning interior pieces. I started with the door panels but if I decide to stitch my Rep. Bride Vios I'll post them up! This process is easy + reversible = WIN!
All that's needed to complete your panels is sewing thread and a needle(hook type).
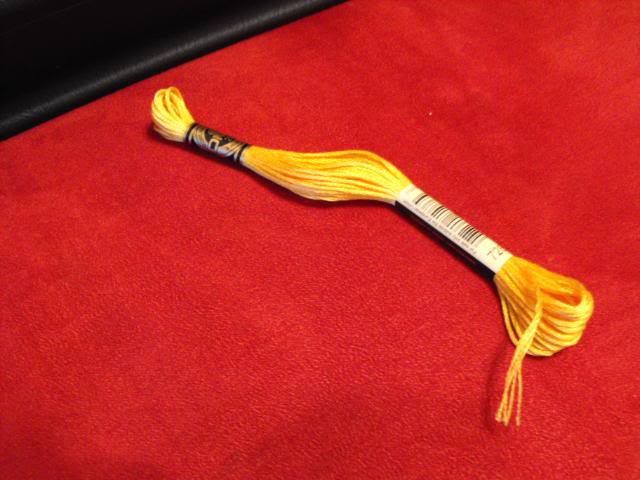
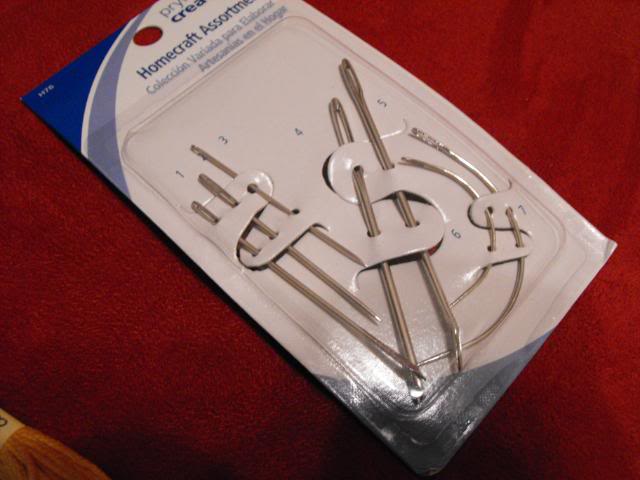
Exactly how much thread? I'm not sure. I just grabbed about 3 bundles(used about 1/2 bundle per panel). I purchased the thread from a local hobby store at about 40 cents per bundle. I'm sure they'll have the hooked needle as well but I picked mine up at Wal-mart(pack pictured, maybe $2.50).
Total cost = about $4
All of these are not needed. If you happen to do this and purchase the same pack as me, I used needle #7.
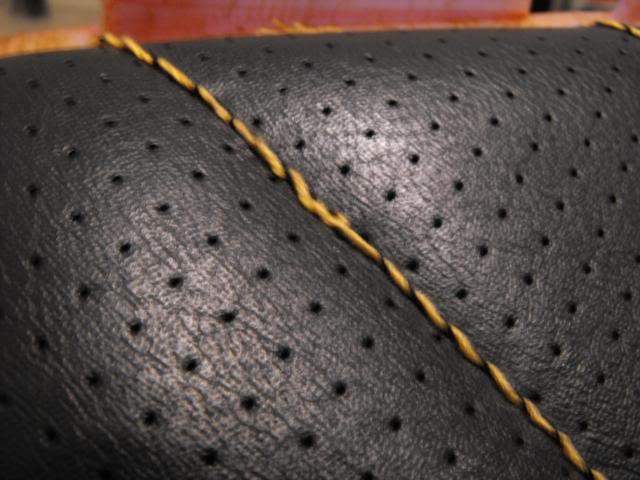
Before

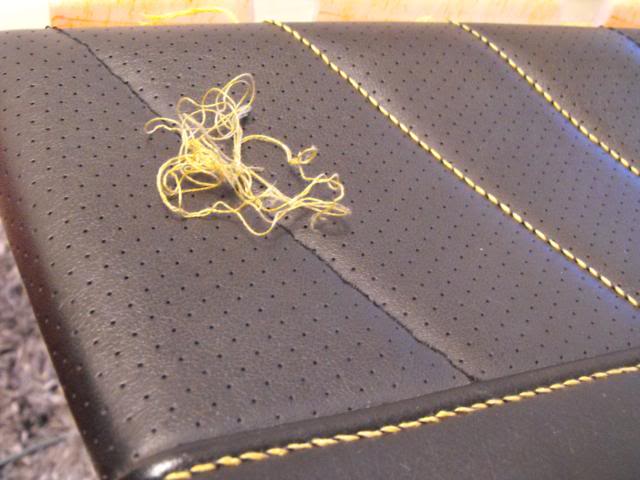
During...
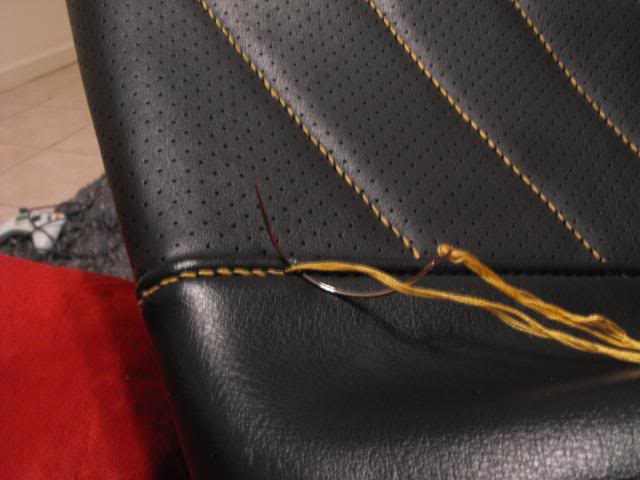
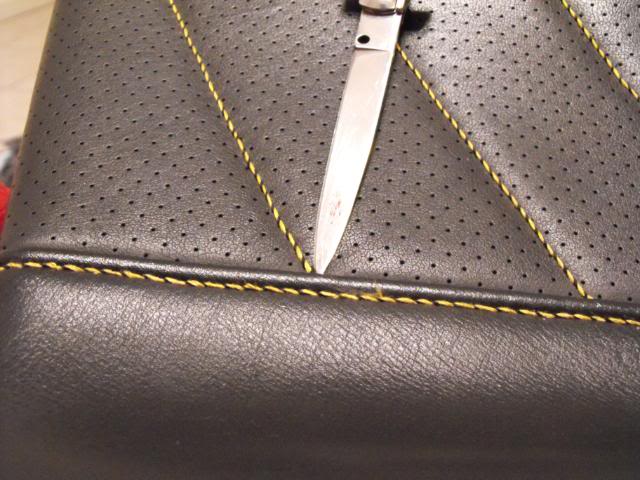
Basically all you do is weave the thread you're adding in and out/ up and over the pre-existing thread.
This was the very first line I did. Trying to get a feel for it, totally screwed it up.
But as I stated above, the process is reversible so I re-stitched it.
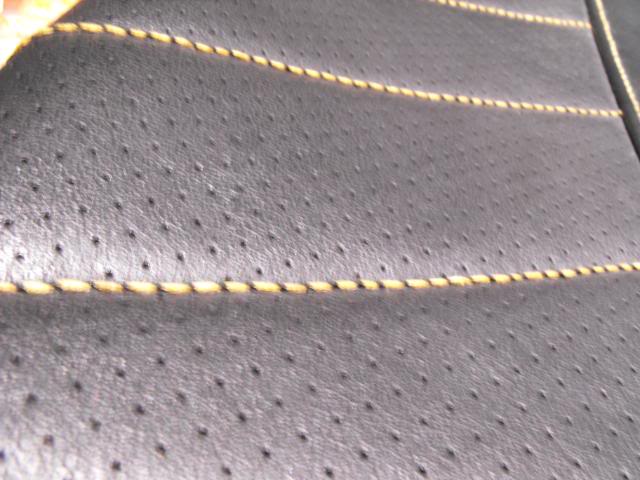
Fixed
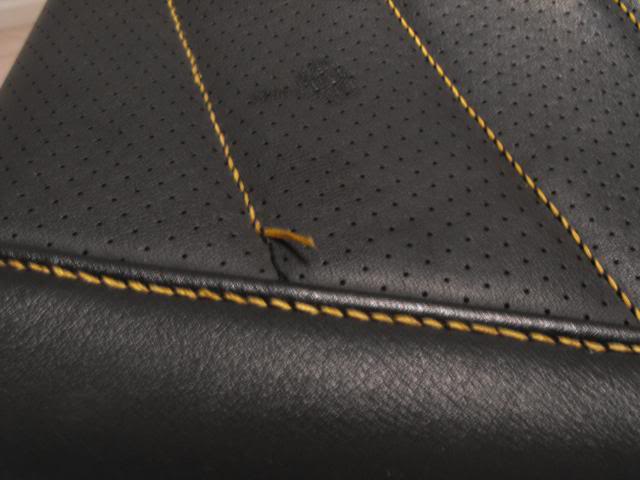
I started with a knot at the top of the panel and worked my way down. Each time I reached the bottom I cut the end of the thread and shoved it under the piping.
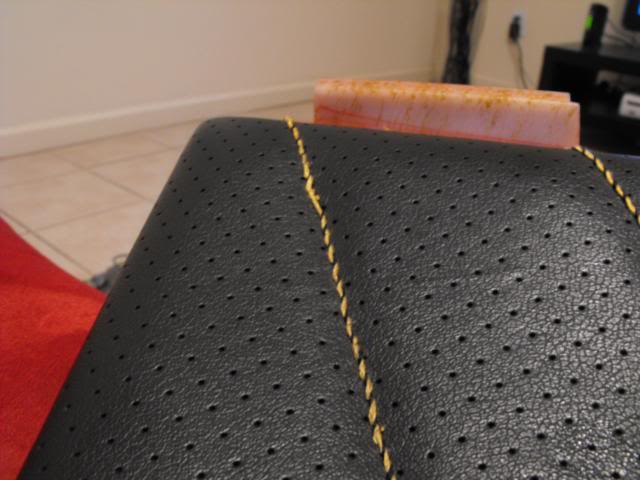
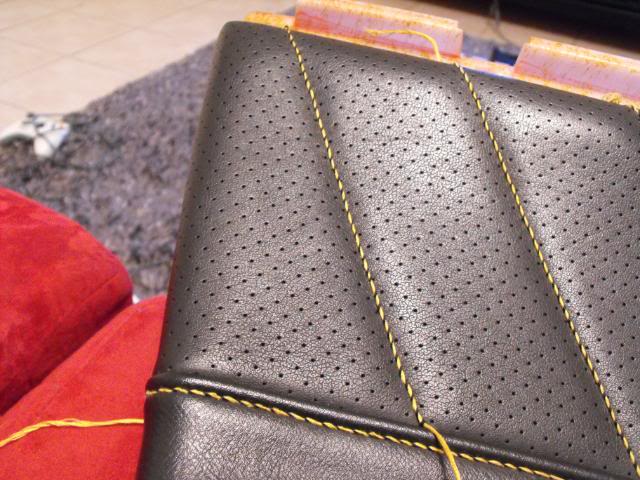
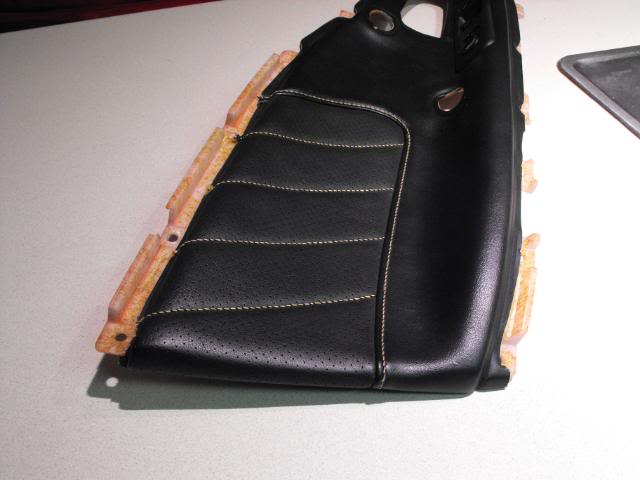
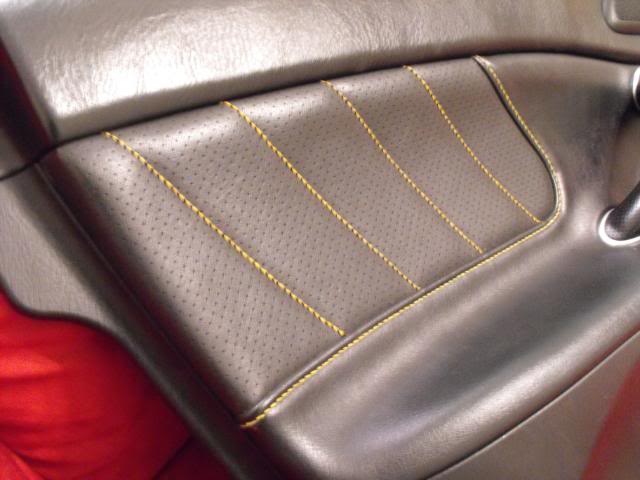
Finished product...

Sorry that I wasn't really thorough at all but figured it was be pretty straight forward.
**TIPS**
I don't really know a lot about sewing thread at all but If there's a such thing as thread that doesn't fray, use that.
Pull each loop equally as tight to get a uniform oem look.
If you're working with a light colored thread such as myself, make sure that your hands are CLEAN.
Try your best not to tear the oem thread, that's what the added thread holds on to.
TAKE YOUR TIME(Took me like 3hrs. per panel)
Pros:
Inexpensive
Looks great
Cons:
Time consuming
TAYLOR GANG OR A MOUSE TRAP!
) I chose to go with a yellow/gold colored thread similar to the CR/Go Tuning interior pieces. I started with the door panels but if I decide to stitch my Rep. Bride Vios I'll post them up! This process is easy + reversible = WIN! All that's needed to complete your panels is sewing thread and a needle(hook type).
Exactly how much thread? I'm not sure. I just grabbed about 3 bundles(used about 1/2 bundle per panel). I purchased the thread from a local hobby store at about 40 cents per bundle. I'm sure they'll have the hooked needle as well but I picked mine up at Wal-mart(pack pictured, maybe $2.50).
Total cost = about $4
All of these are not needed. If you happen to do this and purchase the same pack as me, I used needle #7.
Before
During...
Basically all you do is weave the thread you're adding in and out/ up and over the pre-existing thread.
This was the very first line I did. Trying to get a feel for it, totally screwed it up.
But as I stated above, the process is reversible so I re-stitched it.
Fixed
I started with a knot at the top of the panel and worked my way down. Each time I reached the bottom I cut the end of the thread and shoved it under the piping.
Finished product...
Sorry that I wasn't really thorough at all but figured it was be pretty straight forward.
**TIPS**
I don't really know a lot about sewing thread at all but If there's a such thing as thread that doesn't fray, use that.
Pull each loop equally as tight to get a uniform oem look.
If you're working with a light colored thread such as myself, make sure that your hands are CLEAN.
Try your best not to tear the oem thread, that's what the added thread holds on to.
TAKE YOUR TIME(Took me like 3hrs. per panel)
Pros:
Inexpensive
Looks great
Cons:
Time consuming
TAYLOR GANG OR
A MOUSE TRAP!


Trending Topics
05-12-2011, 07:05 AM
#8
Registered User

I'll have to see if I can convince my wife to do this for me. She has sewn before as a hobby and will be a better hand at this then me...I just need to figure out what i have to buy her to get her to agree .
Looks good!
.Looks good!
