Coilover Install - DIY - Results and thoughts
 09-07-2012, 12:18 PM
#1

Thread Starter
Join Date: Jun 2012
Posts: 870
Likes: 0
Received 0 Likes
on
0 Posts
It has been a while since I joined and I have been asking a lot of questions most of them probably stupid and my fellow S2kers have been great about getting back to me. I figured it was time to give something back. Here is my take on a coilover install, I personally used KW V2s but this basic install can be used for any coilover kit. My goal is to make this install as comprehensive as possible so that someone who has never done this before will be able to go step by step and understand what needs to be done. I hope this helps someone out. Feel free to PM me or post with any questions.
Disclaimer: YOU are responsible for your car and any changes you make to it. I am not. This article should give you a good outline of what is required to do an install I strongly advise you to read it the whole way through before deciding if you are up for the challenge. If you are not technically minded I would not recommend doing the install you can end up hurting yourself or your car. If you are technically minded and have never done coilover’s this can be a fun project that can be completed in under a day (it took me about 4-5 hours to complete).
First things first, tools:
Impact wrench (optional, but preferred)
17mm wrench
17mm socket
14mm socket
10mm socket
19mm Wrench
V2 specific – 8mm wrench
Spring compressor
Allen key (optional )
Car Jack
Jack Stands
Breaker bar
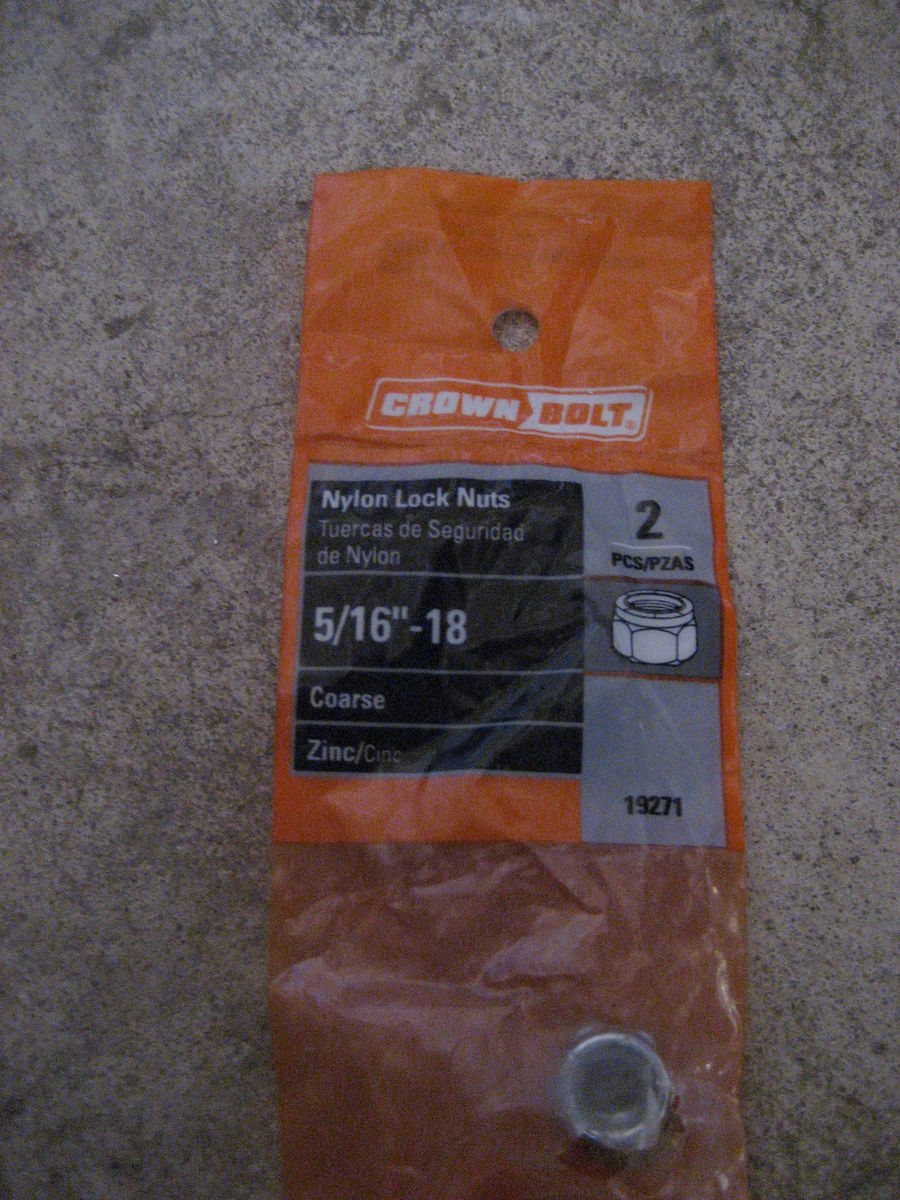
You may need to purchase a new nuts and/or bolts to hold the brake line to the strut body depending on what you are going to replace your old struts with. I purchased a self locking nut from home depot and an longer screw.
This nut should fit the factory bolt just in case you need it.
Take and record the current measurements of your car. This means having your car on a relativley level surface and taking measurements from the center of the wheel to the bottom of the wheel well. and Again from the floor to the bottom of the wheel well.
You will also need the coils:

Getting started you want to jack your car up onto 4 jack stands as shown below. I like to keep the jacks under the front and rear jack point under little load just in case anything happens to one of the jack stands.

I started with the driver side front. The first thing thing to do and that a lot of people disregard is detach the ABS wire from the upper control arm before detaching the arm. The ABS cables are a huge pain to replace and not to mention they are very expensive. I started by removing the 10mm bolt that holds the cable to the body

I then proceeded to remove the upper control arm with 2 bolts on the on either side of the arm. My bolts came off fairly easliy but if depending on the age of your car you may need to use a breaker bar. These are 17mm bolts.

Once the bolts are off you wiggle the arm out of it's place and push it to the side with little effort. As you can on the upper right side of the arm the 10mm bolt that was undone for the ABS sensor did not give enough slack on the ABS cable and there is a lot of tension on the cable. the impact wrench is still dangling from the bottom of strut bolt as I panic to loosen the cable.

I was not comfortable with working and possibly damaging the cable so undid the braket that holds the cable onto the arm. you can see the image below. Better safe than sorry.

once the cable is removed it can be pushed aside
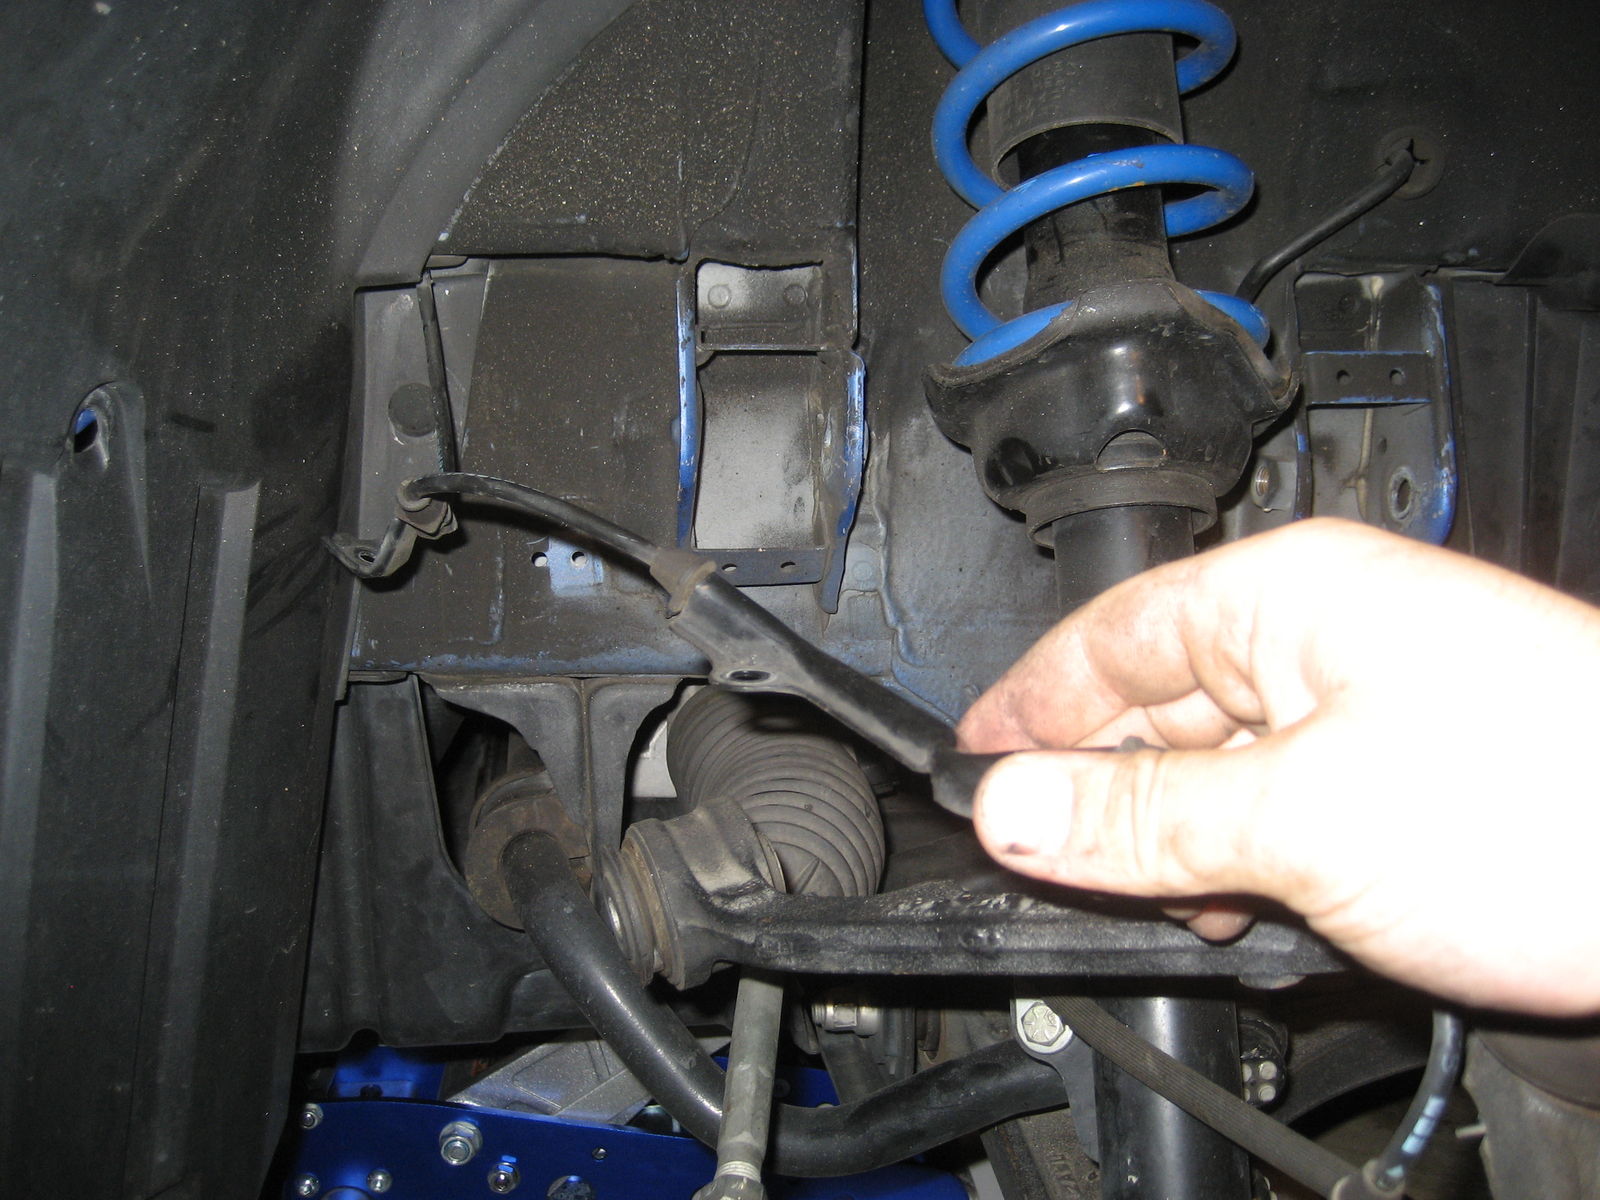
Next is to under the brake line that are bolted to the strut body - these are only on the front. Now that all the lines are out of the way we can work worry free
The first step in getting the old suspension off is going to be to unscrew the lower bolt of the suspension. I used an my impact gun with a 17mm socket.

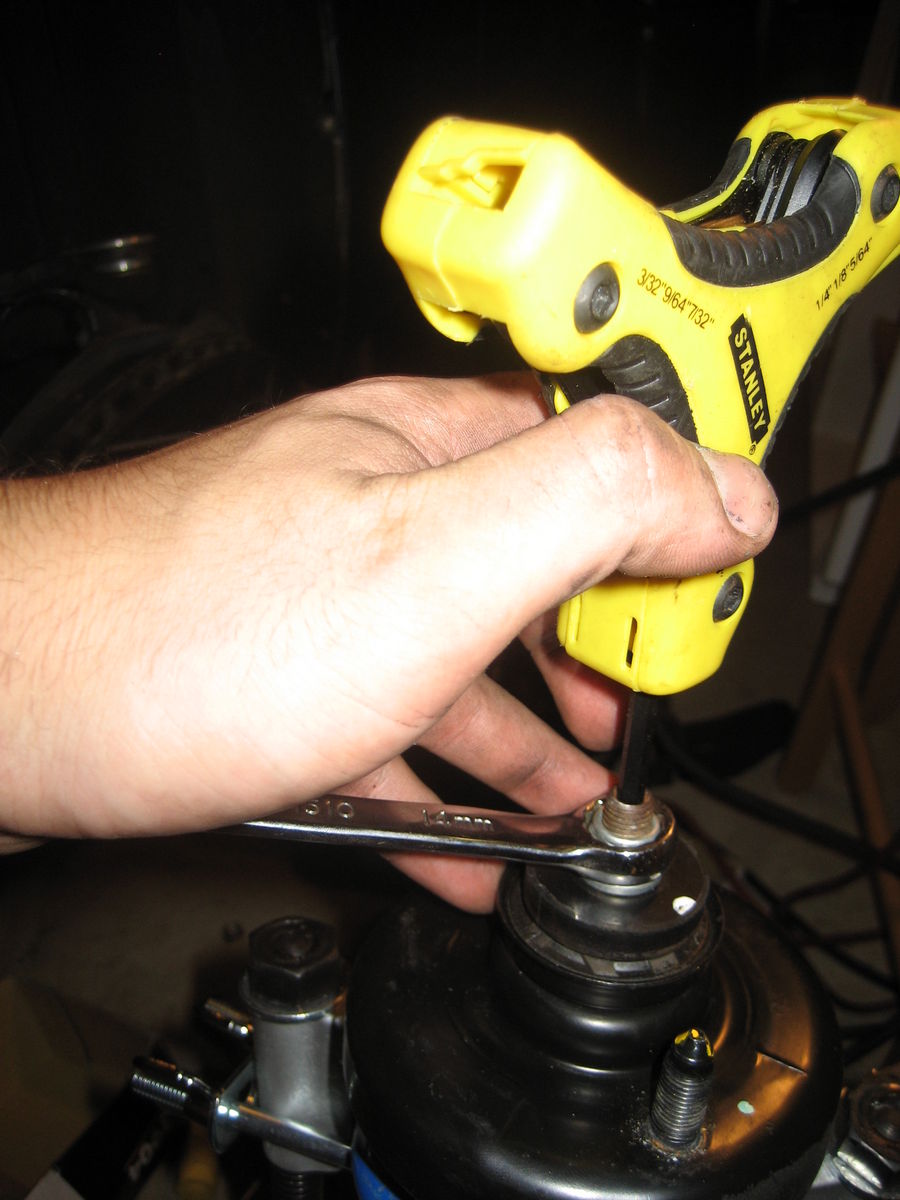
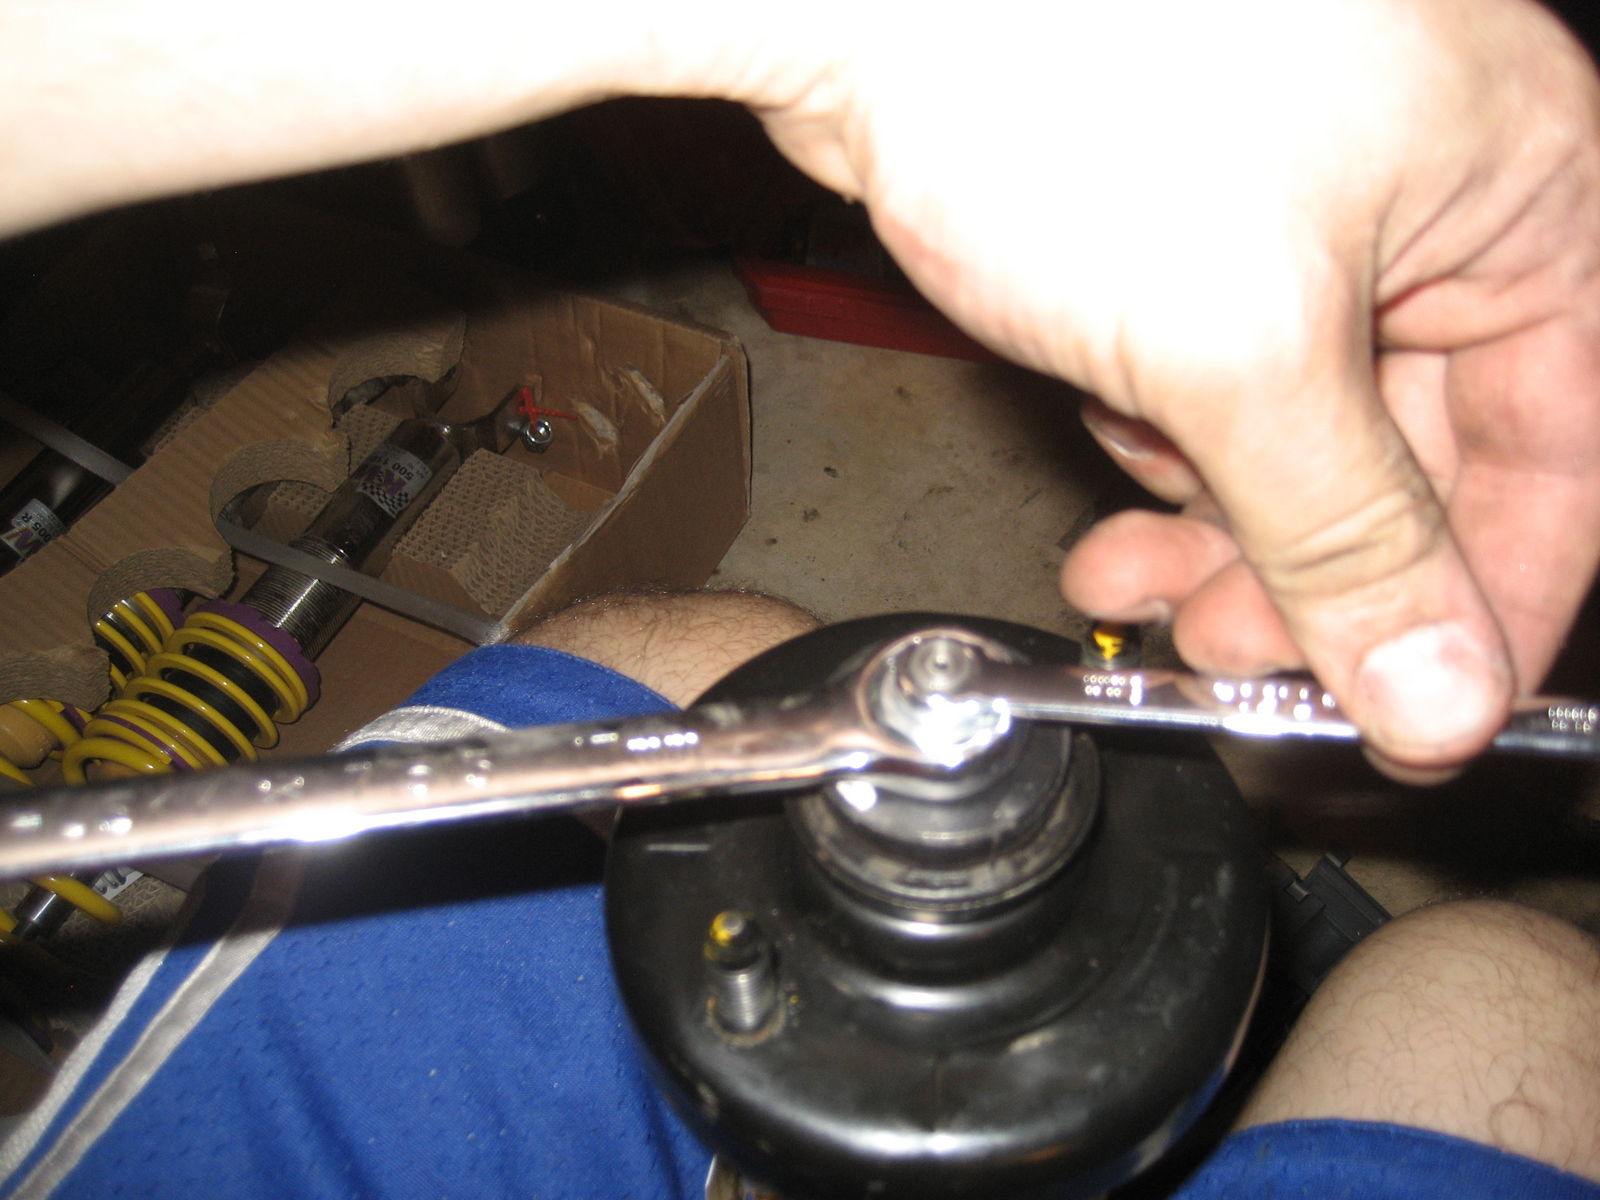
The next step is to unscrew the two bolts on the top of the coil over that hold it to the body. These bolts are 14mm.

The coil should come right out with minimum effort.
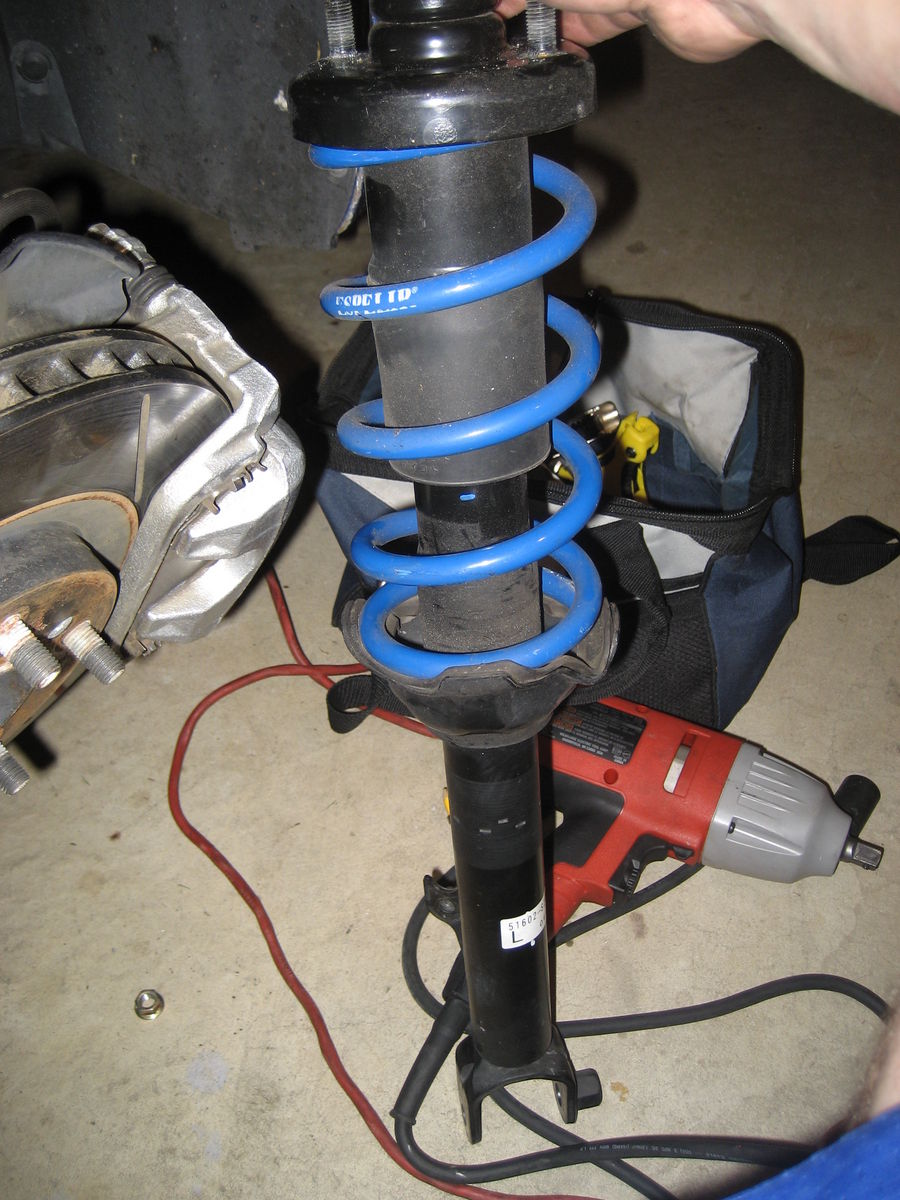
If you are using new top hats you can ignore this part. If you will be reusing your factory top hats then you will need to use spring compressors to compress the spring so that we can safely remove the top hat. I used my impact wrench to tighten the spring compression. you don't need to compress the spring all the way just enough so that it is no longer applying pressure to the top of the strut.

Once the compressors are on it should look something like this. Note the spring is compressed here - the bottom of the spring is no longer sitting on the bottom of the spring seat.
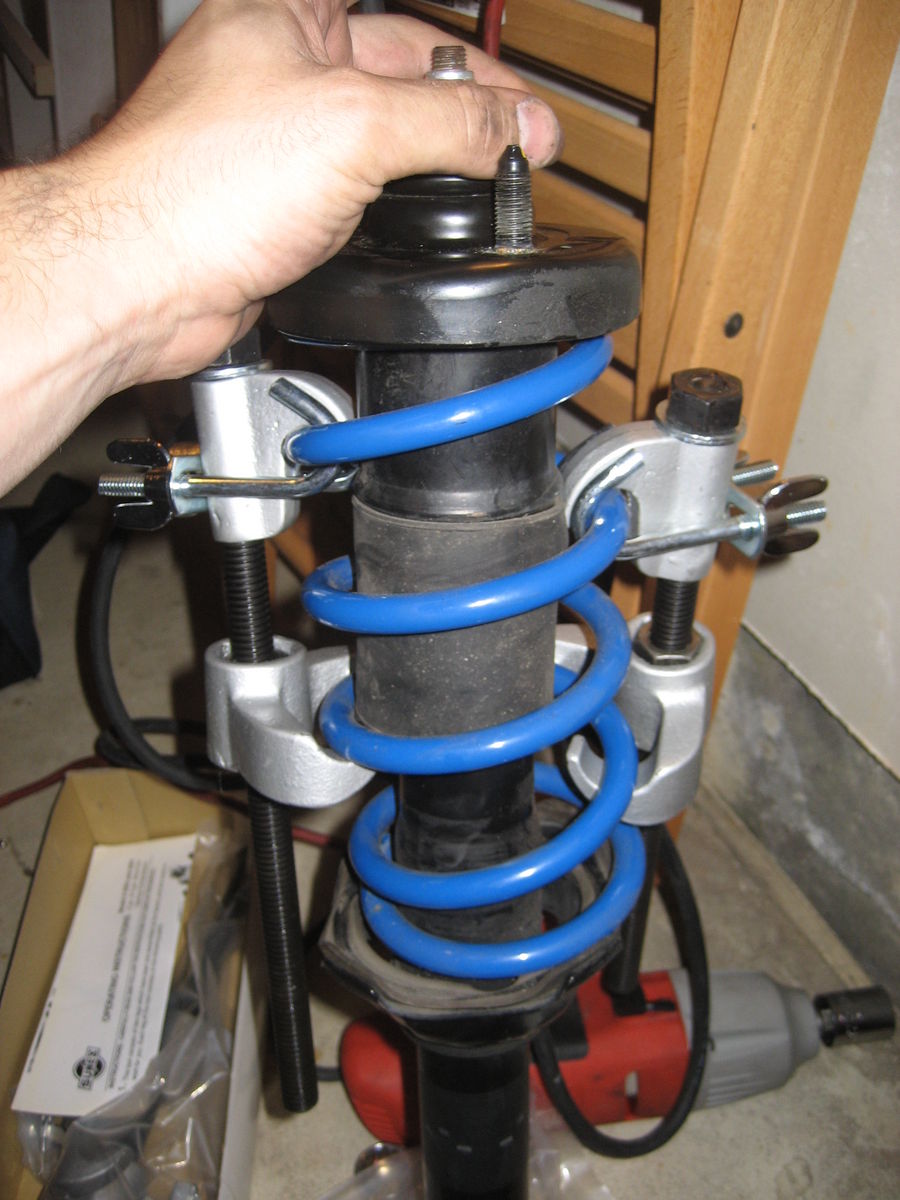
I plan on reselling my factory suspension so I used a hex key and a wrench to undo the top of the bold to prevent any shredding of the thread or any damage to the inside of the suspension. I ended up having to use a much longer hex wrench and a mallet to get it loose. A much simpler solution is to use an impact wrench and unscrew the top bolt it is a 14mm.
The next step is to put the top hat on to the new suspension. I did not pull apart the old top hat, I simply slipped it on to the KW suspension and tightened it (it has not given me any issues). There is a black metal ring on the factory suspension that looks like an oversized washer you will will most likely need this for your new suspension but consult the owners manual to be sure. Some people will tell you to take an impact gun shoot down the top hat screw. This can be done but it isn't the best method because you risk spinning the piston inside the strut and possibly causing damage to it, not worth it in my opinion. It will also make it more difficult to line up the screws when inserting the coils back on the car. I tightened the screws with a 14mm bolt that came with the V2 while holding the piston rod with an 8mm wrench. I did not torque them I only tightened them enough so that the top hat wouldn't fall off.
The next step is to install the the new coilover. This is why waiting to torque the top hat makes the install easier. You can adjust the rotation of the coilovers so that the screws in the top hats will line up with the holes on the car. you may end up spinning the piston a little, this is not ideal but it shouldn't cause an issue if you are careful. I spun mine about a half a turn by accident before i realized what happened. It did not have any effect on the performance of the suspension. Side note - as far as i understand spinning the strut will not cause any damage on its own because the piston in the strut is not connected to the strut body, however if you apply torque you can dislodge the rings or worse damage the actual adjusting mechanism in the piston. If anyone who is more knowledgeable would like to shed any light on I would love to understand how it works.
Once the strut is in you can you can start bolting it down. I started with the strut bottom bolt. Although this is probably not the most mechanically correct way to do it it was the easiest for me. I used my knee to line up the lower control arm with the holes on the strut body and slid the bolt in. The bolt is 17mm and the self locking nut that comes with the v2 is 19mm. If you are using factory struts the strut is already threaded so you do not have to worry about a bolt.

Then hand screw the bolts at the top - you don't need to torque them yet. I would torque the lower bolts now that the strut is in place. The factory specs are 47 lb ft.

Once done screw the bolts back in for the control arm. these are torqued to 76 lb ft. Note- The purple thing right below the bottom spring is the spring collar. We will come back to it later when adjusting the height.

reattached the ABS cable

Then using the bolts you have purchased or the factory bolts reattached the brake line to the strut body.

You are done with the drivers side - expect for torquing the top bolts, which we will do once the car is under load.
Move onto the passengers side coil follow the same steps as listed above.
Once this is completed. we can move onto the rear.
I started with the driver side rear because it is the more complicated side. First thing to do is to unscrew the gas cap there are three bolts I don't remember if they are 8 or 10mm. You will also need to remove the gas cap in order to be able to remove the line.

Taking out the spare tire and the spare trunk lining. You will be able to see what is part of the lining is meant to come off because all of the pins will have a back and a little metal piece to hold onto so that they can be removed. once they are removed you will need to bend back the passenger side of the trunk liner to expose the top strut bolts and the gas filler line. There is a 10mm bolt on the gas line that needs to be unscrewed, it should be pretty obvious because it is the only thing that bolts the gas long to the body. Now firmly but gently pull the gas line neck back it should pop out of its place and dangle loosely. At this point I would advise you to put the gas cap back on so that nothing falls in the line. Now we are ready to remove the rear coil.
First undo the bottom bolt of the strut (if you prefer you can unscrew the suspension link first it will take a little bit of pressure off the lower arm so the coil will not pop off when the bolt is removed).

I have read on some of that forums that people have forgone disconnecting the suspesion link in place of having a fat friend stand on the lug bolts of the car to provide counter weight for the car. I would not recommend this. The link takes about 2mins to unscrew and will make the entire job much easier. You will need an hex key and I think a 14mm wrench to unscrew it from under the car. I forgot to take a picture of it. You can see the suspension link in the photo above as the rod with 4 dots on the top of it. It is located to bottom left of the strut behind the ABS cable. On the other side (not visible) of the link is the bolt that needs to be undone. I would recommend undoing the lower link because it is easier to get to. You only need to undo 1 side.
The next step will be to unbolt the two top mounts just like we did in the front they are 14mm. With the gas line removed this should not be fairly easy. Note- The upper side of the the pic below shows the hole where the 10mm gas filler bolt was secured

Now the strut should be removed fairly easily. You will need the same procedure listed above if you want to reuse the top hat. Once the new strut is assembled you can follow the same procedure as for the front one to line up the bolts. You can then start with securing the bottom of the strut to the control arm. you will want to torque the bottom bolt to 47lb ft just like for the front. Side note - you can see in the picture below that the link that I referred to above is disconnected.

Once this is done you should hand tighten the top suspension bolts so secure the strut.
Follow the same procedure for the passenger side. It is a lot easier because there is not fuel line to worry about.
Once both of the rears are on we can reattach the suspension link. Use the hex key to ensure that the link does not twist while tightening the nut. The nut should be torqued to 22 lb ft.
Now we should be all set to put the tires back on. Drop the car and torque everything up. We want to torque the the nut that hold the strut to the body to 36lb ft and piston rod nut to 26lb (this is specific to the V2 but should be fairly similar for all suspensions, Honda factory specs are 22lb ft) while holding the piston rod so we do not spin it
If you are using adjustable coilovers such as the V2s then read on if you are not then you can disregard this piece. I would let the car sit for a day or two before doing anything. I have heard that the springs can take as long as a week to set. So be aware that if you set your car initially to save time it may drop and it may drop unevenly over time. After 3 days I lifted the car again and adjusted the coils. My car was slammed when I bought it and I was tired of rock chips (and speed bumps) so I decided to use the maximum recommended specs for the V2's (still slightly lower than factory) I did this by taking off the tire and measuring from the top of the spring collar (pics above) to the center of the bottom bolt. I did this all around and when I put the car back down I had no more than 2mm difference from the left to right sides for the front and rear. I will be remeasuring in a week just to make sure that everything is the same.
I would recommend waiting a week before getting an alignment. It would suck getting one and then having the ride height change only to have the alignment be knocked off again.
V2 Review: the ride on these is great. It is slightly stiffer than factory but nothing back breaking. On the softest setting the v2's are barley rougher to ride on then factory while at the same time not feeling boaty. The car does feel a lot more planted than with factory because of the heavier springs. The result is something that handles extreme corners a lot better than the factory struts. I can imigine that the car is probably a little less forgiving if you push it over the limit, but I have not been there yet so I can't comment. The suspension can definitely be tuned to the drivers preference unlike some coilover systems such as the Pss9 were it is all or nothing with the stiffness. There is definitely a consistent increase in stiffness as you adjust the settings. The build quality does look nice the springs and the strut body looks like they were assembled with quality. The adjustability is fun to mess around with. In my opinion this system will probably give you a little more control with your as in terms of how you want the car to act i.e. comfort, control, even drift despite the heavy springs. The height adjustability is limited to about an inch and a half according to KW spec's (from wheel center 320mm- 345mm front, 335-360mm rear) which is slightly disappointing if you are looking to slamm your car. As you begin to play around with the setting you can start to see that there is a sweet spot for stiffness and ride height to where your car will handle a lot better when compared to stock. All in all, I would say that is you are in need a replacement suspension this is comparable in price to OEM replacements (if you include springs and tophats) while getting more performance.
I would love some recommendations on the stiffness settings. Here is what I have found while messing. There is nothing scientific about my method, I just set the stiffness and drove the car to see how it felt.
Fully soft - The car rides very well, but feels a little mushy around turns. The back has a tendency to want to pop out under hard acceleration.
Front fully stiff/ rear fully soft - I don't mind this setting it feels like the car handles well and puts down power evenly. The ride quality is not great for daily driving.
Fully stiff - You will feel even small imperfections in the road, your body will shake, not ideal for the road. Or the track, I think that the rear needs to be a little softer because the car does not seem to put down power well.
I have not had a chance to mess around with the non extreme settings yet but I will post more as I do.
For sale link of factory struts and espelier springs
Disclaimer: YOU are responsible for your car and any changes you make to it. I am not. This article should give you a good outline of what is required to do an install I strongly advise you to read it the whole way through before deciding if you are up for the challenge. If you are not technically minded I would not recommend doing the install you can end up hurting yourself or your car. If you are technically minded and have never done coilover’s this can be a fun project that can be completed in under a day (it took me about 4-5 hours to complete).
First things first, tools:
Impact wrench (optional, but preferred)
17mm wrench
17mm socket
14mm socket
10mm socket
19mm Wrench
V2 specific – 8mm wrench
Spring compressor
Allen key (optional )
Car Jack
Jack Stands
Breaker bar
You may need to purchase a new nuts and/or bolts to hold the brake line to the strut body depending on what you are going to replace your old struts with. I purchased a self locking nut from home depot and an longer screw.
This nut should fit the factory bolt just in case you need it.
Take and record the current measurements of your car. This means having your car on a relativley level surface and taking measurements from the center of the wheel to the bottom of the wheel well. and Again from the floor to the bottom of the wheel well.
You will also need the coils:
Getting started you want to jack your car up onto 4 jack stands as shown below. I like to keep the jacks under the front and rear jack point under little load just in case anything happens to one of the jack stands.
I started with the driver side front. The first thing thing to do and that a lot of people disregard is detach the ABS wire from the upper control arm before detaching the arm. The ABS cables are a huge pain to replace and not to mention they are very expensive. I started by removing the 10mm bolt that holds the cable to the body
I then proceeded to remove the upper control arm with 2 bolts on the on either side of the arm. My bolts came off fairly easliy but if depending on the age of your car you may need to use a breaker bar. These are 17mm bolts.
Once the bolts are off you wiggle the arm out of it's place and push it to the side with little effort. As you can on the upper right side of the arm the 10mm bolt that was undone for the ABS sensor did not give enough slack on the ABS cable and there is a lot of tension on the cable. the impact wrench is still dangling from the bottom of strut bolt as I panic to loosen the cable.
I was not comfortable with working and possibly damaging the cable so undid the braket that holds the cable onto the arm. you can see the image below. Better safe than sorry.
once the cable is removed it can be pushed aside
Next is to under the brake line that are bolted to the strut body - these are only on the front. Now that all the lines are out of the way we can work worry free
The first step in getting the old suspension off is going to be to unscrew the lower bolt of the suspension. I used an my impact gun with a 17mm socket.
The next step is to unscrew the two bolts on the top of the coil over that hold it to the body. These bolts are 14mm.
The coil should come right out with minimum effort.
If you are using new top hats you can ignore this part. If you will be reusing your factory top hats then you will need to use spring compressors to compress the spring so that we can safely remove the top hat. I used my impact wrench to tighten the spring compression. you don't need to compress the spring all the way just enough so that it is no longer applying pressure to the top of the strut.
Once the compressors are on it should look something like this. Note the spring is compressed here - the bottom of the spring is no longer sitting on the bottom of the spring seat.
I plan on reselling my factory suspension so I used a hex key and a wrench to undo the top of the bold to prevent any shredding of the thread or any damage to the inside of the suspension. I ended up having to use a much longer hex wrench and a mallet to get it loose. A much simpler solution is to use an impact wrench and unscrew the top bolt it is a 14mm.
The next step is to put the top hat on to the new suspension. I did not pull apart the old top hat, I simply slipped it on to the KW suspension and tightened it (it has not given me any issues). There is a black metal ring on the factory suspension that looks like an oversized washer you will will most likely need this for your new suspension but consult the owners manual to be sure. Some people will tell you to take an impact gun shoot down the top hat screw. This can be done but it isn't the best method because you risk spinning the piston inside the strut and possibly causing damage to it, not worth it in my opinion. It will also make it more difficult to line up the screws when inserting the coils back on the car. I tightened the screws with a 14mm bolt that came with the V2 while holding the piston rod with an 8mm wrench. I did not torque them I only tightened them enough so that the top hat wouldn't fall off.
The next step is to install the the new coilover. This is why waiting to torque the top hat makes the install easier. You can adjust the rotation of the coilovers so that the screws in the top hats will line up with the holes on the car. you may end up spinning the piston a little, this is not ideal but it shouldn't cause an issue if you are careful. I spun mine about a half a turn by accident before i realized what happened. It did not have any effect on the performance of the suspension. Side note - as far as i understand spinning the strut will not cause any damage on its own because the piston in the strut is not connected to the strut body, however if you apply torque you can dislodge the rings or worse damage the actual adjusting mechanism in the piston. If anyone who is more knowledgeable would like to shed any light on I would love to understand how it works.
Once the strut is in you can you can start bolting it down. I started with the strut bottom bolt. Although this is probably not the most mechanically correct way to do it it was the easiest for me. I used my knee to line up the lower control arm with the holes on the strut body and slid the bolt in. The bolt is 17mm and the self locking nut that comes with the v2 is 19mm. If you are using factory struts the strut is already threaded so you do not have to worry about a bolt.
Then hand screw the bolts at the top - you don't need to torque them yet. I would torque the lower bolts now that the strut is in place. The factory specs are 47 lb ft.
Once done screw the bolts back in for the control arm. these are torqued to 76 lb ft. Note- The purple thing right below the bottom spring is the spring collar. We will come back to it later when adjusting the height.
reattached the ABS cable
Then using the bolts you have purchased or the factory bolts reattached the brake line to the strut body.
You are done with the drivers side - expect for torquing the top bolts, which we will do once the car is under load.
Move onto the passengers side coil follow the same steps as listed above.
Once this is completed. we can move onto the rear.
I started with the driver side rear because it is the more complicated side. First thing to do is to unscrew the gas cap there are three bolts I don't remember if they are 8 or 10mm. You will also need to remove the gas cap in order to be able to remove the line.
Taking out the spare tire and the spare trunk lining. You will be able to see what is part of the lining is meant to come off because all of the pins will have a back and a little metal piece to hold onto so that they can be removed. once they are removed you will need to bend back the passenger side of the trunk liner to expose the top strut bolts and the gas filler line. There is a 10mm bolt on the gas line that needs to be unscrewed, it should be pretty obvious because it is the only thing that bolts the gas long to the body. Now firmly but gently pull the gas line neck back it should pop out of its place and dangle loosely. At this point I would advise you to put the gas cap back on so that nothing falls in the line. Now we are ready to remove the rear coil.
First undo the bottom bolt of the strut (if you prefer you can unscrew the suspension link first it will take a little bit of pressure off the lower arm so the coil will not pop off when the bolt is removed).
I have read on some of that forums that people have forgone disconnecting the suspesion link in place of having a fat friend stand on the lug bolts of the car to provide counter weight for the car. I would not recommend this. The link takes about 2mins to unscrew and will make the entire job much easier. You will need an hex key and I think a 14mm wrench to unscrew it from under the car. I forgot to take a picture of it. You can see the suspension link in the photo above as the rod with 4 dots on the top of it. It is located to bottom left of the strut behind the ABS cable. On the other side (not visible) of the link is the bolt that needs to be undone. I would recommend undoing the lower link because it is easier to get to. You only need to undo 1 side.
The next step will be to unbolt the two top mounts just like we did in the front they are 14mm. With the gas line removed this should not be fairly easy. Note- The upper side of the the pic below shows the hole where the 10mm gas filler bolt was secured
Now the strut should be removed fairly easily. You will need the same procedure listed above if you want to reuse the top hat. Once the new strut is assembled you can follow the same procedure as for the front one to line up the bolts. You can then start with securing the bottom of the strut to the control arm. you will want to torque the bottom bolt to 47lb ft just like for the front. Side note - you can see in the picture below that the link that I referred to above is disconnected.
Once this is done you should hand tighten the top suspension bolts so secure the strut.
Follow the same procedure for the passenger side. It is a lot easier because there is not fuel line to worry about.
Once both of the rears are on we can reattach the suspension link. Use the hex key to ensure that the link does not twist while tightening the nut. The nut should be torqued to 22 lb ft.
Now we should be all set to put the tires back on. Drop the car and torque everything up. We want to torque the the nut that hold the strut to the body to 36lb ft and piston rod nut to 26lb (this is specific to the V2 but should be fairly similar for all suspensions, Honda factory specs are 22lb ft) while holding the piston rod so we do not spin it
If you are using adjustable coilovers such as the V2s then read on if you are not then you can disregard this piece. I would let the car sit for a day or two before doing anything. I have heard that the springs can take as long as a week to set. So be aware that if you set your car initially to save time it may drop and it may drop unevenly over time. After 3 days I lifted the car again and adjusted the coils. My car was slammed when I bought it and I was tired of rock chips (and speed bumps) so I decided to use the maximum recommended specs for the V2's (still slightly lower than factory) I did this by taking off the tire and measuring from the top of the spring collar (pics above) to the center of the bottom bolt. I did this all around and when I put the car back down I had no more than 2mm difference from the left to right sides for the front and rear. I will be remeasuring in a week just to make sure that everything is the same.
I would recommend waiting a week before getting an alignment. It would suck getting one and then having the ride height change only to have the alignment be knocked off again.
V2 Review: the ride on these is great. It is slightly stiffer than factory but nothing back breaking. On the softest setting the v2's are barley rougher to ride on then factory while at the same time not feeling boaty. The car does feel a lot more planted than with factory because of the heavier springs. The result is something that handles extreme corners a lot better than the factory struts. I can imigine that the car is probably a little less forgiving if you push it over the limit, but I have not been there yet so I can't comment. The suspension can definitely be tuned to the drivers preference unlike some coilover systems such as the Pss9 were it is all or nothing with the stiffness. There is definitely a consistent increase in stiffness as you adjust the settings. The build quality does look nice the springs and the strut body looks like they were assembled with quality. The adjustability is fun to mess around with. In my opinion this system will probably give you a little more control with your as in terms of how you want the car to act i.e. comfort, control, even drift despite the heavy springs. The height adjustability is limited to about an inch and a half according to KW spec's (from wheel center 320mm- 345mm front, 335-360mm rear) which is slightly disappointing if you are looking to slamm your car. As you begin to play around with the setting you can start to see that there is a sweet spot for stiffness and ride height to where your car will handle a lot better when compared to stock. All in all, I would say that is you are in need a replacement suspension this is comparable in price to OEM replacements (if you include springs and tophats) while getting more performance.
I would love some recommendations on the stiffness settings. Here is what I have found while messing. There is nothing scientific about my method, I just set the stiffness and drove the car to see how it felt.
Fully soft - The car rides very well, but feels a little mushy around turns. The back has a tendency to want to pop out under hard acceleration.
Front fully stiff/ rear fully soft - I don't mind this setting it feels like the car handles well and puts down power evenly. The ride quality is not great for daily driving.
Fully stiff - You will feel even small imperfections in the road, your body will shake, not ideal for the road. Or the track, I think that the rear needs to be a little softer because the car does not seem to put down power well.
I have not had a chance to mess around with the non extreme settings yet but I will post more as I do.
For sale link of factory struts and espelier springs
 09-07-2012, 12:30 PM
#2
Registered User


Join Date: Jun 2010
Location: Phoenix, AZ
Posts: 351
Likes: 0
Received 0 Likes
on
0 Posts
nice write up. I didn't need to take off the front suspension arms when I changed mine. You should be able to snake it from the bottom through to the top. But what did help was detaching the front sway bar if you need extra clearance to get the old set up out or new one in.
 09-10-2012, 05:13 AM
#5
Thread Starter
Join Date: Jun 2012
Posts: 870
Likes: 0
Received 0 Likes
on
0 Posts
I noticed a big difference. It was clear that the factory shocks were not meant to run so low with such heavy springs. Being that the springs in the rear where so stiff the car did not put down power well and the traction control constantly kicked on way too early. with the KW I feel like the rear adjustability let you put down power better.
09-10-2012, 05:21 AM
#6
Thread Starter
Join Date: Jun 2012
Posts: 870
Likes: 0
Received 0 Likes
on
0 Posts
nice write up. I didn't need to take off the front suspension arms when I changed mine. You should be able to snake it from the bottom through to the top. But what did help was detaching the front sway bar if you need extra clearance to get the old set up out or new one in.
You could go that way. If I just figured it was an extra 5 mins to get the bolts off (my screwes were stuck on there so i didn't need to use a breaker bar) and it would give a little more working room. It is really personal preference. I am sure your advise will come in handy to others who read this forum.
 09-10-2012, 06:08 AM
#7
Nice write up and great pictures, thank you for taking the time to do this.
A step that you took that I highly recommend doing as well is unbolting the fuel filler neck and moving it out of the way to do the rear driver side. It is possible to do it without unbolting and moving the fuel filler neck out of the way through the use of socket extensions and a LOT of patience, but please believe me when I say that IT IS NOT WORTH THE TROUBLE to leave the filler neck attached. It only takes about three minutes to unbolt the filler neck, work the neck out of the fender, and move it out of the way of the strut tower in the trunk. The time you take here will be saved when you no longer have to contort your hands and try several extension combinations to try to get at the strut tower nuts.
A step that you took that I highly recommend doing as well is unbolting the fuel filler neck and moving it out of the way to do the rear driver side. It is possible to do it without unbolting and moving the fuel filler neck out of the way through the use of socket extensions and a LOT of patience, but please believe me when I say that IT IS NOT WORTH THE TROUBLE to leave the filler neck attached. It only takes about three minutes to unbolt the filler neck, work the neck out of the fender, and move it out of the way of the strut tower in the trunk. The time you take here will be saved when you no longer have to contort your hands and try several extension combinations to try to get at the strut tower nuts.
Trending Topics
 09-10-2012, 09:49 AM
#10
Thread Starter
Join Date: Jun 2012
Posts: 870
Likes: 0
Received 0 Likes
on
0 Posts
Nice write up and great pictures, thank you for taking the time to do this.
A step that you took that I highly recommend doing as well is unbolting the fuel filler neck and moving it out of the way to do the rear driver side. It is possible to do it without unbolting and moving the fuel filler neck out of the way through the use of socket extensions and a LOT of patience, but please believe me when I say that IT IS NOT WORTH THE TROUBLE to leave the filler neck attached. It only takes about three minutes to unbolt the filler neck, work the neck out of the fender, and move it out of the way of the strut tower in the trunk. The time you take here will be saved when you no longer have to contort your hands and try several extension combinations to try to get at the strut tower nuts.
A step that you took that I highly recommend doing as well is unbolting the fuel filler neck and moving it out of the way to do the rear driver side. It is possible to do it without unbolting and moving the fuel filler neck out of the way through the use of socket extensions and a LOT of patience, but please believe me when I say that IT IS NOT WORTH THE TROUBLE to leave the filler neck attached. It only takes about three minutes to unbolt the filler neck, work the neck out of the fender, and move it out of the way of the strut tower in the trunk. The time you take here will be saved when you no longer have to contort your hands and try several extension combinations to try to get at the strut tower nuts.