Andy*s Berlina Black CR PFAB Turbo Build
 05-10-2017, 10:19 PM
#1

Thread Starter
Hi guys,
Just wanted to share my build. Copy and pasting my thread from FI to here. I bought my car back in 2010. It stayed mostly stock up until recently as i went turbo. This boost project has been a long time in the making and has always been a dream of mine. Years of saving, putting together a kit i felt was right, finding time, making time, gotten married, more research, replacing parts...you get the idea. About a year leading up to the teardown, i began installing a lot of supporting mods to the build such as a new clutch, cdv removal, diff mount inserts, battery relocation, and such. Anyhow its finally done (well its never really done done), made 435/331 on a modest 13psi. Going to be heading back soon for a retune after some problems are worked out. Anyway, here goes it.
Currently, my build consists of:
Stock 2008 unopened f22c 65xxxmiles
Stock transmission
Stock differential
Supertech dual springs 95lbs and ti retainers
Defi bf boost gauge and controller
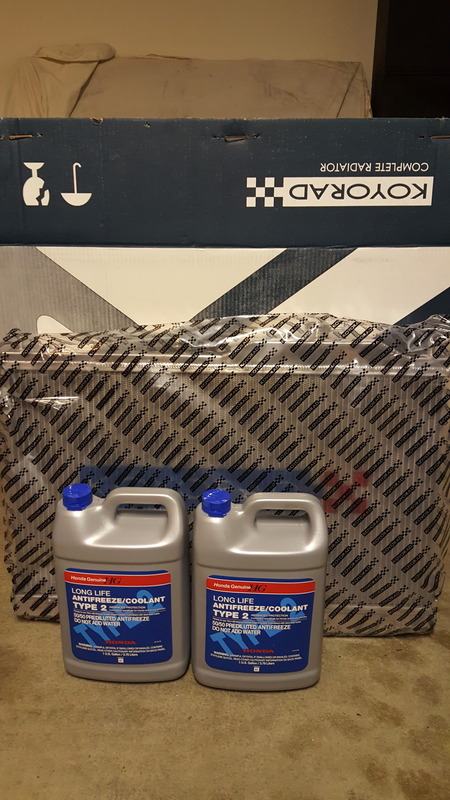
Koyo hypercore radiator
ACT HD pressure plate
OEM friction disk
AP1 flywheel
Exedium differential collars
Spoon front strut tower bar
Spoon magnetic engine and trans bolts
Balladesports TCT
Balladesports bolt in oil pan baffle
Schmuckbuilt oil catch can
Alloycraft heater bracket
NGK iridium 8
DW 1300cc Injectors
SOS fuel return system
SOS fuel pump wiring kit
AEM fuel rail and fuel pressure regulator
AEM 320LPH e85 fuel pump
PFAB equal length topmount manifold and 3" downpipe
Garrett t3 60trim JB turbo .63 A/R
Tial MVR wastegate
Precision 600hp intercooler
2.5" PFAB aluminum intercooler piping
Synapse synchronic bov
Challenge USA 3" Ta-R exhaust
Hondata 4port boost solenoid
Hondata 4 bar map sensor
Hondata flashpro
Vibratechnics HON200M motor mounts
Custom cf heatshielding
Backyard special seat rails
Swift spec r springs
Volk CE28n 17x10 +45
Nankang ns-2r 120utqg 255/40/17
Shout outs:
Pang at PFabrications
All the guys at Science of Speed
Nate at Balladesports
Lorenzo and David at Import Auto Pros
James and Lawrence at Signature Autobody
Kenneth at Funfzehn Automotive
Speedfactory
Below are some pictures/steps of the build.
I cut and smoothed the plastic guards with a dremel to make room for the intercooler piping.
Driver's side:
Passenger's side:
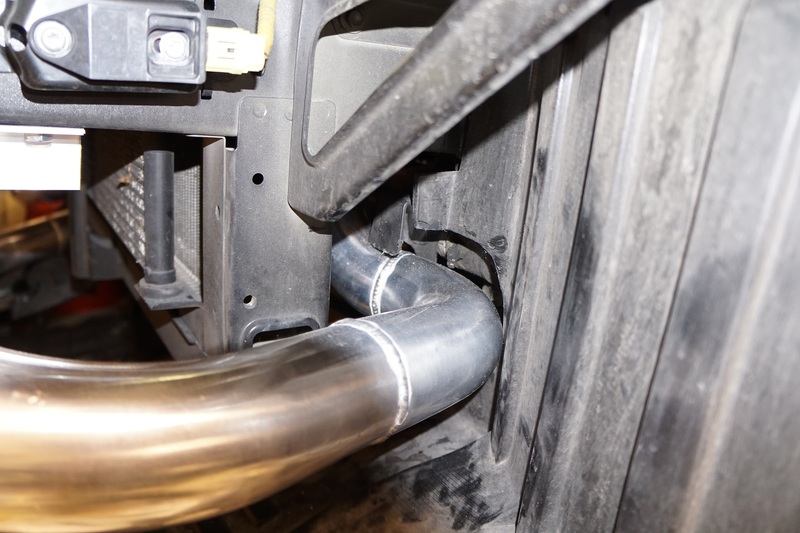
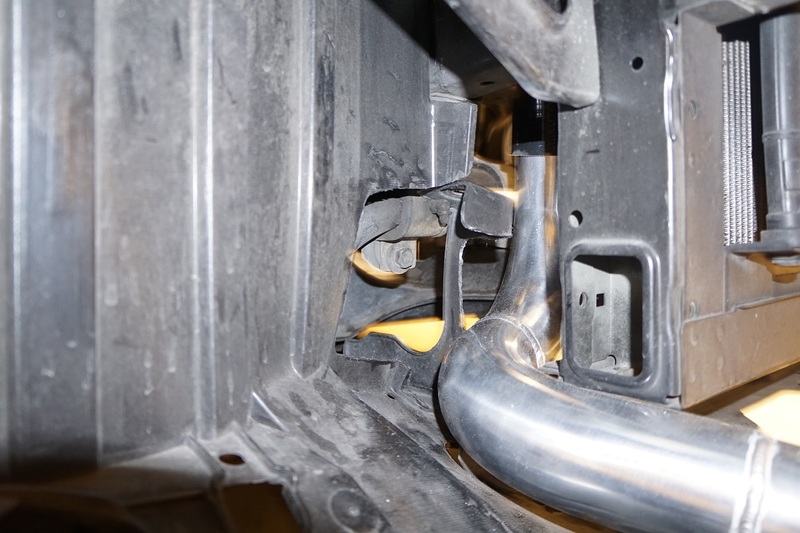
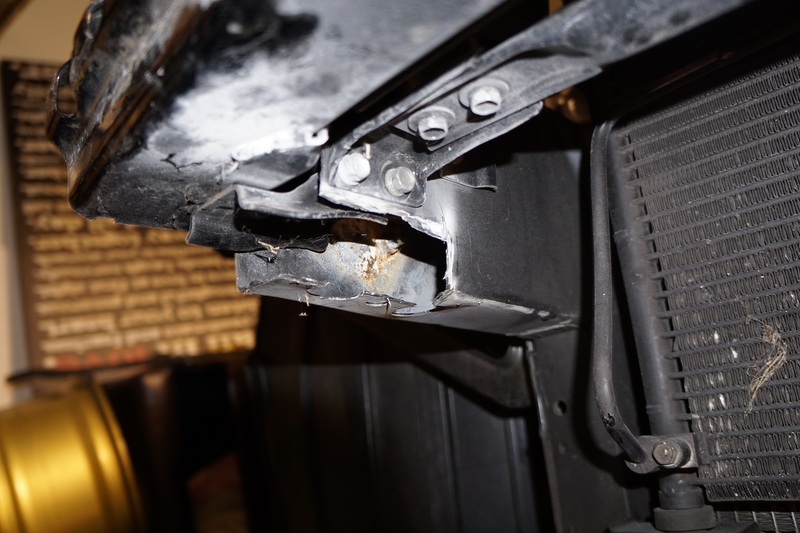
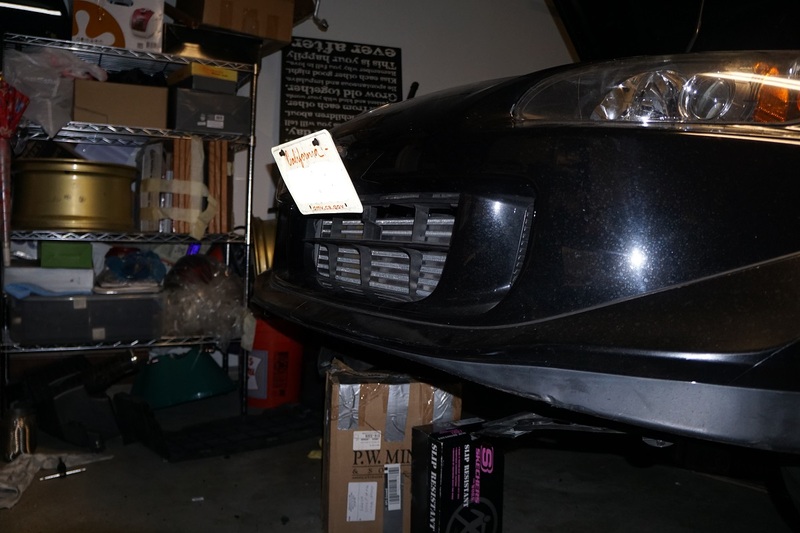
Once clearance for the piping was good, I used the dremel to cut away at the support beams to make room for the precision intercooler (its all hacked up, gonna clean it up later when its all fitting nicely).
Driver's side:
Passenger's side:
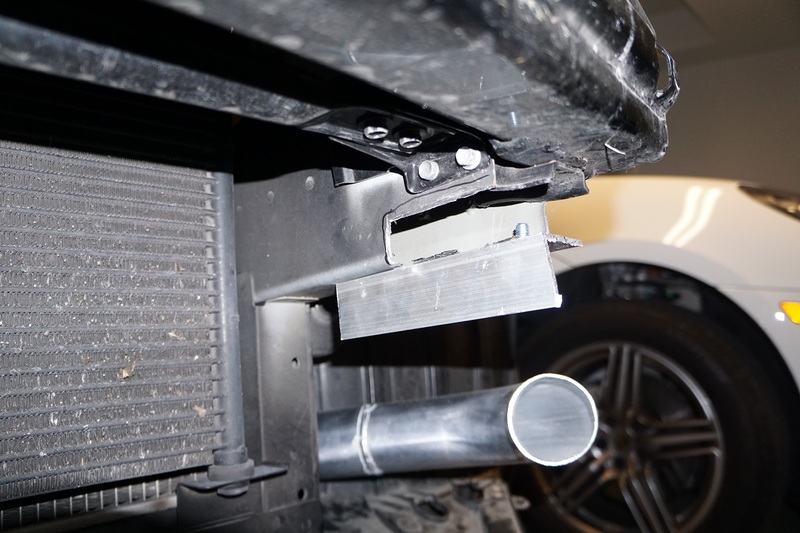
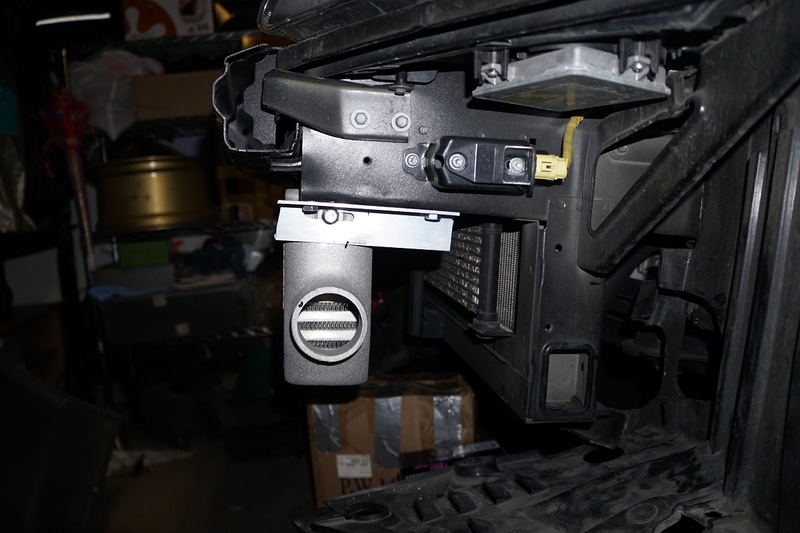
As you can see, I started to make a bracket out of 1.5"x1.5"x6" aluminum L bracket to use as an anchor to mount the intercooler. The precision 600hp intercooler has a threaded hole on each endtank. It also had these aluminum extensions that I cut off to get the intercooler up higher closer to the crossbar about 1/4" more, shown below:

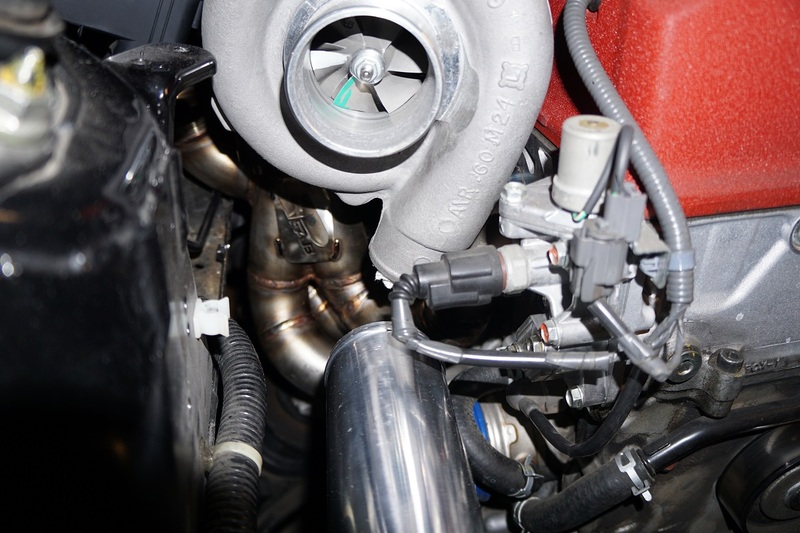
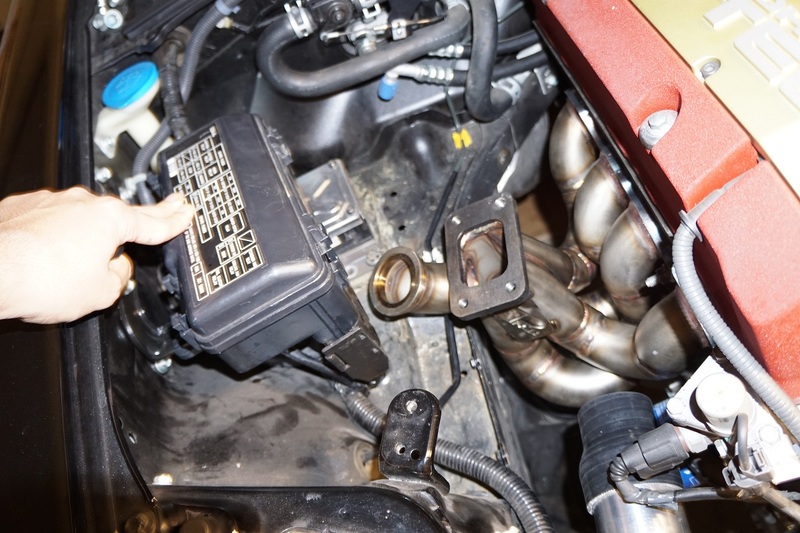
Then I mocked up the pfab manifold, turbo, and downpipe. I ended up thrashing the factory exhaust manifold studs taking them out. Gonna have to buy some new ones :/ It all fits very nicely. Only thing is the elbow for the wastegate sits on the hard brake line which I'll have to bend the line out and around the elbow. Just wondering how I should go about doing this so that I don't put a kink in the line or cause it to vibrate against the chassis somewhere (if anyone has pointers here, please share, I was planning on just using some pliers with shop towels to prevent any scratches??).
Downpipe:

Hard brake line issue:

I'll end up putting a 3" flexpipe somewhere between the end of the downpipe and testpipe.
BATTERY RELOCATION
I also relocated my battery and fusebox some time ago referring to multiple diy threads here on s2ki. The relo was pretty easy and straight forward for anyone tackling this too. I took a couple pictures to show how I did mine.
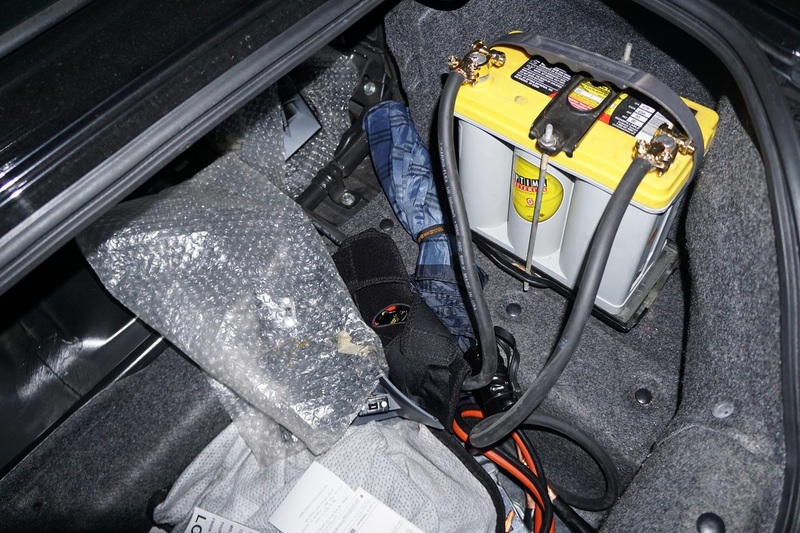
I relocated my battery to the trunk with 0gauge welding wire and gold terminals from O'Reilly's autostore. I had to use a step bit to drill a hole in the firewall to feed the wire through. From there I used a distribution block to wire it up to the factory eps fuses. I grounded the battery to a bolt behind the passenger seat and it seems to hold well with no electrical problems...yet. Hopefully its a good spot, I probably should have sanded the area down a bit but it hasn't given me grief yet. I also used a Scorpion battery kill switch nearest the battery for the power line. It's a cheaply constructed piece but its doing the job. I wrapped it with an old neoprene knee brace that I had so stuff in the trunk don't accidentally hit it. It's kind of half-assed since I couldn't find good places at the time to mount everything. But I recently saw another member mount the battery with factory hardware in the spare tire section, looks so much cleaner. I might have to copy him and place my battery there.
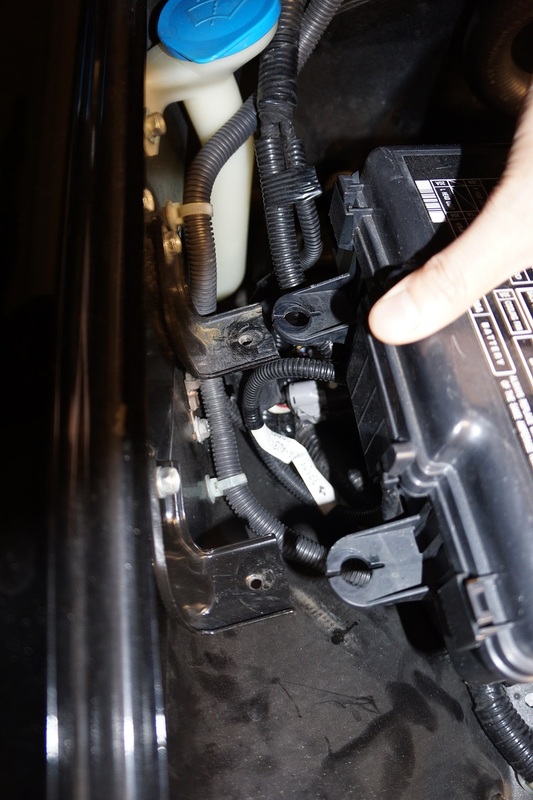
As for the fusebox, I ordered a second bracket from Honda pictured below and it worked out perfectly with how I mounted the fusebox turned to the side.
So got some more items and a little more work done with mounting the intercooler.
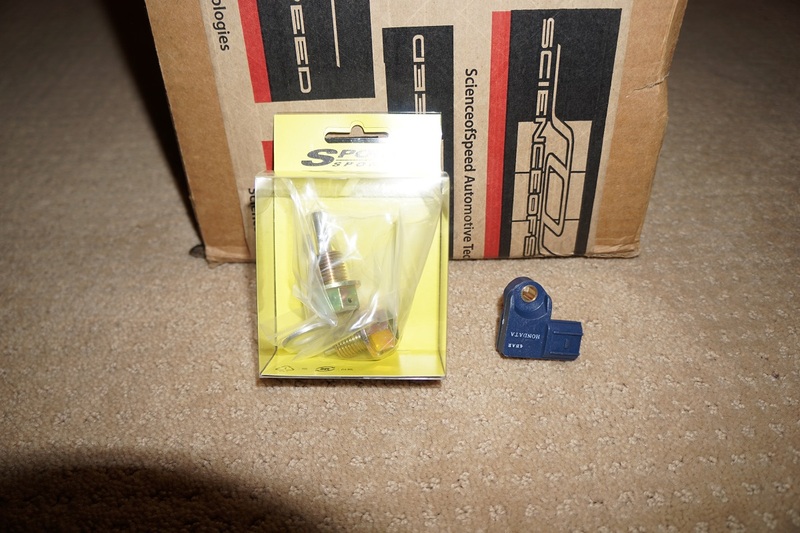
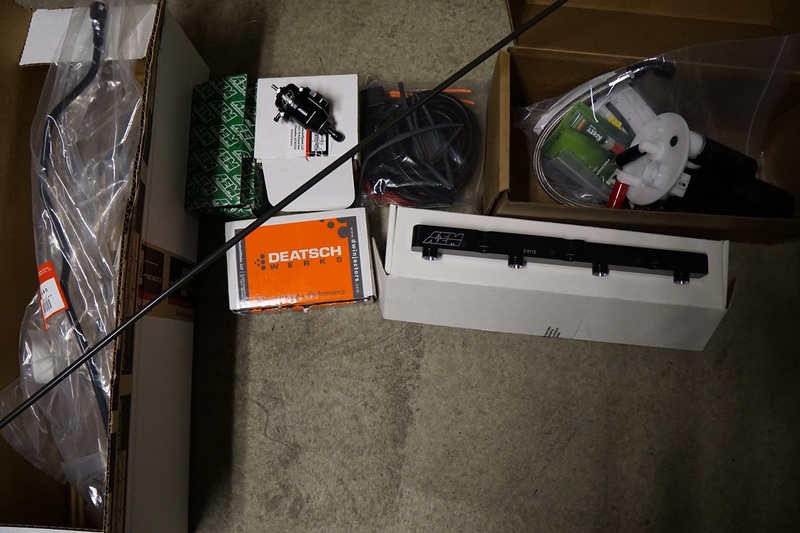
Spoon magnetic bolts and Hondata 4 bar map sensor (big ups to nate from balladesports):
SOS fuel return kit with upgraded aem parts:
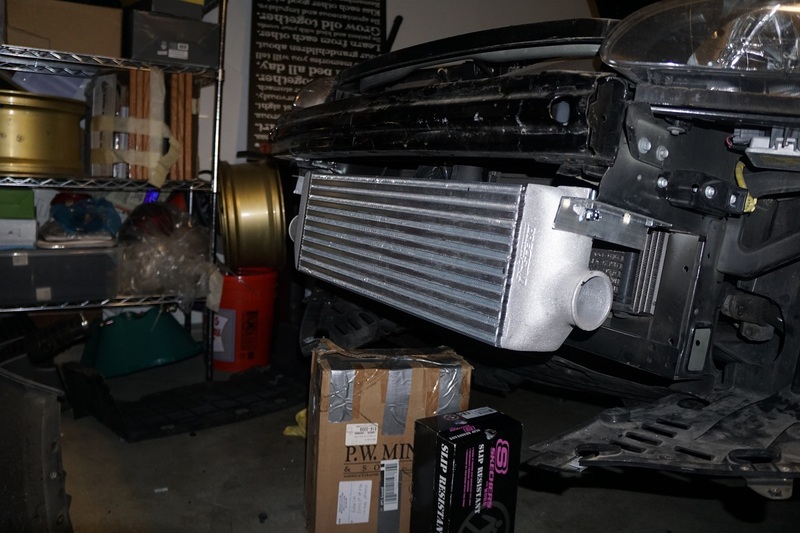
After reading a few threads about how people were mounting their precision intercoolers, I think i'm going to mount it with a small gap up top to allow some air to the radiator. Although, im not fond of how it looks. Hopefully its not too noticeable once the car is down and rolling.
Here are rough brackets i made up to mount the intercooler:
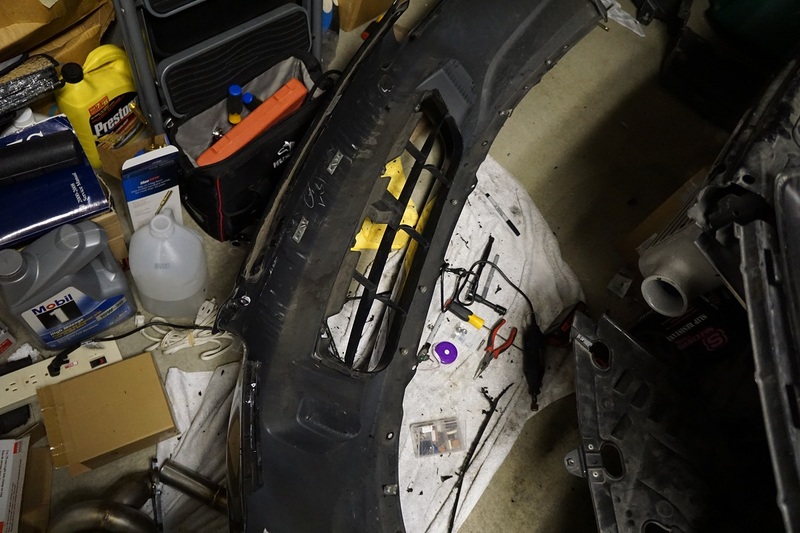
I also trimmed the oem grill to fit around the intercooler:
Here's the gap:

Still not sure if I like how it looks....might have to upgrade the radiator and move it up to fill the gap some day...
And here's the undercarriage:
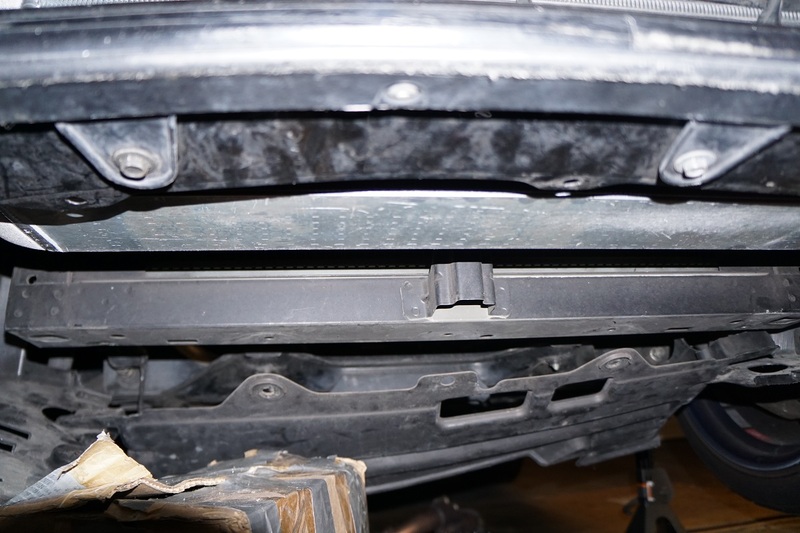
Clears the bottom even with it mounted low.
Well that's it tonight. I have Import Auto Pros in westminster (shoutout to lorenzo, david, and the guys) modifying my intercooler piping and welding my oil pan up. After all the fabrication pieces are installed, I think I'll tackle fuel next.
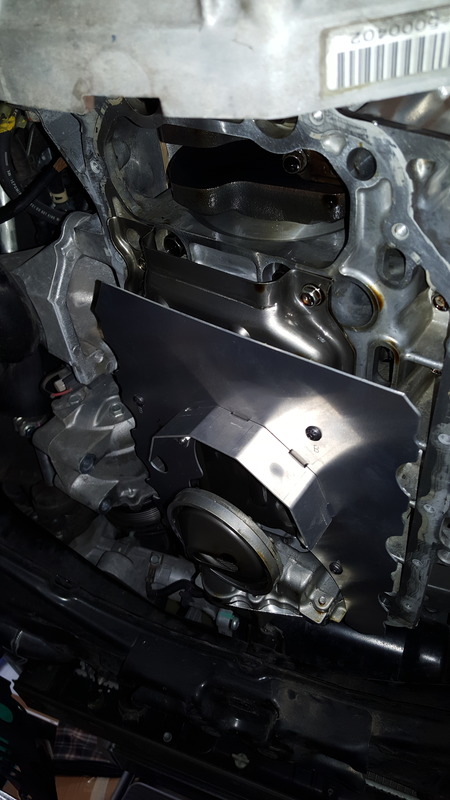
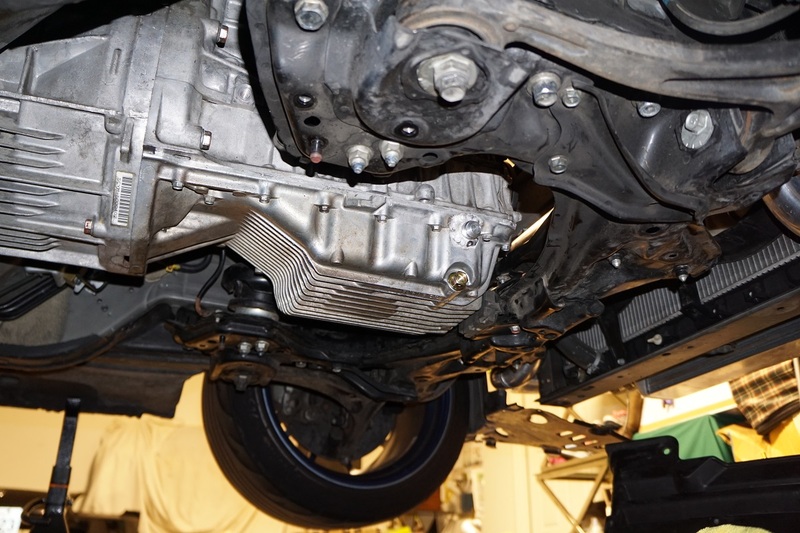
Okay, so got a lot done today. Installed my modified oil pan with bung and Balladesports bolt-in oil pan baffle. Everything was really straight forward here.
Got my modified intercooler piping and turbo back from my guys @ Import Auto Pros in Westminster, CA.
Fits like a glove now.
Also finished up the sos fuel return kit install for 06-up models. The written instructions provided by sos were great, step by step and very easy to follow. Reaching your hands and arms through the tiny crevice between the fuel tank and the frame to install the lines was the toughest part. My forearms are tore up Anyway, the kit is basically all oem honda so everything fit pretty spot on. Couple things I noticed though was that the aem 320 pump's fuel filter sits 1/4"-1/2" higher than oem. This has me worried a little bit with fuel pickup. Will this small difference not allow me to pickup fuel when near empty? Running e85 is already going to kill my gas mileage im hoping i'll be able to pickup fuel to the very end. Also the terminals that go into the relay don't sit securely in place so be sure to push the terminals in from behind to secure it while plugging the relay into its counterpart; the terminals kept getting pushed out when i went to connect the relay.
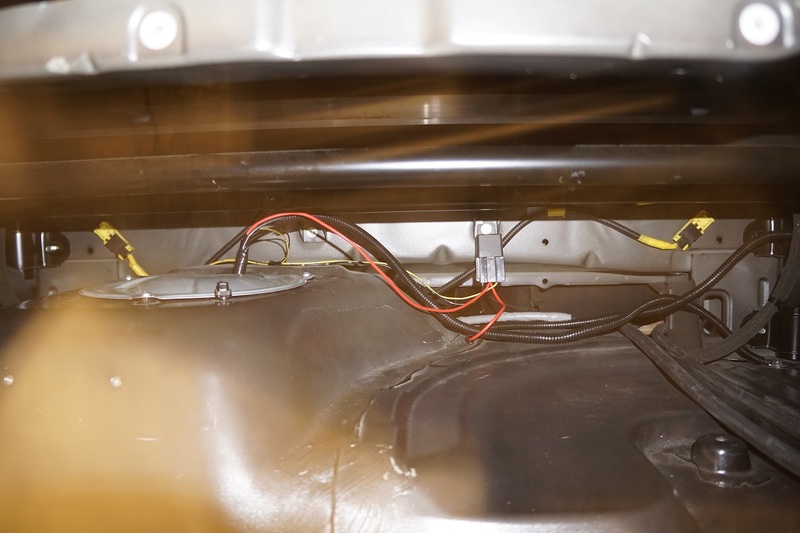
Here's a picture of the completed fuel pump and wiring kit. Just gotta tidy up the wires.
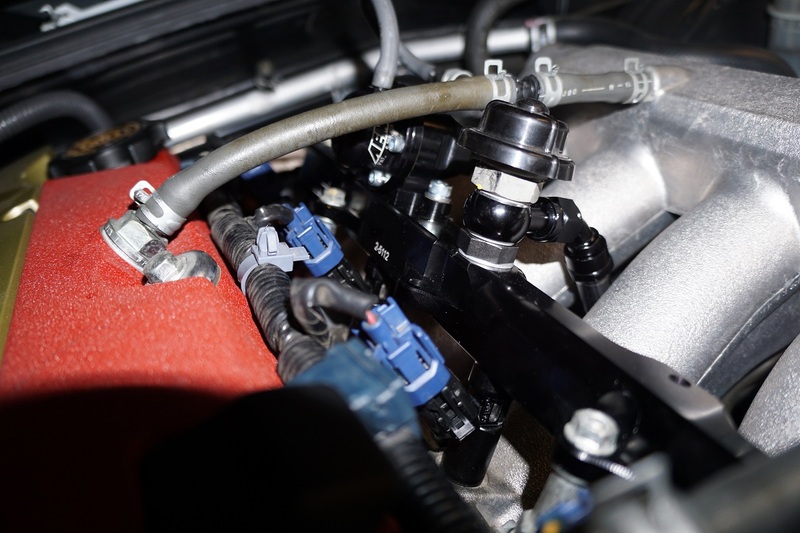
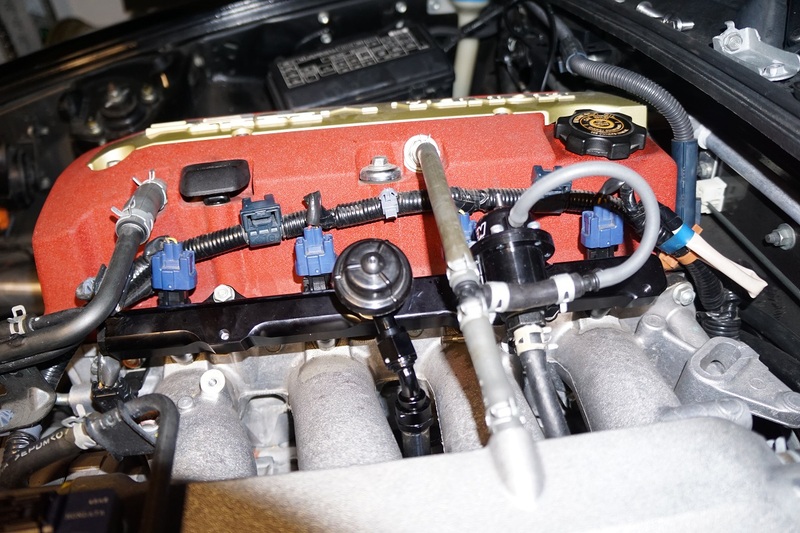
Also finished up the aem fuel rail and dw injectors install. I had sos bore out the aem fuel rail to fit 06-up injectors. But in doing so i noticed the green o-rings that come with the aem fuel rail no longer fit due to the bigger size hole. However, it seems to seal just fine with the use of the o-rings that come on the dw injectors. I also installed the fuel rail without the fuel rail spacers provided by sos, and it sits very snug and flush to the oem mounting points...I guess you dont have to use them??
I think i'm going to have to relocate my fuse box into the fender well as well. I cant find a position for it to clear the wastegate...
Thanks for the pointers hershey. My drain hole is above the level of the baffle so hopefully that will prevent any interference with the drainage.

Ill be heat wrapping my downpipe and dump tube and heat shielding the turbo drain lune like you did as well.
i just ordered an ebay vacuum block for $35 haha. i figured this piece wont need to cost a premium since its just an aluminum block.
ill be porting vacuum for my wastegate/solenoid and blowoff valve from the block.
this...is...where...im...at...lol. popping those plastic clips is a pita! anyway, in the process of relocating the fusebox into the fender area.
Fuse box is done. only had to extend about 6 or so wires. now to tackle the eps box and wires on the other end to alternator and starter.
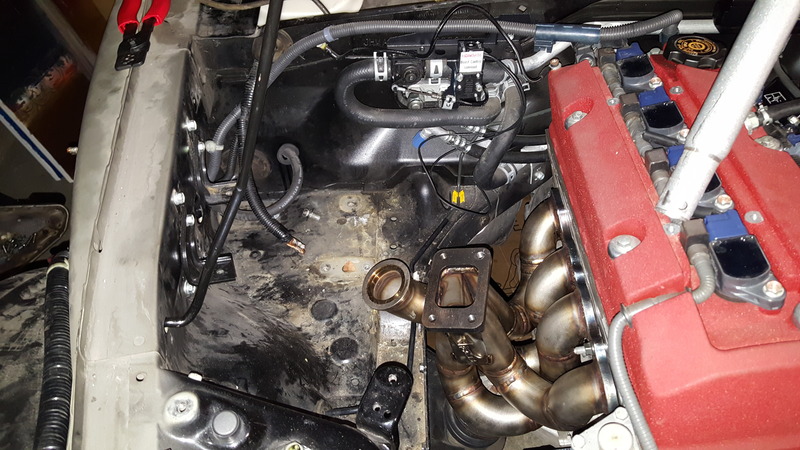
Looks a lot cleaner already, just needs a wash -__- also mounted the solenoid to the alloycraft heater bracket. gonna route the wires thru the same hole as the main battery cable.
also huge shoutout to pang at pfab. best customer service ive experienced.
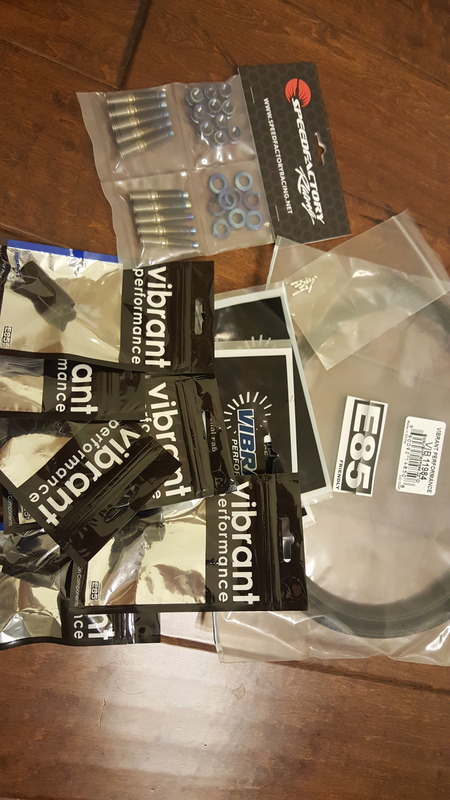
Some more goodies. The speedfactory titanium manifold studs are quality. Get them if you need new ones. Install is very easy especially with the hex on the end of the studs.
Also, i wanted to run steel braided lines on the hot side due to heat but the an fittings dont fit on my boost solenoid, theres not enough space between the two ports on the same side to clear two an fittings coming from the wastegate. im exchanging the -4an lines and an fittings for one-touch fittings from vibrant because the an fittings dont fit on the boost solenoid. Ill put a rubber fuel line over the 1/4" polyethylene tubing and some heat wrap over that to protect it from manifold temp. Just waiting again for more parts to come in
also was able to move the hard brake line out the way. Just unclipped the clip in the center and bent it carefully by hand.
I can smell the finish line Got everything mounted up
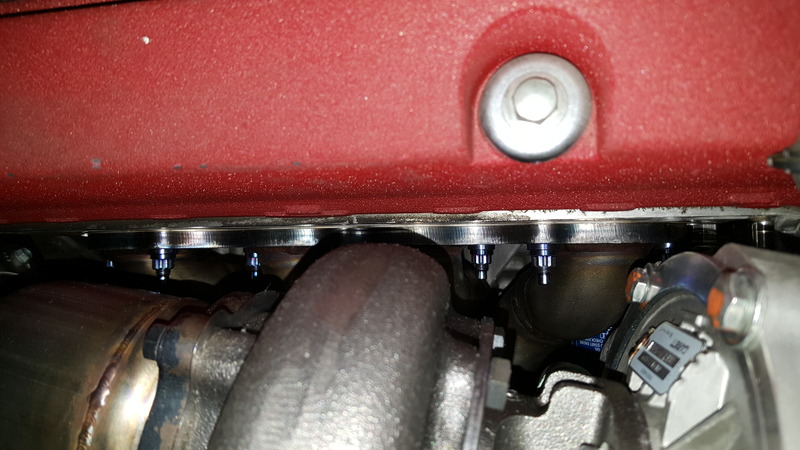
Thanks speedfactory for the manifold bolts. Can hardly see them but i really like the burnt titanium lol.
Also got all my oil and vacuum lines plumbed. I ended up using vibrant push lock fittings for my vacuum stuff with 1/4" p.e. tubing. Also put rubber hose over the tubing for extra protection against manifold heat.
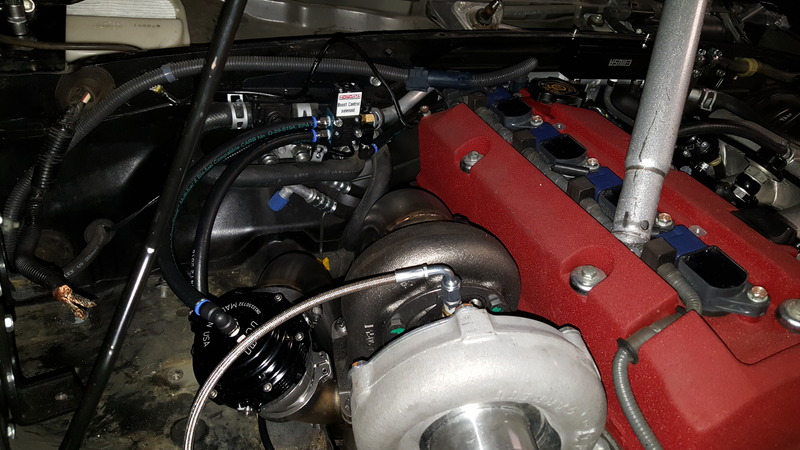
I mounted the boost solenoid to the alloycraft heater bracket. Also running a vacuum block up at the center of the firewall.
Heres a pic of the bov plumbed using the pushlock fittings. The tubes slide in very easily...hopefully theyre not prone to leaking. Hopefully ill have some more time over the long weekend to finish her up.
alright, pinning the b16 port for the solenoid on the ecu harness was a bitch. It wouldve gone by so much quicker if i had known from the beginning theres a stupid locking clip that needs to be popped in order to install/remove pins...
anyway, also got my defi boost gauge and controller installed. Fed through the passenger side firewall then across under the dash from the interior to under the steering wheel.
also switched the ignition on a few times and fuel pump primes and no leaks at the fuel rail!
if all goes well i should be able to fire her up tomorrow...on new years day!
Made a custom heat shield out of dry carbon for my vacuum and ac lines.
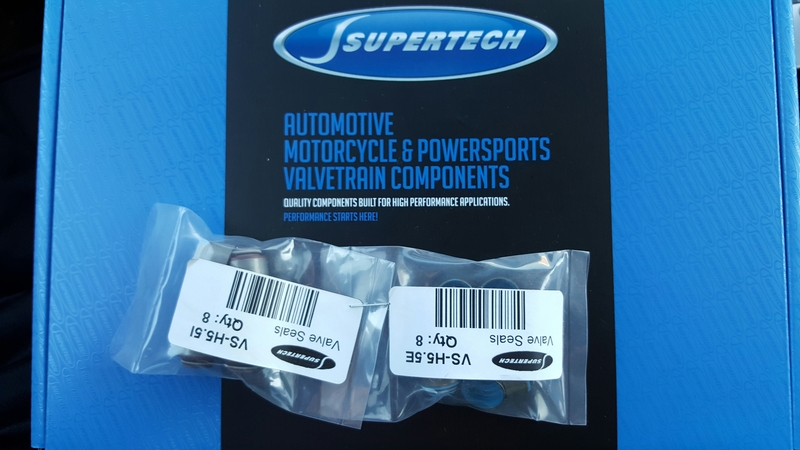
Went with supertech duals. Just picked these bad boys up!
Some more updates. Got my downpipe redone all v band 3" by my guys at import auto pros. Have my dump to the ground, not recirculated.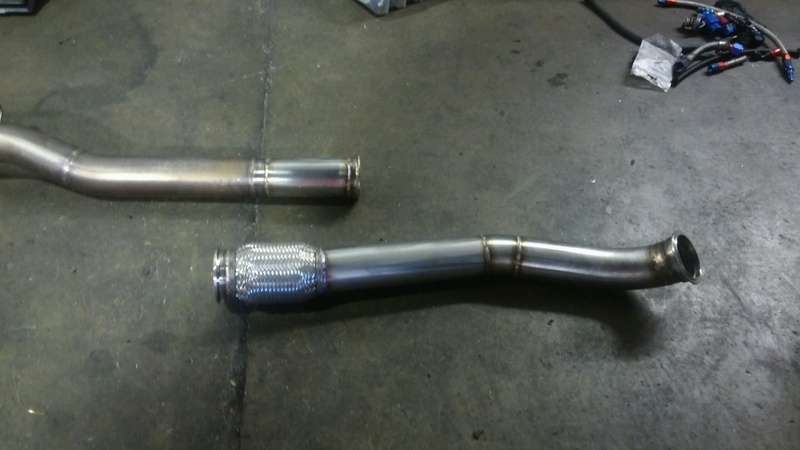
Also had them put in the supertech duals.
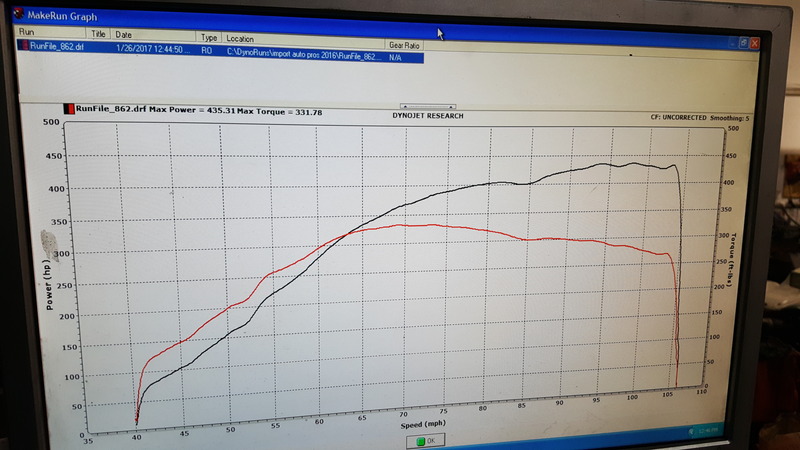
Made 435whp/331wtq on the dynojet at only 13lbs. This manifold flows, we were hittin 335whp at only 5lbs of boost. The 4port solenoid was giving us problems with overboosting so we turned it down to 11lbs at the end. Injector duty cycle was at 70-75% at 13lbs on the dw1300 so we could probably hit 15-16lbs safely at 80-85% duty cycle.
Anyways its running pretty solid right now. Full boost at 4k feels great. Surprised at how much torque its making too. Just got a few things to work out like leaky oil pan bung, etc.
Gonna swap out the 4port for a 3port, fix the leak then head back for another run. One run we hit boost cut at 19lbs at around 5k rpm and we were hittin 444 already. Curve looked like it was gonna exceed 500 easy at 19lbs..prob gonna need 2000cc inj for that much boost tho.
heres the run on 13psi
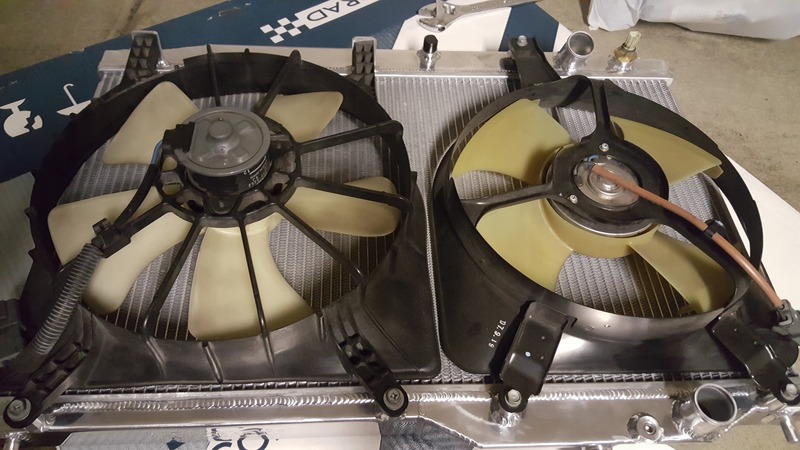
Also got around to installing the new radiator. Went with the newer design koyo rad with stock fans. Had to cut out a section of the fan to fit around the intercooler piping on the passenger side.
Picture update!
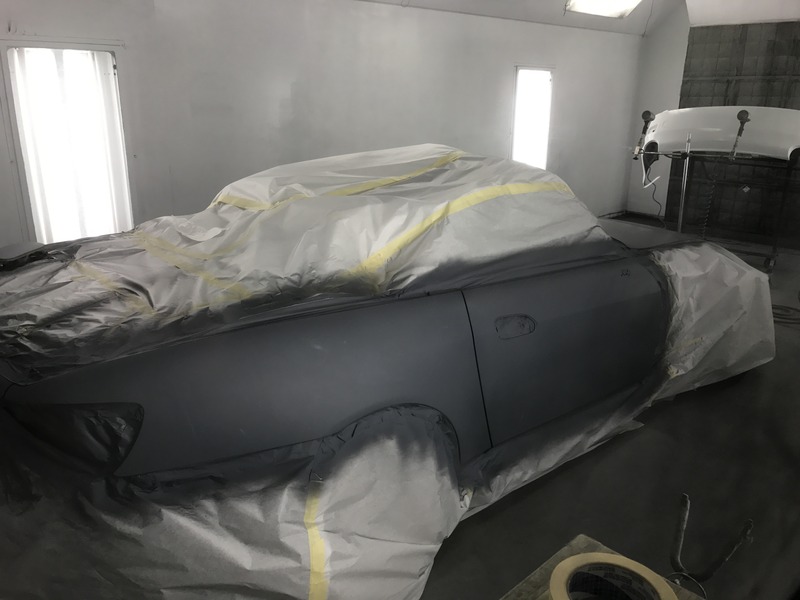
Its at Signature Autobody getting a full respray. Fresh oem berlina black.
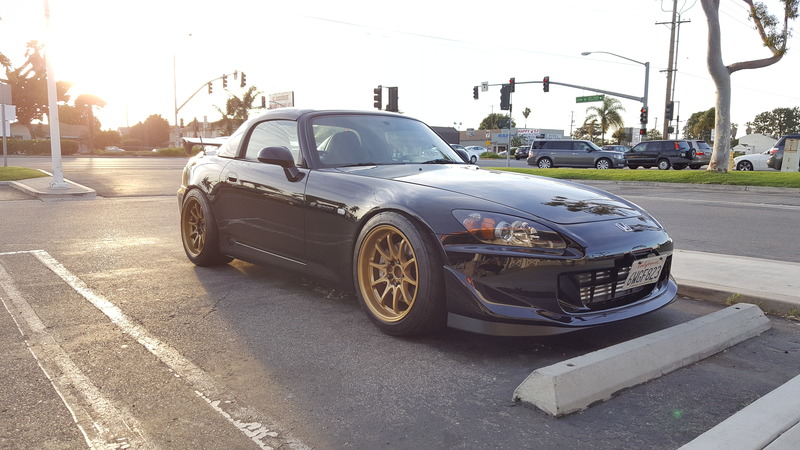
New pictures. Got the car back from Signature Autobody. Big ups to james and lawrence!
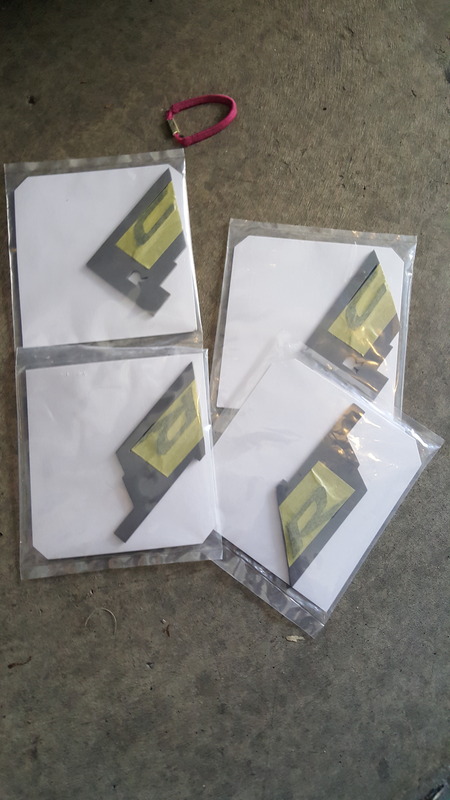
putting on new emblems
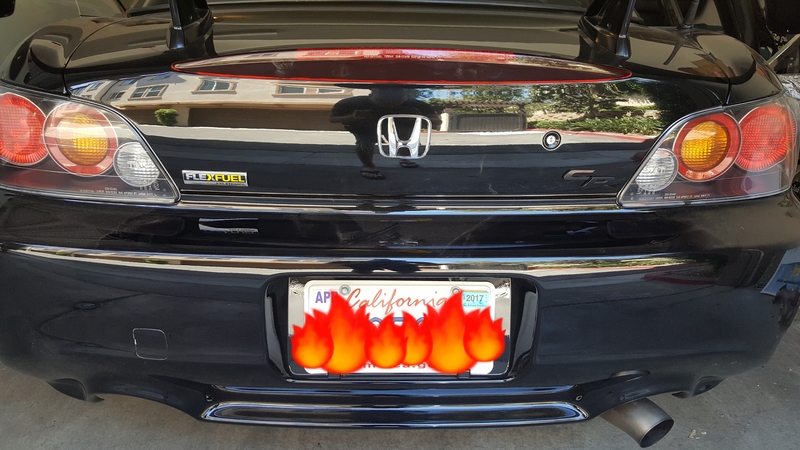
flexfuel
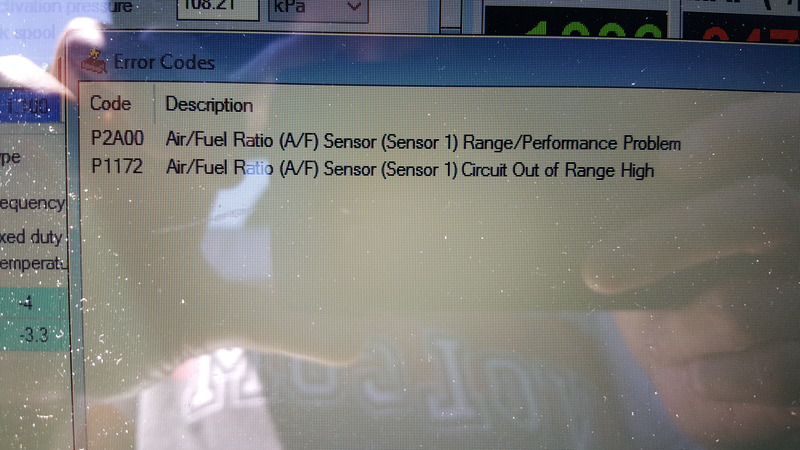
Couple things, my car started thrpwing 2 codes. Are these codes something that could be addressed in the tune or is it something mechanical?
also noticed my motor mounts are leaking. Ive been reading up on vibratechnics mounts.
On another note, on cold startups my car began idling pretty rough for a min or two. Once rpms drop down to 1000rpm, its back to its normal pur and symptoms completely go away. Is this the infamous rough idle ppl have been speaking of dw injectors? Otherwise they function just fine.
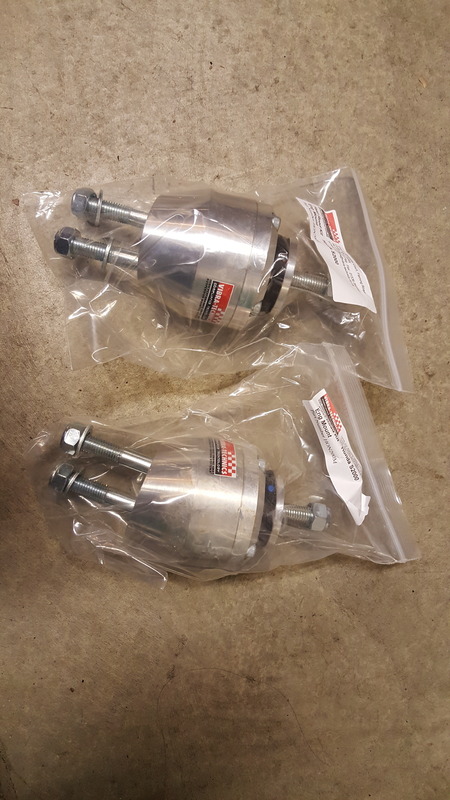
On the bright side, i just got my new motor mounts in the mail. Vibratechnics 200 mounts. Ill be putting these in shortly. Hopefully the vibration is tolerable. Both my oem mounts are leaking
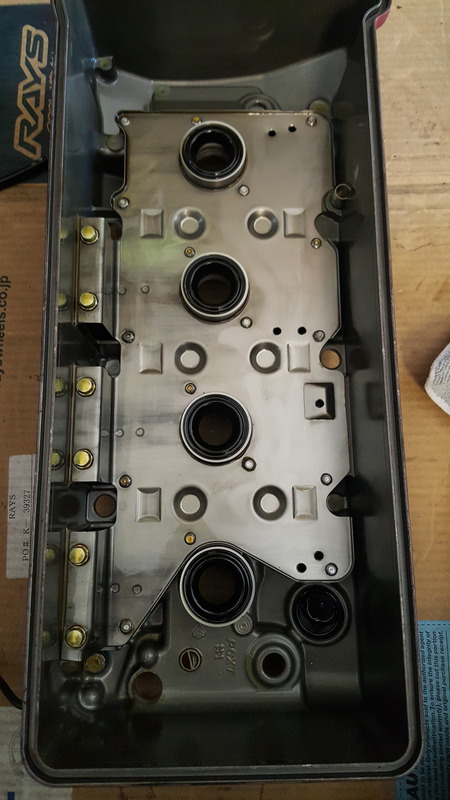
Also did the rainh8ter vc mod. Well, the shortcut way. Made sure to use a deburring tool and magnet to collect all the little shavings then rinsed thoroughly.
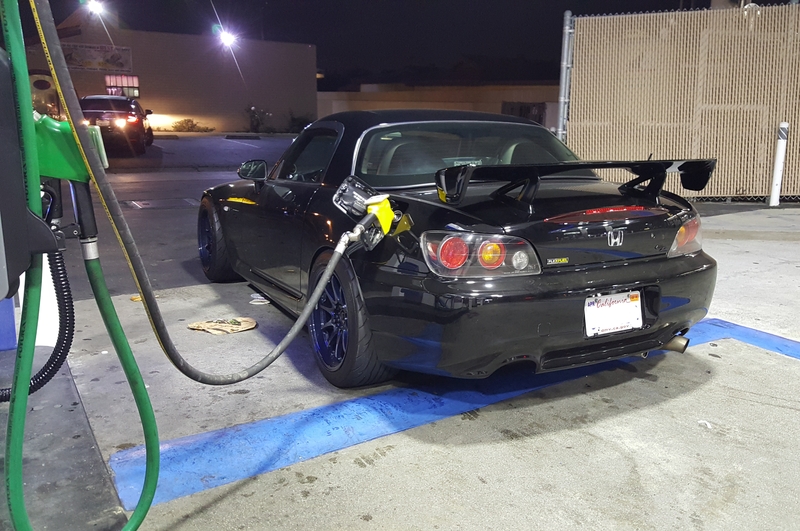
That e85 life
Just wanted to share my build. Copy and pasting my thread from FI to here. I bought my car back in 2010. It stayed mostly stock up until recently as i went turbo. This boost project has been a long time in the making and has always been a dream of mine. Years of saving, putting together a kit i felt was right, finding time, making time, gotten married, more research, replacing parts...you get the idea. About a year leading up to the teardown, i began installing a lot of supporting mods to the build such as a new clutch, cdv removal, diff mount inserts, battery relocation, and such. Anyhow its finally done (well its never really done done), made 435/331 on a modest 13psi. Going to be heading back soon for a retune after some problems are worked out. Anyway, here goes it.
Currently, my build consists of:
Stock 2008 unopened f22c 65xxxmiles
Stock transmission
Stock differential
Supertech dual springs 95lbs and ti retainers
Defi bf boost gauge and controller
Koyo hypercore radiator
ACT HD pressure plate
OEM friction disk
AP1 flywheel
Exedium differential collars
Spoon front strut tower bar
Spoon magnetic engine and trans bolts
Balladesports TCT
Balladesports bolt in oil pan baffle
Schmuckbuilt oil catch can
Alloycraft heater bracket
NGK iridium 8
DW 1300cc Injectors
SOS fuel return system
SOS fuel pump wiring kit
AEM fuel rail and fuel pressure regulator
AEM 320LPH e85 fuel pump
PFAB equal length topmount manifold and 3" downpipe
Garrett t3 60trim JB turbo .63 A/R
Tial MVR wastegate
Precision 600hp intercooler
2.5" PFAB aluminum intercooler piping
Synapse synchronic bov
Challenge USA 3" Ta-R exhaust
Hondata 4port boost solenoid
Hondata 4 bar map sensor
Hondata flashpro
Vibratechnics HON200M motor mounts
Custom cf heatshielding
Backyard special seat rails
Swift spec r springs
Volk CE28n 17x10 +45
Nankang ns-2r 120utqg 255/40/17
Shout outs:
Pang at PFabrications
All the guys at Science of Speed
Nate at Balladesports
Lorenzo and David at Import Auto Pros
James and Lawrence at Signature Autobody
Kenneth at Funfzehn Automotive
Speedfactory
Below are some pictures/steps of the build.
I cut and smoothed the plastic guards with a dremel to make room for the intercooler piping.
Driver's side:

Passenger's side:

Once clearance for the piping was good, I used the dremel to cut away at the support beams to make room for the precision intercooler (its all hacked up, gonna clean it up later when its all fitting nicely).
Driver's side:

Passenger's side:

As you can see, I started to make a bracket out of 1.5"x1.5"x6" aluminum L bracket to use as an anchor to mount the intercooler. The precision 600hp intercooler has a threaded hole on each endtank. It also had these aluminum extensions that I cut off to get the intercooler up higher closer to the crossbar about 1/4" more, shown below:

Then I mocked up the pfab manifold, turbo, and downpipe. I ended up thrashing the factory exhaust manifold studs taking them out. Gonna have to buy some new ones :/ It all fits very nicely. Only thing is the elbow for the wastegate sits on the hard brake line which I'll have to bend the line out and around the elbow. Just wondering how I should go about doing this so that I don't put a kink in the line or cause it to vibrate against the chassis somewhere (if anyone has pointers here, please share, I was planning on just using some pliers with shop towels to prevent any scratches??).

Downpipe:

Hard brake line issue:

I'll end up putting a 3" flexpipe somewhere between the end of the downpipe and testpipe.
BATTERY RELOCATION
I also relocated my battery and fusebox some time ago referring to multiple diy threads here on s2ki. The relo was pretty easy and straight forward for anyone tackling this too. I took a couple pictures to show how I did mine.

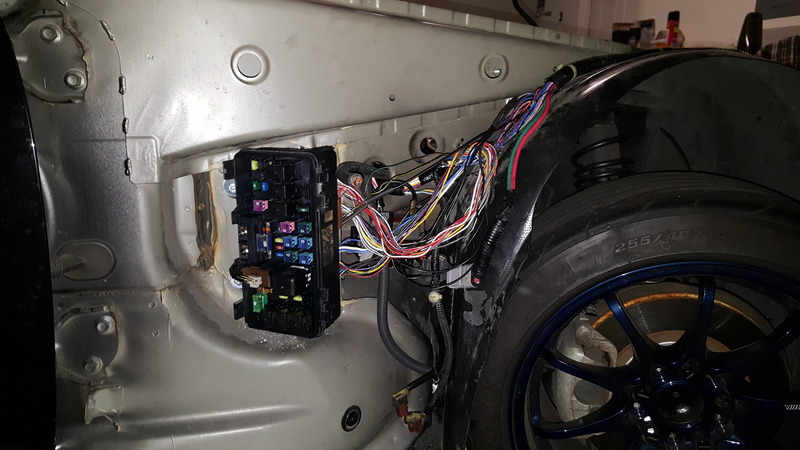
I relocated my battery to the trunk with 0gauge welding wire and gold terminals from O'Reilly's autostore. I had to use a step bit to drill a hole in the firewall to feed the wire through. From there I used a distribution block to wire it up to the factory eps fuses. I grounded the battery to a bolt behind the passenger seat and it seems to hold well with no electrical problems...yet. Hopefully its a good spot, I probably should have sanded the area down a bit but it hasn't given me grief yet. I also used a Scorpion battery kill switch nearest the battery for the power line. It's a cheaply constructed piece but its doing the job. I wrapped it with an old neoprene knee brace that I had so stuff in the trunk don't accidentally hit it. It's kind of half-assed since I couldn't find good places at the time to mount everything. But I recently saw another member mount the battery with factory hardware in the spare tire section, looks so much cleaner. I might have to copy him and place my battery there.
As for the fusebox, I ordered a second bracket from Honda pictured below and it worked out perfectly with how I mounted the fusebox turned to the side.

So got some more items and a little more work done with mounting the intercooler.
Spoon magnetic bolts and Hondata 4 bar map sensor (big ups to nate from balladesports):

SOS fuel return kit with upgraded aem parts:

After reading a few threads about how people were mounting their precision intercoolers, I think i'm going to mount it with a small gap up top to allow some air to the radiator. Although, im not fond of how it looks. Hopefully its not too noticeable once the car is down and rolling.
Here are rough brackets i made up to mount the intercooler:


I also trimmed the oem grill to fit around the intercooler:

Here's the gap:


Still not sure if I like how it looks....might have to upgrade the radiator and move it up to fill the gap some day...
And here's the undercarriage:

Clears the bottom even with it mounted low.
Well that's it tonight. I have Import Auto Pros in westminster (shoutout to lorenzo, david, and the guys) modifying my intercooler piping and welding my oil pan up. After all the fabrication pieces are installed, I think I'll tackle fuel next.
Okay, so got a lot done today. Installed my modified oil pan with bung and Balladesports bolt-in oil pan baffle. Everything was really straight forward here.


Got my modified intercooler piping and turbo back from my guys @ Import Auto Pros in Westminster, CA.

Fits like a glove now.
Also finished up the sos fuel return kit install for 06-up models. The written instructions provided by sos were great, step by step and very easy to follow. Reaching your hands and arms through the tiny crevice between the fuel tank and the frame to install the lines was the toughest part. My forearms are tore up
Anyway, the kit is basically all oem honda so everything fit pretty spot on. Couple things I noticed though was that the aem 320 pump's fuel filter sits 1/4"-1/2" higher than oem. This has me worried a little bit with fuel pickup. Will this small difference not allow me to pickup fuel when near empty? Running e85 is already going to kill my gas mileage im hoping i'll be able to pickup fuel to the very end. Also the terminals that go into the relay don't sit securely in place so be sure to push the terminals in from behind to secure it while plugging the relay into its counterpart; the terminals kept getting pushed out when i went to connect the relay.
Here's a picture of the completed fuel pump and wiring kit. Just gotta tidy up the wires.
Also finished up the aem fuel rail and dw injectors install. I had sos bore out the aem fuel rail to fit 06-up injectors. But in doing so i noticed the green o-rings that come with the aem fuel rail no longer fit due to the bigger size hole. However, it seems to seal just fine with the use of the o-rings that come on the dw injectors. I also installed the fuel rail without the fuel rail spacers provided by sos, and it sits very snug and flush to the oem mounting points...I guess you dont have to use them??


I think i'm going to have to relocate my fuse box into the fender well as well. I cant find a position for it to clear the wastegate...

Thanks for the pointers hershey. My drain hole is above the level of the baffle so hopefully that will prevent any interference with the drainage.

Ill be heat wrapping my downpipe and dump tube and heat shielding the turbo drain lune like you did as well.
i just ordered an ebay vacuum block for $35 haha. i figured this piece wont need to cost a premium since its just an aluminum block.
ill be porting vacuum for my wastegate/solenoid and blowoff valve from the block.

this...is...where...im...at...lol. popping those plastic clips is a pita! anyway, in the process of relocating the fusebox into the fender area.
Fuse box is done. only had to extend about 6 or so wires. now to tackle the eps box and wires on the other end to alternator and starter.

Looks a lot cleaner already, just needs a wash -__- also mounted the solenoid to the alloycraft heater bracket. gonna route the wires thru the same hole as the main battery cable.

also huge shoutout to pang at pfab. best customer service ive experienced.
Some more goodies. The speedfactory titanium manifold studs are quality. Get them if you need new ones. Install is very easy especially with the hex on the end of the studs.
Also, i wanted to run steel braided lines on the hot side due to heat but the an fittings dont fit on my boost solenoid, theres not enough space between the two ports on the same side to clear two an fittings coming from the wastegate. im exchanging the -4an lines and an fittings for one-touch fittings from vibrant because the an fittings dont fit on the boost solenoid. Ill put a rubber fuel line over the 1/4" polyethylene tubing and some heat wrap over that to protect it from manifold temp. Just waiting again for more parts to come in

also was able to move the hard brake line out the way. Just unclipped the clip in the center and bent it carefully by hand.
I can smell the finish line
Got everything mounted up
Thanks speedfactory for the manifold bolts. Can hardly see them but i really like the burnt titanium lol.
Also got all my oil and vacuum lines plumbed. I ended up using vibrant push lock fittings for my vacuum stuff with 1/4" p.e. tubing. Also put rubber hose over the tubing for extra protection against manifold heat.

I mounted the boost solenoid to the alloycraft heater bracket. Also running a vacuum block up at the center of the firewall.

Heres a pic of the bov plumbed using the pushlock fittings. The tubes slide in very easily...hopefully theyre not prone to leaking. Hopefully ill have some more time over the long weekend to finish her up.
alright, pinning the b16 port for the solenoid on the ecu harness was a bitch. It wouldve gone by so much quicker if i had known from the beginning theres a stupid locking clip that needs to be popped in order to install/remove pins...
anyway, also got my defi boost gauge and controller installed. Fed through the passenger side firewall then across under the dash from the interior to under the steering wheel.
also switched the ignition on a few times and fuel pump primes and no leaks at the fuel rail!
if all goes well i should be able to fire her up tomorrow...on new years day!
Made a custom heat shield out of dry carbon for my vacuum and ac lines.

Went with supertech duals. Just picked these bad boys up!

Some more updates. Got my downpipe redone all v band 3" by my guys at import auto pros. Have my dump to the ground, not recirculated.

Also had them put in the supertech duals.

Made 435whp/331wtq on the dynojet at only 13lbs. This manifold flows, we were hittin 335whp at only 5lbs of boost. The 4port solenoid was giving us problems with overboosting so we turned it down to 11lbs at the end. Injector duty cycle was at 70-75% at 13lbs on the dw1300 so we could probably hit 15-16lbs safely at 80-85% duty cycle.
Anyways its running pretty solid right now. Full boost at 4k feels great. Surprised at how much torque its making too. Just got a few things to work out like leaky oil pan bung, etc.
Gonna swap out the 4port for a 3port, fix the leak then head back for another run. One run we hit boost cut at 19lbs at around 5k rpm and we were hittin 444 already. Curve looked like it was gonna exceed 500 easy at 19lbs..prob gonna need 2000cc inj for that much boost tho.
heres the run on 13psi

Also got around to installing the new radiator. Went with the newer design koyo rad with stock fans. Had to cut out a section of the fan to fit around the intercooler piping on the passenger side.


Picture update!
Its at Signature Autobody getting a full respray. Fresh oem berlina black.

New pictures. Got the car back from Signature Autobody. Big ups to james and lawrence!

putting on new emblems

flexfuel

Couple things, my car started thrpwing 2 codes. Are these codes something that could be addressed in the tune or is it something mechanical?

also noticed my motor mounts are leaking. Ive been reading up on vibratechnics mounts.
On another note, on cold startups my car began idling pretty rough for a min or two. Once rpms drop down to 1000rpm, its back to its normal pur and symptoms completely go away. Is this the infamous rough idle ppl have been speaking of dw injectors? Otherwise they function just fine.
On the bright side, i just got my new motor mounts in the mail. Vibratechnics 200 mounts. Ill be putting these in shortly. Hopefully the vibration is tolerable. Both my oem mounts are leaking

Also did the rainh8ter vc mod. Well, the shortcut way. Made sure to use a deburring tool and magnet to collect all the little shavings then rinsed thoroughly.

That e85 life


The following users liked this post:
S1 S2 (05-11-2017)
The following users liked this post:
Ap2low (06-09-2017)
05-11-2017, 09:16 PM
#3
Thread Starter
Just got this in. Schmuckbuilt oil catch can and coolant reservoir combo in black wrinkle paint. Real quality piece. Planning on running pcv and crank vent directly to it.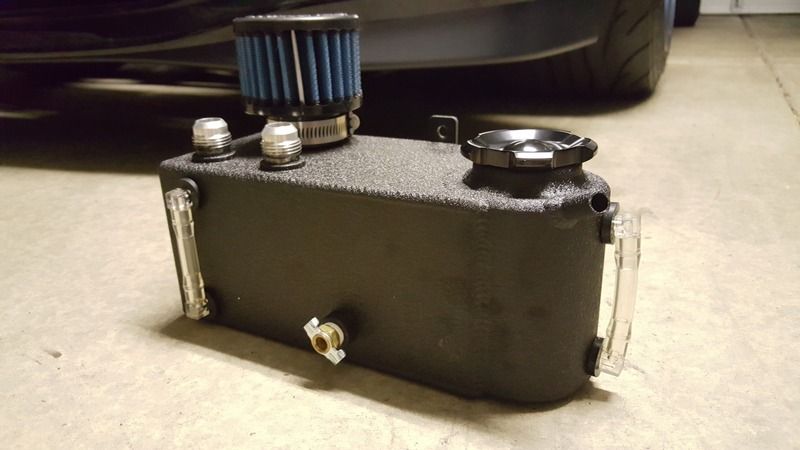


 05-12-2017, 12:03 PM
#5
Thread Starter
05-14-2017, 08:09 PM
#7
Thread Starter
Im a turbo whore. Sorry its not to your liking. Its not for everyone. Having driven the cr for 6years in near stock form, the lack of power began to bore me. I also daily my cr just about everyday which is probably gonna kill you too haha. It doesnt sit in the garage gaining collectors-mint-condition value, i enjoy it just about every single day, moreso now that its boosted.
At this stage going turbo was never a question, how to put together a kit to produce turbo amounts of power with a supercharger-like linear powerband was the challenge...which feels amazing on low and full throttle. I dont think there are many builds with a whp to wtq ratio as mine with a near linear graph. Most builds with a larger turbo have a sudden onset of power which admittedly is fun in its own right. Anyway, im just here to share my recent build and help answer any questions. To each his own
At this stage going turbo was never a question, how to put together a kit to produce turbo amounts of power with a supercharger-like linear powerband was the challenge...which feels amazing on low and full throttle. I dont think there are many builds with a whp to wtq ratio as mine with a near linear graph. Most builds with a larger turbo have a sudden onset of power which admittedly is fun in its own right. Anyway, im just here to share my recent build and help answer any questions. To each his own
The following users liked this post:
R00567 (06-07-2017)
Trending Topics
06-07-2017, 04:53 PM
#8
Im a turbo whore. Sorry its not to your liking. Its not for everyone. Having driven the cr for 6years in near stock form, the lack of power began to bore me. I also daily my cr just about everyday which is probably gonna kill you too haha. It doesnt sit in the garage gaining collectors-mint-condition value, i enjoy it just about every single day, moreso now that its boosted.
At this stage going turbo was never a question, how to put together a kit to produce turbo amounts of power with a supercharger-like linear powerband was the challenge...which feels amazing on low and full throttle. I dont think there are many builds with a whp to wtq ratio as mine with a near linear graph. Most builds with a larger turbo have a sudden onset of power which admittedly is fun in its own right. Anyway, im just here to share my recent build and help answer any questions. To each his own
At this stage going turbo was never a question, how to put together a kit to produce turbo amounts of power with a supercharger-like linear powerband was the challenge...which feels amazing on low and full throttle. I dont think there are many builds with a whp to wtq ratio as mine with a near linear graph. Most builds with a larger turbo have a sudden onset of power which admittedly is fun in its own right. Anyway, im just here to share my recent build and help answer any questions. To each his own
06-09-2017, 01:02 AM
#9
Thread Starter
Thanks dude. A properly boosted s is one of the funnest things ive ever driven in my life. I cant wait for yours to be done. Its cool to see everyones build throughout and the finish line. Everyones build is slightly different, composing of different parts and yielding different results. I enjoy studying different dyno graphs analyzing hp and tq curves at their peaks and at what rpm and just comparing them to others and trying to figure out what parts do what according to that. Kind of helped me put together my kit the way i thought and wanted over the years. Ive read and researched threads some over 10years old here on s2ki from previous boosted owners. Its crazy. Its so much fun.
anyway, i havent updated this thread in a while. Since, ive installed the vibratechnics motor mounts and my manifold is in the process of being repaired by pang at pfab. Im not entirely sure what started the crack on the manifold but i have a feeling torn oem motor mounts and series of other events led to this. Anyway, im waiting for the manifold to get shipped back so i can put everything back together again. I also had pang add bracing to the manifold. Ill post pics as soon as i get the mani back.
As for the motor mounts, they create some tolerable vibrations at low rpm and idle. Its really not bad at all. Throttle response is better and the jolting created by very low rpm on/off throttle is lessened.
Oh, another small issue i had after the motor mount install was that my dumptube began to vibrate against the oem motor mount heat shield i installed along with the new mounts (for extra heat protection). I ended up peening the area on the dp down and the little relief if created fixed the issue.
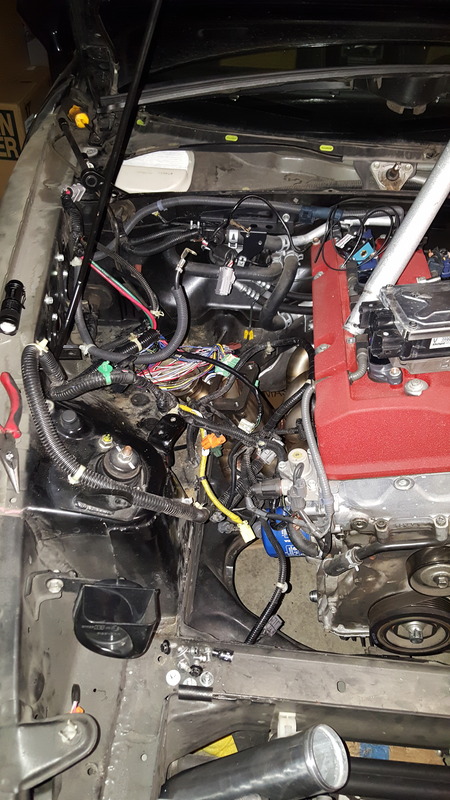
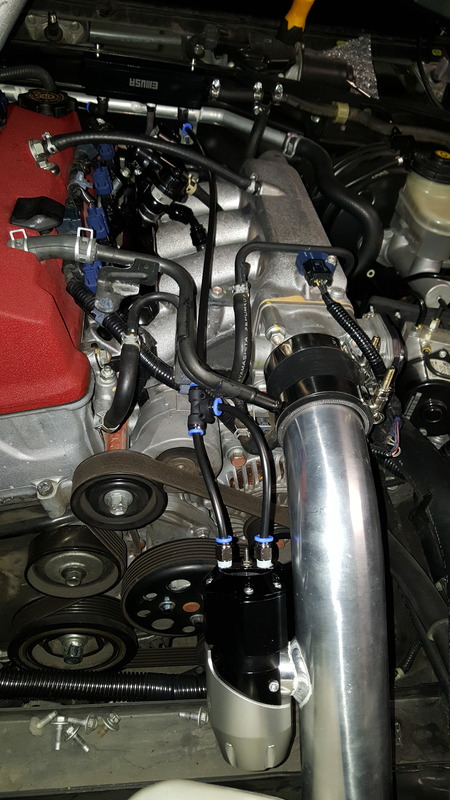
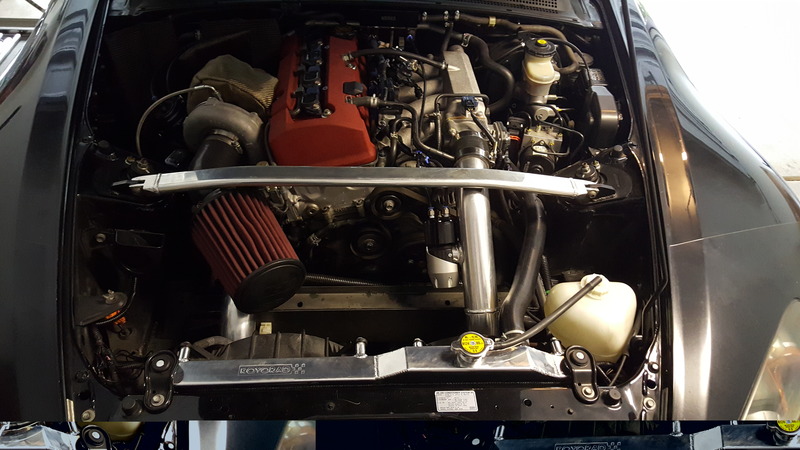
I also got around to installing the schmuckbuilt coolant combo oil catch can...its a crafty little piece. I used -10an for the pcv with the valve removed and -8an for the front vc vent with matching an barb fittings and hoses.
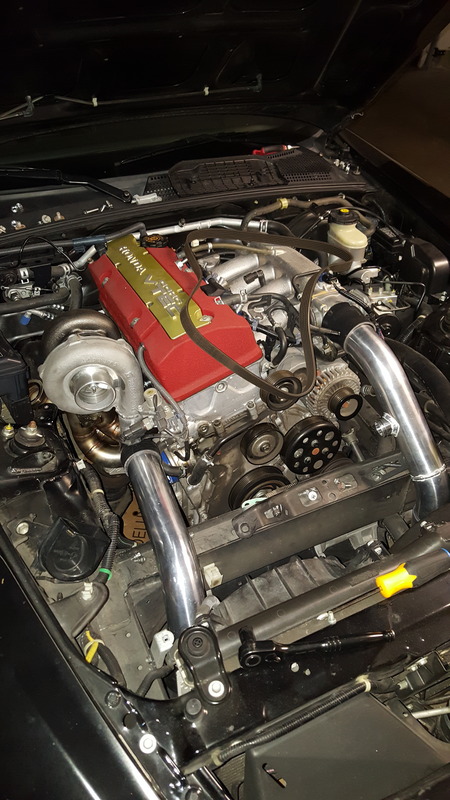
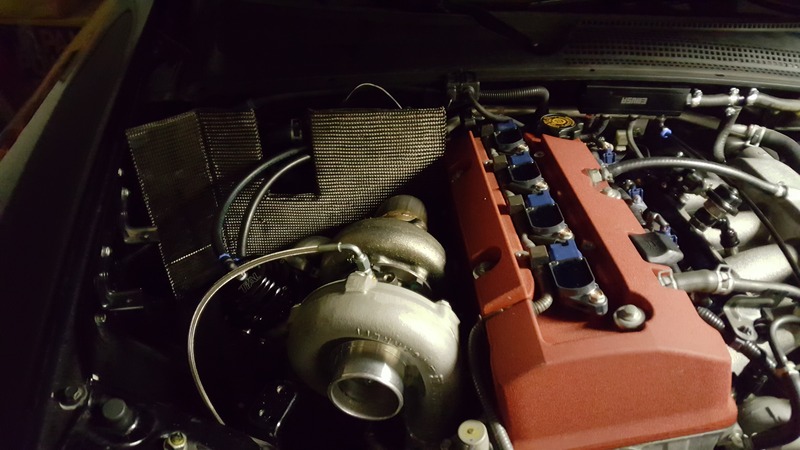
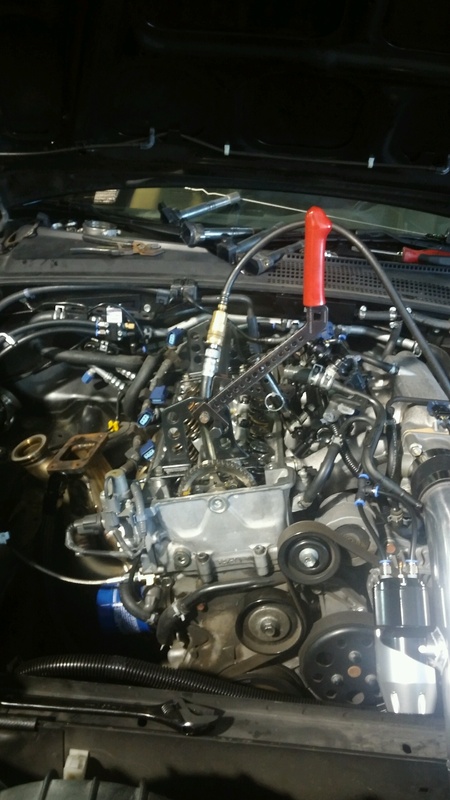
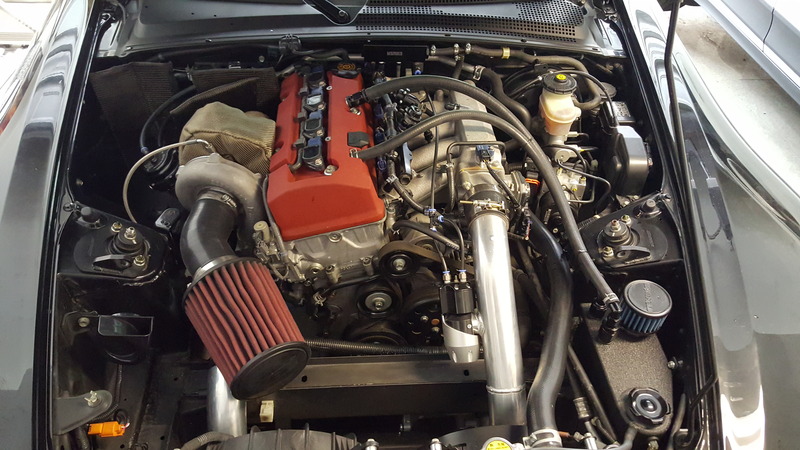
Heres a quick pic of the engine bay before i tore it down again.
anyway, i havent updated this thread in a while. Since, ive installed the vibratechnics motor mounts and my manifold is in the process of being repaired by pang at pfab. Im not entirely sure what started the crack on the manifold but i have a feeling torn oem motor mounts and series of other events led to this. Anyway, im waiting for the manifold to get shipped back so i can put everything back together again. I also had pang add bracing to the manifold. Ill post pics as soon as i get the mani back.
As for the motor mounts, they create some tolerable vibrations at low rpm and idle. Its really not bad at all. Throttle response is better and the jolting created by very low rpm on/off throttle is lessened.
Oh, another small issue i had after the motor mount install was that my dumptube began to vibrate against the oem motor mount heat shield i installed along with the new mounts (for extra heat protection). I ended up peening the area on the dp down and the little relief if created fixed the issue.
I also got around to installing the schmuckbuilt coolant combo oil catch can...its a crafty little piece. I used -10an for the pcv with the valve removed and -8an for the front vc vent with matching an barb fittings and hoses.
Heres a quick pic of the engine bay before i tore it down again.


