Impractical but fun Daily Driver build in Sydney
 01-17-2017, 03:29 PM
#1


Hi all,
Thanks to all for sharing so much information on this forum, and helping me to make the decision I needed an S2000 in my life..
A little background - I have owned many and varied cars, always with a priority based around the driving experience and a sense of occasion. The recent daily driver list has been 06 Boxster S, 08 BMW M6, 07 Alfa Brera. I also own some classics, including a track focused 911, and have spent a good deal of time competing in Amateur level motorsport, although not much the past 3 years. Of my recent dailies, the M6 went when I needed to reduce my car payment to buy a house, and the Brera was beautifully built but a really underwhelming drive. I felt the need to get back into something fun and still cheap. I considered E46 M3, Various Evo Lancers, a 135i (in my future for sure), and S15, or the S2000. For sheer driving experience and the mantra of driving a slower car fast the S2000 was the winner, and I felt like doing s small build to make it my car and relfect my priorities.
As you'll see as the project progresses this is more of a track car and canyon carver than daily driver, but life is too short to drive something boring - practicality be screwed :-)
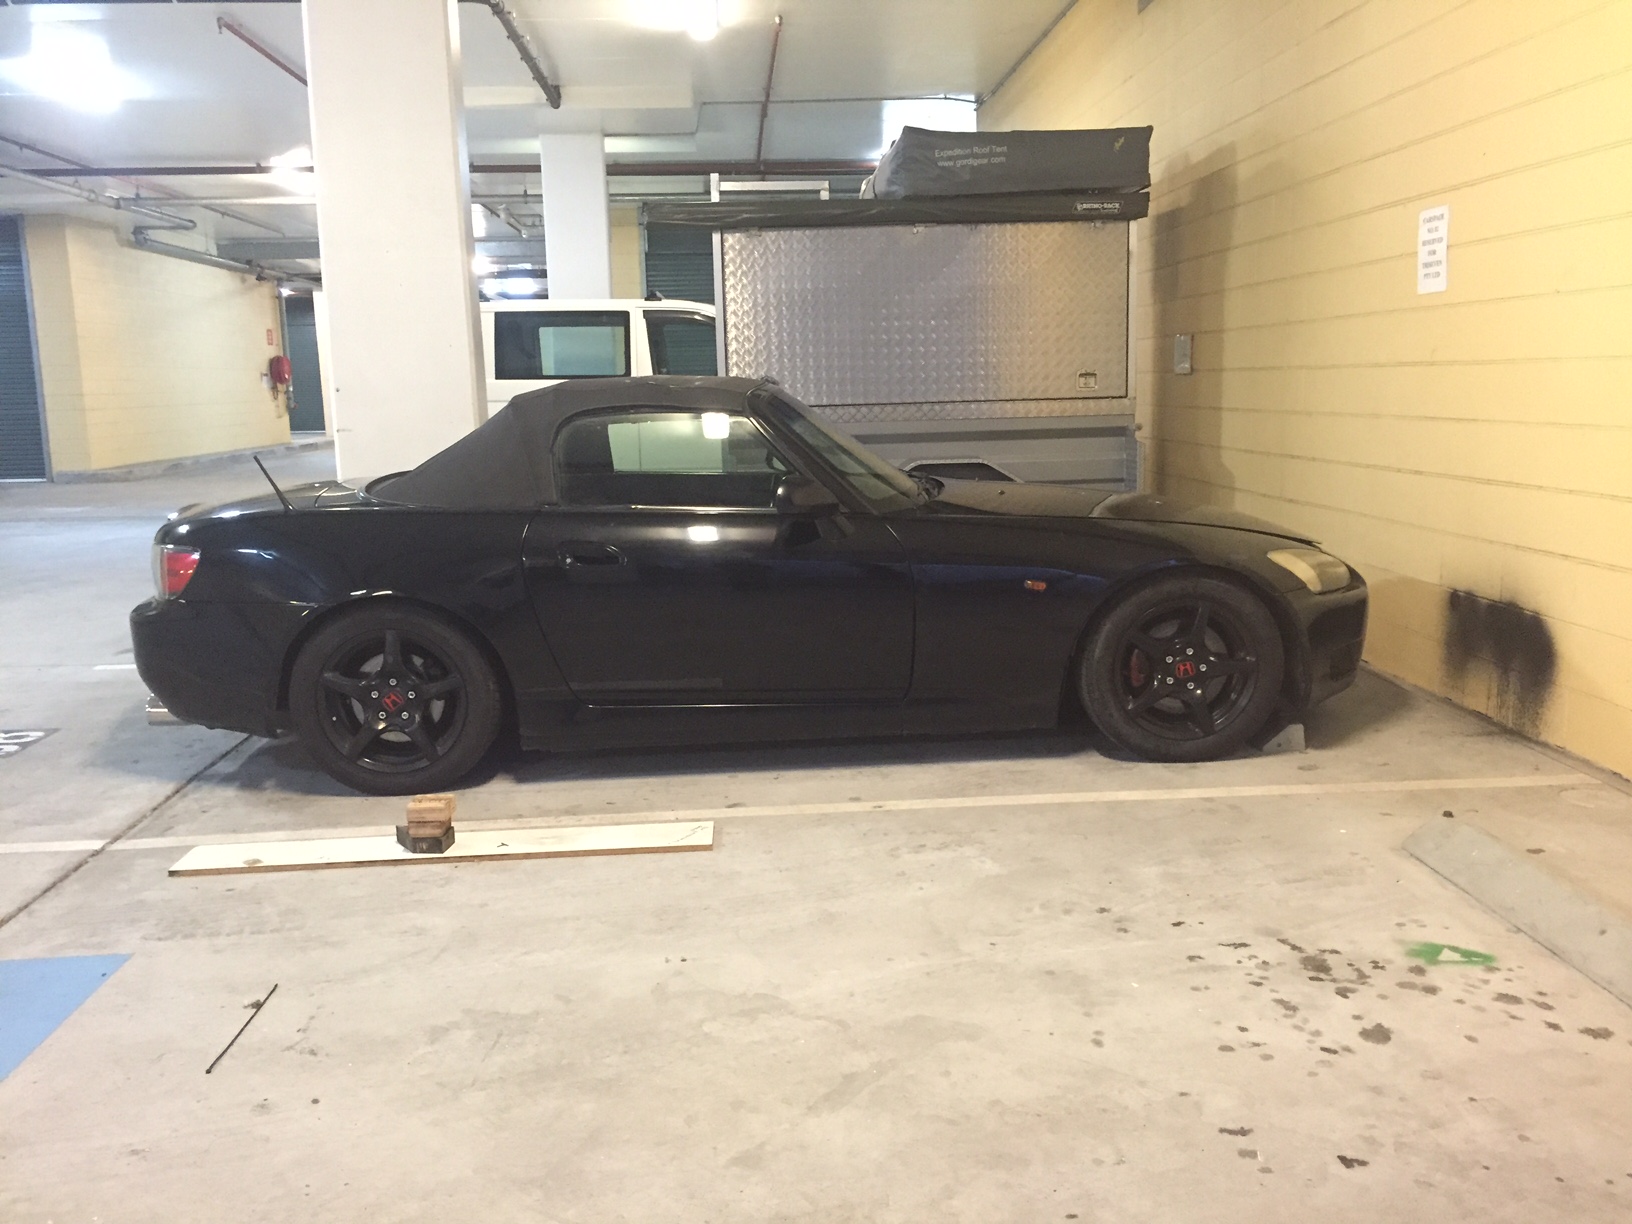
I hence went on a search and picked up this low km but rough Berlina Black Ap1

Not much I wanted to keep but a good base and the right price.
The goal for the project is suspension that is a decent compromise between track and street, some weight reduction, a nice tyre and wheel package, and a few nice details here and there. I DIY everything, and will cover a few details of the build here.
Cheers,
Earlysport
Thanks to all for sharing so much information on this forum, and helping me to make the decision I needed an S2000 in my life..
A little background - I have owned many and varied cars, always with a priority based around the driving experience and a sense of occasion. The recent daily driver list has been 06 Boxster S, 08 BMW M6, 07 Alfa Brera. I also own some classics, including a track focused 911, and have spent a good deal of time competing in Amateur level motorsport, although not much the past 3 years. Of my recent dailies, the M6 went when I needed to reduce my car payment to buy a house, and the Brera was beautifully built but a really underwhelming drive. I felt the need to get back into something fun and still cheap. I considered E46 M3, Various Evo Lancers, a 135i (in my future for sure), and S15, or the S2000. For sheer driving experience and the mantra of driving a slower car fast the S2000 was the winner, and I felt like doing s small build to make it my car and relfect my priorities.
As you'll see as the project progresses this is more of a track car and canyon carver than daily driver, but life is too short to drive something boring - practicality be screwed :-)
I hence went on a search and picked up this low km but rough Berlina Black Ap1
Not much I wanted to keep but a good base and the right price.
The goal for the project is suspension that is a decent compromise between track and street, some weight reduction, a nice tyre and wheel package, and a few nice details here and there. I DIY everything, and will cover a few details of the build here.
Cheers,
Earlysport
Last edited by Earlysport; 01-17-2017 at 03:51 PM.
 01-17-2017, 03:38 PM
#2
First up exhaust. Key area for weight reduction and of course sound, and some power gain with a testpipe.
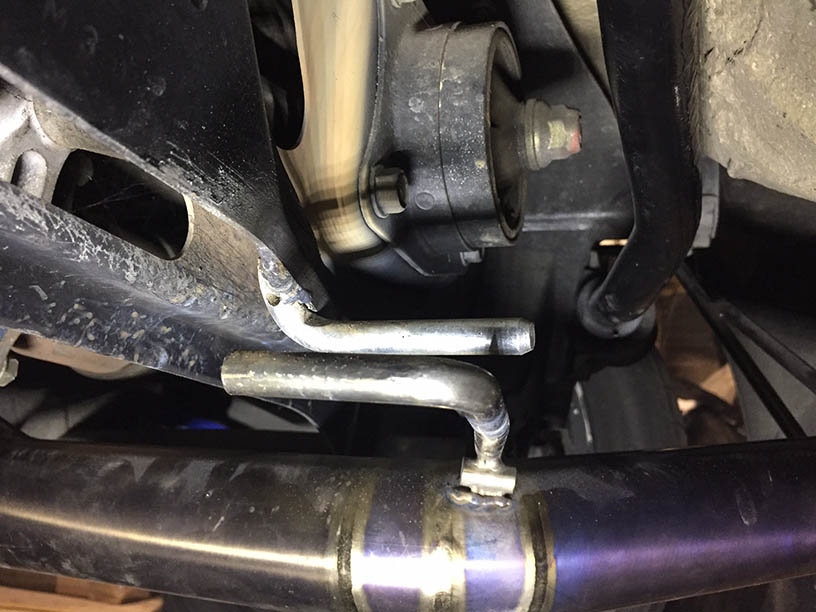
I picked up an Amuse R1 titanium single system with test pipe. Beautifully made and huge weight reduction from the factory boat anchor. Fitment was OK, however the factory hangers allowed the exhaust to move a little too far sideways and the resonator to contact the rear subframe. An additional hanger was in place on the exhaust, however nothing on the car. Hence I welded on an additional hanger to the rear subframe to hold the exhaust laterally a little firmer and provide clearance.
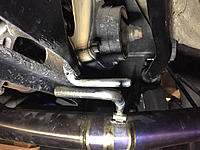
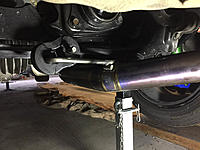
Now the exhaust fitted well. It sounds great too.
Cheers,
Earlysport
I picked up an Amuse R1 titanium single system with test pipe. Beautifully made and huge weight reduction from the factory boat anchor. Fitment was OK, however the factory hangers allowed the exhaust to move a little too far sideways and the resonator to contact the rear subframe. An additional hanger was in place on the exhaust, however nothing on the car. Hence I welded on an additional hanger to the rear subframe to hold the exhaust laterally a little firmer and provide clearance.

Now the exhaust fitted well. It sounds great too.
Cheers,
Earlysport
01-17-2017, 03:49 PM
#3
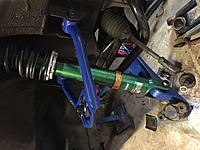
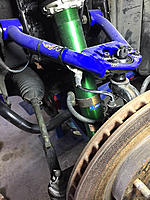
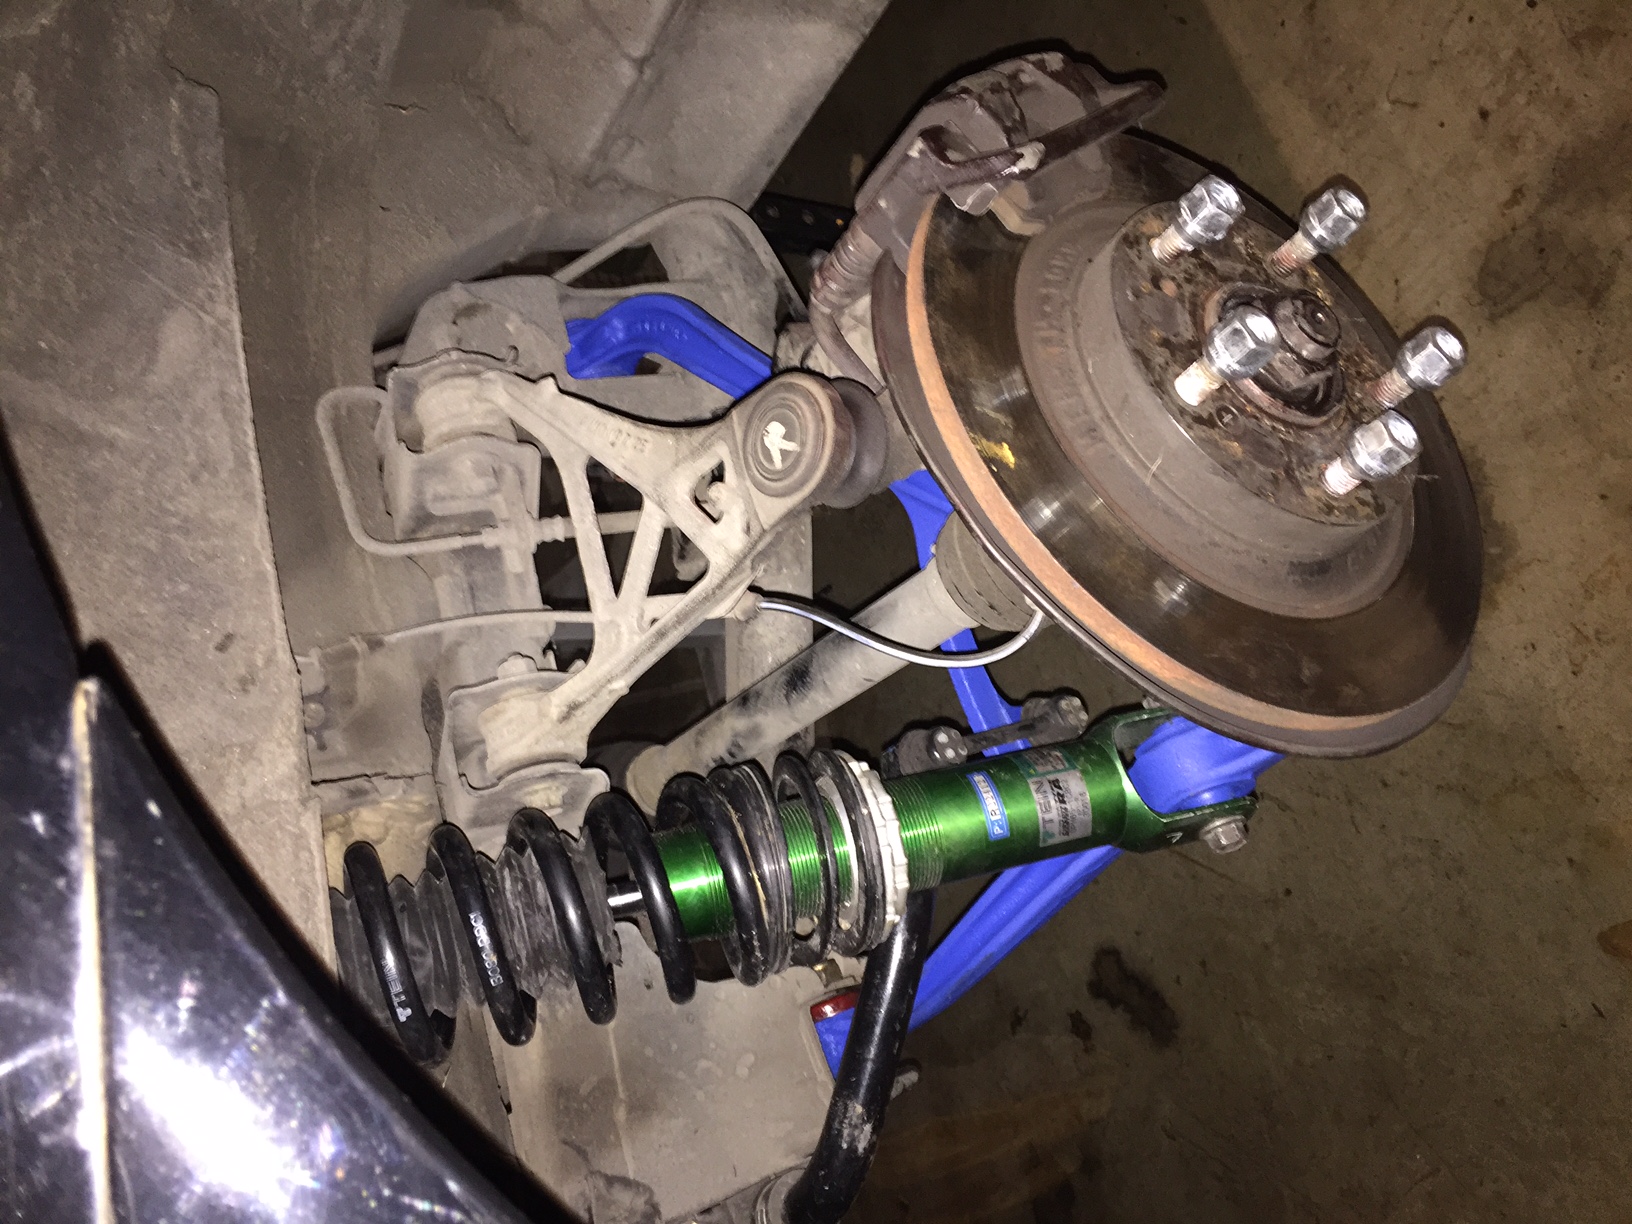
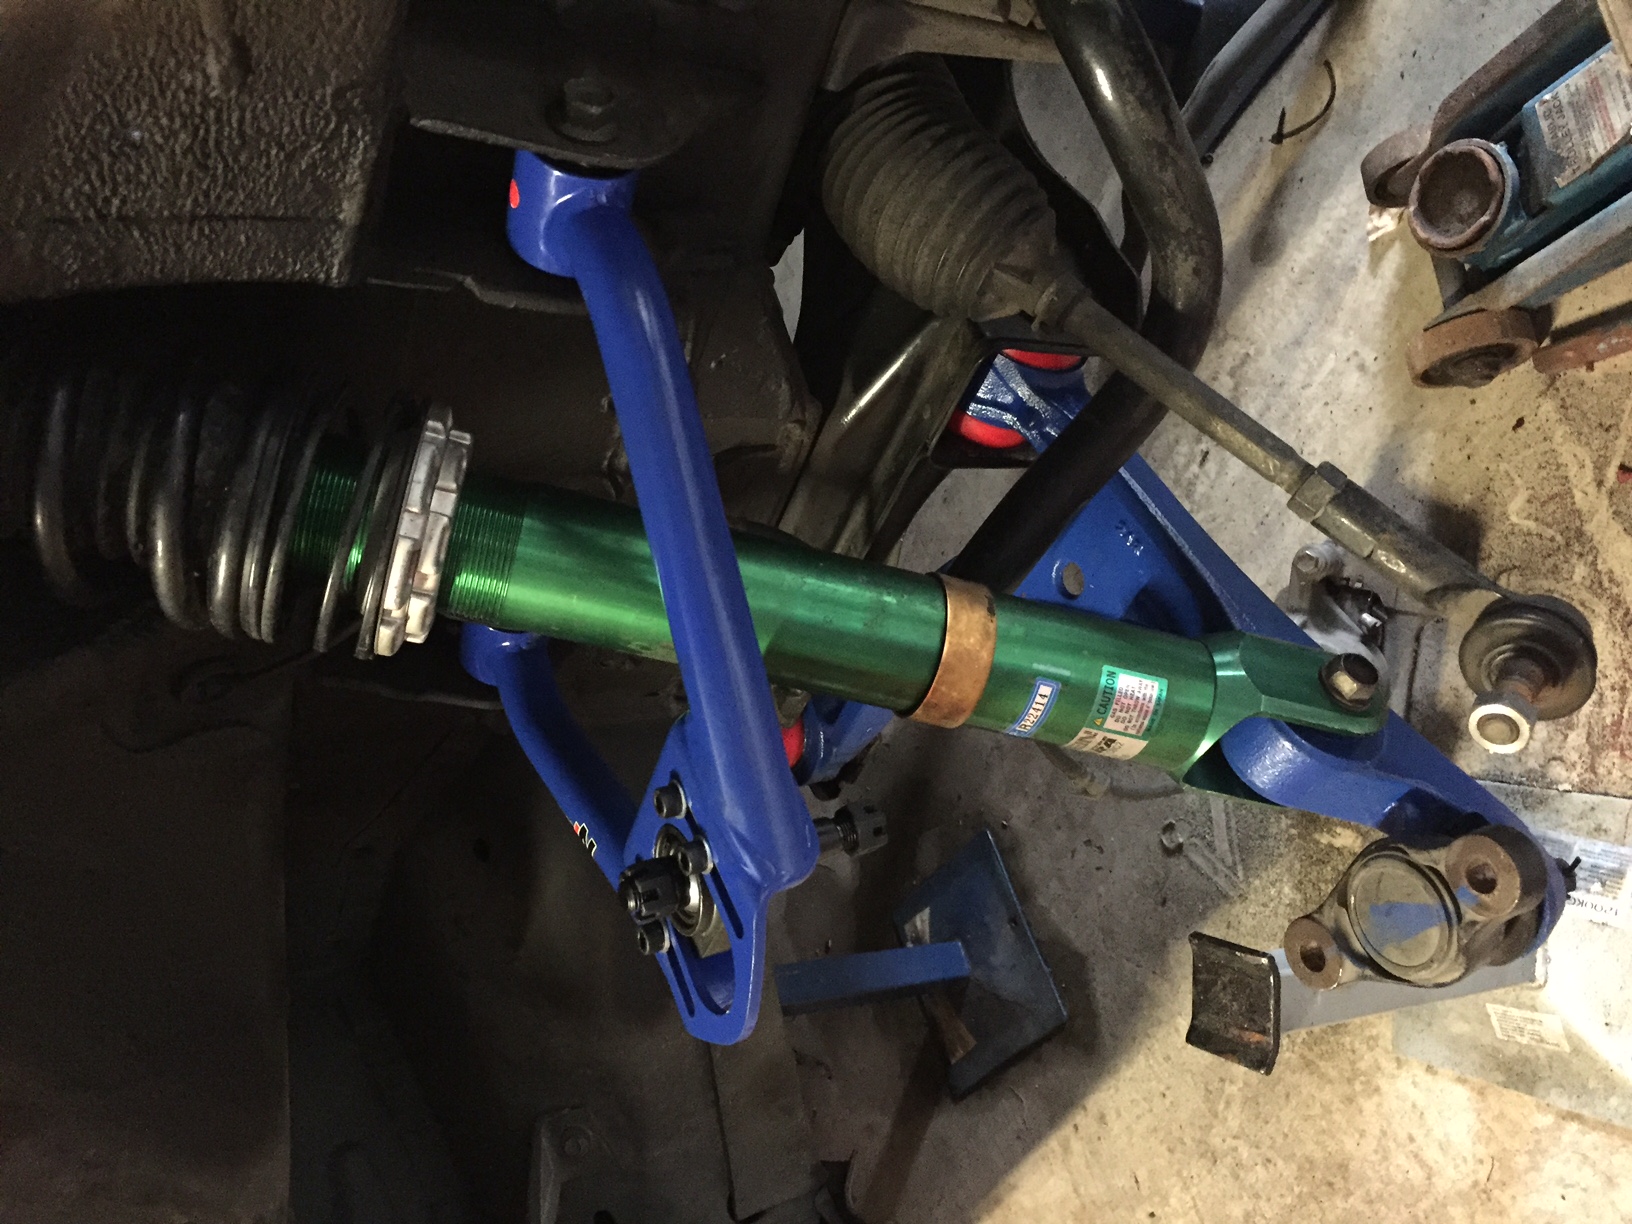
Suspension is really a focus of this build, so I collected the following.
- Tein monotube Circuit Master RA coilovers with 10k springs.
- An Ap2 rear sway bar (softer than first gen AP1)
- Energy urethane bushing set, and superpro front sway bar bushes and rear offset bushes.
- Spherical bearing front adjustable upper control arms
- Hardrace heim jointed rear toe control rods
- Megan rear driveshaft spacers
- Hardrace engine mounts
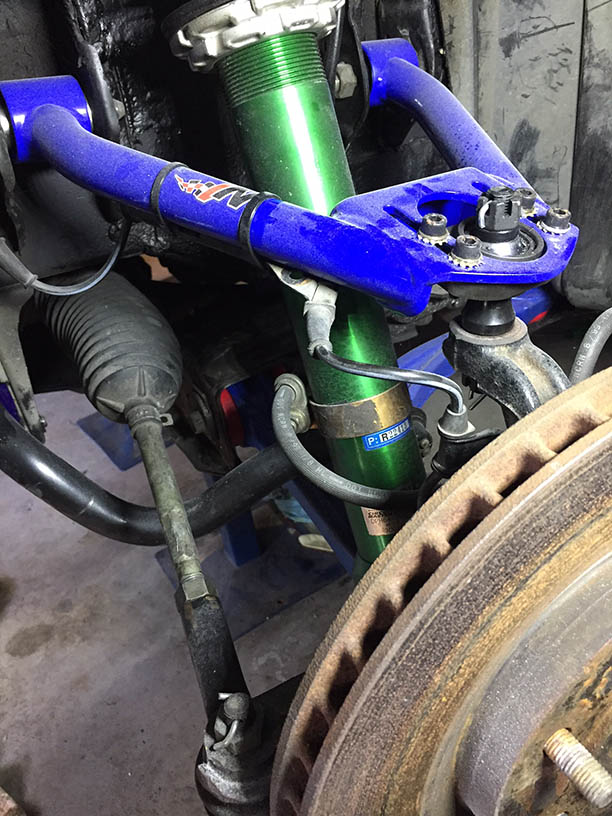
Cleaning up the control arms and pressing bushings is a tedious job. I ended up painting them blue to match the new front upper arms. The adjustable front arms give me the ability to decrease track width a little to fit the wheel combo I have in mind and till achieve whatever camber setting I desire. The arms I have use four bolts to hold position - I've added star washers and will add a plate and horizontal lock bolt if the adjustment doesn't hold position. I didn't do the rear upper arms as yet as the OEM bushings are in nice shape. I welded the front upper control arm mounts for future tear prevention.

Cheers,
Earlysport
- Tein monotube Circuit Master RA coilovers with 10k springs.
- An Ap2 rear sway bar (softer than first gen AP1)
- Energy urethane bushing set, and superpro front sway bar bushes and rear offset bushes.
- Spherical bearing front adjustable upper control arms
- Hardrace heim jointed rear toe control rods
- Megan rear driveshaft spacers
- Hardrace engine mounts
Cleaning up the control arms and pressing bushings is a tedious job. I ended up painting them blue to match the new front upper arms. The adjustable front arms give me the ability to decrease track width a little to fit the wheel combo I have in mind and till achieve whatever camber setting I desire. The arms I have use four bolts to hold position - I've added star washers and will add a plate and horizontal lock bolt if the adjustment doesn't hold position. I didn't do the rear upper arms as yet as the OEM bushings are in nice shape. I welded the front upper control arm mounts for future tear prevention.
Cheers,
Earlysport
01-18-2017, 02:18 PM
#4
Details are important to me, and I feel like in any build it's the details, and custom details if possible, that are one of the most rewarding aspects. So this car will have a few touches that are a little out of the norm.
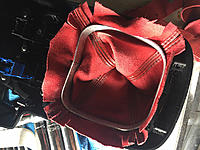
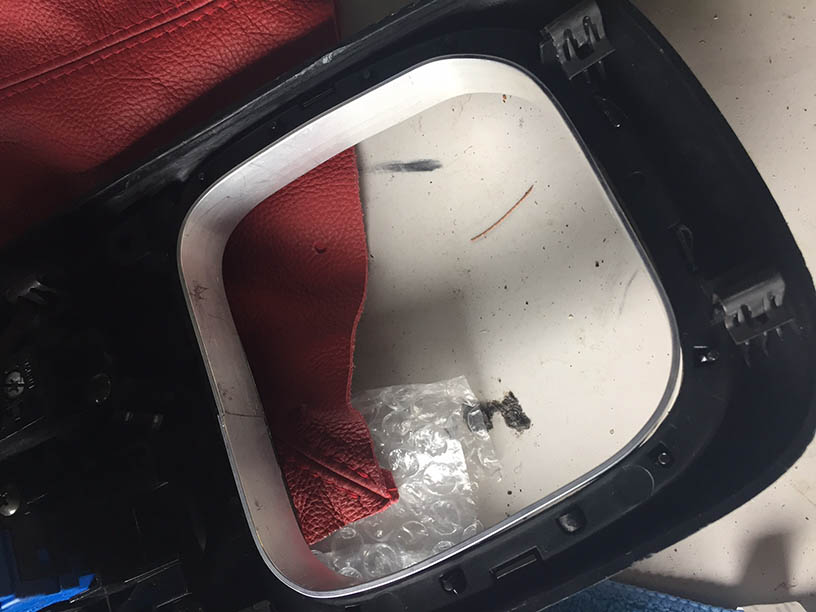
The car originally had red interior. I am changing the majority to black (carpet and seats) but keeping some red accents. The door panel inserts will remain, and I wanted a matching red leather gear boot. I couldn't find one specific to the S2000, so I bought a matching colour geniune leather generic one (I think it was for a skyline) and went to work. Cutting it to fit the standard mounting tabs wasn't going to work, so I bent up an inner aluminium trim ring to mount it.

This is then glued to the inside of the boot to mount it, and press fit inside the console.
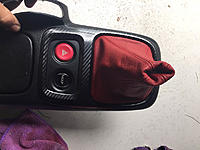
And from the top then looks like this. I've also wrapped the shifter surround piece in carbon film, and covered the centre armrest part in alcantara.
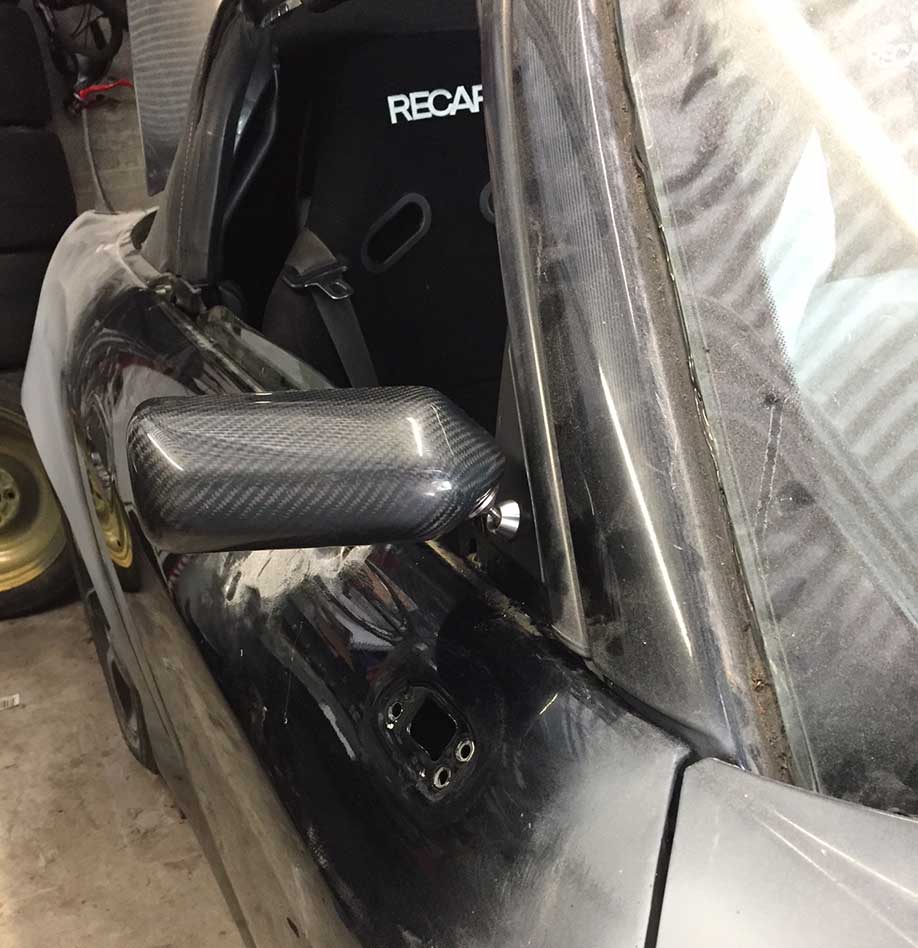
Another detail for the exterior is the craft square style mirrors. I know it's probably fine but I really don't like the weird base plates to mount them to cover the factory mounting holes. As I'm painting the car filling the factory mounting holes is no problem, so I looked for a clean solution to mounting them.
I ended up picking up a pair of carbon mirrors with the 'front corner of the door inside the A pillar' mounting plate. The right size hole drilled through the factory section of the door (rubber) and then a smaller M6 size hole through the inner metal and inner rubber for a mounting bolt did the job.

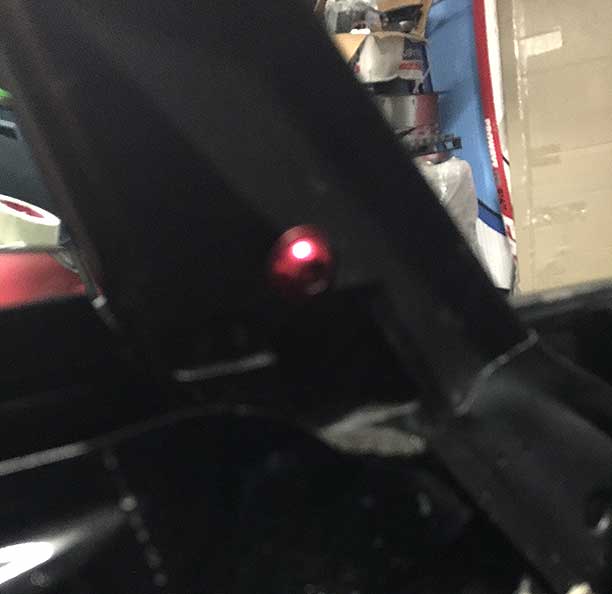
The bolt is an aluminium one cut to precise length, as it must secure the mirror and also lock the ball mechanism for the mirror adjustment.

A plate welded over the factory mounting holes and after paint it looks like this;
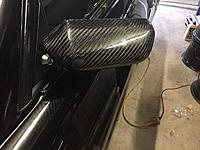
The mirrors are great to use in this position, low profile, and maximum weight saved over OEM.
Cheers,
Earlysport
The car originally had red interior. I am changing the majority to black (carpet and seats) but keeping some red accents. The door panel inserts will remain, and I wanted a matching red leather gear boot. I couldn't find one specific to the S2000, so I bought a matching colour geniune leather generic one (I think it was for a skyline) and went to work. Cutting it to fit the standard mounting tabs wasn't going to work, so I bent up an inner aluminium trim ring to mount it.
This is then glued to the inside of the boot to mount it, and press fit inside the console.

And from the top then looks like this. I've also wrapped the shifter surround piece in carbon film, and covered the centre armrest part in alcantara.

Another detail for the exterior is the craft square style mirrors. I know it's probably fine but I really don't like the weird base plates to mount them to cover the factory mounting holes. As I'm painting the car filling the factory mounting holes is no problem, so I looked for a clean solution to mounting them.
I ended up picking up a pair of carbon mirrors with the 'front corner of the door inside the A pillar' mounting plate. The right size hole drilled through the factory section of the door (rubber) and then a smaller M6 size hole through the inner metal and inner rubber for a mounting bolt did the job.
The bolt is an aluminium one cut to precise length, as it must secure the mirror and also lock the ball mechanism for the mirror adjustment.
A plate welded over the factory mounting holes and after paint it looks like this;

The mirrors are great to use in this position, low profile, and maximum weight saved over OEM.
Cheers,
Earlysport
The following users liked this post:
Mauro (03-24-2019)
01-30-2017, 04:18 PM
#5
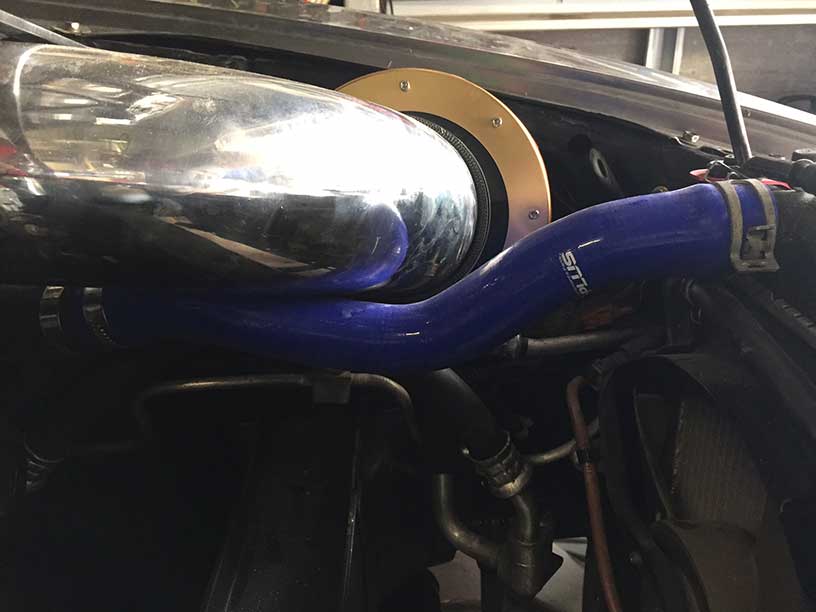
The car came with a long ram AEM intake but I wanted to try something different. Namely short ram with cold air and a larger diameter, so here is my custom 4" intake.
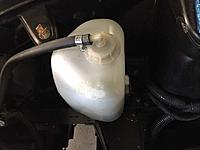
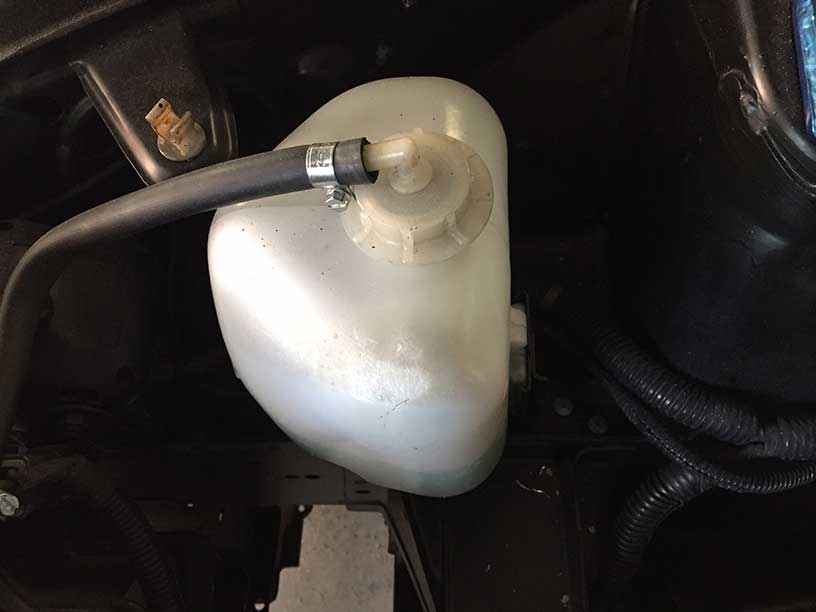
I also wanted to avoid running the intake right behind the radiator and the associated hot air, so the first step was relocate the radiator overflow to the other side of the engine bay.
The factory bracket was used with some new mounting holes.
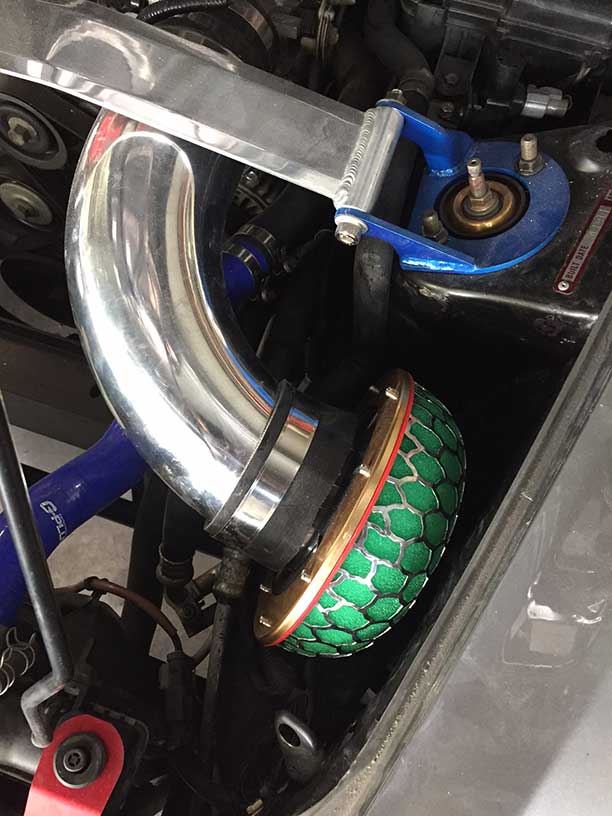
A piece of 4" AL bend and a silicone reducer to join it to the OEM throttle body, and a HKS 4" pod. I chose the HKS as they are about the shallowest 4" pod on the market, and still have a nice radiused mouth. I also picked up a 4" bellmouth should I want to try running with no filter in future (unlikley).
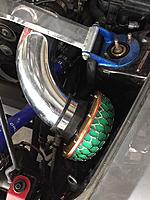
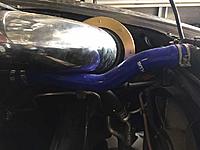
This filter position puts it right next to the factory opening into the area behind the bumper and wheel well liner, and it will also be fed cold air from the opening forward above the frame rail to behind the bumper. Of course to fit it here the raditator hose was in the way - not too hard to solve by using two top radiator hoses cut into the appropriate sections with a joiner in between. Now the hose routes down under the intake pipe.
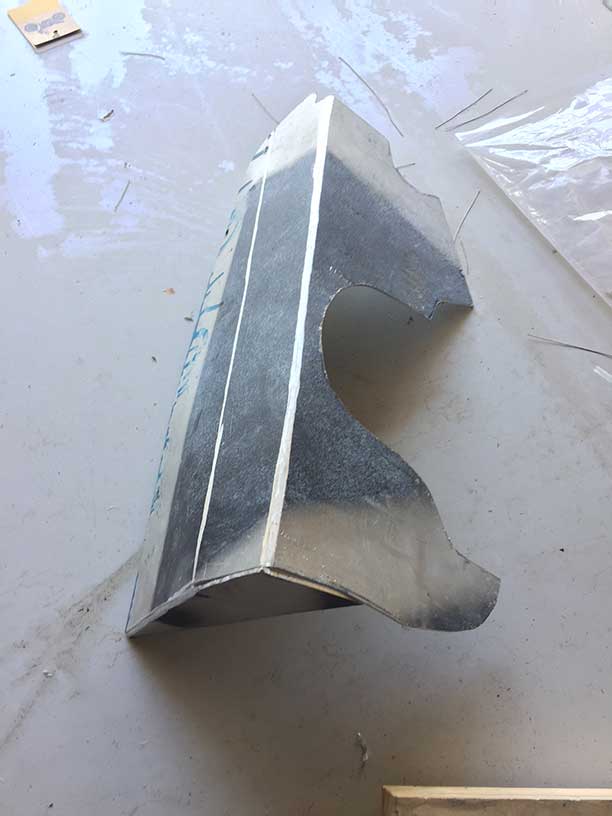
I then wanted to box in the filter, again for cold air retention and to also make the look more subtle. I made a template and cut and folded some sheet aluminium and then welded it up.

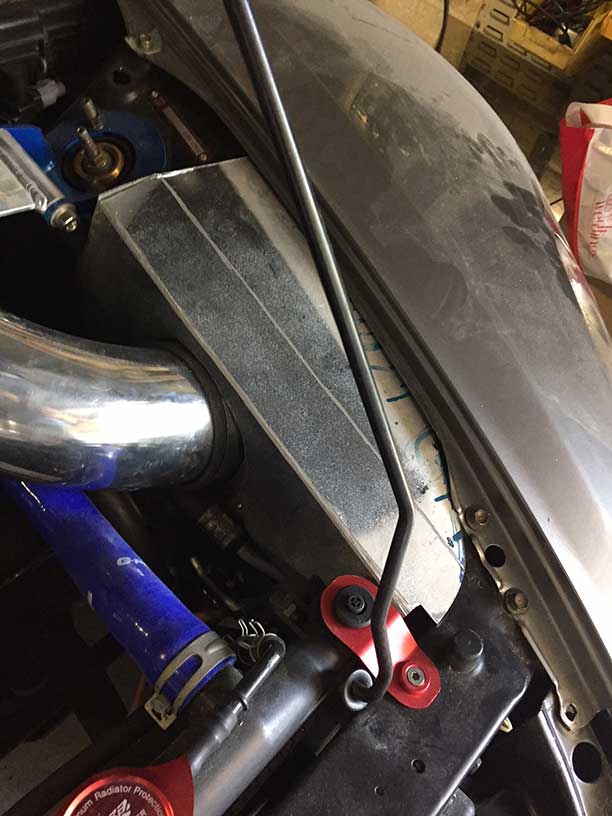
it fits in like so..

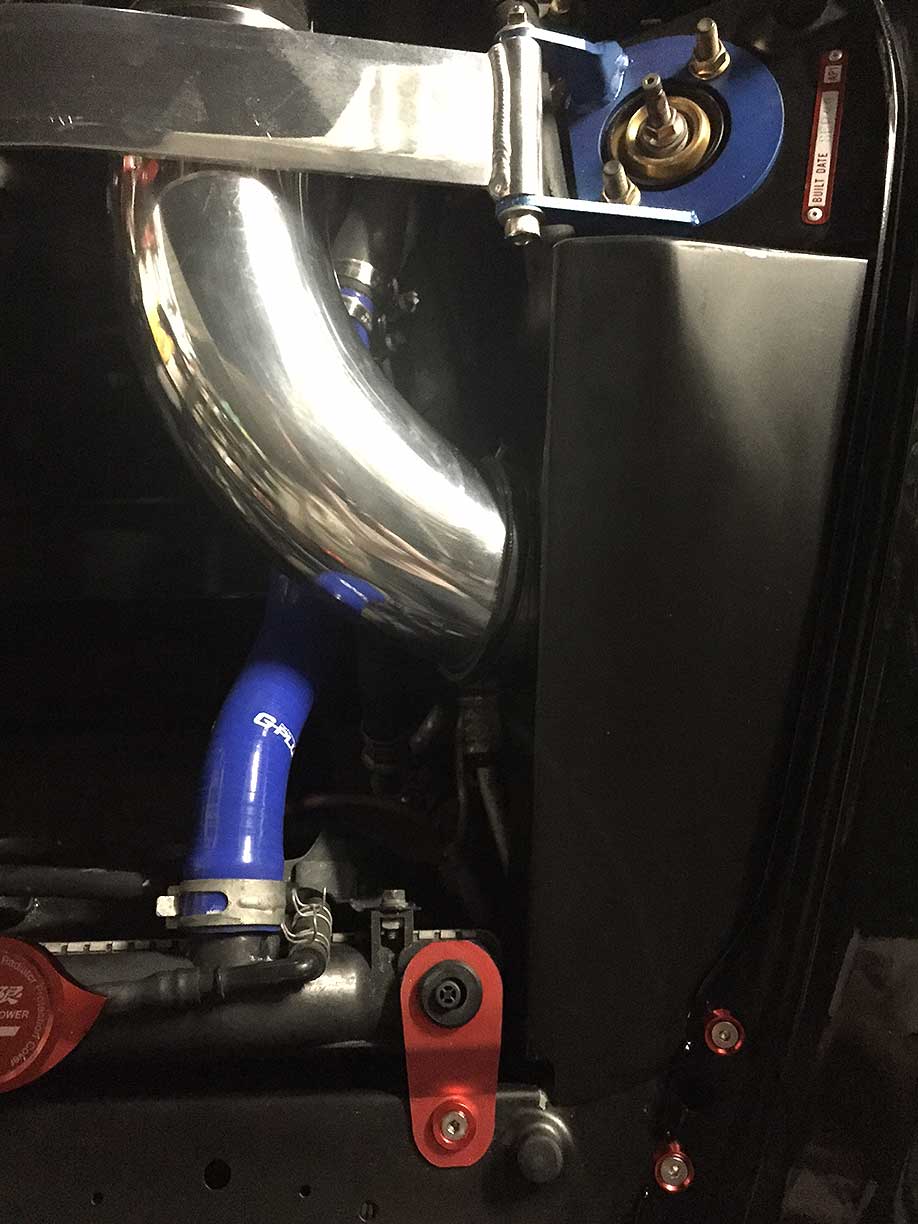
The finished product looks like this in the engine bay. Also note there's no plumbing for valve cover venting as I'm running a catch can and definitely don't want blow by in my intake.

No dyno before or after (yet) so can't tell you how it will work, but I do know intake temps will be as low as possible and obviously plenty of flow.
Cheers
Earlysport
I also wanted to avoid running the intake right behind the radiator and the associated hot air, so the first step was relocate the radiator overflow to the other side of the engine bay.
The factory bracket was used with some new mounting holes.
A piece of 4" AL bend and a silicone reducer to join it to the OEM throttle body, and a HKS 4" pod. I chose the HKS as they are about the shallowest 4" pod on the market, and still have a nice radiused mouth. I also picked up a 4" bellmouth should I want to try running with no filter in future (unlikley).
This filter position puts it right next to the factory opening into the area behind the bumper and wheel well liner, and it will also be fed cold air from the opening forward above the frame rail to behind the bumper. Of course to fit it here the raditator hose was in the way - not too hard to solve by using two top radiator hoses cut into the appropriate sections with a joiner in between. Now the hose routes down under the intake pipe.
I then wanted to box in the filter, again for cold air retention and to also make the look more subtle. I made a template and cut and folded some sheet aluminium and then welded it up.
it fits in like so..
The finished product looks like this in the engine bay. Also note there's no plumbing for valve cover venting as I'm running a catch can and definitely don't want blow by in my intake.
No dyno before or after (yet) so can't tell you how it will work, but I do know intake temps will be as low as possible and obviously plenty of flow.
Cheers
Earlysport
The following users liked this post:
Mauro (03-24-2019)
01-30-2017, 04:29 PM
#6
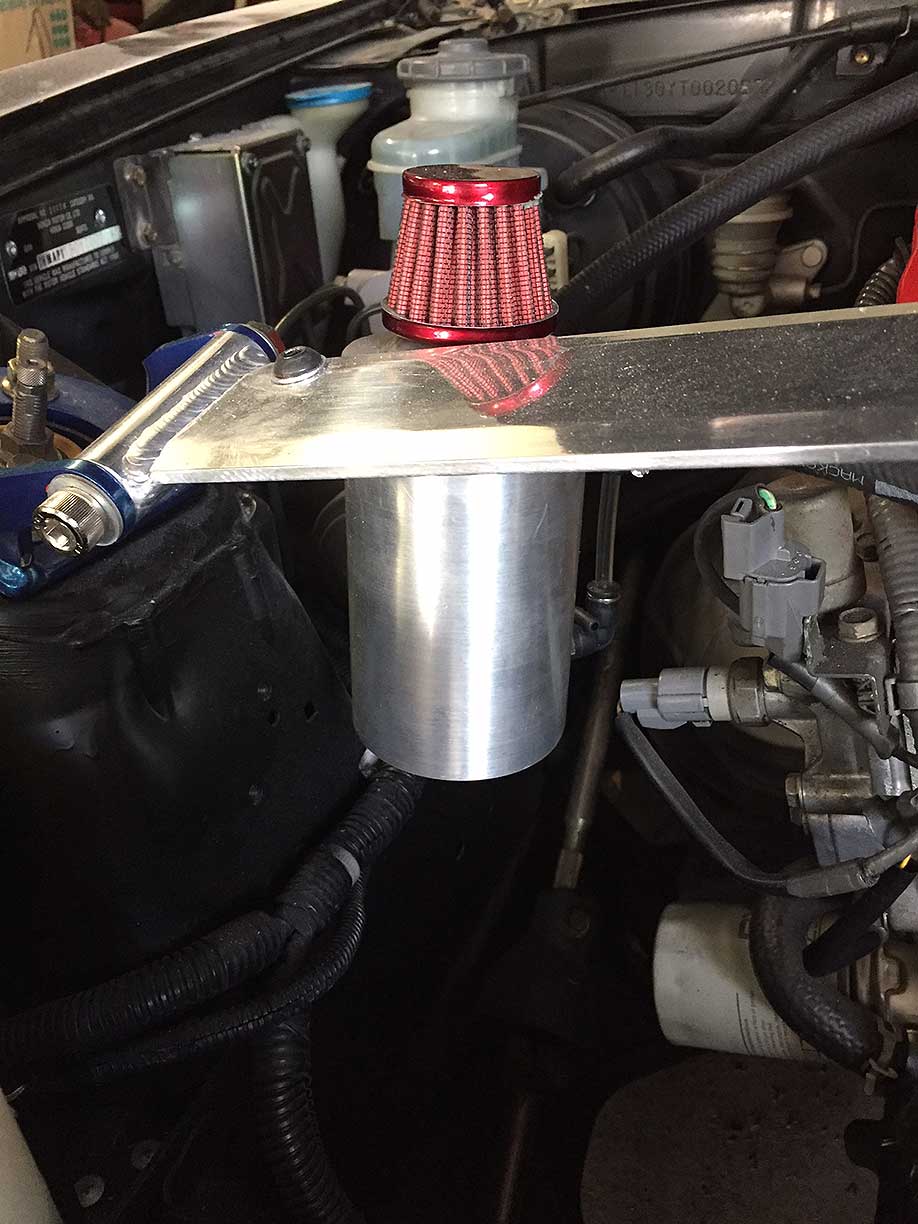
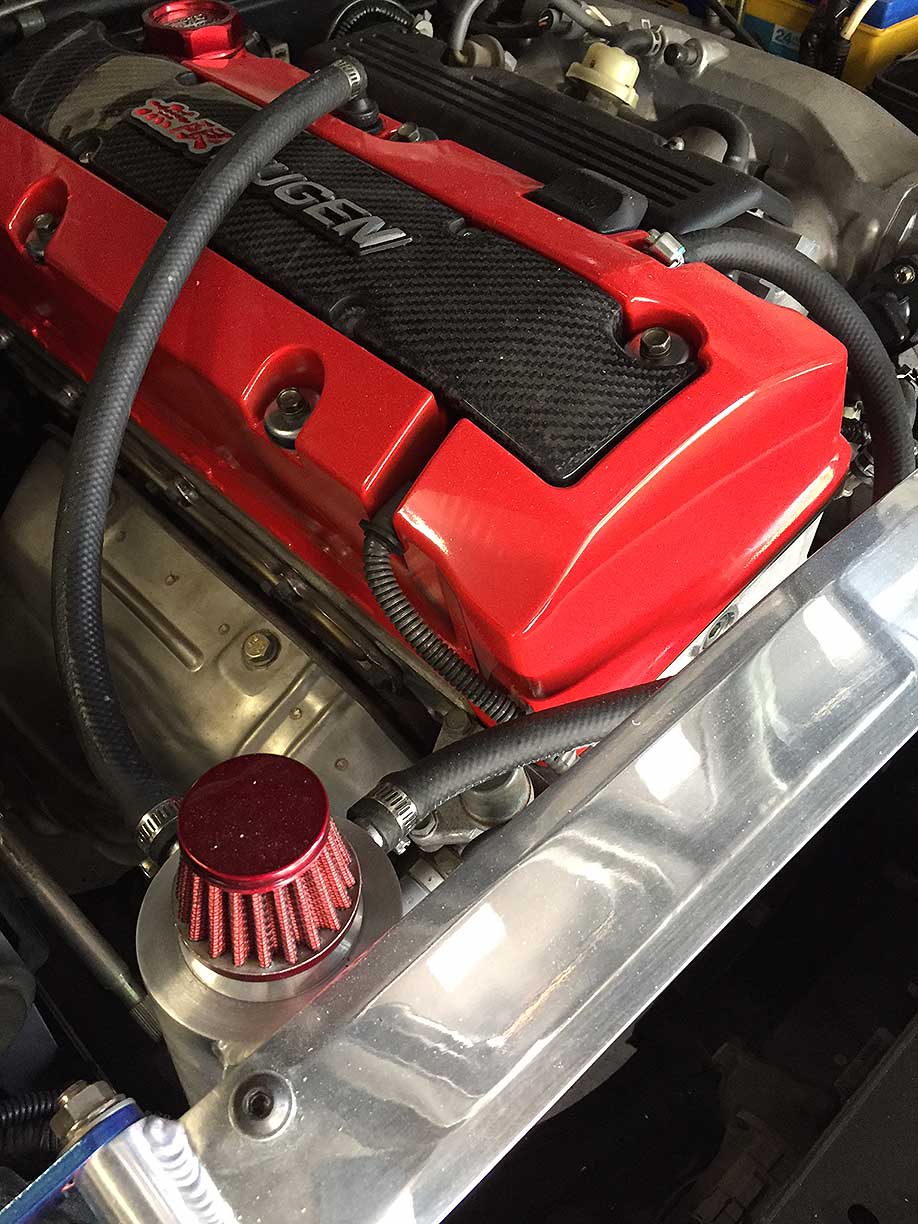
My simple catch can arrangement to keep power robbing / detonation inducing blow by and oil vapour out my intake.
Vented catch can mounted on my strut brace.
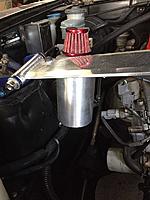
And plumbed to breather and PCV port.

factory ports on the intake manifold or blocked with vacuum plugs.
Cheers
Earlysport
Vented catch can mounted on my strut brace.
And plumbed to breather and PCV port.
factory ports on the intake manifold or blocked with vacuum plugs.
Cheers
Earlysport
Trending Topics
02-02-2017, 09:42 PM
#8
 02-07-2017, 02:12 PM
#9
Finishing off any required maintenance and parts replacement.
The EPS steering had more assistance to the right than left, and wouldn't complete the re-centering procedure, so I ordered a new torque sensor. When it arrived I learnt something new about torque sensors. The part I ordered is for an 08 CR and is identical in outward appearance to my AP1 sensor, except one important fact. the Left hand drive and right hand drive sensors have the pinion splined the opposite way.
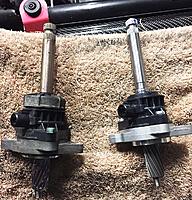
Damn. Buying Honda parts in Australia is ridiculous (like 3 times the price) hence buying from the USA or elsewhere. So I'm faced with either buying from Japan, or I believe I can swap the electronic module off the new sensor onto mine and see if that's where the issue is. I can also clean out the mechanical part of the old sensor while it is apart which may help. Fingers crossed.
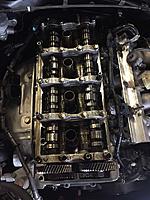
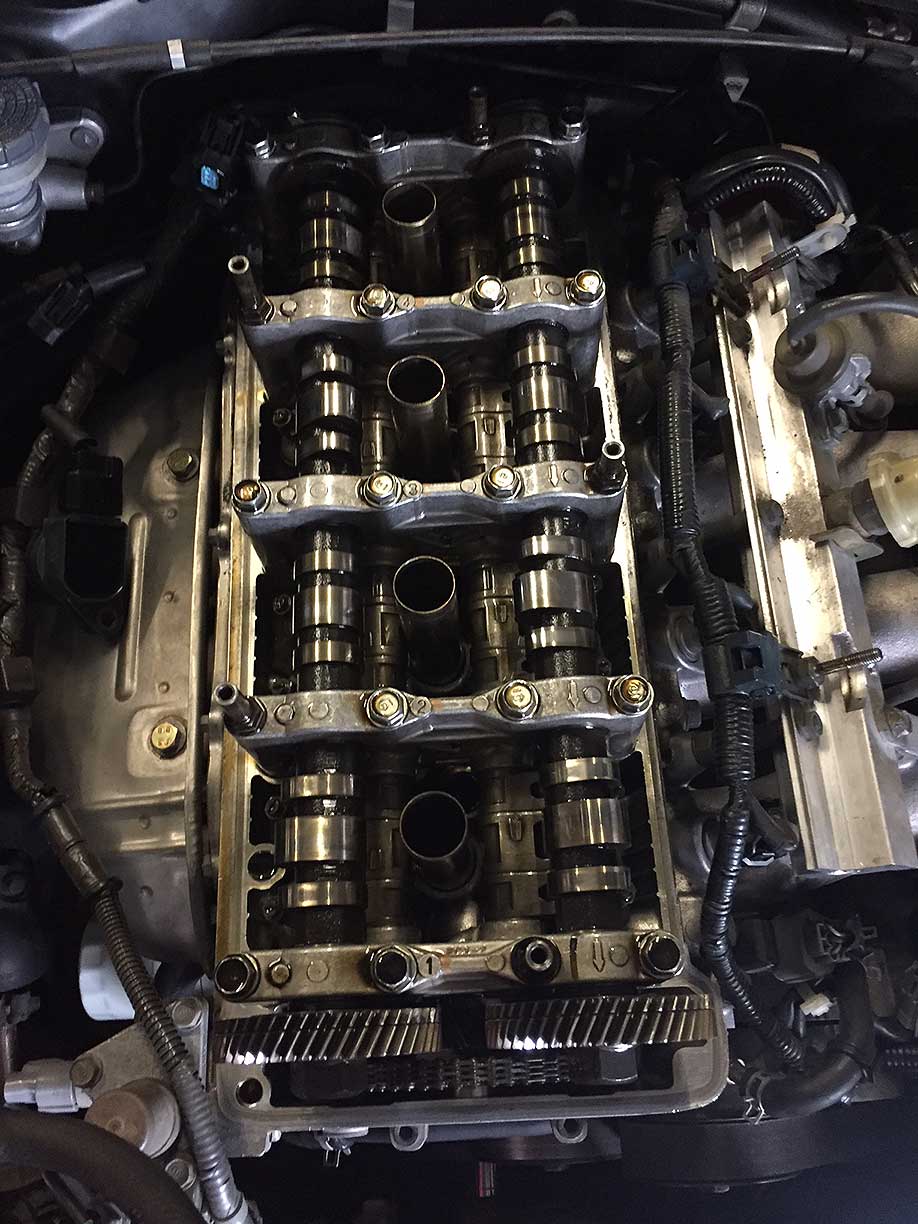
I also did a valve adjustment and inspected the retainers for any signs of cracking - all look good, and valves were mostly in spec so it seems the car has been decently maintained in the past.
Cheers
Earlysport
The EPS steering had more assistance to the right than left, and wouldn't complete the re-centering procedure, so I ordered a new torque sensor. When it arrived I learnt something new about torque sensors. The part I ordered is for an 08 CR and is identical in outward appearance to my AP1 sensor, except one important fact. the Left hand drive and right hand drive sensors have the pinion splined the opposite way.
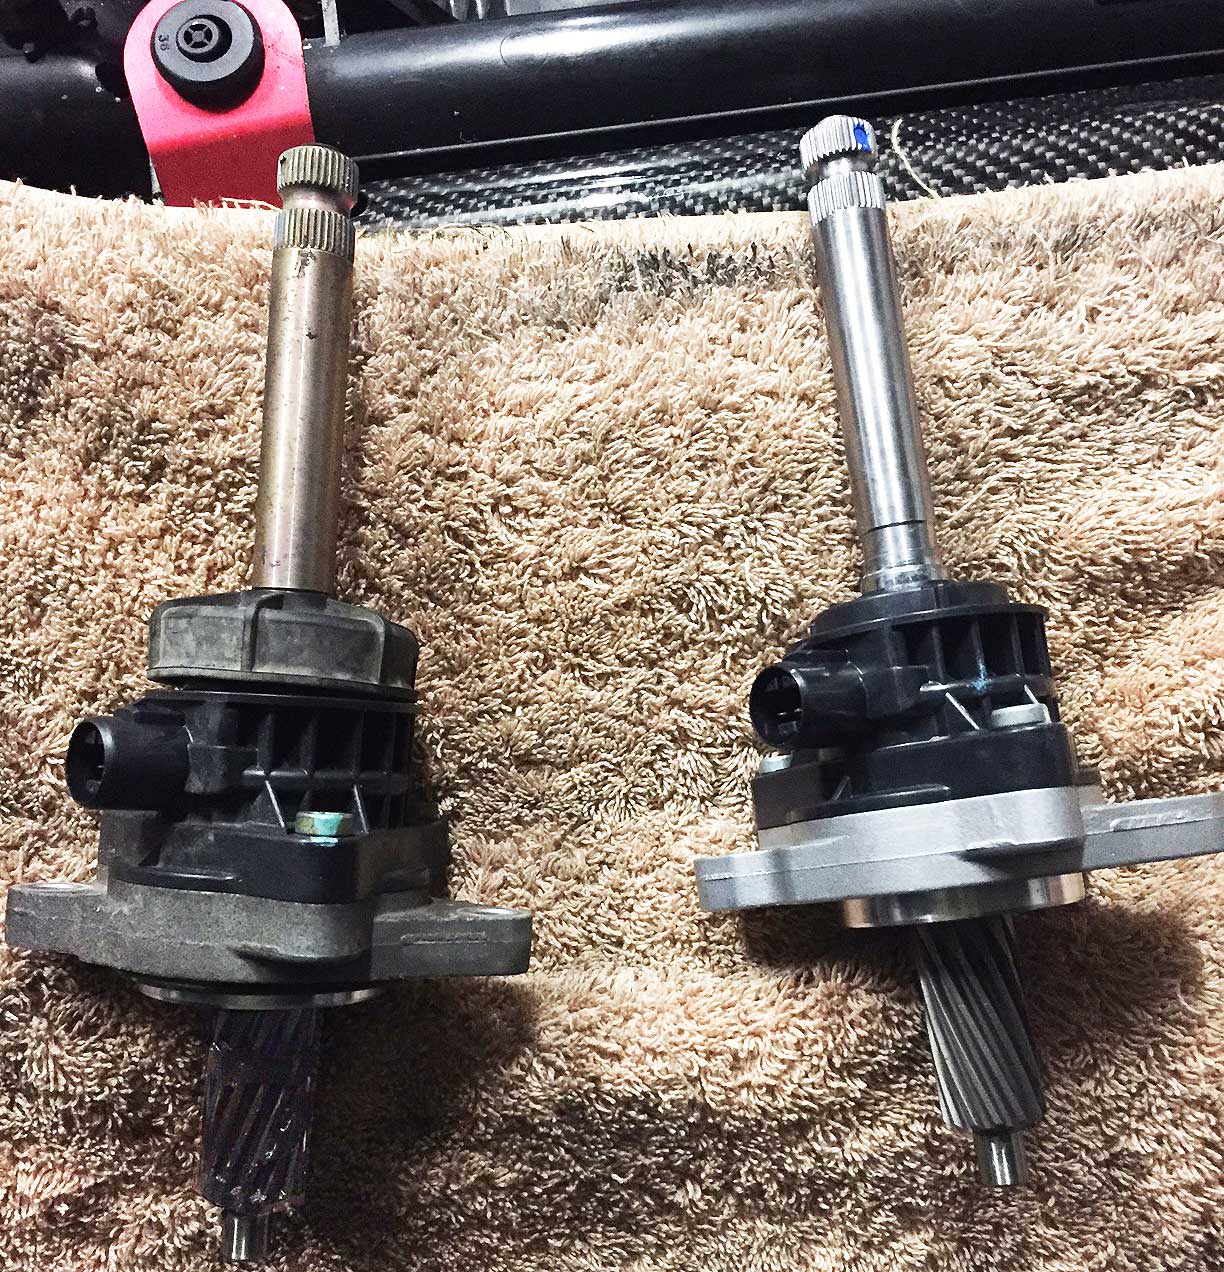
Damn. Buying Honda parts in Australia is ridiculous (like 3 times the price) hence buying from the USA or elsewhere. So I'm faced with either buying from Japan, or I believe I can swap the electronic module off the new sensor onto mine and see if that's where the issue is. I can also clean out the mechanical part of the old sensor while it is apart which may help. Fingers crossed.
I also did a valve adjustment and inspected the retainers for any signs of cracking - all look good, and valves were mostly in spec so it seems the car has been decently maintained in the past.
Cheers
Earlysport
The following users liked this post:
Mauro (03-24-2019)
02-07-2017, 02:23 PM
#10
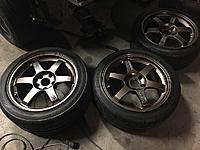
I also finally tracked down the exact wheels I wanted to run. Old school Rays TE37's. I refinished them in bronze with new OEM decals, and wrapped them in RE11's. It will be a staggered setup - 8.5" ET40 front (235's) and 9.5" ET40 rear with 255's. As I'm going to be driving the car hard and want maximum performance I'll be running camber and toe settings that reflect that, rather than camber to make the wheel and tyre fit. Likely -2.5 front and -2 rear. That meant I had to pump the shit out of the rear guards to fit the ET40 wheels with a 255. Probably pushed them out 10mm at least, About as far as they would go without buckling the guard up above the fender lip or cutting the inner guard from the outer. Anyway after the work the fitment is real nice.
Cheers,
Earlysport

Cheers,
Earlysport