Kenny_Stang's build thread: GPW content inside!
 06-02-2017, 07:02 AM
#101


Thread Starter

So I am way overdue with some updates, so will try to cover some of the changes to the car. Not long after my last update I did another track day at MSR-C.

The car ran great, but after the first session I lost one of the Longacre splitter support rods, and had some concerning squeaking coming from the brakes. So I decided to end my day early and left at lunch after 3 sessions.
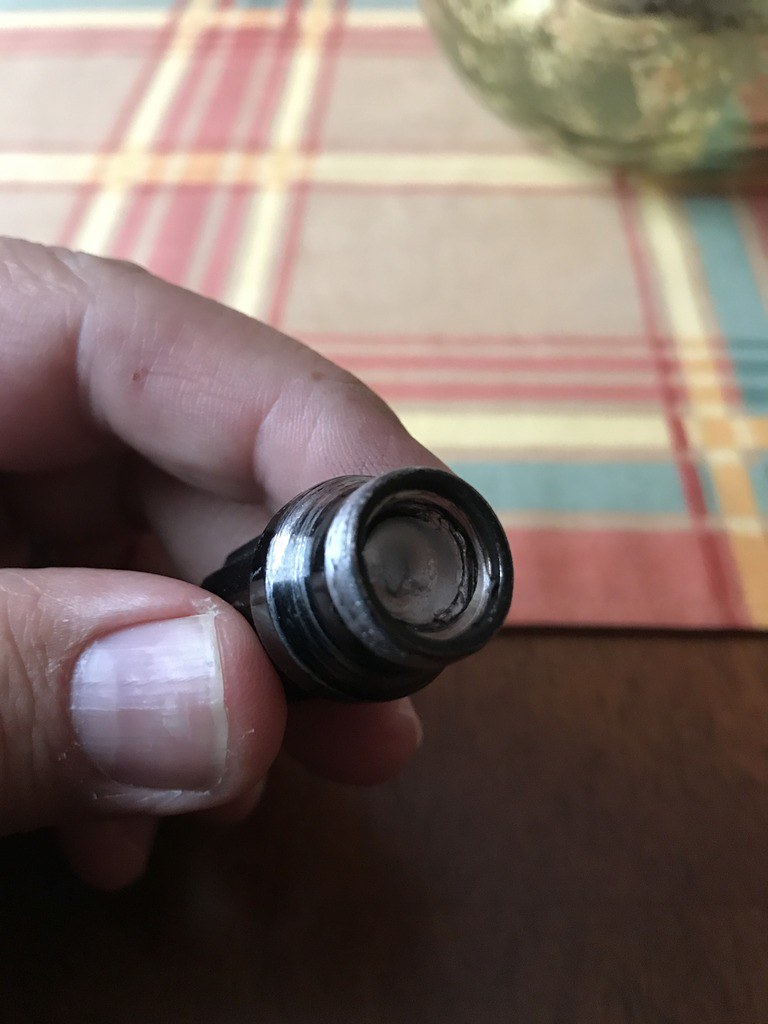
During the week I decided to do a complete check of the entire braking system to make sure there was no binding, and that everything was working as expected. During this process as I was taking off the lug nuts on the front wheel, one of the studs broke off.
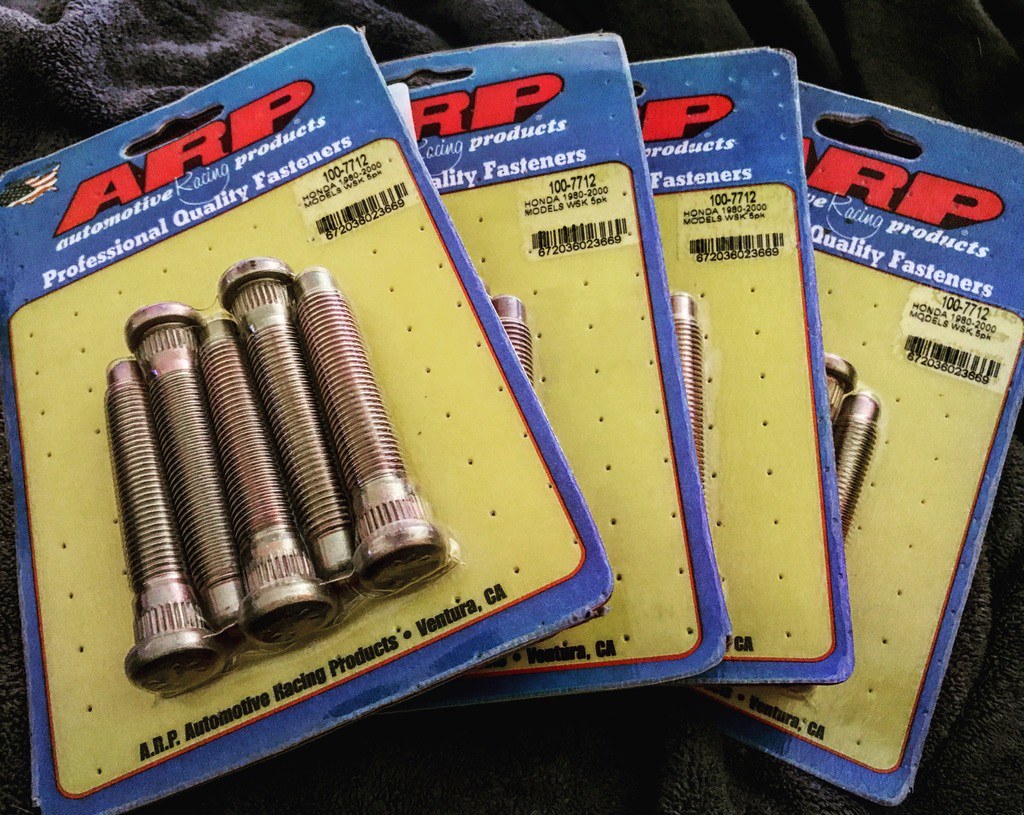
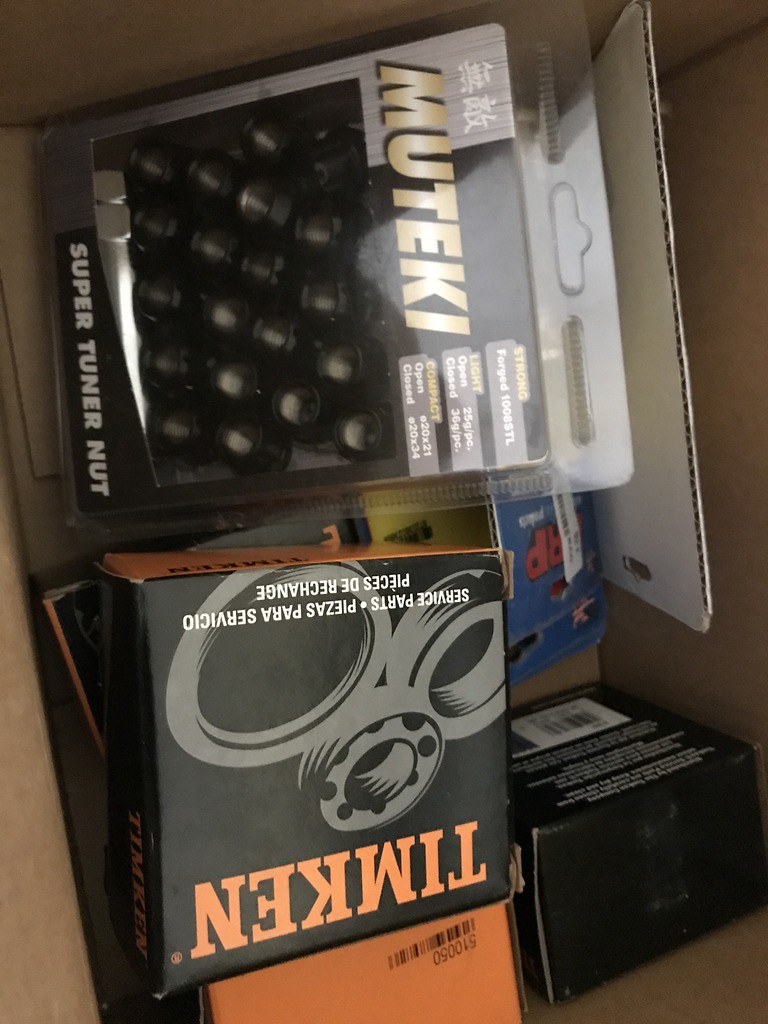
I decided to go ahead and replace all of the studs with ARP extended studs as well as the wheel bearings with Timken OE replacements and the lug nuts with open end Muteki acorn nuts
While trying to get the Axle Nut off the rear wheels I ended up breaking two 24" 1/2" breaker bars, the axle nut would not budge.

Rather than break any more tools (and cause further damage to my ego) I decided to put everything back together and take the car to John Wallace to have him take care of them for me. I made sure I torqued all lug nuts back to 80 ft/lbs and had my wife follow me just in case something went wrong. This was a good idea as I was a couple of miles from John's house when I started feeling a vibration coming from the rear passenger wheel. I pulled over at a gas station and found that 4 of the 5 lug nuts on the rear wheel had come loose and were close to falling off completely.
It appears that a couple of different items caused this to happen, first of all the plastic hubcentric ring in that wheel had become deformed/melted from tracking the car. So when I torqued the lug nuts on that side they seemed to be fully torqued, but after driving the hubcentric ring moved and the lugs were too loose and the vibrations caused them to back out. Also it appears that my Gorrilla Extended Lug Nuts which I had originally purchased to use with my Forgestar F14's were not properly seating against the seat of the TR Motorsports C3 wheels. Fortunately I had purchased new Muteki lug nuts to replace the Gorilla ones.
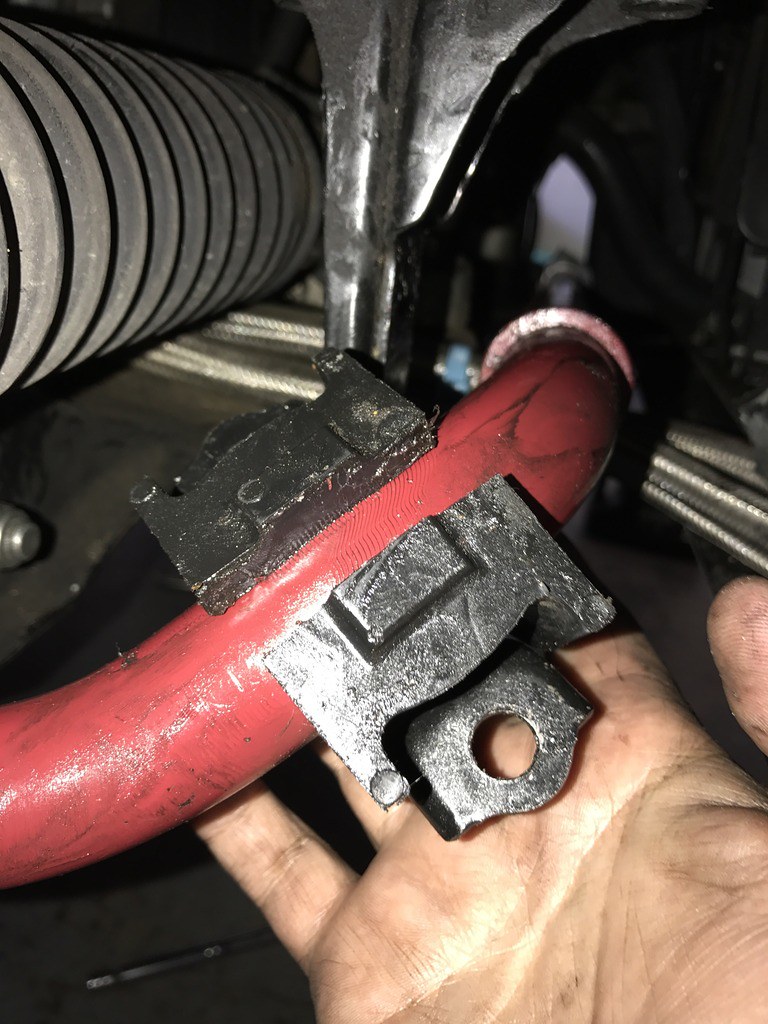
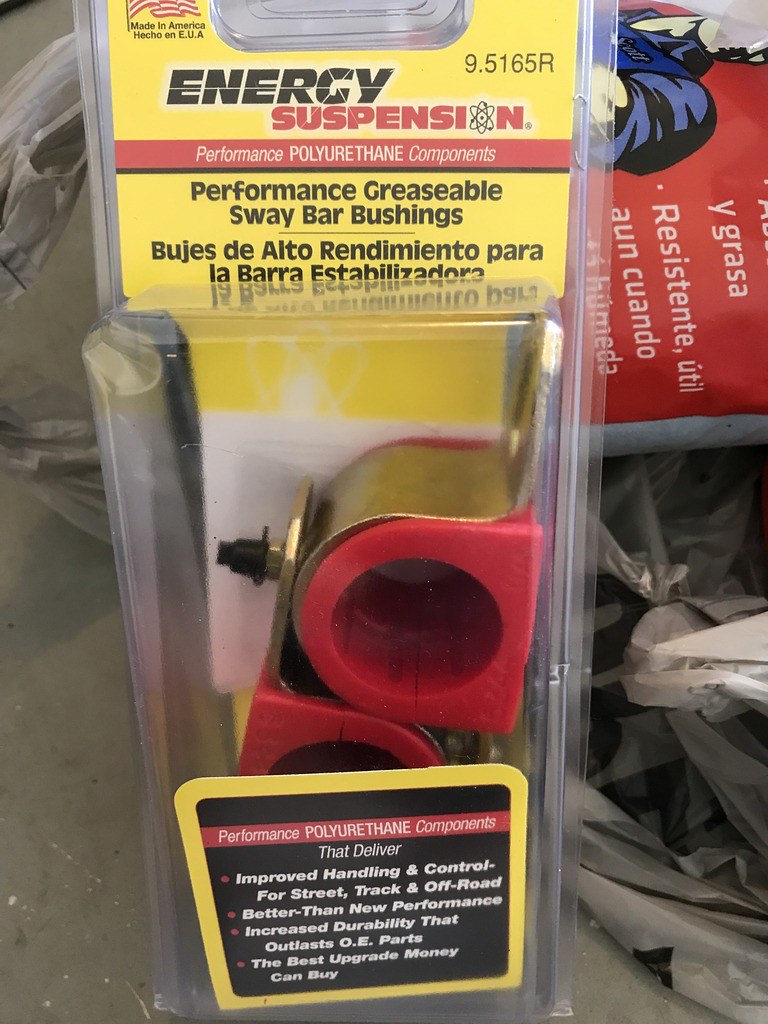
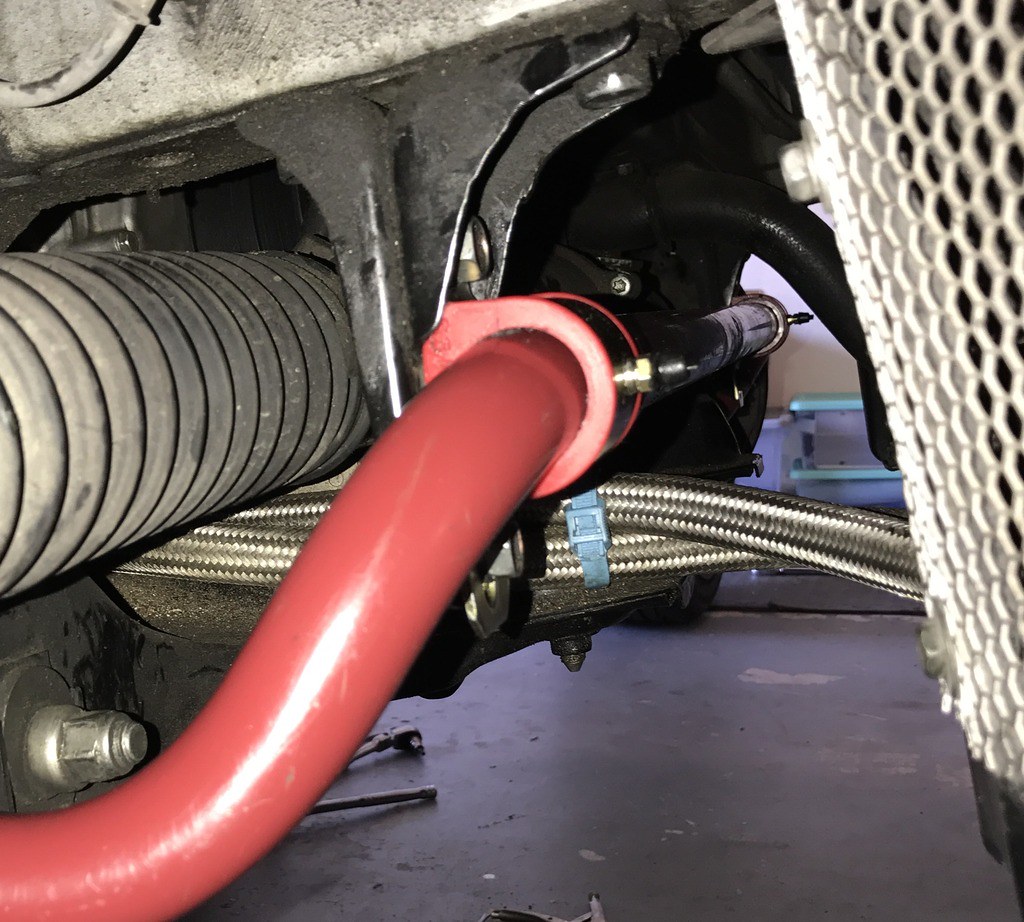
After getting the car back from John (who ended up having to use a 3 foot long 3/4" breaker bar with a cheater bar to get the axle nuts off) I decided to also address a couple of other items. A few months before I had purchased a set of used Eibach front and rear swaybars and wanted to get these installed. Halfway through the install I found that the supplied swaybar bushings were not the correct ones, and would not allow the bracket to be installed. Fortunately I was able to find some Energy Suspension bushings at my local AutoZone that worked. I only ended up doing the front swaybar as I have read that the softer AP2 S2000 rear swaybar is prefered.
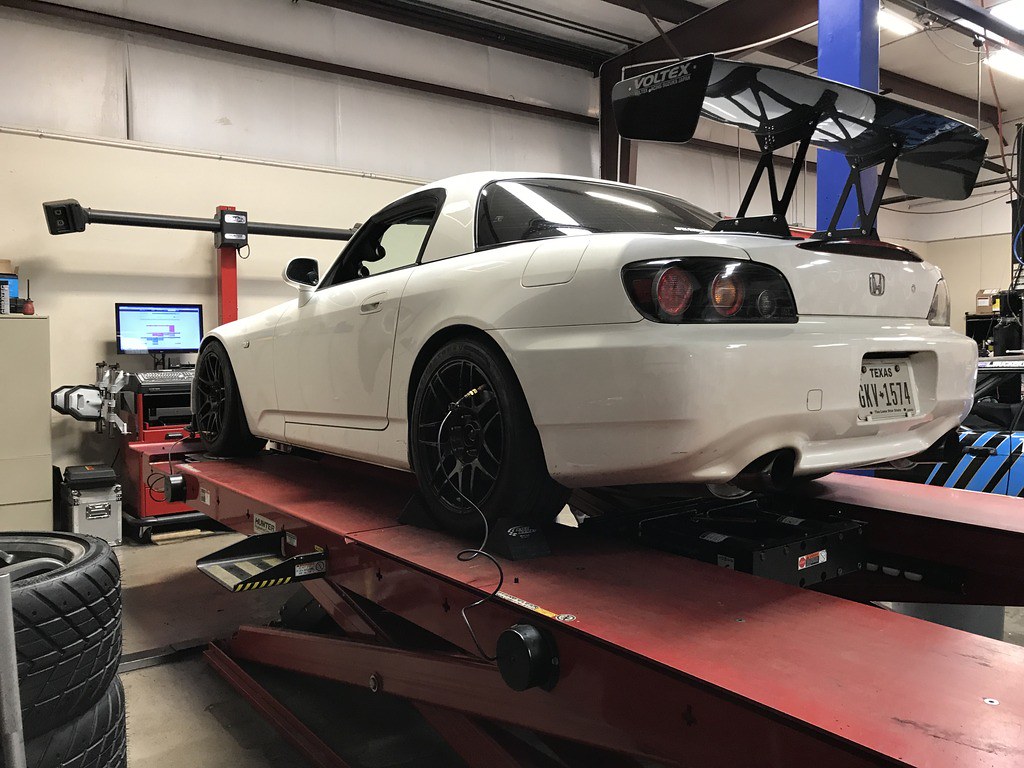
After getting the swaybar installed and having to take the knuckles off to have the new studs and bearings pressed in, I thought it was a good idea to have the alignment checked and updated at Texas Track Works.
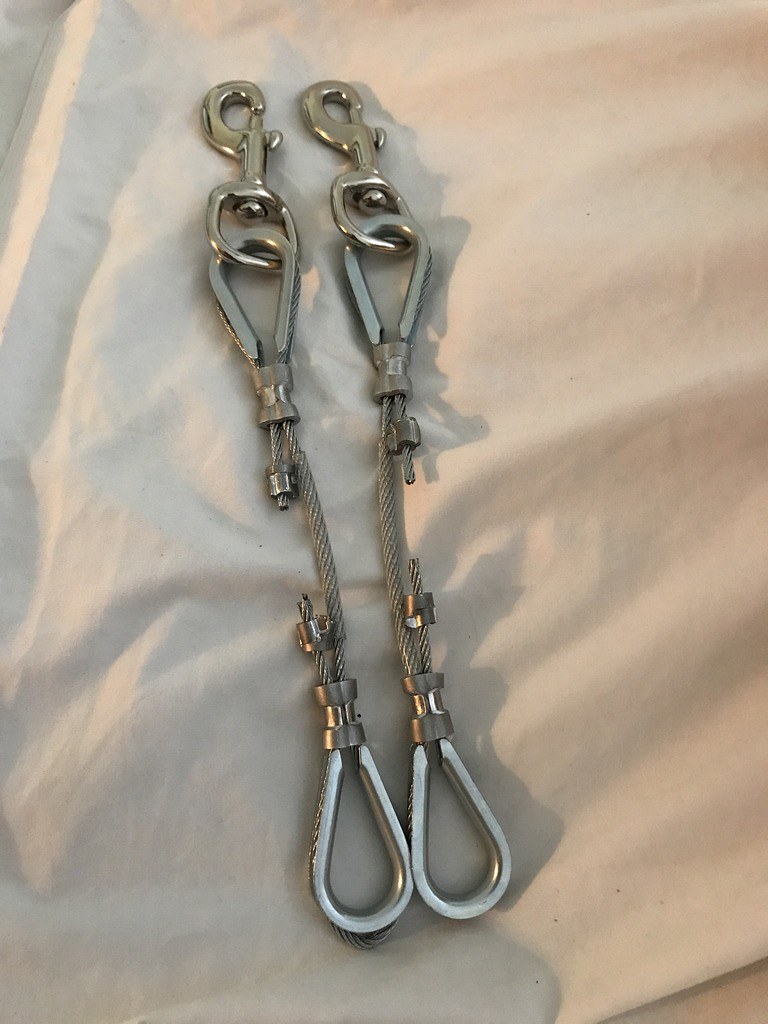
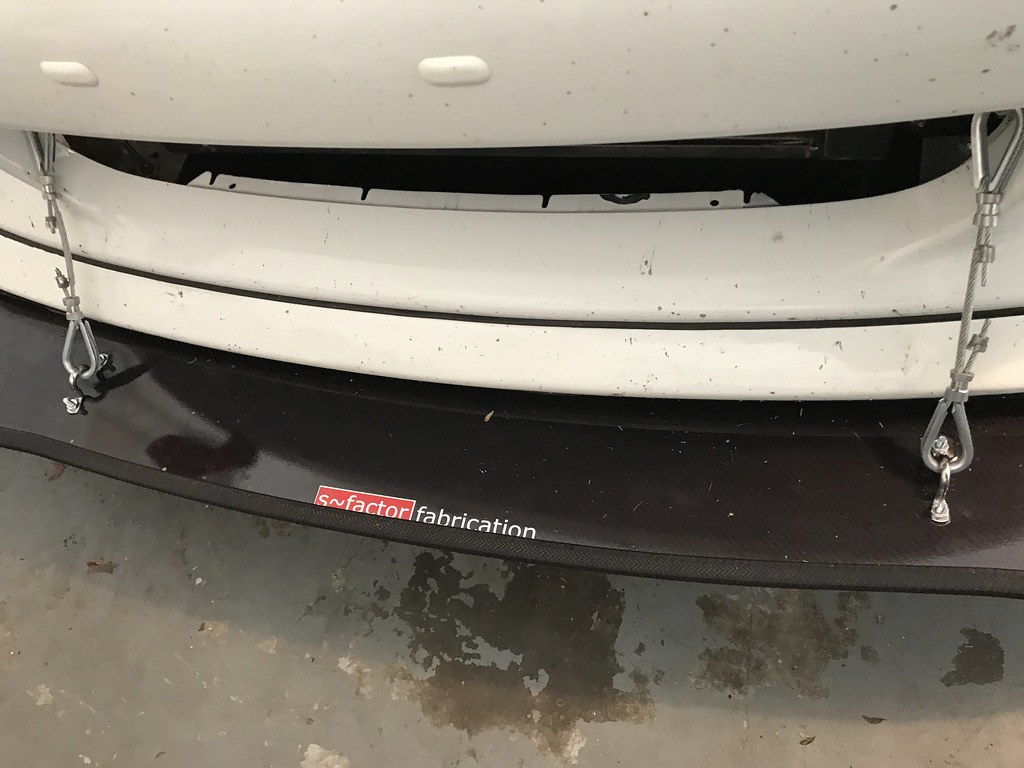
Another trick I picked up from John was to use steel cable for the splitter supports rather than using splitter rods. This gives the splitter the ability to flex upwards if you have a bad off, rather than being solid and digging in and causing more damage.
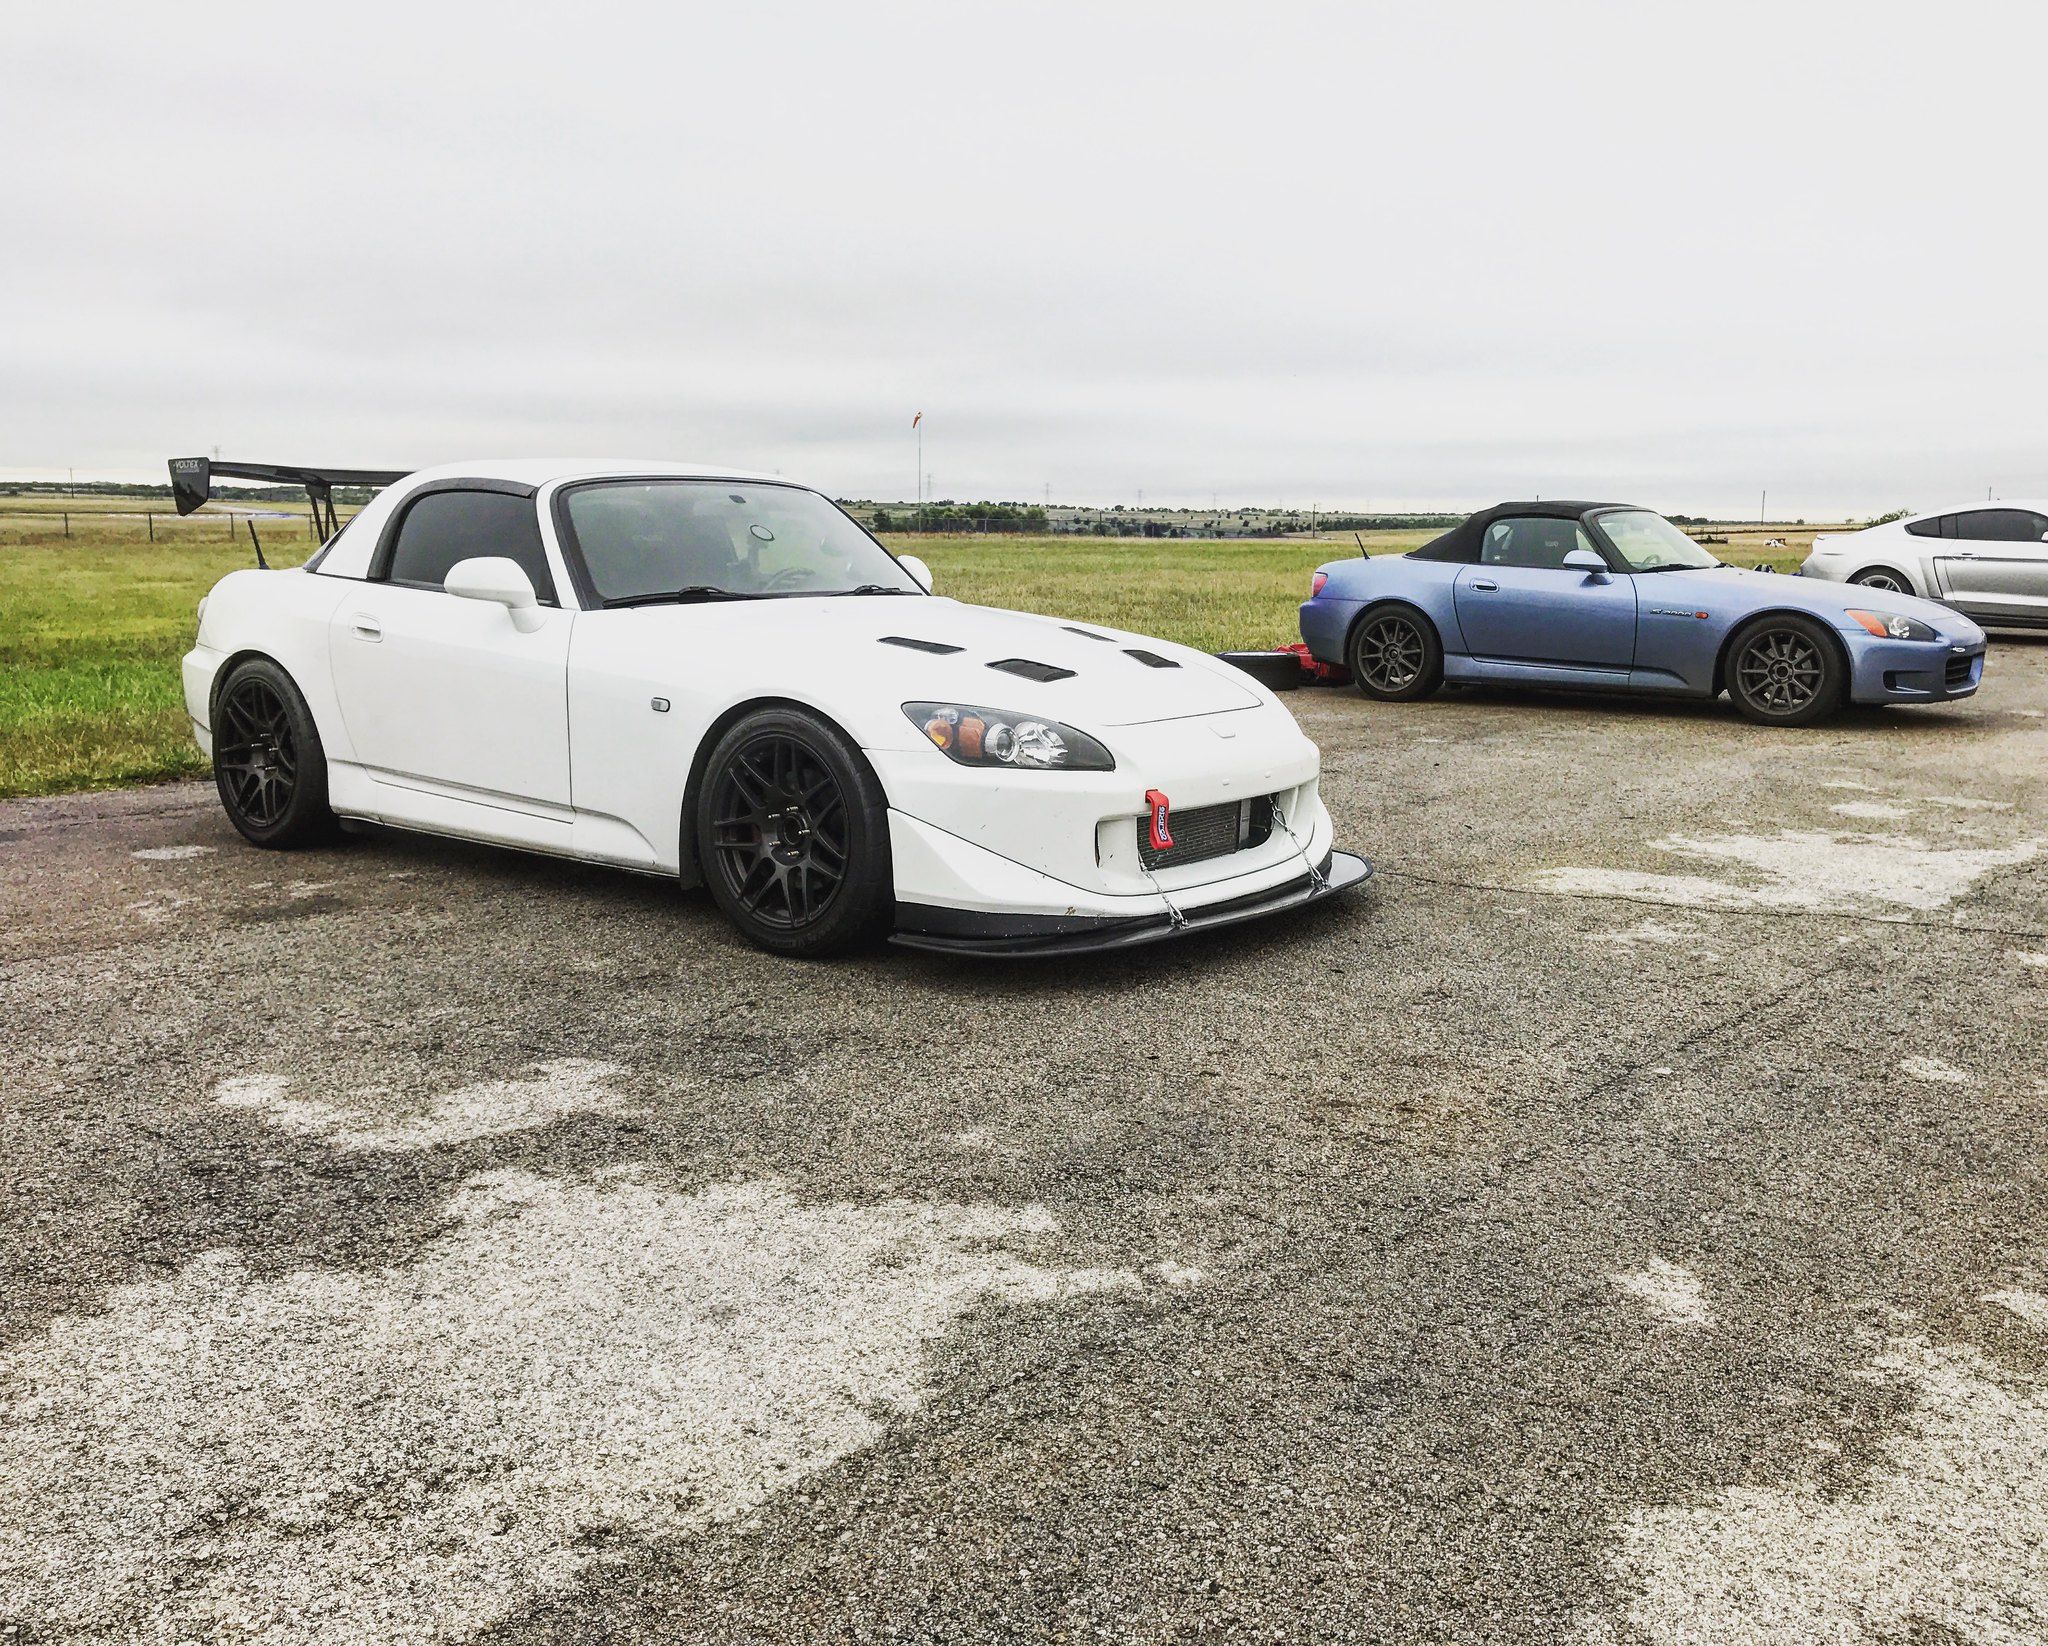
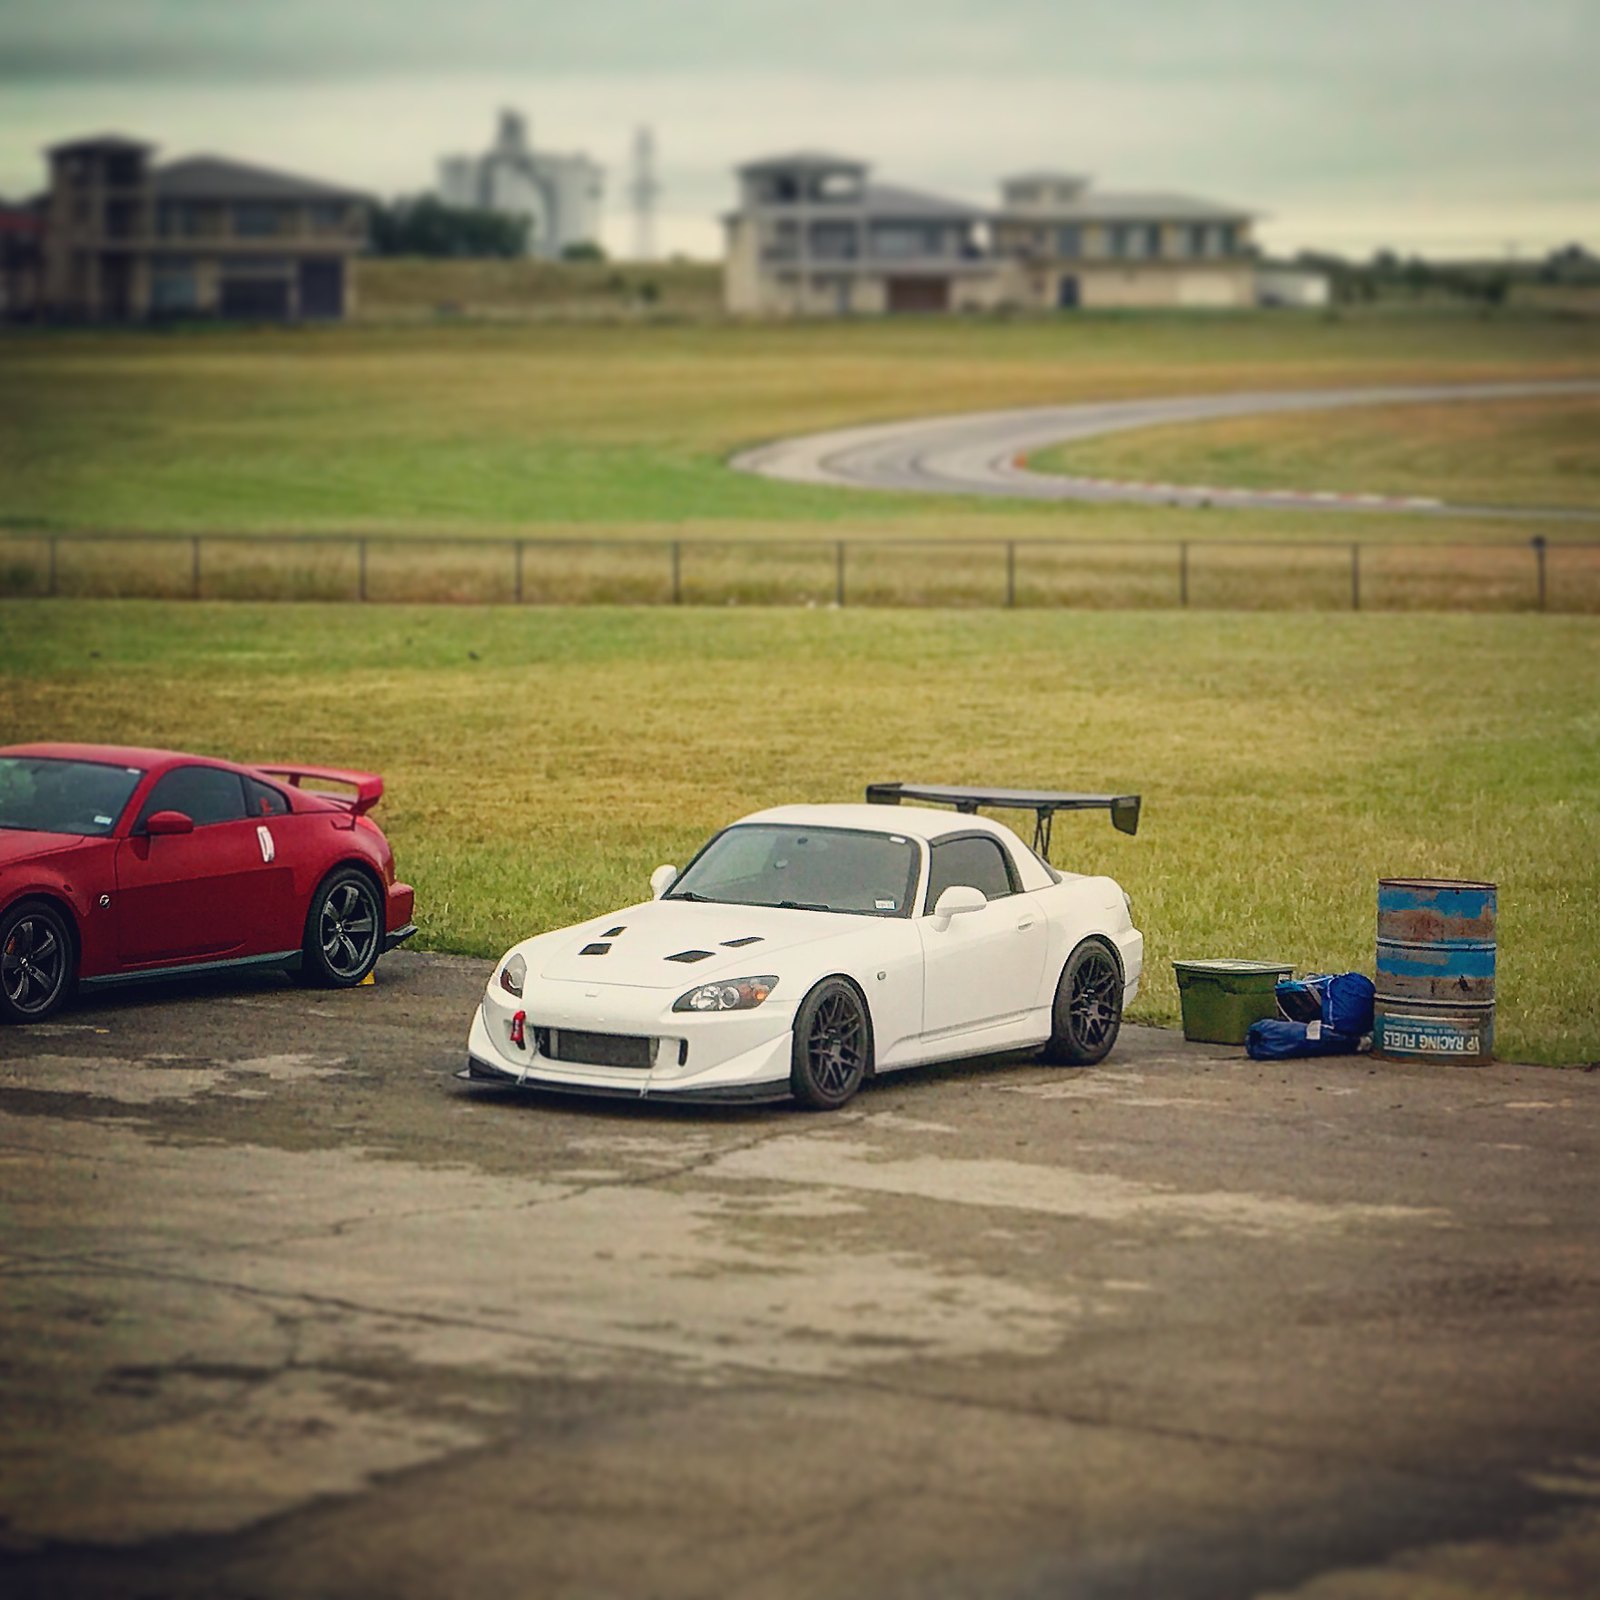
My next track day was great, we ran the 1.3 "short" course as MSR-C and this is by far my favorite configuration. The day started cool and the track was damp, fortunately the rain stayed away and was able to get some good runs in.
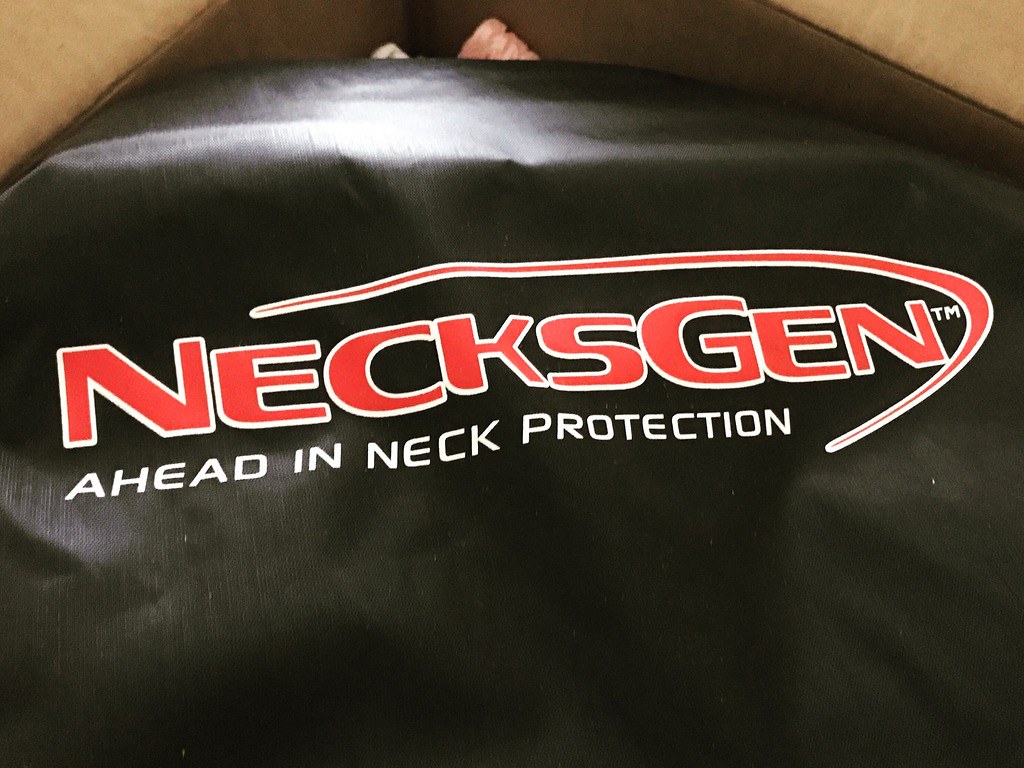
That's it for now, will be taking a few months off from doing any tracking for the summer. During that time will hopefully be installing my Rockstar Garage roll bar and 5 point harnesses. Also picked up a NecksGen Rev HNR for use once I get the roll bar and harnesses installed.
The car ran great, but after the first session I lost one of the Longacre splitter support rods, and had some concerning squeaking coming from the brakes. So I decided to end my day early and left at lunch after 3 sessions.
During the week I decided to do a complete check of the entire braking system to make sure there was no binding, and that everything was working as expected. During this process as I was taking off the lug nuts on the front wheel, one of the studs broke off.
I decided to go ahead and replace all of the studs with ARP extended studs as well as the wheel bearings with Timken OE replacements and the lug nuts with open end Muteki acorn nuts
While trying to get the Axle Nut off the rear wheels I ended up breaking two 24" 1/2" breaker bars, the axle nut would not budge.
Rather than break any more tools (and cause further damage to my ego) I decided to put everything back together and take the car to John Wallace to have him take care of them for me. I made sure I torqued all lug nuts back to 80 ft/lbs and had my wife follow me just in case something went wrong. This was a good idea as I was a couple of miles from John's house when I started feeling a vibration coming from the rear passenger wheel. I pulled over at a gas station and found that 4 of the 5 lug nuts on the rear wheel had come loose and were close to falling off completely.
It appears that a couple of different items caused this to happen, first of all the plastic hubcentric ring in that wheel had become deformed/melted from tracking the car. So when I torqued the lug nuts on that side they seemed to be fully torqued, but after driving the hubcentric ring moved and the lugs were too loose and the vibrations caused them to back out. Also it appears that my Gorrilla Extended Lug Nuts which I had originally purchased to use with my Forgestar F14's were not properly seating against the seat of the TR Motorsports C3 wheels. Fortunately I had purchased new Muteki lug nuts to replace the Gorilla ones.
After getting the car back from John (who ended up having to use a 3 foot long 3/4" breaker bar with a cheater bar to get the axle nuts off) I decided to also address a couple of other items. A few months before I had purchased a set of used Eibach front and rear swaybars and wanted to get these installed. Halfway through the install I found that the supplied swaybar bushings were not the correct ones, and would not allow the bracket to be installed. Fortunately I was able to find some Energy Suspension bushings at my local AutoZone that worked. I only ended up doing the front swaybar as I have read that the softer AP2 S2000 rear swaybar is prefered.
After getting the swaybar installed and having to take the knuckles off to have the new studs and bearings pressed in, I thought it was a good idea to have the alignment checked and updated at Texas Track Works.
Another trick I picked up from John was to use steel cable for the splitter supports rather than using splitter rods. This gives the splitter the ability to flex upwards if you have a bad off, rather than being solid and digging in and causing more damage.
My next track day was great, we ran the 1.3 "short" course as MSR-C and this is by far my favorite configuration. The day started cool and the track was damp, fortunately the rain stayed away and was able to get some good runs in.
That's it for now, will be taking a few months off from doing any tracking for the summer. During that time will hopefully be installing my Rockstar Garage roll bar and 5 point harnesses. Also picked up a NecksGen Rev HNR for use once I get the roll bar and harnesses installed.
Last edited by Kenny_Stang; 07-13-2017 at 07:24 AM. Reason: Updating links to Flickr
 06-02-2017, 02:06 PM
#102

Just finished reading the whole thread, love the detail. For the cable splitter supports, I've always wanted to make a "collapsible" support rod, so (like you said) the splitter can flex up on curbs and small oopsies, but still hold 100% weight without stretching over time like cables do. Is that something you might want to try out?
06-03-2017, 07:30 AM
#103
Thread Starter
Just finished reading the whole thread, love the detail. For the cable splitter supports, I've always wanted to make a "collapsible" support rod, so (like you said) the splitter can flex up on curbs and small oopsies, but still hold 100% weight without stretching over time like cables do. Is that something you might want to try out?
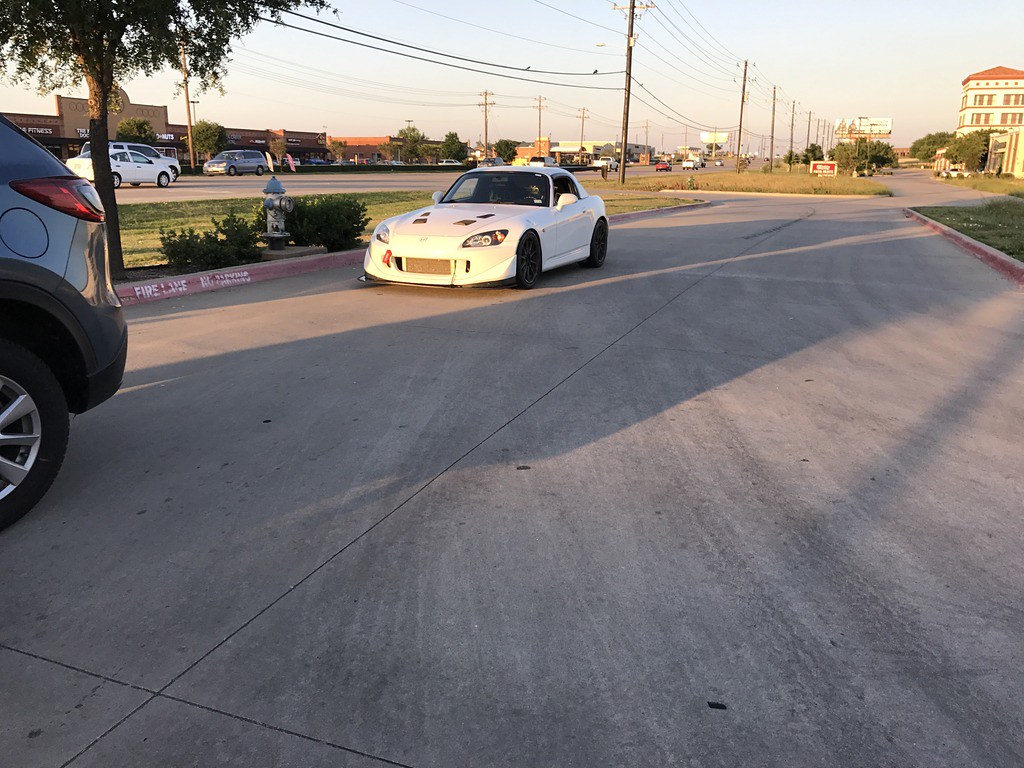
Basically the splitter support cables perform the same a collapsible rod would, allows the splitter to flex up but keeps the splitter firm under normal conditons. I actually had a chance to test it that same track day, as you can probably see in the picture of them installed I had a small off and mowed some grass, the splitter held up perfectly.
06-21-2017, 11:32 AM
#104
Thread Starter
Going through some track day withdrawals so made an illustration of my car using a photo taken from one of my track days

Last edited by Kenny_Stang; 07-13-2017 at 06:41 AM.
06-23-2017, 01:54 PM
#105

nice updates, how was the track day after the sway bar install? what setting did you end up going with (softer/stiffer)? i need to get new swaybar bushings for mine, ill have to see if my local auto parts store has that part number in stock.
06-26-2017, 04:59 AM
#106
Thread Starter
The car felt great, I ended up using the stiffest setting and kept the stock AP2 rear bar. I'll have to wait to do a couple of more track days before I get accustomed to the changes the swaybar brings.
07-13-2017, 05:29 AM
#107
Thread Starter
For whatever reason Photobucket has stopped allowing 3rd party linking of their photos, so I am migrating all the photos to Flickr. It's going to take a while to update the thread, but in the time being the pictures can be found here: https://www.flickr.com/gp/152621366@N08/5F6960
07-17-2017, 06:43 AM
#108
Thread Starter
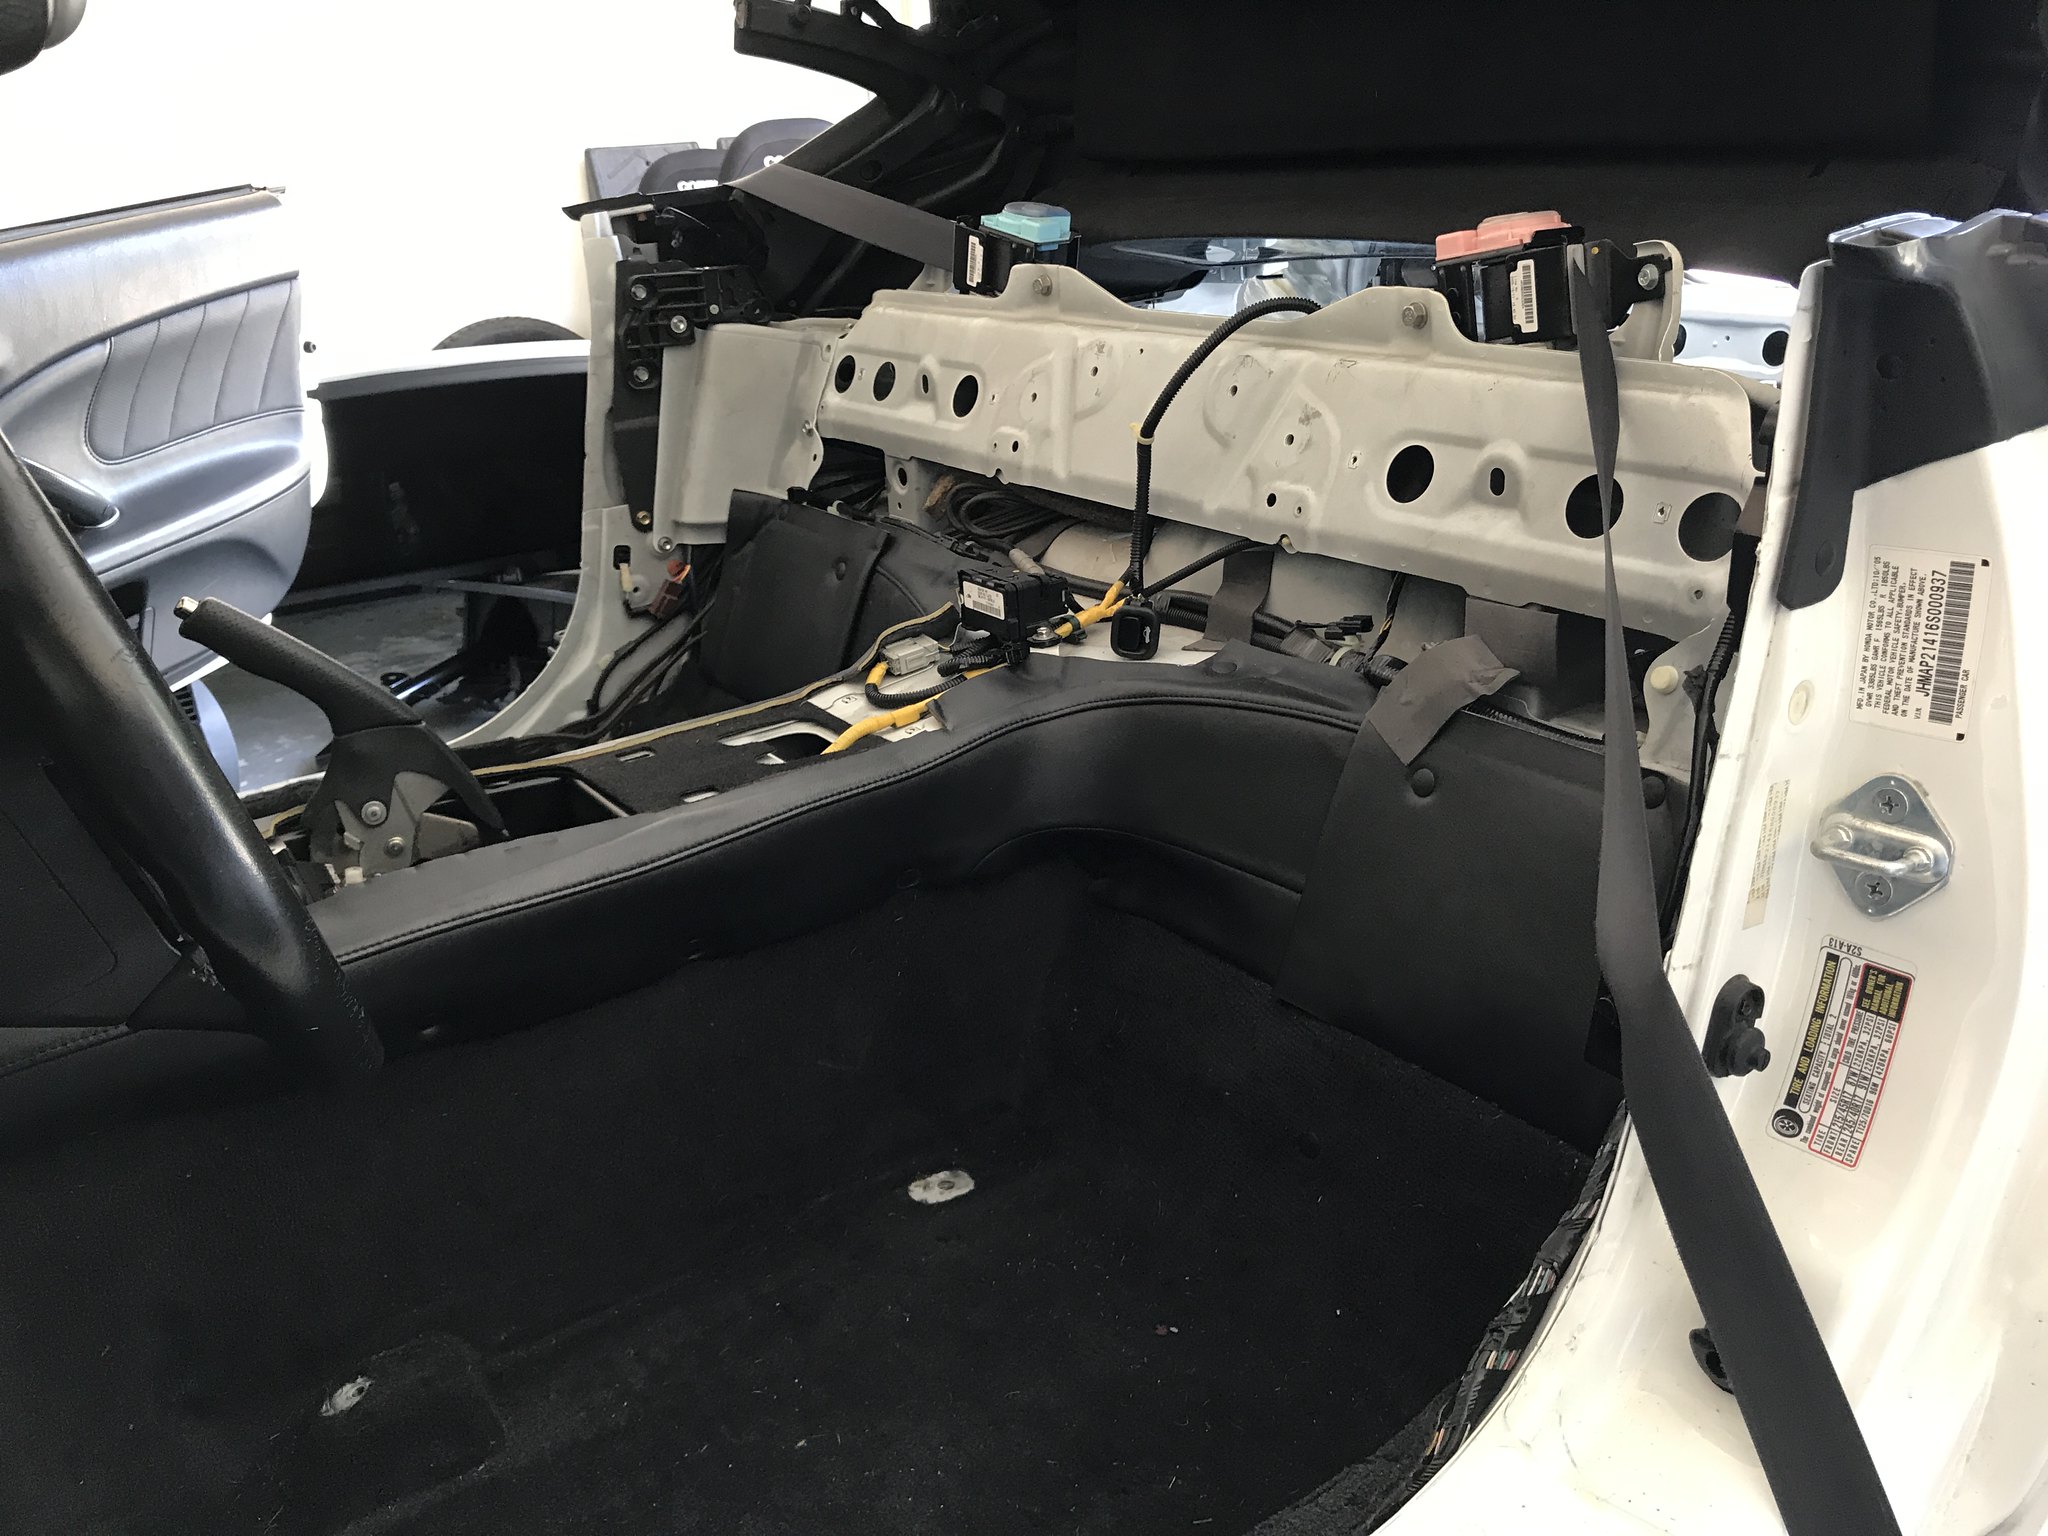
So in preperation for the install of my Rockstar Garage Roll Bar I started pulling the interior of the S2000.
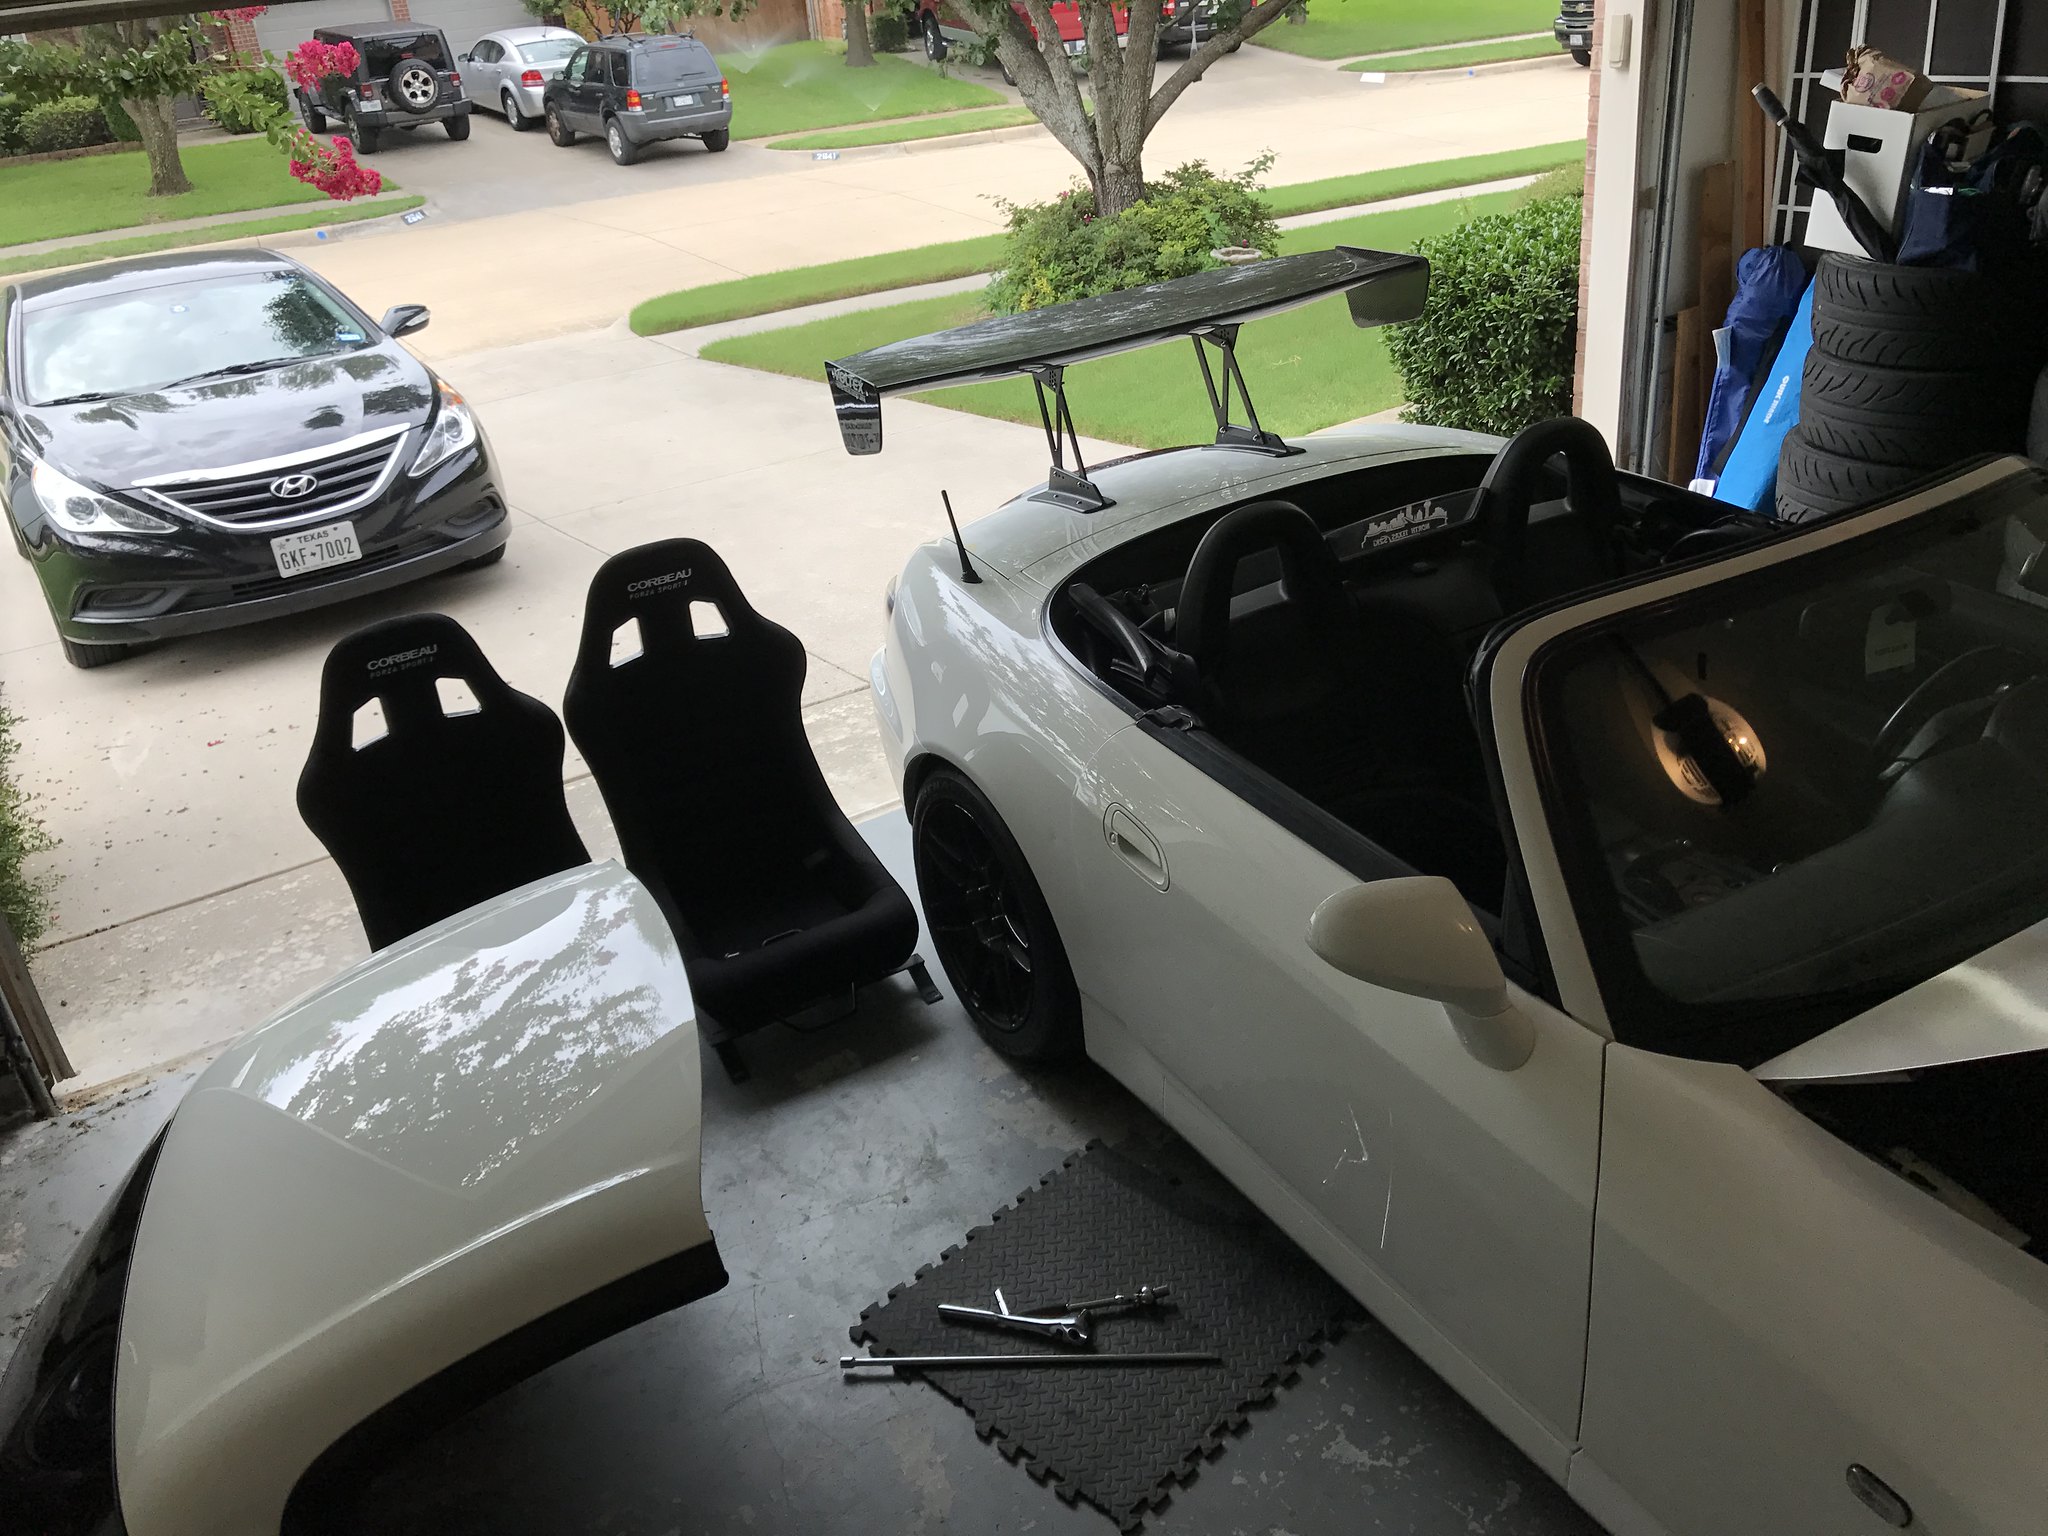
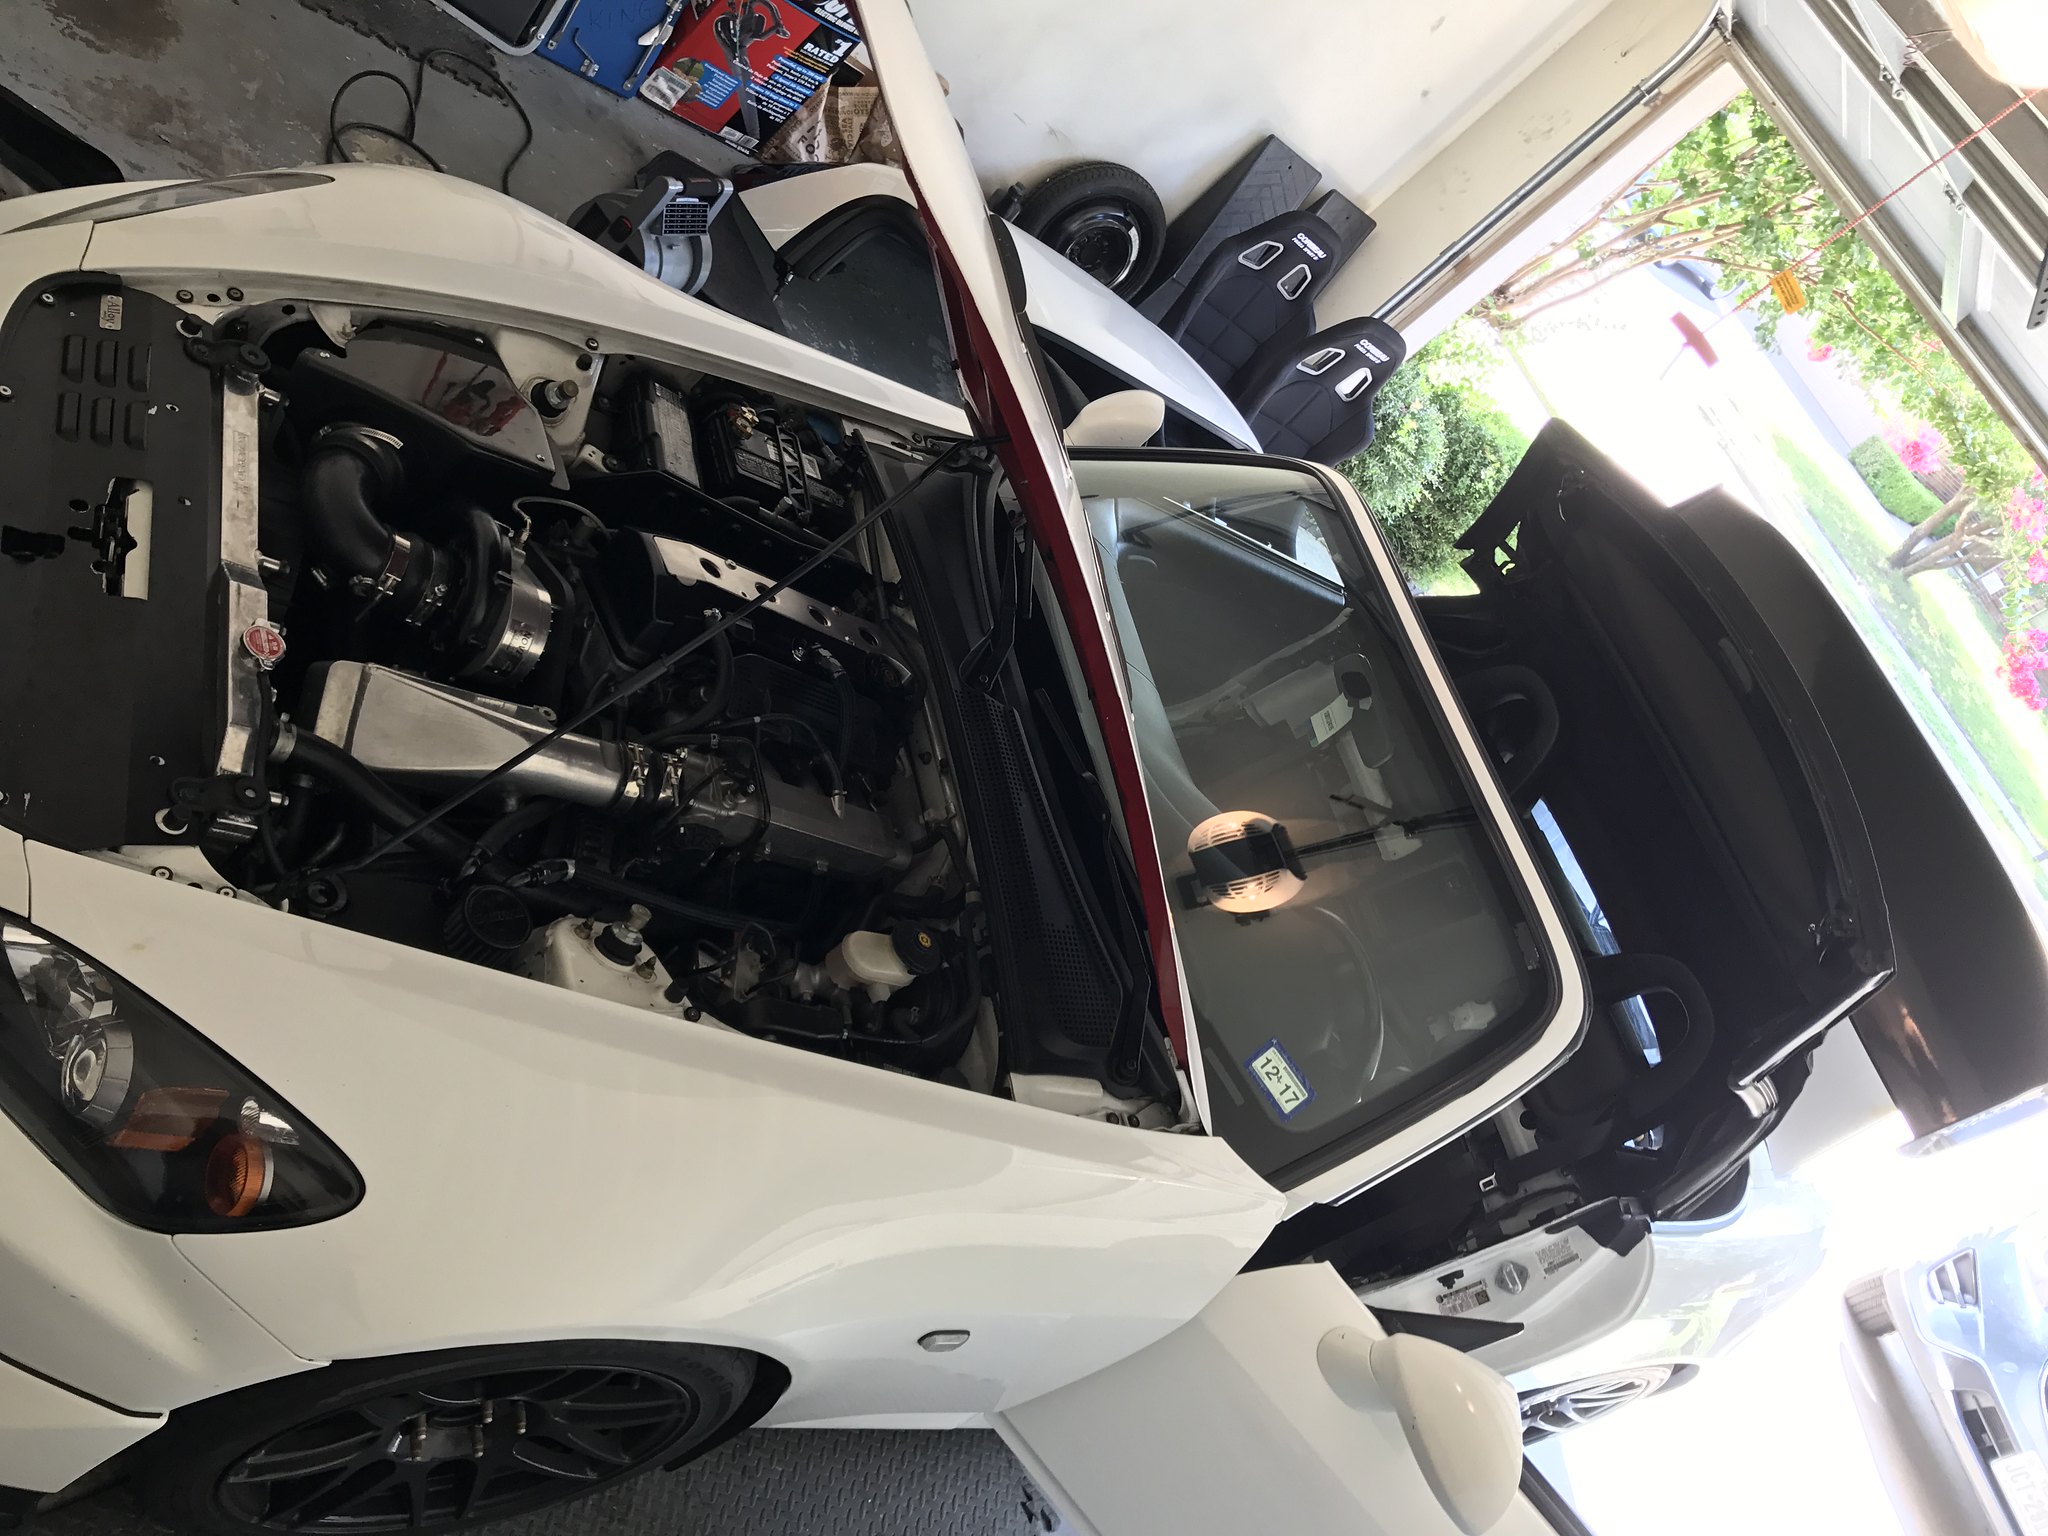
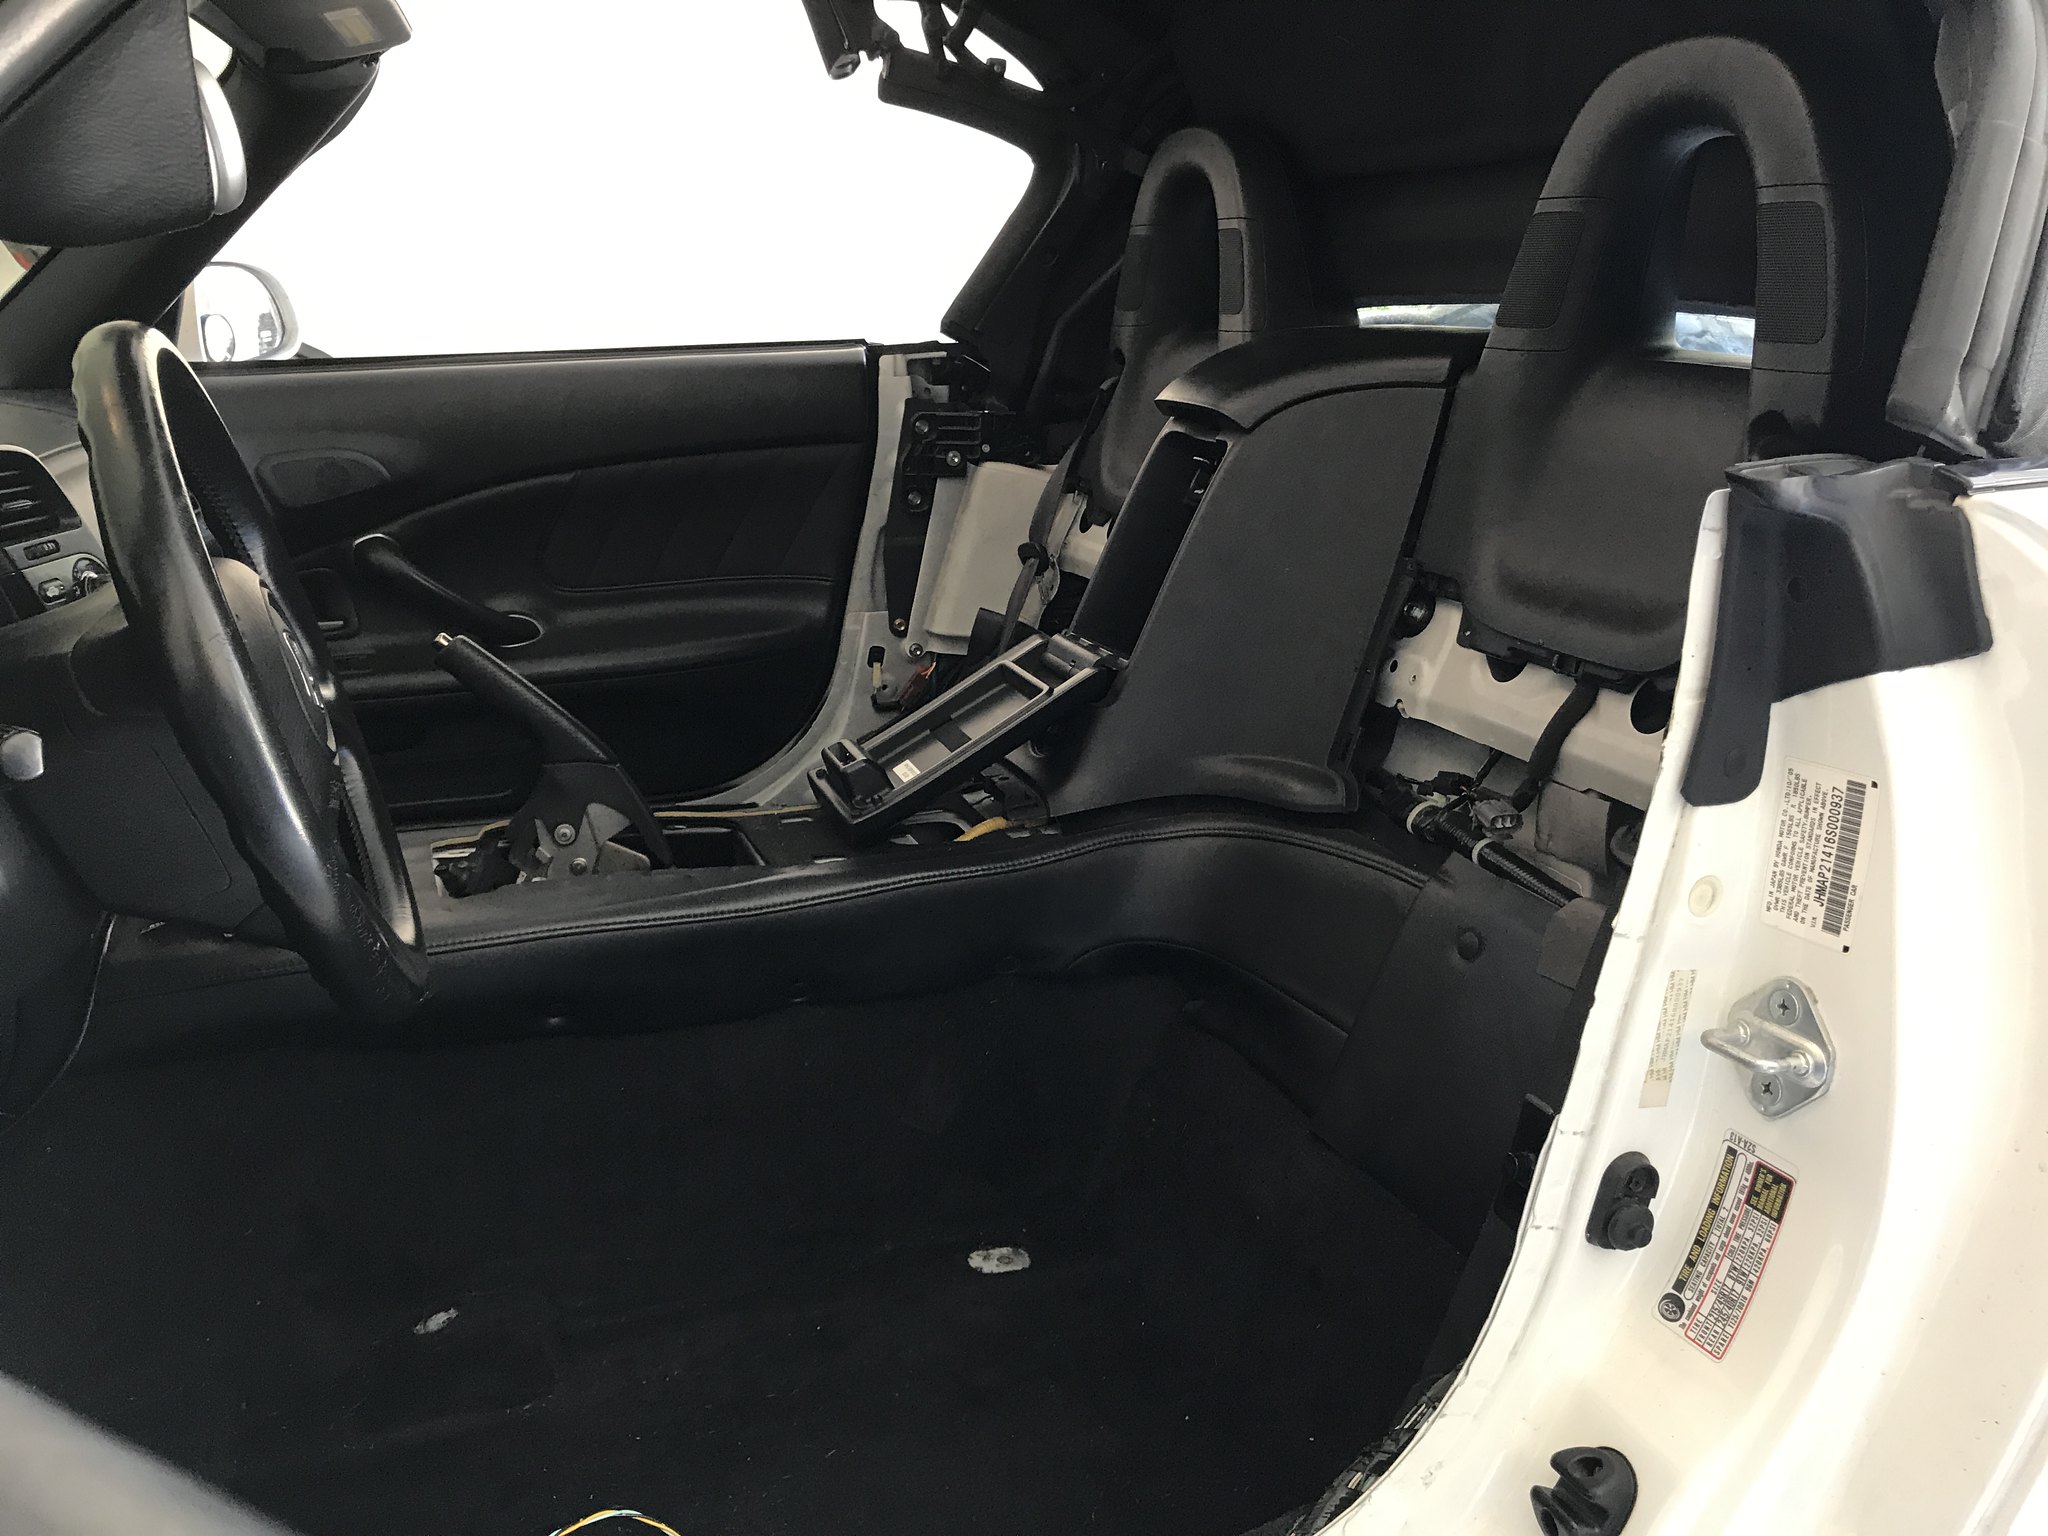
Overall this is fairly easy to do, but some of the bolts require you to be a contortionist, and doing all this during the Texas summer, is not the most enjoyable thing I've ever done. Taking frequent breaks and staying hydrated is really important, I'm also only working during the morning or late evenings. Once it gets over 100 in the garage, I stop.
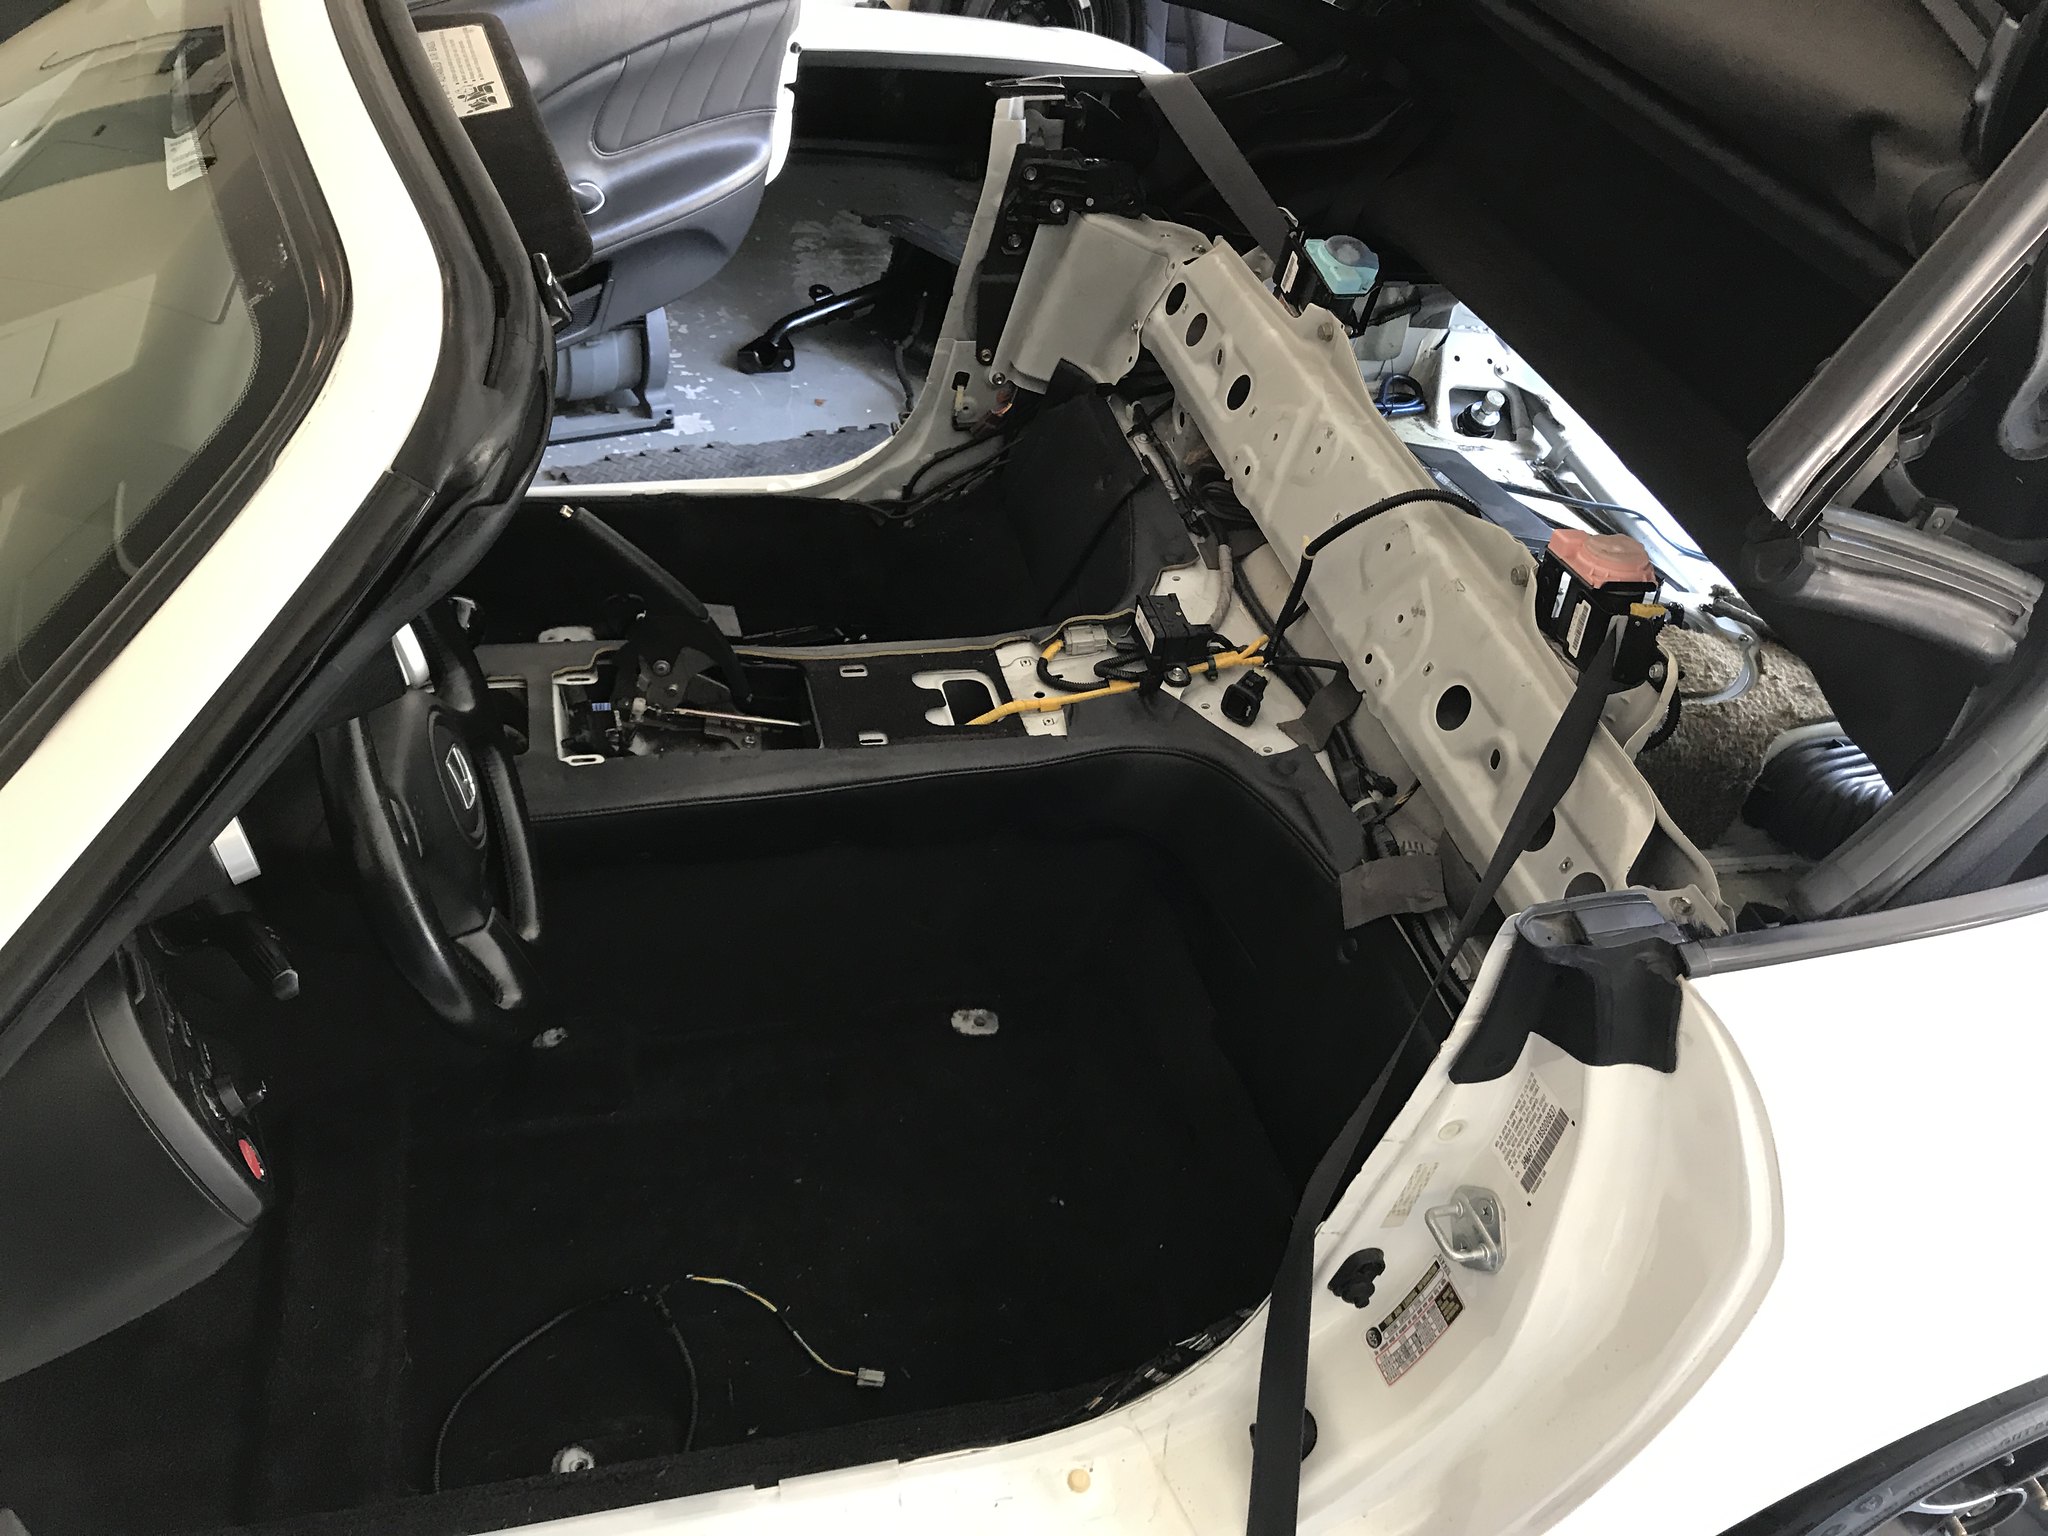
The roll bar should be here on Tuesday, but I probably won't start the install until the weekend.
Overall this is fairly easy to do, but some of the bolts require you to be a contortionist, and doing all this during the Texas summer, is not the most enjoyable thing I've ever done. Taking frequent breaks and staying hydrated is really important, I'm also only working during the morning or late evenings. Once it gets over 100 in the garage, I stop.
The roll bar should be here on Tuesday, but I probably won't start the install until the weekend.
08-11-2017, 05:46 AM
#109
Thread Starter
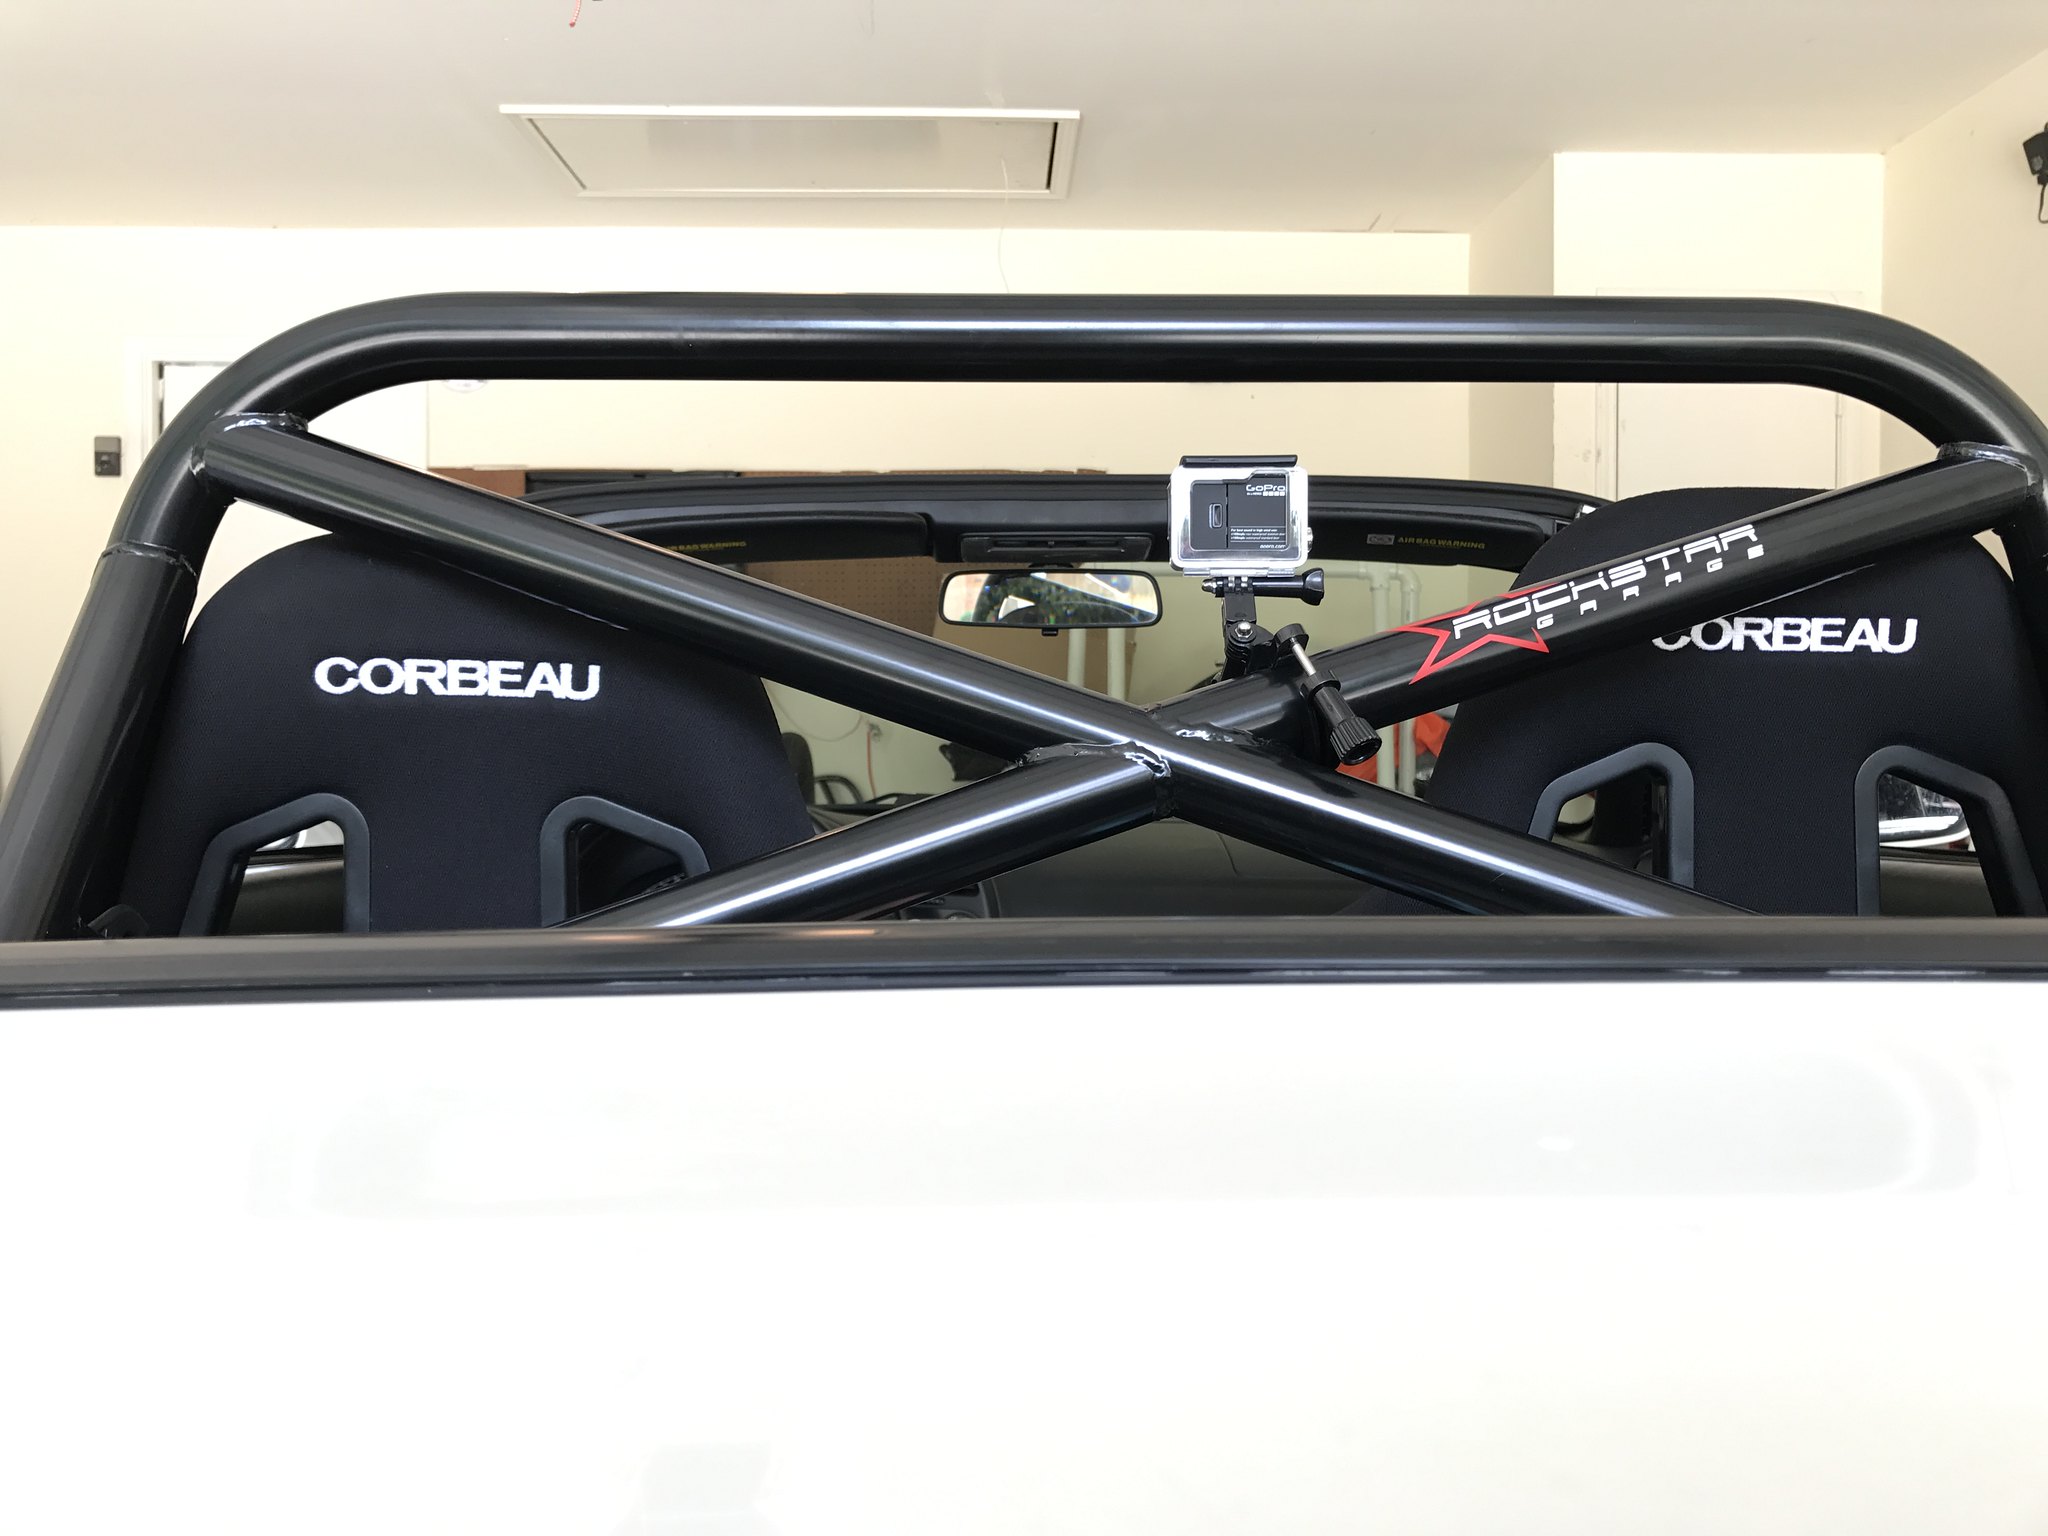
Finally received the Rockstar Garage X Bar
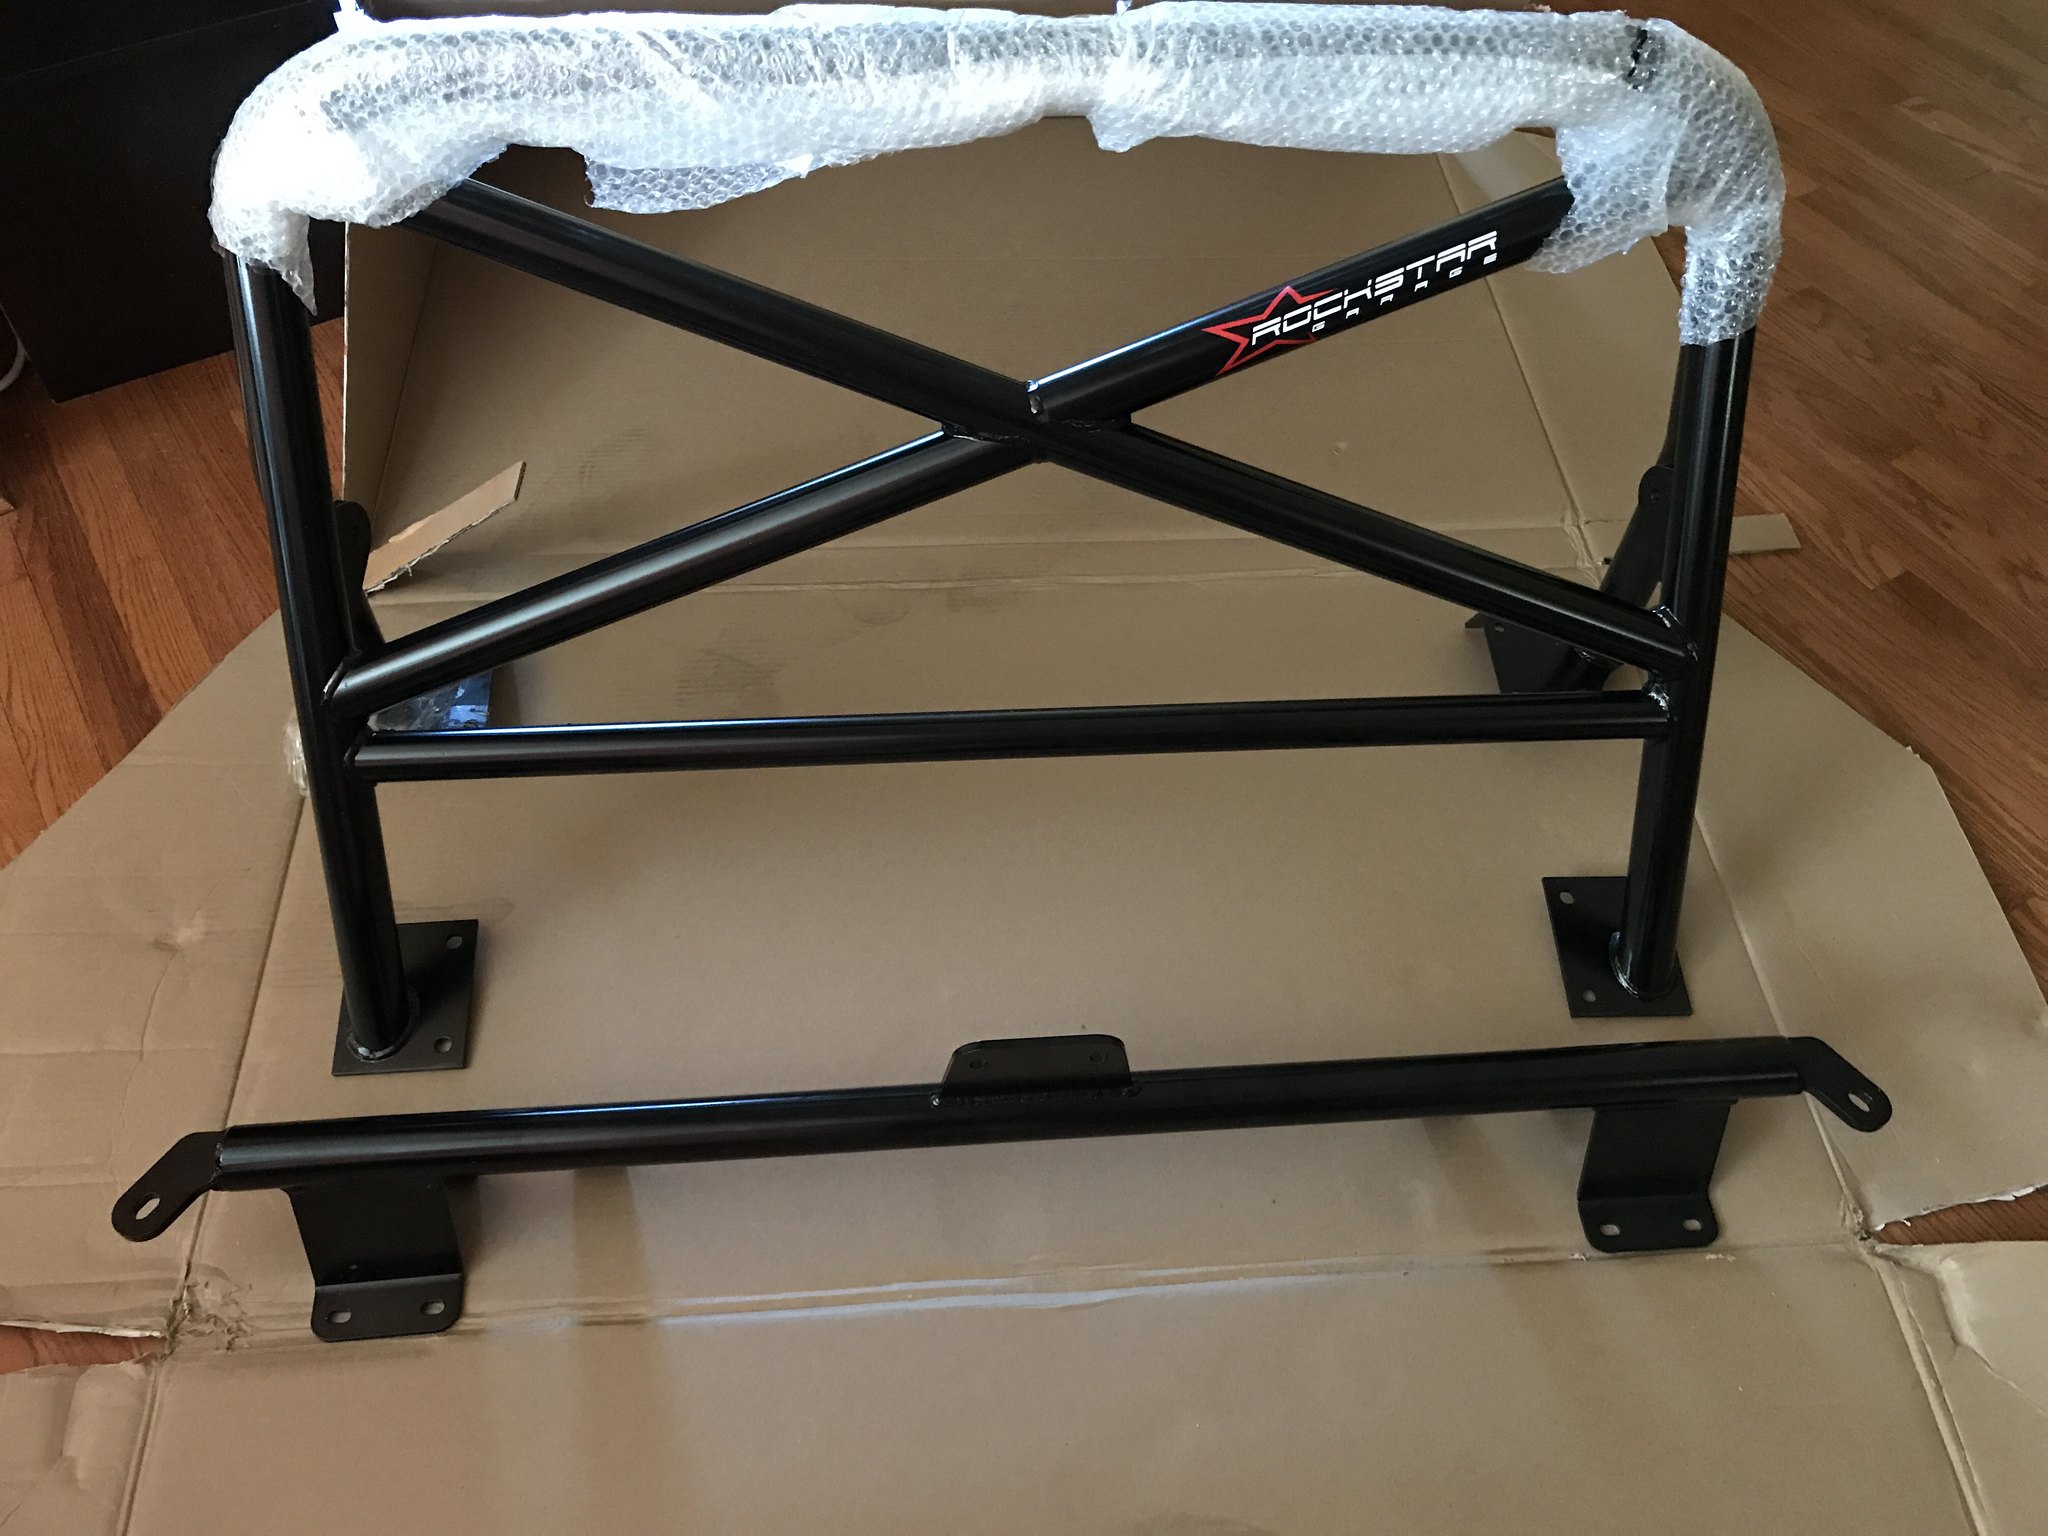
It was well packaged, and the quality of the bar and welds was excellent. Did some test fitting of the bar, the install is not difficult but it does require some planning
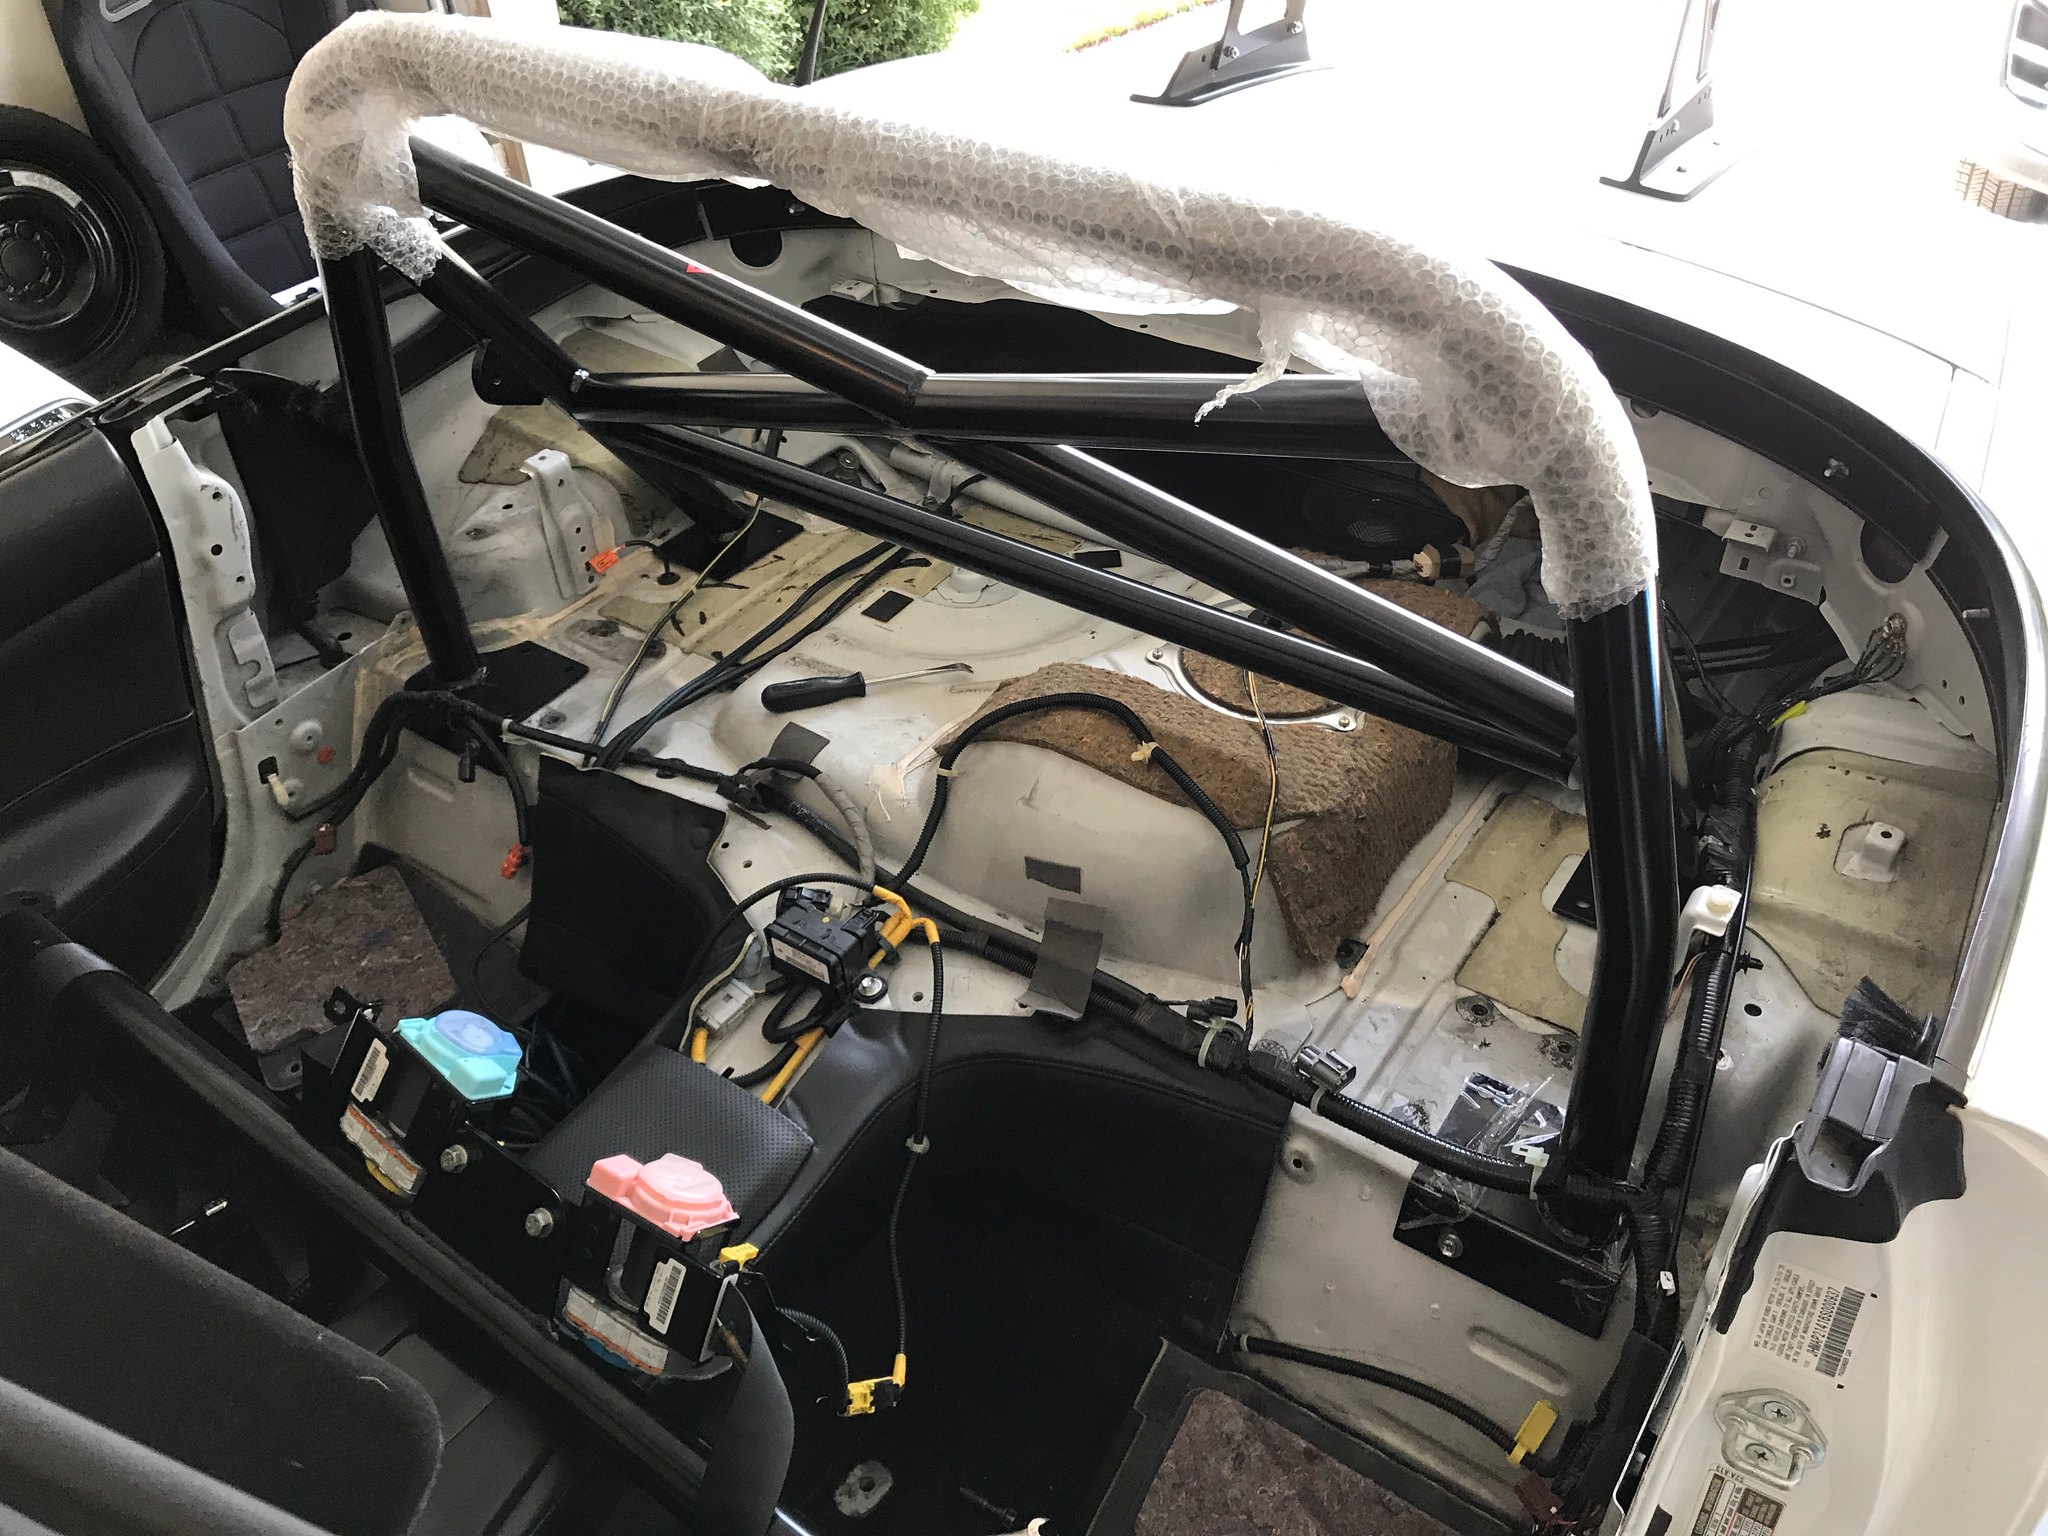
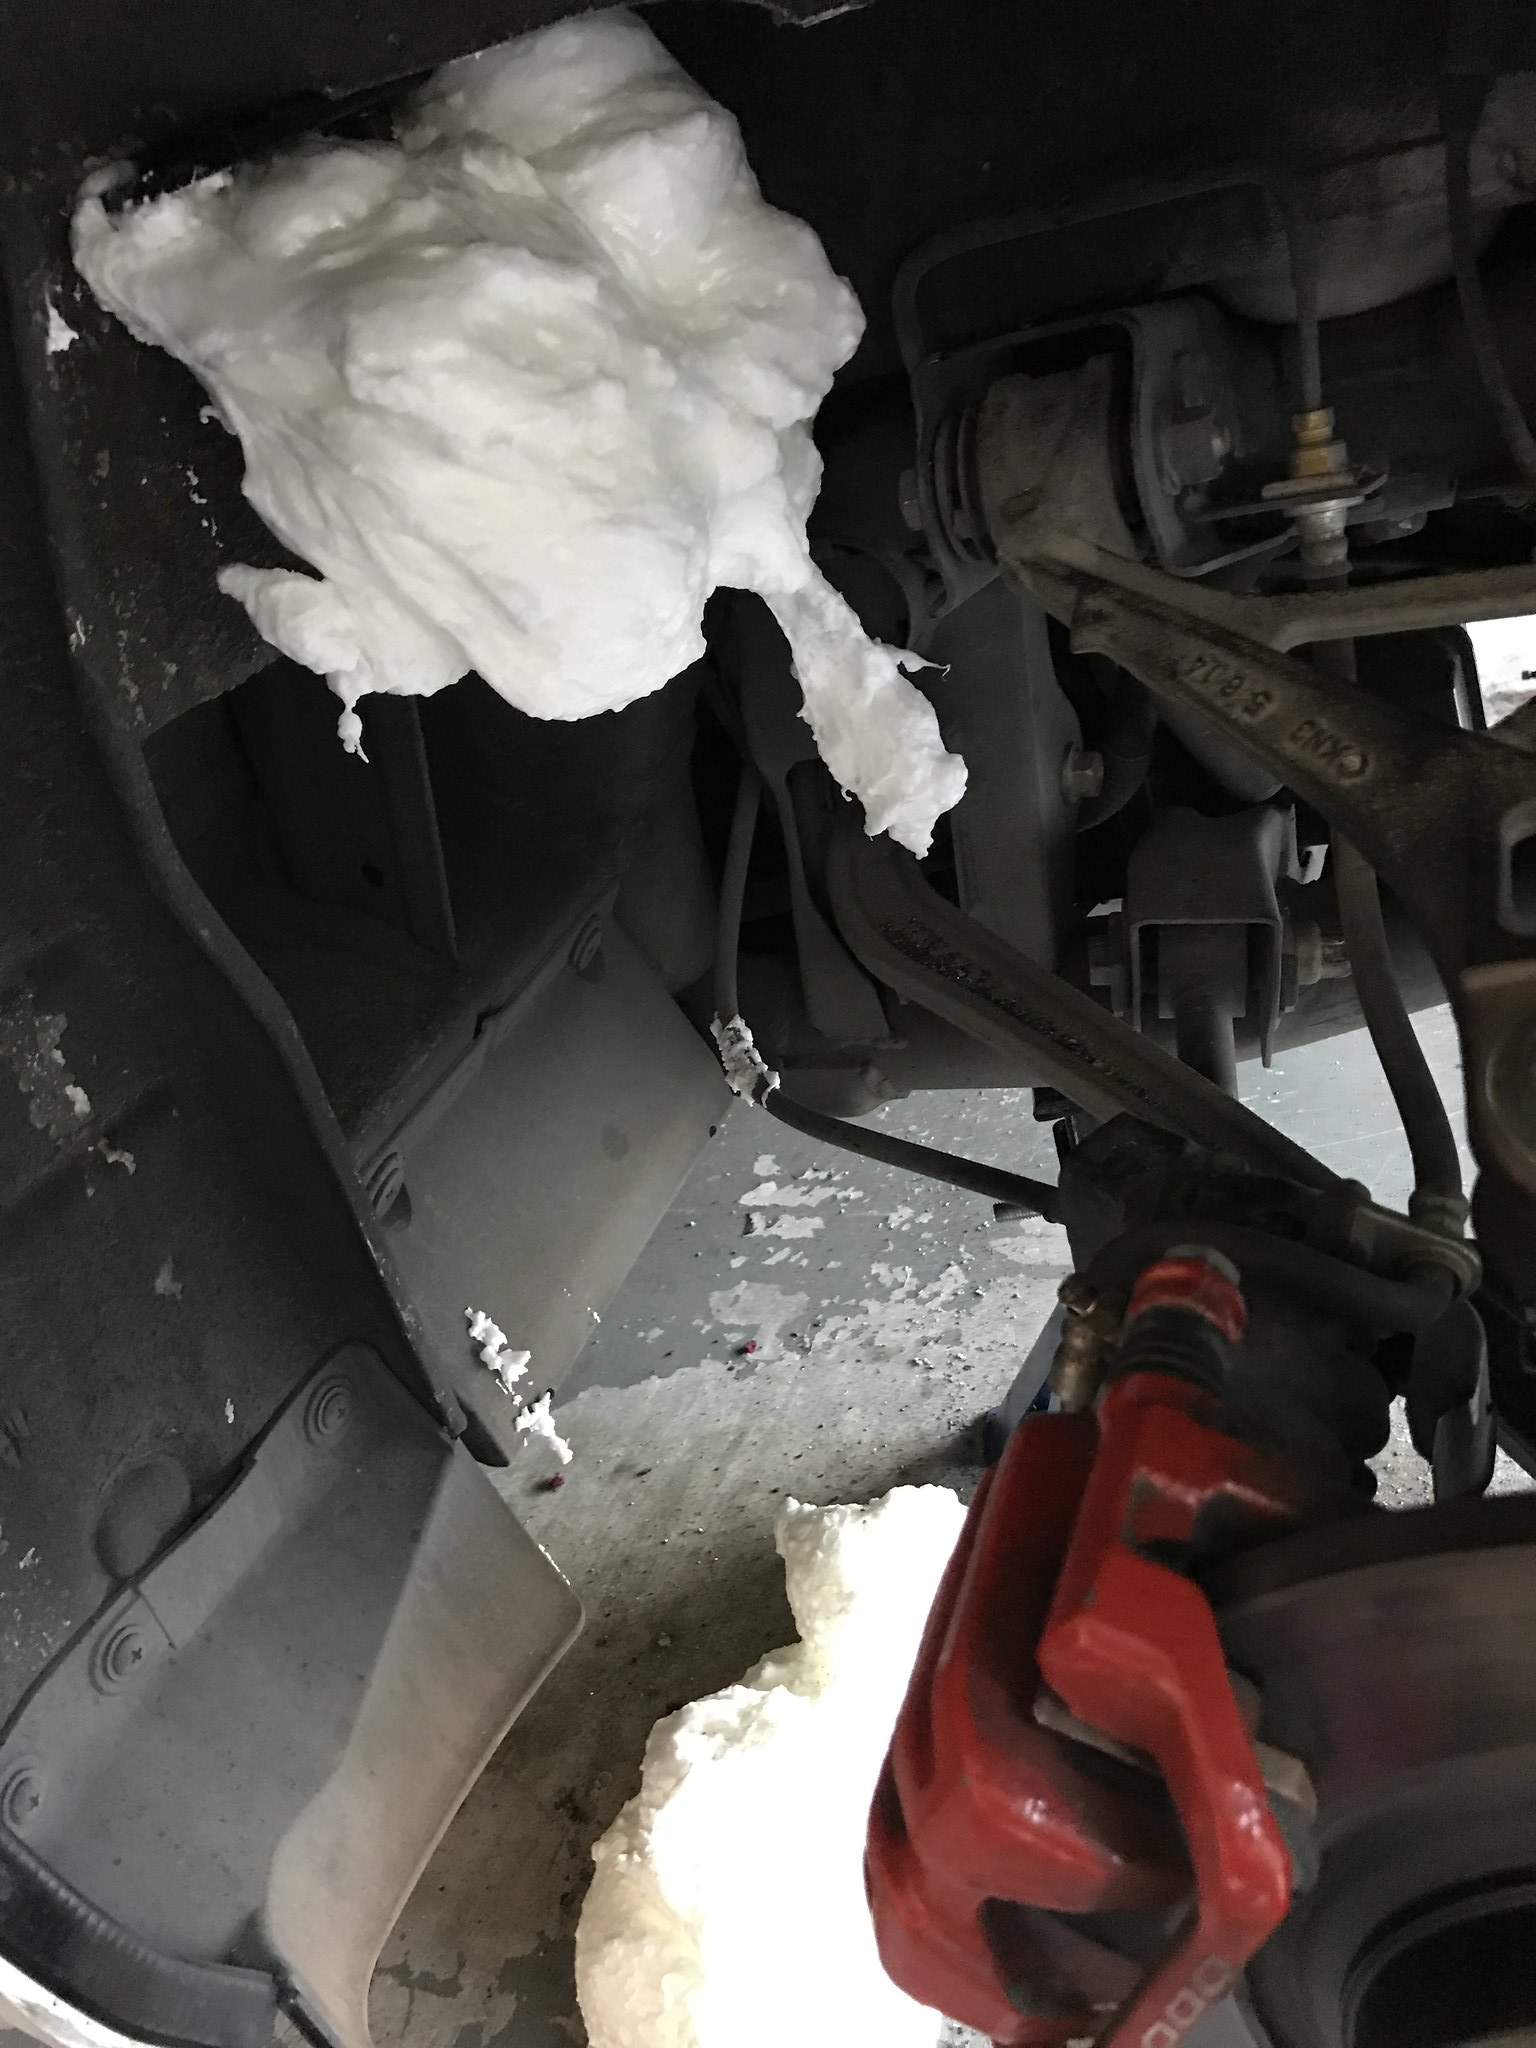
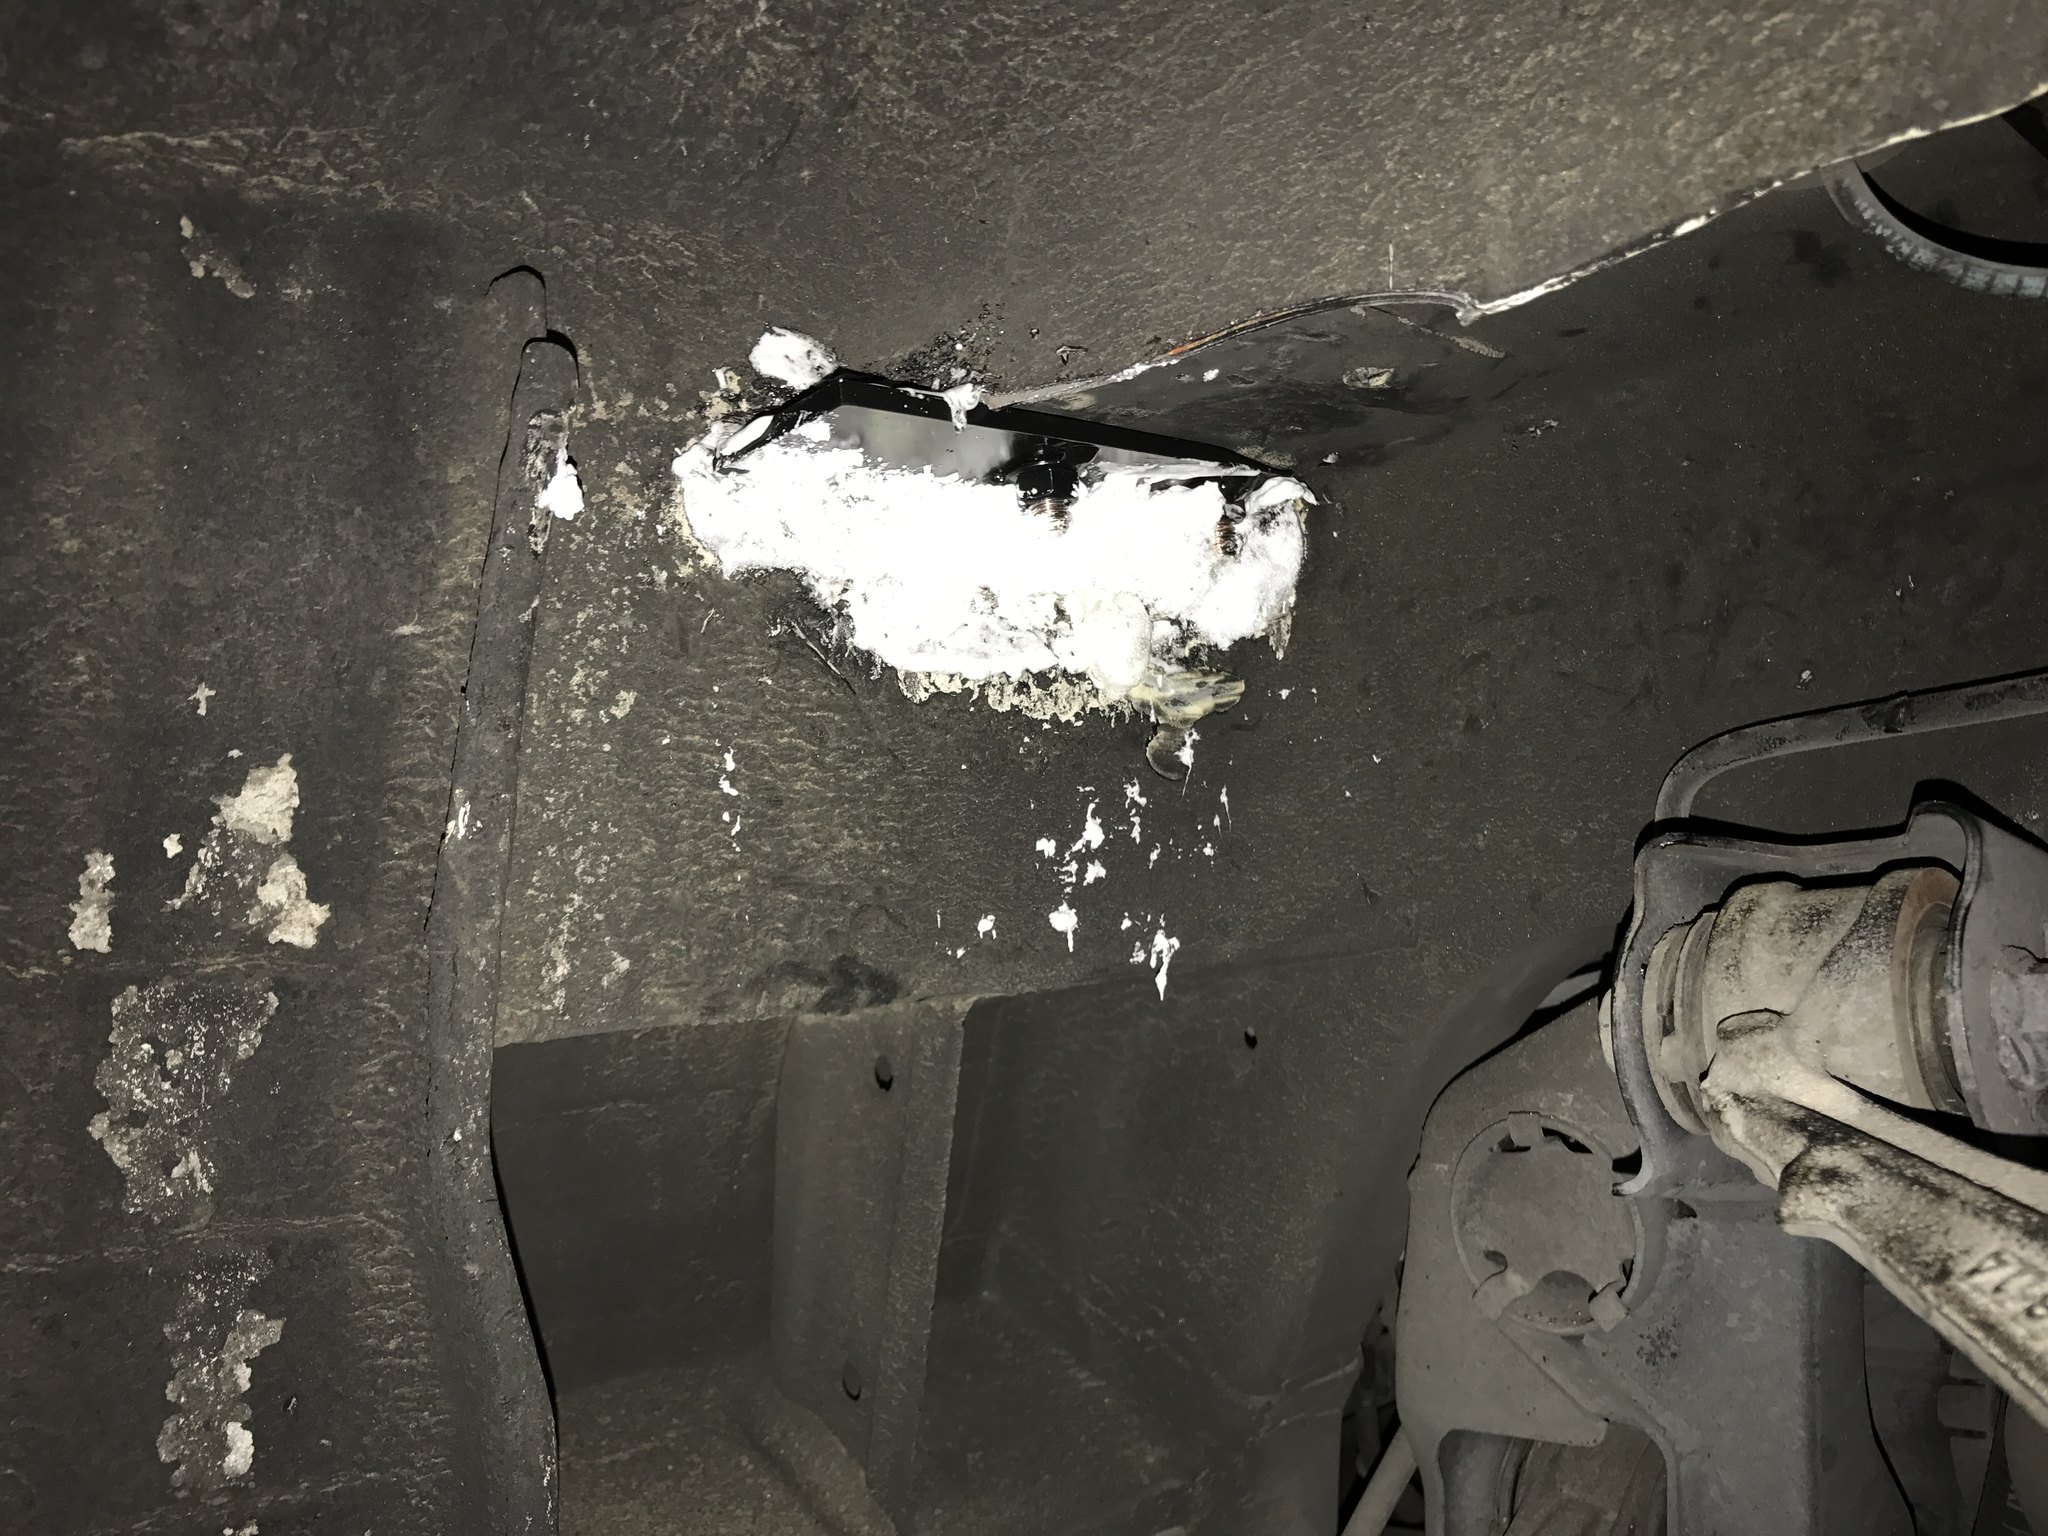
One of the major modifications that you need to make is cut an access hole in your wheel well to allow the front backing plate to fit. I used a 1/2" hole saw and a body saw with a heavy duty blade to make the cuts.
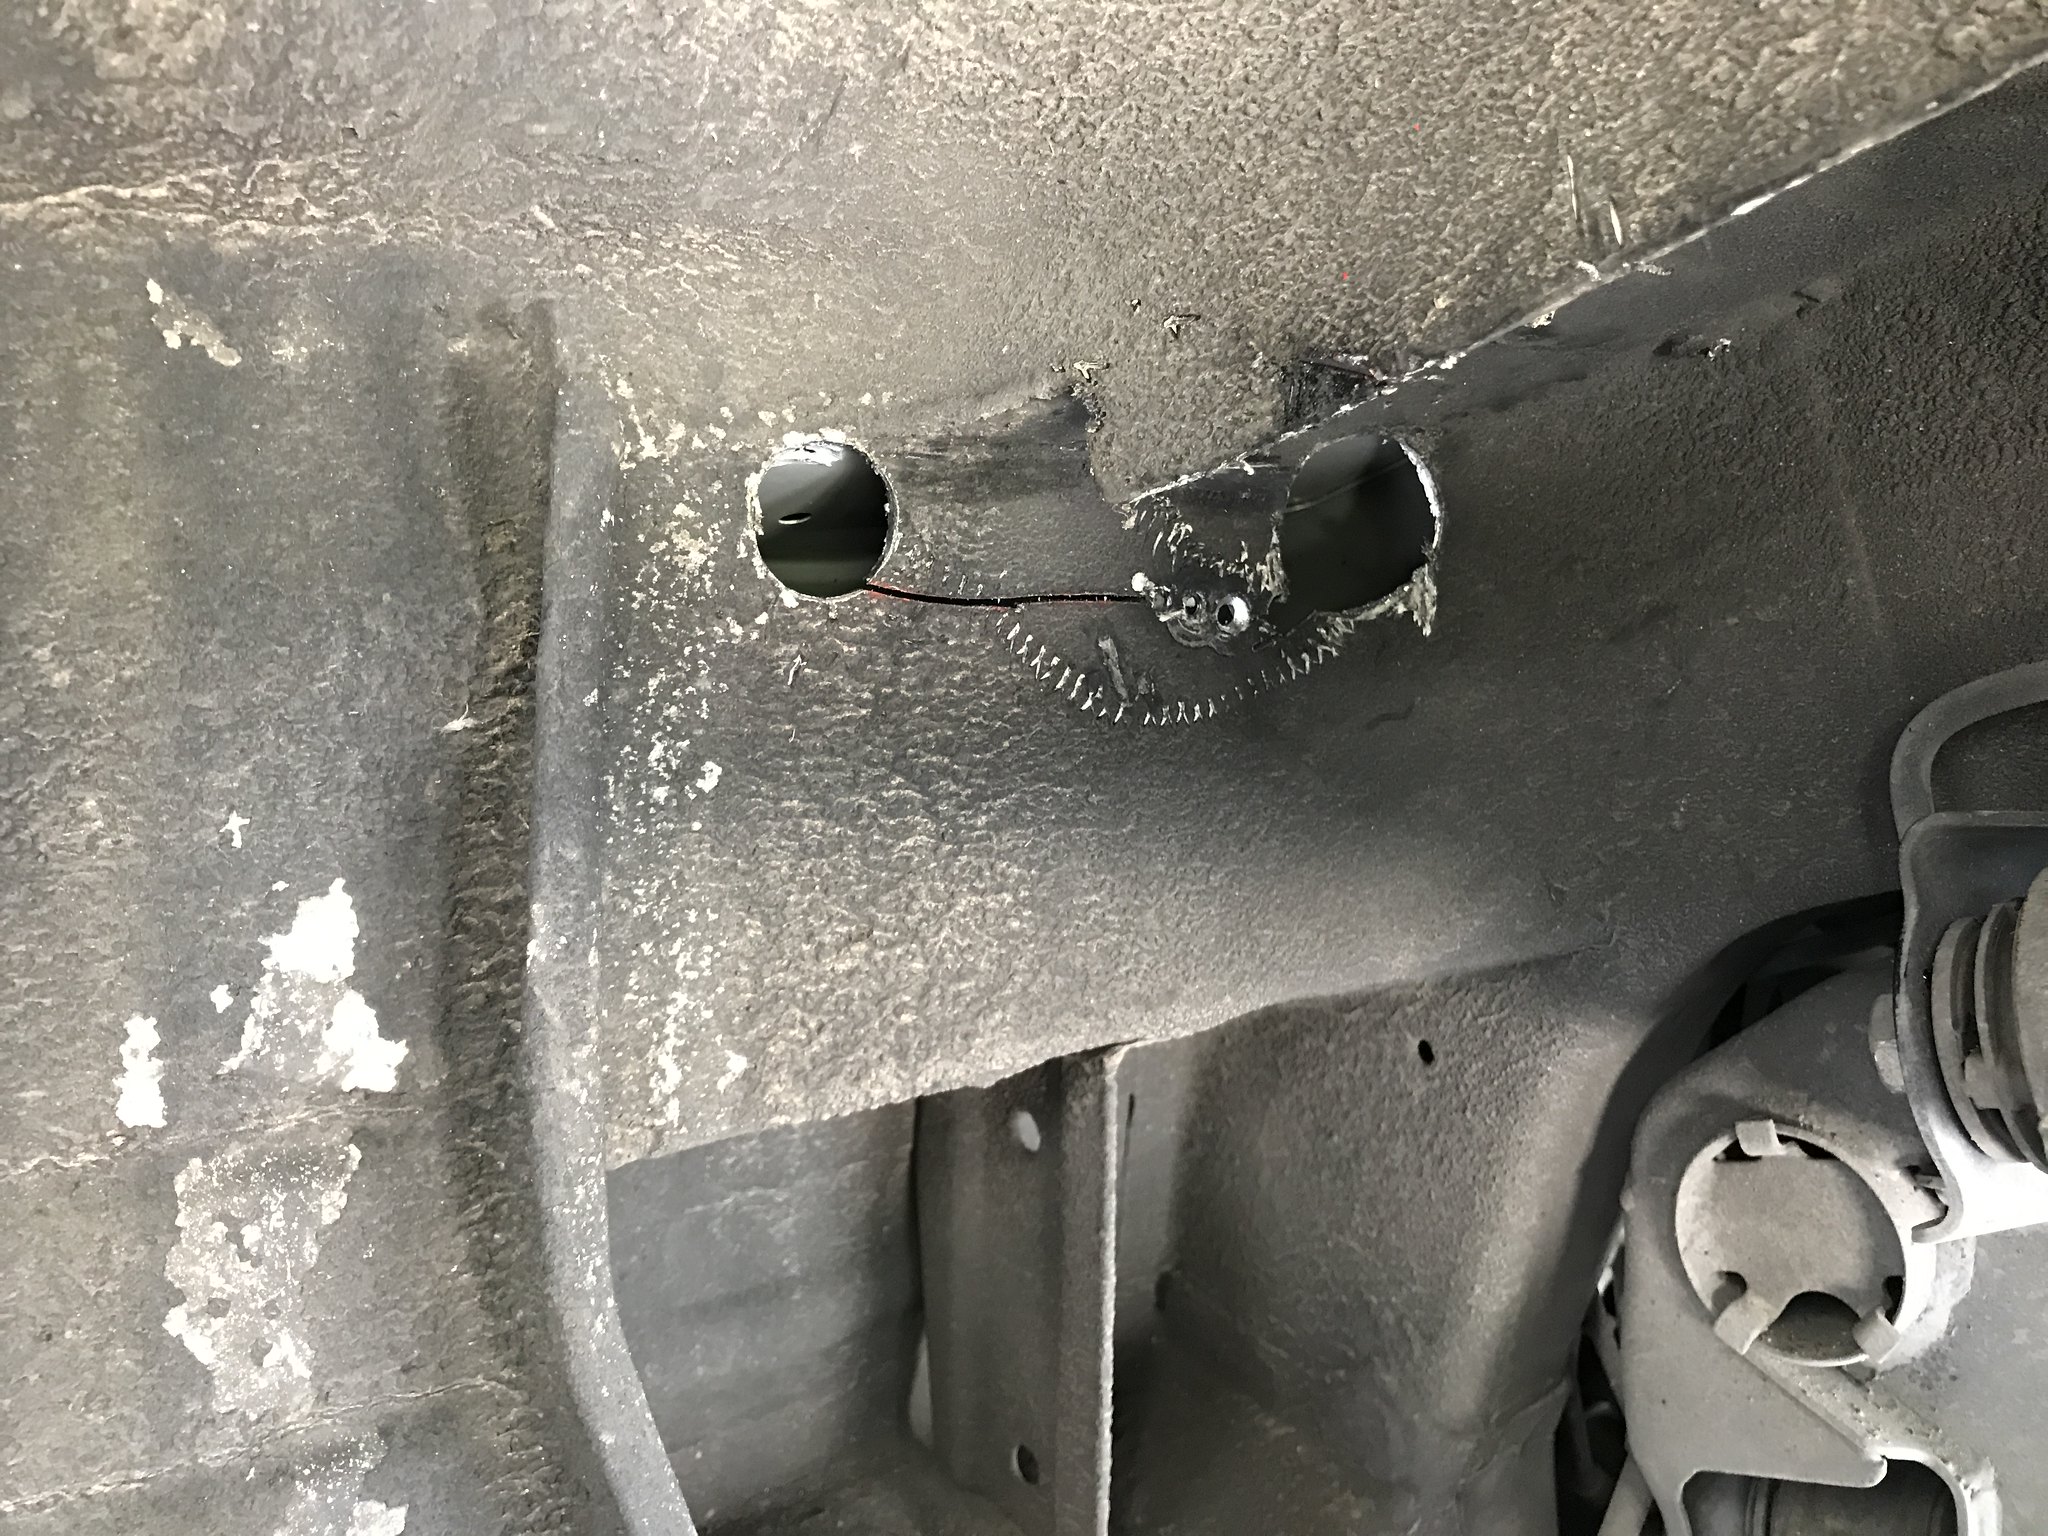
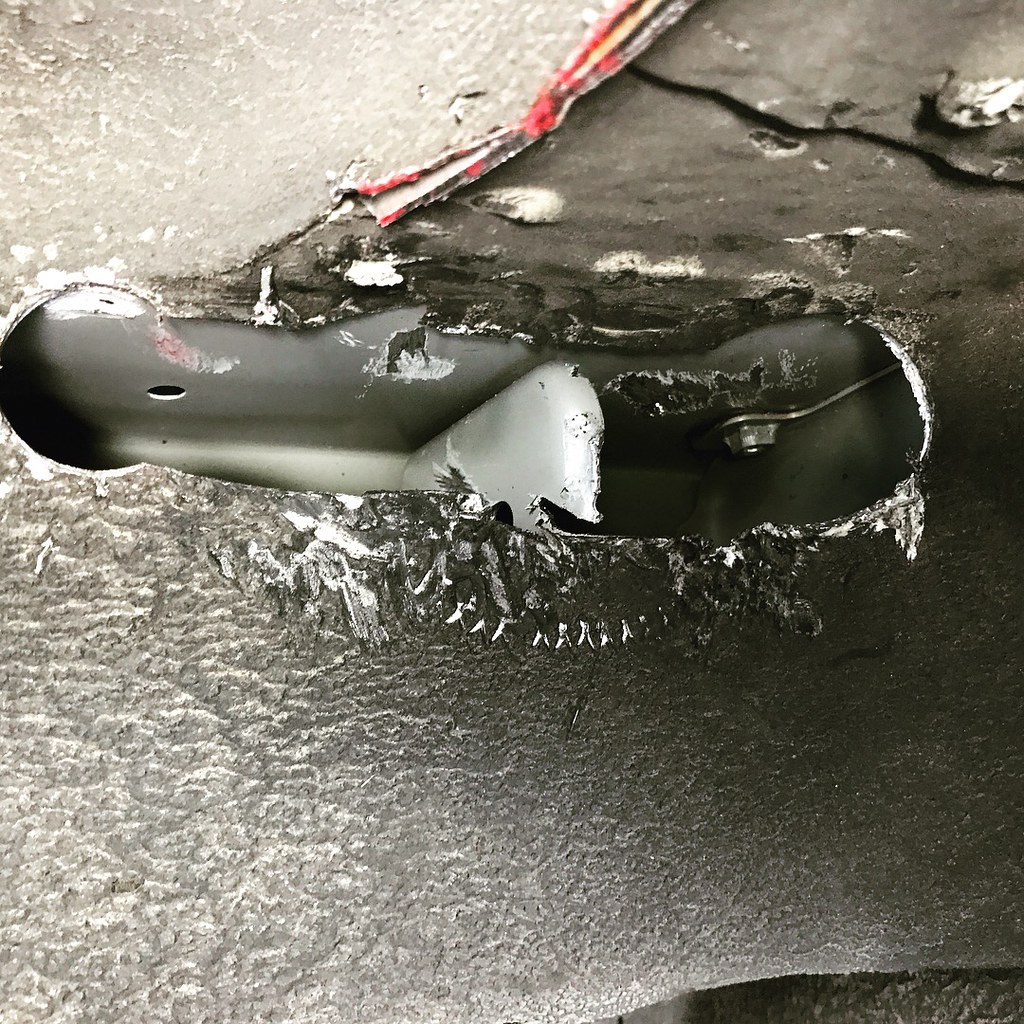
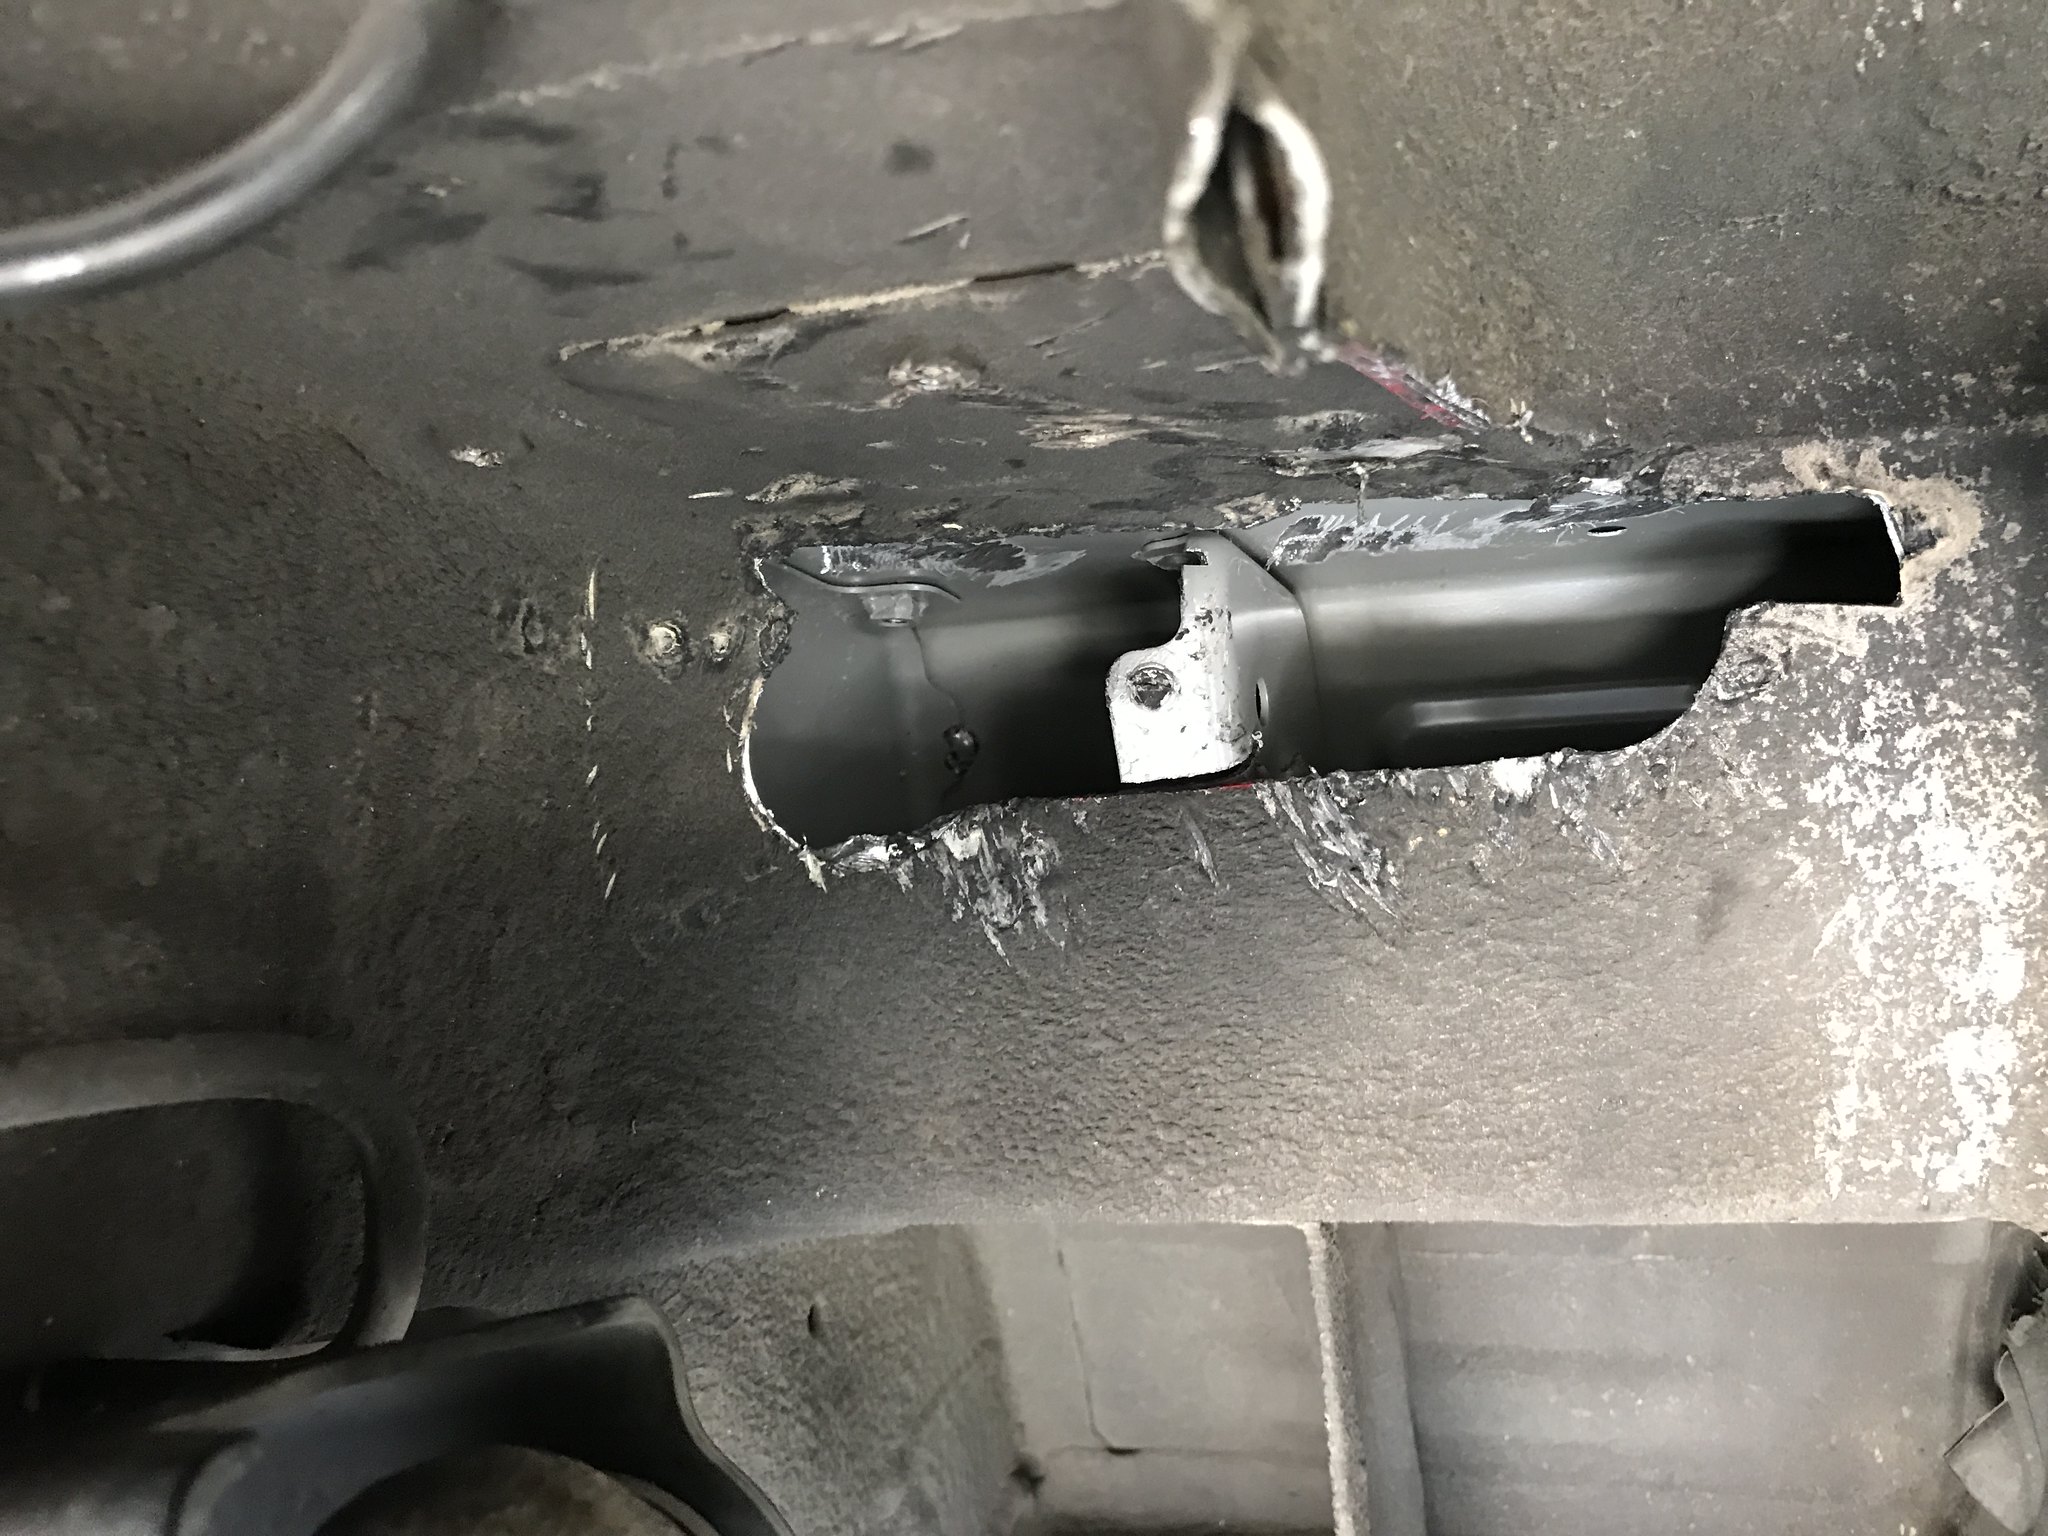
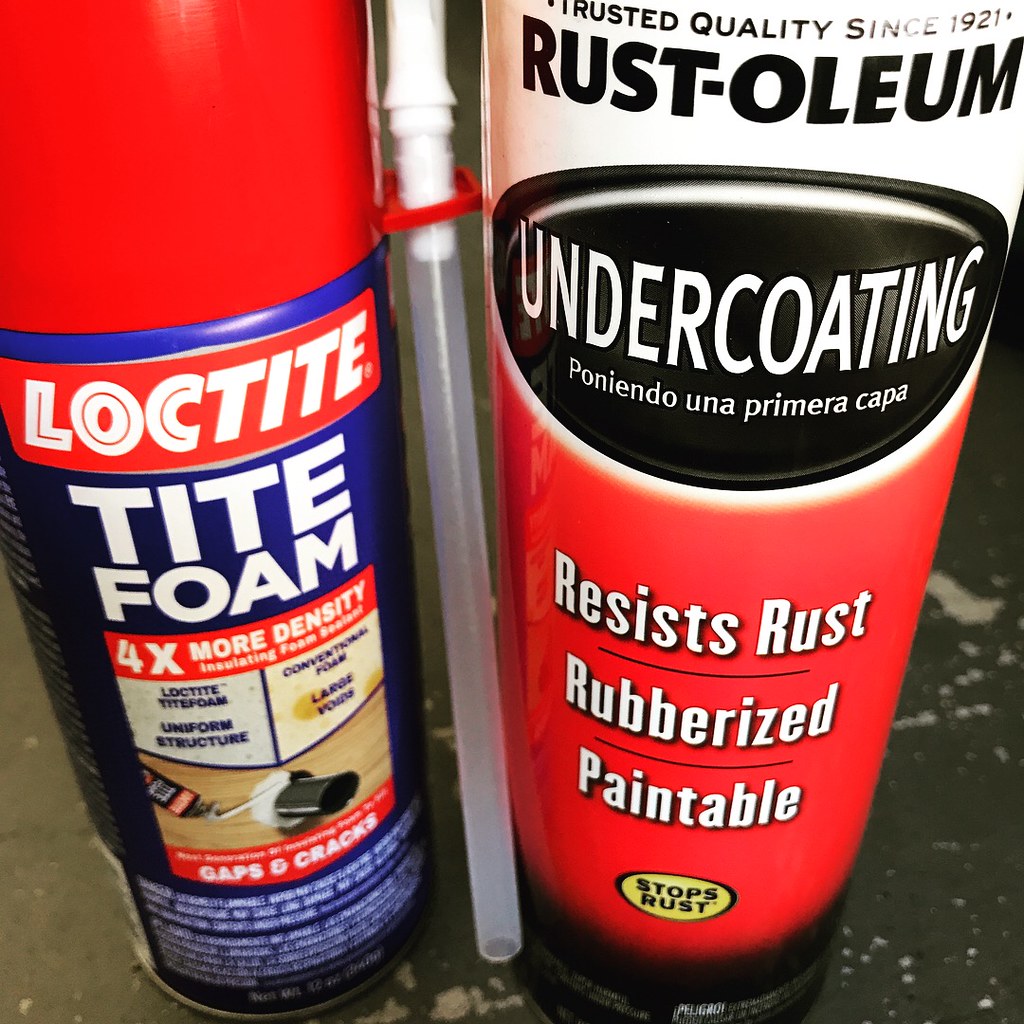
Once the wheel wells were cut, drilled the necessary holes for the bar, and mounted it to the backing plates. Filled the now open space exposed by the cut in the wheel wells with Loctite Expanding foam, and covered everything with Rustoleum Undercoating rust inhibiting spray

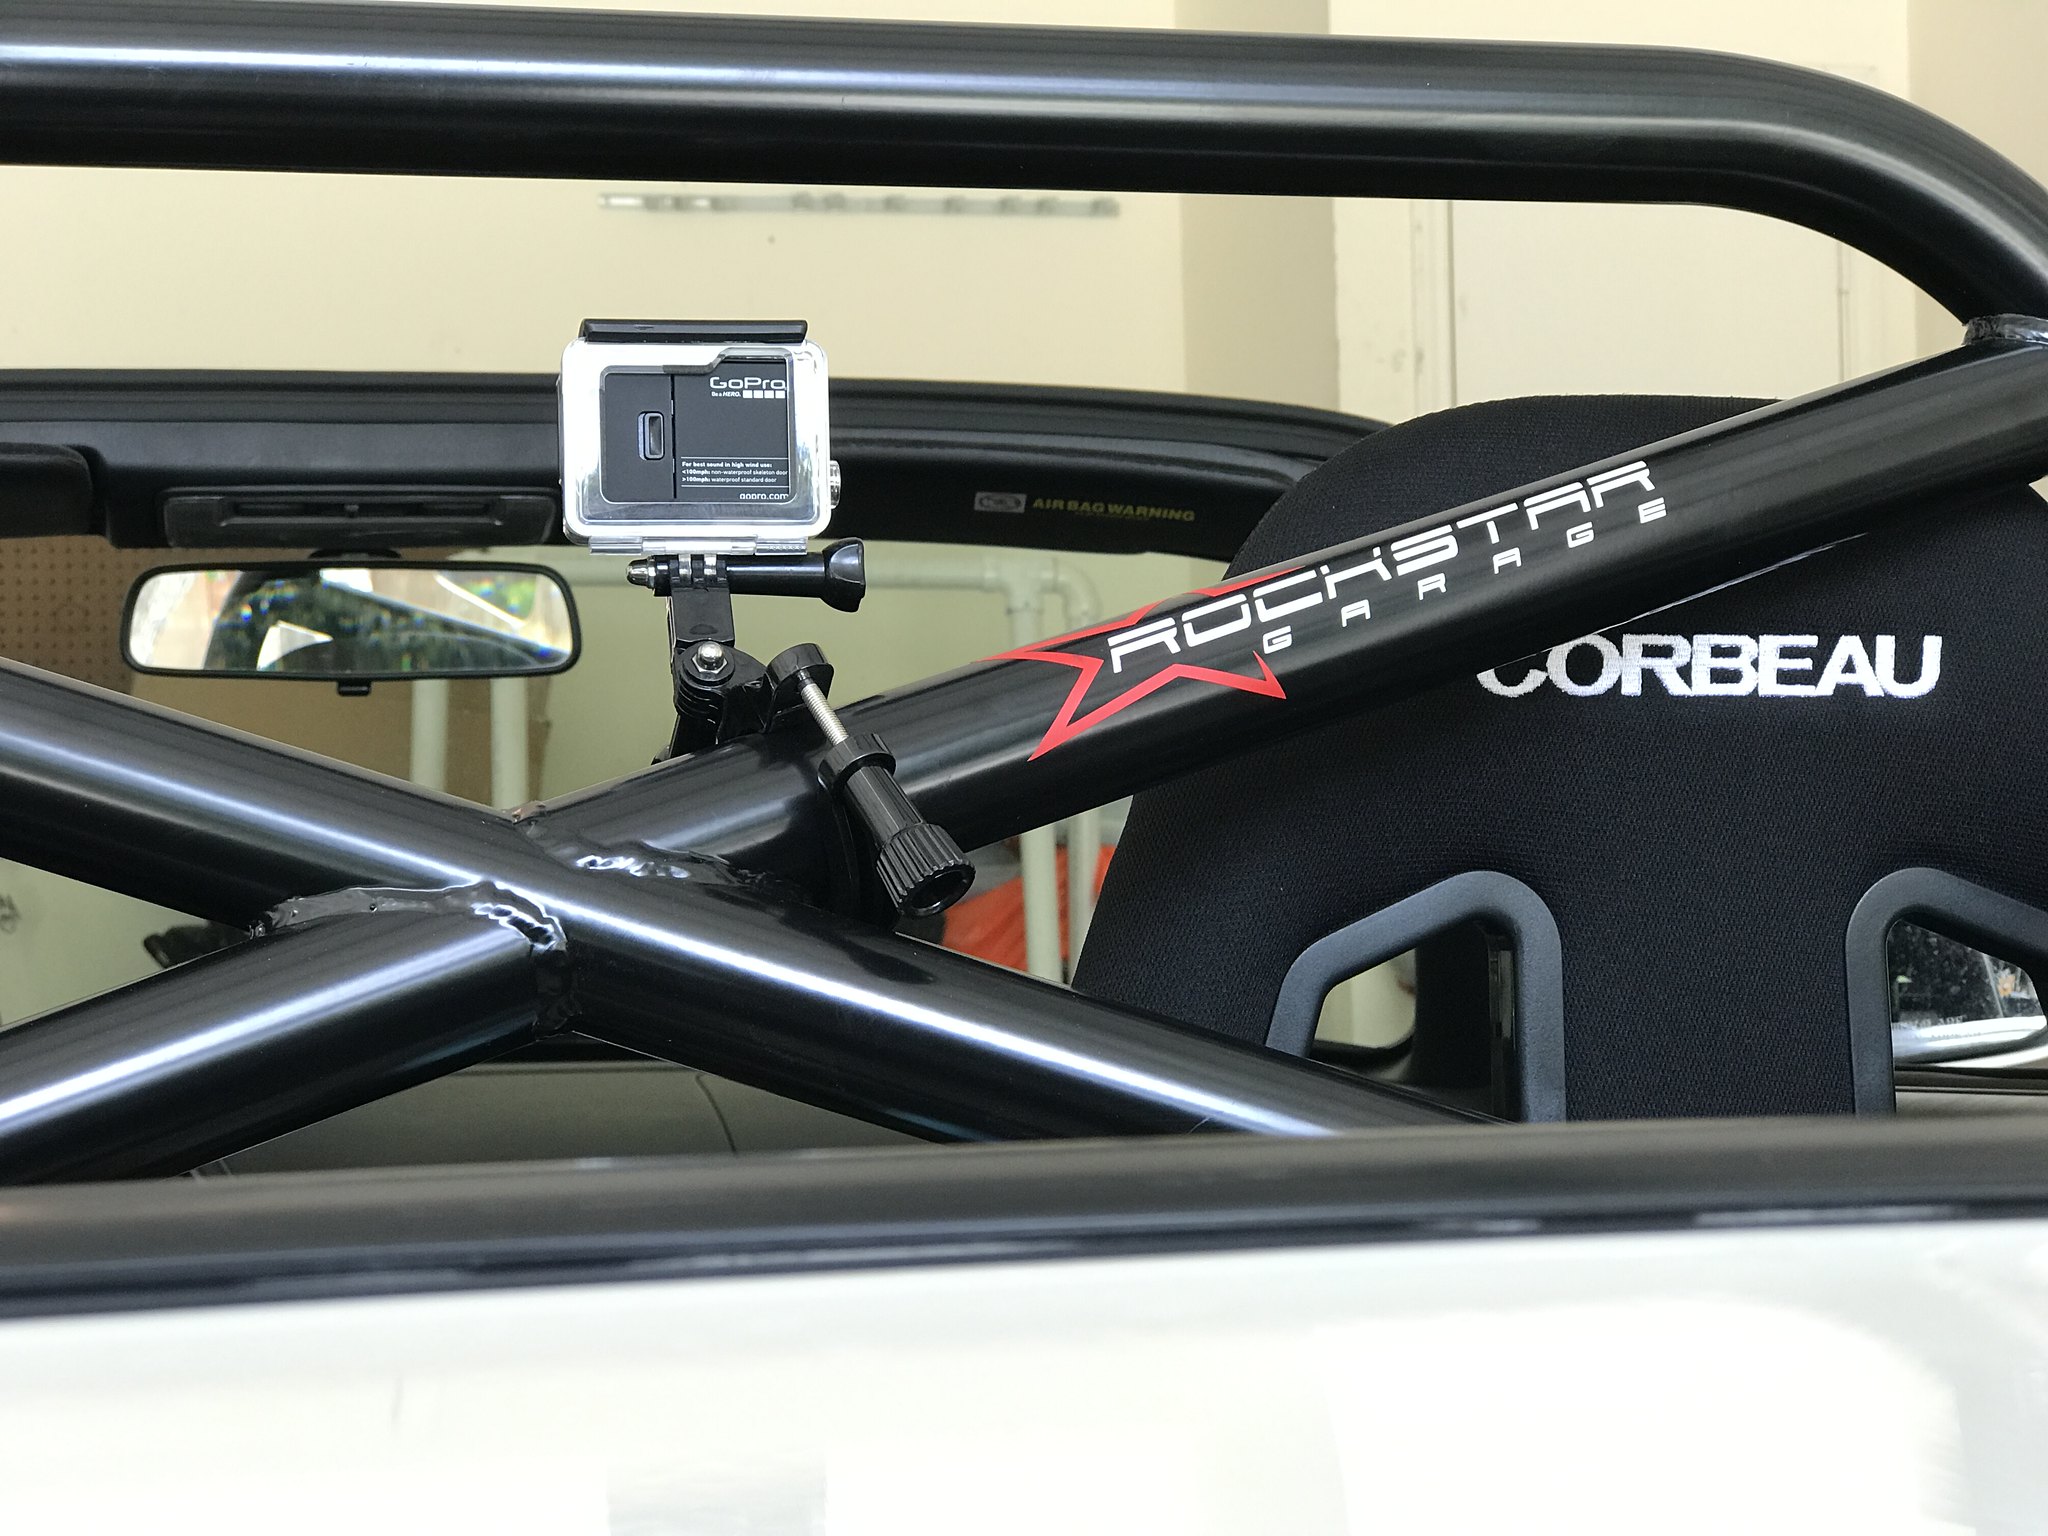
Once the roll bar was installed, was able to get the Ultrashield 5 point harnesses for both the driver and passenger seats
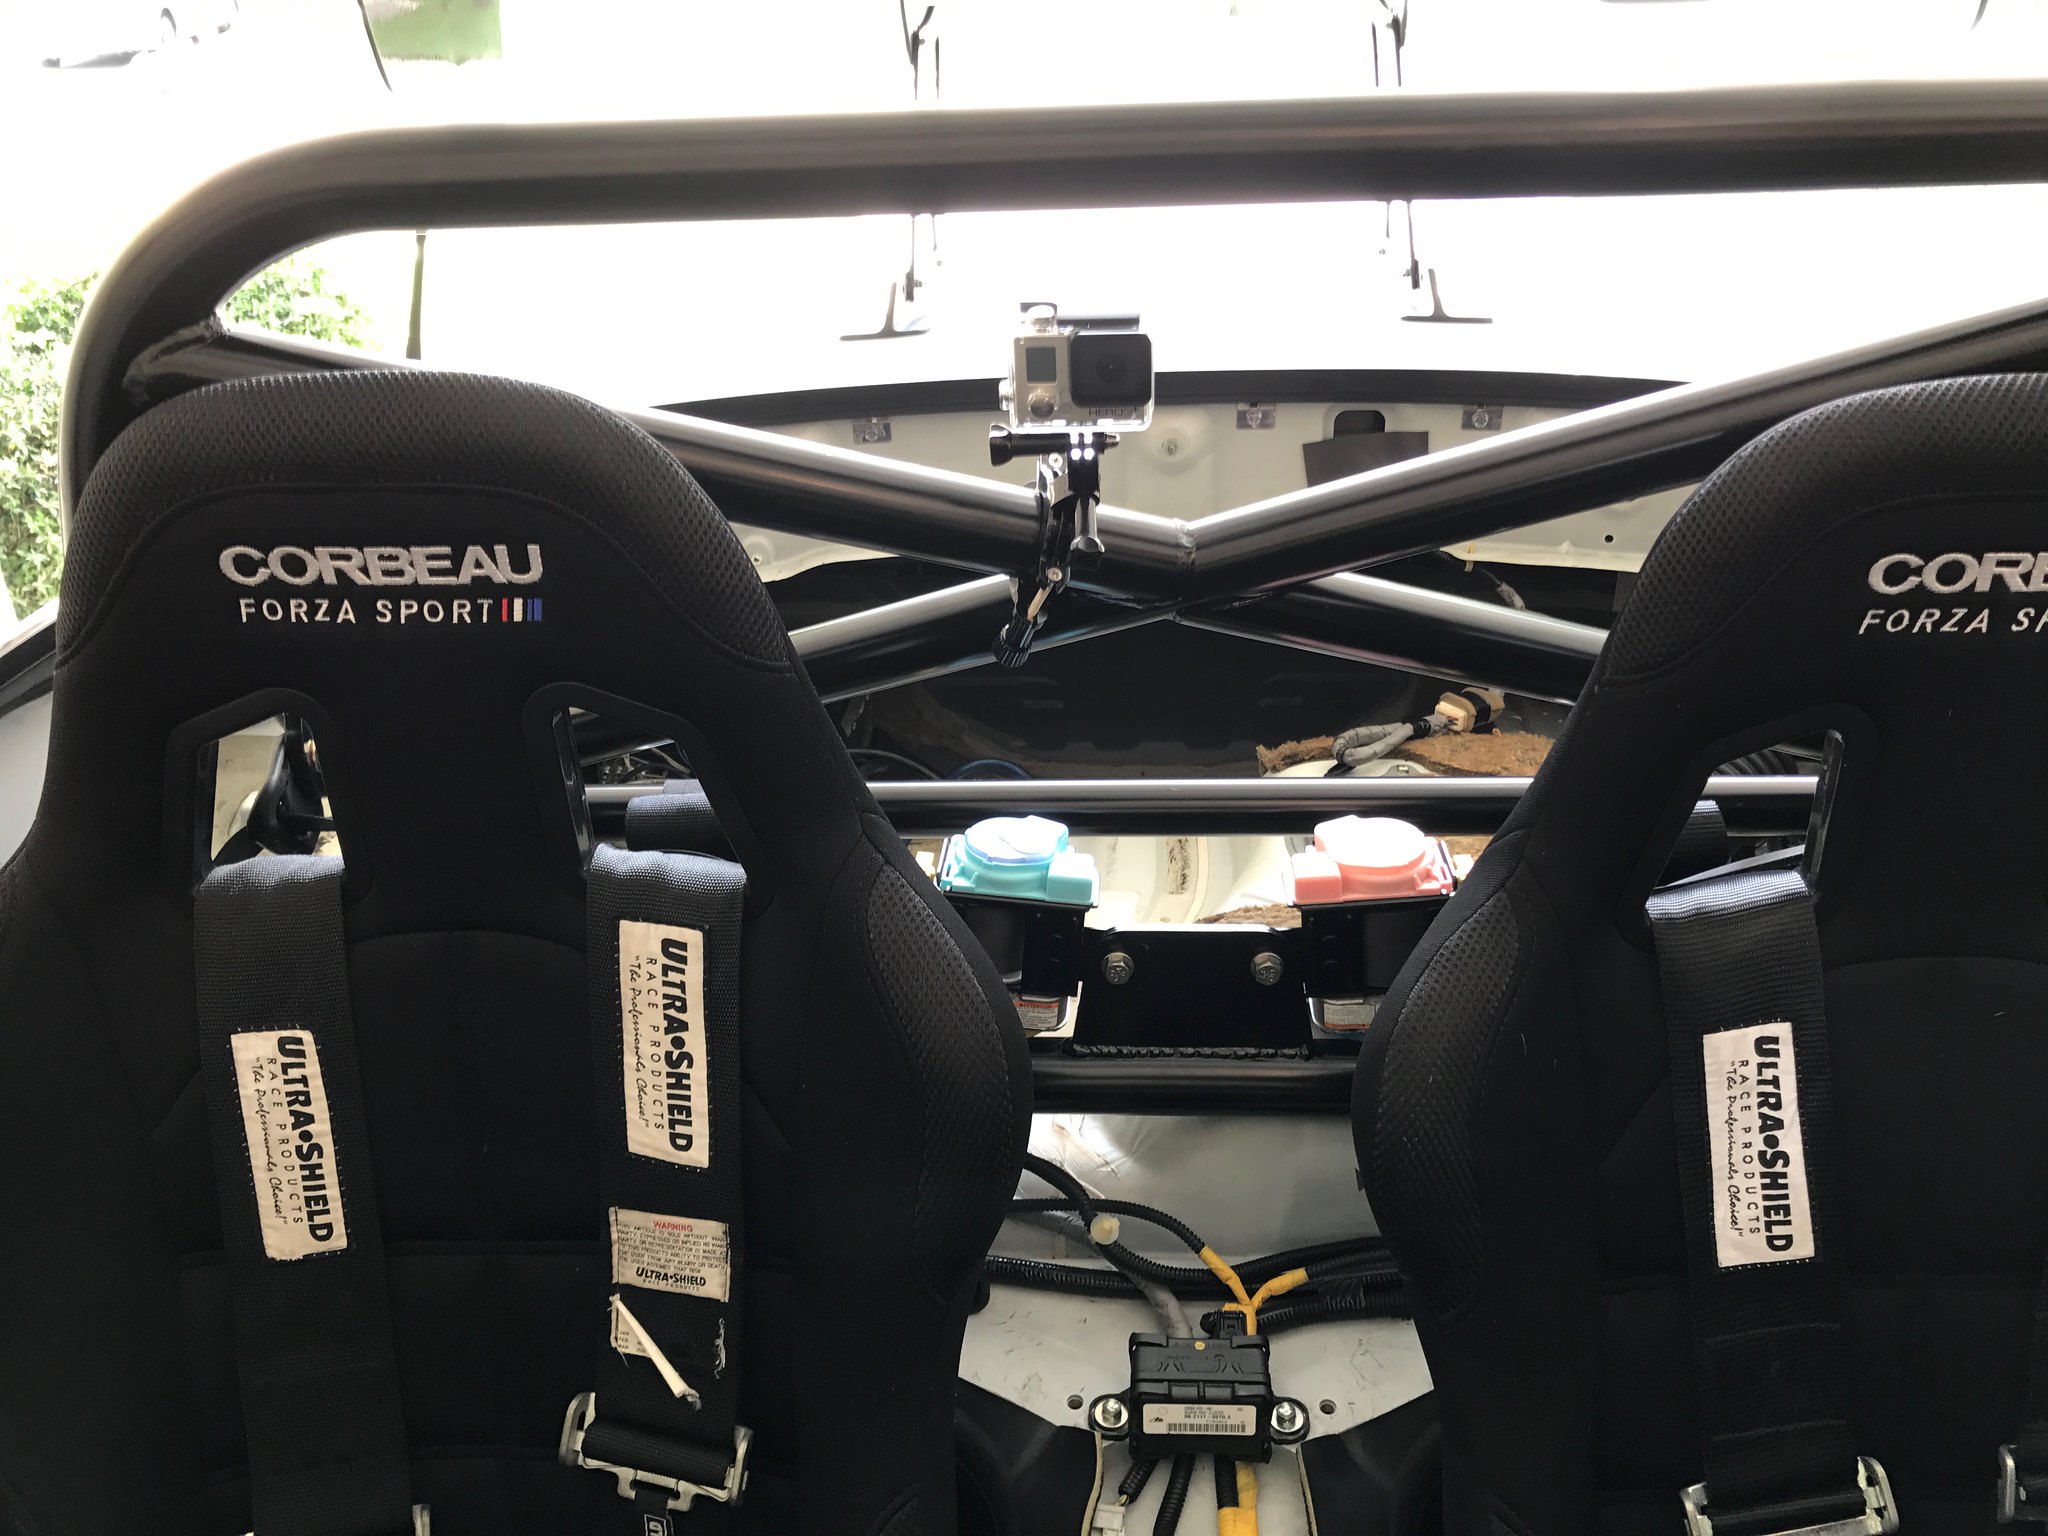
Since I had to remove the majority of the plastics and interior to install the roll bar, I had to buy a new mount for my GoPro. Tried a couple of different locations and ended up with this one as it didn't interfere with the hard top.
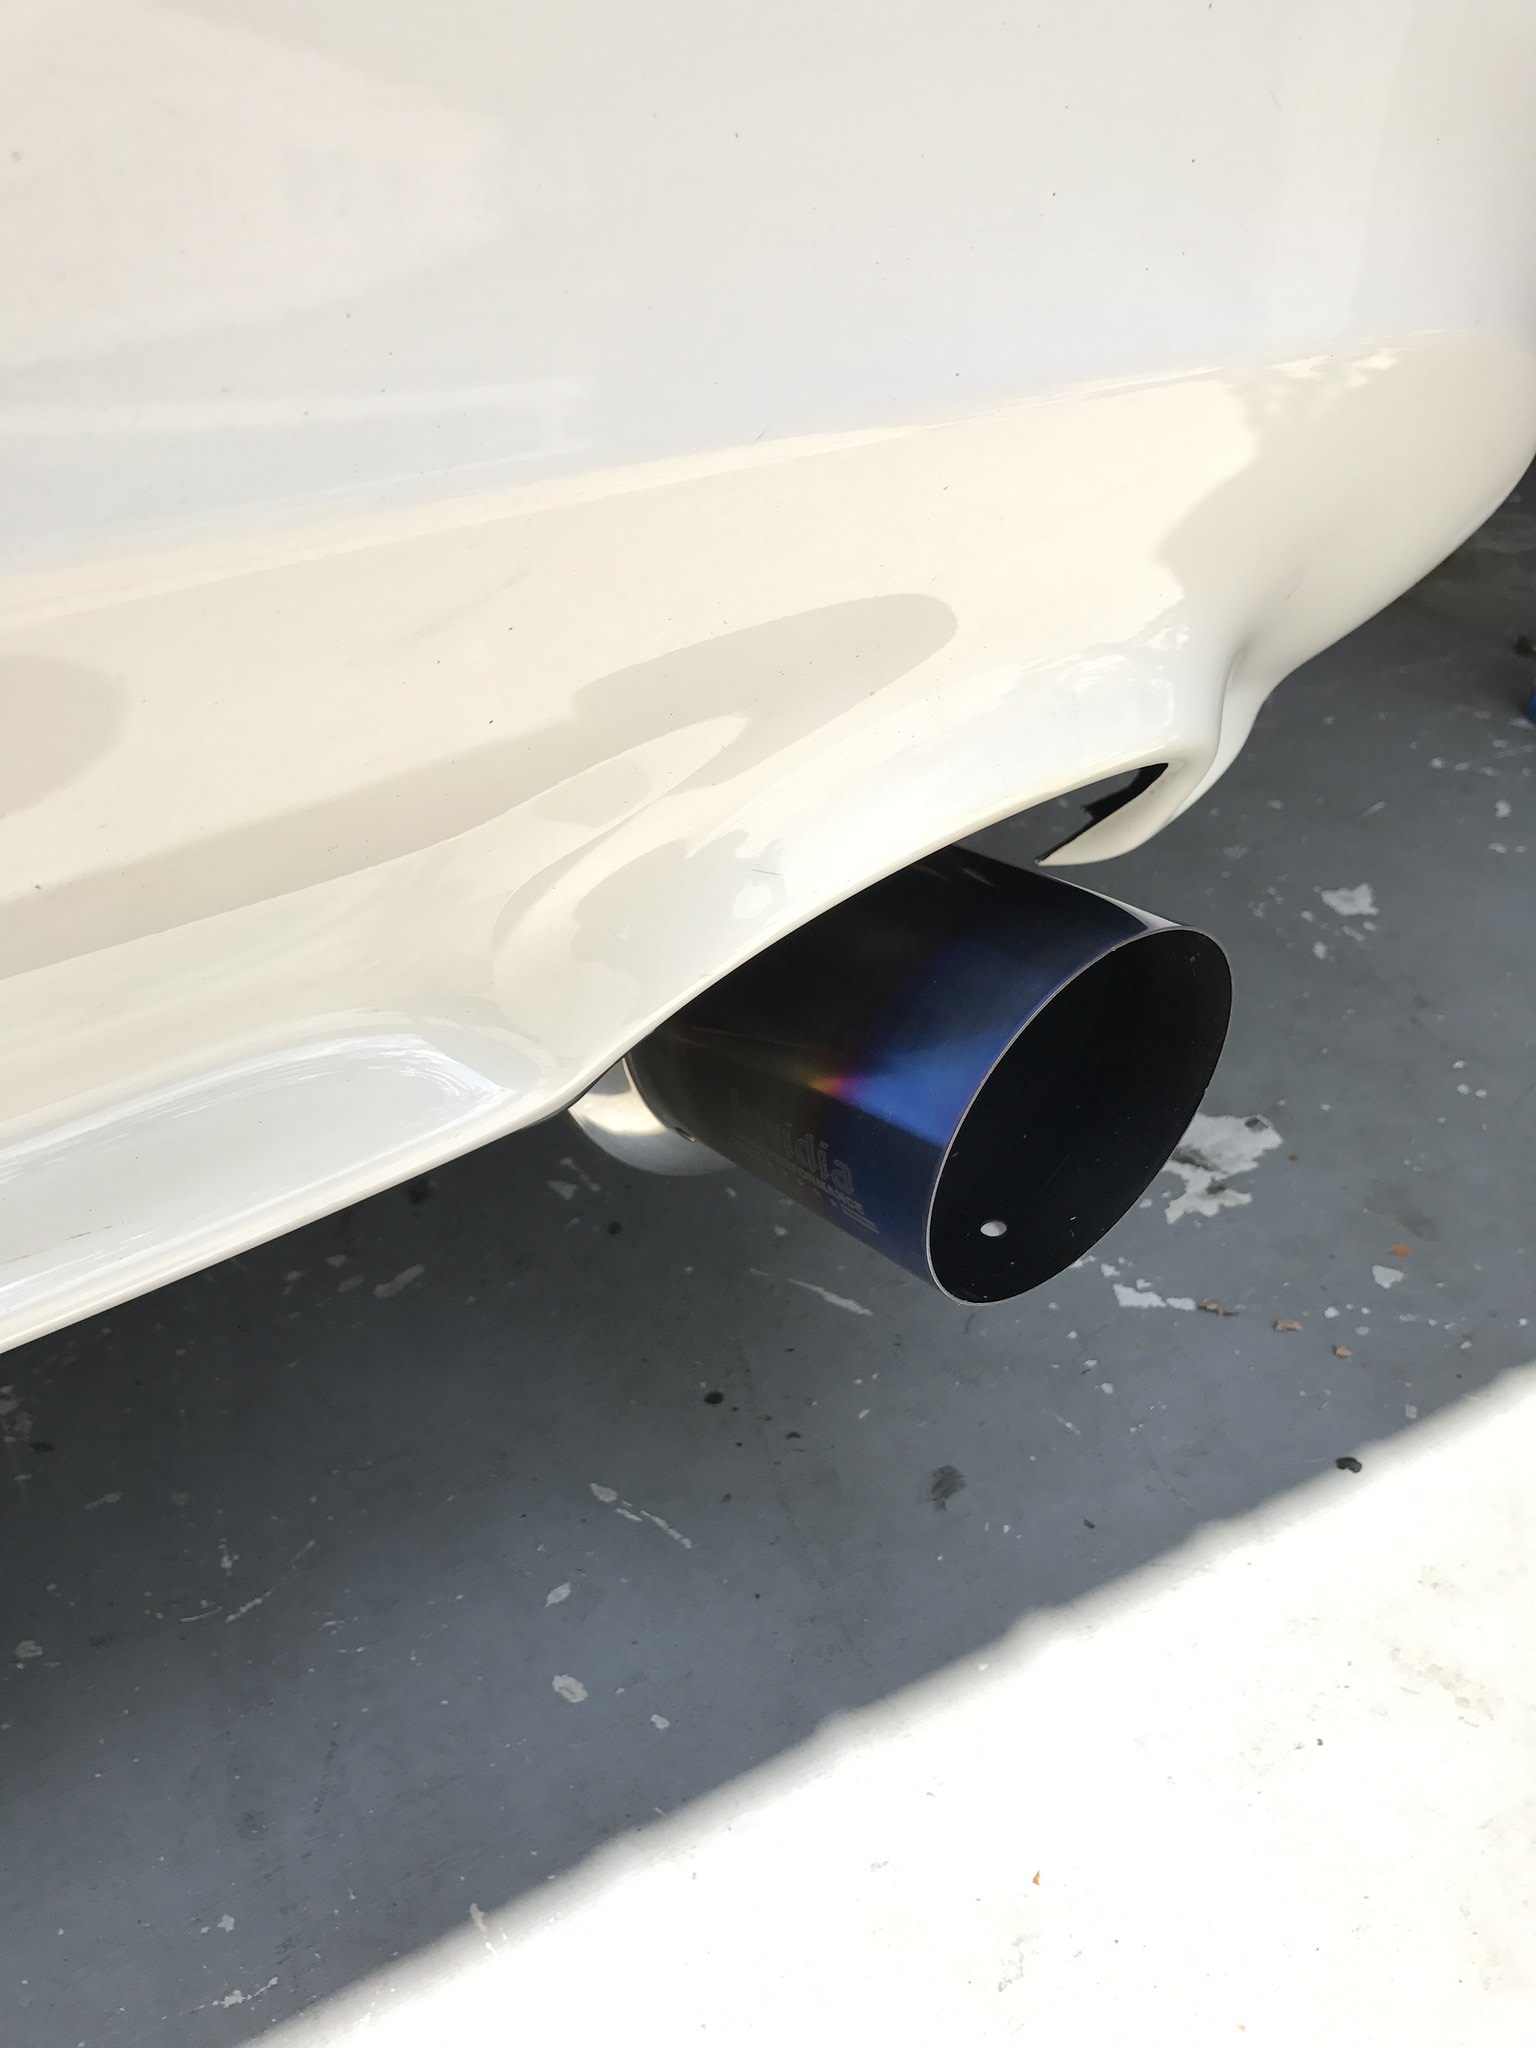
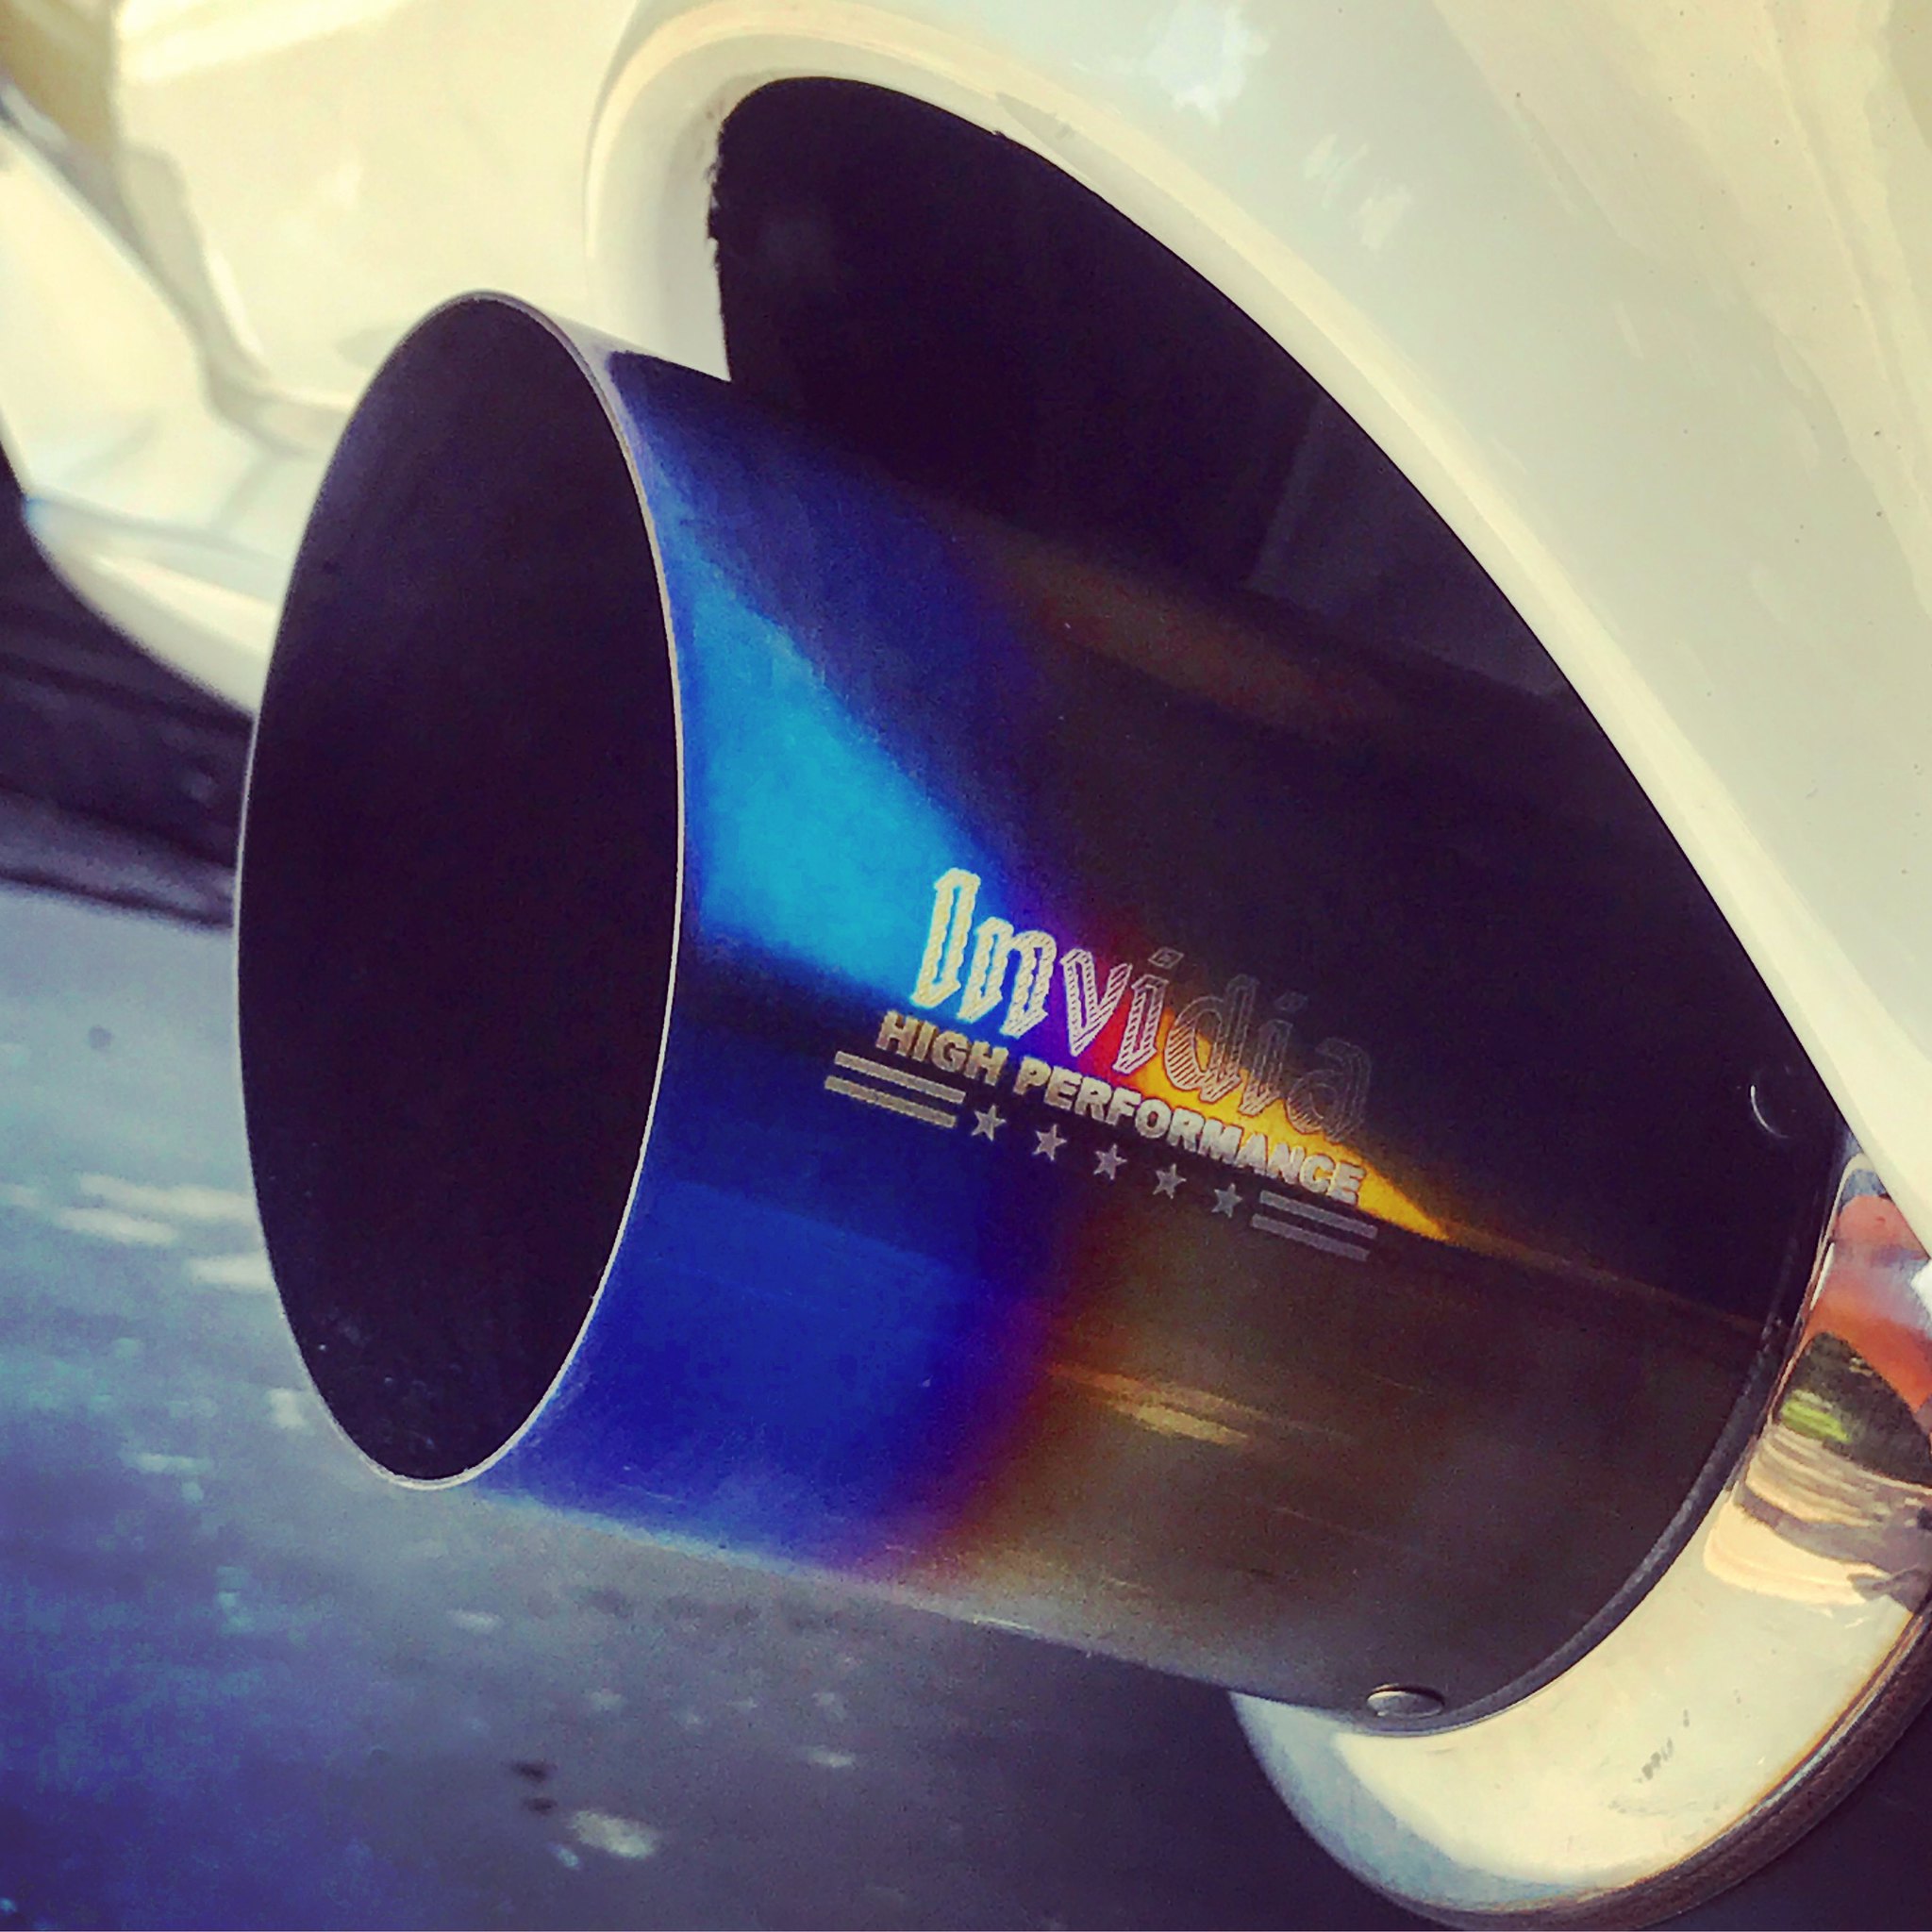
With a large portion of the interior from the rear seats back removed, and the soft top also removed, I decided to continue with the weight savings by selling my Greddy Spectrum Elite dual exhaust and installing a Invidia N1 single exhaust

That's all for now, have a few more mods on their way, will post about those soon!
It was well packaged, and the quality of the bar and welds was excellent. Did some test fitting of the bar, the install is not difficult but it does require some planning
One of the major modifications that you need to make is cut an access hole in your wheel well to allow the front backing plate to fit. I used a 1/2" hole saw and a body saw with a heavy duty blade to make the cuts.
Once the wheel wells were cut, drilled the necessary holes for the bar, and mounted it to the backing plates. Filled the now open space exposed by the cut in the wheel wells with Loctite Expanding foam, and covered everything with Rustoleum Undercoating rust inhibiting spray
Once the roll bar was installed, was able to get the Ultrashield 5 point harnesses for both the driver and passenger seats
Since I had to remove the majority of the plastics and interior to install the roll bar, I had to buy a new mount for my GoPro. Tried a couple of different locations and ended up with this one as it didn't interfere with the hard top.
With a large portion of the interior from the rear seats back removed, and the soft top also removed, I decided to continue with the weight savings by selling my Greddy Spectrum Elite dual exhaust and installing a Invidia N1 single exhaust
That's all for now, have a few more mods on their way, will post about those soon!
08-15-2017, 05:30 AM
#110
Thread Starter
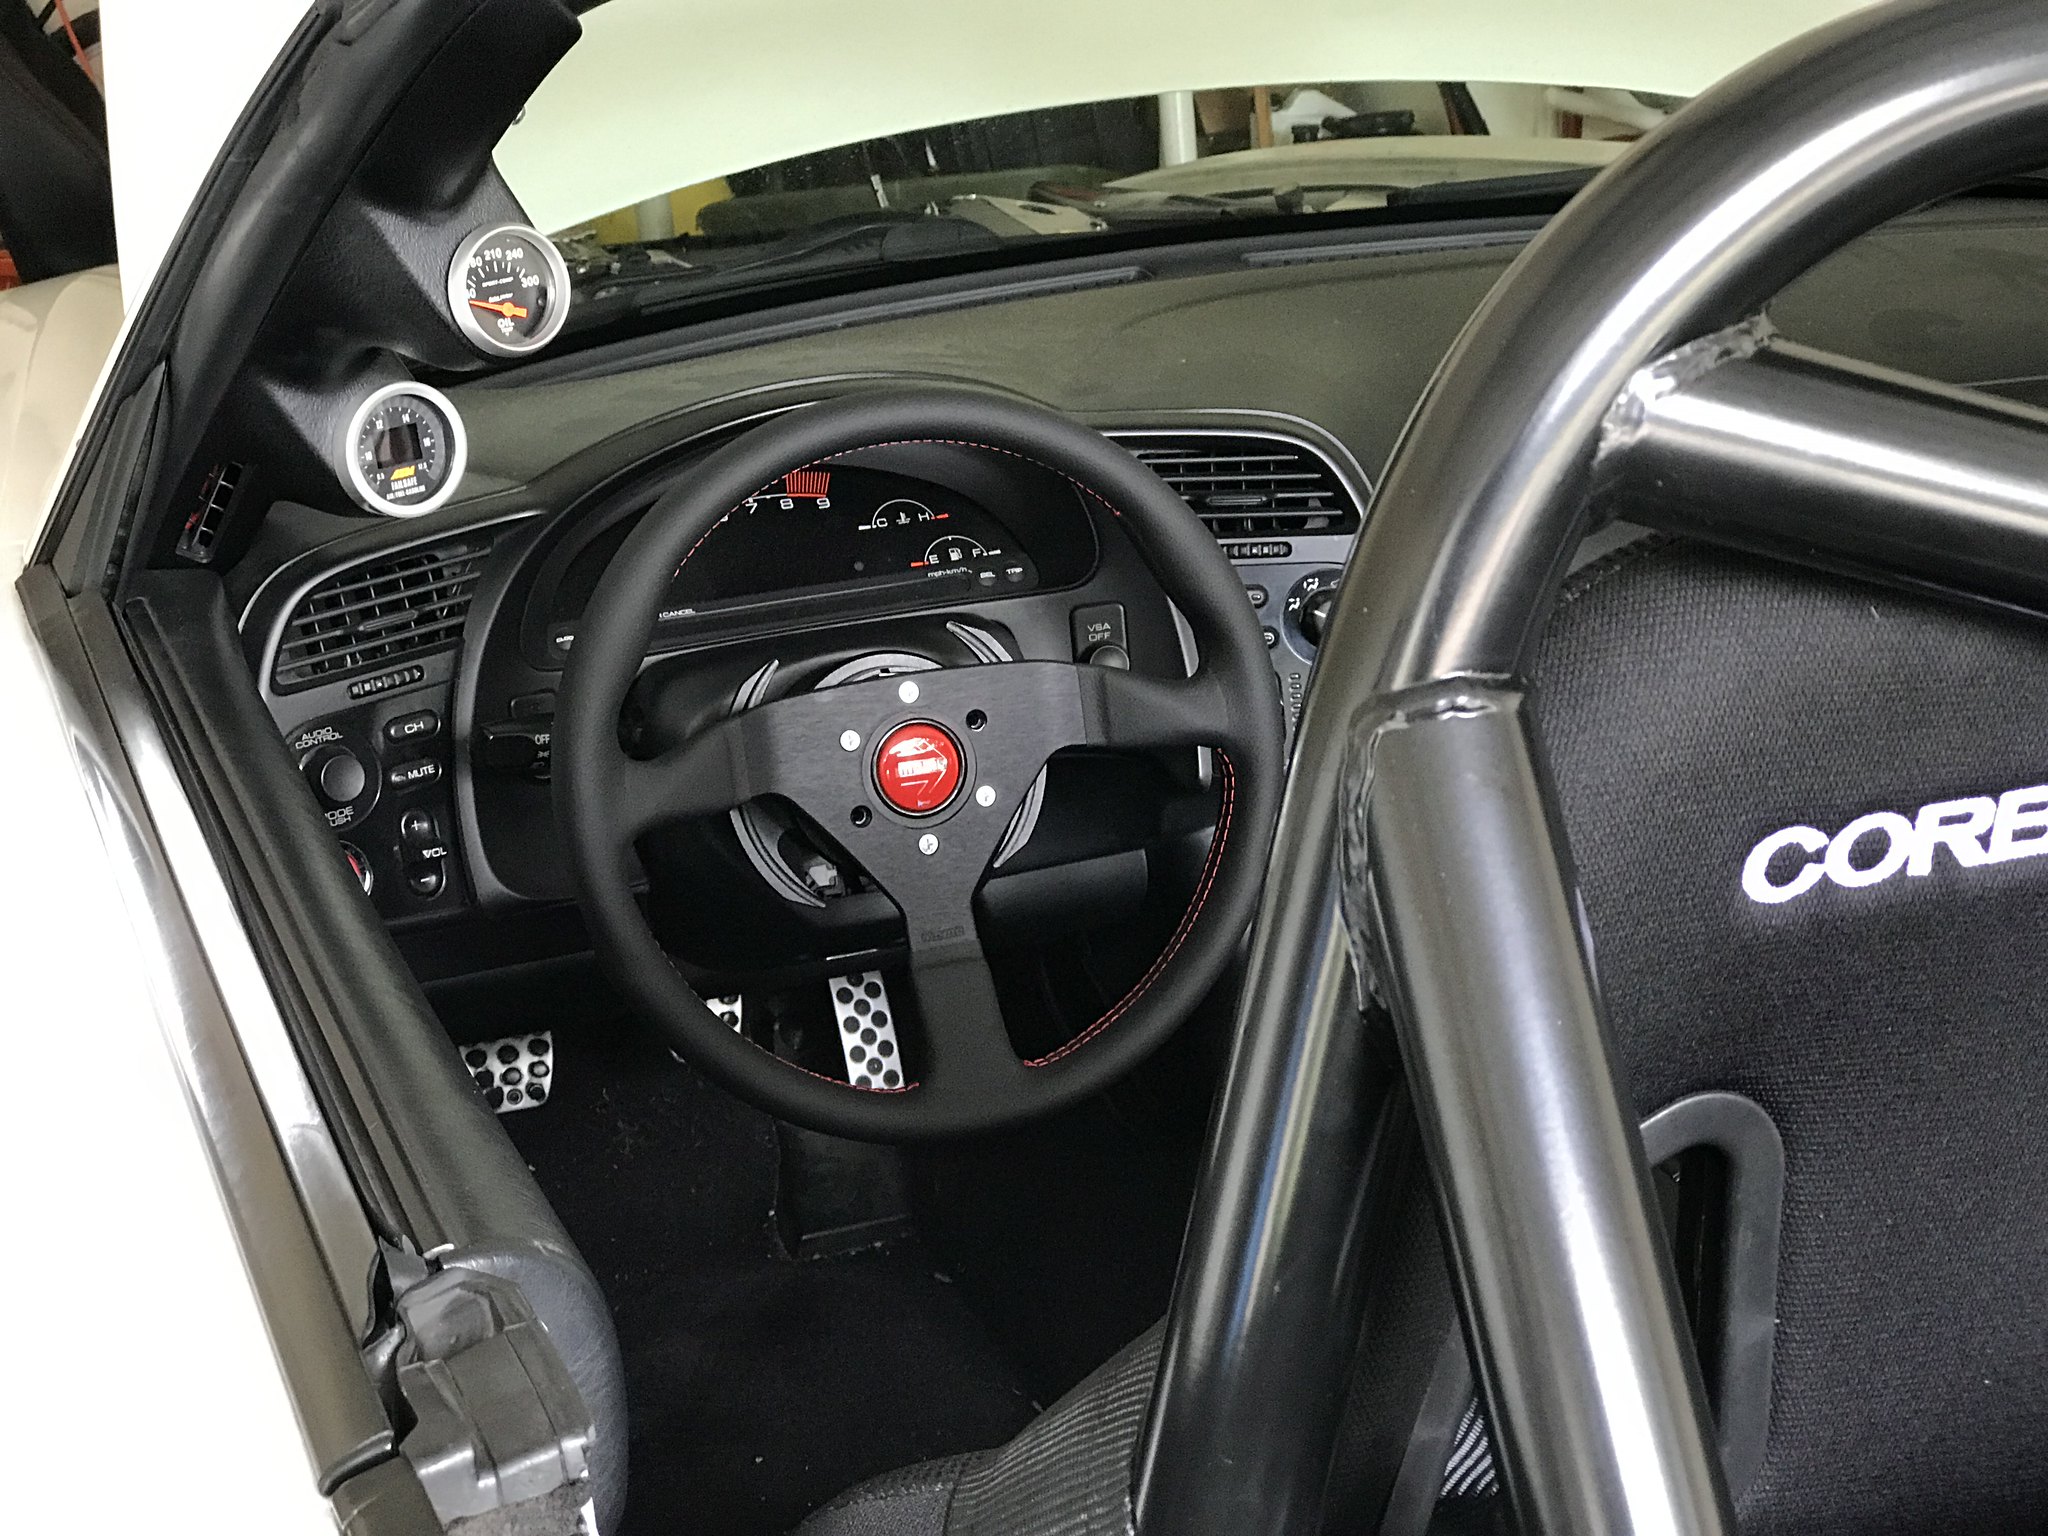
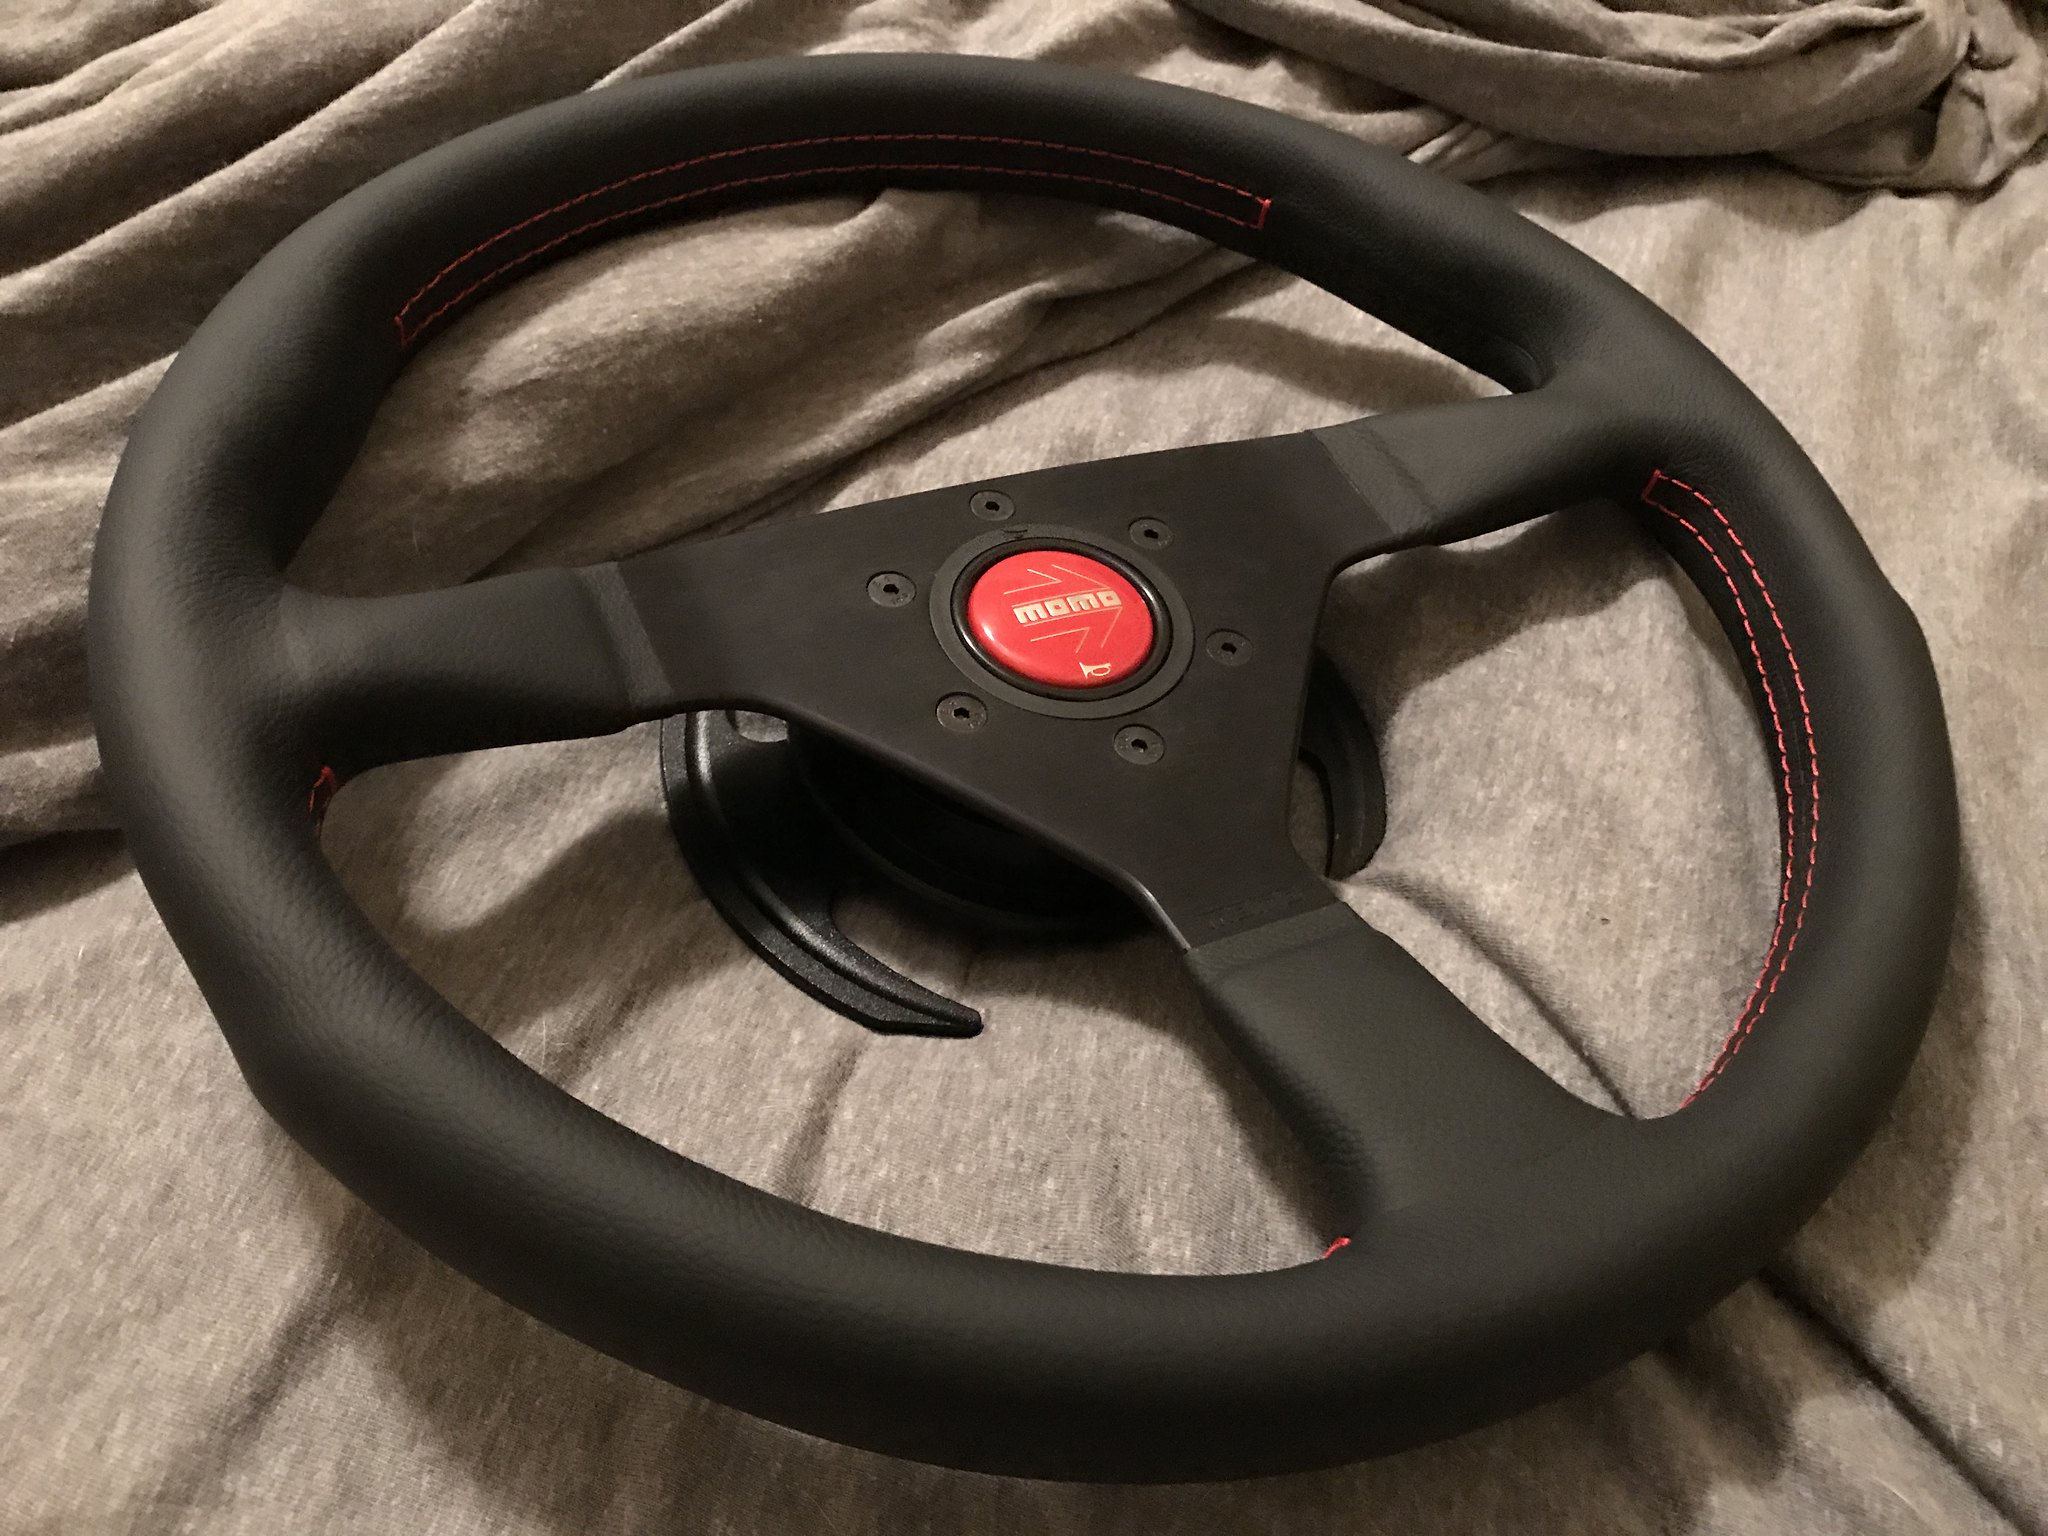
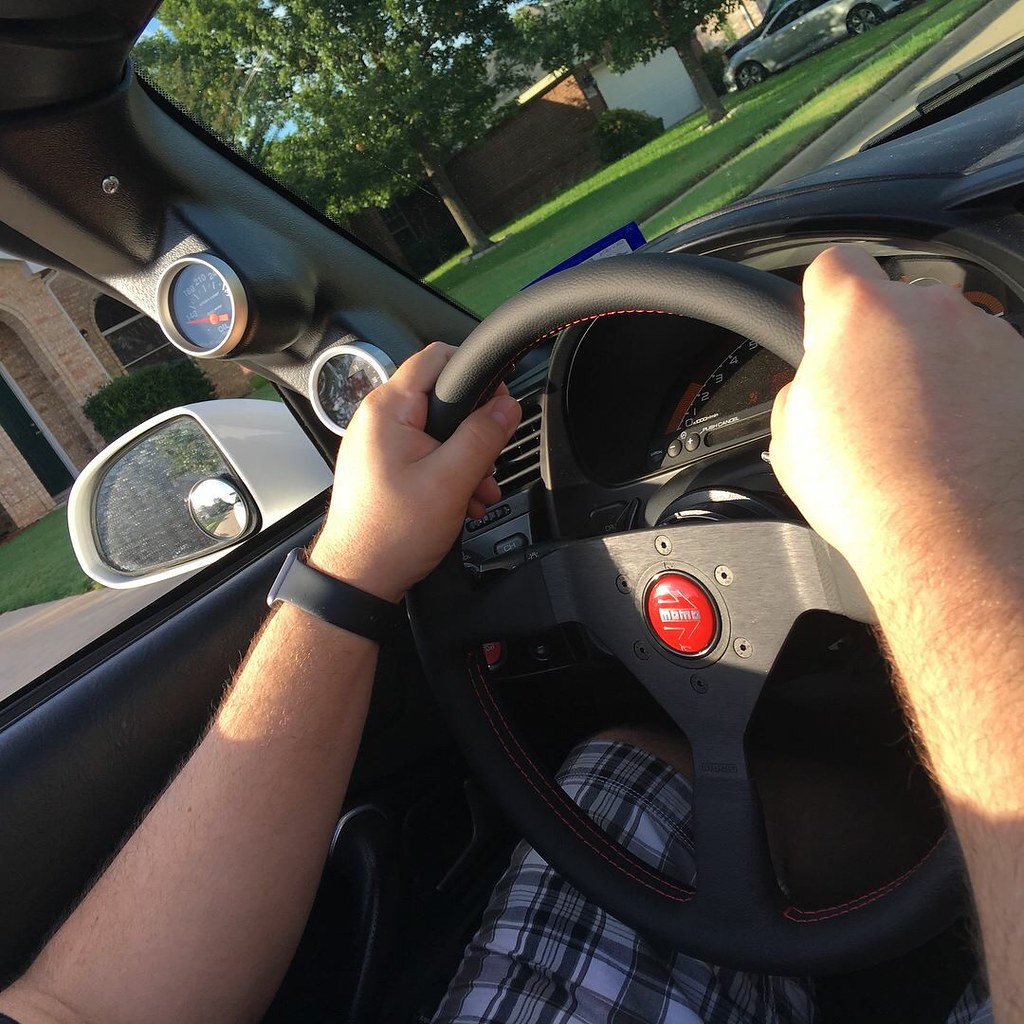
With the new roll bar and harnesses, I felt it was important to also upgrade the steering wheel. After doing some research and reading about different wheel setups, I decided to order the 350mm Momo Monte Carlo in leather and pair it with the NRG Short Hub and v3 Quick Release.
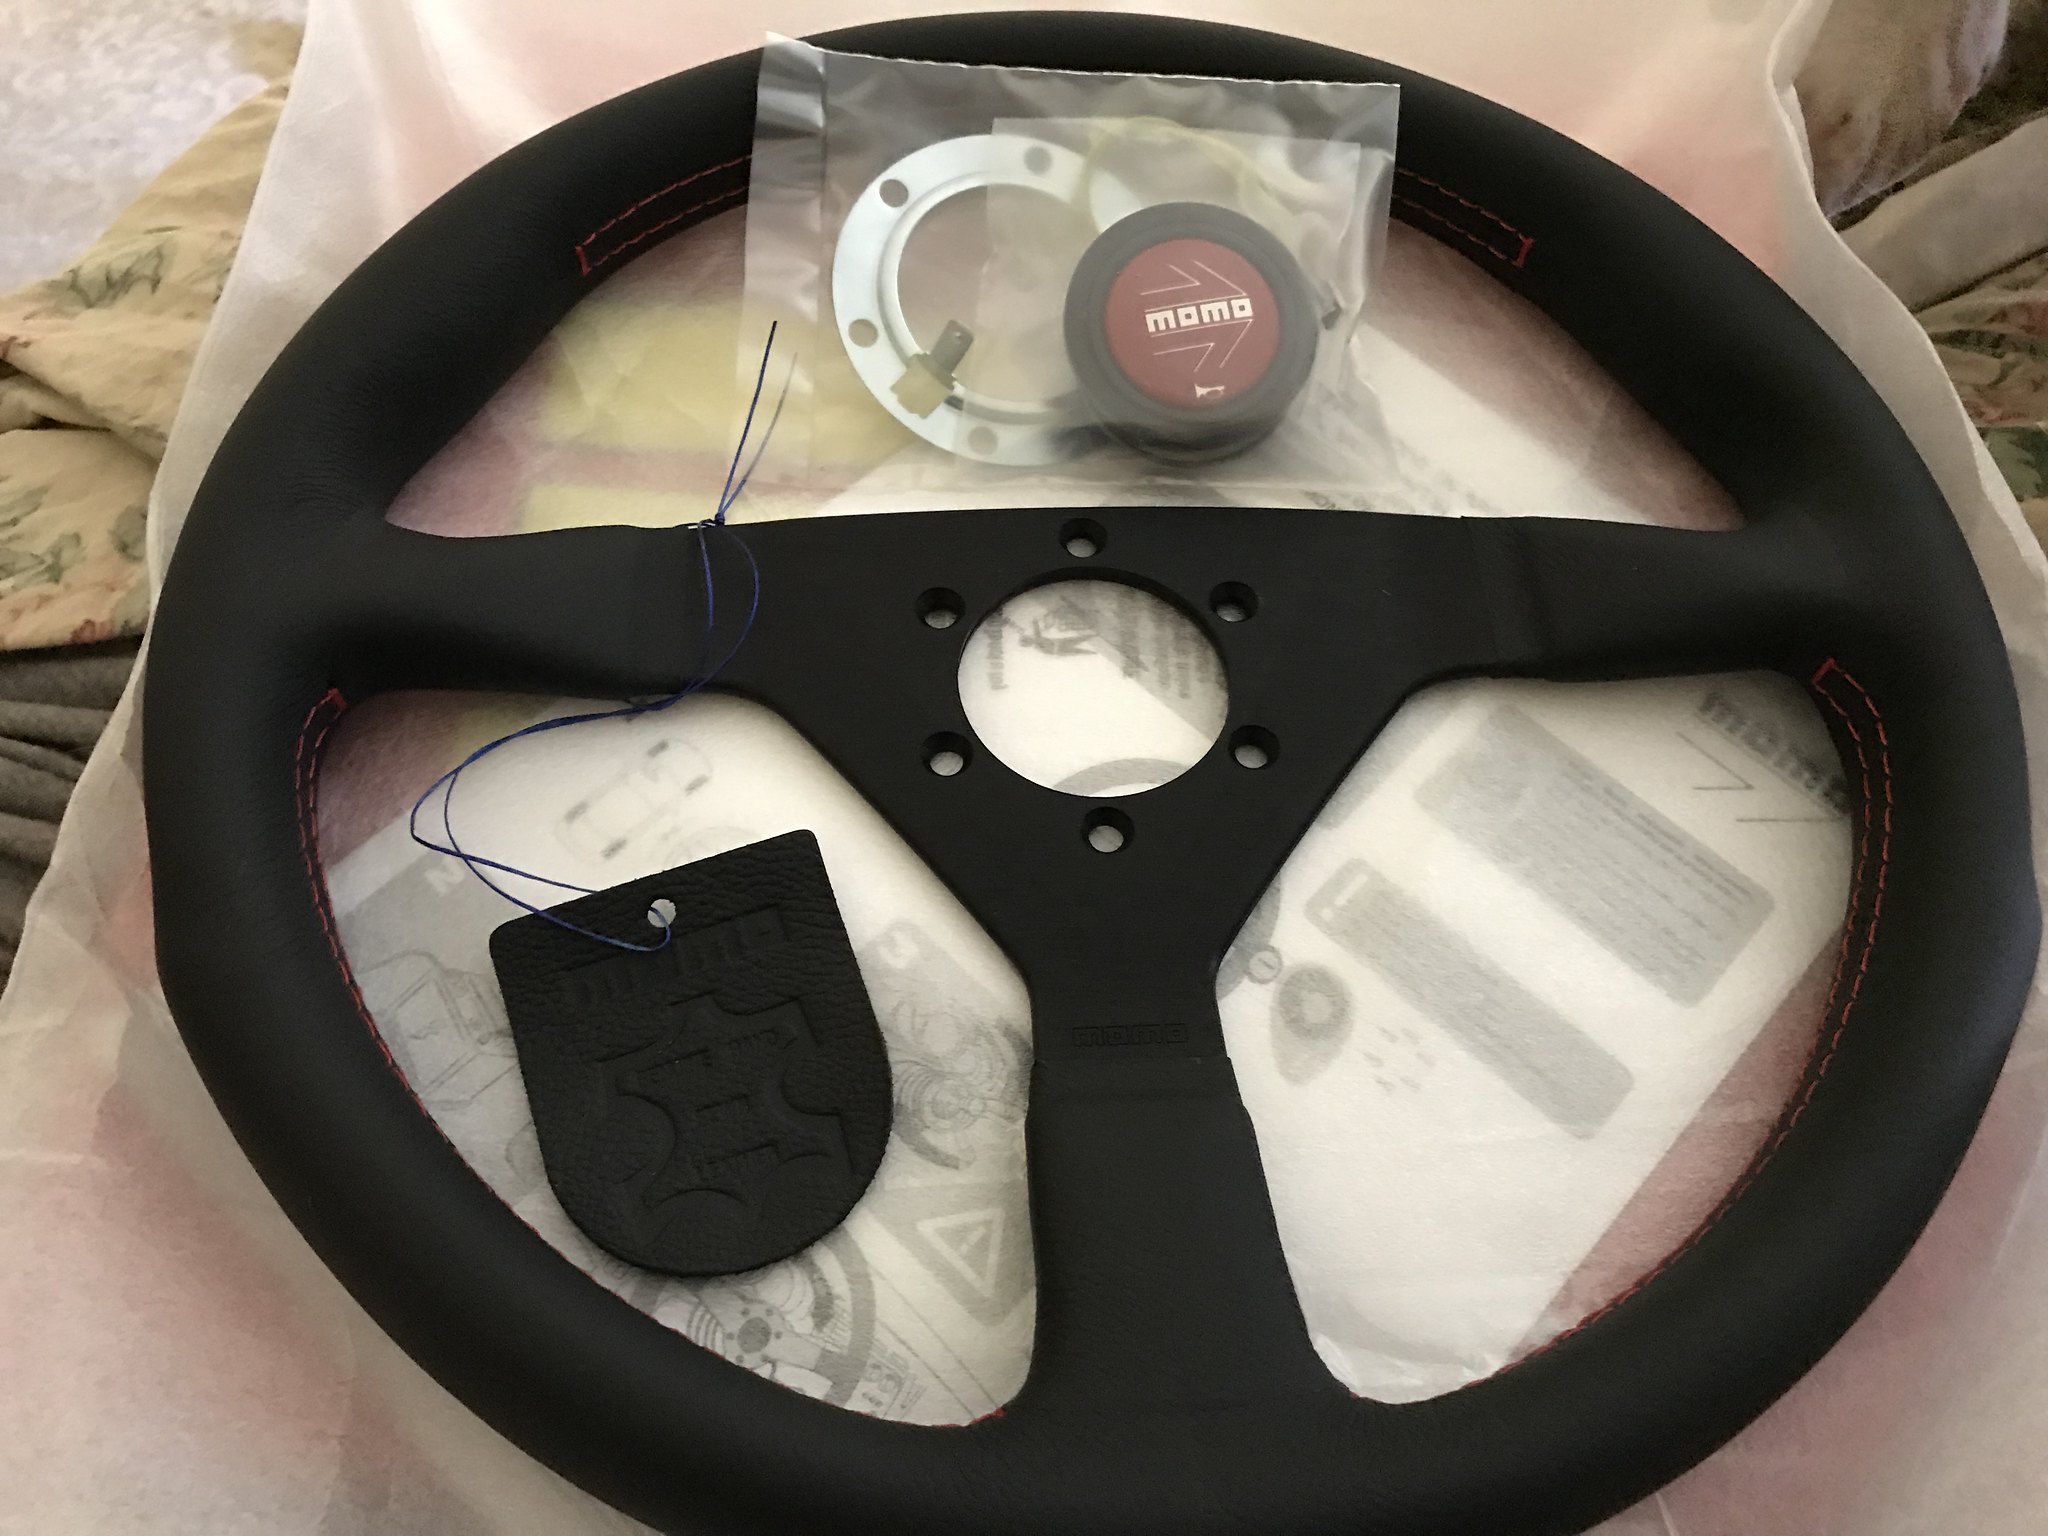

The install is very straight forward, just made sure to take special precautions and disconnect the battery 15 minutes before I touched the airbag.
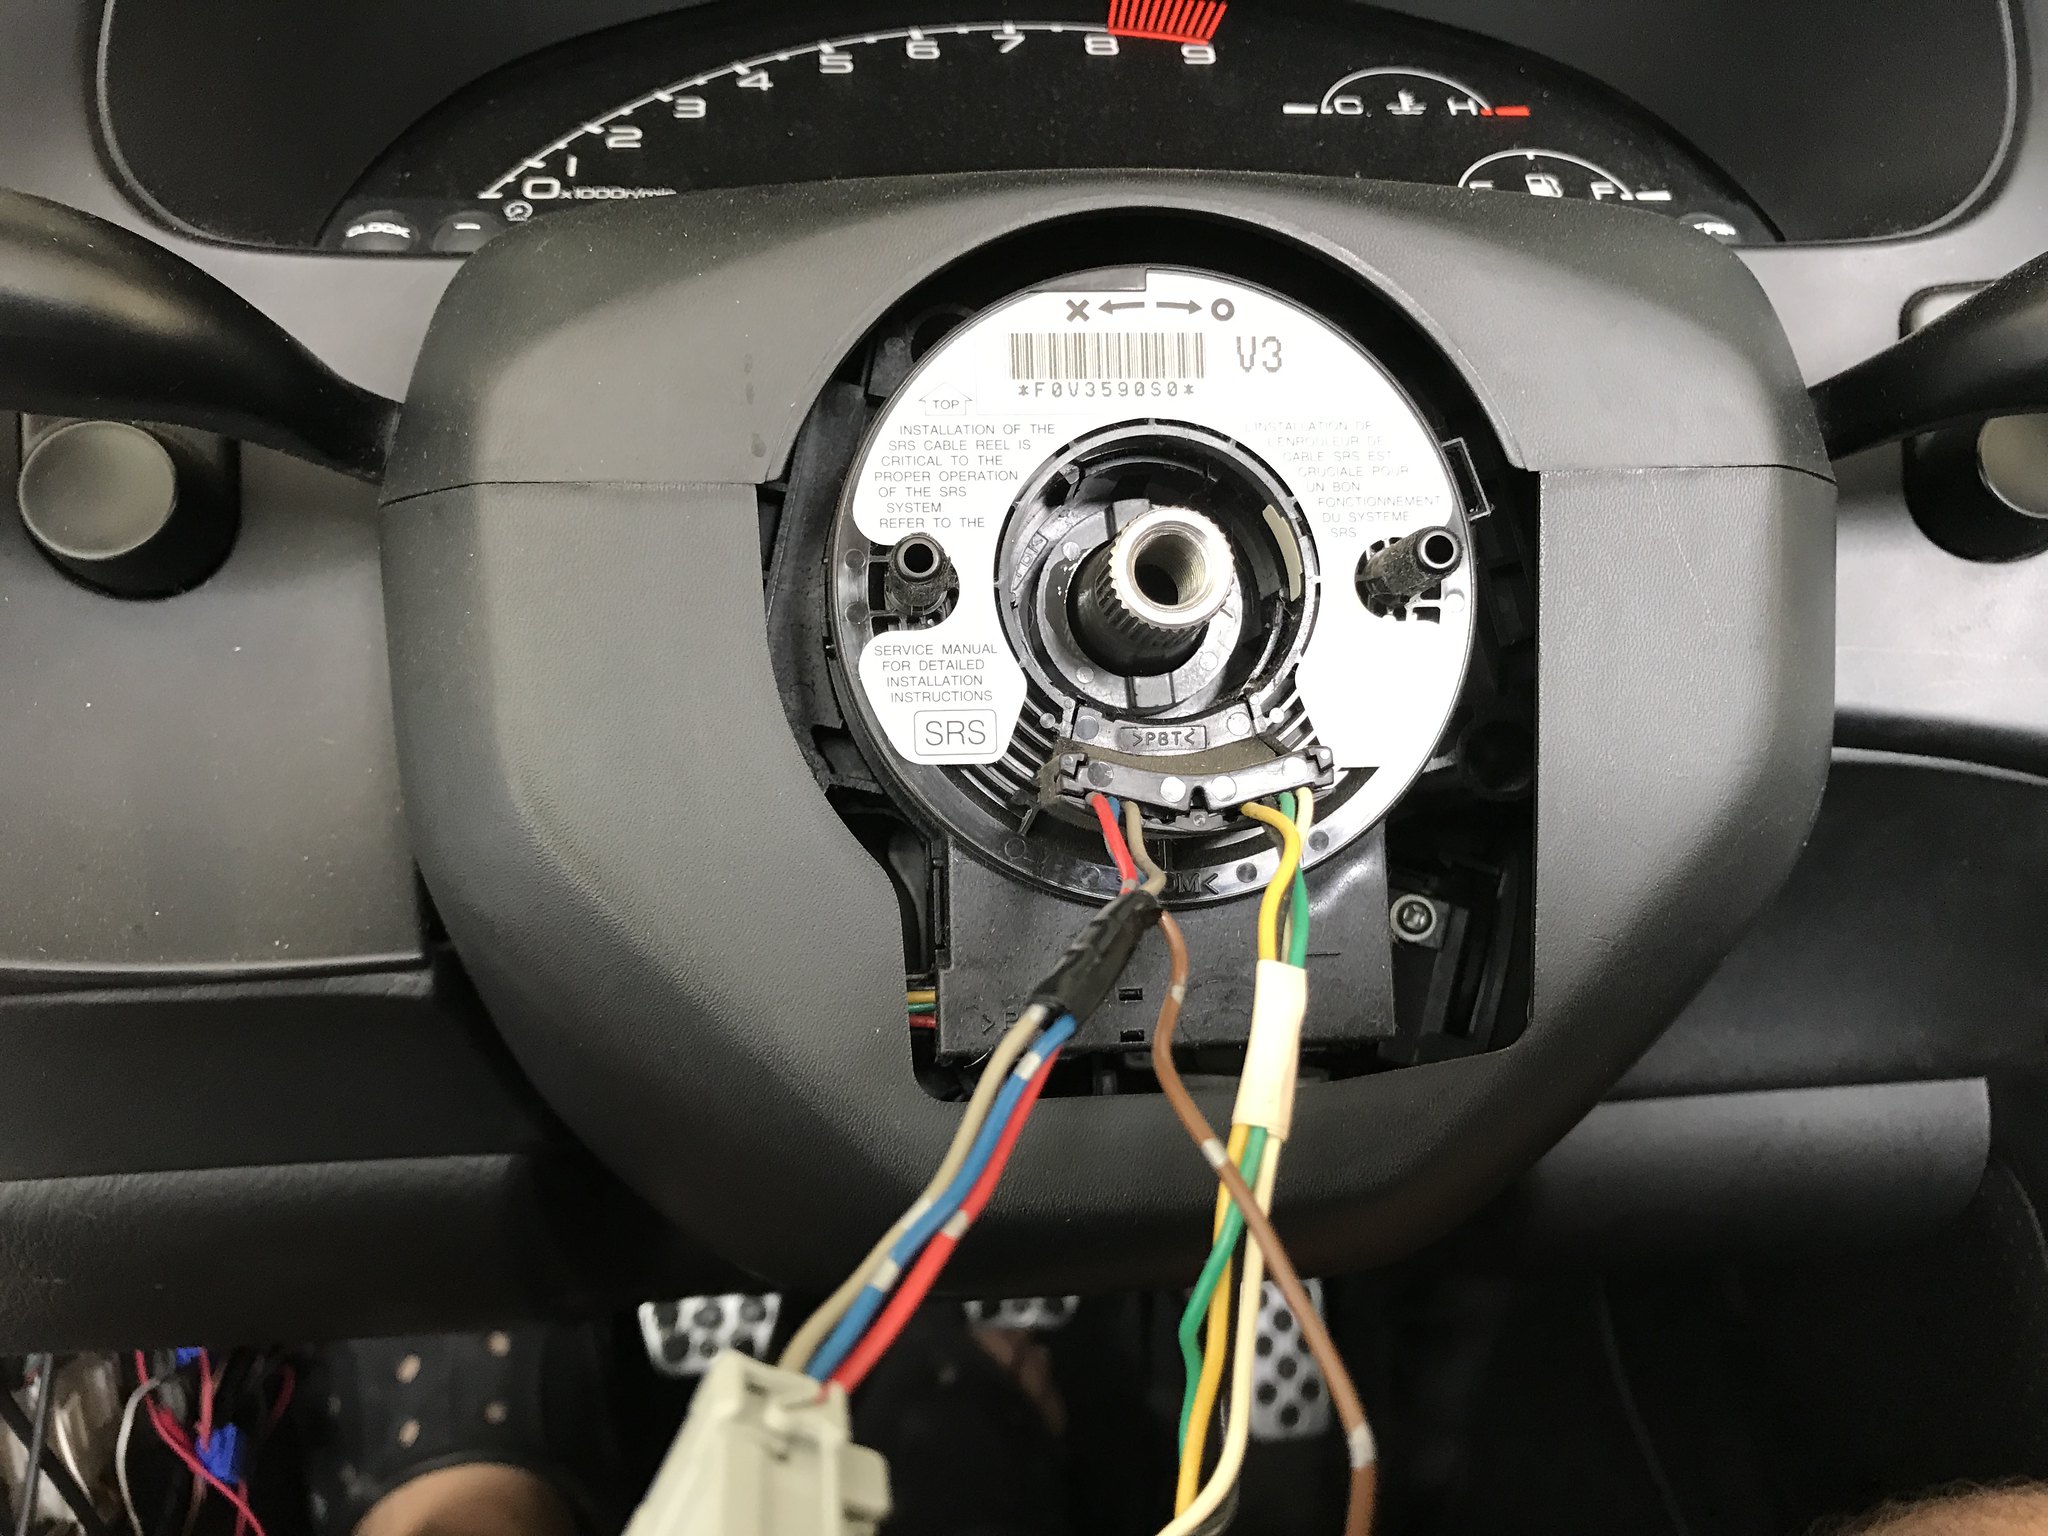
Didn't realize that the steering wheel didn't come with the screws to attach it to the hub, so for mock up purposes I used some I had laying around while I waited for the correct screws to come in (countersunk M5x15mm hex in flat black).
Thanks to the marvels of Amazon Prime Now shipping I had the right screws by the end of the day and was able to finish the install

On Sunday got to take the car for a spirited drive through some back country roads to get a feel for the new wheel. So far really like the feel of the wheel, its slightly thicker than the OEM and has some great contouring that really helps with the control you have.
Have signed up for Club Trials with SCCA on August 26th, can't wait to try all the new mods then and see how the changes have helped.
The install is very straight forward, just made sure to take special precautions and disconnect the battery 15 minutes before I touched the airbag.
Didn't realize that the steering wheel didn't come with the screws to attach it to the hub, so for mock up purposes I used some I had laying around while I waited for the correct screws to come in (countersunk M5x15mm hex in flat black).
Thanks to the marvels of Amazon Prime Now shipping I had the right screws by the end of the day and was able to finish the install
On Sunday got to take the car for a spirited drive through some back country roads to get a feel for the new wheel. So far really like the feel of the wheel, its slightly thicker than the OEM and has some great contouring that really helps with the control you have.
Have signed up for Club Trials with SCCA on August 26th, can't wait to try all the new mods then and see how the changes have helped.