Spoon Feds's MY00 NFR AP1 "build"
 04-05-2019, 07:01 AM
#51

Thank you!
 05-01-2019, 07:52 AM
#52

Thread Starter
May 1st, 2019
Few updates:
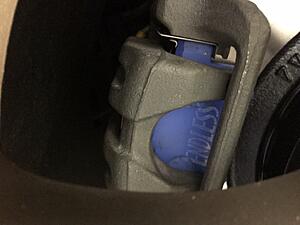
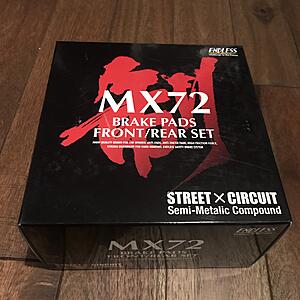
Installed my Spoon callipers with Stoptech stainless lines and Endless MX72 brake pads. Pics whenever it stops raining here in Ontario.
The MX72 just happen to match the blue of the Spoon calliper...which im not mad at
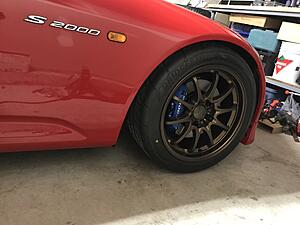
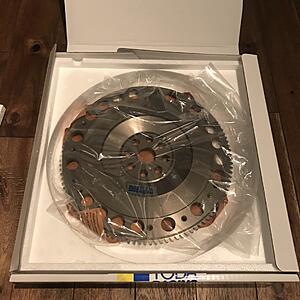
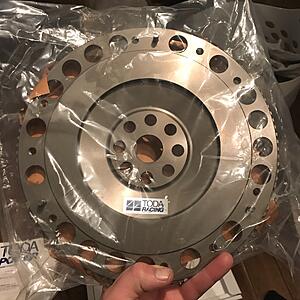
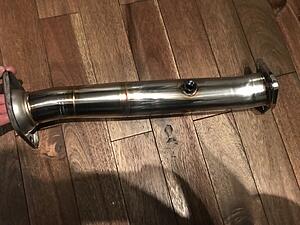
Also picked up a Toda flywheel and 60~70 mm test pipe. These two items won't be installed for a while (clutch job next winter etc).

Few updates:
Installed my Spoon callipers with Stoptech stainless lines and Endless MX72 brake pads. Pics whenever it stops raining here in Ontario.
The MX72 just happen to match the blue of the Spoon calliper...which im not mad at


Also picked up a Toda flywheel and 60~70 mm test pipe. These two items won't be installed for a while (clutch job next winter etc).


 05-02-2019, 03:32 AM
#55
Thread Starter
05-02-2019, 03:42 AM
#56
Thread Starter
Ya I had to do a mild roll (no intentional pulling) and tab relocation. Using the fender roller its critical that you take your time and get the paint nice and hot, to where you can't leave your hard on it for more than half a second. If you rush this process you have a chance of cracking the paint.
When I relocated the tab/bumper mounting point, rather than using a self tapping screw, I drilled a small 5 mm hole and used stainless hardware. The hardware had a nice snug fit in the hole preventing the bumper from shifting. This also allows the bumper to be more "serviceable". After all that was done and tight I removed the original mounting hardware and cut the tab using a slitting disc and tidied everything up with a burr on a die grinder

The following users liked this post:
Acethriller (05-02-2019)
05-02-2019, 06:47 AM
#57
Originally Posted by Spoon Fed
Thanks for the kind words!
Ya I had to do a mild roll (no intentional pulling) and tab relocation. Using the fender roller its critical that you take your time and get the paint nice and hot, to where you can't leave your hard on it for more than half a second. If you rush this process you have a chance of cracking the paint.
When I relocated the tab/bumper mounting point, rather than using a self tapping screw, I drilled a small 5 mm hole and used stainless hardware. The hardware had a nice snug fit in the hole preventing the bumper from shifting. This also allows the bumper to be more "serviceable". After all that was done and tight I removed the original mounting hardware and cut the tab using a slitting disc and tidied everything up with a burr on a die grinder
05-02-2019, 07:26 AM
#58
Thread Starter
05-03-2019, 06:36 AM
#60


Awesome choice in parts! Not sure if you've ever used a set of MX-72s before or not, but I had a set on my previous vehicle and they were fantastic!! Great feeling pad with a remarkably low amount of dust