Clutch Install DIY
 04-06-2010, 07:08 AM
#1

Thread Starter

Here is a recent clutch install I did for a member on here. I could've taken more pictures but it was a pain to take pics with my SLR with dirty hands. If you're in socal I will do it for you at a low cost....
Follow me on IG for more pics: nalgas_de_fierro
To begin you need the following tools:
Sockets: 10mm, 12mm, 14mm, 17mm, and 19mm
Wrenches
8mm allen wrench
At least two jack stands
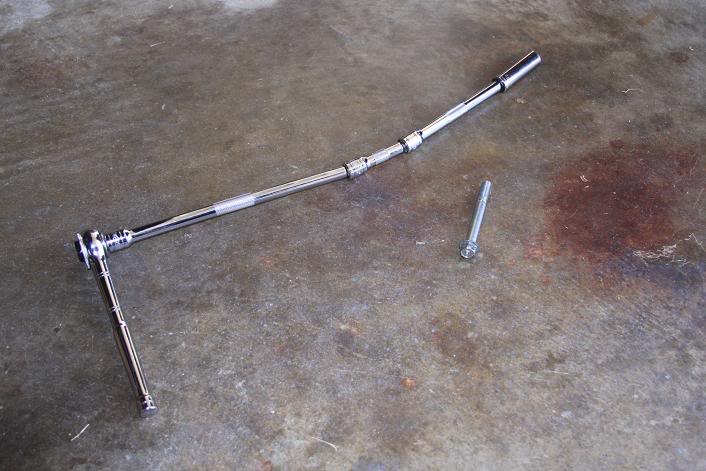
At least 24 in of wobble extensions
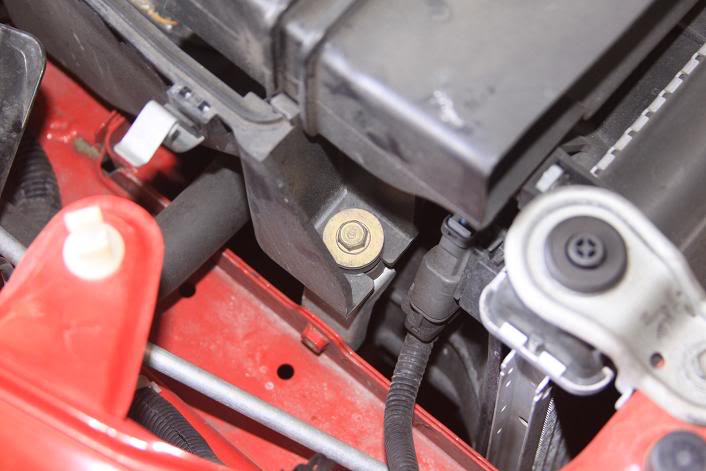
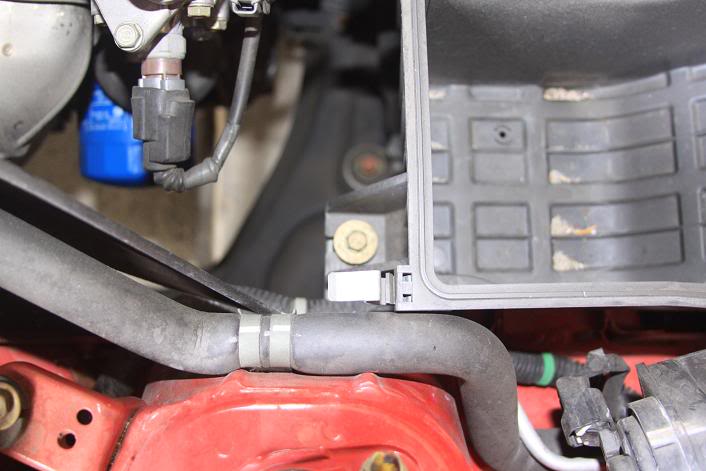
Begin by removing the stock air box (3, 10mm bolts)

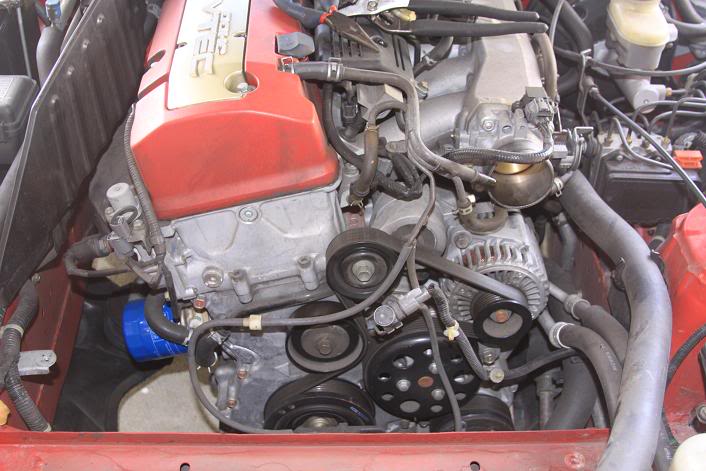
Remove the serpentine belt by moving the idler pulley counter-clockwise (14mm)
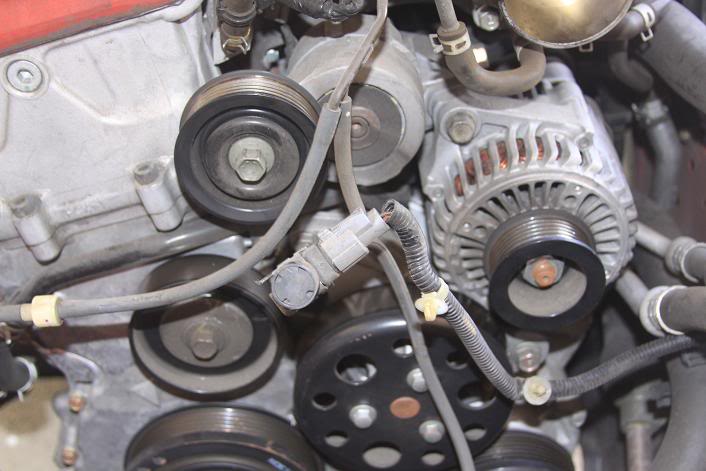
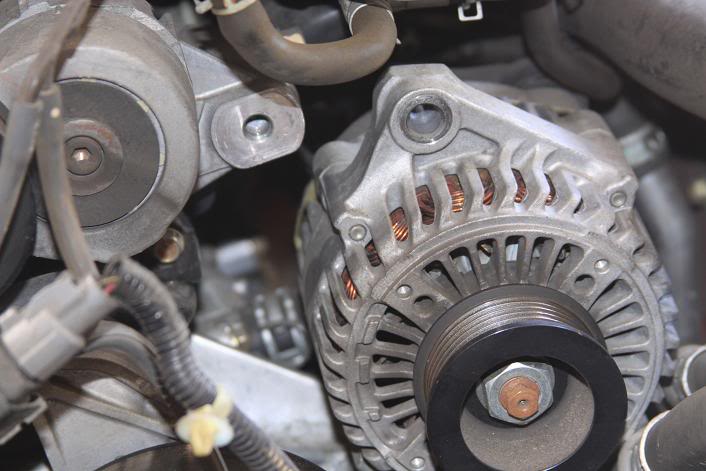
Remove the top alternator bolt (14mm)
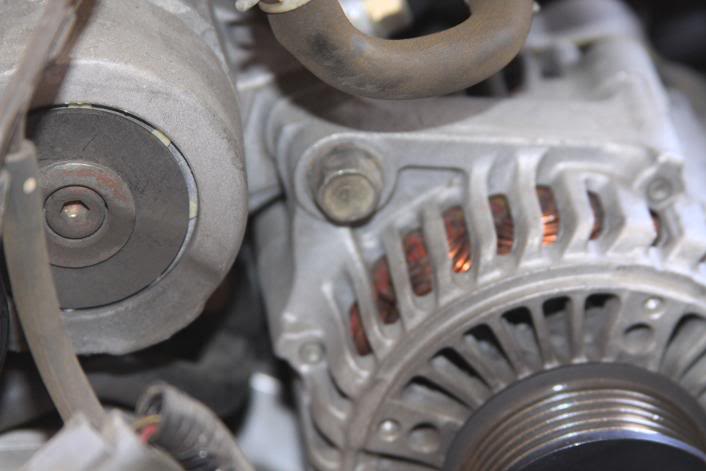
Rotate alternator over clockwise
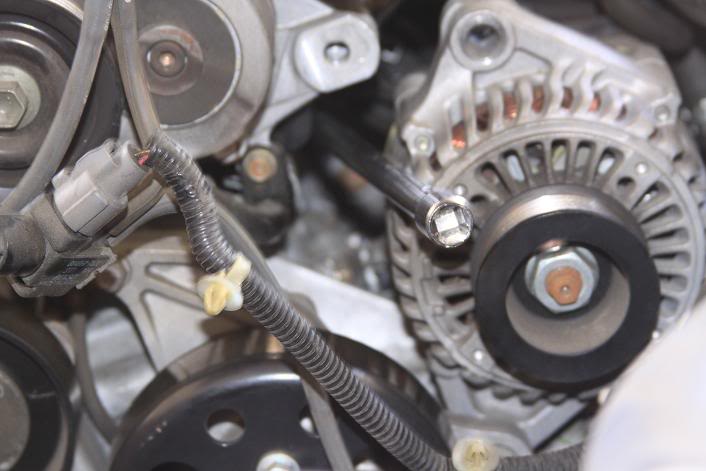
Insert the extensions and remove top starter bolt (14mm)
Remove the black heat shield (4, 10mm bolts)

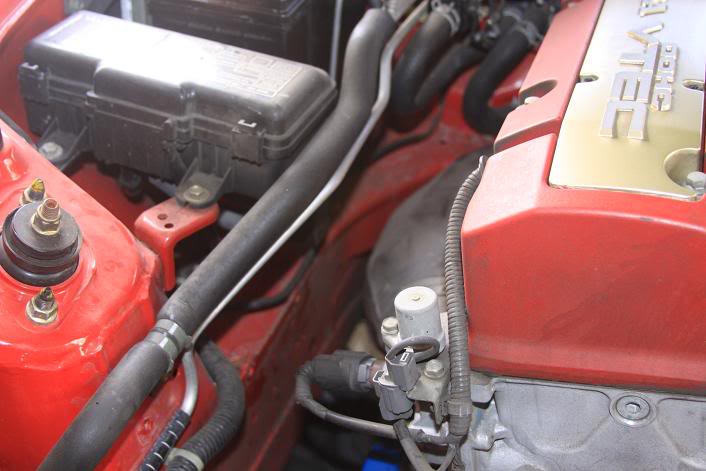
Remove exhaust manifold heat shield (4, 12mm bolts)
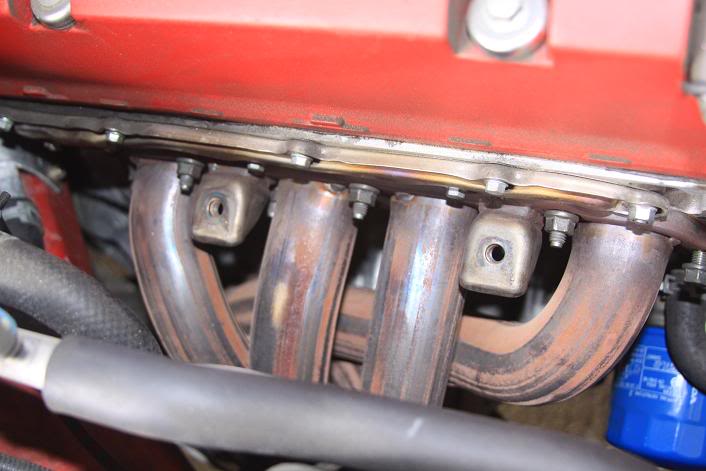
Remove exhaust manifold nuts (7, 12mm nuts)
Go under the car and remove the manifold support (2, 14mm bolts)
Using two wrenches remove cat/header bolts (2, 12mm)
Under the subframe, remove motor mount nuts (4, 17mm)
Lift the passenger side of the motor about 2in and remove header from below.
On the driver side under the car, remove the A/C condenser bolts (4, 14mm)
Mark the position of the steering shaft and remove the bottom bolt (10mm)
Loosen the top bolt (10mm) and slide the joint towards the firewall
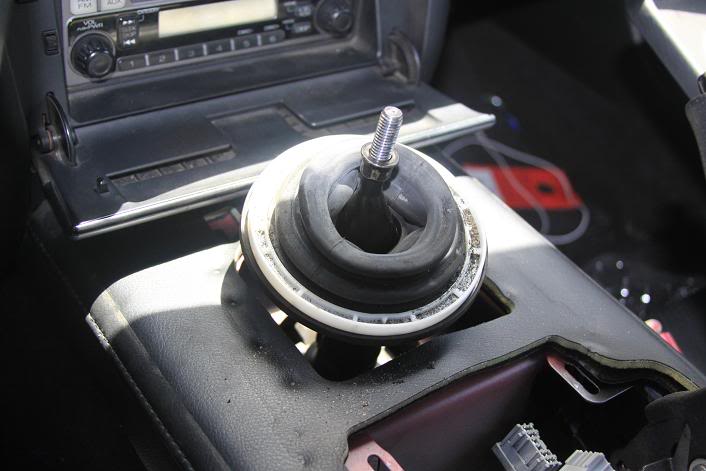
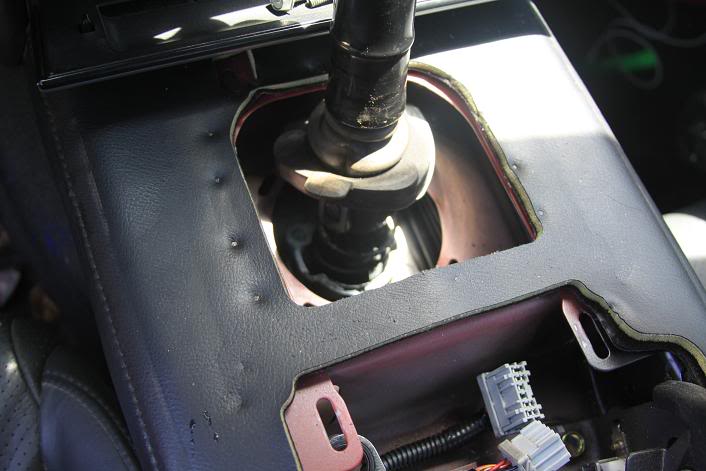
-Inside the car: remove the shift knob holding locking nut with 14mm wrench
-Remove the center console (it just snaps out, unplug two harnesses before removing)
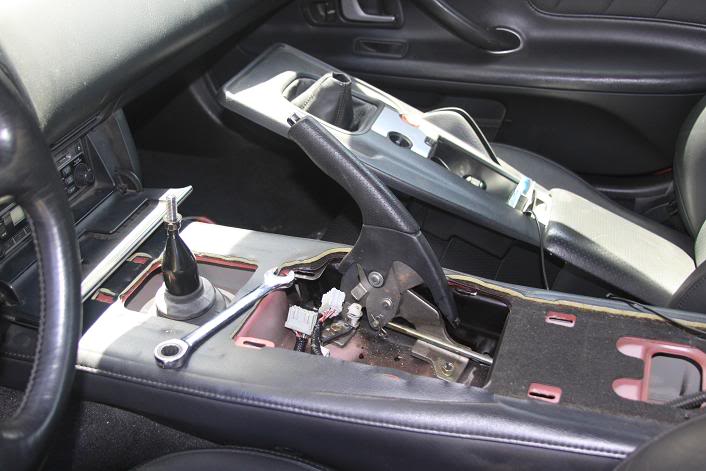
-Using a flat head screwdriver, there are 4 arrows on the annular plastic piece, insert screwdriver and push towards the outside of the ring
Remove the shifter (3, 10mm bolts)
Back under the car:
Remove driveshaft bolts (8, 8mm allen wrench)
Remove the lower brace bar (3, 14mm per side)
Lower subframe (3 bolts per side, remove the middle one (19mm), the closest ones to the firewall are 17mm (back out 3 inches), the ones farthest away are 19mm (back out 3 inches)

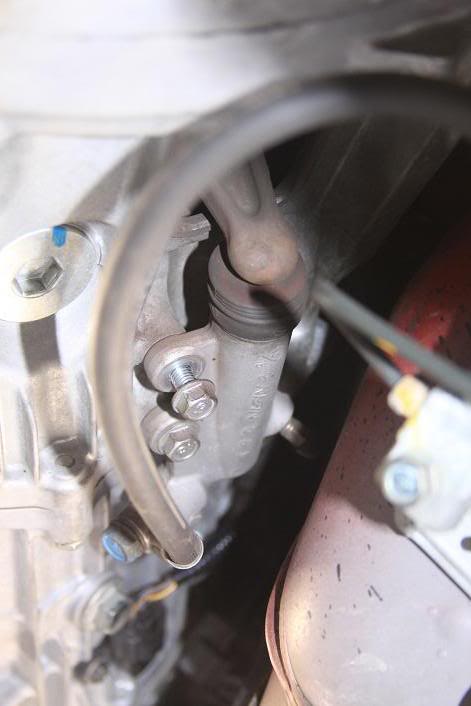
Remove slave cylinder on transmission housing (2, 12mm)
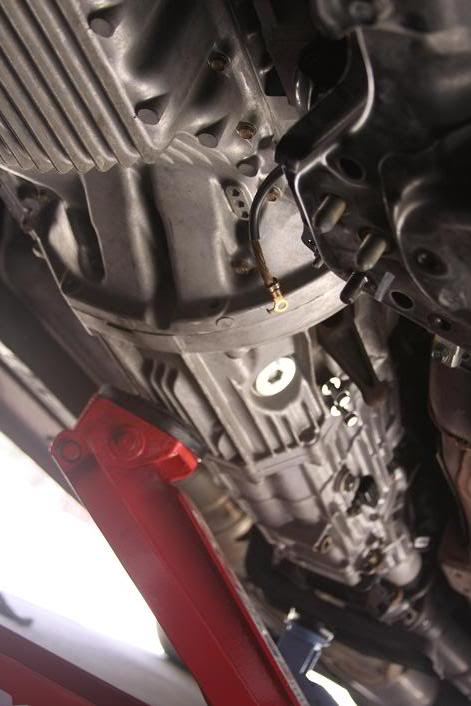
With a jack support transmission housing and unbolt tranny mount (3, 14mm)
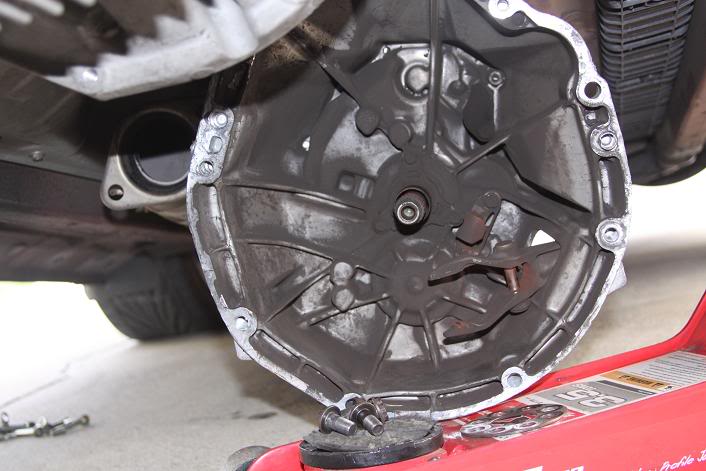
Remove transmission bolts (2, 14mm & 6, 17mm)
Disengage fork from throwout bearing

Lower jack and pull the transmission out until the main shaft is completely out
Remove pressure plate (12, 10mm 12 point nuts)
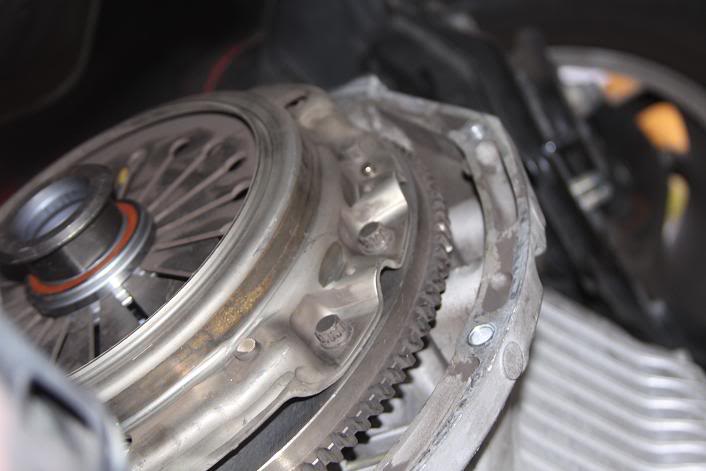
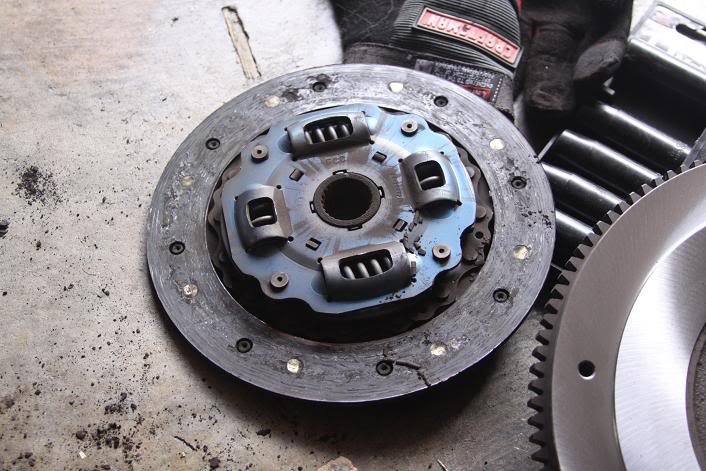
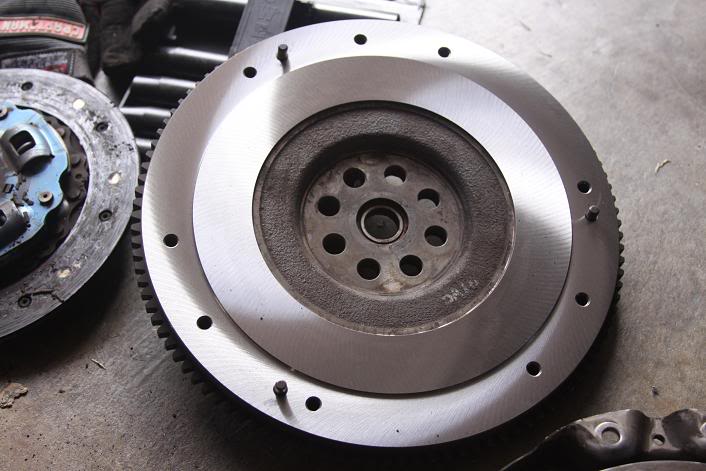
Random Pictures:
Worn out clutch:
Resurfaced flywheel
Brand new disk

Follow me on IG for more pics: nalgas_de_fierro
To begin you need the following tools:
Sockets: 10mm, 12mm, 14mm, 17mm, and 19mm
Wrenches
8mm allen wrench
At least two jack stands
At least 24 in of wobble extensions
Begin by removing the stock air box (3, 10mm bolts)
Remove the serpentine belt by moving the idler pulley counter-clockwise (14mm)
Remove the top alternator bolt (14mm)
Rotate alternator over clockwise
Insert the extensions and remove top starter bolt (14mm)
Remove the black heat shield (4, 10mm bolts)
Remove exhaust manifold heat shield (4, 12mm bolts)
Remove exhaust manifold nuts (7, 12mm nuts)
Go under the car and remove the manifold support (2, 14mm bolts)
Using two wrenches remove cat/header bolts (2, 12mm)
Under the subframe, remove motor mount nuts (4, 17mm)
Lift the passenger side of the motor about 2in and remove header from below.
On the driver side under the car, remove the A/C condenser bolts (4, 14mm)
Mark the position of the steering shaft and remove the bottom bolt (10mm)
Loosen the top bolt (10mm) and slide the joint towards the firewall
-Inside the car: remove the shift knob holding locking nut with 14mm wrench
-Remove the center console (it just snaps out, unplug two harnesses before removing)
-Using a flat head screwdriver, there are 4 arrows on the annular plastic piece, insert screwdriver and push towards the outside of the ring
Remove the shifter (3, 10mm bolts)
Back under the car:
Remove driveshaft bolts (8, 8mm allen wrench)
Remove the lower brace bar (3, 14mm per side)
Lower subframe (3 bolts per side, remove the middle one (19mm), the closest ones to the firewall are 17mm (back out 3 inches), the ones farthest away are 19mm (back out 3 inches)
Remove slave cylinder on transmission housing (2, 12mm)
With a jack support transmission housing and unbolt tranny mount (3, 14mm)
Remove transmission bolts (2, 14mm & 6, 17mm)
Disengage fork from throwout bearing
Lower jack and pull the transmission out until the main shaft is completely out
Remove pressure plate (12, 10mm 12 point nuts)
Random Pictures:
Worn out clutch:
Resurfaced flywheel
Brand new disk
Last edited by blueap2; 08-01-2017 at 12:25 PM.

The following users liked this post:
Royaltrophy (05-10-2017)


Trending Topics
06-29-2010, 12:51 PM
#8

I would like to add to this thread. I just did a clutch on a members car and I did it a little differently than what was posted. I do not have pictures but this is what I did.
I did not drop the lower subframe and the reason why is because it is possible to knock the car out of alignment, also you would have to disconnect your steering shaft and if you do not know what you are doing, you can break the clock spring in the steering column for the airbag if the steering wheel gets turn 360 degrees. What I did was use two floor jacks and had the car up on four jack stands. I took off the header and the catalytic converter as he mentioned above along with everything else he posted. Then with one floor jack under the transmission and one under the engine, I unbolted both engine mounts(three nuts, one on top 17mm and two on the bottom 14mm) and engine mount brackets(four bolts all 14mm). Removed the brackets and the passenger side mount. I left the drivers side mount in since it did not have to come out and it was kind of a pain to remove it. By doing this, I lowered the engine and transmission down so I now can get at the two top bellhousing bolts. You cannot get these bolts just but unbolting the transmission crossmember mount. I lowered it slowly and had enough slack for all the wiring and hoses with no issues. I used a 17mm swivel socket attached to a 1/2" to 3/8" reducer attached to some 1/2" socket extensions. Use the 1/2" since it will put more torque on the bolt than the 3/8" extensions will. After that I put everything back together.
What I can tell you that this is not an easy job. It is even harder if you are a big person with big hands. I'm average size of 5'9" 185 with 15+ years as an auto technician and I could barely get my hands in most places. Doing it on your back does not help either.
Also, I HIGHLY recommend investing in 3/8" swivel sockets which you can get from Sears. Not a swivel with a socket at the end of it, one with the socket head incorporated in the swivel for those who are not that tool savvy. These will make your life easier, not just for this job but for any job you come across.
James
The following users liked this post:
Spaceman2345 (03-01-2023)

