
How to Change Wheel Color in Photoshop

Thread Starter
Registered User
Joined: Jul 2007
Posts: 904
Likes: 0
From: Tustin, CA
How to Change Wheel Color in Photoshop
by Bloodred
I visit several car forums, and I always see people requesting Photoshops of different wheels on their cars, so I figured I'd just do a quick guide on the easiest way to do this. Like they always say, give a man a fish, you feed him for a day, etc. If one of the mods wants to sticky this, it might be helpful in the future.
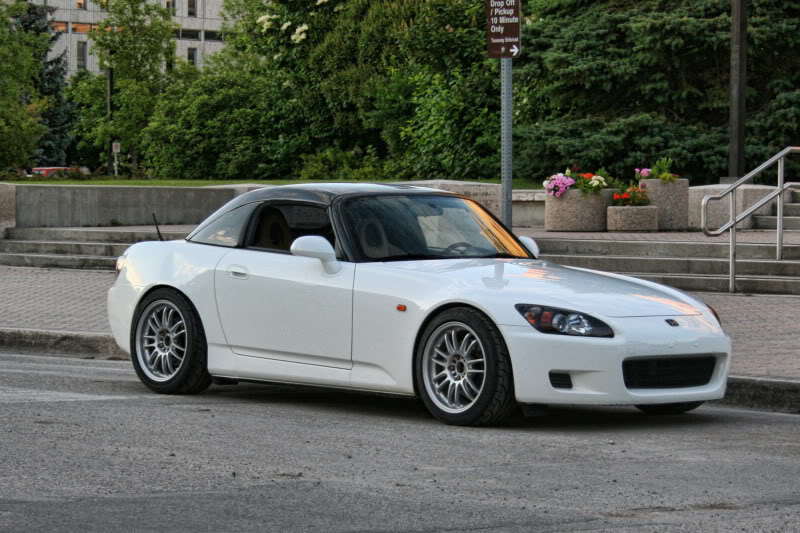
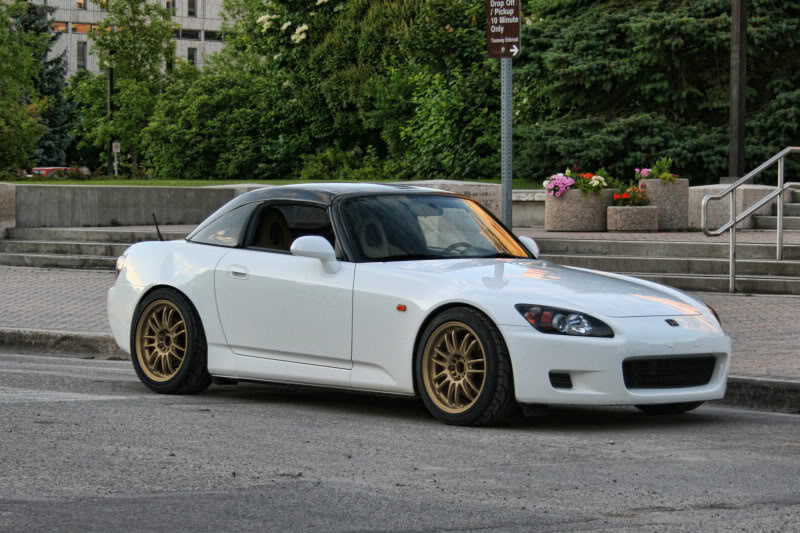
To start out, open up Photoshop (I use CS3, but all the versions should be pretty similar for this process). Try to find an image of your car that isn't at an extreme angle, as it will make this process easier. Here's the image I'll be using (thanks to member type-j for the pic):
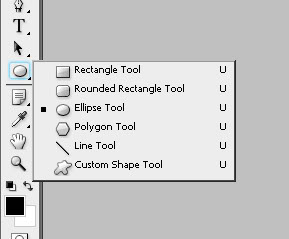
First, I'll show you how to change the color of your wheels. Start by selecting the ellipse tool as seen here (click and hold down on the rectangle tool if you don't see it):
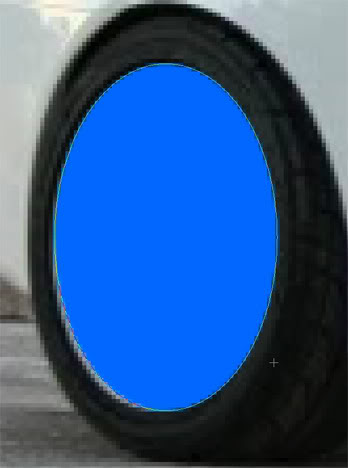
Then, zoom in on one of the wheels (shortcut: ctrl + space + click & drag), and draw a circle approximately the size of the wheel. Don't worry if it isn't perfect, we'll fix that in a second.
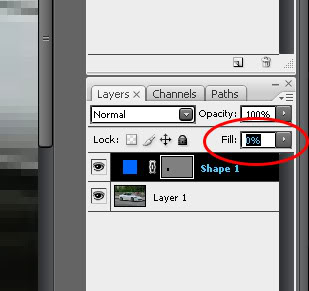
Now we have a problem: we can't see the wheel because the circle is blocking it. To fix this, go into your layers palette (Window>Layers if you don't see it), click on Shape 1 and set the "fill" to 0% as seen here:
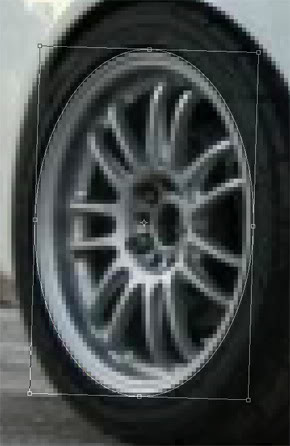
Now, all you should see is a light outline of the circle (if you don't see the outline, click the gray rectangle on the Shape 1 layer). Now we need to make the circle fit the outline of the rim. With the circle selected, go Edit>Free Transform Path (or hit ctrl+t):
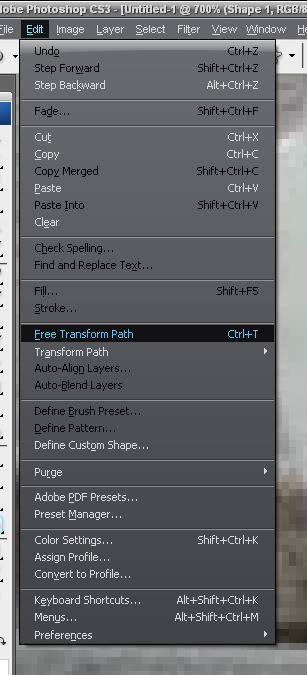
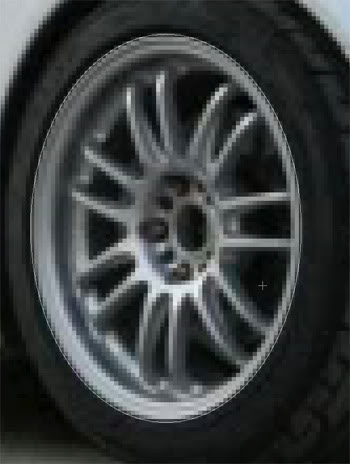
You should see a box with handles appear around the circle. Now scale and rotate the circle until it fits the wheel perfectly. I usually line up the edges of the box to the edges of the rim, then rotate it to get the circle to line up perfectly. Hit Enter when you have it lined up to finalize the changes.
Ok, that's one wheel outlined, now do the other one the same way (draw another ellipse, free transform, hit enter to finalize).
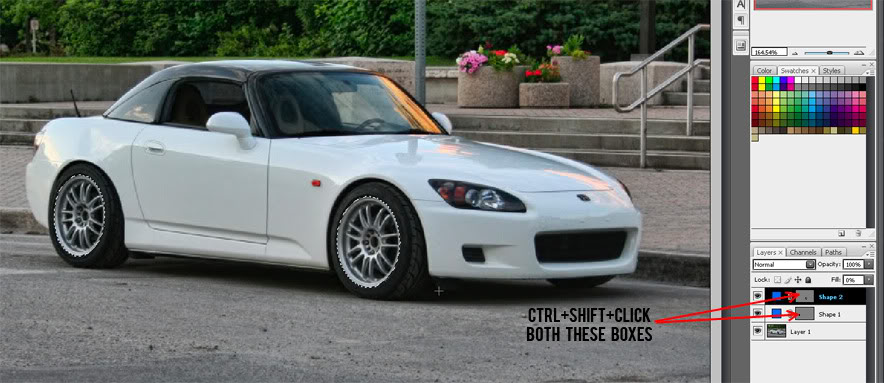
Once you're done outlining both wheels, zoom out (shortcut: ctrl+0). Then, hold down Ctrl AND Shift and click inside each of the gray rectangles on the Shape 1 and Shape 2 layers in the Layers palette. You should now see a dotted outline around each wheel, showing that they are selected:
Here's the fun part: in the Layers palette, click the little black/white circle at the bottom (looks somewhat like a yin/yang symbol), then select "hue/saturation."
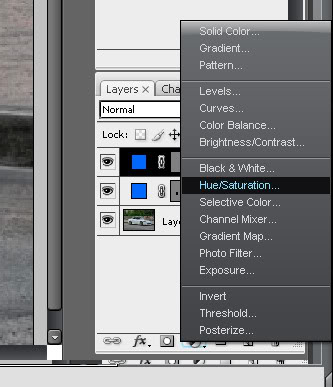
This will create what's known as an "Adjustment Layer" which only adjusts the area we had selected (the wheels). After clicking "hue/saturation" on the menu, a box will pop up:
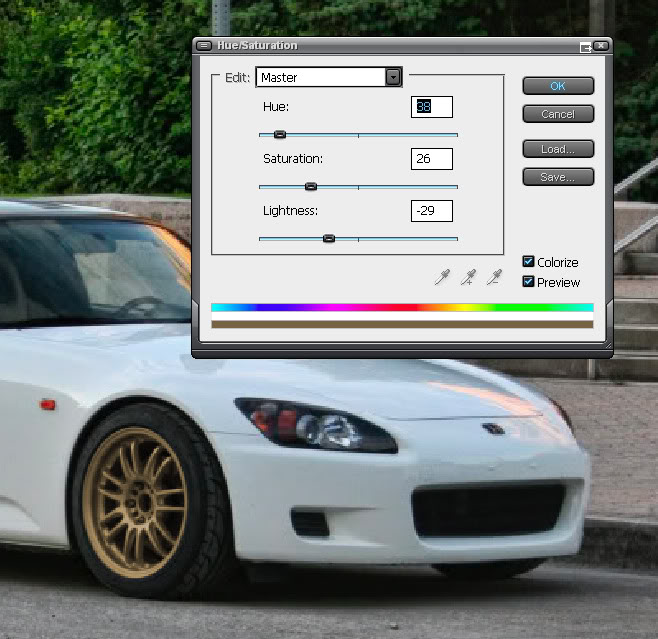
First, click the check box next to "Colorize" to make the wheels a uniform color. Then, just drag the sliders left or right to get the color you want. Saturation makes the color more intense, hue changes the shade, and lightness changes lightness (obvious huh?). Low saturation and lightness values work well for creating metallic colors like gold and bronze. Click OK when you're done.
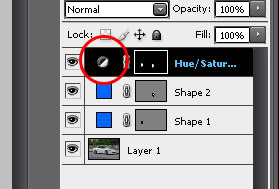
I suggest saving this as a .PSD file, since that will let you go back and change the colors again without redoing all the steps. To change the colors again, just double-click the black/white circle on the "Hue/Saturation" layer (circled below):
That's all there is to it. If there's enough interest, I can also make a guide on how to Photoshop different wheels onto cars.
A technical note (for those who want to understand what they just did):
What you have just created is called a "mask." In Photoshop, anything white on the mask is affected by the adjustment layer we just made, anything black is not affected. Notice how in the last image above, there are two white spots inside the black box on the Hue/Saturation layer. Those spots are the wheels, which are white on the mask because they're masked off to be recolored, much like you'd mask something off to paint it in real life. If you understand this concept, everything becomes much easier, and you can just add black or white to recolor certain parts of the image. Just use a paintbrush or select and Edit>Fill with black or white to recolor anything on the car.
Happy Photoshopping
UPDATE 7-31-09: Click here for Part 2!
by Bloodred
I visit several car forums, and I always see people requesting Photoshops of different wheels on their cars, so I figured I'd just do a quick guide on the easiest way to do this. Like they always say, give a man a fish, you feed him for a day, etc. If one of the mods wants to sticky this, it might be helpful in the future.
To start out, open up Photoshop (I use CS3, but all the versions should be pretty similar for this process). Try to find an image of your car that isn't at an extreme angle, as it will make this process easier. Here's the image I'll be using (thanks to member type-j for the pic):
First, I'll show you how to change the color of your wheels. Start by selecting the ellipse tool as seen here (click and hold down on the rectangle tool if you don't see it):
Then, zoom in on one of the wheels (shortcut: ctrl + space + click & drag), and draw a circle approximately the size of the wheel. Don't worry if it isn't perfect, we'll fix that in a second.
Now we have a problem: we can't see the wheel because the circle is blocking it. To fix this, go into your layers palette (Window>Layers if you don't see it), click on Shape 1 and set the "fill" to 0% as seen here:
Now, all you should see is a light outline of the circle (if you don't see the outline, click the gray rectangle on the Shape 1 layer). Now we need to make the circle fit the outline of the rim. With the circle selected, go Edit>Free Transform Path (or hit ctrl+t):
You should see a box with handles appear around the circle. Now scale and rotate the circle until it fits the wheel perfectly. I usually line up the edges of the box to the edges of the rim, then rotate it to get the circle to line up perfectly. Hit Enter when you have it lined up to finalize the changes.
Ok, that's one wheel outlined, now do the other one the same way (draw another ellipse, free transform, hit enter to finalize).
Once you're done outlining both wheels, zoom out (shortcut: ctrl+0). Then, hold down Ctrl AND Shift and click inside each of the gray rectangles on the Shape 1 and Shape 2 layers in the Layers palette. You should now see a dotted outline around each wheel, showing that they are selected:
Here's the fun part: in the Layers palette, click the little black/white circle at the bottom (looks somewhat like a yin/yang symbol), then select "hue/saturation."
This will create what's known as an "Adjustment Layer" which only adjusts the area we had selected (the wheels). After clicking "hue/saturation" on the menu, a box will pop up:
First, click the check box next to "Colorize" to make the wheels a uniform color. Then, just drag the sliders left or right to get the color you want. Saturation makes the color more intense, hue changes the shade, and lightness changes lightness (obvious huh?). Low saturation and lightness values work well for creating metallic colors like gold and bronze. Click OK when you're done.
I suggest saving this as a .PSD file, since that will let you go back and change the colors again without redoing all the steps. To change the colors again, just double-click the black/white circle on the "Hue/Saturation" layer (circled below):
That's all there is to it. If there's enough interest, I can also make a guide on how to Photoshop different wheels onto cars.
A technical note (for those who want to understand what they just did):
What you have just created is called a "mask." In Photoshop, anything white on the mask is affected by the adjustment layer we just made, anything black is not affected. Notice how in the last image above, there are two white spots inside the black box on the Hue/Saturation layer. Those spots are the wheels, which are white on the mask because they're masked off to be recolored, much like you'd mask something off to paint it in real life. If you understand this concept, everything becomes much easier, and you can just add black or white to recolor certain parts of the image. Just use a paintbrush or select and Edit>Fill with black or white to recolor anything on the car.
Happy Photoshopping
UPDATE 7-31-09: Click here for Part 2!


