DIY How To Install Ebay Pre Cut Window Tint
 06-21-2010, 03:38 PM
#1

Thread Starter

Join Date: Feb 2010
Posts: 776
Likes: 0
Received 0 Likes
on
0 Posts
I decided to be the tester for some Ebay precut window tint. I called around to all of my local shops and they said it would be around $150 before tax to do the two windows on the S. Seeing as that was rather high, I decided to try and do it myself. I have seen some bad tint jobs in my days and was kind of scared to try it. Everything looks great though now. Only thing I have to wait for is the time to take its toll on it. I will update this with pictures every so often to let everyone know how it holds up. I have not done a DIY before so please go easy on me. I figured I would do this because I searched and did not see one. So this could either help someone trying to save some money or save people money because it does not look good over time. We will see!
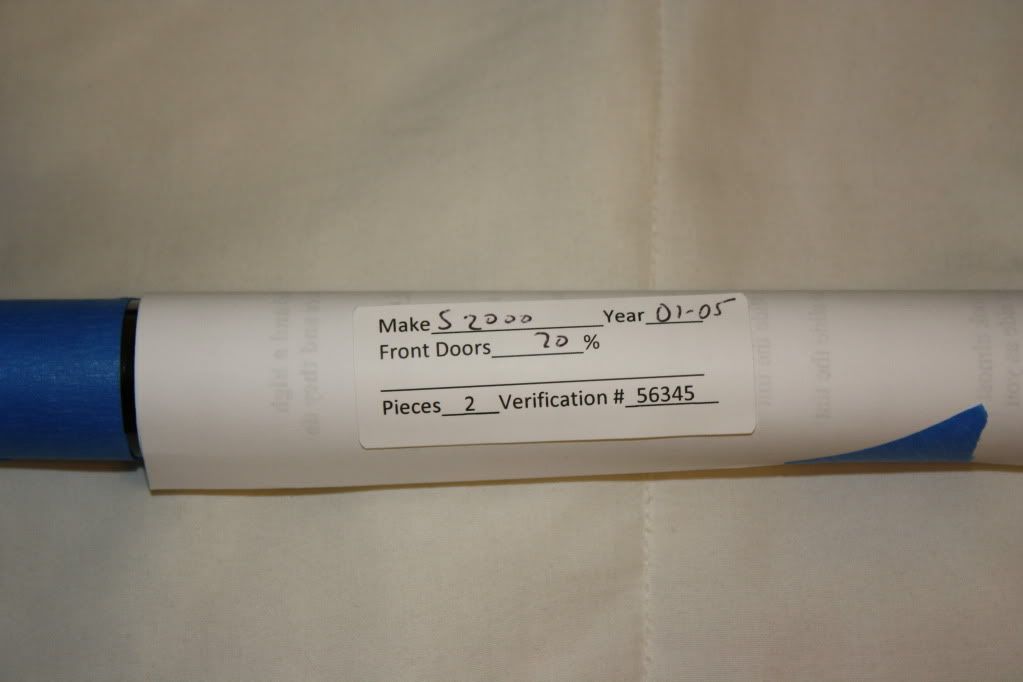
Here is the tint that I bought on Ebay:
http://cgi.ebay.com/ebaymotors/ws/eBayISAP...RK%3AMEWNX%3AIT
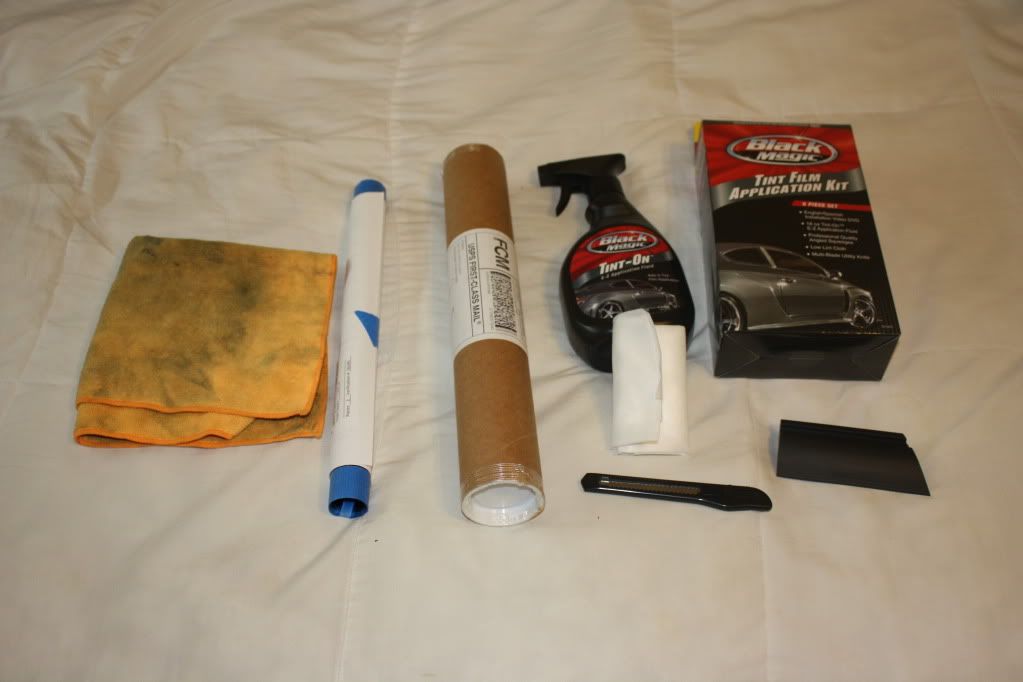
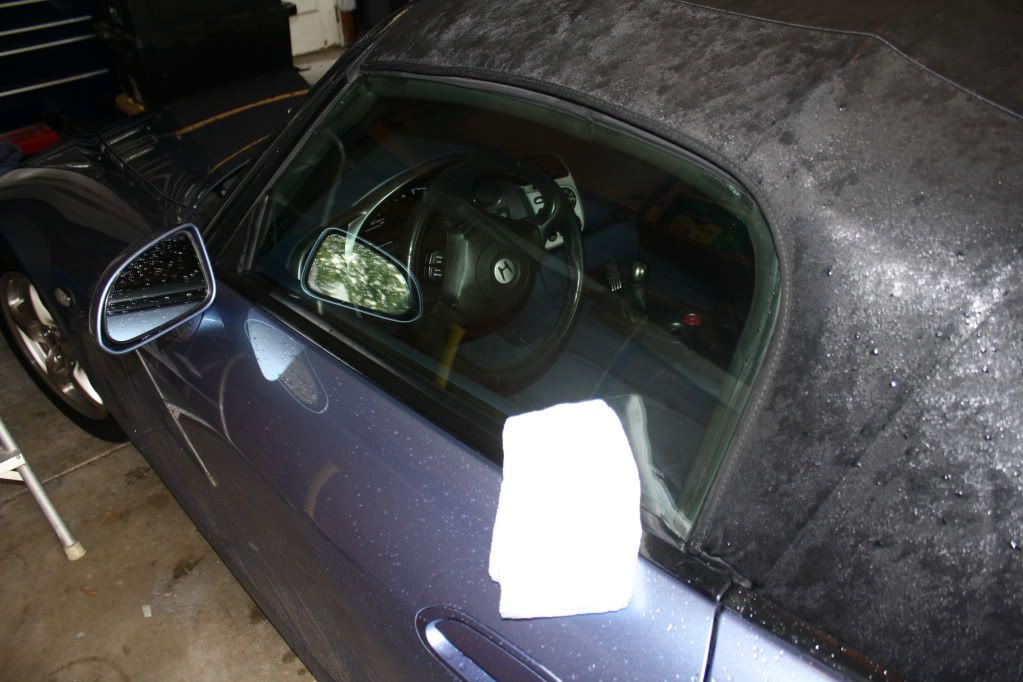
And I also used Black Magic Tint Installation Kit that I got from Autozone for 10 bucks. It comes with the solution (or you could just use water and baby soap), squeegee, lint free towel, razor blade (not needed), and an instructional DVD that did not work on my computer. I also had a clean (the one in the picture below is not what I used just what I had when taking the picture) microfiber towel to wipe off the blade and any excess water.
***Before you do anything make sure you are using the correct side of the tint. When you set the glossy side of the tint onto the window it should match up because you are going to take it and put the sticky side to the inside of the window!***
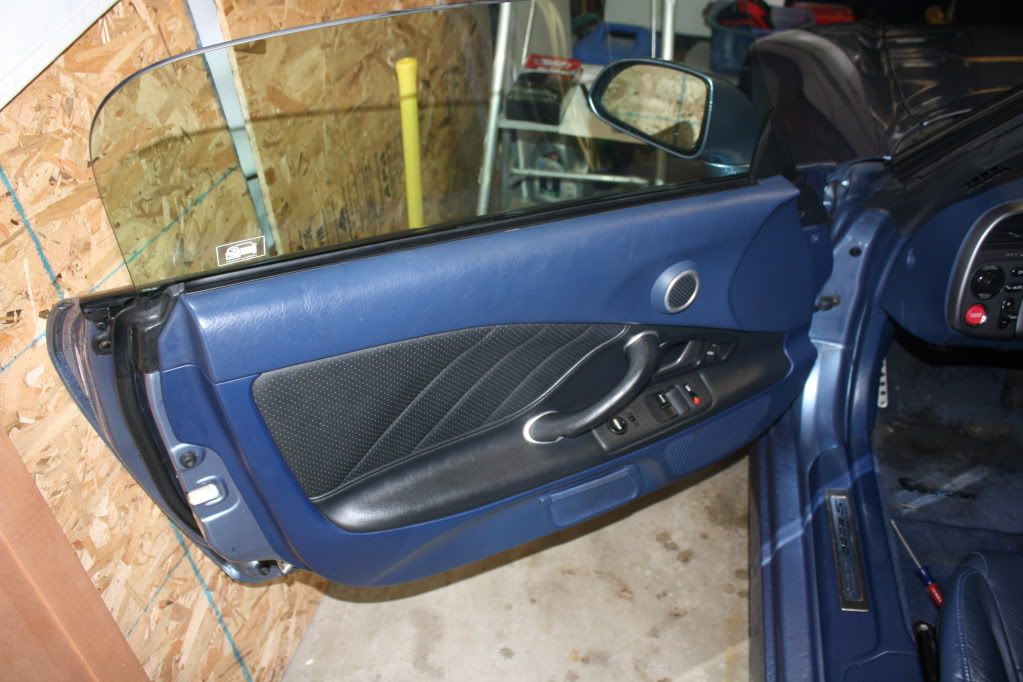
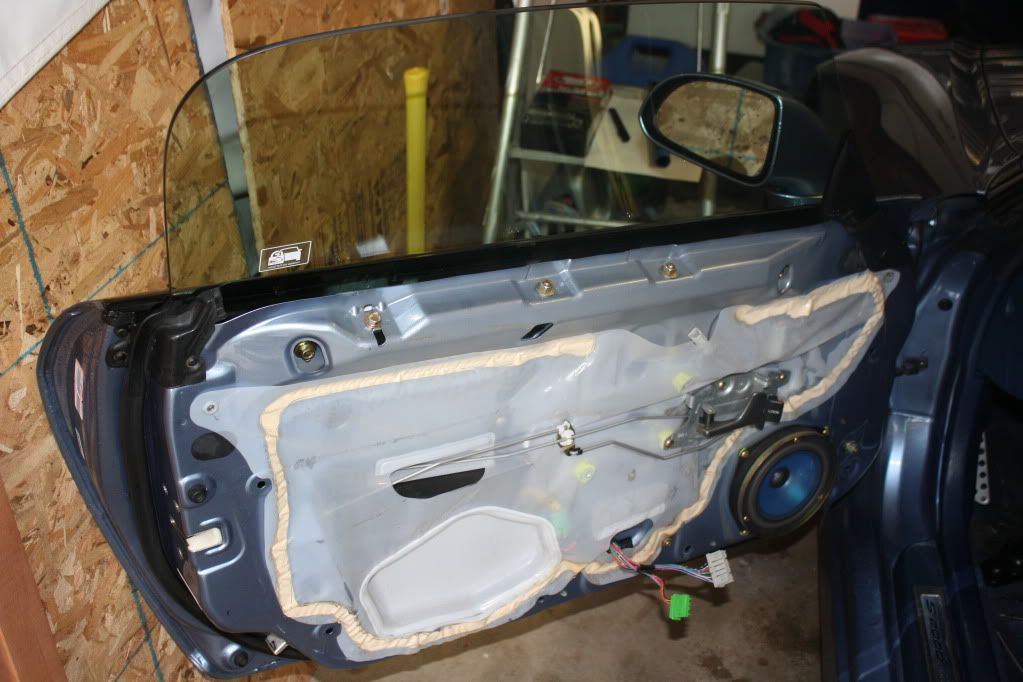
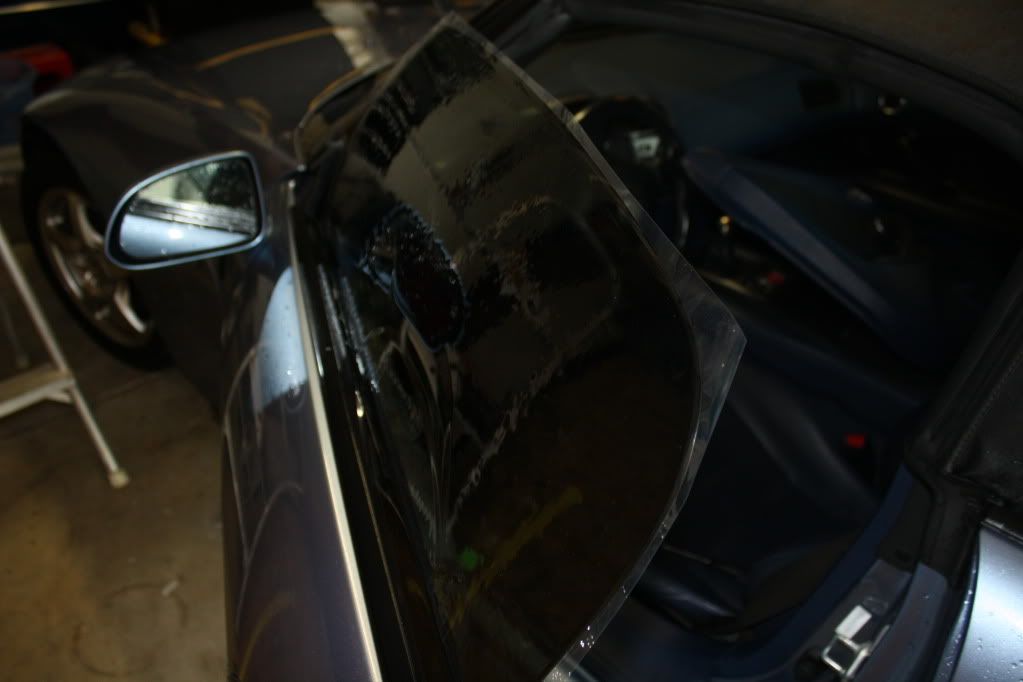
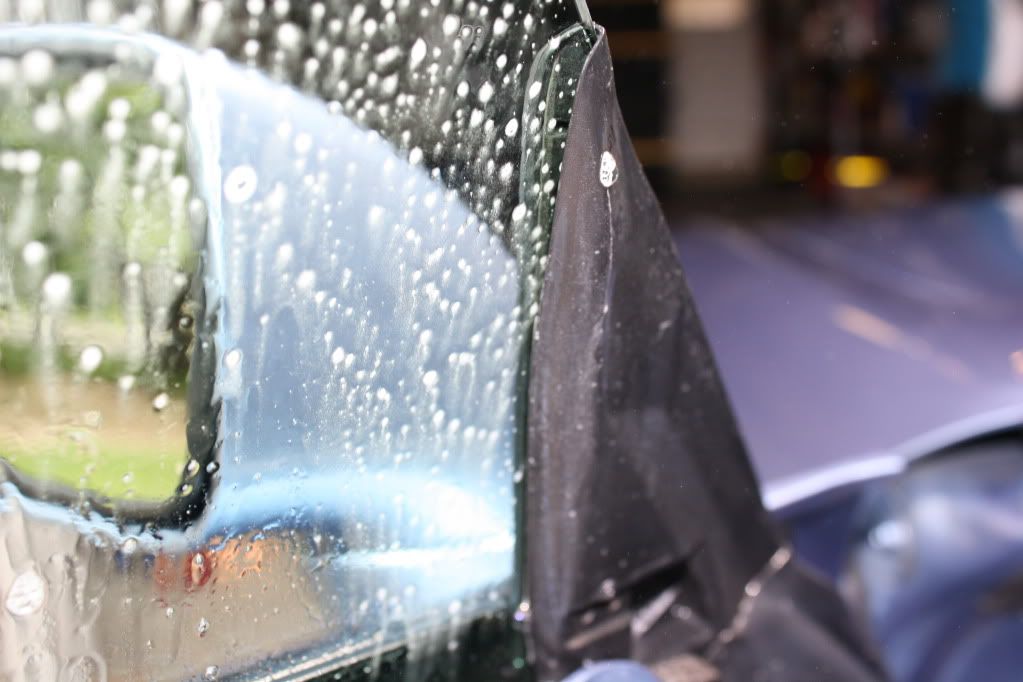
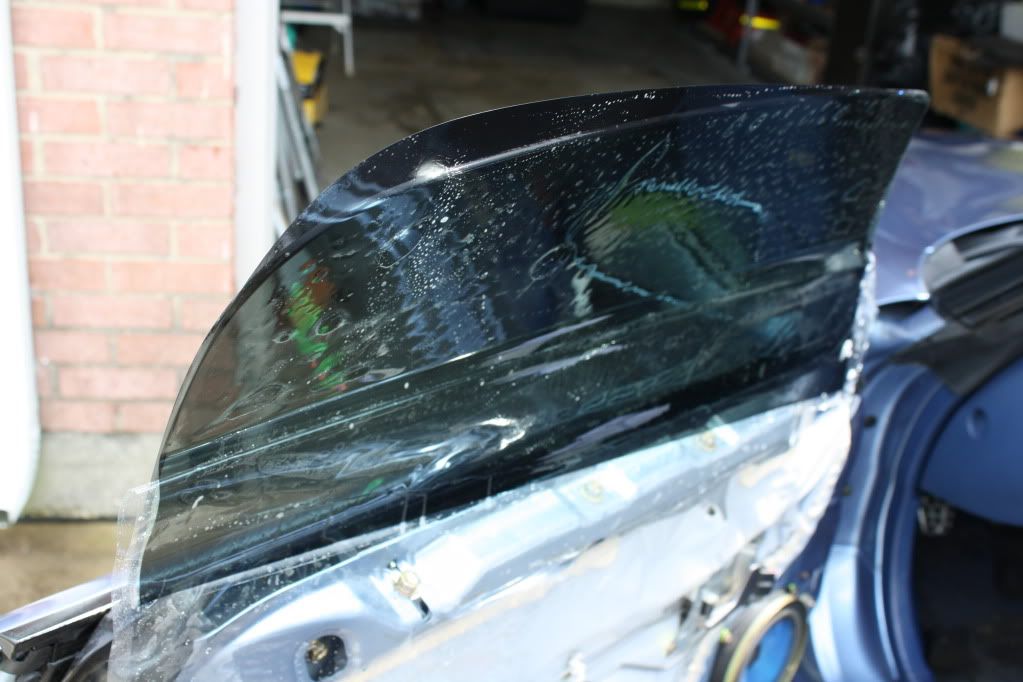
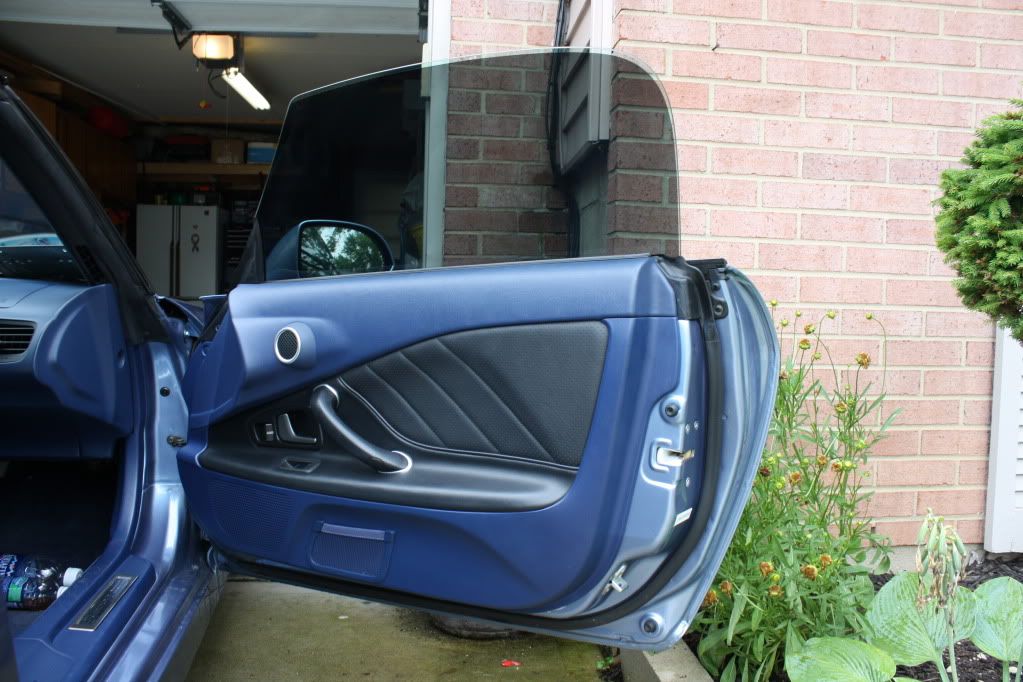
First thing to do is to remove the inner door panel. This will allow you to get down to the bottom of the tint to make sure no water is trapped in there and that you get a good seal on the bottom.
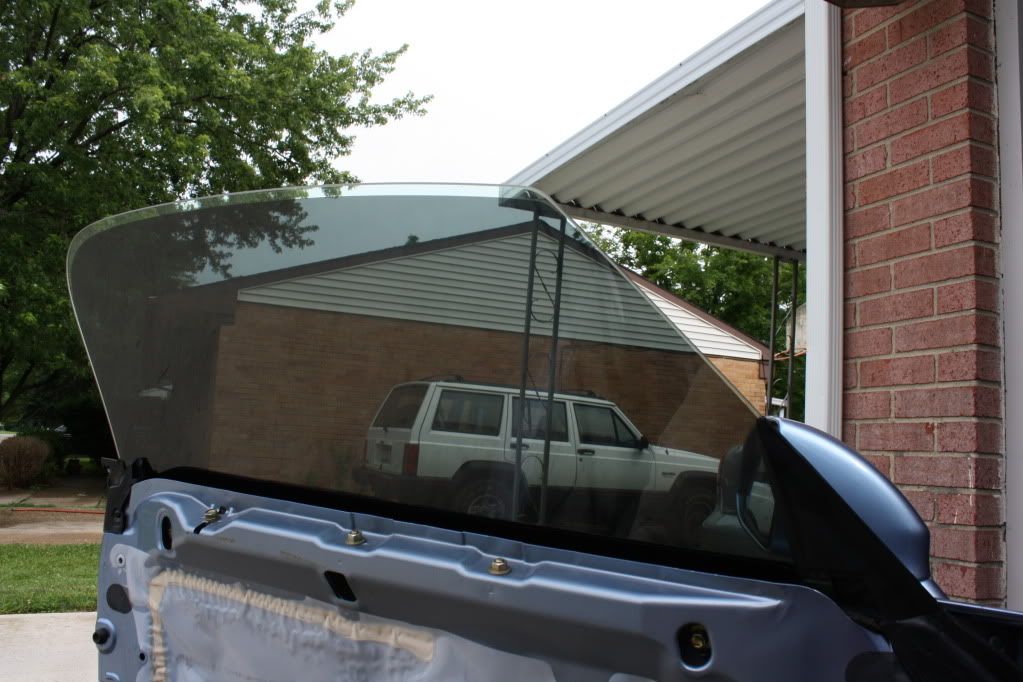
Clean the OUTSIDE window. You will be using the outside window to stick the glossy side of the tint to it while you take off the tint. But for now just clean it, dry it, and then re-spray it again and stick the backside of the tint to it with the clear film facing you.
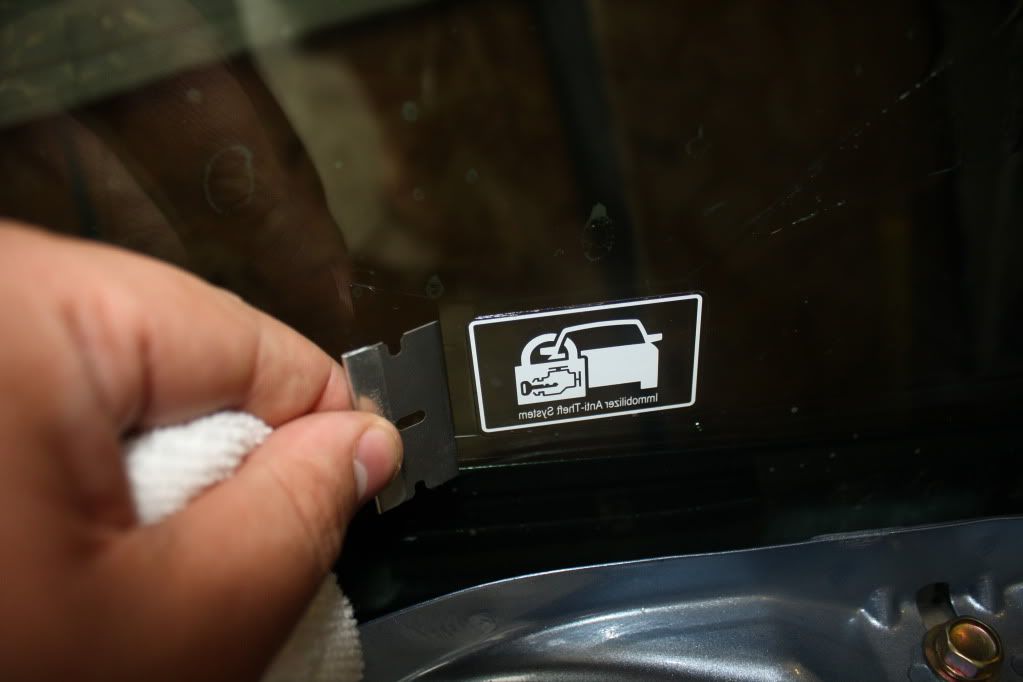
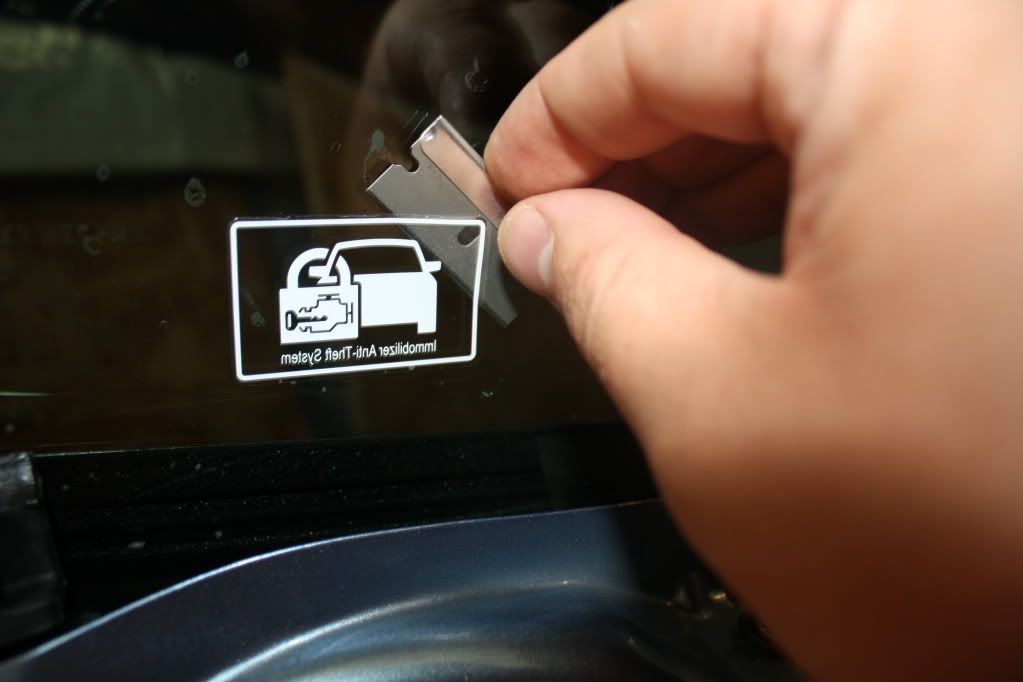
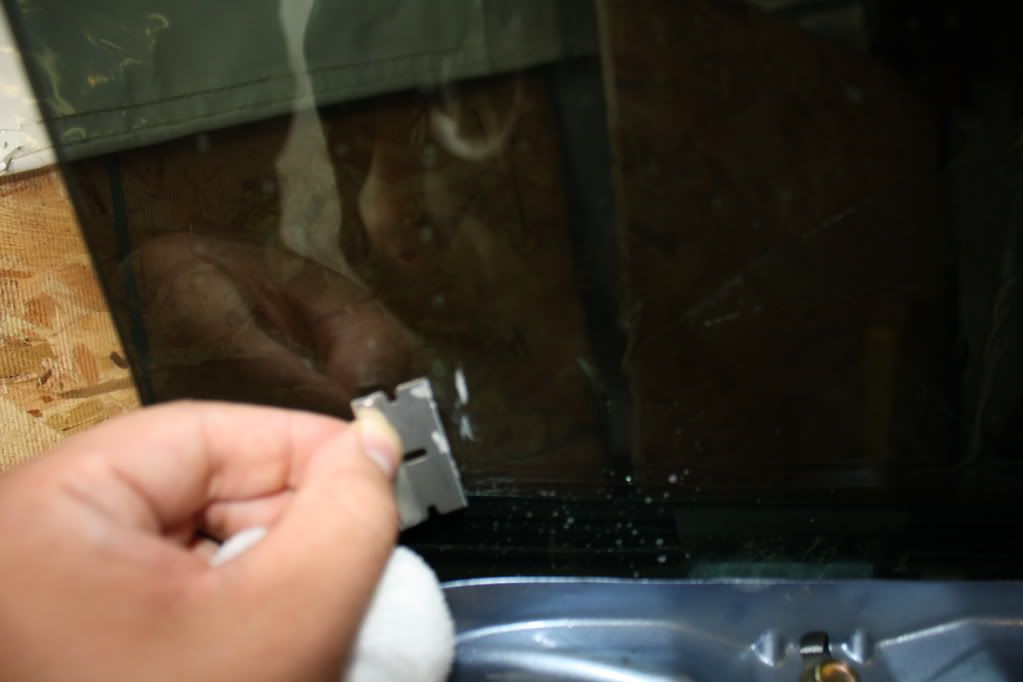
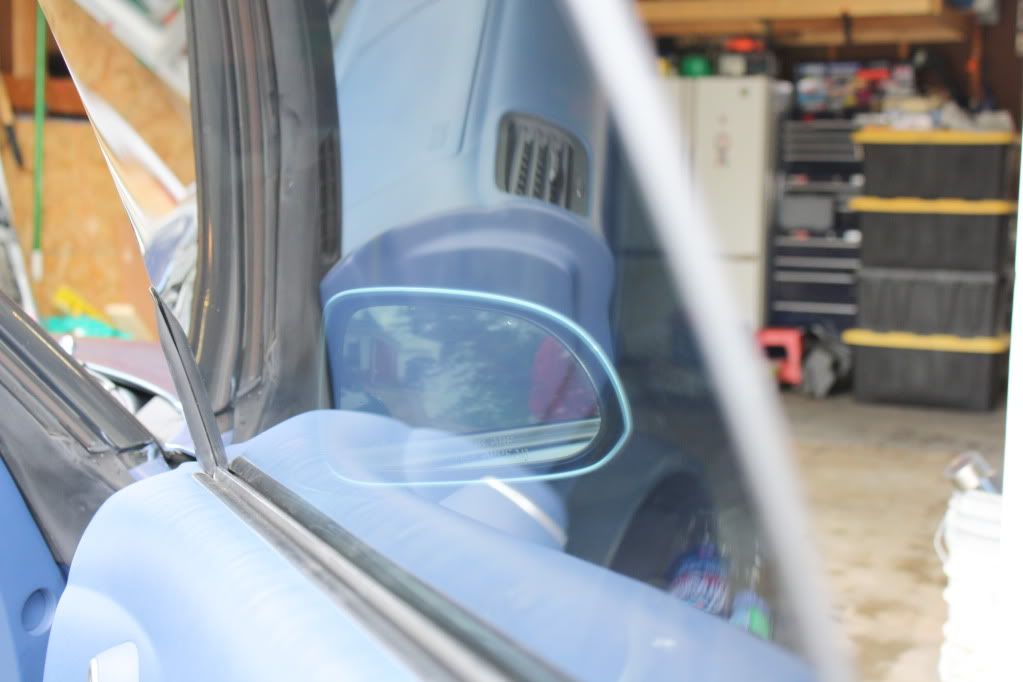
Now is a good time to also remove the sticker in the inside of the window. I neglected to do this first and had to do it after I cleaned the window. Just spray a little bit of the solution on the sticker and use a razor blade to peel it off. After it is off, spray a little more solution on the residue and scrape it off with the razor.
I removed the door panels to make sure that I was able to get to the bottom of the tint.
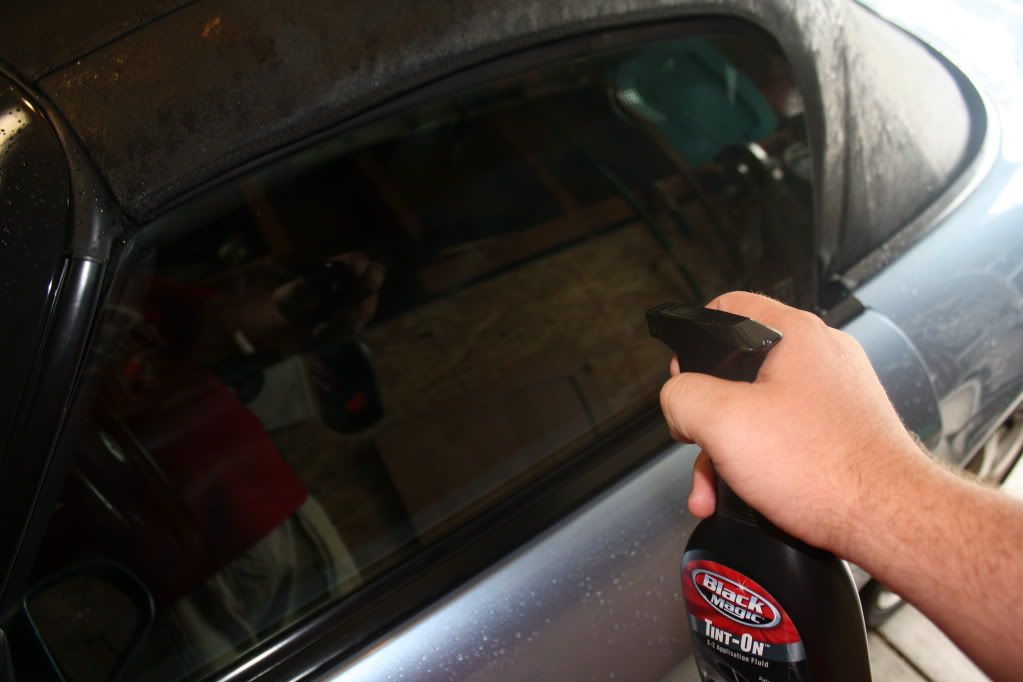
While the tint is hanging on the outside of the window, clean the inside of the window with the provided solution and the squeegee. I cleaned it two times just to make sure that I got everything. After it is completely clean spray the solution all over the inside. The reason you do this is to be able to move the sticky side of the tint around to make sure that you get a good fit. Also, make sure you get some of the solution into these two edges of the door so that the tint will be able to slide in.
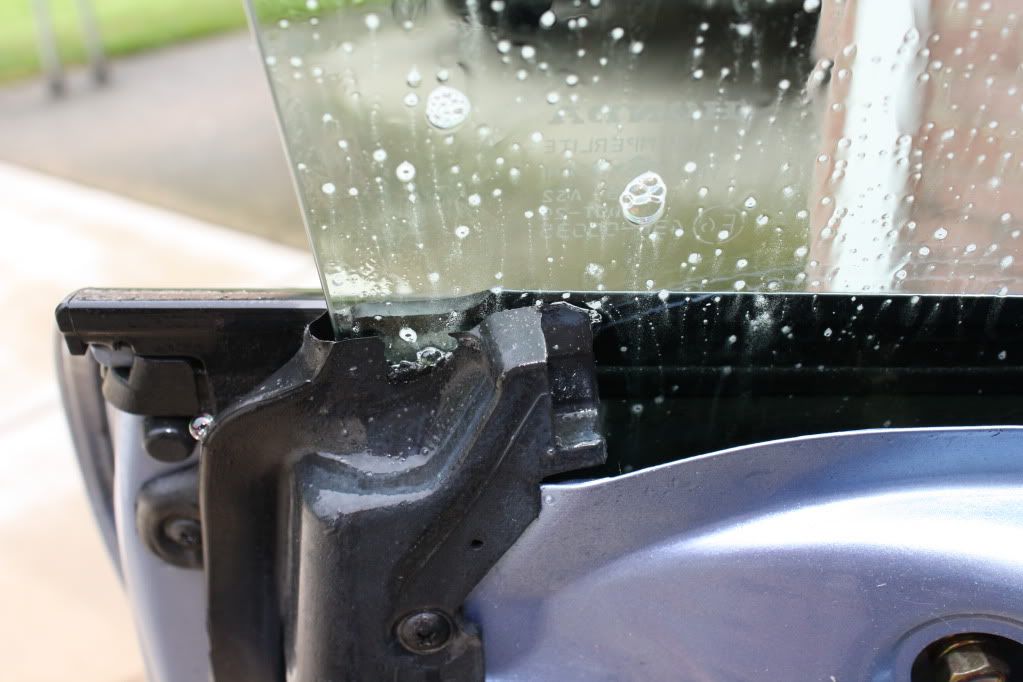
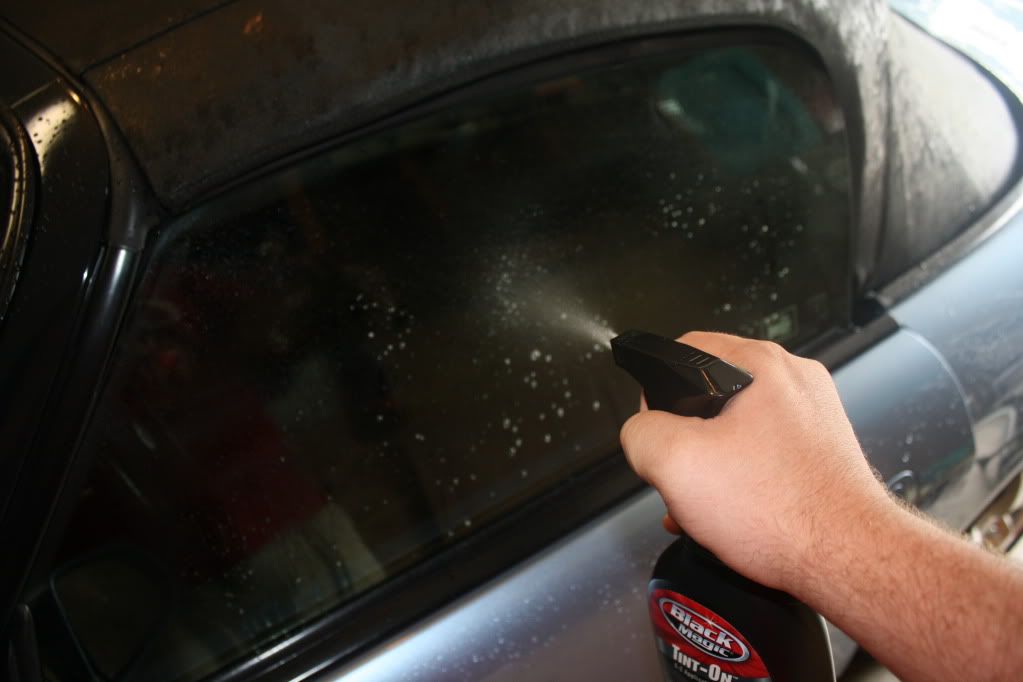
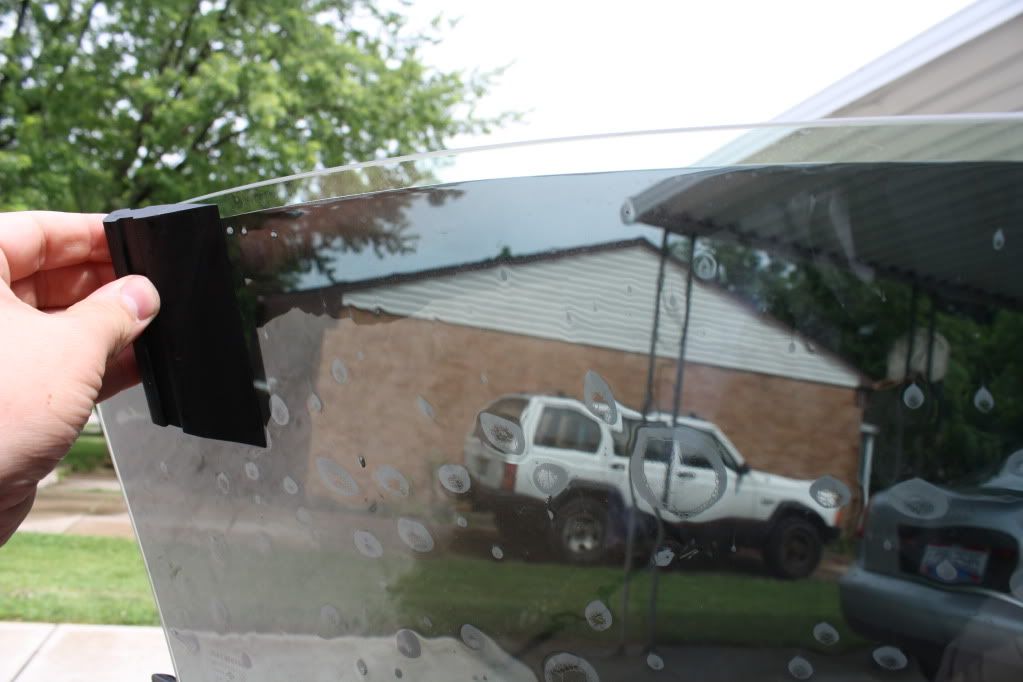
After spraying the inside, leaving no dry spots, remove the clear film from the sticky side of the tint half way. Make sure that you are still spraying the tint as you remove the clear film. If two dry spots of the tint film touch, the tint will most likely be ruined. Note that you should still have the solution sprayed on the inside of the window, as well as spraying on the tint as you are taking off the clear film.
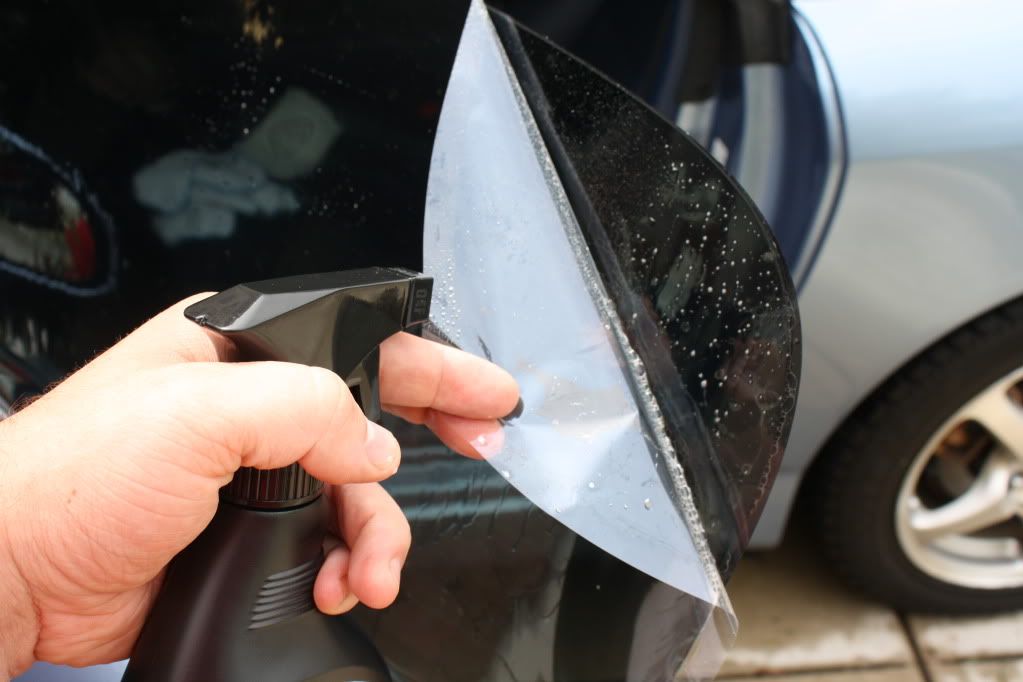
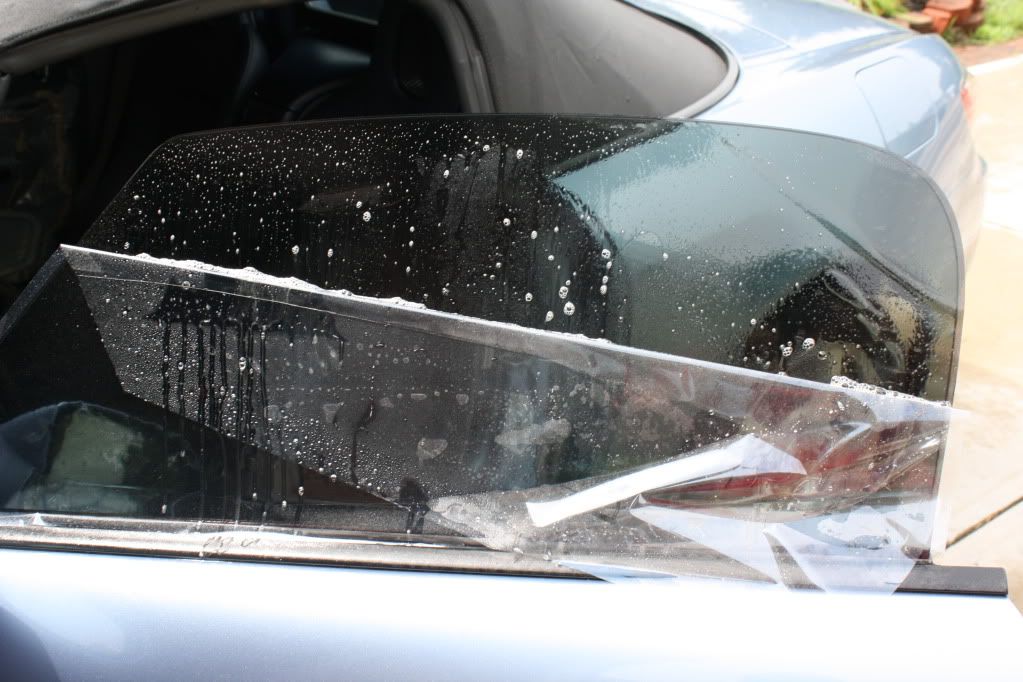
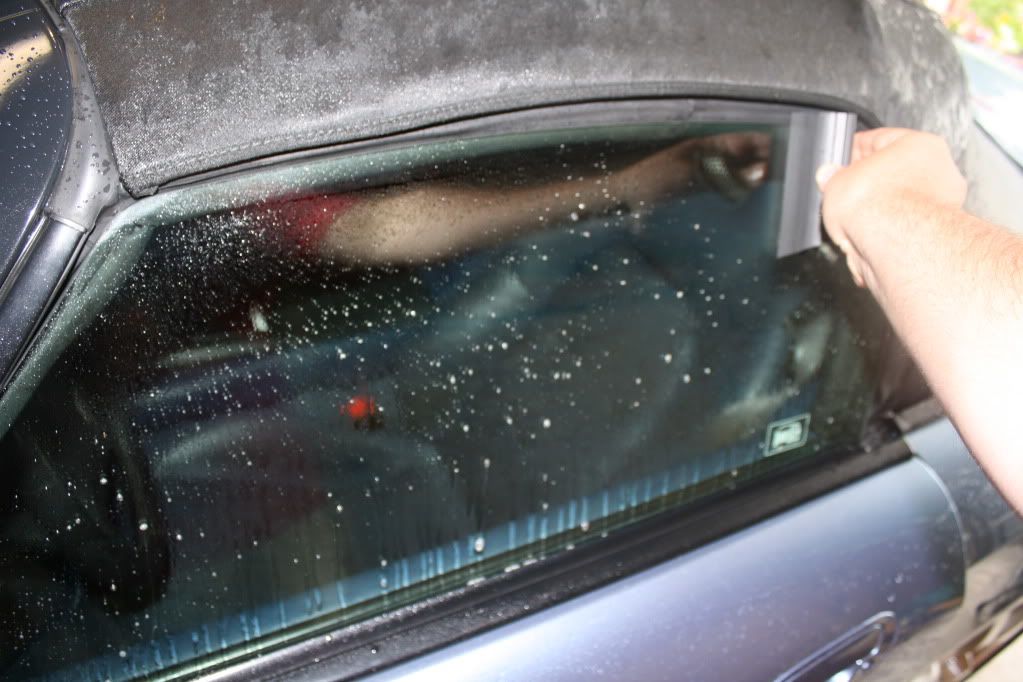
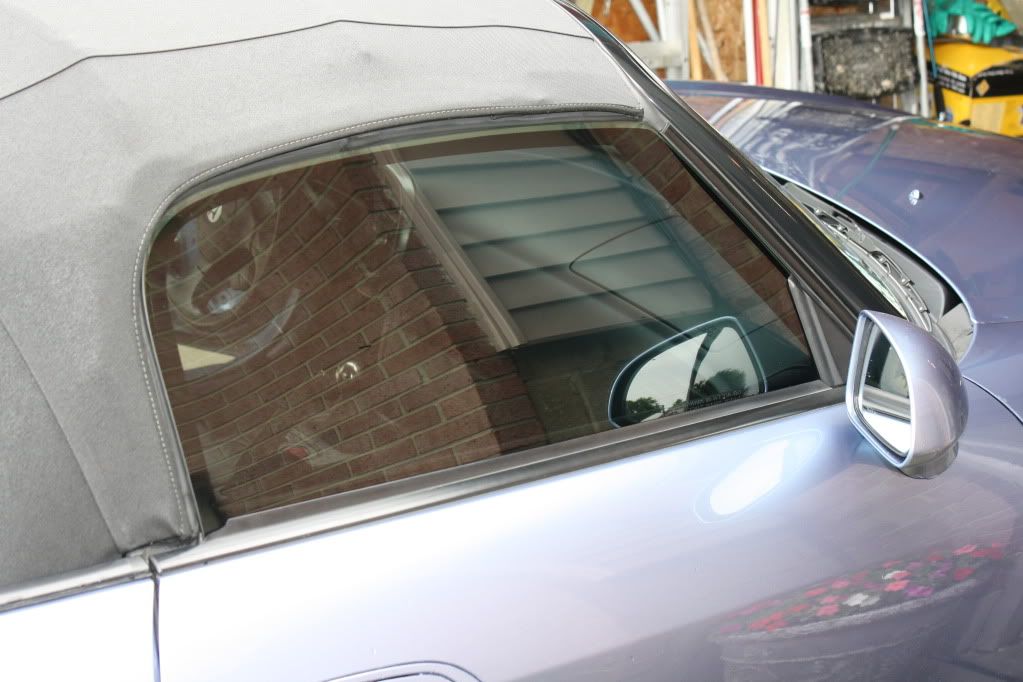
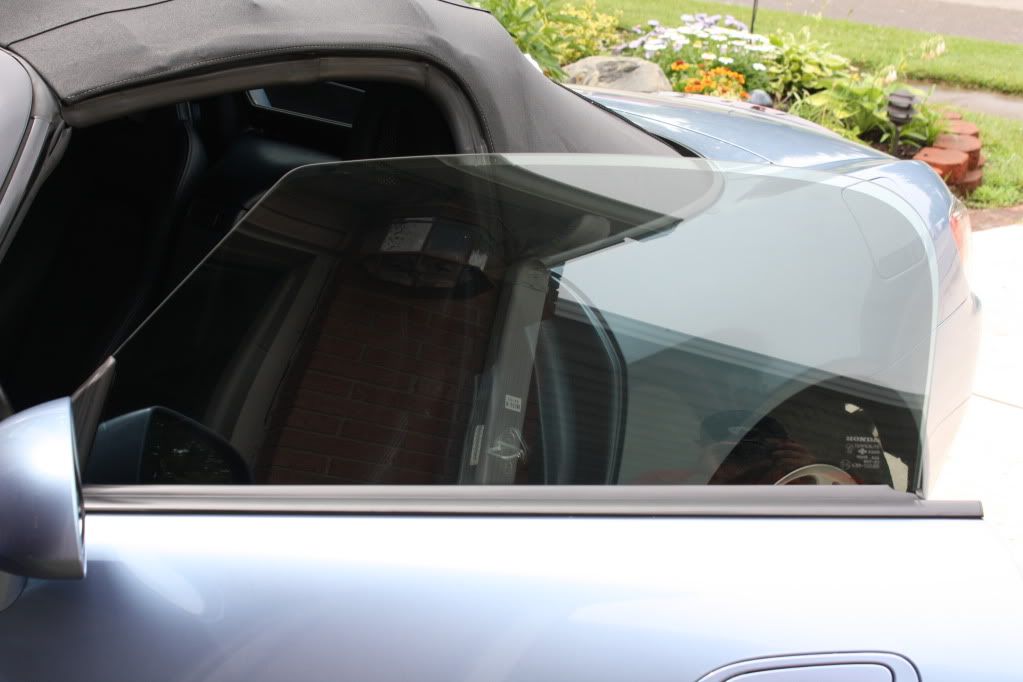
Now remove half of the film and place it about a half inch from the top. Re-spray the lower half of the window and remove the rest of the clear film. The picture below shows before I removed the entire clear film. You will notice that there are bubbles and the tint does not look good. This is what is suppose to happen.
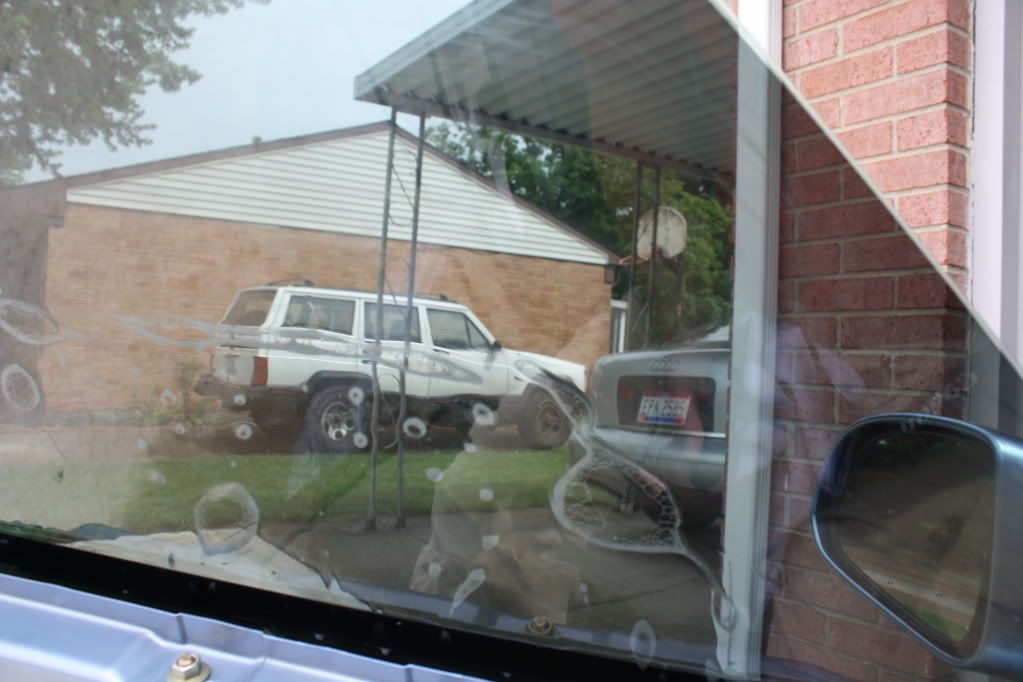
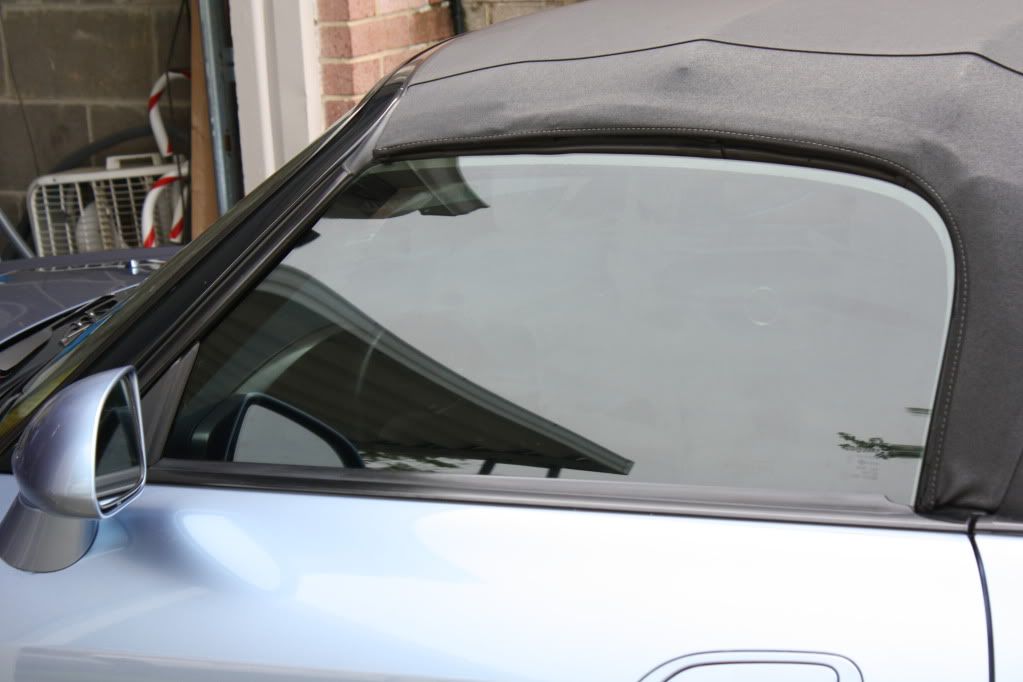
You will want to align the tint under the right and left side of the molding as pictured a few photos above (the two places not to miss with the solution). The tint aligned great all the way around, but I was worried about the top half inch. The reason why there is such a gap there when aligning it is because when you shut the door that part goes onto the rubber seal. Once the tint is completely aligned, you want to start using your squeegee to remove the solution from the backside of the film. Once the water is removed, the tint will stay in place. Make sure you start from the top and work your way towards the bottom and allow the solution to fall out of the bottom of the tint.
Make sure you get all of the solution and bubbles and any imperfections out of the tint. After that you should be done! Put your door inserts back on and do not roll down the windows for a couple of days to let it cure. It may have a hazy look to it that should go away after a couple of days.
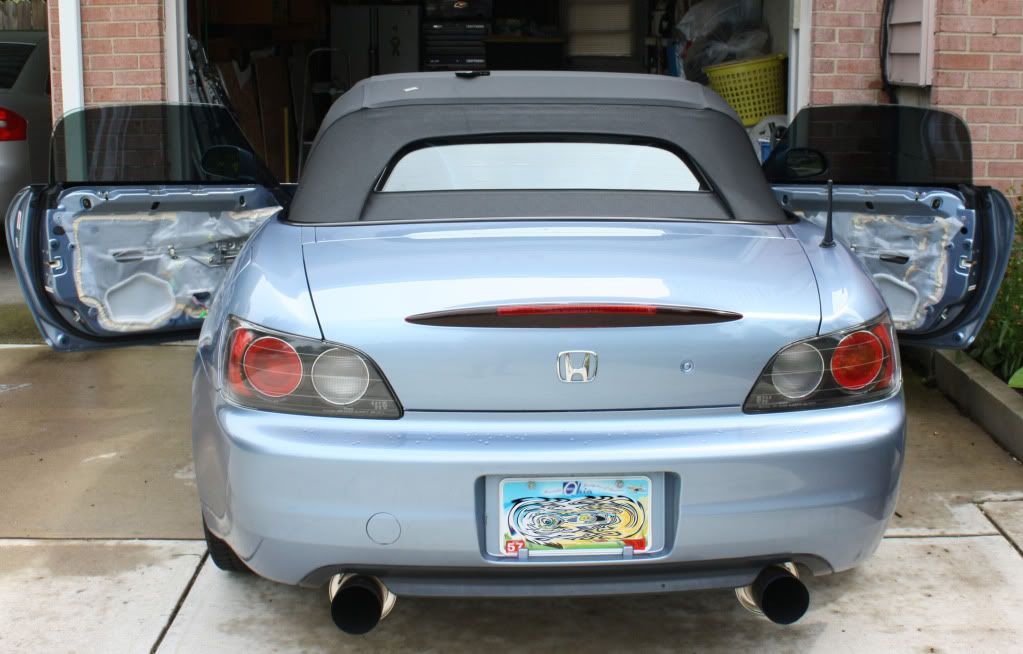
And there you go. If there is anything that I did wrong or that you would suggest people do another way then please post. I will add some pictures after a couple weeks and even after a couple of months to let everyone know that quality of the tint.
Here is the tint that I bought on Ebay:
http://cgi.ebay.com/ebaymotors/ws/eBayISAP...RK%3AMEWNX%3AIT
And I also used Black Magic Tint Installation Kit that I got from Autozone for 10 bucks. It comes with the solution (or you could just use water and baby soap), squeegee, lint free towel, razor blade (not needed), and an instructional DVD that did not work on my computer. I also had a clean (the one in the picture below is not what I used just what I had when taking the picture) microfiber towel to wipe off the blade and any excess water.
***Before you do anything make sure you are using the correct side of the tint. When you set the glossy side of the tint onto the window it should match up because you are going to take it and put the sticky side to the inside of the window!***
First thing to do is to remove the inner door panel. This will allow you to get down to the bottom of the tint to make sure no water is trapped in there and that you get a good seal on the bottom.
Clean the OUTSIDE window. You will be using the outside window to stick the glossy side of the tint to it while you take off the tint. But for now just clean it, dry it, and then re-spray it again and stick the backside of the tint to it with the clear film facing you.
Now is a good time to also remove the sticker in the inside of the window. I neglected to do this first and had to do it after I cleaned the window. Just spray a little bit of the solution on the sticker and use a razor blade to peel it off. After it is off, spray a little more solution on the residue and scrape it off with the razor.
I removed the door panels to make sure that I was able to get to the bottom of the tint.
While the tint is hanging on the outside of the window, clean the inside of the window with the provided solution and the squeegee. I cleaned it two times just to make sure that I got everything. After it is completely clean spray the solution all over the inside. The reason you do this is to be able to move the sticky side of the tint around to make sure that you get a good fit. Also, make sure you get some of the solution into these two edges of the door so that the tint will be able to slide in.
After spraying the inside, leaving no dry spots, remove the clear film from the sticky side of the tint half way. Make sure that you are still spraying the tint as you remove the clear film. If two dry spots of the tint film touch, the tint will most likely be ruined. Note that you should still have the solution sprayed on the inside of the window, as well as spraying on the tint as you are taking off the clear film.
Now remove half of the film and place it about a half inch from the top. Re-spray the lower half of the window and remove the rest of the clear film. The picture below shows before I removed the entire clear film. You will notice that there are bubbles and the tint does not look good. This is what is suppose to happen.
You will want to align the tint under the right and left side of the molding as pictured a few photos above (the two places not to miss with the solution). The tint aligned great all the way around, but I was worried about the top half inch. The reason why there is such a gap there when aligning it is because when you shut the door that part goes onto the rubber seal. Once the tint is completely aligned, you want to start using your squeegee to remove the solution from the backside of the film. Once the water is removed, the tint will stay in place. Make sure you start from the top and work your way towards the bottom and allow the solution to fall out of the bottom of the tint.
Make sure you get all of the solution and bubbles and any imperfections out of the tint. After that you should be done! Put your door inserts back on and do not roll down the windows for a couple of days to let it cure. It may have a hazy look to it that should go away after a couple of days.
And there you go. If there is anything that I did wrong or that you would suggest people do another way then please post. I will add some pictures after a couple weeks and even after a couple of months to let everyone know that quality of the tint.


 06-21-2010, 05:24 PM
#4
Registered User

Join Date: Sep 2006
Posts: 2,330
Likes: 0
Received 0 Likes
on
0 Posts
i tried one of the ebay precuts. i was able to get it to the top of the window. i had it on for only a day before i ripped it off. reason was because i did it outside when it was windy and got all kinds of crap on the window. also it bubbled in a few areas.
$150 for two from windows tinted plus TAX? wtf. your going to the wrong shops. i had a hook up and got two doors and rear window done for $75. before the hook up i called around and found a good place a few co workers when to and they told me $120 for three windows
ps: you should have been able to tint it all the way to the top. that just doesnt look right
06-21-2010, 08:34 PM
#5
Thread Starter
Join Date: Feb 2010
Posts: 776
Likes: 0
Received 0 Likes
on
0 Posts
Thanks for the comments guys. And as for the top of the window, the tint was cut so that if it were to be moved up, it would hang off of the edge one one side or the other. Its hard to explain but I messed with it for a while and that was the best I could get it. Not bad for less then 30 bucks.
06-21-2010, 10:07 PM
#6

Nice job man, but you went way too low from where it meets the top. I bought Black Magic brand tint from Walmart and was able to cut out the shape of the window with a razor as well. Good job!!
06-22-2010, 04:17 AM
#7
Originally Posted by starchland,Jun 21 2010, 07:09 PM
Is it possible to get the tint closer to the top of the window? this is the only thing I dont like about aftermarket tint.
Trending Topics
 06-22-2010, 06:44 AM
#9
Originally Posted by MasterForce,Jun 22 2010, 09:08 AM
i got mine done for $120 OTD. 35% all around and they used 3M tint. not only that but i have a lifetime guarantee if there are any bubbles, peels, or fades. 
SunTek Carbon XP 35% all around - it's not $400 tint, but I think it's a good deal for the price.
06-24-2010, 11:56 AM
#10
Registered User

Join Date: Dec 2006
Location: 702 TOPDOWN
Posts: 8,210
Likes: 0
Received 0 Likes
on
0 Posts
Originally Posted by MasterForce,Jun 22 2010, 05:08 AM
i got mine done for $120 OTD. 35% all around and they used 3M tint. not only that but i have a lifetime guarantee if there are any bubbles, peels, or fades.
 with him...although you did a great job applying the tint, the pre-cut tint is horrible. I manage a tint shop, so if any of my customers get their cars back like that none of them will be happy. Also we do carry Suntek, Solar Gard, 3M and Johnson films, INHO Suntek films are not great. Solar Gard and 3M would be your best bet, both have lifetime warranty and the film are much more durable also provides better heat rejection compare to the other too films we have available.