In-Expensive Additions You Can Make To Your S2K
 06-27-2015, 05:11 PM
#1
Registered User

Thread Starter

Join Date: Nov 2010
Posts: 214
Likes: 0
Received 0 Likes
on
0 Posts
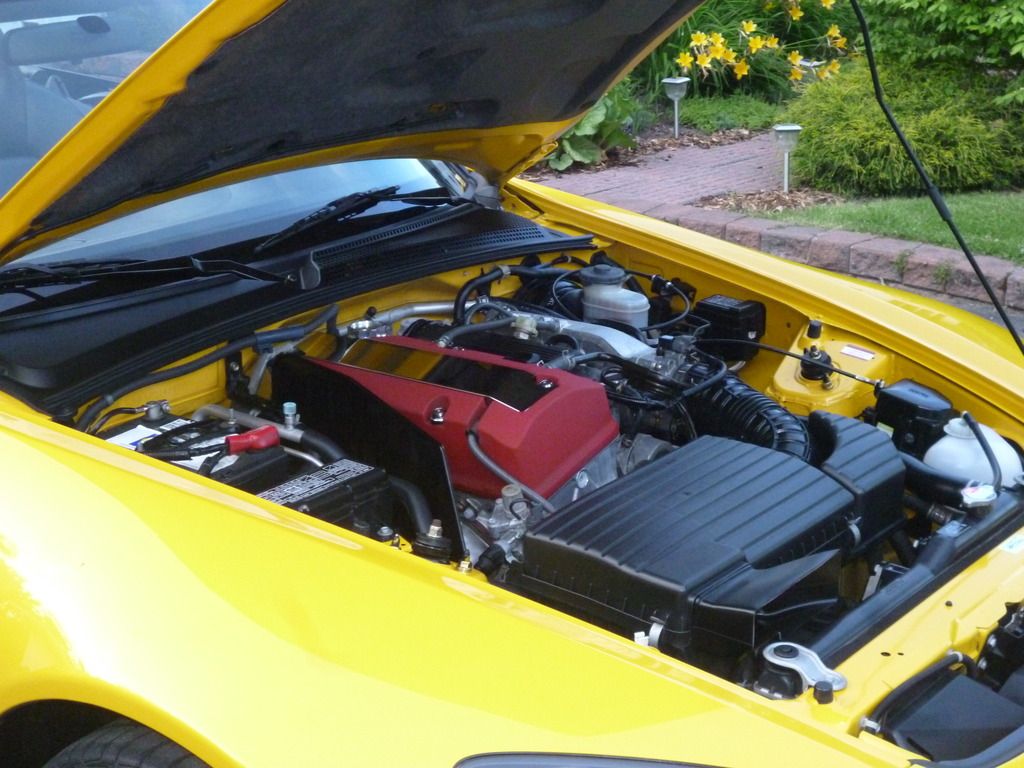
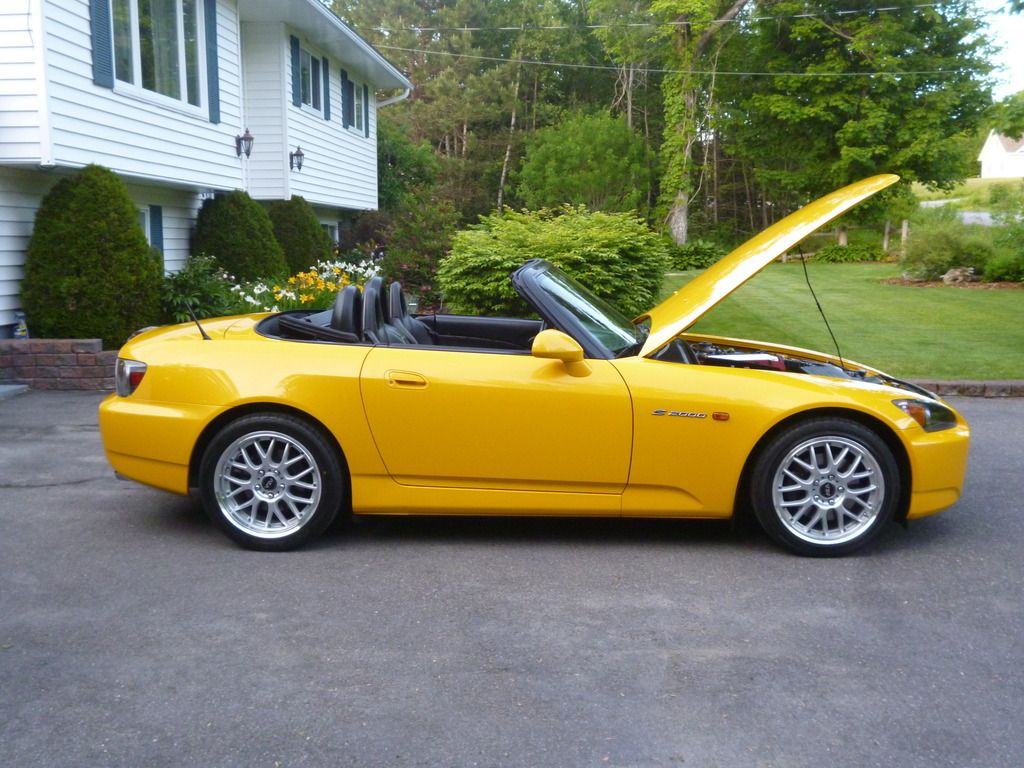
For the last few years, I have spent a few hundred dollars,each year, on changing a few things on my S2000.
My goal is always to be able to put it back to the way it was, when it came off the showroom floor, with ease.
S2K Wind Deflector Graphic $10
Gear Shift Knob $80
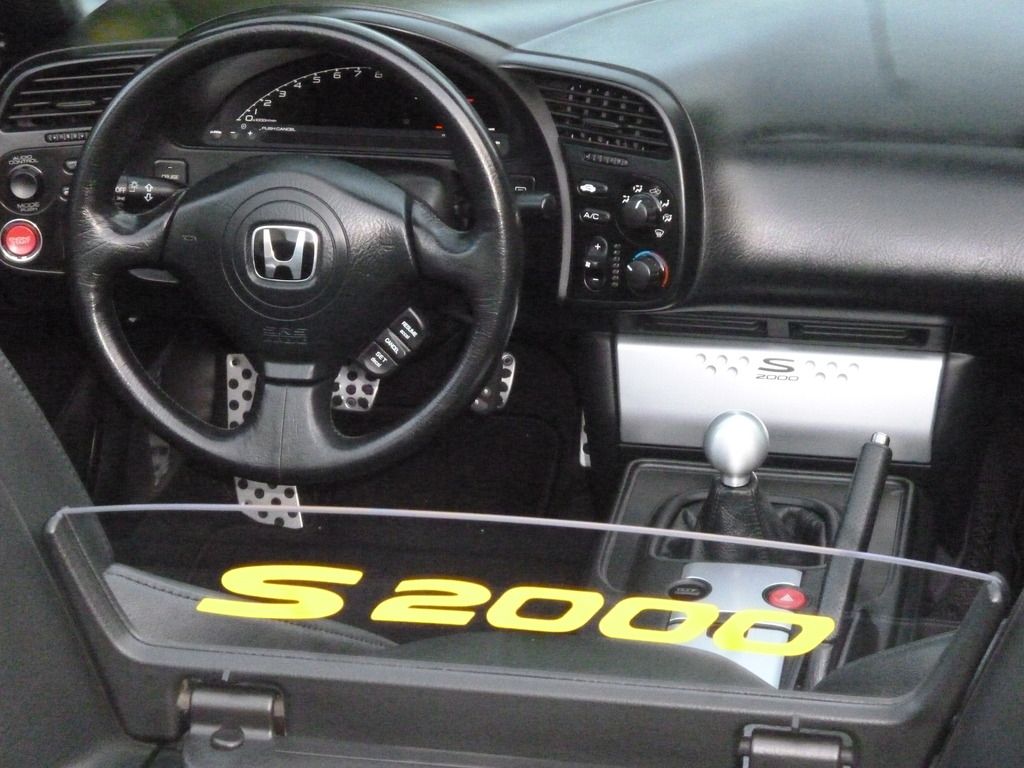
Valve Cover Polished Aluminum Insert, and New Hardware $140
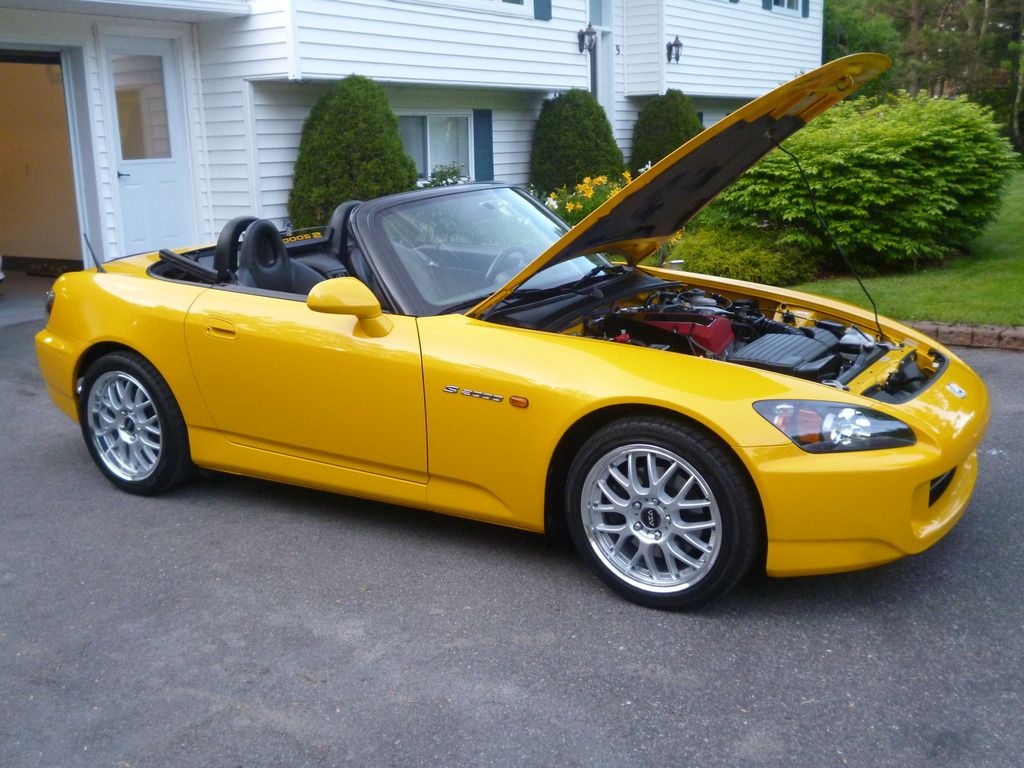
I spent a lot this year with some new wheels at a big $600 from Tire Rack.
My goal is always to be able to put it back to the way it was, when it came off the showroom floor, with ease.
S2K Wind Deflector Graphic $10
Gear Shift Knob $80

Valve Cover Polished Aluminum Insert, and New Hardware $140

I spent a lot this year with some new wheels at a big $600 from Tire Rack.


 07-14-2015, 05:10 AM
#3

I've always been the same, not wanting to do anything irreversible. I've lowered my drivers seat rail (i'm 6'3 and barely fit, let alone with a helmet). I woulding actually cut anything until i had a spare rail to switch back to.
One thing I have done that is irreversible is to roll the rear fenders. And i have 0 regrets and think this is a really important mod for anybody daily driving in wet/terrible climates. I have no pictures on hand, but i'll try to explain a bit why/how. The reason why i did this was because the rear fender lip retains lots of dirt/water, even with the rubber strip removed. rusting is inevitable for a daily driven car in NS. I never considered rolling for wheel clearance, but now I have a bit more room if I ever need more rubber.
1) First, remove the rubber 'protective' strip on the fender lip. this should have been tossed the day you got the car.
2) Remove wheel, look around the inside of the lip area for any rust. You'll notice that Honda did not seam seal the entire area around the lip. there's a 1 inch gap from the 90 degree bend of the fender lip that only has paint for protection. see the images i've linked from OneSilverS2K's thread
what will happen to the lip eventually (luckily mine wasn't nearly this bad!)
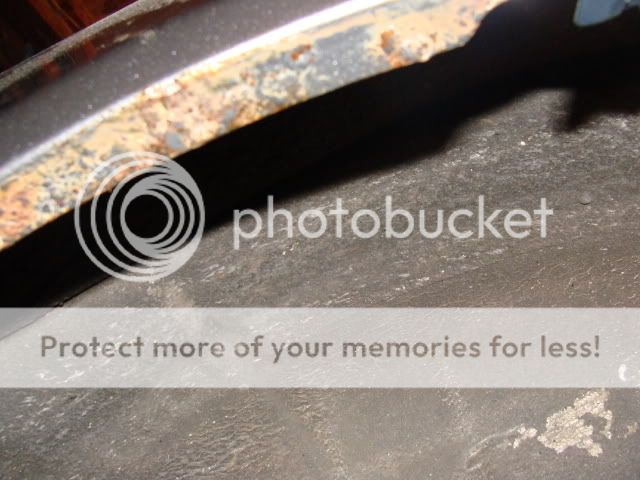
note the curve of the fender in this picture, and the ~1" gap upwards from this where there is NO SEAM SEALER! (but plenty of rust)
3) Don't panic. using a dremel with a flappy sanding disk wheel, sand away ALL the rust from the lowest, most forward part of the fender, all the way to where the rear bumper screws in. Dont forget the little 'shelf' area where the bumper screws into. this rea also isn't seam sealed well! this step takes a lot of time. Helps to have the car on a lift so you're not on your back, but as long as your wheel is off you'll have plenty of clearance. I made sure that i sanded through all traces of rust. Luckily the rust protection in this areas is enough to make this area mostly surface rust that easily sands away.
4) If you're lucky like me, you don't have any extensive rust on the exterior paint. In a few instances, there were very minor bubbles around spot welds. for these, i used about 4 layers of painters tape around the areas, and sanded these with the dremel+flappy disk. I made absolutely sure sand only what needed to be done and not a milliliter more. I really didn't want to do any cosmetic painting, because I know I would never be happy with it.
note: if you have any rust coming from between the two layers of the pinched steel, you likely will have a persistent rust problem. this may be cause for professional medical attention at this point
6) I applied POR15 (silver, for a closer color match for anything exposed). follow directions on the can. POR15 primer should be used on bare metal to ensure proper adhesion. I didn't use primer because A) i didn't have it, and B) i like to live dangerously
7) roll the fenders, according to this excellent DIY by cpl_allen. Note that I didn't cut any metal, or relocate any bolts. I wasn't going for clearance. Again, this step take a lot of time. And you want to take a lot of time here. two very bad outcomes come from rushing this. first, you can crack your paint, and second you can warp the metal causing a waviness to the metal around the fender lip. I used a hair dryer and made sure the metal was always greater than 115 F, but no more than 150F. This step alone. I was lucky and was able to borrow an eastwood fender roller from a friend for this step. You'll probably spend 4-6 hours here if you're as slow as I am. 80% of that will be making sure the metal is hot enough (with a 20$ laser temp gun from canadian tire).
note: if you don't want to roll your fenders, you can likely skip this step anyways, you'll just use a bit more seam sealer. you'll still be protecting your metal just as well.
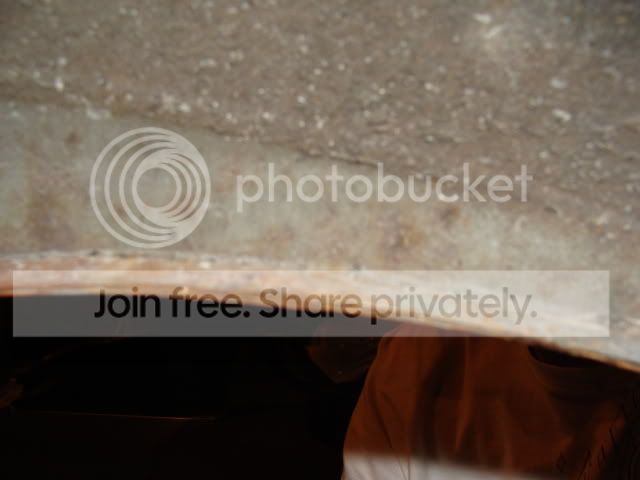
8) Add seam sealer! everywhere! I used liberally. The aim here was the fill the small gap between the outer fender and the newly rolled fender lip. This was no dirt could ever rest in this area. I also made sure to add a skim of seam sealer (roughly 1/8" thickness) over the areas adjacent to the lip that were never protected before (see image 2, step 2). You'll need gloves for this step. If you're inherently as messy as I am, it would be a great idea to once again mask off the entire area with green painters tape. You have maybe about a half hour work time once the material is applied. First, I applied a bunch and forced it into every gap by hand. afterwards i tried to make it prettier by skimming over with my finger. Wait about 45 minutes and touch with your finger. should be hardened on the surface, but still uncured underneath in thicker areas. Curing takes a while to complete (I put mine all back together and noticed that it didn't firm completely for about 3-5 days)
9) You're all done! Just check your work to make sure you didn't miss any areas. No bare metal should be exposed. touch up afterwards as necessary. I found that tan color of the sealant to be a bit of an eyesore. I quickly hit everything with some matte black tremclad rust paint after 45 minutes of seam sealer curing.
All in, I spend a weekend doing this. probably cumulatively 16 hours of fiddling around and OCD'ing things. My car is a MY2000, so my case would be severe compared to some of you guys with newer cars. If I were to do this again, i'd probably skip the fender rolling step. it's just too risky for me to do on a nice car. As far as results, I've had this done for over a month. No rust, very little dirt is retained. And anywhere dirt is retained, I'm confident the seam sealer + POR15 will keep my fenders rust free for years to come.
I'll try and get some pictures posted of the results to give you a better idea of what/where i worked.
One thing I have done that is irreversible is to roll the rear fenders. And i have 0 regrets and think this is a really important mod for anybody daily driving in wet/terrible climates. I have no pictures on hand, but i'll try to explain a bit why/how. The reason why i did this was because the rear fender lip retains lots of dirt/water, even with the rubber strip removed. rusting is inevitable for a daily driven car in NS. I never considered rolling for wheel clearance, but now I have a bit more room if I ever need more rubber.
1) First, remove the rubber 'protective' strip on the fender lip. this should have been tossed the day you got the car.
2) Remove wheel, look around the inside of the lip area for any rust. You'll notice that Honda did not seam seal the entire area around the lip. there's a 1 inch gap from the 90 degree bend of the fender lip that only has paint for protection. see the images i've linked from OneSilverS2K's thread
what will happen to the lip eventually (luckily mine wasn't nearly this bad!)
note the curve of the fender in this picture, and the ~1" gap upwards from this where there is NO SEAM SEALER! (but plenty of rust)
3) Don't panic. using a dremel with a flappy sanding disk wheel, sand away ALL the rust from the lowest, most forward part of the fender, all the way to where the rear bumper screws in. Dont forget the little 'shelf' area where the bumper screws into. this rea also isn't seam sealed well! this step takes a lot of time. Helps to have the car on a lift so you're not on your back, but as long as your wheel is off you'll have plenty of clearance. I made sure that i sanded through all traces of rust. Luckily the rust protection in this areas is enough to make this area mostly surface rust that easily sands away.
4) If you're lucky like me, you don't have any extensive rust on the exterior paint. In a few instances, there were very minor bubbles around spot welds. for these, i used about 4 layers of painters tape around the areas, and sanded these with the dremel+flappy disk. I made absolutely sure sand only what needed to be done and not a milliliter more. I really didn't want to do any cosmetic painting, because I know I would never be happy with it.
note: if you have any rust coming from between the two layers of the pinched steel, you likely will have a persistent rust problem. this may be cause for professional medical attention at this point
6) I applied POR15 (silver, for a closer color match for anything exposed). follow directions on the can. POR15 primer should be used on bare metal to ensure proper adhesion. I didn't use primer because A) i didn't have it, and B) i like to live dangerously
7) roll the fenders, according to this excellent DIY by cpl_allen. Note that I didn't cut any metal, or relocate any bolts. I wasn't going for clearance. Again, this step take a lot of time. And you want to take a lot of time here. two very bad outcomes come from rushing this. first, you can crack your paint, and second you can warp the metal causing a waviness to the metal around the fender lip. I used a hair dryer and made sure the metal was always greater than 115 F, but no more than 150F. This step alone. I was lucky and was able to borrow an eastwood fender roller from a friend for this step. You'll probably spend 4-6 hours here if you're as slow as I am. 80% of that will be making sure the metal is hot enough (with a 20$ laser temp gun from canadian tire).
note: if you don't want to roll your fenders, you can likely skip this step anyways, you'll just use a bit more seam sealer. you'll still be protecting your metal just as well.
8) Add seam sealer! everywhere! I used liberally. The aim here was the fill the small gap between the outer fender and the newly rolled fender lip. This was no dirt could ever rest in this area. I also made sure to add a skim of seam sealer (roughly 1/8" thickness) over the areas adjacent to the lip that were never protected before (see image 2, step 2). You'll need gloves for this step. If you're inherently as messy as I am, it would be a great idea to once again mask off the entire area with green painters tape. You have maybe about a half hour work time once the material is applied. First, I applied a bunch and forced it into every gap by hand. afterwards i tried to make it prettier by skimming over with my finger. Wait about 45 minutes and touch with your finger. should be hardened on the surface, but still uncured underneath in thicker areas. Curing takes a while to complete (I put mine all back together and noticed that it didn't firm completely for about 3-5 days)
9) You're all done! Just check your work to make sure you didn't miss any areas. No bare metal should be exposed. touch up afterwards as necessary. I found that tan color of the sealant to be a bit of an eyesore. I quickly hit everything with some matte black tremclad rust paint after 45 minutes of seam sealer curing.
All in, I spend a weekend doing this. probably cumulatively 16 hours of fiddling around and OCD'ing things. My car is a MY2000, so my case would be severe compared to some of you guys with newer cars. If I were to do this again, i'd probably skip the fender rolling step. it's just too risky for me to do on a nice car. As far as results, I've had this done for over a month. No rust, very little dirt is retained. And anywhere dirt is retained, I'm confident the seam sealer + POR15 will keep my fenders rust free for years to come.
I'll try and get some pictures posted of the results to give you a better idea of what/where i worked.
07-16-2015, 03:47 PM
#4


^Definitely a smart move to remove those as early as possible. I have an eastwood fender roller and heat gun that I can rent out in dartmouth area if anyone wants to roll their own fenders.
 08-10-2015, 04:09 PM
#7

Another inexpensive change using OEM parts:
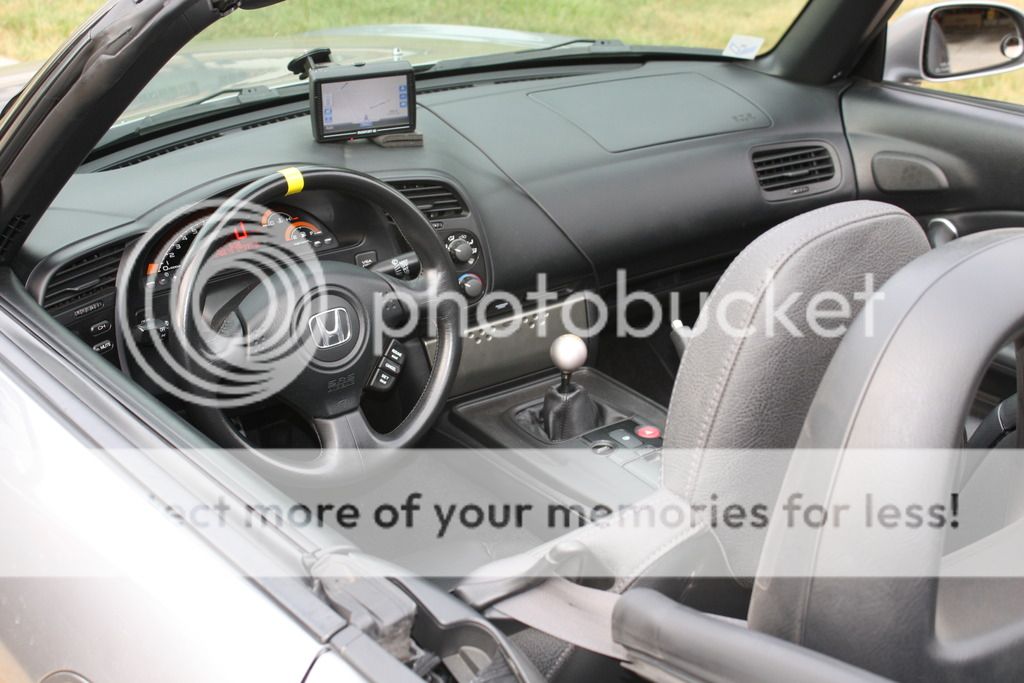
I always thought the silver radio cover, the only silver thing inside my '06, was out of place. Earlier years had silver trim around the dash controls and on the console. Finally replaced it with the CR faux CF cover. Think it was $25 new in the sealed bubble wrap. Still a contrast, but not glaring silver.
The CR shift knob (swapped last year) is the only silver thing there now.
All swapped parts, including the OEM exhaust in the shed, are available for the next owner. Nothing that can't be put back to stock.
Like the yellow band on the steering wheel? Saw this on some Civics in the high school parking lot and said "Kool."
-- Chuck
Trending Topics
08-11-2015, 02:14 AM
#9
I can't see buying form Tire Rack being worth it at this point with our dollar so poor. I bought my tires from there last year for cheap, I tried to order the same set and it was double..
I am hoping to find a set locally, just hope my current tires hold up till October, damn rwd lol