When you click on links to various merchants on this site and make a purchase, this can result in this site earning a commission. Affiliate programs and affiliations include, but are not limited to, the eBay Partner Network.
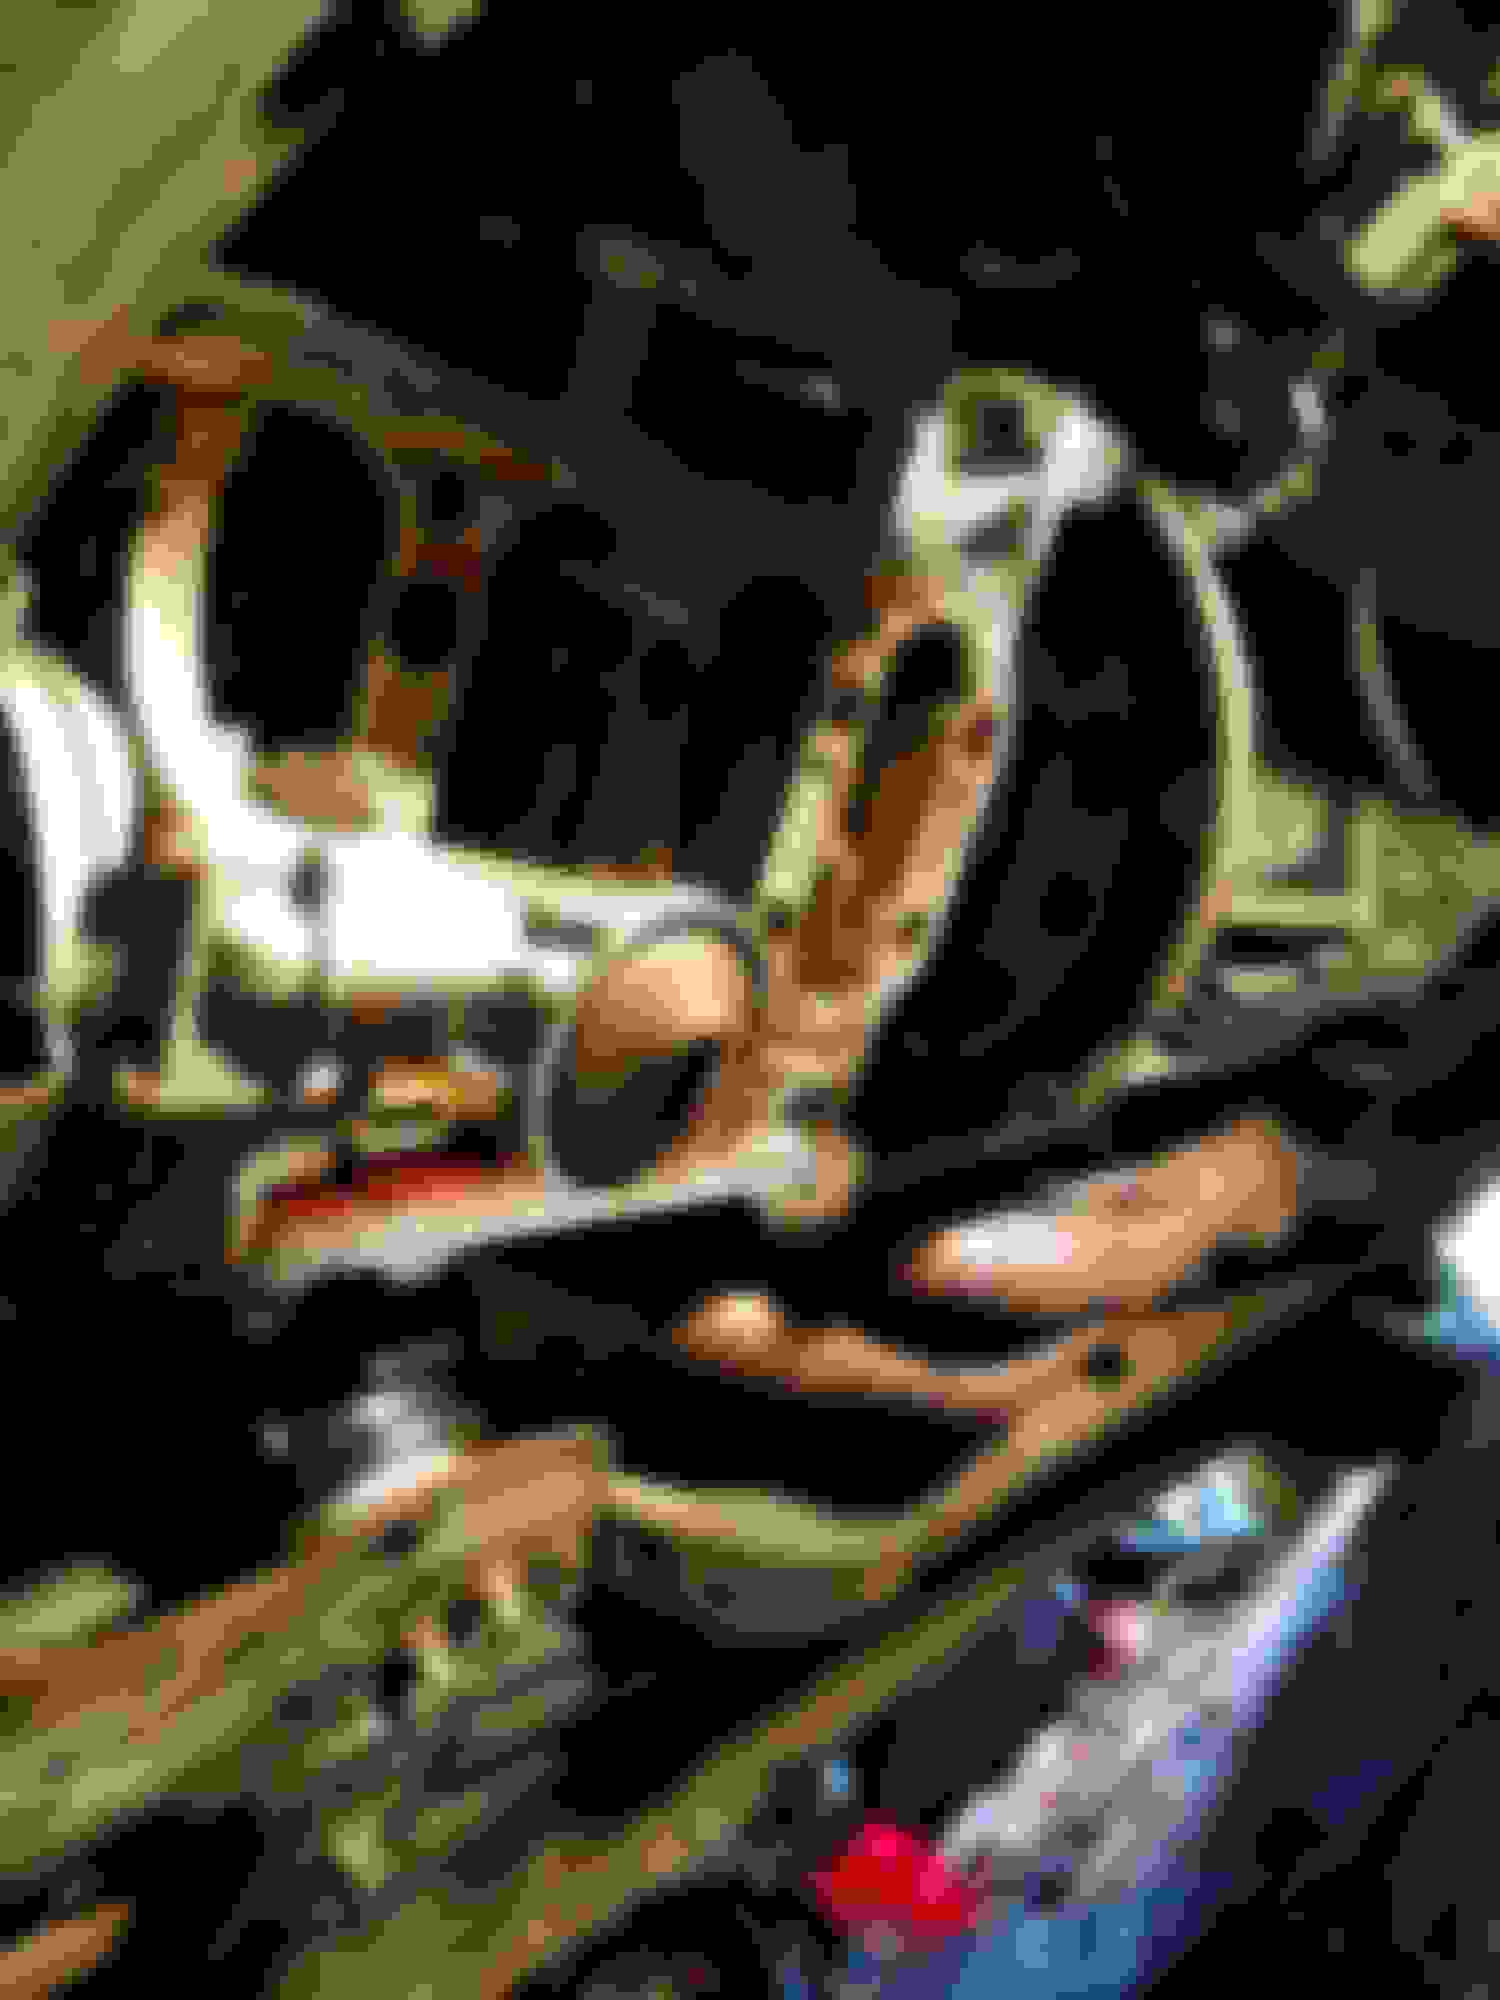
Happy Easter everybody! Over this weekend the car saw a HUUUUGEEEE improvement. Lately I haven't had much time to work on the car at all, and with the Rud event nearly here I was feeling the stress. So it was perfectly timed when Aashish recommended I see if Jake was available to swap the clutch/flywheel, and to my luck he was! Before I get into the details of the job, I have to give Jake a huge shoutout and thank you. He is a super cool guy, and his workmanship is fantastic. Not to mention he kept me in the loop throughout the process and let me know of any issues he came across. I highly recommend him without any reservation or issue whatsoever. So on Thursday as I headed to Boston for another weekend of grad school I stopped by Jake's place and dropped off the car and new parts, and he graciously brought me to the airport to pick up a rental. Not even 2 hours go by and he gives me a call letting me know that the transmission was out, new flywheel already torqued down but in order to fit the SOS pressure plate, we had to open up one of the mounting holes ever so slightly. He also let me know that the starter bolt was missing, as were 2 bolts on the transmission, and many were just hand tight (the curse of the salvage title never ends), and the trans itself was about a quart low on fluid. But Jake being the man he is, had spare bolts, and even pulled one off his own car to put on mine! He resealed the trans and put everything back together and WOW. The clutch has never felt so good. The SOS setup is very light and engagement is very positive. Previously the shifter used to move about when in gear, and now it stays very steady and doesn't move around. While at it, Jake noticed that one of the windshield washer nozzles was messed up so he replaced that as well. Here are a few pics of the install:
I would have been in a world of trouble had I attempted this install myself. I may have done some damage to the trans driving about so low on fluid, but overall I am in much better shape going into the season thanks all to Jake.
I'm actually about 30 miles from Buffalo, so I just say Buffalo so peeps have a better idea lol.
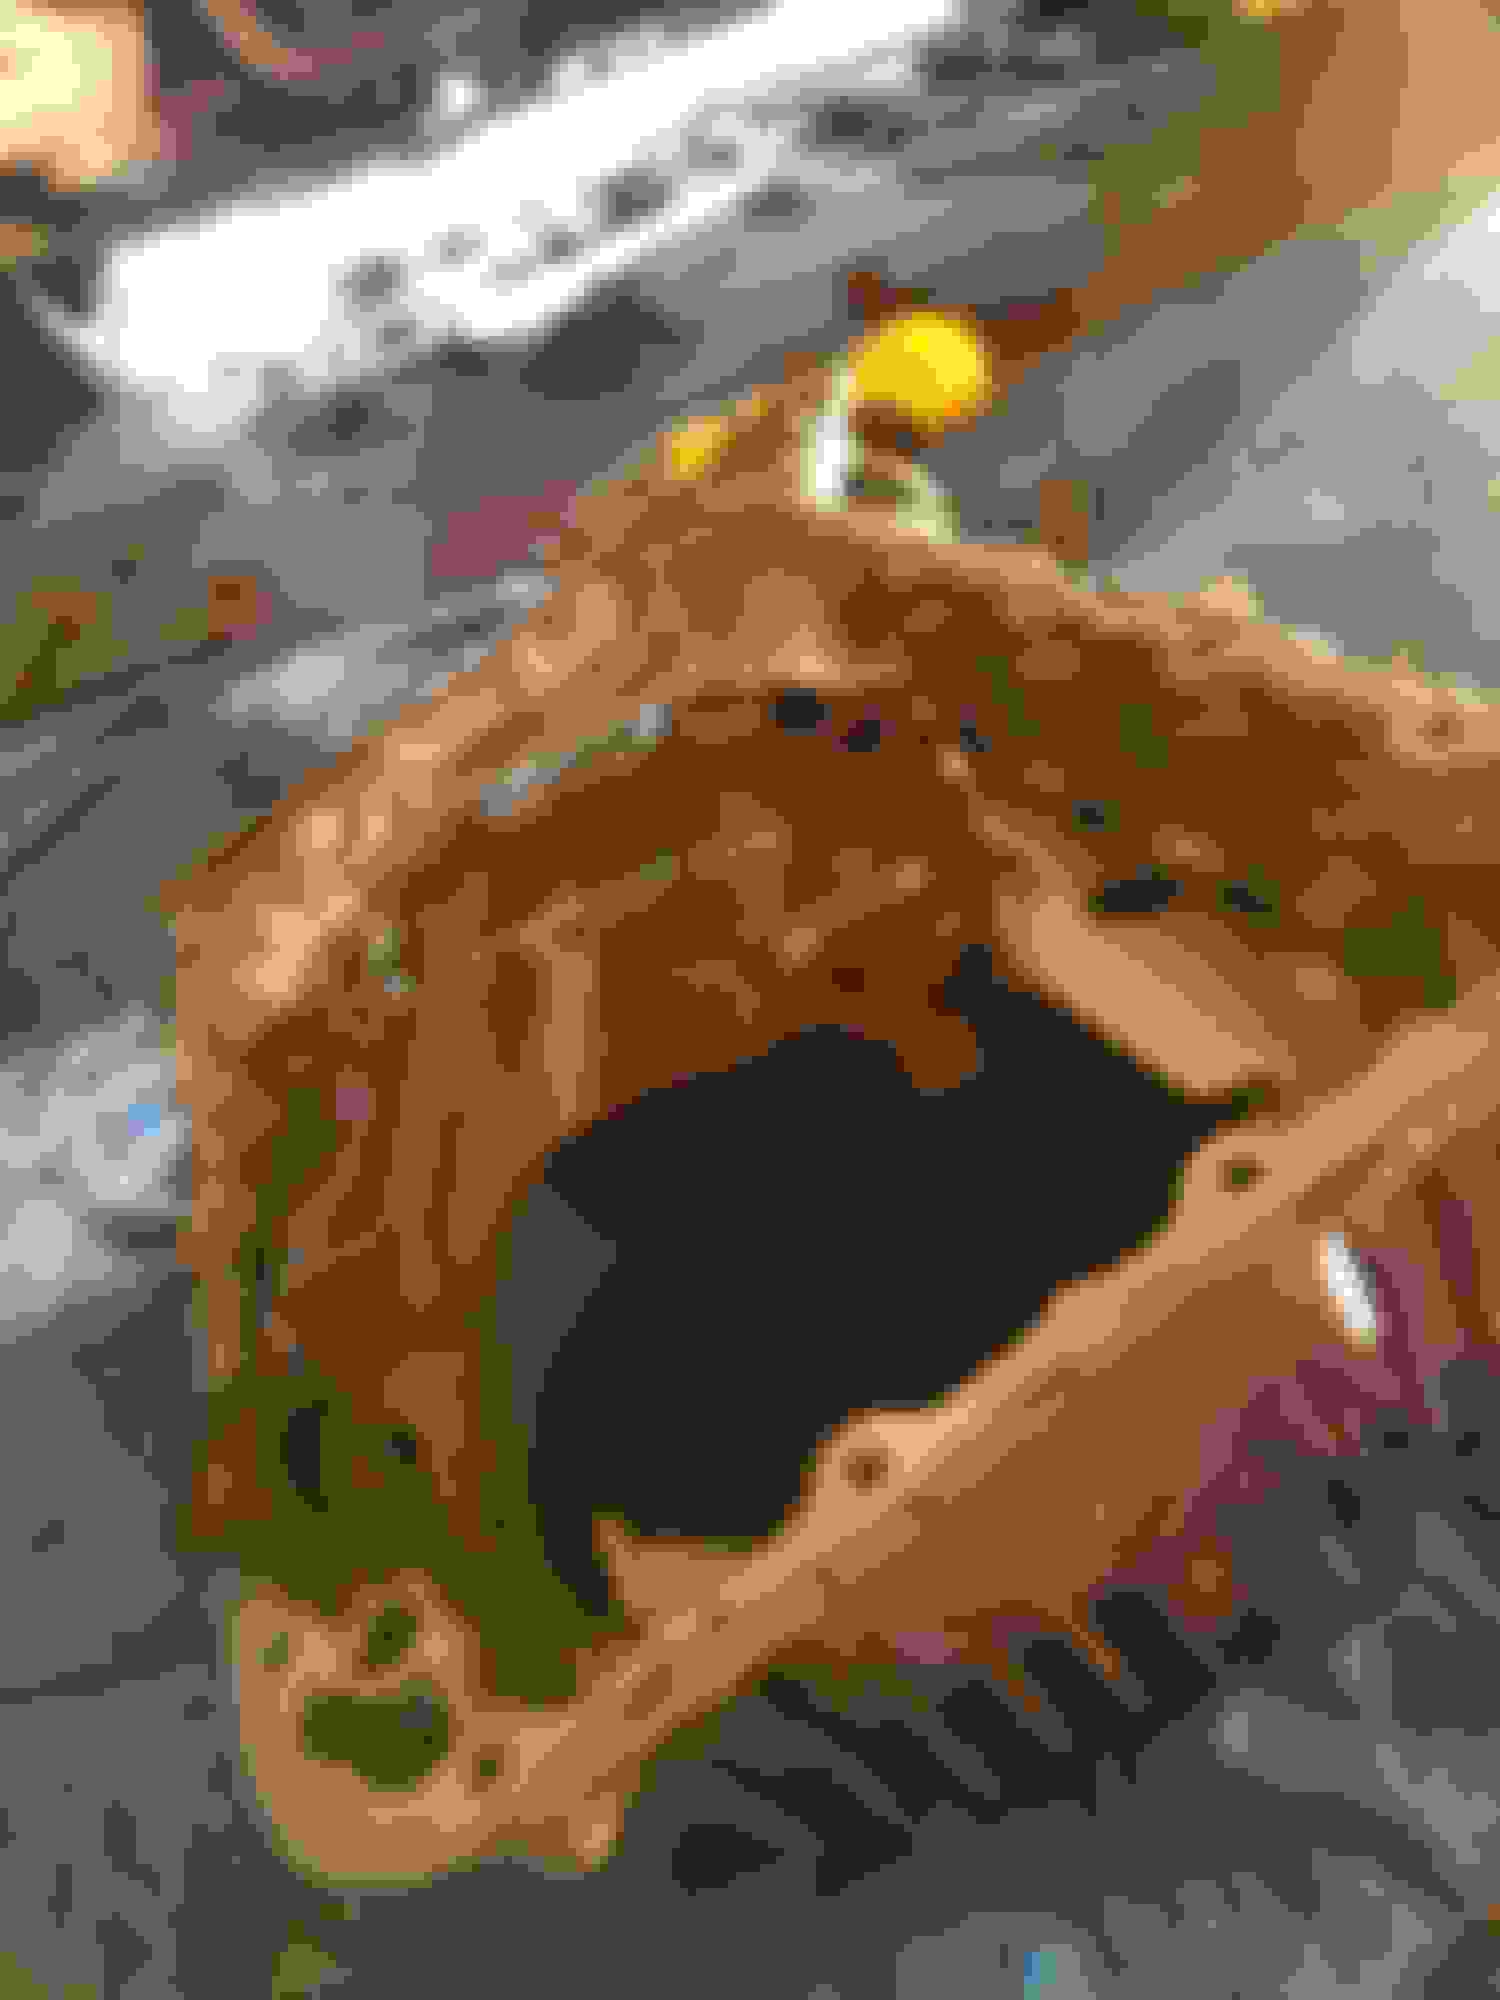
Update! Well somewhat! About 24 hours prior to the Rud event at Palmer I thought to myself: "I should really install the oil pan, oil cooler, halo seat, and harness for Thursday's event!". Last moment craziness is my specialty. With the old pan off, I took a razor blade and began cleaning the block mating surface. Also popped off the windage tray. The Canton has a windage tray built in, and the Canton pan wont fit unless you remove the stock one.
Given that the pan is made of steel it is noticeably heavier than stock, but the more robust baffles and increased capacity is welcomed. NOTE: My canton kit did not come with any hardware to mount, and the factory bolts cannot be used. Fortunately my local home depot had the hardware. 6mm allen head bolts 1.0 thread pitch, and up to 18mm in length, though I used 16mm and it felt solid so I wasn't concerned. The supplied flywheel cover was slightly ghetto but fit fine without any clearance issues.
The Mishi oil cooler was super easy to install. As my bumper inlet has that plastic "grill" cut out, and the upper shroud removed as well, I was able to pop the cooler in through the opening. Routing of lines was equally easy, just have to adjust their position on the sandwich plate slightly so there is enough room to get the oil filter on. But otherwise, its a super fast install.
While I didn't grab pics of the seat or harness install, they are both very straight forward. There's a great harness install guide on Rob Robinnette's website. and seats are equally straight forward. The Pro ADV does fit in the S without modification to the transmission tunnel, and you can close the door without cutting, but you really have to slam it. So I will be cutting the panel slightly. Another gripe I have is with the EVS rails I used. Instructions were all in Japanese, and the adjusters are so cumbersome. Additionally the front left rail did not line up with the factor mount so I drilled a new hole and used a nut to secure that side. Not a huge deal, but you would think that it would be a bolt-in affair.
After hooning it around for 7 sessions at Palmer, the car was feeling rock solid. And WOW have I been missing out not having a proper seat in the car. No more sliding around or using your legs and arms to keep you in spot. Unfortunately by the end of the day I did notice the tiniest of oil puddles under the car as Greg suggested may happen. But its negligible, and I constantly monitor the oil level so I'm not too concerned. Now to just install the passenger seat, build a tire trailer and get to the competing part!
AweSome! I really liked ur car when jake and I were putting your clutch in! One other thing to keep an eye on is the baffles inside the oil pan seem to crack, gregs did and it started to hit the oil pump.. we welded it back up but just a heads up
Thanks man! I imagine you will be seeing it many more times in Jakes garage at the minimum lol. That's right I remember Greg posting about his Caton having cracks in it as well. I'll have to make it an annual check up. Seems like anything other than an unmodified stock pan is prone to cracking at some point.
"NOTE: My canton kit did not come with any hardware to mount, and the factory bolts cannot be used. Fortunately my local home depot had the hardware. 6mm allen head bolts 1.0 thread pitch, and up to 18mm in length, though I used 16mm and it felt solid so I wasn't concerned. The supplied flywheel cover was slightly ghetto but fit fine without any clearance issues."
That's kind of interesting. My Canton pan came with the 6mm allen head bolts, but I'm pretty sure I went back to the stock bolts. Easier to deal with. Of course, I cross threaded one and had to go for a longer bolt.
 04-16-2017, 01:10 PM