
Wilwood Front & Rear BBK - DIY - Install Tips - Lots of Pics
 05-27-2013, 08:25 PM
#1
Registered User


Thread Starter
I recently decided to purchase a set of Wilwood Brakes from MVP Motorsports. I was faced with purchasing an upgraded rotor kit or go full BBK, after doing a lot of research I finally decided on a path. The rotor upgrade uses an OEM caliper but is not cheap and after buying the rotors and new OEM calipers the cost was approaching a BBK. So I decided to bite the bullet and look for a full kit. The key items in the decision were that they could handle track duty, rear parking brake, large pad area, parts availability, reasonably priced pads and rotors and the Wilwood kit fit all the criteria. I will say there are certainly better kits out there but for one reason or another they did not fit my criteria.
Some things to note, you will need to order your front kit specifying the color and rotor type, the brake lines are extra and required (Kinda crappy that they are not included) and fluid. I would not recommend cross drilled and stick with slotted only. The rear brakes are the same pick the rotor style and color then add brake lines and you will need parking brake cables.
-----------------------------------------------------------------------------------------------------
Update - 7-15-2013
I have been driving the car around for a few hundred miles now and had the car on track for several sessions.
For the street as you can imagine there is Zero difference in the OEM brakes, but at the track is an entirely different story. On track I am using the DT30's in the Front and DT20 in the rear which is not usable on the street. They squeal soooooo loud even I was somewhat embarrassed as everyone was looking at me. However on track these pads were great. They wore very well and had great initial bite.
I put the brakes through about 50-60 1:4Xmin laps at Heartland Park Topeka. The modulation was great, much better than I had anticipated. As soon as I brought the pads up to temp they were perfectly consistent the entire time. The rotor temps were much lower also, I measured an average front temp around 450F in front after a cool down and 350F in the rear. The OEM rotors were running 500-600F front and 800F rear! There are no signs of rotor stress cracks and the rotors have a smooth surface.
Long term testing is certainly the key to this project but my current prospective is that the front kit is great. I would recommend it to others for a great braking system at a very reasonable cost. The rears however, I am still not sold that they are the best solution. My money is on either the Racing Brake rotor upgrade or the Stoptech w/o E-brake.
http://www.youtube.com/watch?v=58HI1OQlI6M
---------------------------------------------------------------------------------------------------
Pro's
-Cost
-(2) Piece Rotor
-Cheap Rings
-Simple Components
-Perfect fitment (With Supplied Shims)
Cons
-Non-Floating rotor
-Large Installation time
-Special tools required for the installation
-Small variety of pad choices
-The bleeder are ridiculously small
Special Tools Required for the Install
-Dial Calipers
-11mm 12 Point Socket
-1/4" Box Wrench for bleeders
-Torque wrench (30ftlb min)
-Cut off wheel
-Vice Grip Pliars
-10mm Line Wrench
-Wire Lock Pliars
-0.032" Saftey Wire
The install on the front kit took me about 8 hours including wiring the rotors and cleaning up everything as I went. The manual was decent, more photos are always good but I was able to follow it all easily. Here is a link to the Wilwood Manual http://www.wilwood.com/PDF/DataSheets/ds605.pdf
I started by removing the OEM brakes but leaving the caliper connected to the brake line and zip tie it out of the way. I then removed the heat shield using a pair of channel lock pliars on the screws to loosen them. Then cutting a small section out of the caliper side of the shield so it can be removed and further cut to make way for the new caliper and rotor.
Note the areas removed and that I wrapped the tie rod ends in foil tape to help prevent melting the boot.
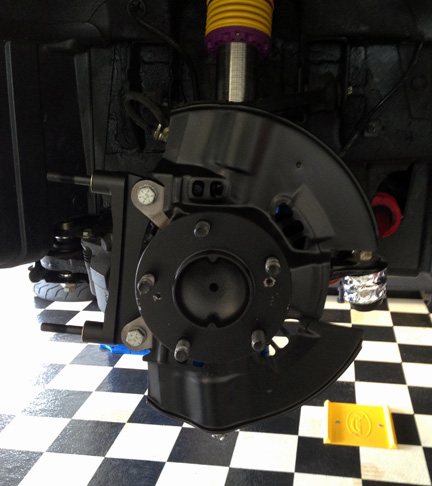
Next I removed the rust from the hub and caliper mounting ears, then sprayed a very thin coat of cold galvanized spray paint. Since I also coated the studs I then came back and used a 12mm x 1.5 thread cutter to clean the threads.
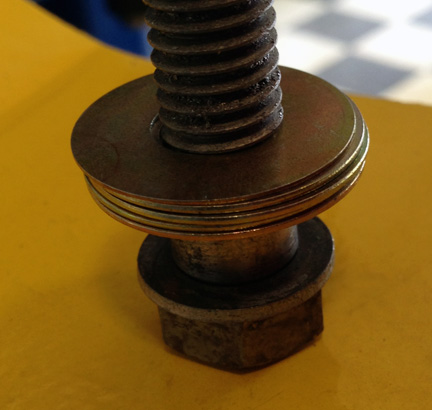
Now that everything is clean the next step is to get the caliper mounting bracket installed and shimmed properly. During the fitment use a little oil on the caliper bolts and mounting studs. Next start with the recommended 0.016" and 0.032" shim and install the rotor and caliper them measure the distance between each side.
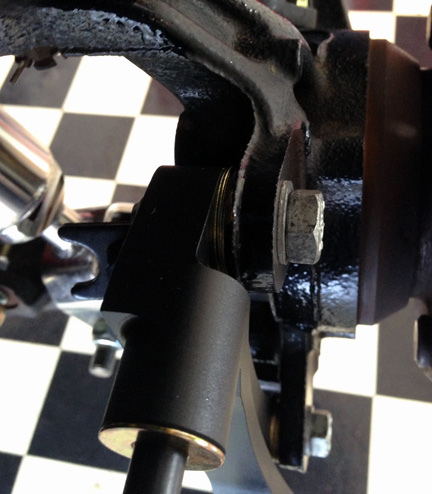
Add or subtract shims unit you get the same distance on each side of the rotor. Then install the pads and ensure you have gotten the spacing correct.
I ended up needing (4) 0.032" and (1) 0.016" shim for both sides.
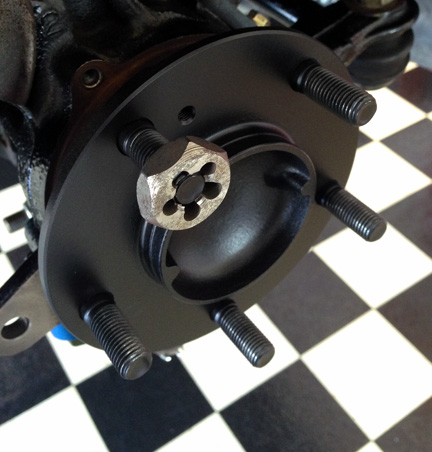
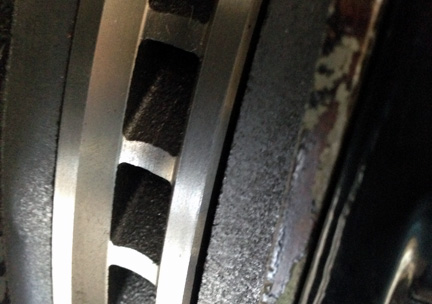
Now check that the pads are at the correct radius out from the hub. You should have installed a 0.035" shim as indicated to achieve, from my car this was the ideal spacing. As seen in the photos the pad should be nearly identical width as the rotor face.
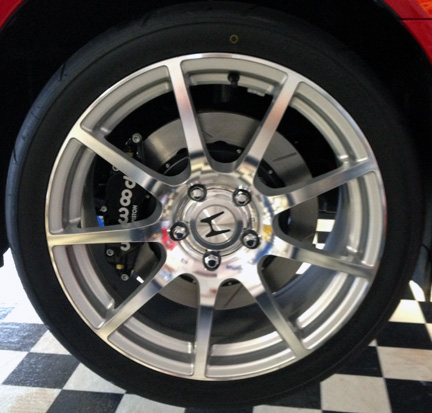
Now that the spacing is correct it is time to check the wheel fitment. Hopefully using the Wilwood template you have already tested the fitment but now is the time to double check.
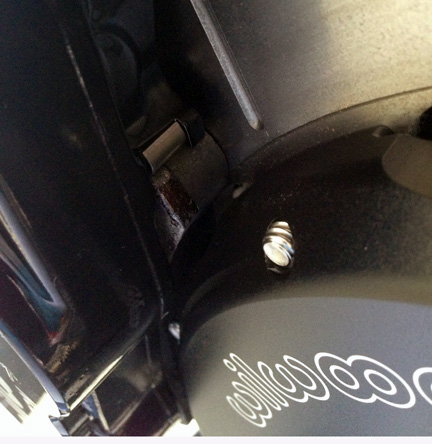
Since everything fit its time to reinstall. Starting with the heat shield, I used new 5mm x 0.8" bolts with lock washers to secure the shield just like the OEM but with a hex head
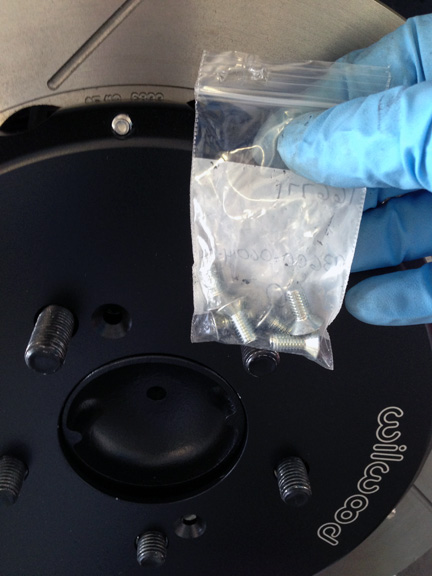
I always keep a bunch of extra rotor screws around, might as well throw on a new set to match the new rotors.
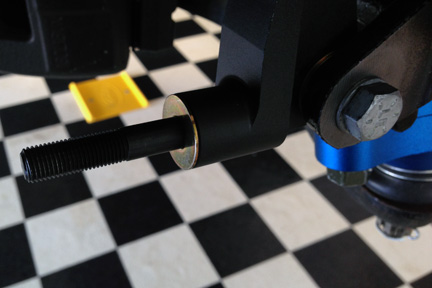
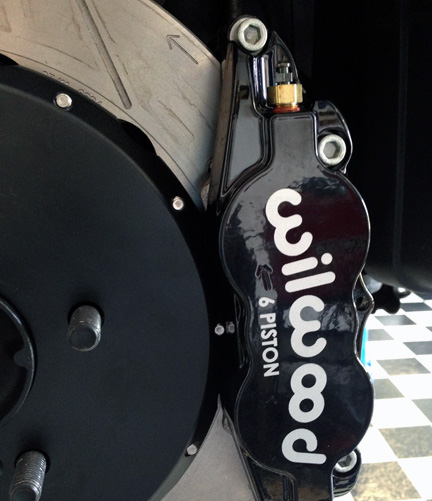
Next I installed the caliper mounting brackets and torqued to spec with Loctite (42ftlb). When you put on the calipers and rotors make sure you pay attention to the rotation, the calipers and rotors are specific to the right and left.
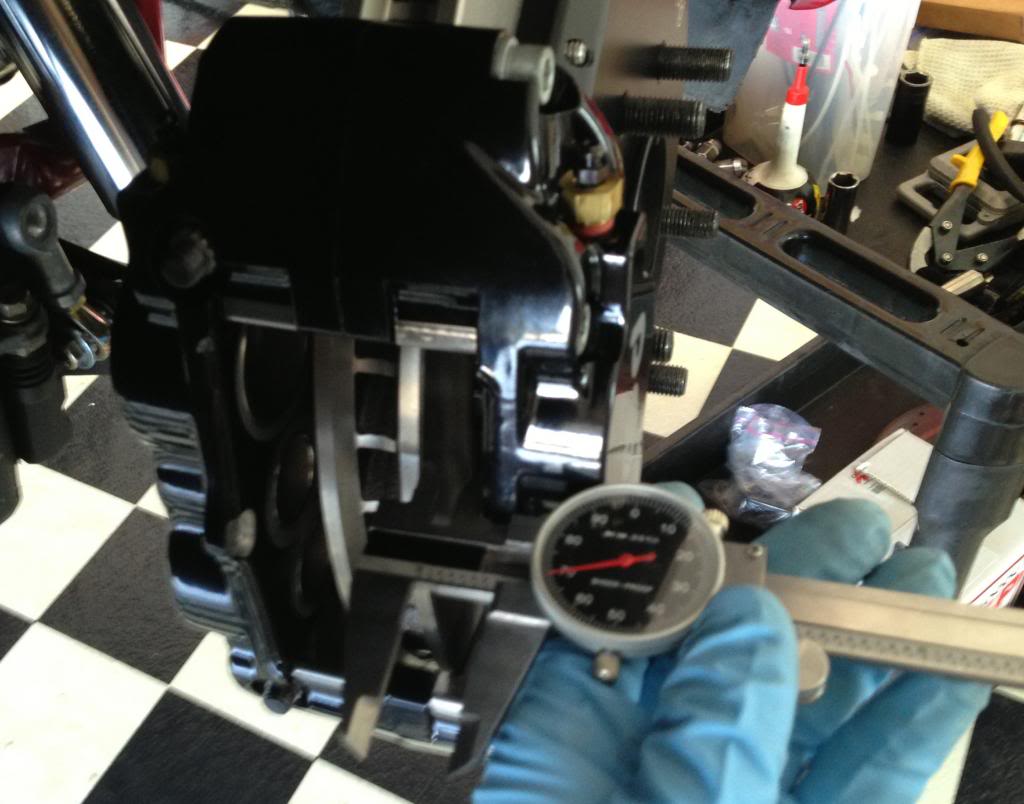
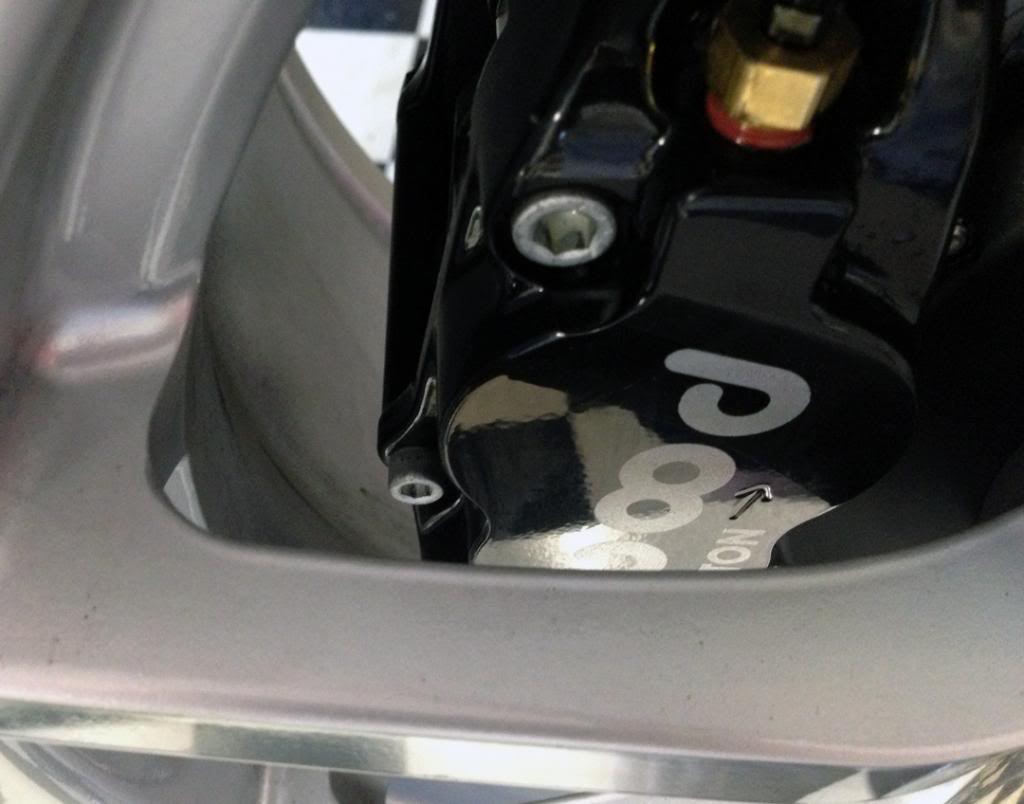
Here is a shot of the interior of the caliper take note of the size of the pistons. The trailing piston is much larger.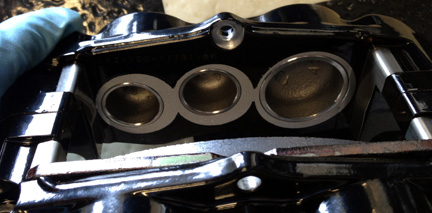
This was the a tricky one, I had to dig in my tool box to find an 11mm 12 point socket that fit. Luckily I had a 1/2" that fit my torque wrench and torqued them to spec (30-35ftlb).
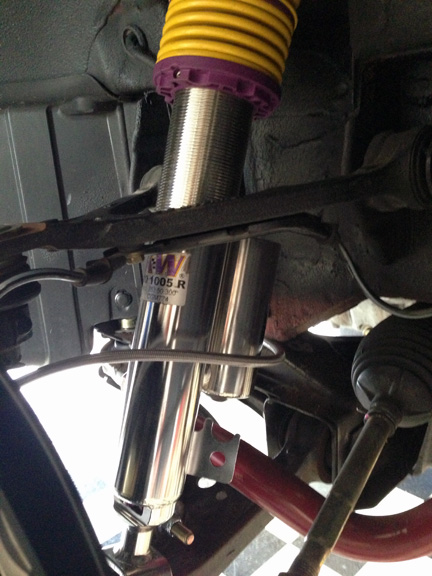
With everything installed its time to start the brake lines. First start by checking the tightness of all the bleeders and the bases. I started at the caliper and put on a small amount of thread sealer, liquid type only, on the 90deg fitting supplied with the kit at the caliper. Once that was in loosely I routed the brake line forward just to match the OEM around the front of the shock and back to the hard line. Now that the line was ready to install I finally took off the factory brake line and quickly installed the Wilwood so that I lost as little fluid as possible. When loosening the OEM hardline do yourself a favor and buy a 10mm line wrench to help prevent striping the line.
From here I merely bled the caliper starting on the passenger side outer bleeder and moving to the inner.
I torqued the wheels and then bedded & burnished the pads per their instructions.
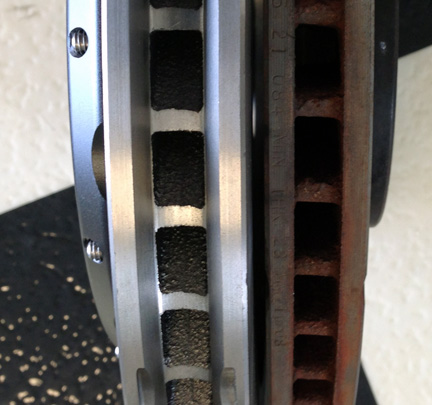
I wish I weighed everything but forgot to check it out but I am going to guess there is probably a 15lb difference. The calipers alone must be at least 5lbs less each and the rotors a couple.
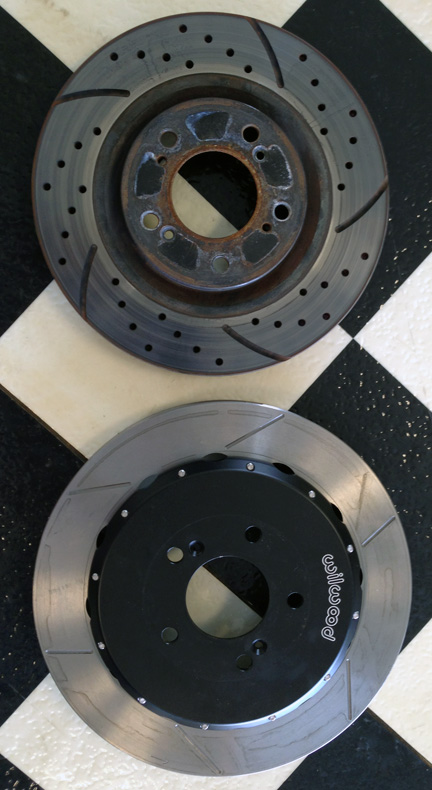
Here are some random photos of OEM sized rotors and Wilwoods
Some things to note, you will need to order your front kit specifying the color and rotor type, the brake lines are extra and required (Kinda crappy that they are not included) and fluid. I would not recommend cross drilled and stick with slotted only. The rear brakes are the same pick the rotor style and color then add brake lines and you will need parking brake cables.
-----------------------------------------------------------------------------------------------------
Update - 7-15-2013
I have been driving the car around for a few hundred miles now and had the car on track for several sessions.
For the street as you can imagine there is Zero difference in the OEM brakes, but at the track is an entirely different story. On track I am using the DT30's in the Front and DT20 in the rear which is not usable on the street. They squeal soooooo loud even I was somewhat embarrassed as everyone was looking at me. However on track these pads were great. They wore very well and had great initial bite.
I put the brakes through about 50-60 1:4Xmin laps at Heartland Park Topeka. The modulation was great, much better than I had anticipated. As soon as I brought the pads up to temp they were perfectly consistent the entire time. The rotor temps were much lower also, I measured an average front temp around 450F in front after a cool down and 350F in the rear. The OEM rotors were running 500-600F front and 800F rear! There are no signs of rotor stress cracks and the rotors have a smooth surface.
Long term testing is certainly the key to this project but my current prospective is that the front kit is great. I would recommend it to others for a great braking system at a very reasonable cost. The rears however, I am still not sold that they are the best solution. My money is on either the Racing Brake rotor upgrade or the Stoptech w/o E-brake.
http://www.youtube.com/watch?v=58HI1OQlI6M
---------------------------------------------------------------------------------------------------
Pro's
-Cost
-(2) Piece Rotor
-Cheap Rings
-Simple Components
-Perfect fitment (With Supplied Shims)
Cons
-Non-Floating rotor
-Large Installation time
-Special tools required for the installation
-Small variety of pad choices
-The bleeder are ridiculously small
Special Tools Required for the Install
-Dial Calipers
-11mm 12 Point Socket
-1/4" Box Wrench for bleeders
-Torque wrench (30ftlb min)
-Cut off wheel
-Vice Grip Pliars
-10mm Line Wrench
-Wire Lock Pliars
-0.032" Saftey Wire
The install on the front kit took me about 8 hours including wiring the rotors and cleaning up everything as I went. The manual was decent, more photos are always good but I was able to follow it all easily. Here is a link to the Wilwood Manual http://www.wilwood.com/PDF/DataSheets/ds605.pdf
I started by removing the OEM brakes but leaving the caliper connected to the brake line and zip tie it out of the way. I then removed the heat shield using a pair of channel lock pliars on the screws to loosen them. Then cutting a small section out of the caliper side of the shield so it can be removed and further cut to make way for the new caliper and rotor.
Note the areas removed and that I wrapped the tie rod ends in foil tape to help prevent melting the boot.

Next I removed the rust from the hub and caliper mounting ears, then sprayed a very thin coat of cold galvanized spray paint. Since I also coated the studs I then came back and used a 12mm x 1.5 thread cutter to clean the threads.

Now that everything is clean the next step is to get the caliper mounting bracket installed and shimmed properly. During the fitment use a little oil on the caliper bolts and mounting studs. Next start with the recommended 0.016" and 0.032" shim and install the rotor and caliper them measure the distance between each side.


Add or subtract shims unit you get the same distance on each side of the rotor. Then install the pads and ensure you have gotten the spacing correct.

I ended up needing (4) 0.032" and (1) 0.016" shim for both sides.

Now check that the pads are at the correct radius out from the hub. You should have installed a 0.035" shim as indicated to achieve, from my car this was the ideal spacing. As seen in the photos the pad should be nearly identical width as the rotor face.


Now that the spacing is correct it is time to check the wheel fitment. Hopefully using the Wilwood template you have already tested the fitment but now is the time to double check.

Since everything fit its time to reinstall. Starting with the heat shield, I used new 5mm x 0.8" bolts with lock washers to secure the shield just like the OEM but with a hex head

I always keep a bunch of extra rotor screws around, might as well throw on a new set to match the new rotors.

Next I installed the caliper mounting brackets and torqued to spec with Loctite (42ftlb). When you put on the calipers and rotors make sure you pay attention to the rotation, the calipers and rotors are specific to the right and left.

Here is a shot of the interior of the caliper take note of the size of the pistons. The trailing piston is much larger.

This was the a tricky one, I had to dig in my tool box to find an 11mm 12 point socket that fit. Luckily I had a 1/2" that fit my torque wrench and torqued them to spec (30-35ftlb).

With everything installed its time to start the brake lines. First start by checking the tightness of all the bleeders and the bases. I started at the caliper and put on a small amount of thread sealer, liquid type only, on the 90deg fitting supplied with the kit at the caliper. Once that was in loosely I routed the brake line forward just to match the OEM around the front of the shock and back to the hard line. Now that the line was ready to install I finally took off the factory brake line and quickly installed the Wilwood so that I lost as little fluid as possible. When loosening the OEM hardline do yourself a favor and buy a 10mm line wrench to help prevent striping the line.


From here I merely bled the caliper starting on the passenger side outer bleeder and moving to the inner.

I torqued the wheels and then bedded & burnished the pads per their instructions.
I wish I weighed everything but forgot to check it out but I am going to guess there is probably a 15lb difference. The calipers alone must be at least 5lbs less each and the rotors a couple.
Here are some random photos of OEM sized rotors and Wilwoods


The following users liked this post:
s2000ellier (02-11-2019)
05-27-2013, 08:25 PM
#2
Registered User
Thread Starter
Rear Brake Kit
I finally got the rear brakes installed but I still have some little things to clean up.
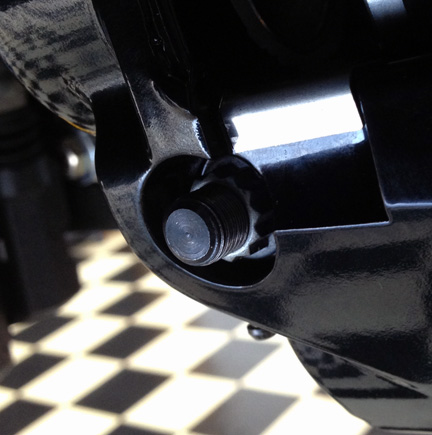
First, in order to get the caliper installed you will need a thin wall 11mm 12point deep well socket. This was a bit hard to find but I am not sure how you would install without it.
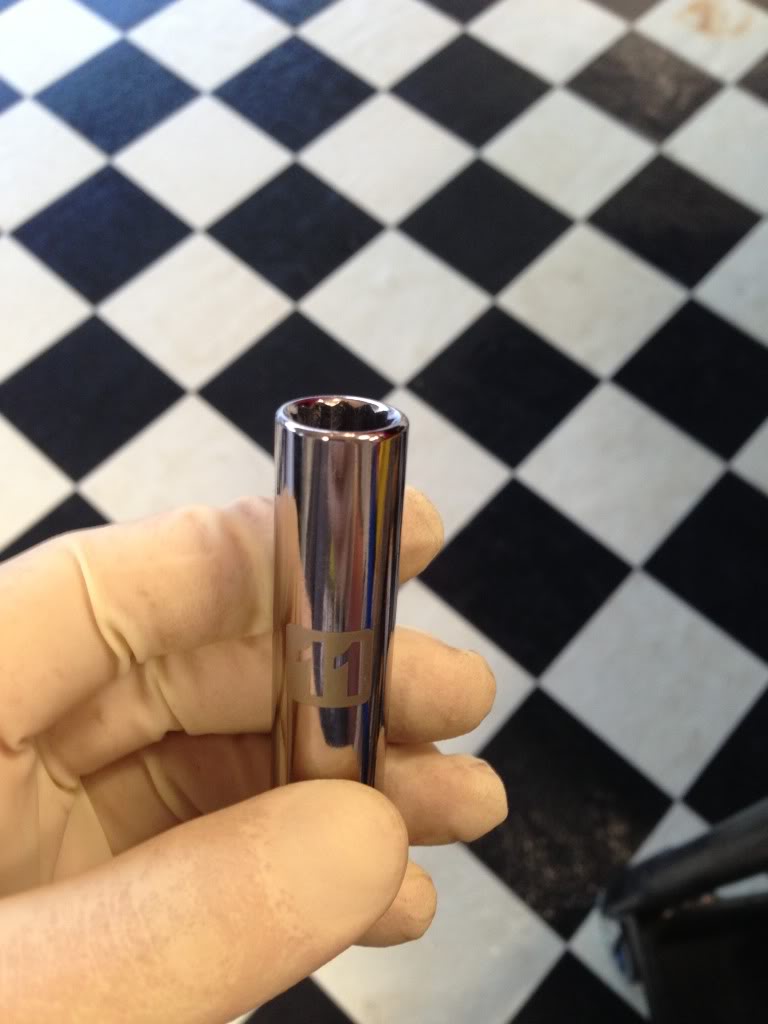
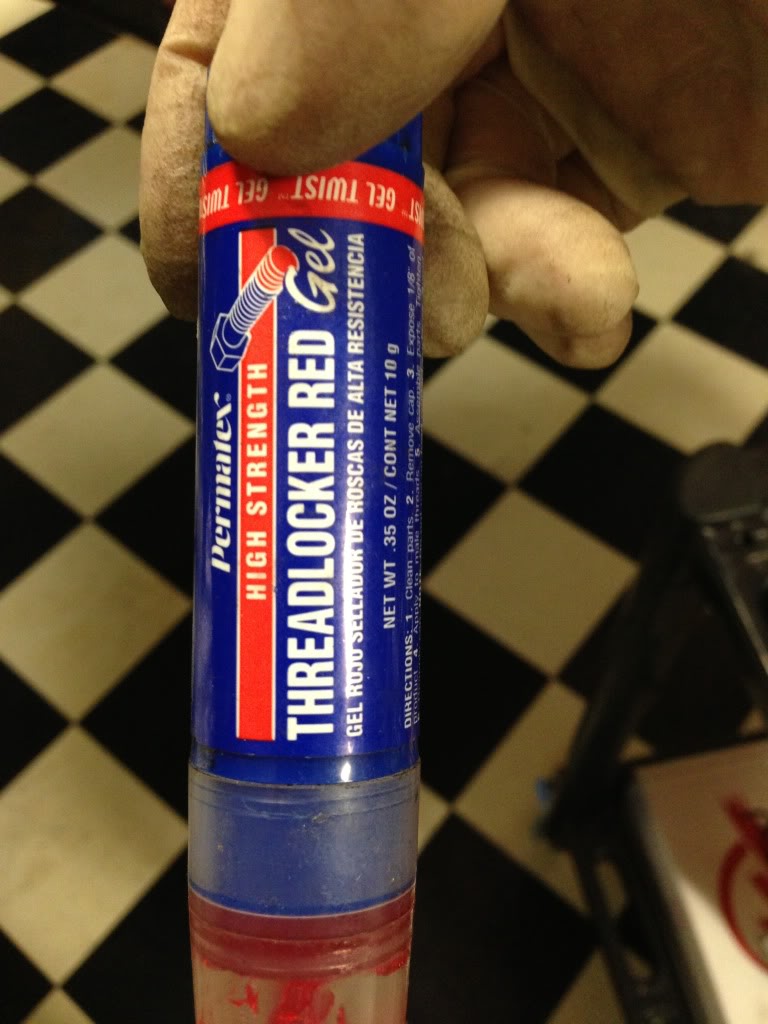
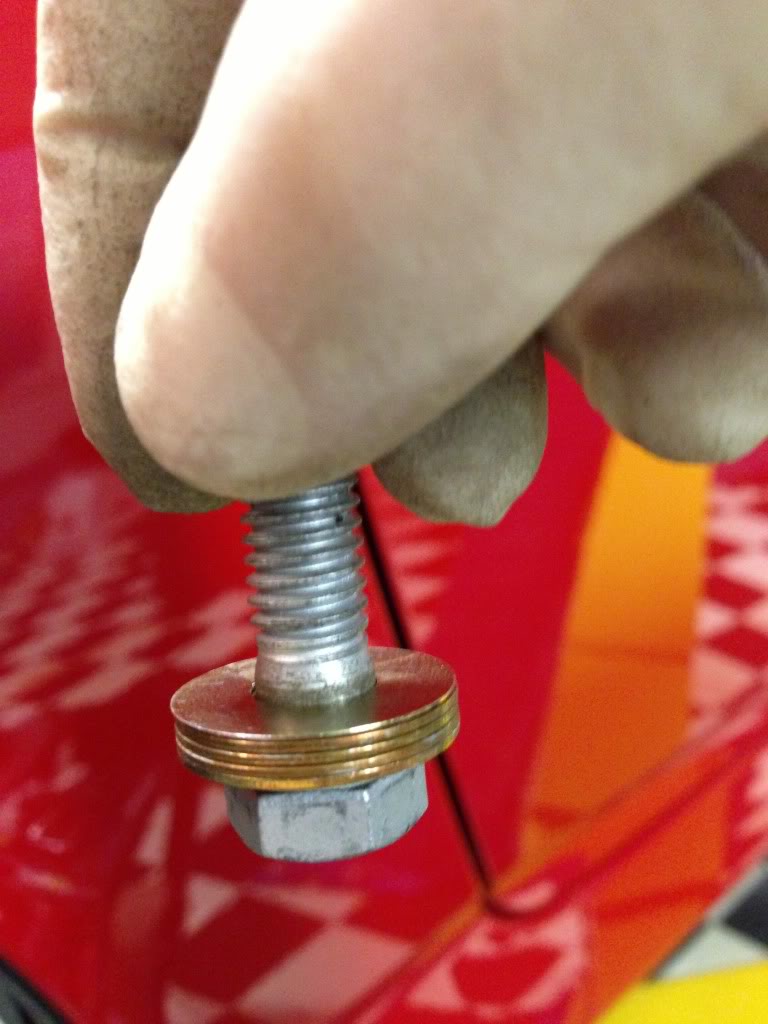
I figured I would throw in a shot of this. Rather than traditional liquid Locktite I found this Gel years ago and seems to make things much easier.
As with the front kit you will need to shim the caliper bracket so that it has equal distance from each side of the rotor. Note that removal of the caliper make this portion much easier.
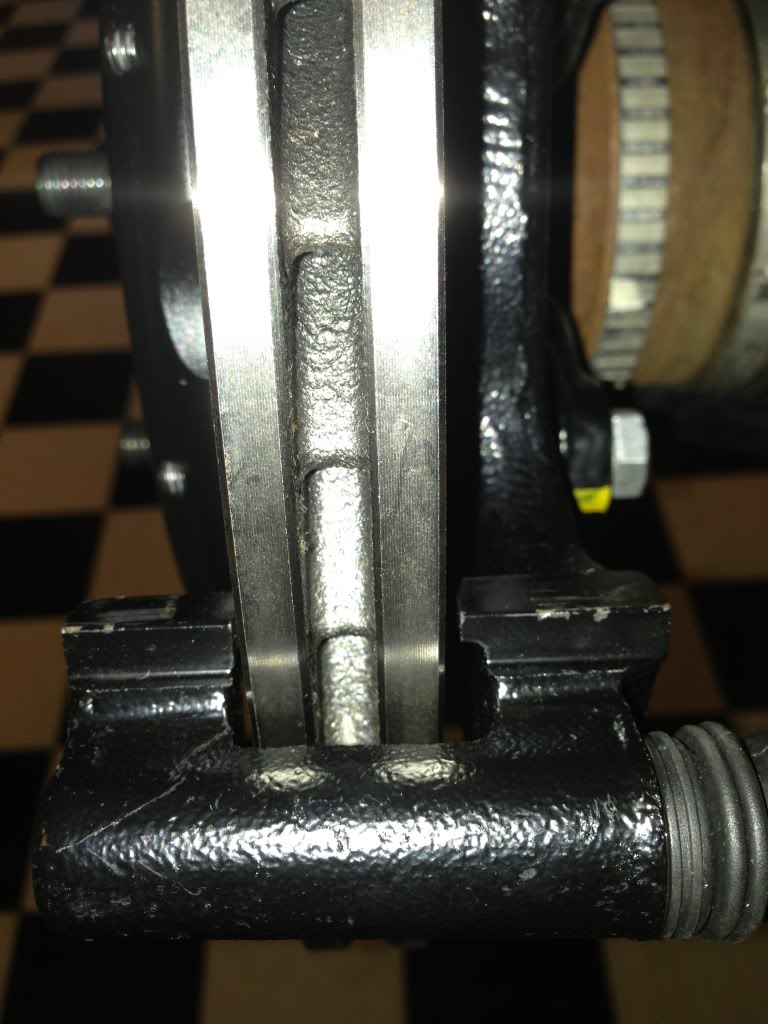
On both sides of the rear brake kit I used (4) 0.32mm Shims and (1) 0.16mm Shims
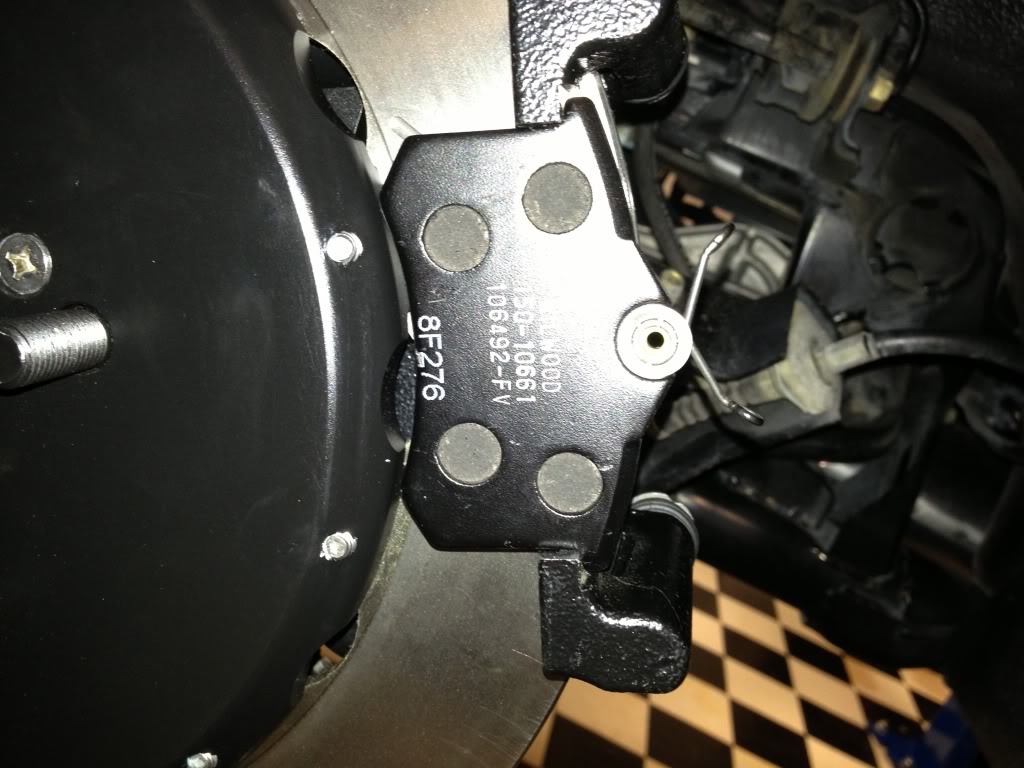
Now check the brake pad fitment on the rotor surface. I needed no shims for the rear. The caliper bracket was bolted straight to the caliper bracket.
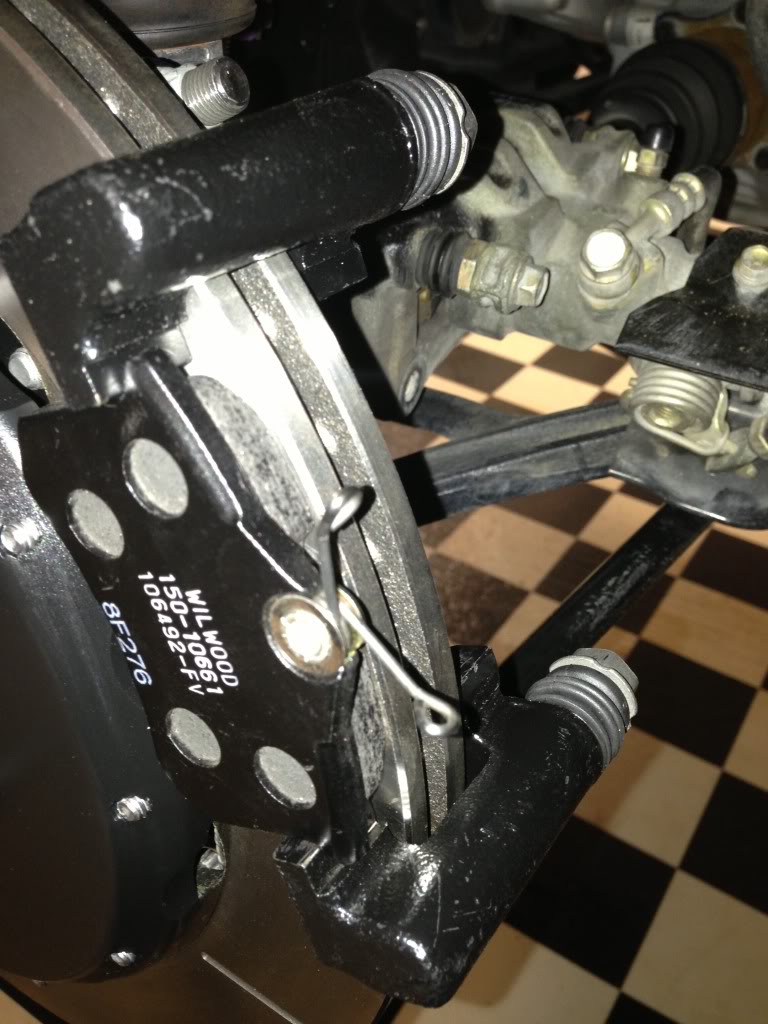
The factory brake cables will not work with the kit. You will have to order the new cables with the kit. I carefully I cut off the boots and them put them over the supplied cables.
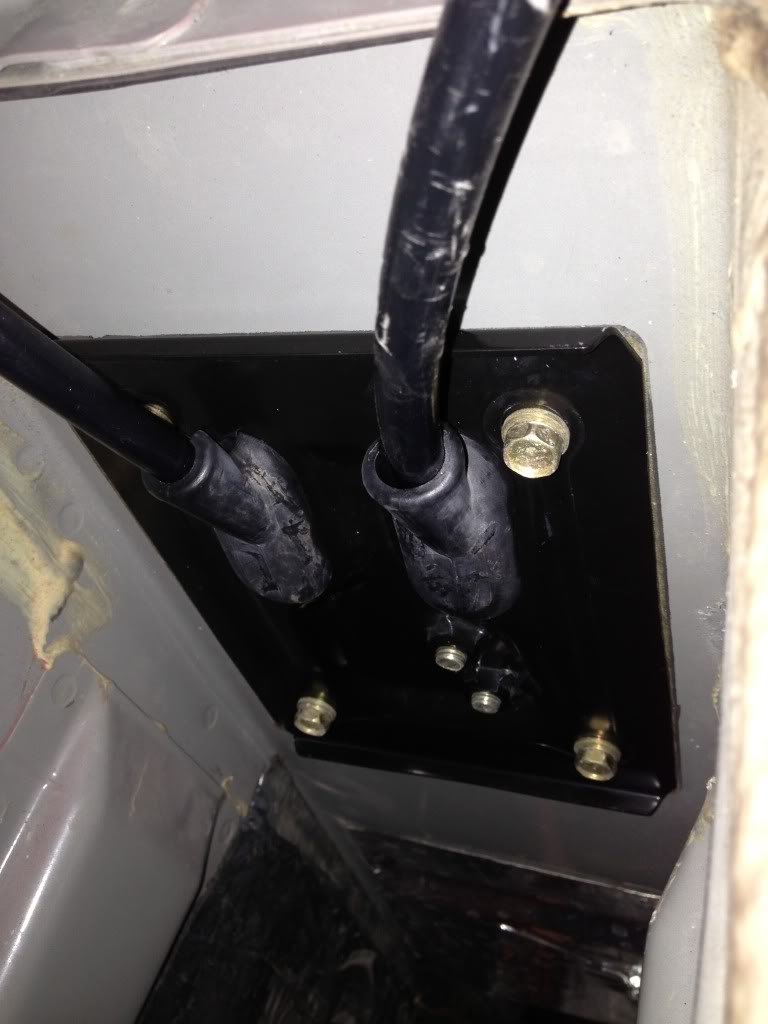
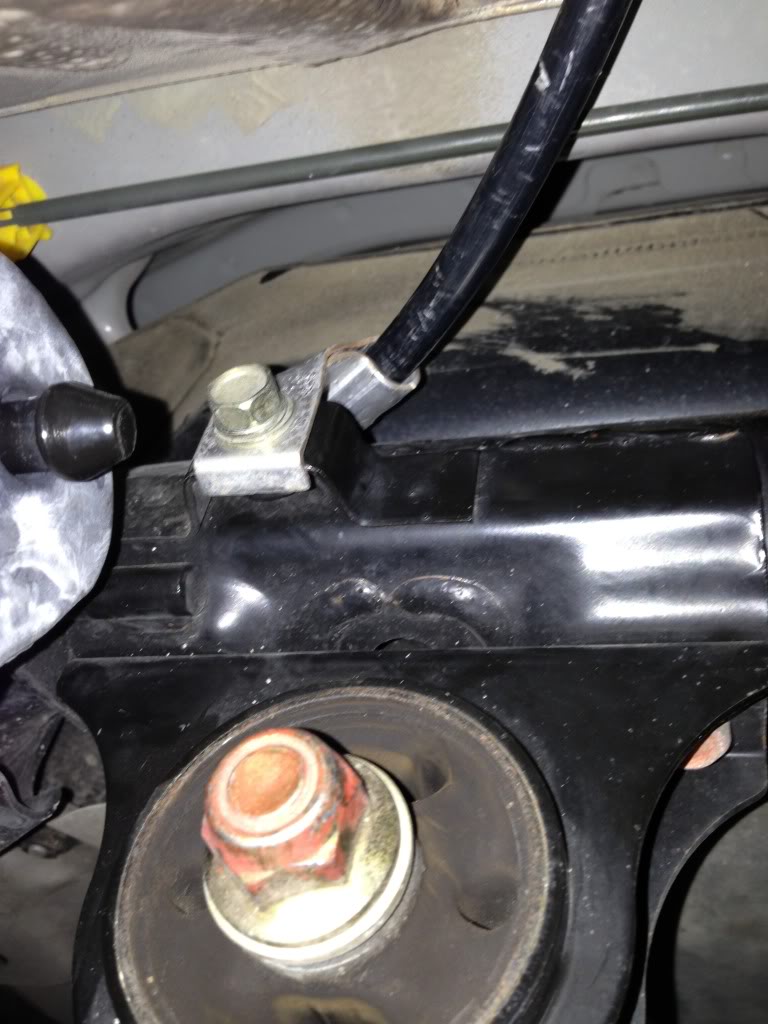
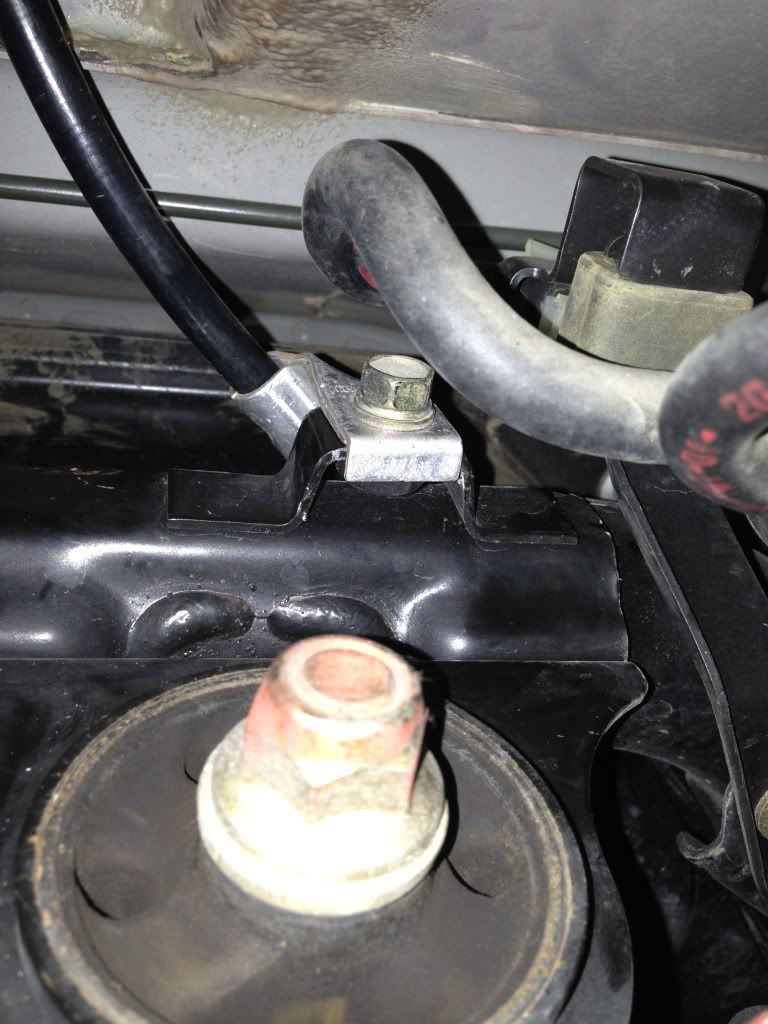
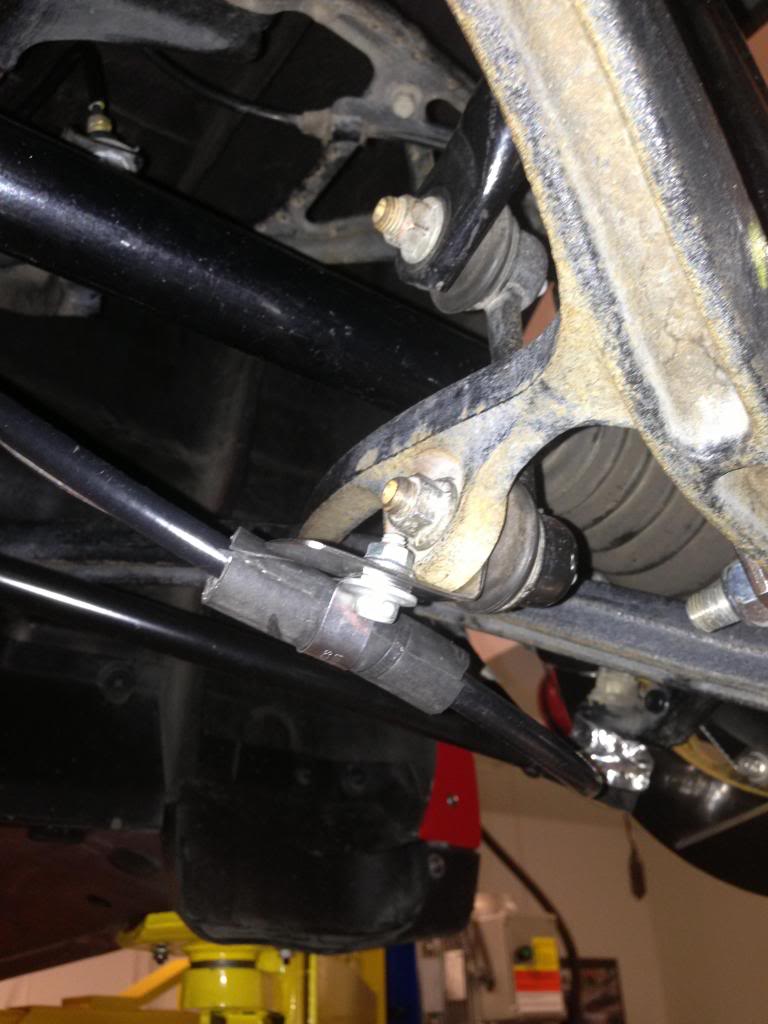
You will have to slightly bend the OEM brackets above the differential but they will work. You will not be able to use the brackets bolted by the wheel well. The cable was run in between the frame and gas tank. I bent the aluminum shield back and put a piece of hose around the cable.

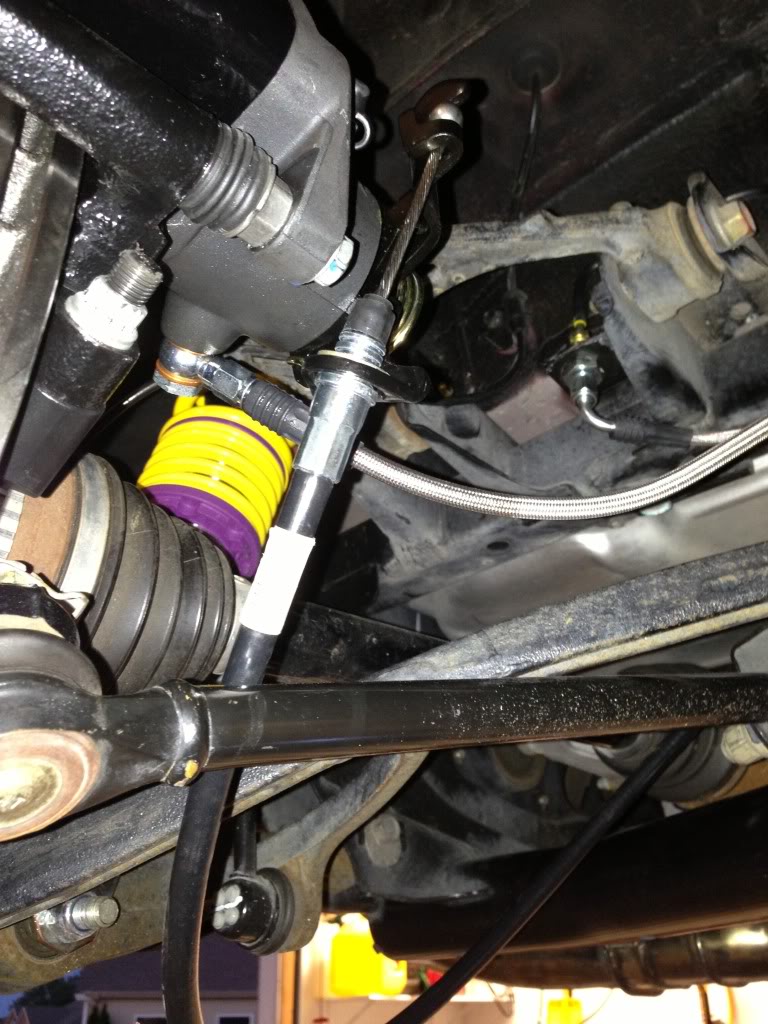
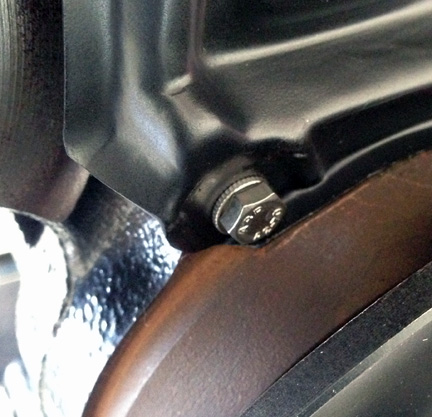
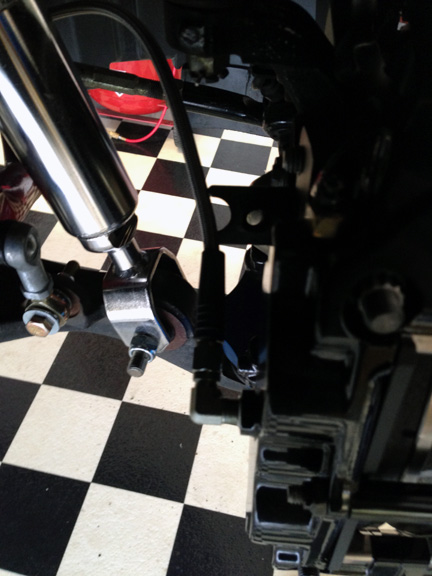
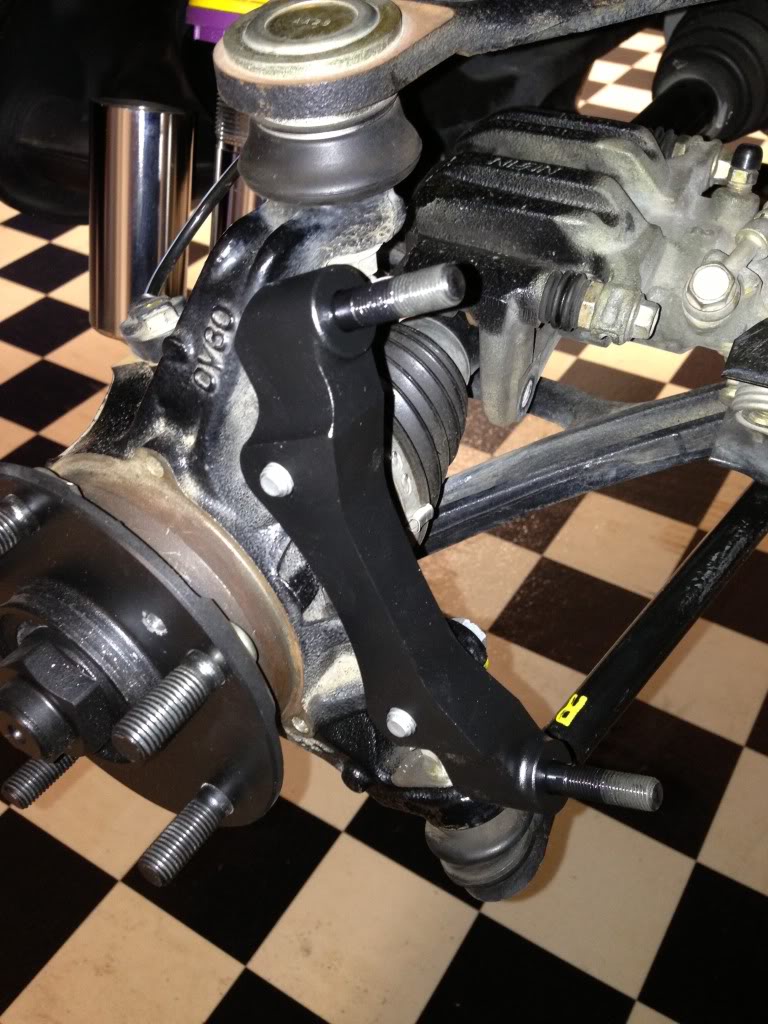
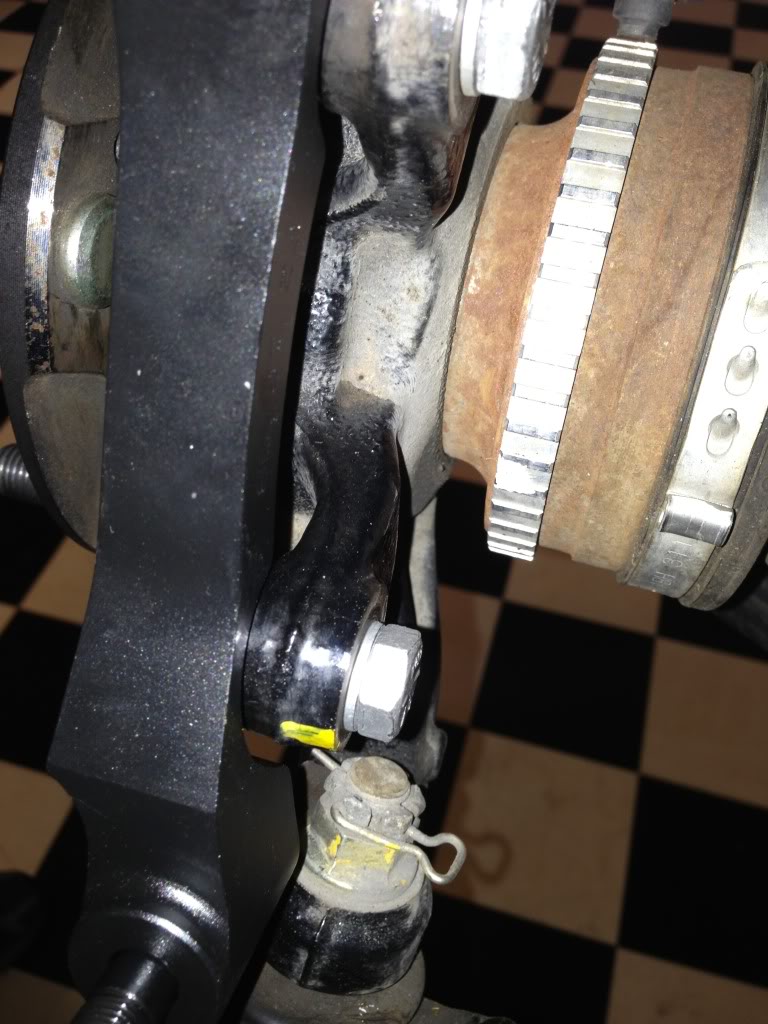
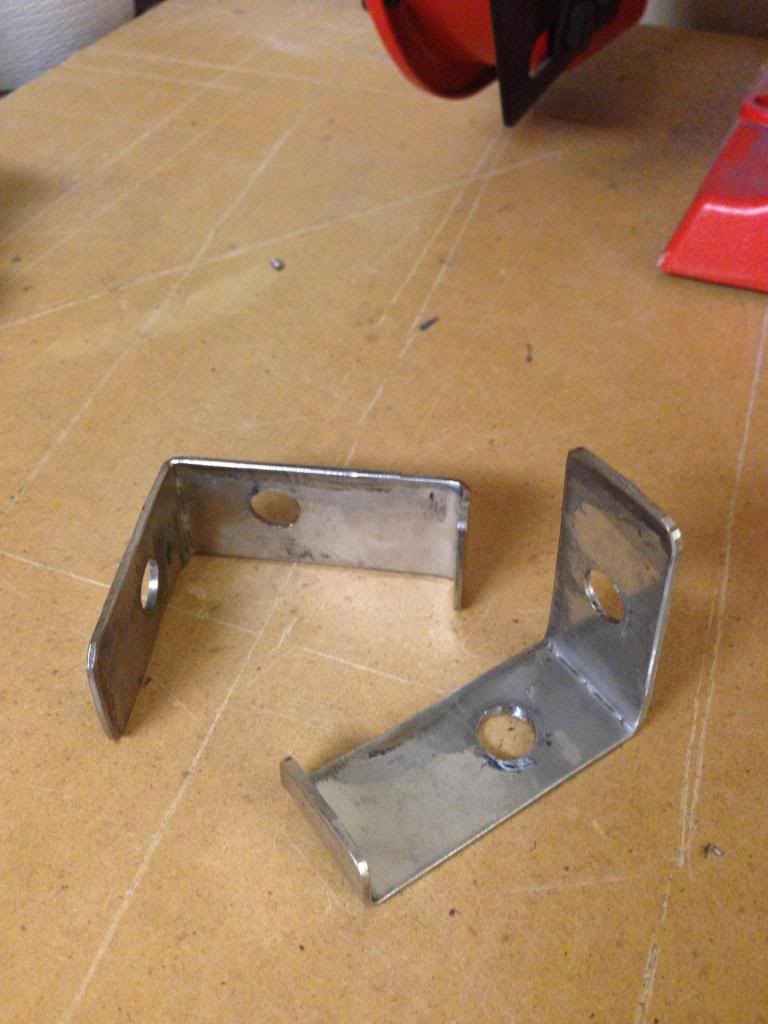
This is the tricky part, the cable need to be secured some how and the best solution I could come up with is to make brackets that supported off the lower control arm and were sandwiched between it and the swaybar endlink.

I finally got the rear brakes installed but I still have some little things to clean up.
First, in order to get the caliper installed you will need a thin wall 11mm 12point deep well socket. This was a bit hard to find but I am not sure how you would install without it.

I figured I would throw in a shot of this. Rather than traditional liquid Locktite I found this Gel years ago and seems to make things much easier.

As with the front kit you will need to shim the caliper bracket so that it has equal distance from each side of the rotor. Note that removal of the caliper make this portion much easier.


On both sides of the rear brake kit I used (4) 0.32mm Shims and (1) 0.16mm Shims

Now check the brake pad fitment on the rotor surface. I needed no shims for the rear. The caliper bracket was bolted straight to the caliper bracket.


The factory brake cables will not work with the kit. You will have to order the new cables with the kit. I carefully I cut off the boots and them put them over the supplied cables.

You will have to slightly bend the OEM brackets above the differential but they will work. You will not be able to use the brackets bolted by the wheel well. The cable was run in between the frame and gas tank. I bent the aluminum shield back and put a piece of hose around the cable.


This is the tricky part, the cable need to be secured some how and the best solution I could come up with is to make brackets that supported off the lower control arm and were sandwiched between it and the swaybar endlink.


The following users liked this post:
s2000ellier (02-10-2019)
05-31-2013, 06:26 AM
#4
Registered User
Thread Starter
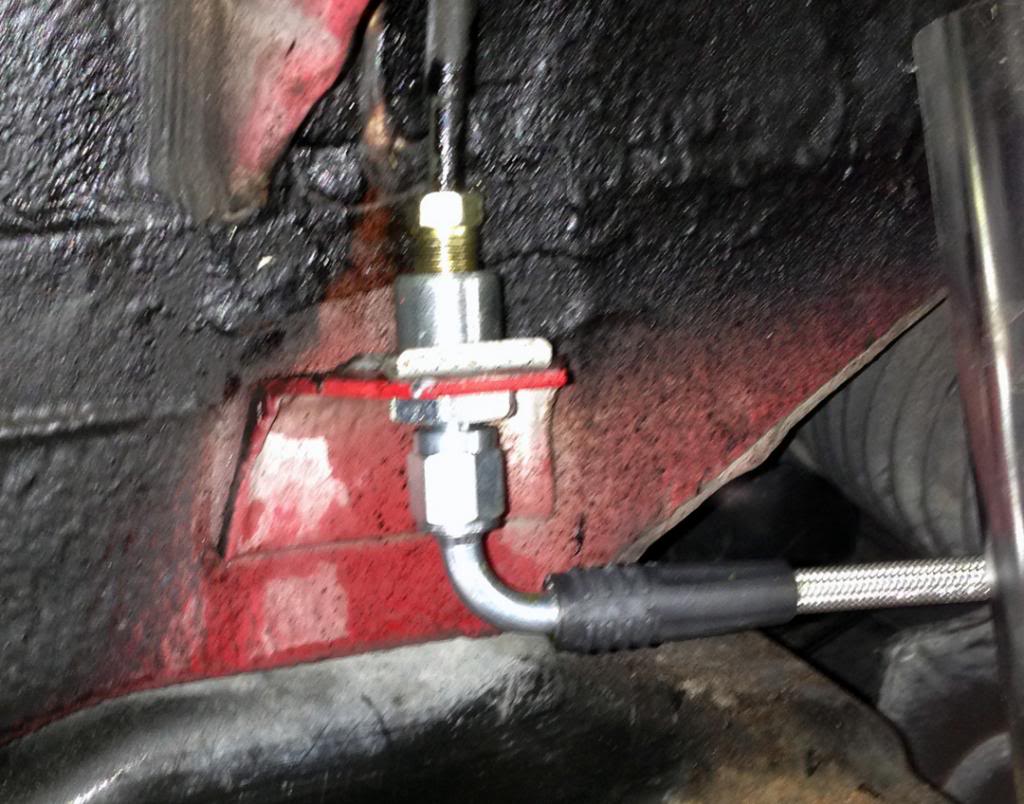
The stainless lines are required for the installation. If you buy the kit from Wilwood they will send the both lines, fitting for the caliper and adapter to the OEM brake line. The trick is going to be how they are secured to the suspension to prevent binding or wear, for me this is yet to be determined.
 06-24-2013, 06:47 AM
#6
Registered User
Thread Starter
I do, I would like to join NASA or SCCA and start competing, however my work schedule does not lend it's self to a commitment like that. For now I track it on Test & Tune days focusing on learning to set up the car and the all important driver mod.
06-26-2013, 03:42 AM
#7
Registered User
a friend of mine got this installed.
the fittings didn't fit so the workshop had to make new threads.
i drove the car and the ABS is affected a lot by this kit (stock AP2 sized tires).
this is not surprising - but still we kinda hopped that it will keep the usual promise of working perfect with stock ABS.
the fittings didn't fit so the workshop had to make new threads.
i drove the car and the ABS is affected a lot by this kit
(stock AP2 sized tires).this is not surprising - but still we kinda hopped that it will keep the usual promise of working perfect with stock ABS.
Trending Topics
06-26-2013, 06:02 AM
#8
Registered User
Thread Starter
a friend of mine got this installed.
the fittings didn't fit so the workshop had to make new threads.
i drove the car and the ABS is affected a lot by this kit (stock AP2 sized tires).
this is not surprising - but still we kinda hopped that it will keep the usual promise of working perfect with stock ABS.
the fittings didn't fit so the workshop had to make new threads.
i drove the car and the ABS is affected a lot by this kit
(stock AP2 sized tires).this is not surprising - but still we kinda hopped that it will keep the usual promise of working perfect with stock ABS.
My next thought is the hydraulic system I was able to bleed through the caliper using assisted gravity bleeding. However there have been many which had to reverse bleed the system to get all the air out. This is why I stated that you should wait until the last second to break the OEM brake line loose. This way you have less opportunity to lose lots of fluid. When I did hook up the brake line, I already has the master cylinder full and the bleeders open to help purge the air.
I am interested in the fittings you were talking about. I did not have trouble on my kit but I think it would be good to elaborate so people installing in the future will know to look for the problem before installing.
07-03-2013, 06:26 PM
#10
Registered User
Join Date: Nov 2012
Location: Rochester, NY
Posts: 99
Likes: 0
Received 0 Likes
on
0 Posts
Good write up, i also ordered a set, should be here soon. Will definitely use this as a reference.
Is the safety wire absolutely necessary? I was just gonna use loc-tite.
And did you get the parking cable kit for the rears? I ordered it just in case the oem's didnt fit. Any updates to the rear?
Is the safety wire absolutely necessary? I was just gonna use loc-tite.
And did you get the parking cable kit for the rears? I ordered it just in case the oem's didnt fit. Any updates to the rear?