Personal project / build diary / T2000
 01-14-2017, 10:47 AM
#1
Registered User

Thread Starter

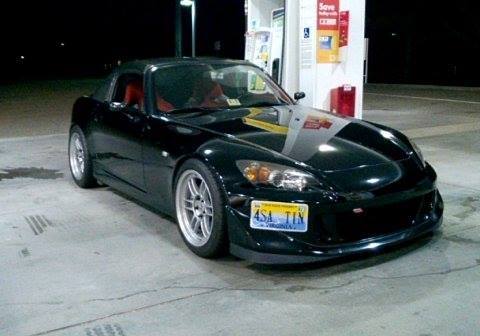
Hi everyone, I lost my favorite car to an accident which was not my fault. Instead of taking the insurance money and parting the rest of the car out, I spent all of it on another shell and upgraded components. The original car was an aggressive street car, but the new reiteration will be motorsport focused. I will update this thread with any noteworthy details for the purpose of documentation. If due to some unforeseen circumstance this machine should trade hands I hope the new owner will find or will be led to this thread. I am an engineering student pursuing a minor in Motorsports and therefore may focus more on technology and efficiency instead of class rules.
The old car was a 2000 model year with an 2005my transmission. 92k on the motor, diff, and 52k on gearbox.

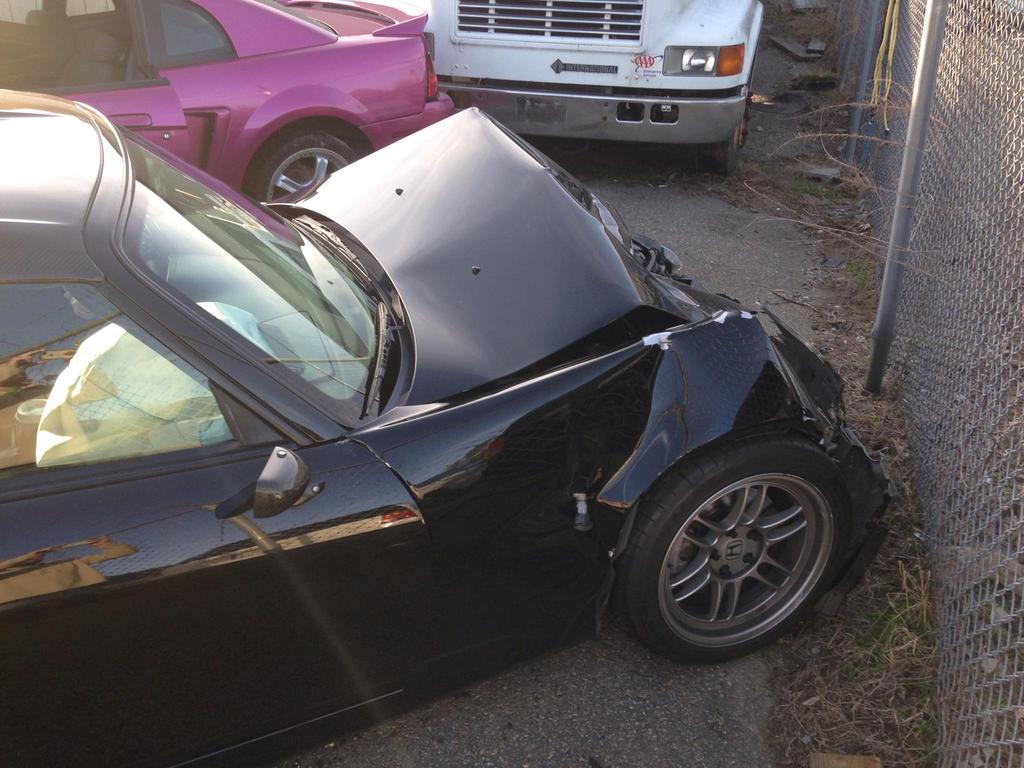
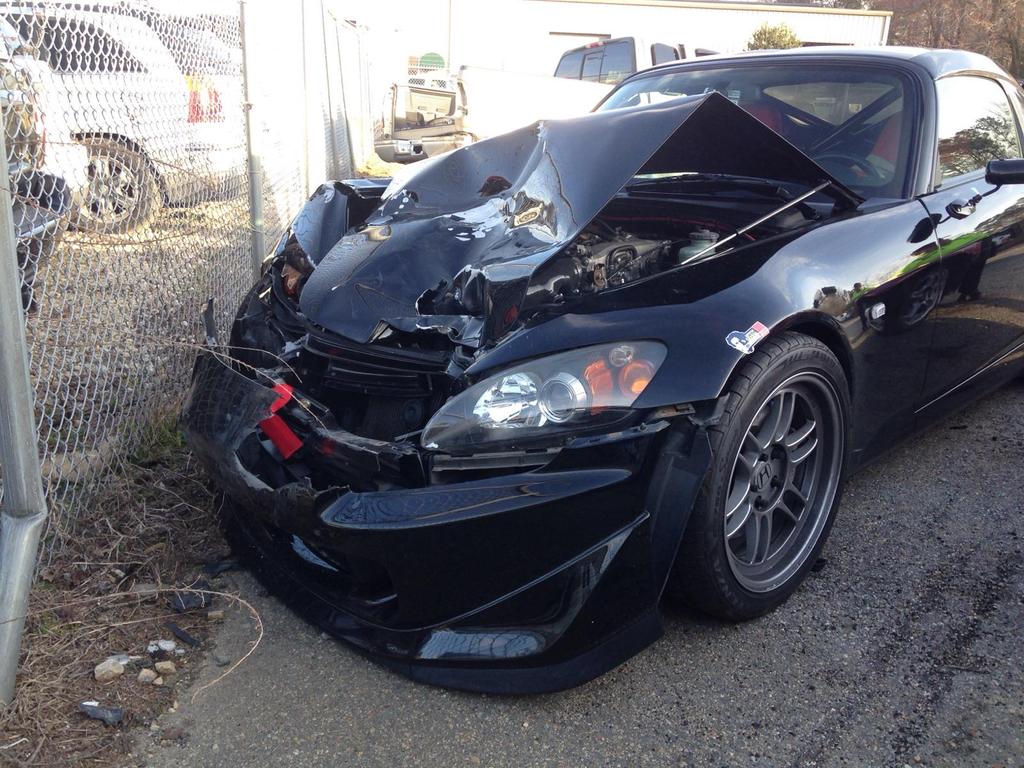
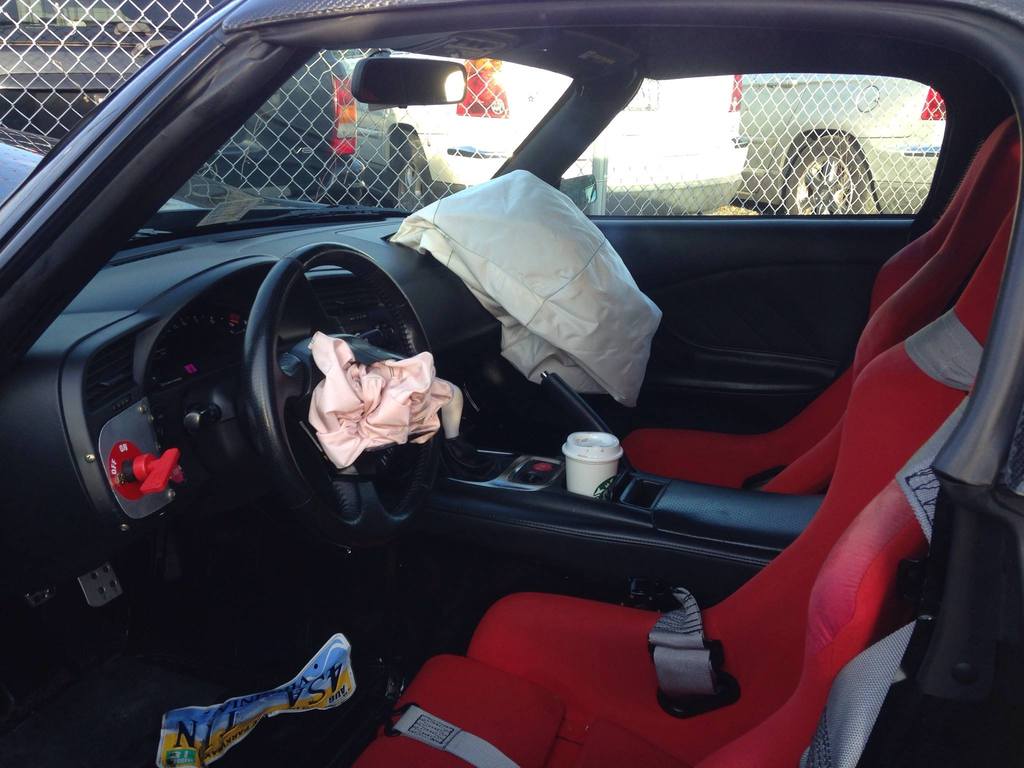
Damage sustained. Unibody buckled in spots as far as the fuel tank hump.
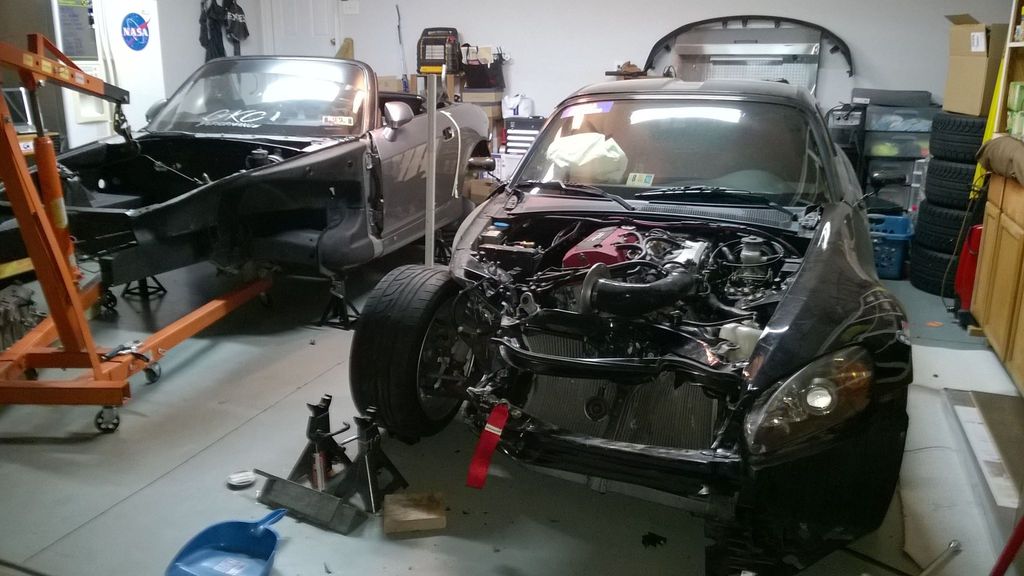
New shell (82k) picked up in Pa from Mr. Clark. I was told he picked the shell up with everything cut to fit an LS swap, he shaved the bay and welded up where the unibody has been cut.

The old car was a 2000 model year with an 2005my transmission. 92k on the motor, diff, and 52k on gearbox.


Damage sustained. Unibody buckled in spots as far as the fuel tank hump.


New shell (82k) picked up in Pa from Mr. Clark. I was told he picked the shell up with everything cut to fit an LS swap, he shaved the bay and welded up where the unibody has been cut.


Last edited by rocketstarter; 01-14-2017 at 10:53 AM.
 01-14-2017, 11:00 AM
#3
Registered User
Thread Starter
reserved for parts list, mileage, maintenance intervals
Interior:
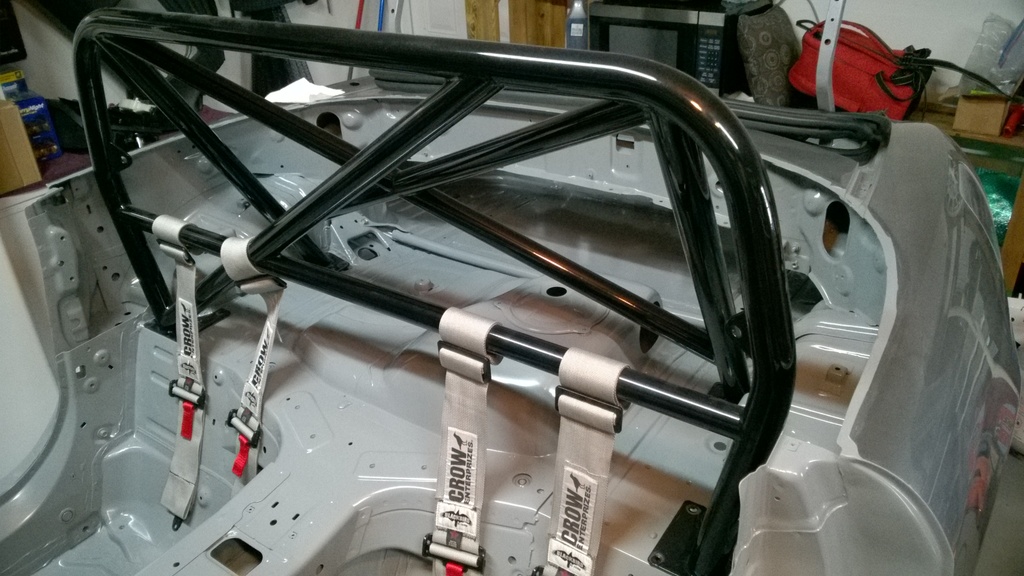
- Ballade Roll Bar (2014 Version)
- Crow Harness / Upgraded Cam Lock and Anodized hardware, 30deg sub-mount / Note: NEXT TIME ASK FOR PULL-UP LAP BELTS
(3" 5-Way Kam Lock, 52" Lap Belt Clip In, Individual Harness Wrap Around, Anti-Sub Belt Bolt In, Pull Down Adjustment, SFI 16-1 Approved)
- Schroth 01324 - Bolt-in B23A Kit "Rallye End"
Interior:
- Ballade Roll Bar (2014 Version)
- Crow Harness / Upgraded Cam Lock and Anodized hardware, 30deg sub-mount / Note: NEXT TIME ASK FOR PULL-UP LAP BELTS
(3" 5-Way Kam Lock, 52" Lap Belt Clip In, Individual Harness Wrap Around, Anti-Sub Belt Bolt In, Pull Down Adjustment, SFI 16-1 Approved)
- Schroth 01324 - Bolt-in B23A Kit "Rallye End"
Last edited by rocketstarter; 01-16-2017 at 11:16 AM.
 01-14-2017, 10:19 PM
#5
Registered User
Thread Starter

 Decent thread
  01-16-2017, 11:04 AM
#7
Registered User
Thread Starter
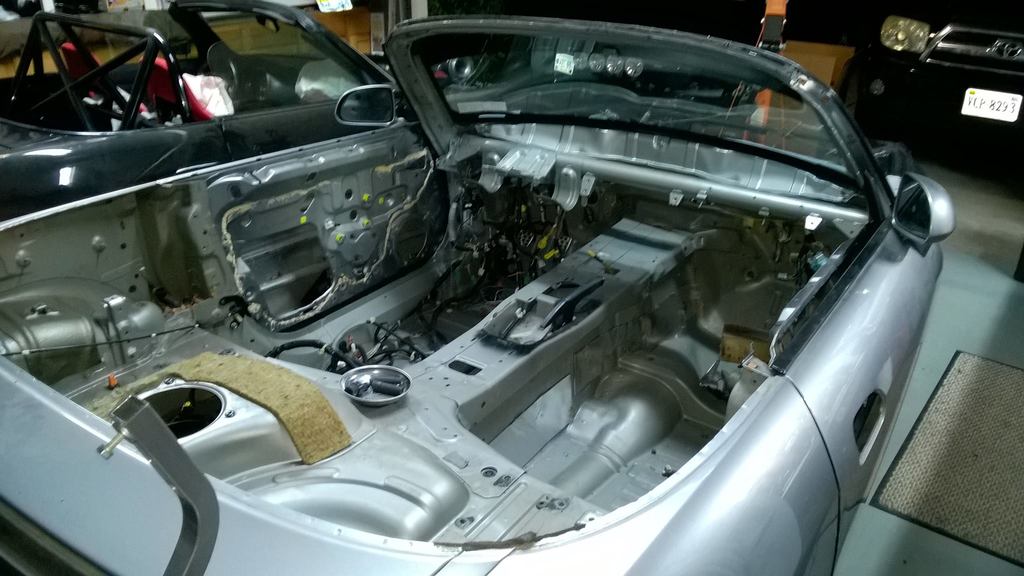
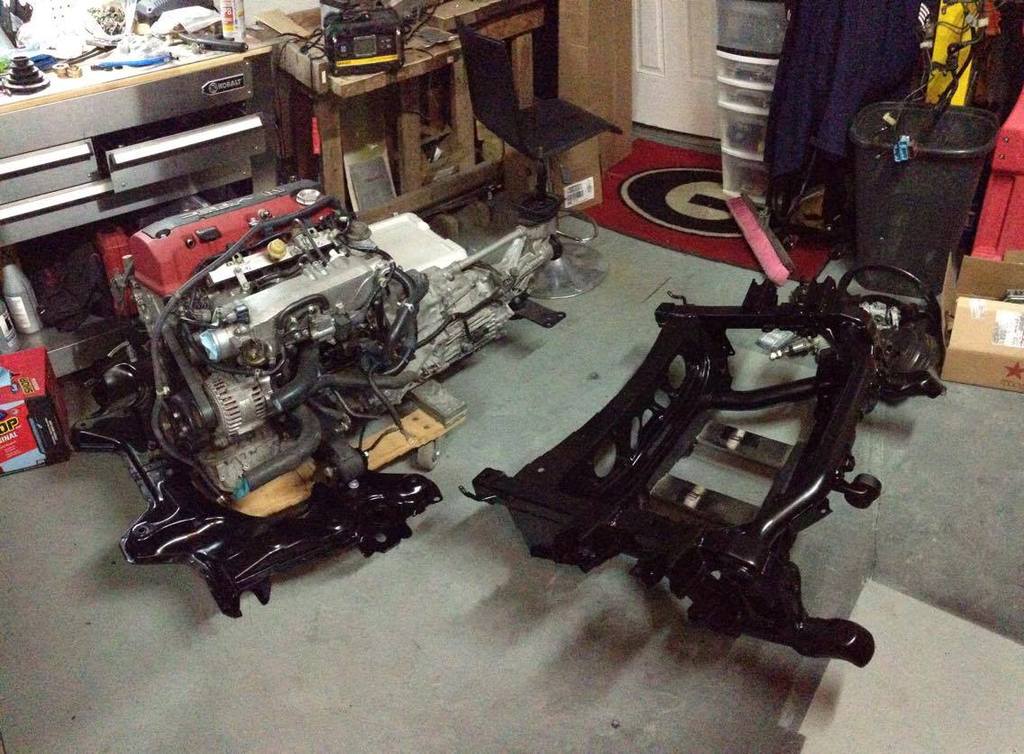
Fresh shell stripped of everything but the windshield.
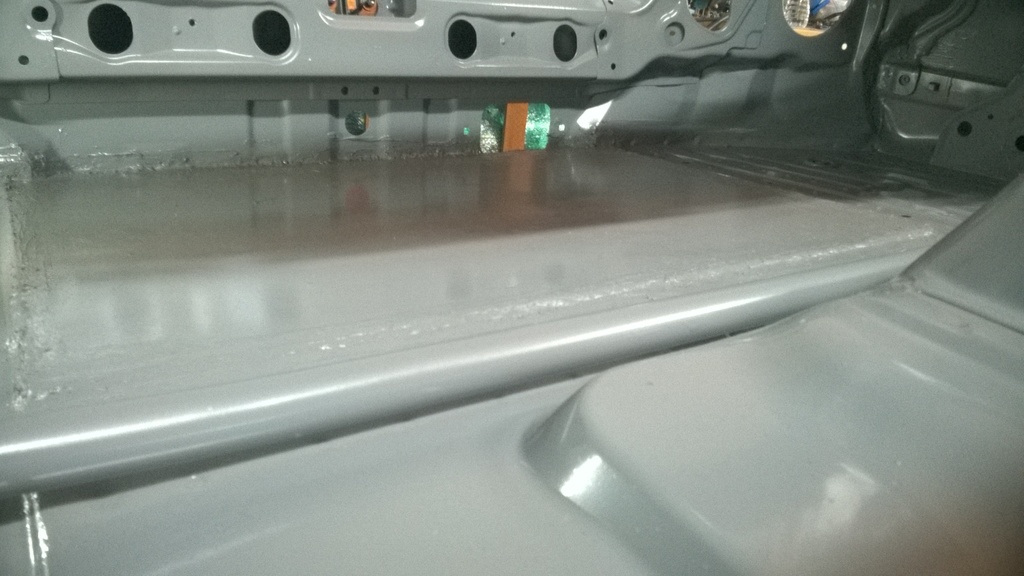
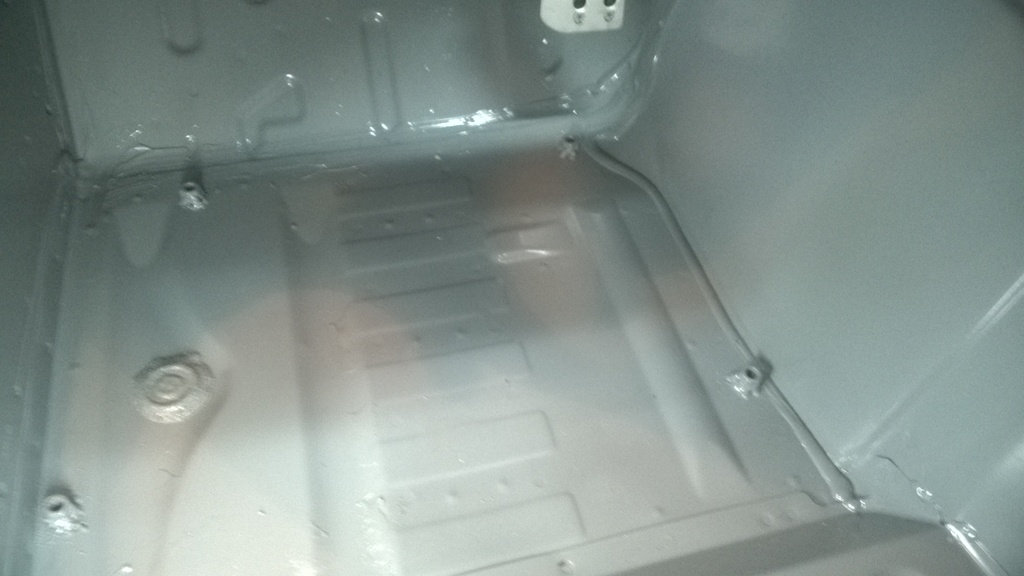
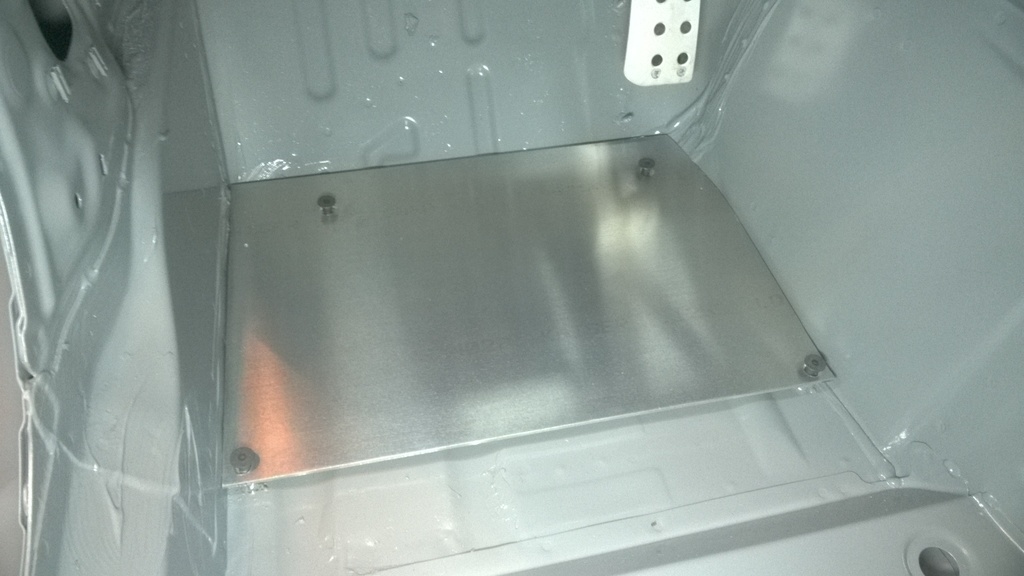
The trunk was drilled for a tow hitch and rusted so I used a pry bar to break the spot welds and welded in a 19" x 26.5" 1/8" steel plate, I contoured the rear of the trunk so I could weld all four sides. The vertical wall was hard not to burn though as it's very thin, I had to tack it all the way across. Everything was primered and painted grey or smoky greay or whatever it's called from rustoleum,
Not everyone made it.

On the last car my heel kept getting hung up on the contours of the floor, I was using skateboard grip tape on the floorboard but it didn't lay down as nice as it could if the floor was flat. So this time around I used a 5mm sheet of 6061 and welded 4 double stacked nuts to the floor board.
Roll bar in place, need a hand to tighten the hardware, the nuts use a pinch lock so it takes a considerable amount of force to snug these up.
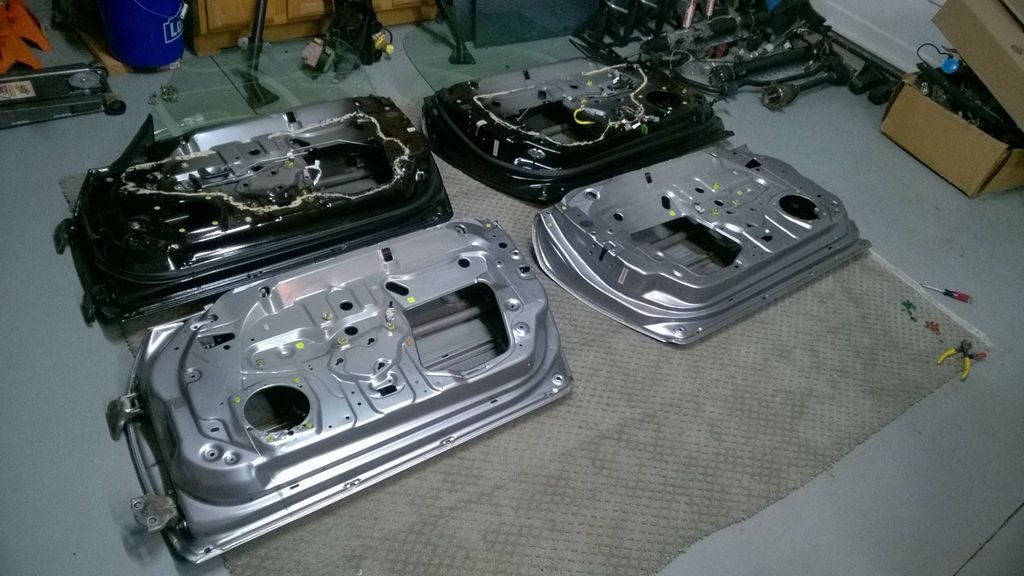
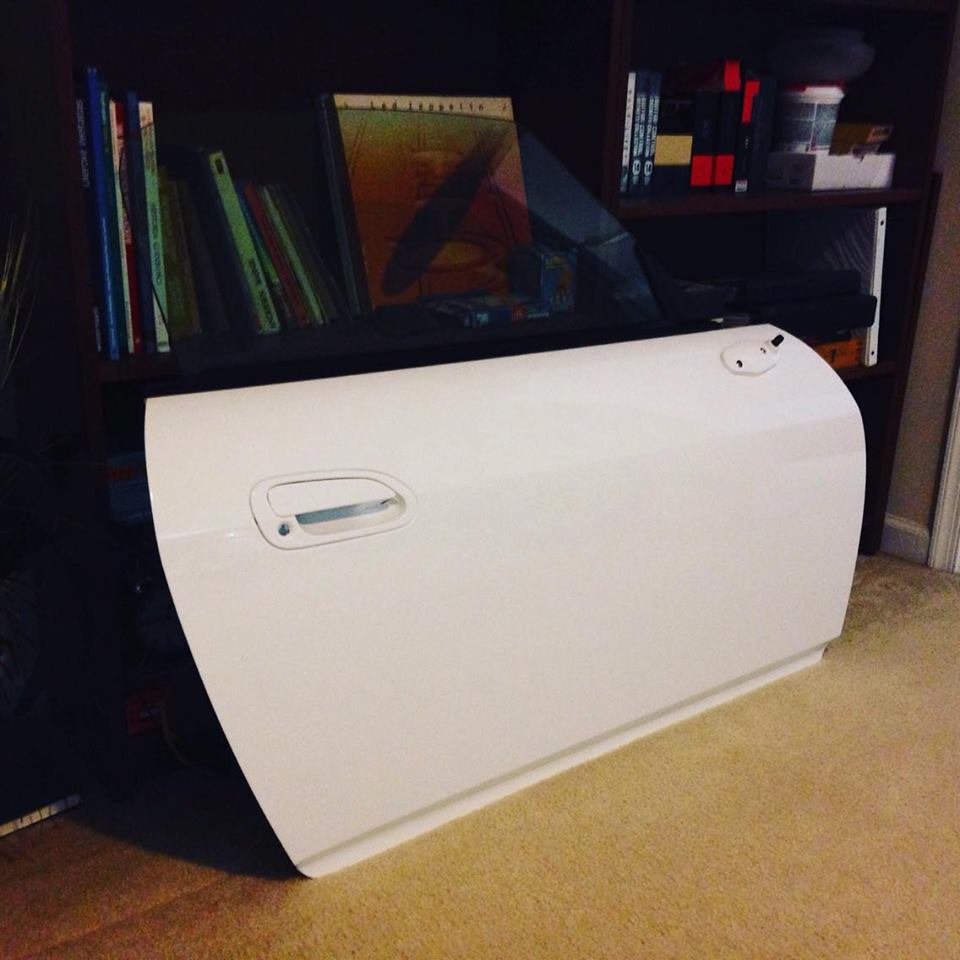
I'm swapping over the door mechanisms onto the new less deformed doors at the moment, but that's all that happened over the last few months.
The trunk was drilled for a tow hitch and rusted so I used a pry bar to break the spot welds and welded in a 19" x 26.5" 1/8" steel plate, I contoured the rear of the trunk so I could weld all four sides. The vertical wall was hard not to burn though as it's very thin, I had to tack it all the way across. Everything was primered and painted grey or smoky greay or whatever it's called from rustoleum,


Not everyone made it.

On the last car my heel kept getting hung up on the contours of the floor, I was using skateboard grip tape on the floorboard but it didn't lay down as nice as it could if the floor was flat. So this time around I used a 5mm sheet of 6061 and welded 4 double stacked nuts to the floor board.


Roll bar in place, need a hand to tighten the hardware, the nuts use a pinch lock so it takes a considerable amount of force to snug these up.

I'm swapping over the door mechanisms onto the new less deformed doors at the moment, but that's all that happened over the last few months.

Trending Topics
01-16-2017, 11:34 AM
#8
Registered User
Thread Starter
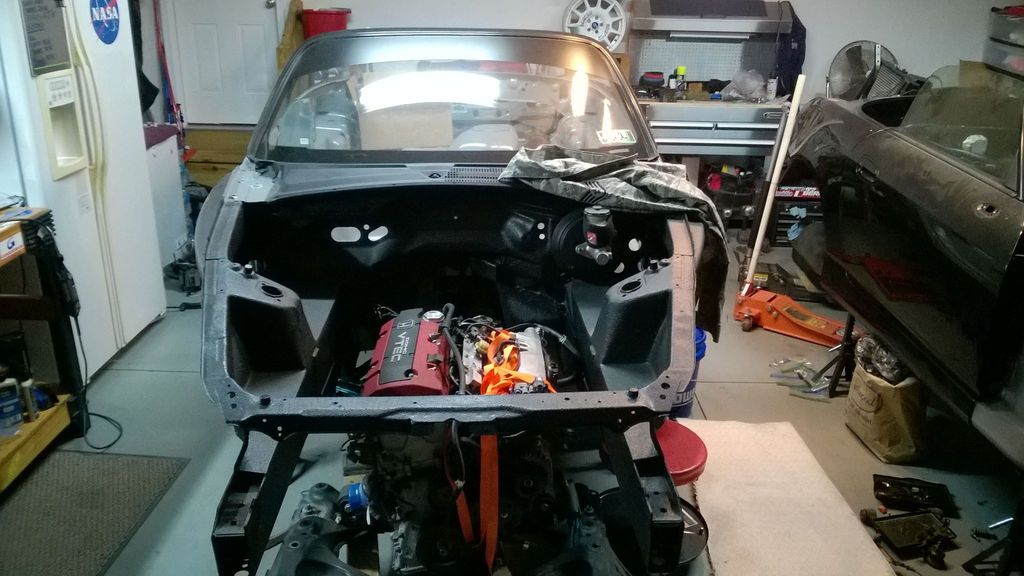
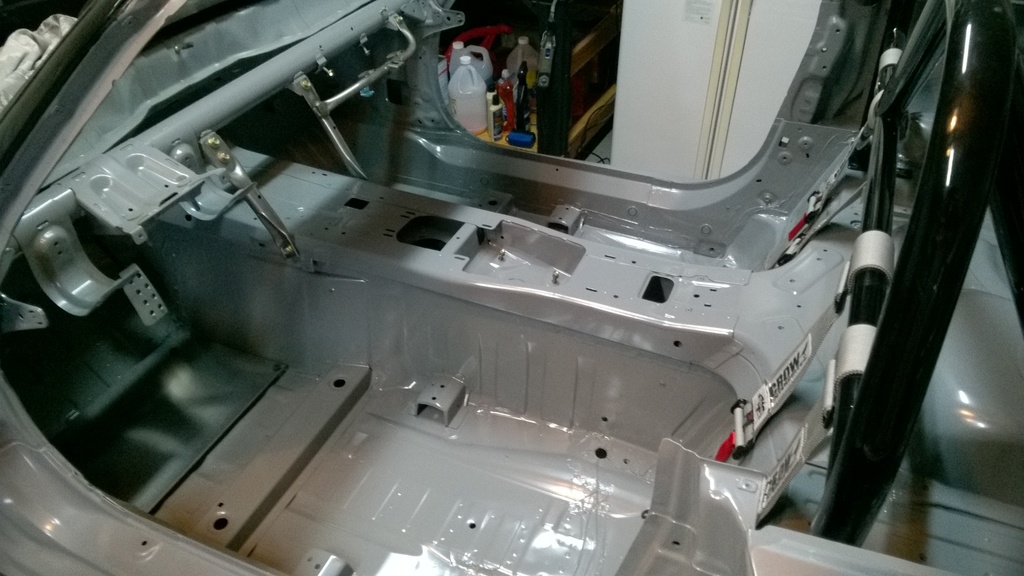
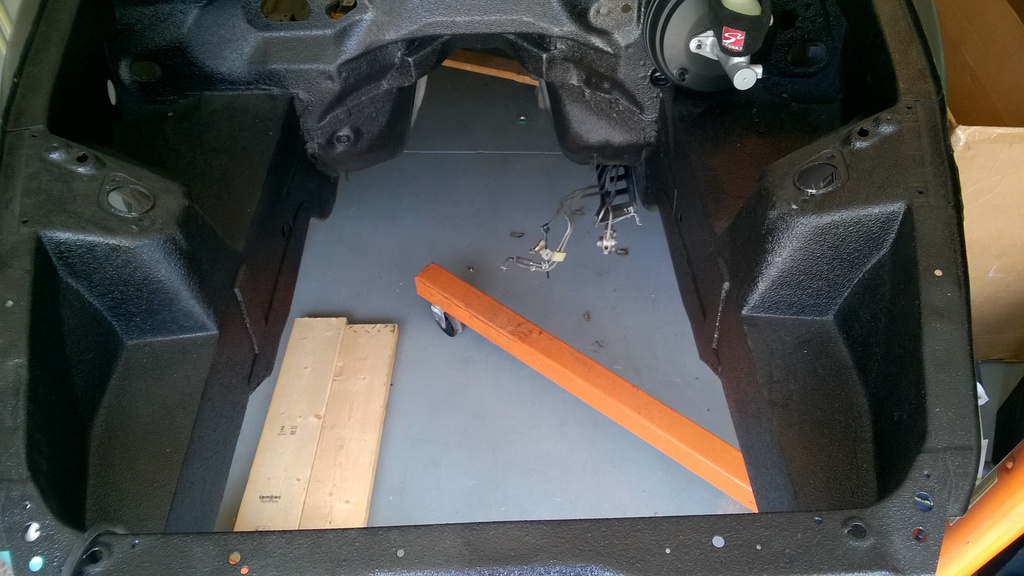
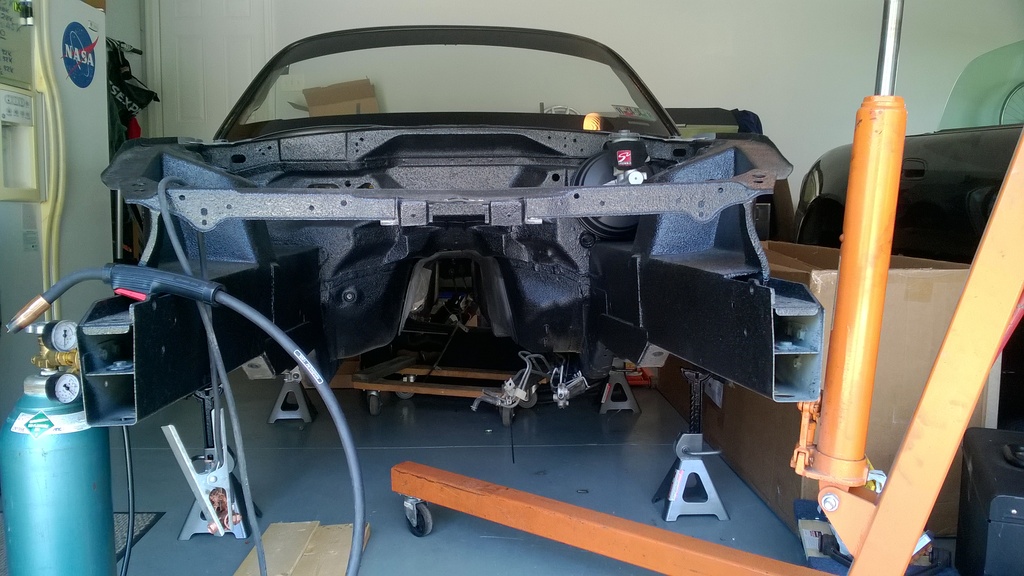
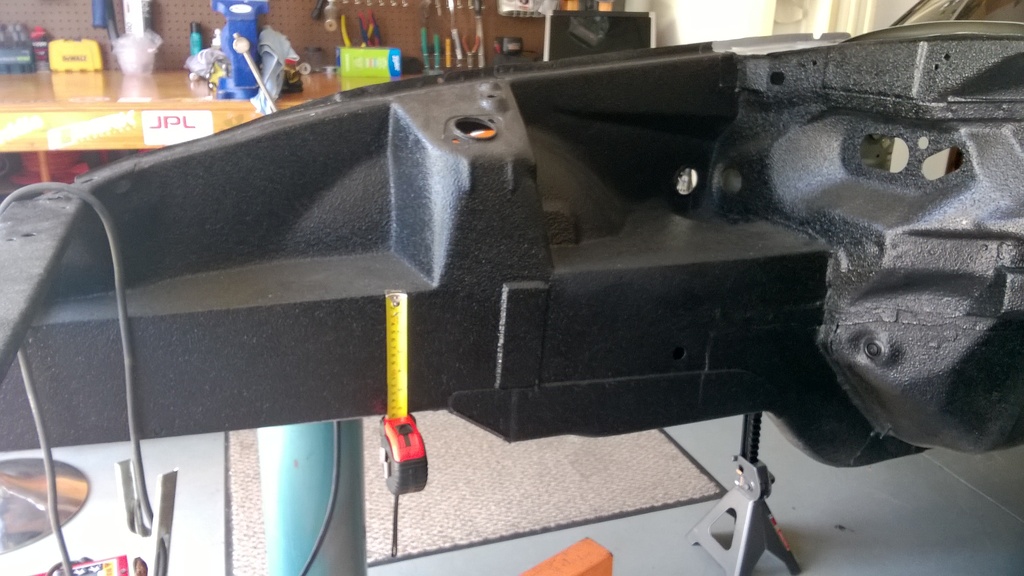
Up next will be some minor fabrication in the engine bay. I can't undo all the plating and unfortunately ALL the mounting locations for EVERYTHING have been shaved, filled, cut and/or plated-over.
None of the heater/ac stuff is going back in the car so I will be relocating almost all of the electronics underneath the passenger side dash where the airbag and heater-core used to be.
But for now I will start by making a removable tubular cross/member and a removable tubular Radiator mount. That way I will be able to roll out the engine/gearbox with the subframe through the front of the car. Also need to add material where the frame was notched by the firewall and the steering column, as well as add support underneath the brake booster.


Last edited by rocketstarter; 01-16-2017 at 11:49 AM.
06-04-2017, 07:32 PM
#10
Registered User
Thread Starter
Taking the car in a new direction.
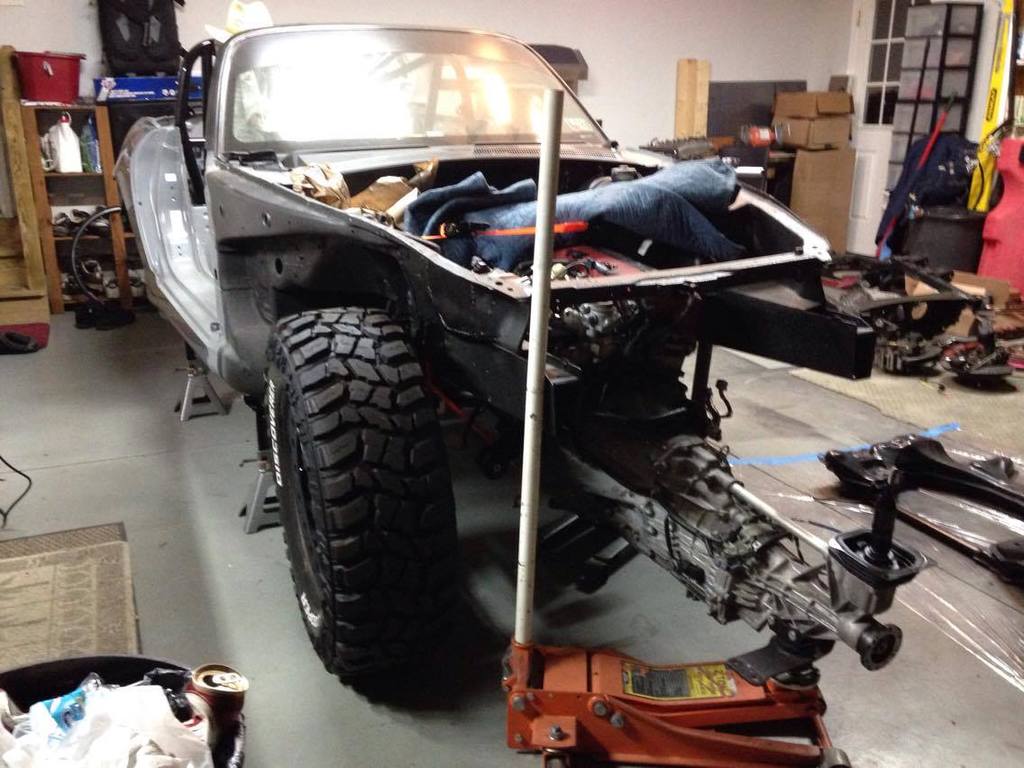
Kidding. Sanded down the rust spots on the used front JDM sub frame as well as my old rear and sprayed them with some semi-gloss
I'm not impressed with the finish of the Innovative steel motor mounts, both pairs I have on hand have between 500 and 1000 miles and the powdercoat was chipping on both. When I scraped it off with a screwdriver there was surface rust below the paint and you can tell they haven't been sandblasted at all. Poor prep work on their part, but an easy fix since I have EVERYTHING apart.
Note: Motor mount to subframe bolts still loose, bushing bolt still loose.
Doors weren't too hard to wrap, ended up sanding some rust as well and sprayed the inside with gloss grey
Stripping the bedliner was a huge pain, what's even worse is that everything is bondo'd between 1/16-1/8" thick, how is that not supposed to crack? Why not just use seam sealer where needed?
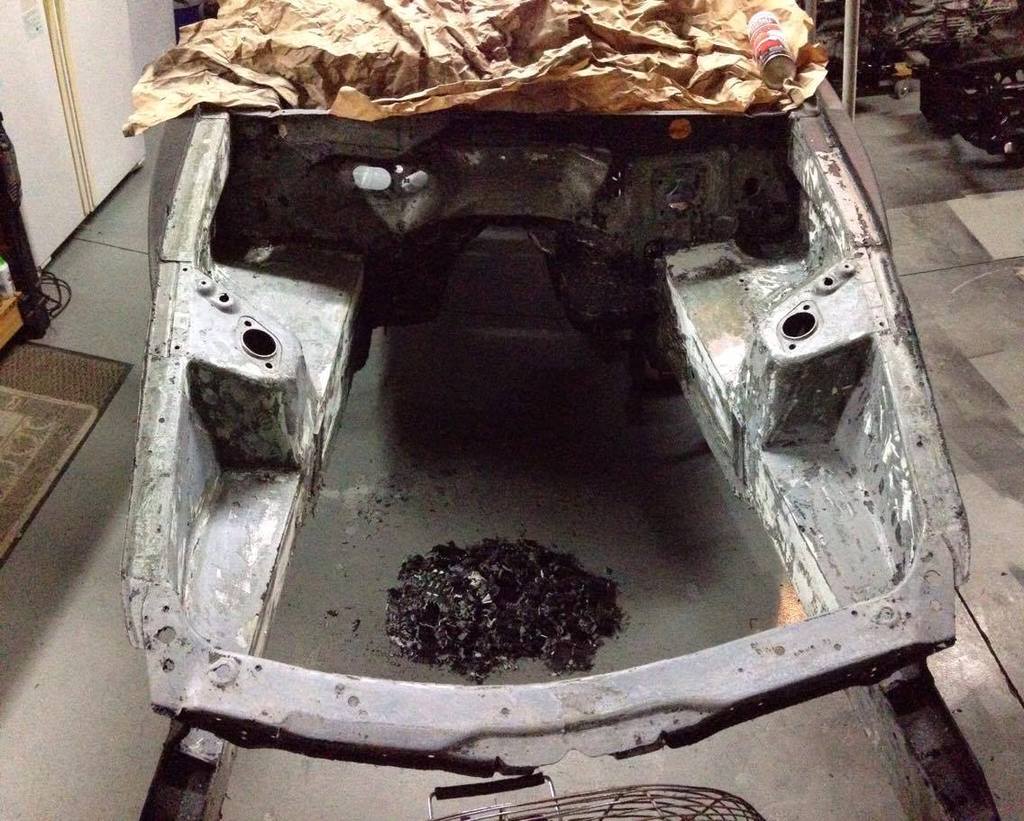
Beats me. 2 days to strip it down to bare metal.
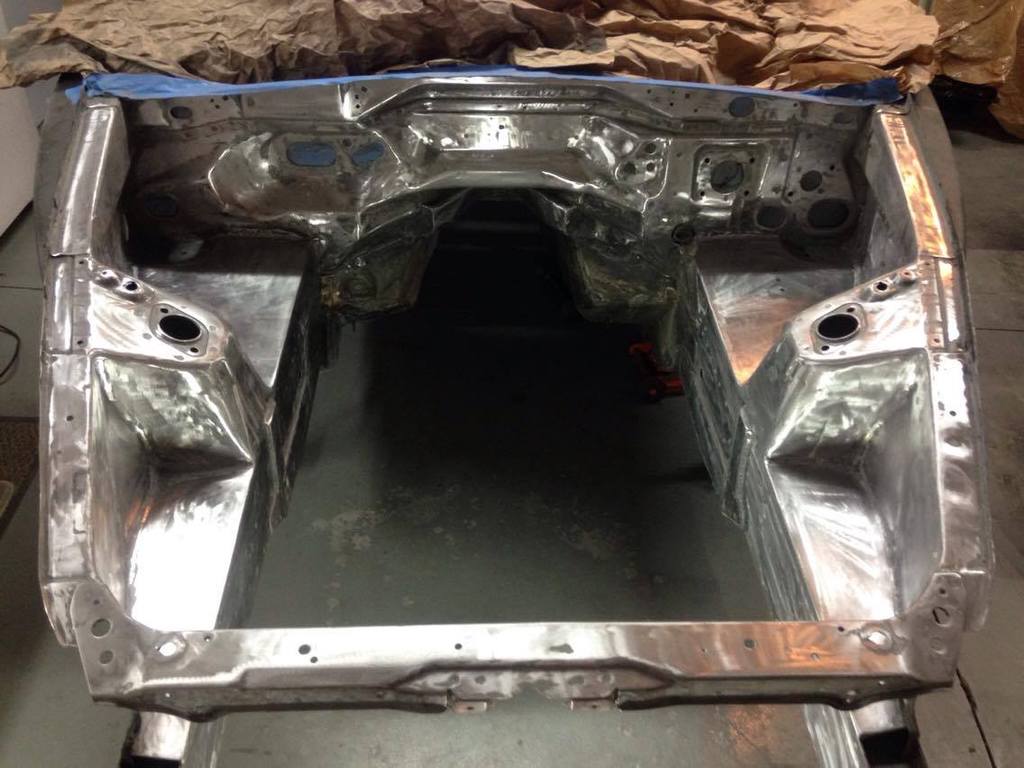
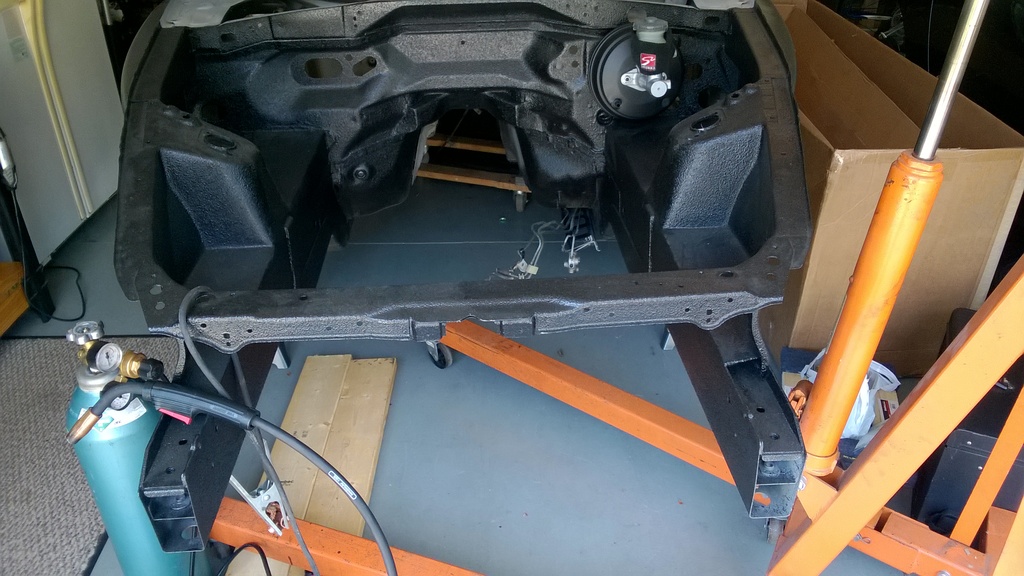
Next comes fabricating a new cross member, re-building the transmission tunnel support that used to be the X frame. Those missing pieces by the battery and brake booster are going to be a pain to rebuild. Anybody have any ideas?

Kidding. Sanded down the rust spots on the used front JDM sub frame as well as my old rear and sprayed them with some semi-gloss

I'm not impressed with the finish of the Innovative steel motor mounts, both pairs I have on hand have between 500 and 1000 miles and the powdercoat was chipping on both. When I scraped it off with a screwdriver there was surface rust below the paint and you can tell they haven't been sandblasted at all. Poor prep work on their part, but an easy fix since I have EVERYTHING apart.
Note: Motor mount to subframe bolts still loose, bushing bolt still loose.
Doors weren't too hard to wrap, ended up sanding some rust as well and sprayed the inside with gloss grey

Stripping the bedliner was a huge pain, what's even worse is that everything is bondo'd between 1/16-1/8" thick, how is that not supposed to crack? Why not just use seam sealer where needed?

Beats me. 2 days to strip it down to bare metal.

Next comes fabricating a new cross member, re-building the transmission tunnel support that used to be the X frame. Those missing pieces by the battery and brake booster are going to be a pain to rebuild. Anybody have any ideas?