Sreeve2k
 01-03-2017, 10:30 AM
#11
i got most of the bottom cushion off but couldn't get the middle rings off, i guess i should of cut them off. I then gave up and put it back together when i realized the foam was falling apart. maybe ill give it another go and cut those rings off
i figured i want racing seats eventually but they better these are the more i can sell them for in the future also
i figured i want racing seats eventually but they better these are the more i can sell them for in the future also
Your seats are looking remarkably good for nearly 200Kkms otherwise
darcy
 01-03-2017, 03:17 PM
#12
Registered User

Thread Starter
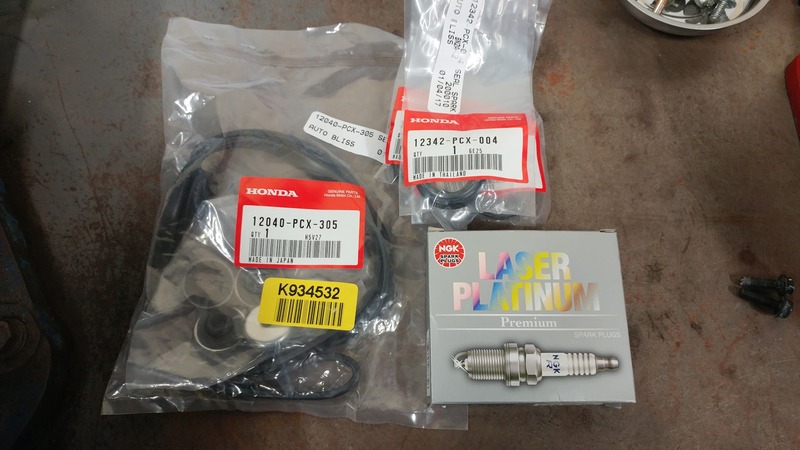
Today i decided to change my spark plugs
i pulled out the coils and plugs to find them like this


guess its time for an overhaul
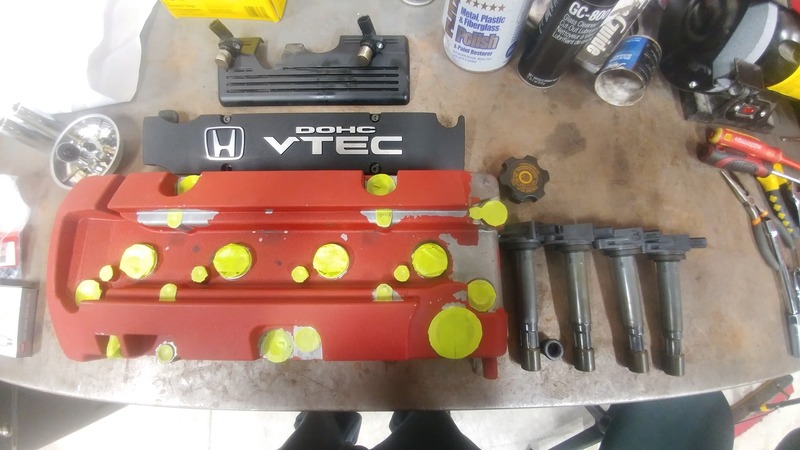
pulled off the valve cover and took this opportunity to do a valve adjustment

out of the16 valves, only like 4 or 5 did not need adjusting. some of them were a pain to get at.
back breaking work... had to stay leaned over for a long time to do it. now my back kinda hurts
Honda didn't have the gaskets in stock and told me it would arrive tomorrow so i figured why not repaint the valve cover while i wait. I didnt have wrinkle paint on hand so i just prepared it for VHT red wrinkle paint tomorrow

Meanwhile i read up on here that people do this refresh on the shift mechanisms so i decided to do that too


Honda again didn't have any in stock they told me i have to wait till mid - end of january
so that will have to wait
Tomorrow hopefully ill get around to painting the valve cover, putting it all back together, and installing my new OEM spark plugs. i wonder if ill notice a difference from the valve adjustment (sound wise)
Last edited by Sreeve; 01-03-2017 at 03:20 PM.


The following users liked this post:
Sreeve (01-03-2017)
01-03-2017, 06:27 PM
#14
It looks like the plugs may have been loose at some point in the past and the bottom of the coil boots overheated, which was an issue with early ap1's. New valvecover gaskets will help to keep them dry, and torque the new plugs to 20 ft lbs as the owner manual spec. which is a tad too low.
I wouldn't condemn the motor just yet, all Ap1's consume some oil. The plugs don't look oil soaked, just some oil burning combined with running rich, the new changes may help with things going forward.
That shifter is definitely in need of a lube job, I bet it will feel like butter once you get that done.
Looks like you are doing all the right things to nurse this car back to health
Last edited by zeroptzero; 01-04-2017 at 05:50 AM.
The following users liked this post:
Sreeve (01-03-2017)
01-04-2017, 08:10 AM
#15

Welcome to the forum. Hope that wasn't a big pile of money you had there. Makes me rethink what I sold my AP1 for. Come spring make sure to make it out to a meet or two 
01-04-2017, 10:53 AM
#16

On AP1s, the plugs tend to loosen. Good idea to check them every few months, especially if you track the car at all.
Lots of stories on the S2K forum about the plugs backing out and grenading, dropping bits back into the cylinder.
:-(
While you have the shift assembly off, check the clutch slave push rod for lube and possible 'tit' on the ball.
Attachment 76981
Lots of stories on the S2K forum about the plugs backing out and grenading, dropping bits back into the cylinder.
:-(
While you have the shift assembly off, check the clutch slave push rod for lube and possible 'tit' on the ball.
Attachment 76981
Last edited by hawkman199; 04-08-2019 at 10:54 AM.
01-04-2017, 06:36 PM
#17
Registered User
Thread Starter
thanks for the good feedback guys! and ill check out that clutch slave push rod once i change the fluid. i was not even aware of that
the valve cover gaskets came in today
i started painting today, went alright. ive never used wrinkle paint before and i think i went a little too heavy. i got some runs on the most important part, the part that faces the front

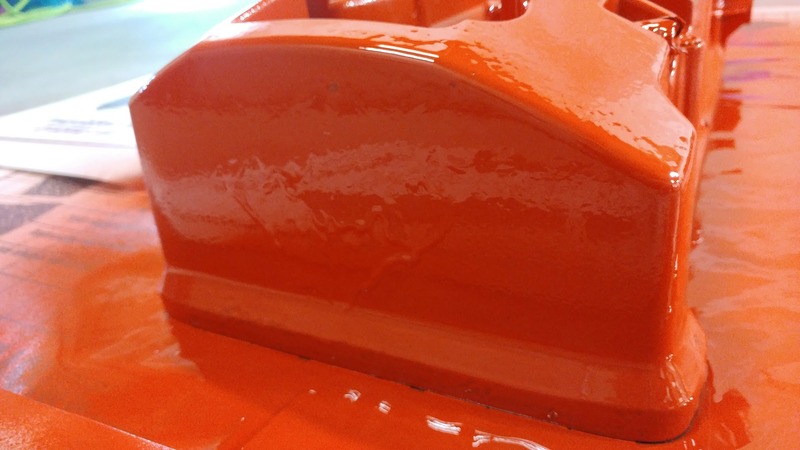
it also takes a long time to dry, some say to put it in an oven. I just aimed a fan at it
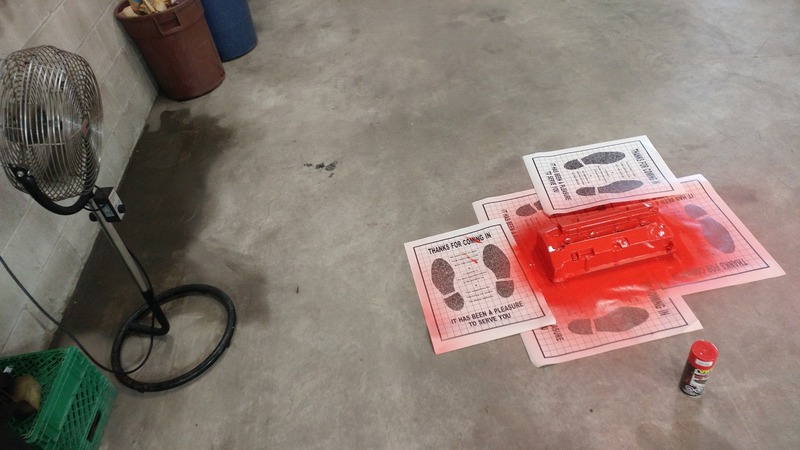
TIP: cover more area around your painting area cause i got it all on the floor. i guess it will come off eventually but wooopsss
im going to let it dry over night, attempt to sand the run spots and give it a few more coats to clean it up a bit
overall its good, the red seems to be a little more on the bright red side then the original honda red (closer to Ferrari valve cover red)
ill post finished pictures probably tomorrow or the day after

the valve cover gaskets came in today

i started painting today, went alright. ive never used wrinkle paint before and i think i went a little too heavy. i got some runs on the most important part, the part that faces the front


it also takes a long time to dry, some say to put it in an oven. I just aimed a fan at it

TIP: cover more area around your painting area cause i got it all on the floor. i guess it will come off eventually but wooopsss
im going to let it dry over night, attempt to sand the run spots and give it a few more coats to clean it up a bit
overall its good, the red seems to be a little more on the bright red side then the original honda red (closer to Ferrari valve cover red)
ill post finished pictures probably tomorrow or the day after
01-05-2017, 03:18 PM
#18
Oh, and while I think of it, check your cabin filter. When I first got my MY02, it looked like nobody had replaced it in years.
$23 at AutoPartsWay.
You can blow them out every year.
$23 at AutoPartsWay.
You can blow them out every year.
Last edited by hawkman199; 04-08-2019 at 10:54 AM.
01-05-2017, 03:38 PM
#19
Community Organizer


Love the project and the color. 
The fun is in the resurrection!
Edit: Hope the paper doesn't stick too bad to the valve cover.
The fun is in the resurrection!
Edit: Hope the paper doesn't stick too bad to the valve cover.
Last edited by Hfreak; 01-05-2017 at 05:35 PM.