My widebody LS6 RX7 build
 09-24-2011, 05:51 PM
#1
Registered User
Thread Starter
Join Date: May 2008
Location: San Antonio
Posts: 286
Likes: 0
Received 0 Likes
on
0 Posts
I started this project when I was 22. Im 26 now. :hsugh: Here is every single picture Ive taken to date. For the first time in nearly 4 years Im actually making progress (slow, but I work on it almost every day now). I'll try to keep bumping this thread with updates/pictures as I go.
Quick backstory so you know why I started this to begin with...
Some thief smashed my window to steal my radar detector.
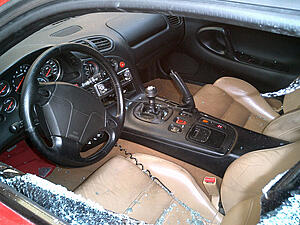
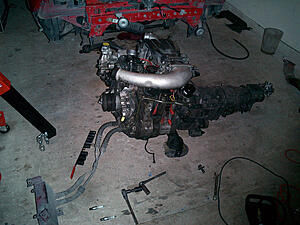
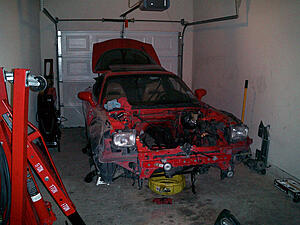
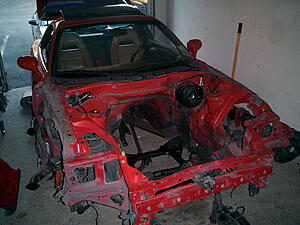
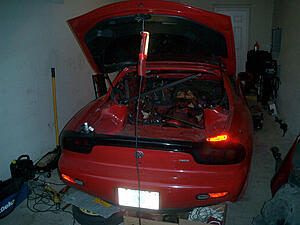
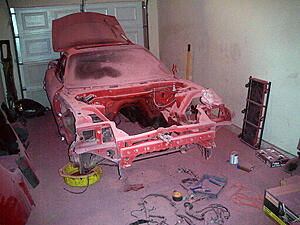
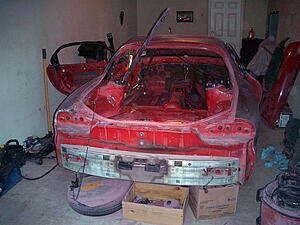
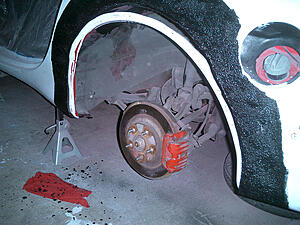
Of course there was only one brand new driver side window left in the entire U.S. and its coming out of Cali, so it'll show up in a week. All the aftermarket glass places I called could only get me a windshield, not door glass. To solve my driving situation I went and found a $600 beater car and drove the RX7 into the garage. Yes, drove. The engine wasnt blown. In that time it was down I figured I would replace the smoking set of twins I had with an almost new set I had purchased about half a year back (less than 12k miles on them). Halfway into tearing the top of the motor apart I figured f@#k it, lets go V8. I pull the motor out and decide it should really get painted while this is all apart. As I start into that I decide I'll need some extra fat tires to put down the power, so I order some pettit flares.
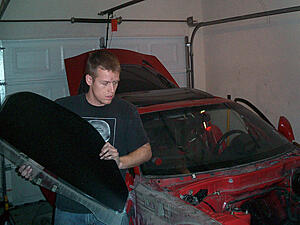
....then the replacement window arrived in the mail.
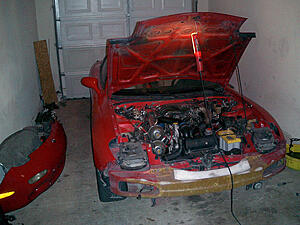
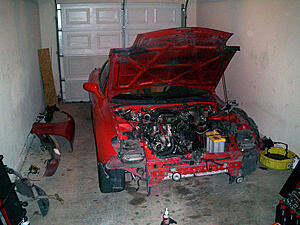
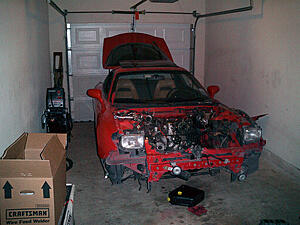
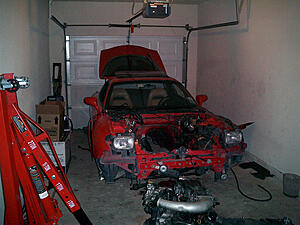
And its out. That didnt take long -
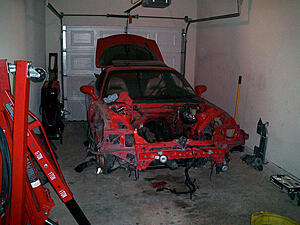


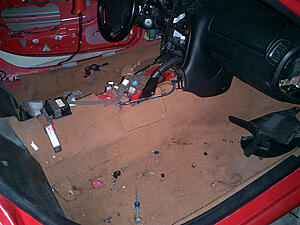
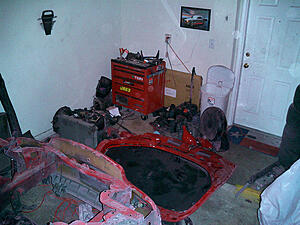
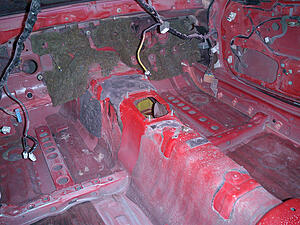
Look at all this change I found under the carpet!
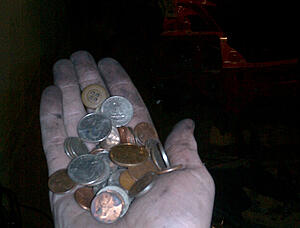
Dirty-
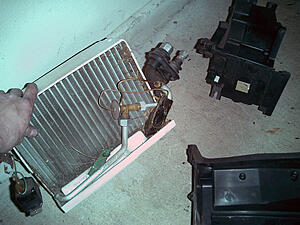
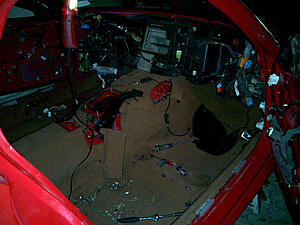
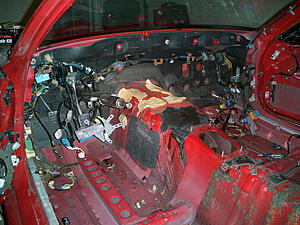
On a side note, this is seriously my brilliant idea of keeping organized -
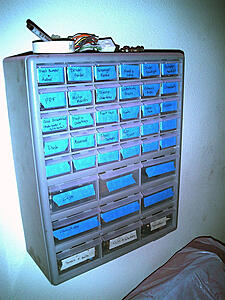
Of course now that Im putting it all back together Im thinking to myself, "wtf is this stupid shit? I dont remember how or where any of this goes." Its like putting together a damn puzzle.
Quick backstory so you know why I started this to begin with...
Some thief smashed my window to steal my radar detector.

Of course there was only one brand new driver side window left in the entire U.S. and its coming out of Cali, so it'll show up in a week. All the aftermarket glass places I called could only get me a windshield, not door glass. To solve my driving situation I went and found a $600 beater car and drove the RX7 into the garage. Yes, drove. The engine wasnt blown. In that time it was down I figured I would replace the smoking set of twins I had with an almost new set I had purchased about half a year back (less than 12k miles on them). Halfway into tearing the top of the motor apart I figured f@#k it, lets go V8. I pull the motor out and decide it should really get painted while this is all apart. As I start into that I decide I'll need some extra fat tires to put down the power, so I order some pettit flares.
....then the replacement window arrived in the mail.


And its out. That didnt take long -


Look at all this change I found under the carpet!

Dirty-


On a side note, this is seriously my brilliant idea of keeping organized -

Of course now that Im putting it all back together Im thinking to myself, "wtf is this stupid shit? I dont remember how or where any of this goes." Its like putting together a damn puzzle.
 09-24-2011, 05:53 PM
#2
Registered User
Thread Starter
Join Date: May 2008
Location: San Antonio
Posts: 286
Likes: 0
Received 0 Likes
on
0 Posts
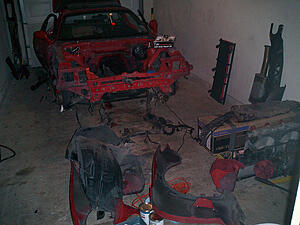
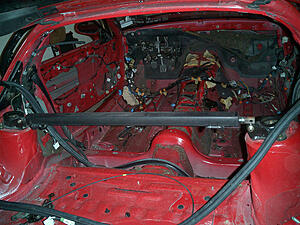
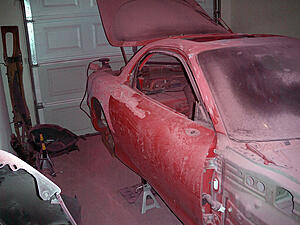
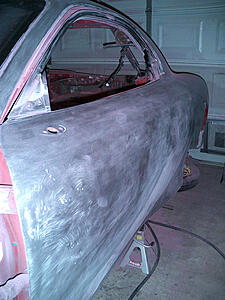
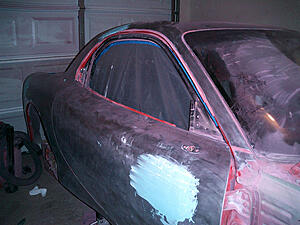
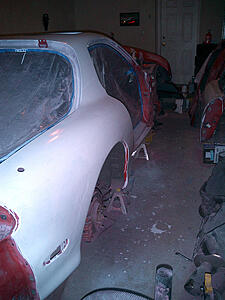
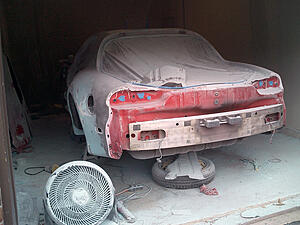
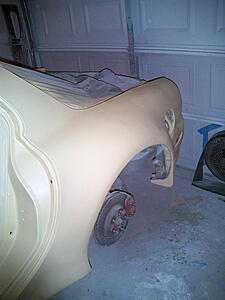
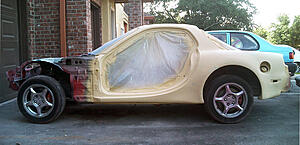
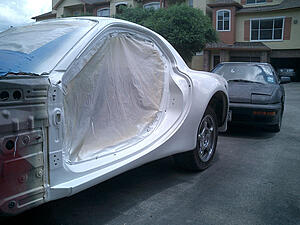
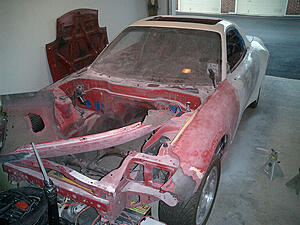
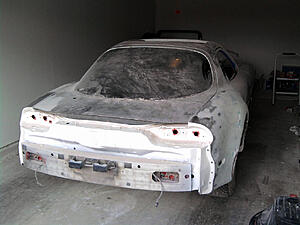
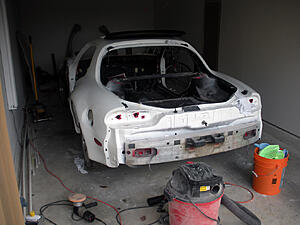
Well, on to the body work. The car had been repainted twice in its life, so Ive got 3 layers of red to go through. Two reasons I took it down to bare metal - 1. I wanted to paint the car white and didnt want to see red if I got a chip. 2. If I got a chip that went through all 4 layers of paint it would be over 1mm deep!
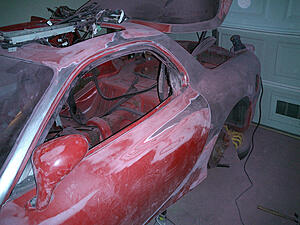
I got this far and realized it would be in my best interest to put up some kind of tarp to keep all the dust isolated. f@#k it, whats done is done, time to continue onward.

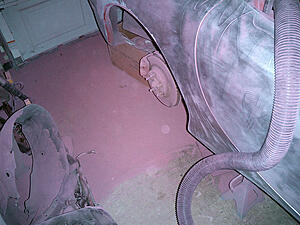
The dust was so thick I was using a shop vac to get up the majority of it -
Better, but the walls were permanently pink, even when I moved out.


Uh oh -

My first attempt at bodywork (using the extremely crappy bondo brand body filler) -
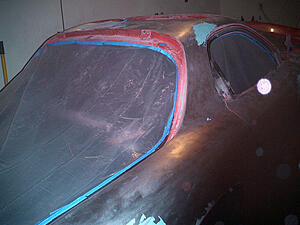
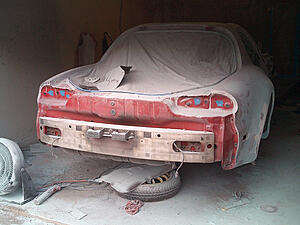
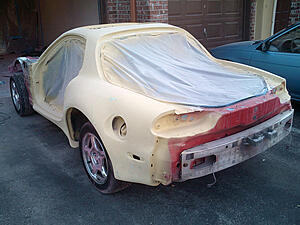
At this point its taken a lot longer than the one week I thought it would take, so I started getting worried about rust. I got some mineral spirits and a can of rustoleum and put a light coat on the metal to keep it protected while I did the rest of the bodywork -

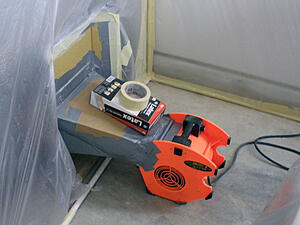
I had now figured out if I put a plastic wall up all the dust stays in one area. Genius!
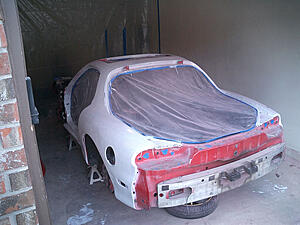


I got this far and realized it would be in my best interest to put up some kind of tarp to keep all the dust isolated. f@#k it, whats done is done, time to continue onward.


The dust was so thick I was using a shop vac to get up the majority of it -

Better, but the walls were permanently pink, even when I moved out.


Uh oh -


My first attempt at bodywork (using the extremely crappy bondo brand body filler) -


At this point its taken a lot longer than the one week I thought it would take, so I started getting worried about rust. I got some mineral spirits and a can of rustoleum and put a light coat on the metal to keep it protected while I did the rest of the bodywork -


I had now figured out if I put a plastic wall up all the dust stays in one area. Genius!
 09-24-2011, 05:54 PM
#3
Registered User
Thread Starter
Join Date: May 2008
Location: San Antonio
Posts: 286
Likes: 0
Received 0 Likes
on
0 Posts
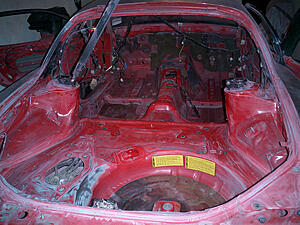
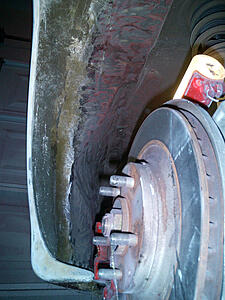
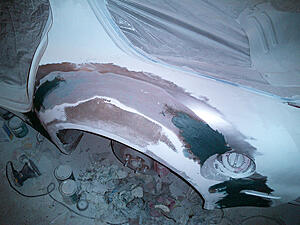
This cant be good -

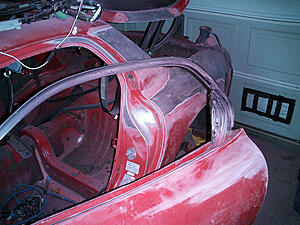
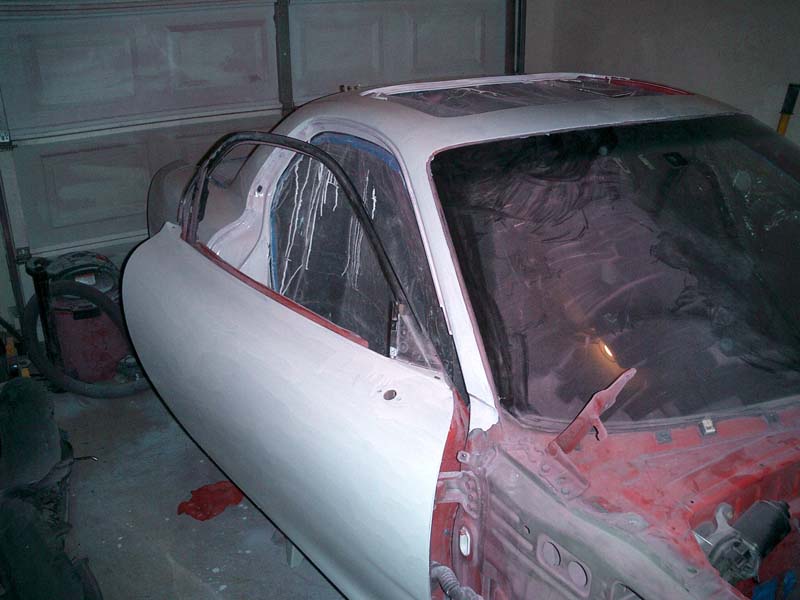
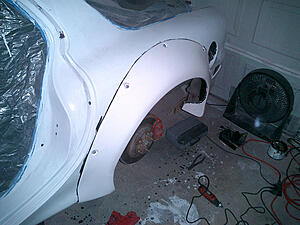
You can see where the antenna used to be. I welded that up and you'd have no idea it was ever there now. Also these flares I paid $300 fit like shit.
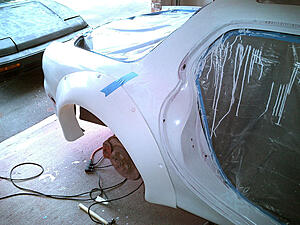
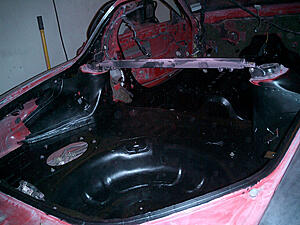
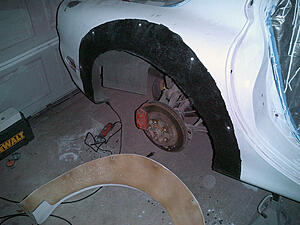
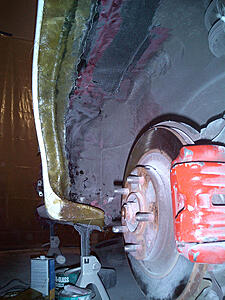
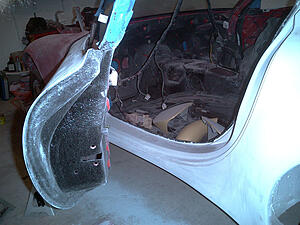
Well, I had to cut the wheel well out to make room for the tires. Didnt want to sacrifice structural rigidity, so with the help of a 4lb hammer, I beat the inner fender liner into position and welded it back to the body.
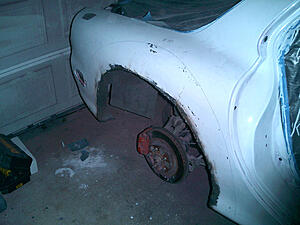
There's where the stock wheel well would have been
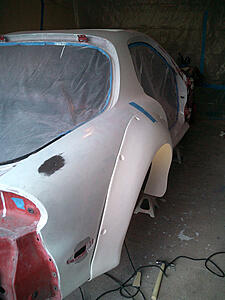
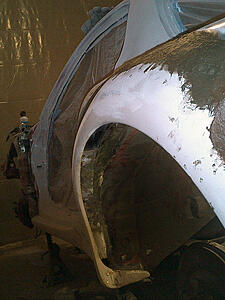
A little bit of trimming and the flares arent nearly as bad -

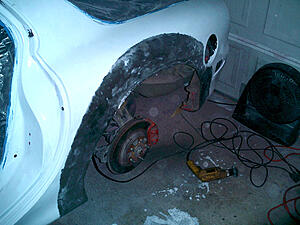
Test fitting -
My first dat ass shot -
Not sure why this is here but its the flap I use as a door to get from one side of the plastic wall to the other.
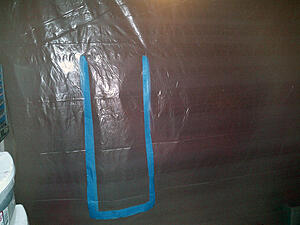
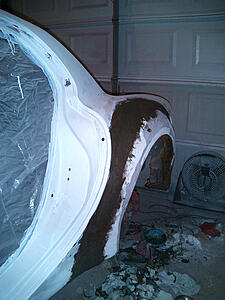
I put some threaded pop rivets into the body and coated it with rhino liner to help absorb some of the road noise
Dont be fooled - its actually glued to the metal not the black liner. I went and sanded a section for the glue to adhere directly to the body. The glue is a two part epoxy meant specifically for adhering fiberglass to metal. Used commonly when repairing corvettes. The bolts are also held in with loctite and barbed lock washers.
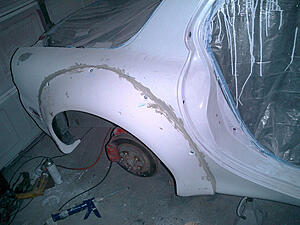
Short hair fiberglass filler. Allows for a little bit of flex without cracking.
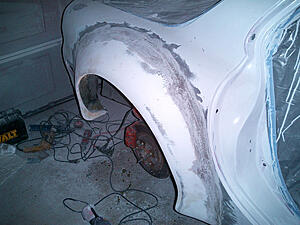
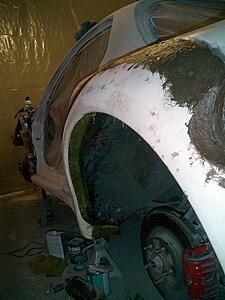
Had to fill in the gap in the wheel well somehow. Here's my first attempt at laying fiberglass -
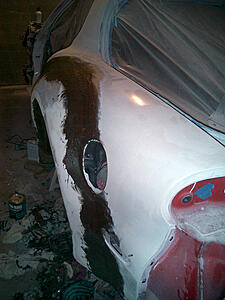

You can see where the antenna used to be. I welded that up and you'd have no idea it was ever there now. Also these flares I paid $300 fit like shit.


Well, I had to cut the wheel well out to make room for the tires. Didnt want to sacrifice structural rigidity, so with the help of a 4lb hammer, I beat the inner fender liner into position and welded it back to the body.


There's where the stock wheel well would have been

A little bit of trimming and the flares arent nearly as bad -

Test fitting -


My first dat ass shot -

Not sure why this is here but its the flap I use as a door to get from one side of the plastic wall to the other.

I put some threaded pop rivets into the body and coated it with rhino liner to help absorb some of the road noise

Dont be fooled - its actually glued to the metal not the black liner. I went and sanded a section for the glue to adhere directly to the body. The glue is a two part epoxy meant specifically for adhering fiberglass to metal. Used commonly when repairing corvettes. The bolts are also held in with loctite and barbed lock washers.

Short hair fiberglass filler. Allows for a little bit of flex without cracking.

Had to fill in the gap in the wheel well somehow. Here's my first attempt at laying fiberglass -


 09-24-2011, 05:56 PM
#4
Registered User
Thread Starter
Join Date: May 2008
Location: San Antonio
Posts: 286
Likes: 0
Received 0 Likes
on
0 Posts
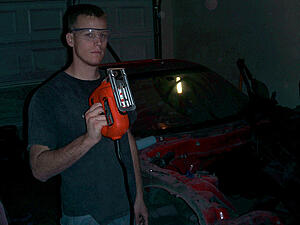
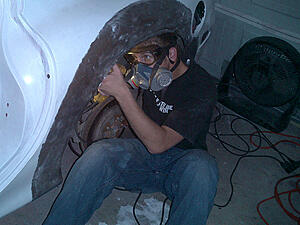
Getting ready to start sanding fiberglass for the first time. Pay specific attention to my footwear -
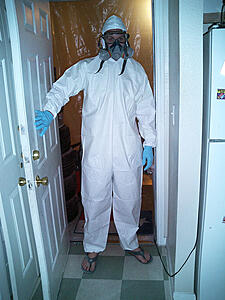
Of course now I just wear a respirator, but you can never be too careful your first time.

Ya, I might be doing bodywork in the garage
'Skim' coat of bondo to finish it off. God what was I thinking -

Of course now I just wear a respirator, but you can never be too careful your first time.


Ya, I might be doing bodywork in the garage

'Skim' coat of bondo to finish it off. God what was I thinking -


 09-24-2011, 05:57 PM
#5
Registered User
Thread Starter
Join Date: May 2008
Location: San Antonio
Posts: 286
Likes: 0
Received 0 Likes
on
0 Posts
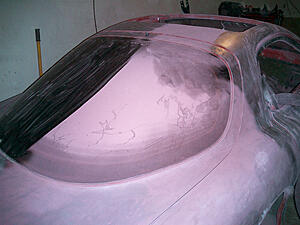
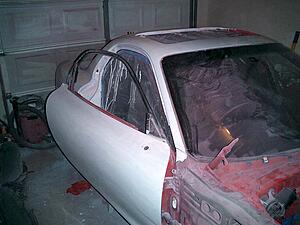
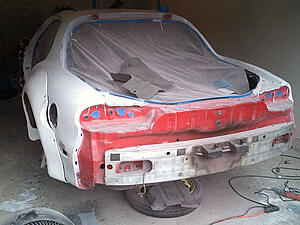
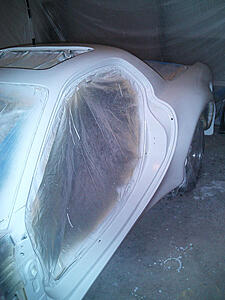
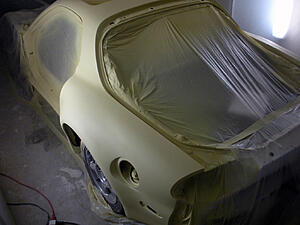
At this point I sanded off all the white rustoleum paint and never took pictures, so all of a sudden its primered -
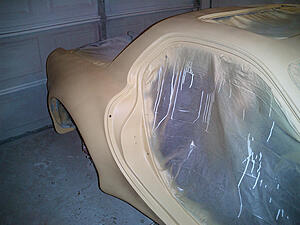
There's actually an etching primer underneath the yellow filler primer.
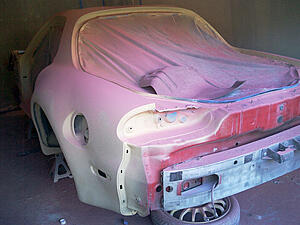
What a complete mess -
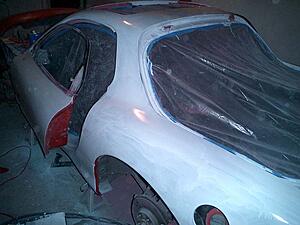
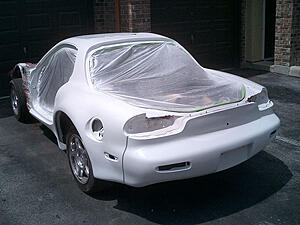
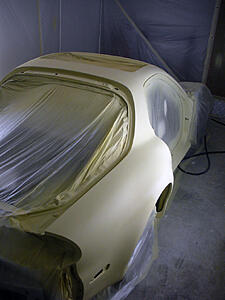
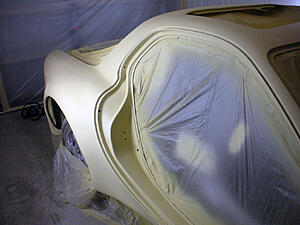
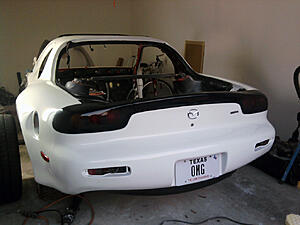
Here's my first attempt at painting this car. Single stage acrylic using a 1.8 tip on a cheap $60 hvlp gun. Again, what was I thinking -
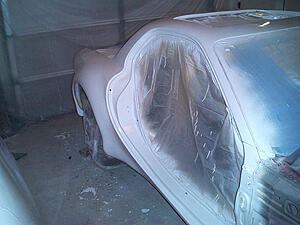
Tons of orange peel and I didnt prep the bumper correctly so the paint never cured.


There's actually an etching primer underneath the yellow filler primer.

What a complete mess -


Here's my first attempt at painting this car. Single stage acrylic using a 1.8 tip on a cheap $60 hvlp gun. Again, what was I thinking -


Tons of orange peel and I didnt prep the bumper correctly so the paint never cured.

 09-24-2011, 05:57 PM
#6
Registered User
Thread Starter
Join Date: May 2008
Location: San Antonio
Posts: 286
Likes: 0
Received 0 Likes
on
0 Posts
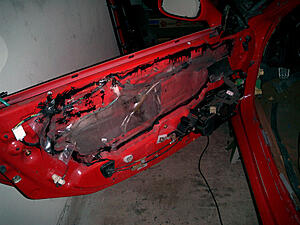
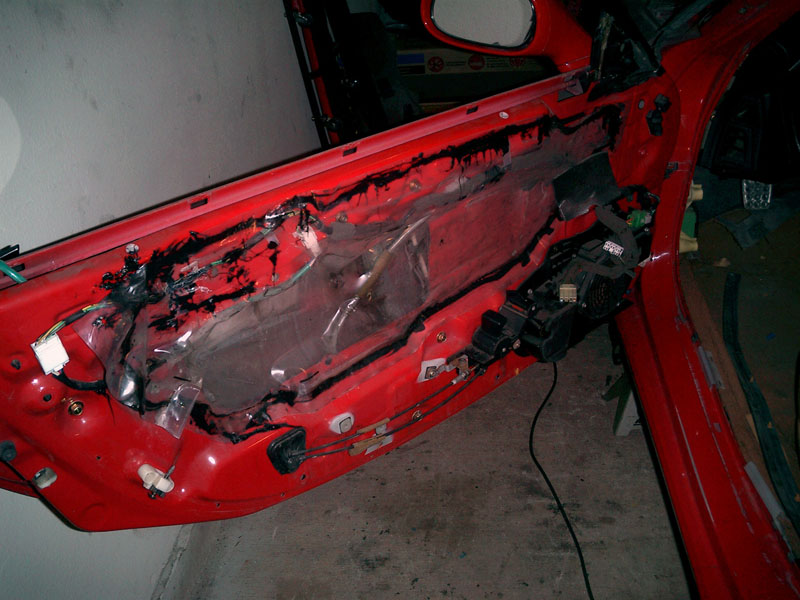
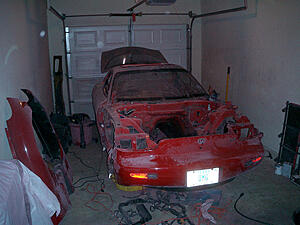
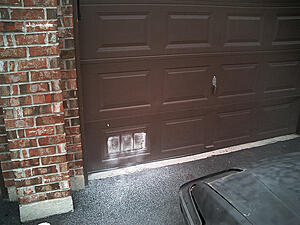
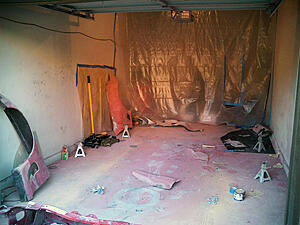
Then I thought putting rhino liner on the inside of the door was a brilliant idea and would make painting that much easier (since Id only have to paint one side of the door). Let me tell you how awesome it is removing all that.
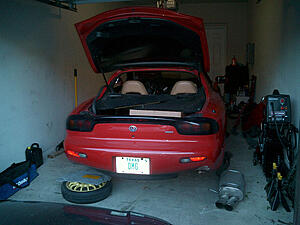
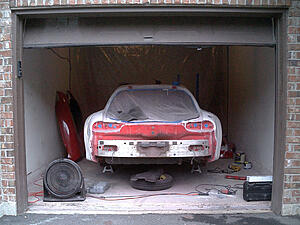
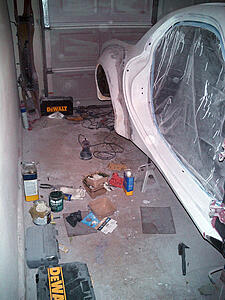
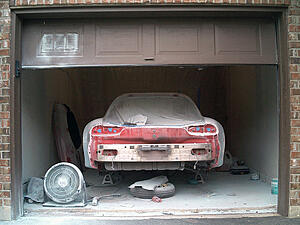
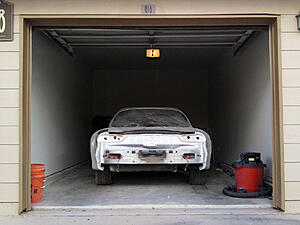
Okay. So now its been a year. Ive had to move to a different apt complex. Here is how the car sat for another year, untouched. Almost forgotten about. My old roomate moved out and I was using his compressor to power the paint gun so I couldn't keep going with the body work.

Okay. So now its been a year. Ive had to move to a different apt complex. Here is how the car sat for another year, untouched. Almost forgotten about. My old roomate moved out and I was using his compressor to power the paint gun so I couldn't keep going with the body work.

 09-24-2011, 05:58 PM
#7
Registered User
Thread Starter
Join Date: May 2008
Location: San Antonio
Posts: 286
Likes: 0
Received 0 Likes
on
0 Posts
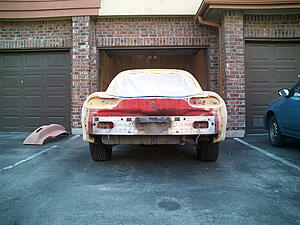
At the end of year 2 I had pretty much run out of steam on this project and was ready to throw in the towel. I had no interest in it anymore and my job left me with no free time to work on it. One my coworkers was getting ready to open up a paint shop. He had gone to UTI's paint and body school and the S2000 he owned had an amazing orange flake paintjob he had done himself. I threw him $1800 to finish the RX7 and put the body back together.
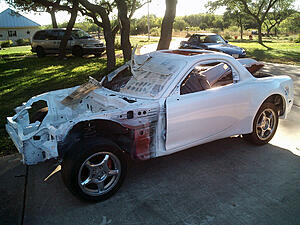
Now I might be an amateur, but I can put this guy to shame with my limited experience. I gave him all the right products to do the job and all he had to do was buy the color/clear. He used none of what I gave him, didnt prep the metal correctly, and bought the cheapest color/clear he could find. The paint was flaking off down to bare metal within months and the car was different color whites. It hadnt even moved out of my garage yet! I took him to small claims and won $2400 (and have yet to see a single penny). The car sat for about half a year while all that happened. So now we're at 3.5 years total.
In the meantime I ordered the subframe -
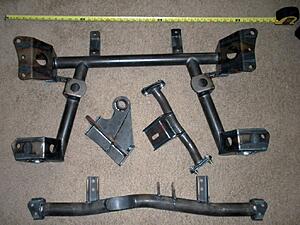
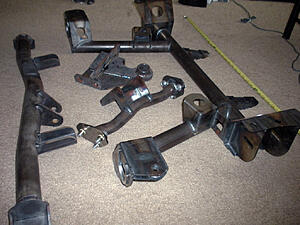
And had it powder coated -
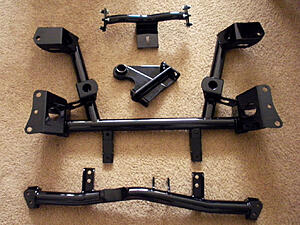
And I moved again.
Trending Topics
09-24-2011, 05:59 PM
#8
Registered User
Thread Starter
Join Date: May 2008
Location: San Antonio
Posts: 286
Likes: 0
Received 0 Likes
on
0 Posts
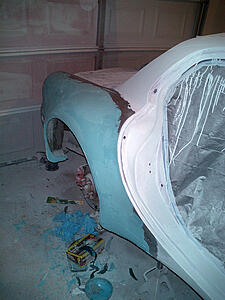
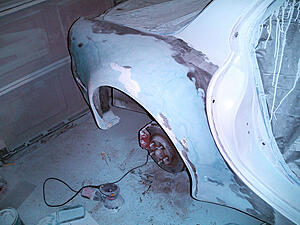
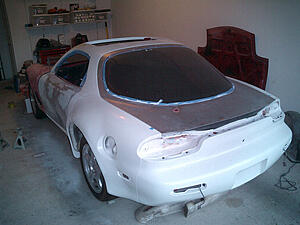
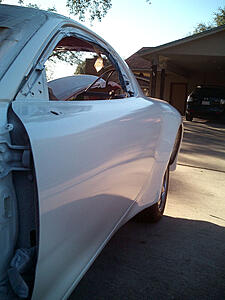
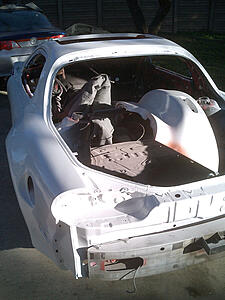
So now Im tasked with undoing everything this idiot "painter" has done. I had to strip all his paint off. Figured Id go through all my trial and error acrylic coats while I was at it and get back down to bare metal....for the second time. This includes redoing a lot of my bodywork. This time around I knew what I was doing and used some nice Rage Gold body filler. By the time I finished It was almost year 4 and it still looked exactly like it had only 1 month into the project.

I built a real exhaust fan that didnt kick any air back into my work space
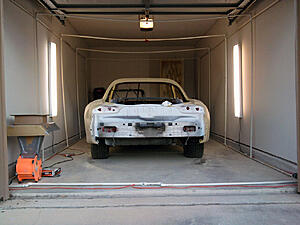
And the booth was now built out of a pvc framework and wrapped in plastic. No more taping to the walls. This created an actual low pressure booth.
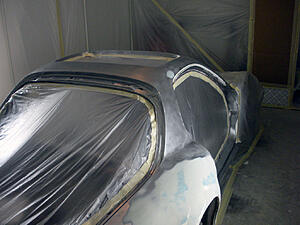
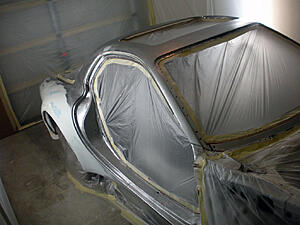
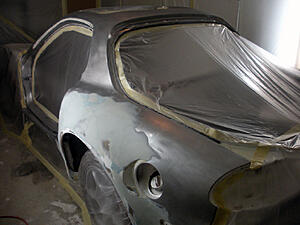
Primered.....again -
This should give you an idea of the pvc skeleton I constructed -


I built a real exhaust fan that didnt kick any air back into my work space

And the booth was now built out of a pvc framework and wrapped in plastic. No more taping to the walls. This created an actual low pressure booth.


Primered.....again -


This should give you an idea of the pvc skeleton I constructed -
 09-24-2011, 06:00 PM
#9
Registered User
Thread Starter
Join Date: May 2008
Location: San Antonio
Posts: 286
Likes: 0
Received 0 Likes
on
0 Posts
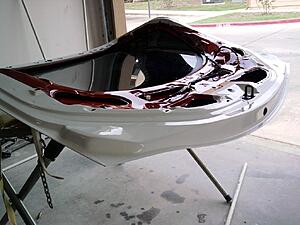
Now I had my own compressor. A nice primer gun and a good (and expensive) paint gun that was the correct needle size. No more single stage either. This time around I was doing a base coat and clear coat.
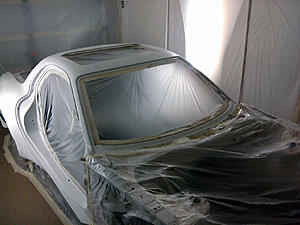
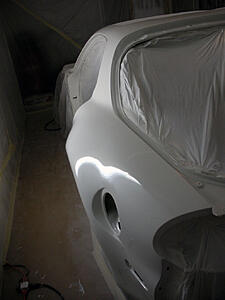
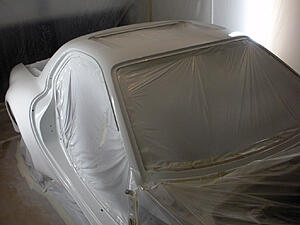
Awww yaahh

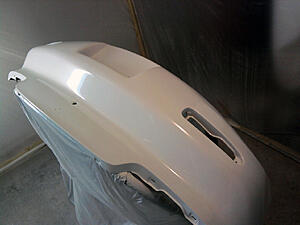
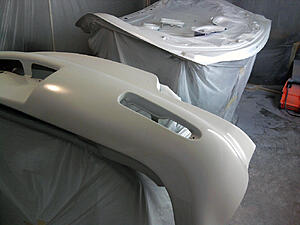
Now on to the rest of the body pieces -


Awww yaahh


Now on to the rest of the body pieces -


