Ayanami - Build Thread
 05-11-2015, 01:15 AM
#61

Thread Starter
Spent some time over the weekend fitting a few new goodies.
Started by removing the Skunk2 Exhaust and fitting the HKS Spec L thats been sitting in my garage for a few weeks.
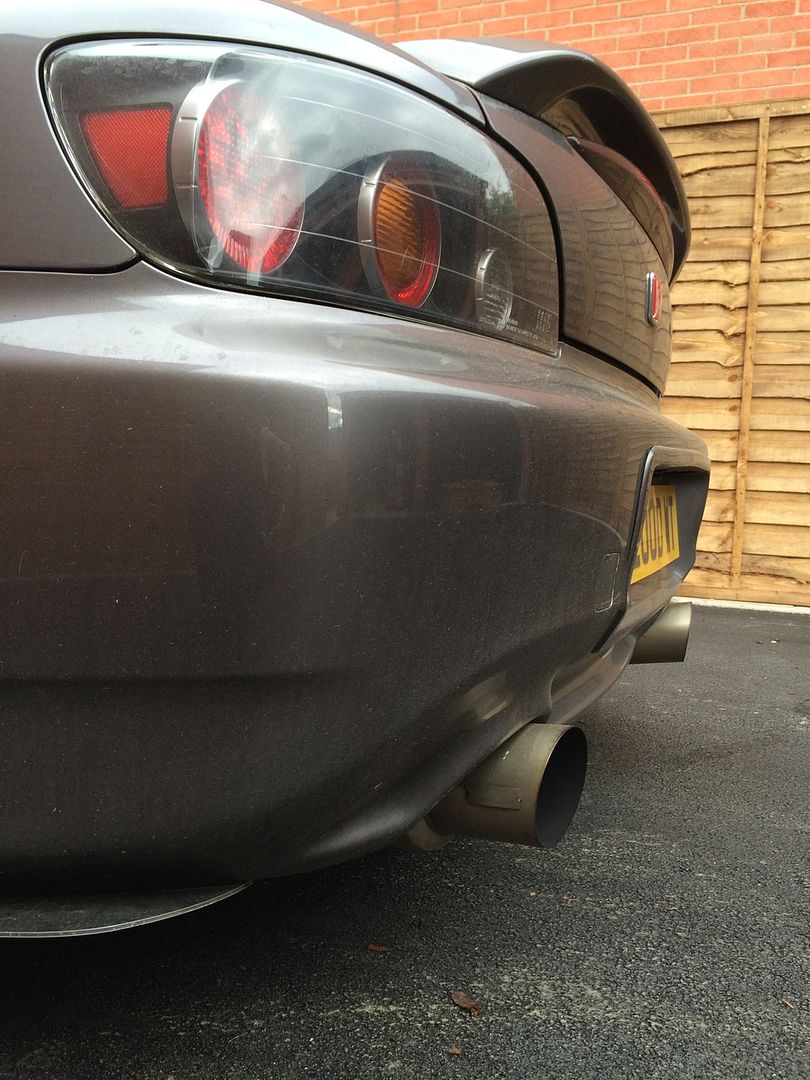
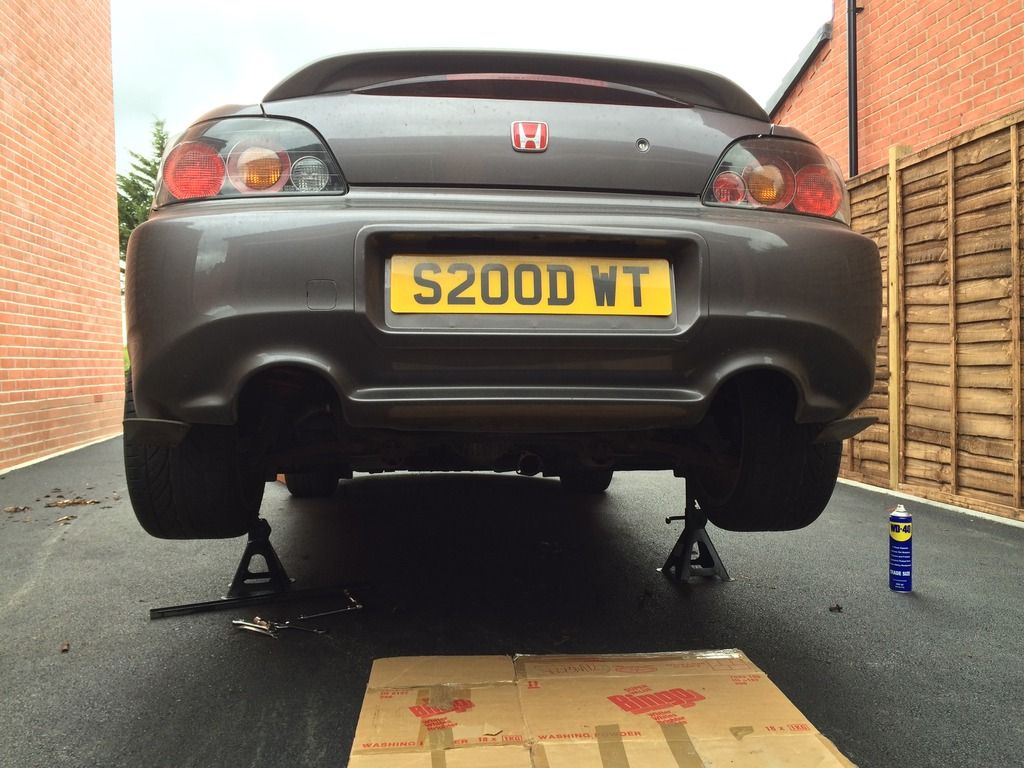
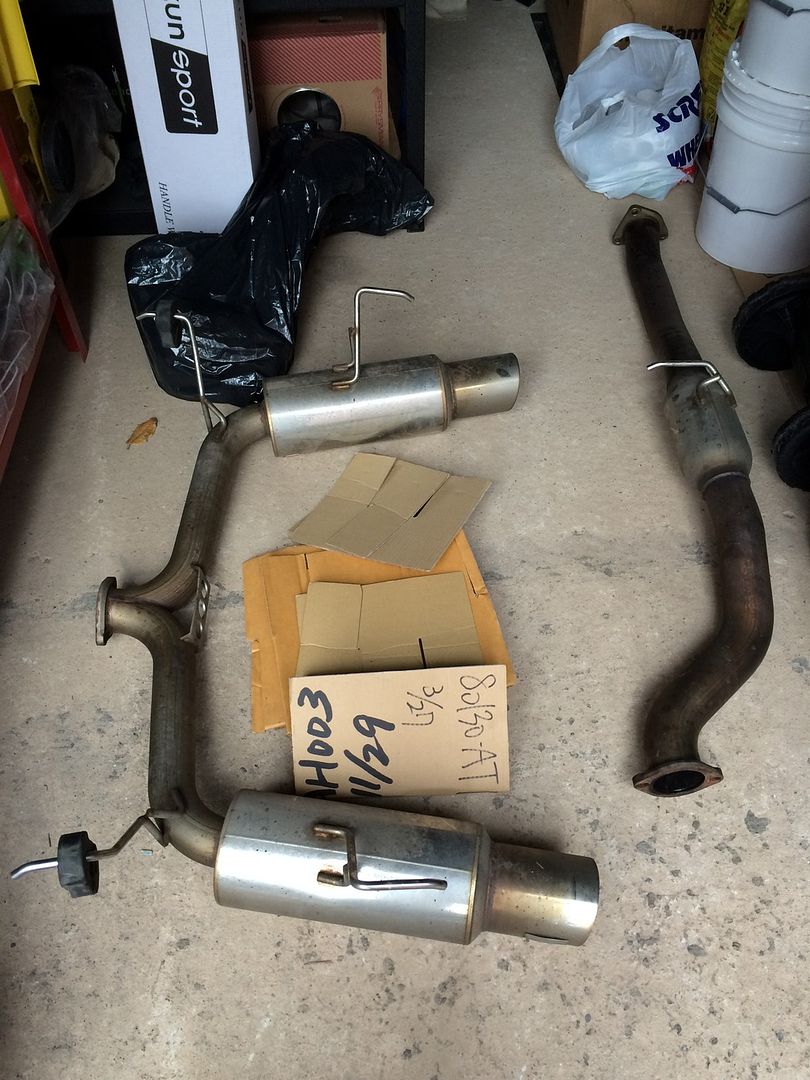

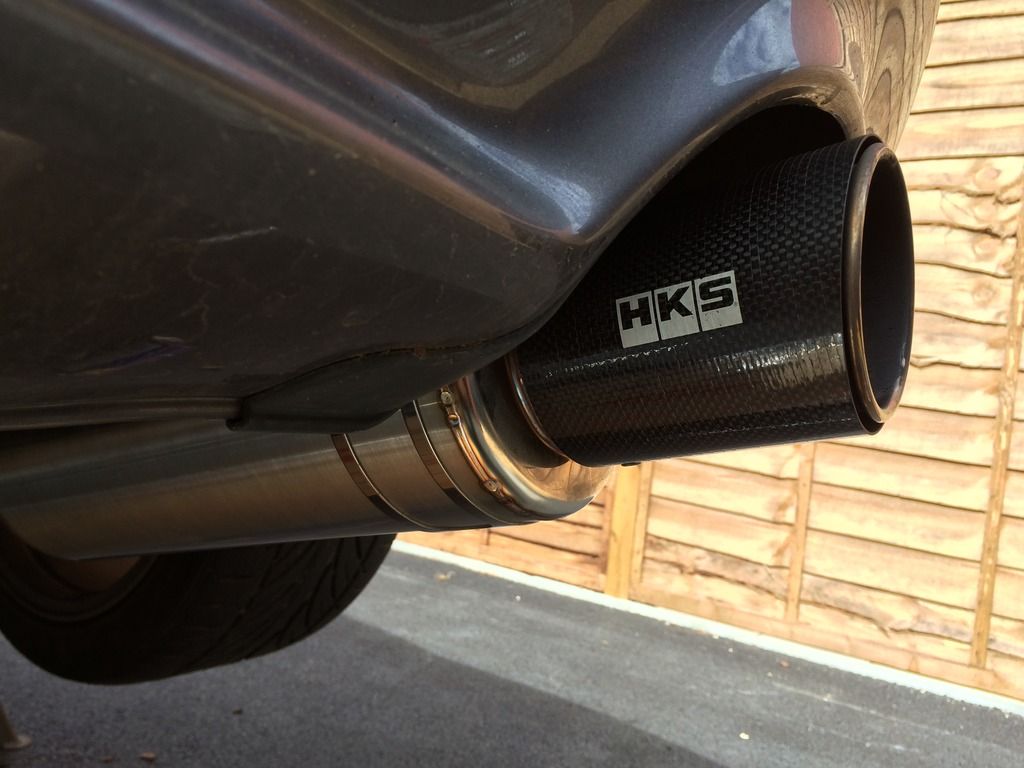
After fitting, needed some tweaking to ensure it sat right and even at the back, then time for a test drive. Completely different noise from the Skunk. The best way I can describe it is as follows:
Skunk2: Bashee scream, amazing sound at WOT. Unfortunately due to the severe lack of baffles, it does drone when around 3-4K rpm.
HKS: Deep growl. Much quieter inside the cabin, but still very noticeable from the outside at idle. Very nice growl with a little bit of Honda rasp for good measure. Initial impressions are very good. (Thanks to Si for the recommendation)
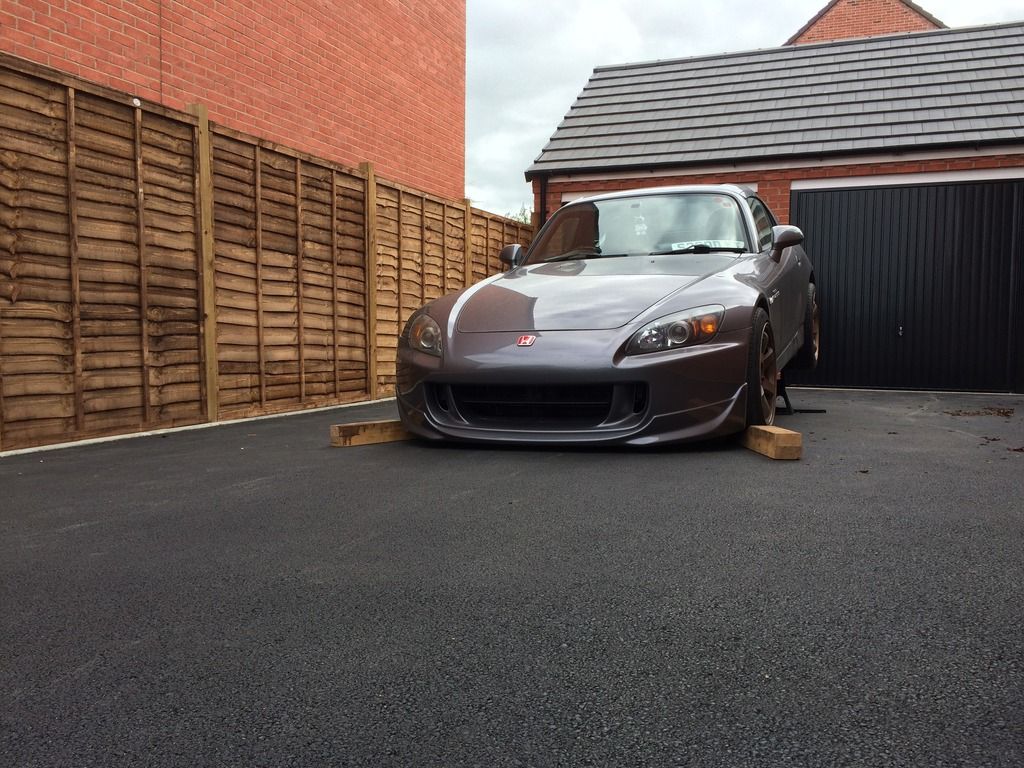
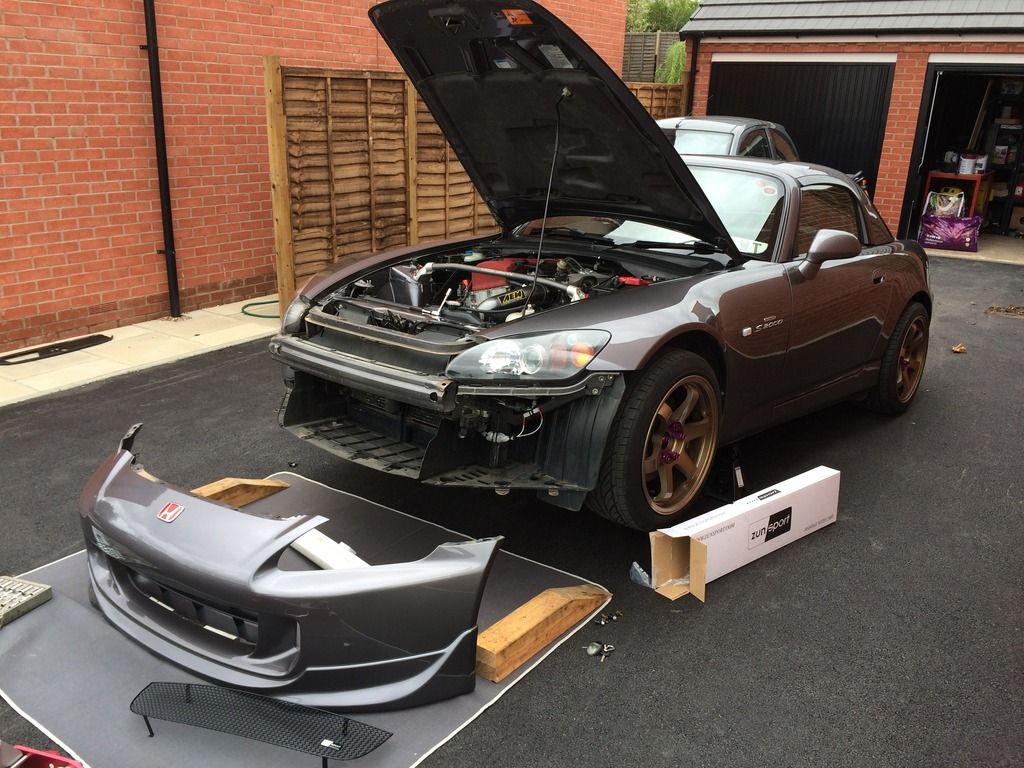
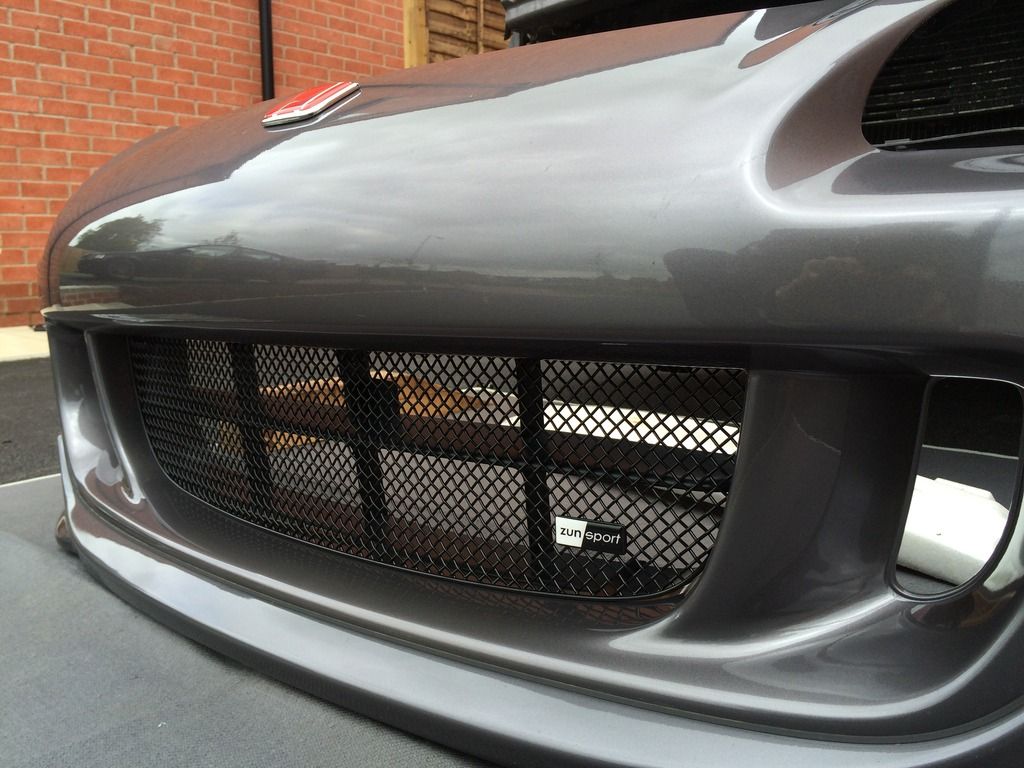
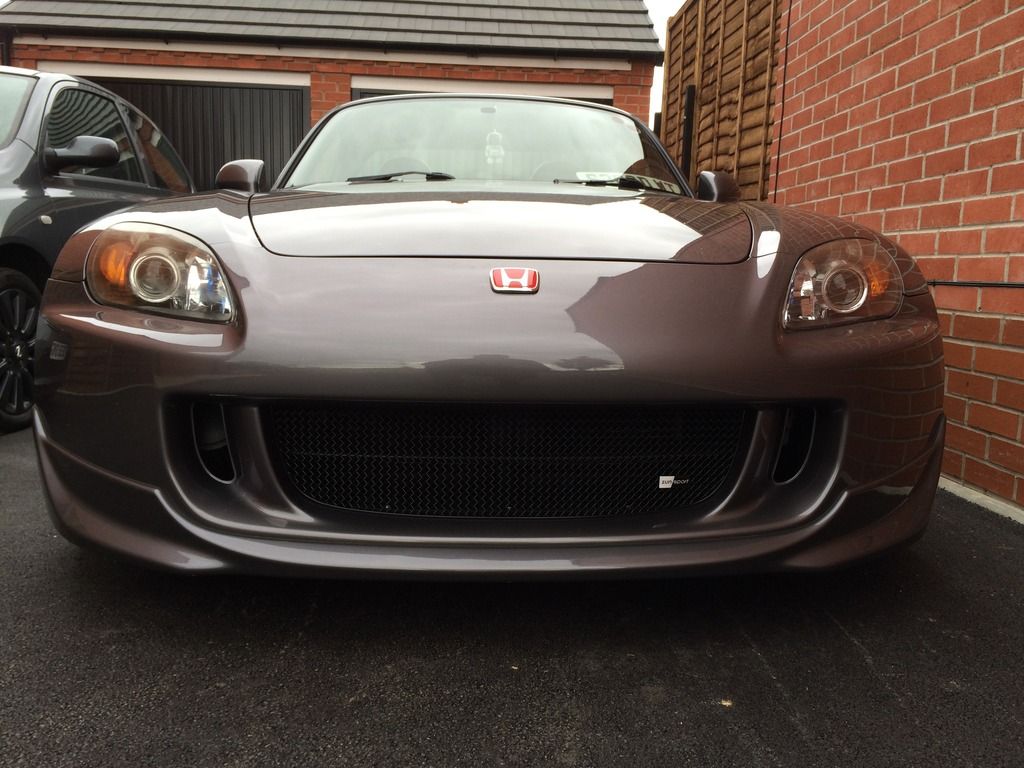
After a quick wash, I then pulled the front bumper off and fitted my Zunsport Grille. Need to make up some brackets so I can fit the side grille's as iv had the fake covers cut out. Will probably wait until I have the Tegiwa ducts before looking at brackets.

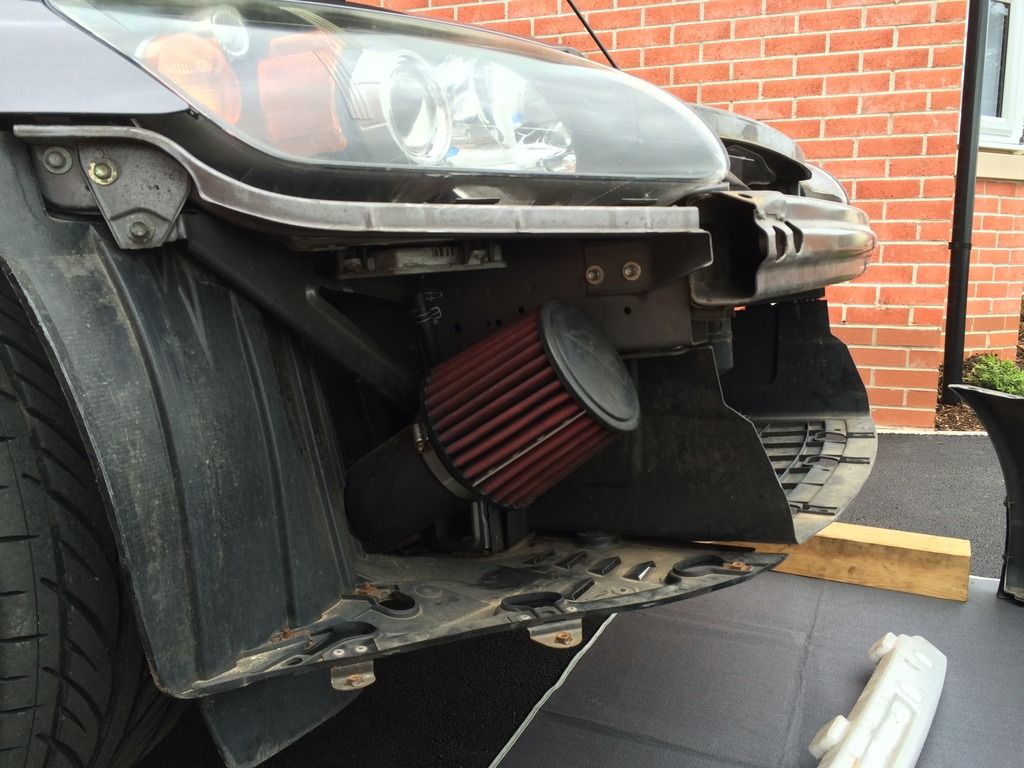
Some AEM goodness.
Next big mod will probably be the refurb of the wheels when I come to replacing the tyres. Colour of choice - Candy apple red.
Started by removing the Skunk2 Exhaust and fitting the HKS Spec L thats been sitting in my garage for a few weeks.


After fitting, needed some tweaking to ensure it sat right and even at the back, then time for a test drive. Completely different noise from the Skunk. The best way I can describe it is as follows:
Skunk2: Bashee scream, amazing sound at WOT. Unfortunately due to the severe lack of baffles, it does drone when around 3-4K rpm.
HKS: Deep growl. Much quieter inside the cabin, but still very noticeable from the outside at idle. Very nice growl with a little bit of Honda rasp for good measure. Initial impressions are very good. (Thanks to Si for the recommendation)
After a quick wash, I then pulled the front bumper off and fitted my Zunsport Grille. Need to make up some brackets so I can fit the side grille's as iv had the fake covers cut out. Will probably wait until I have the Tegiwa ducts before looking at brackets.

Some AEM goodness.


Next big mod will probably be the refurb of the wheels when I come to replacing the tyres. Colour of choice - Candy apple red.


 06-10-2015, 04:48 AM
#63
Thread Starter
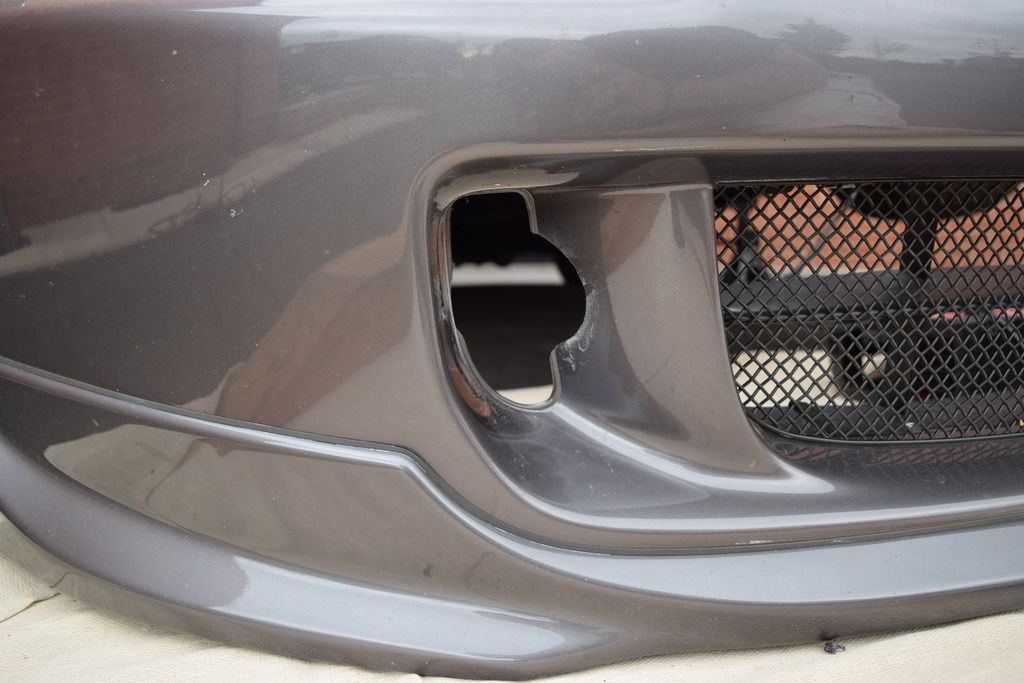
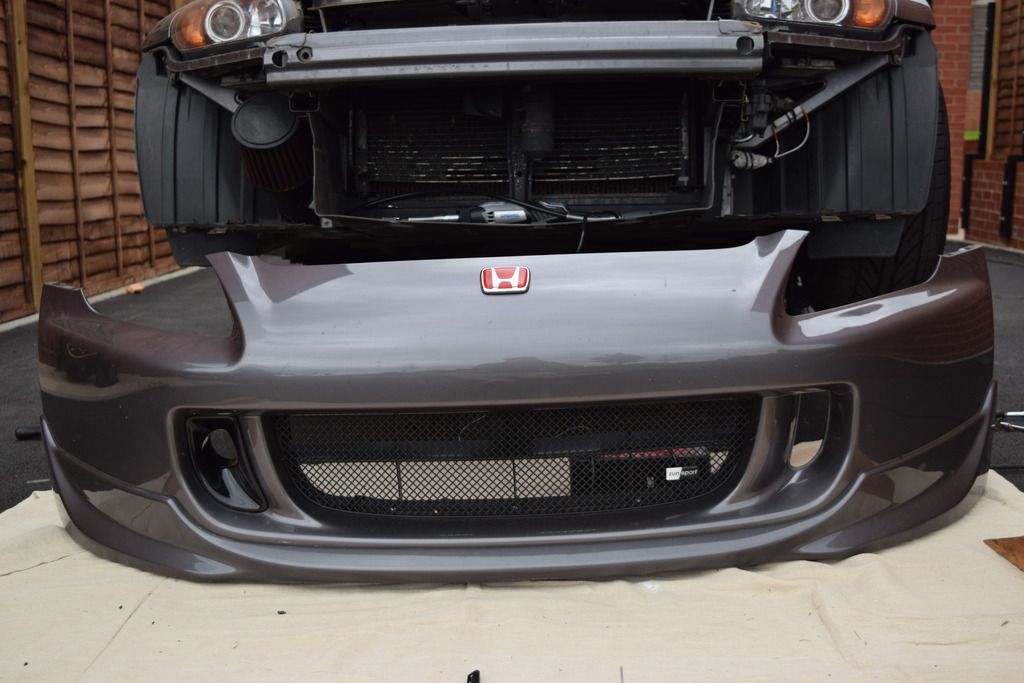
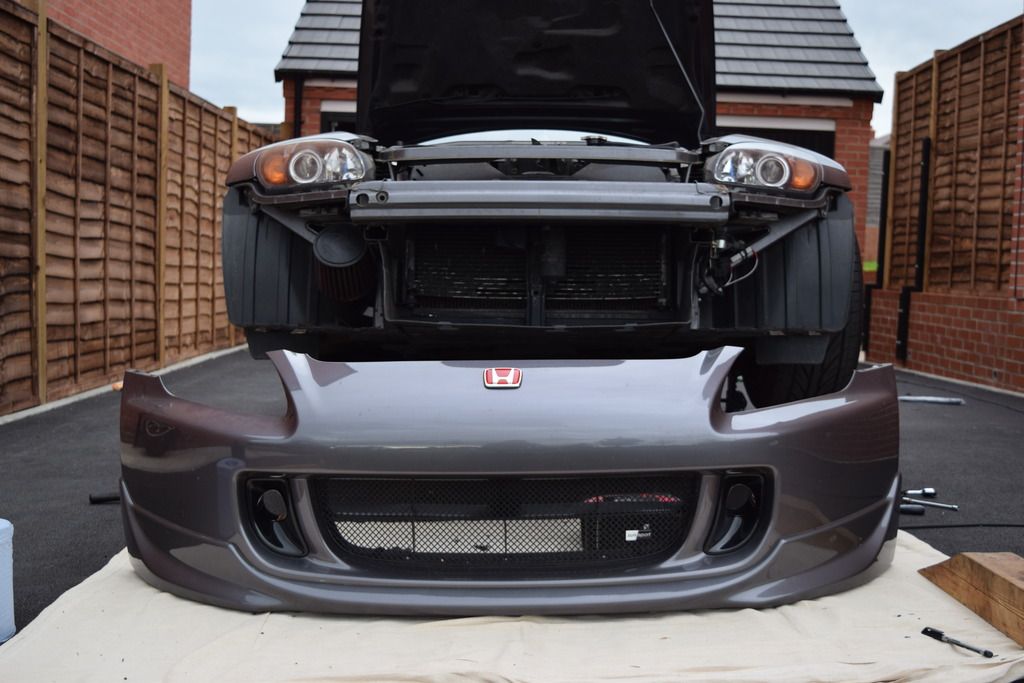
So...my most recent modification was the facelift bumper ducts from Tegiwa. Thanks to some quick emails, I managed to secure the first set and used last weekend to fit them.
***WARNING*** To fit these ducts, you will need to cut the bumper, and not just around the fake vents.
My bumper already had the fake vents cut out, but these were not big enough for the ducts to fit, so further cutting was required.
To ensure a good finish, I bought myself a Dremel 4000-4 with the felxi attachment to get into the small space.
I used a marker pen to roughly mark the area I would need to cut and then used a cutting disc to cut out the bulk before changing to a sanding disc to create a smooth finish and a more defined shape. (The griding disc actually works very well at cutting away the bumper.)
Ducts received from Tegiwa. Very well made.

Removed the bumper and marked up the area to cut.

Using the dremel, it was a back and froth cut / fit / cut / fit until I got a good fit. I wanted to cut as little away as possible.
In the above, I also made a small cut in the left side (outboard side), but when doing the final fit and cutting the other side I realised this was not required.
A trial fit and "with / without" picture before starting to cut the other side.
Both ducts cut:
To ensure they stay in place, I used silicone sealant all around the border. I know it would probably be better use tiger seal or something more permanent, but Silicone allows me to cut them out should I ever require body work on the bumper.
To add extra safety, I also drilled 2 small holes on each side and put a small M5 bolt through to hold it in place.
Bumper back on.

Iv driven the car 100miles to Ace Cafe on Sunday and back. No issues and they are still firmly in place.
Very happy with these and a relatively easy mod if you are happy to cut into your bumper and have the right tools. (Dremel is highly recommended).
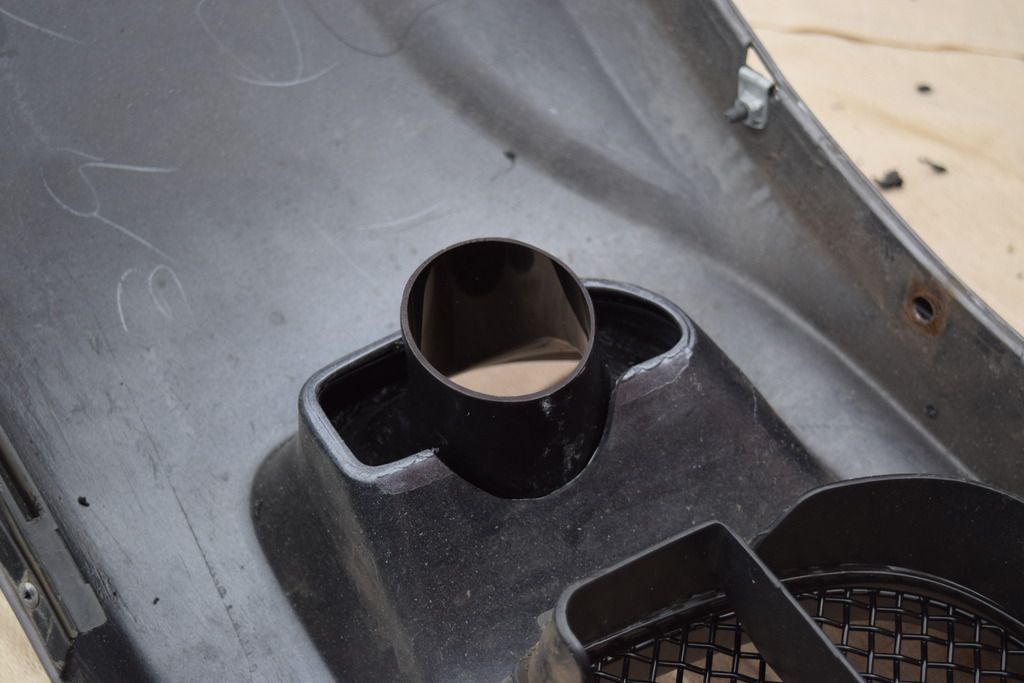
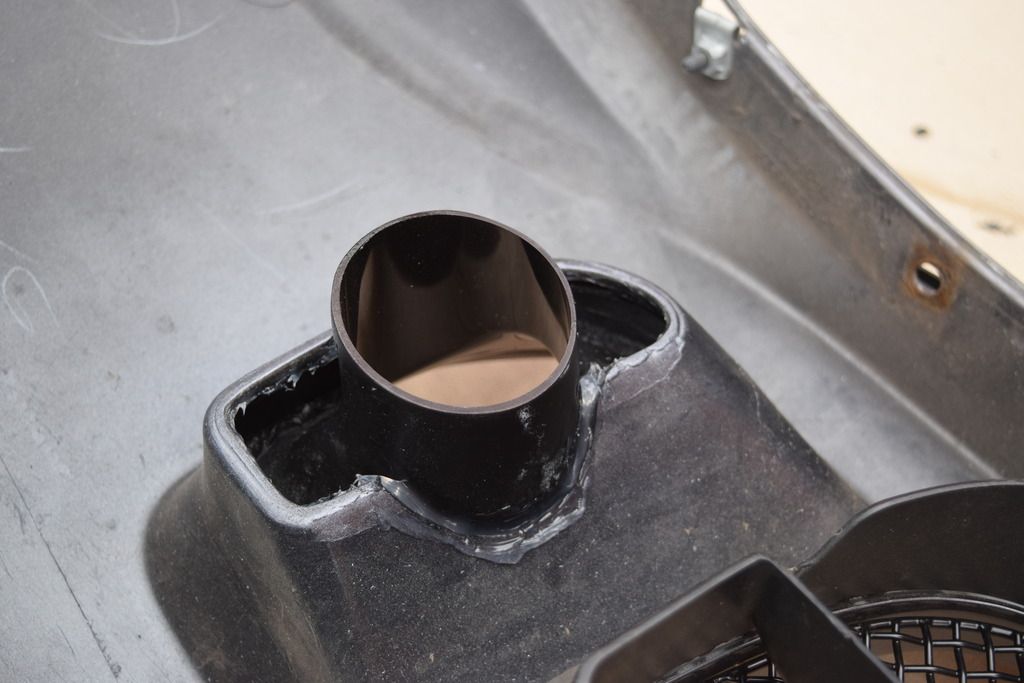
I can also confirm these ducts fit with the AEM V2 induction, although it is close and you might need to trim the induction pipe back 10mm or so if you want to run a brake cooling hose. Otherwise its great for pushing air straight onto the filter. (Unfortunately some / most of the air does his the top plastic of the filter, but still better than no air duct.)
***WARNING*** To fit these ducts, you will need to cut the bumper, and not just around the fake vents.
My bumper already had the fake vents cut out, but these were not big enough for the ducts to fit, so further cutting was required.
To ensure a good finish, I bought myself a Dremel 4000-4 with the felxi attachment to get into the small space.
I used a marker pen to roughly mark the area I would need to cut and then used a cutting disc to cut out the bulk before changing to a sanding disc to create a smooth finish and a more defined shape. (The griding disc actually works very well at cutting away the bumper.)
Ducts received from Tegiwa. Very well made.

Removed the bumper and marked up the area to cut.

Using the dremel, it was a back and froth cut / fit / cut / fit until I got a good fit. I wanted to cut as little away as possible.


In the above, I also made a small cut in the left side (outboard side), but when doing the final fit and cutting the other side I realised this was not required.
A trial fit and "with / without" picture before starting to cut the other side.

Both ducts cut:

To ensure they stay in place, I used silicone sealant all around the border. I know it would probably be better use tiger seal or something more permanent, but Silicone allows me to cut them out should I ever require body work on the bumper.
To add extra safety, I also drilled 2 small holes on each side and put a small M5 bolt through to hold it in place.

Bumper back on.

Iv driven the car 100miles to Ace Cafe on Sunday and back. No issues and they are still firmly in place.
Very happy with these and a relatively easy mod if you are happy to cut into your bumper and have the right tools. (Dremel is highly recommended).
I can also confirm these ducts fit with the AEM V2 induction, although it is close and you might need to trim the induction pipe back 10mm or so if you want to run a brake cooling hose. Otherwise its great for pushing air straight onto the filter. (Unfortunately some / most of the air does his the top plastic of the filter, but still better than no air duct.)
06-10-2015, 06:26 AM
#65
Thread Starter
Thanks Mike.
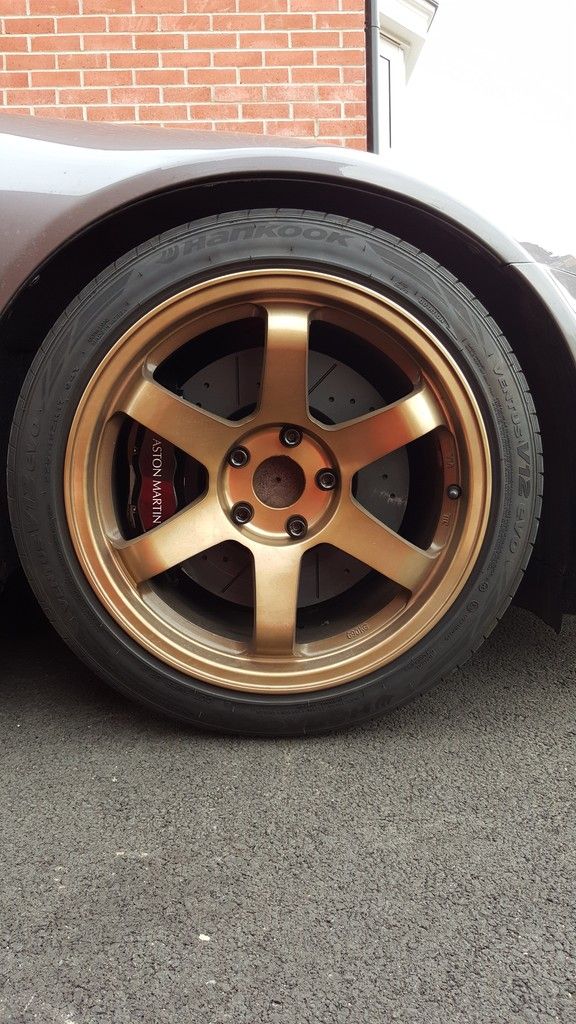
Wheels are Rota Grid Drift 17" x 9
Had to roll rear arches and fender clips on front are missing / worn through.
A bit more camber on front should sort that out. Currently 2Deg rear and 1.5 front if I remember correctly. (0.5Deg more than stock all round.)
Wheels are Rota Grid Drift 17" x 9
Had to roll rear arches and fender clips on front are missing / worn through.
A bit more camber on front should sort that out. Currently 2Deg rear and 1.5 front if I remember correctly. (0.5Deg more than stock all round.)
06-12-2015, 03:38 AM
#66
 08-18-2015, 12:17 AM
#67
Thread Starter
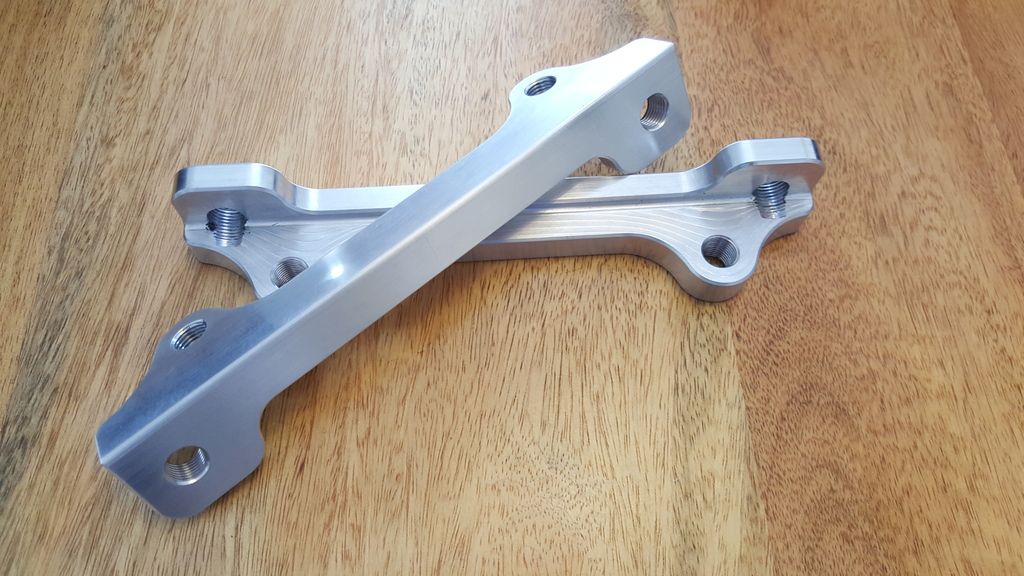
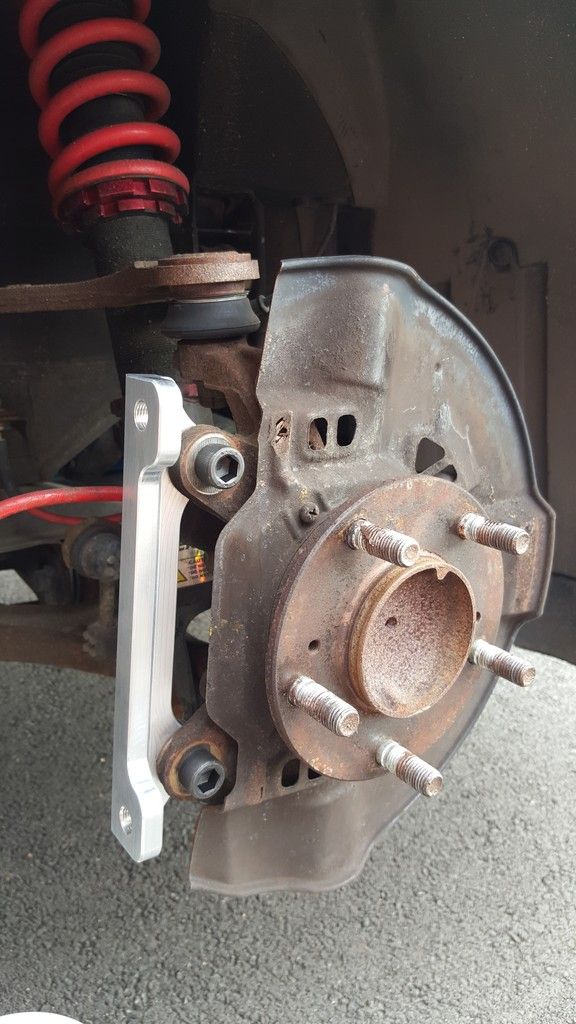
Finally got my brackets back from the machine shop and to my relief, fitment is perfect.
K-Sport 300mm BBK come off and Aston Martin Brembo 330mm BBK goes on.
Brackets:
Complete kit to be fitted:
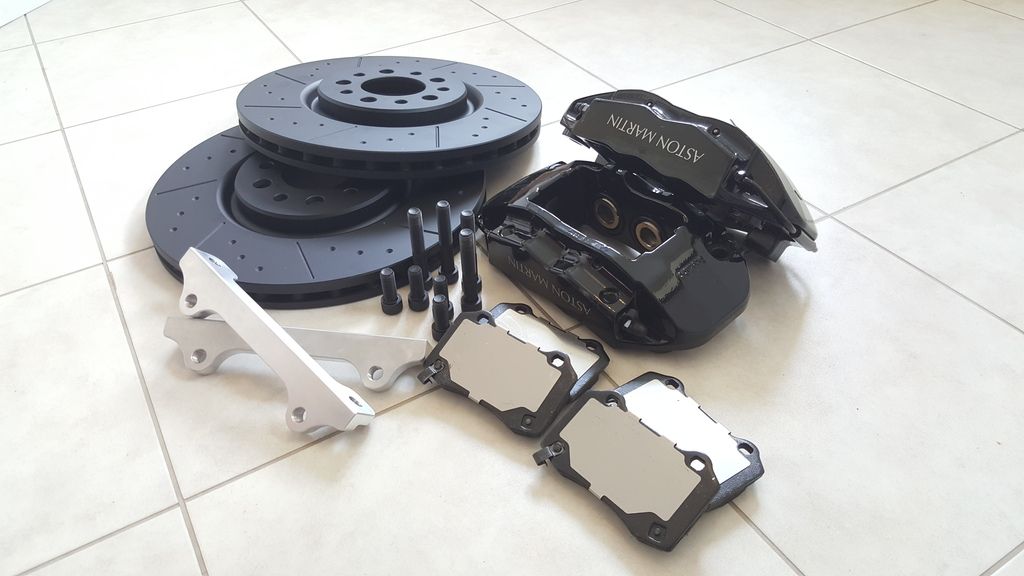
Bracket mounts on:
Brakes Fitted:
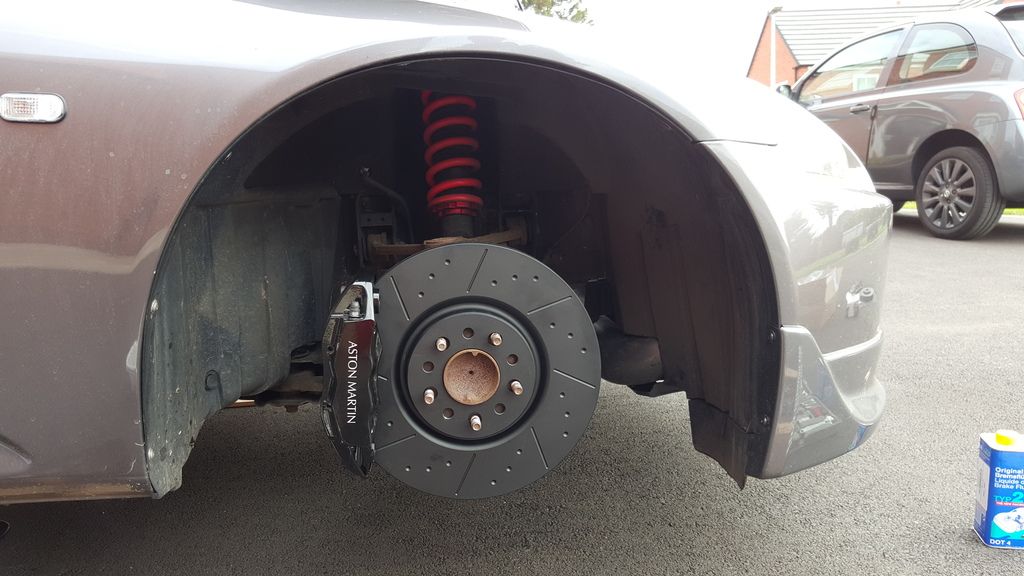
Nicely tucked under wheels:
Took it for a quick spin to start the bedding in and burn off the "black" coating.
Performed brilliantly with great stopping power.

If anyone interested in the same kit, please check out
https://www.s2ki.com/s2000/topic/112...it-interested/
K-Sport 300mm BBK come off and Aston Martin Brembo 330mm BBK goes on.
Brackets:

Complete kit to be fitted:

Bracket mounts on:

Brakes Fitted:

Nicely tucked under wheels:

Took it for a quick spin to start the bedding in and burn off the "black" coating.
Performed brilliantly with great stopping power.
If anyone interested in the same kit, please check out
https://www.s2ki.com/s2000/topic/112...it-interested/


Thread
Thread Starter
Forum
Replies
Last Post