Do you have a bad alternator? If you need to install a new one then save the money you'd spend on a mechanic and just follow our step-by-step guide. This how-to is for the 1999-2003 models of the car.
What You'll Need
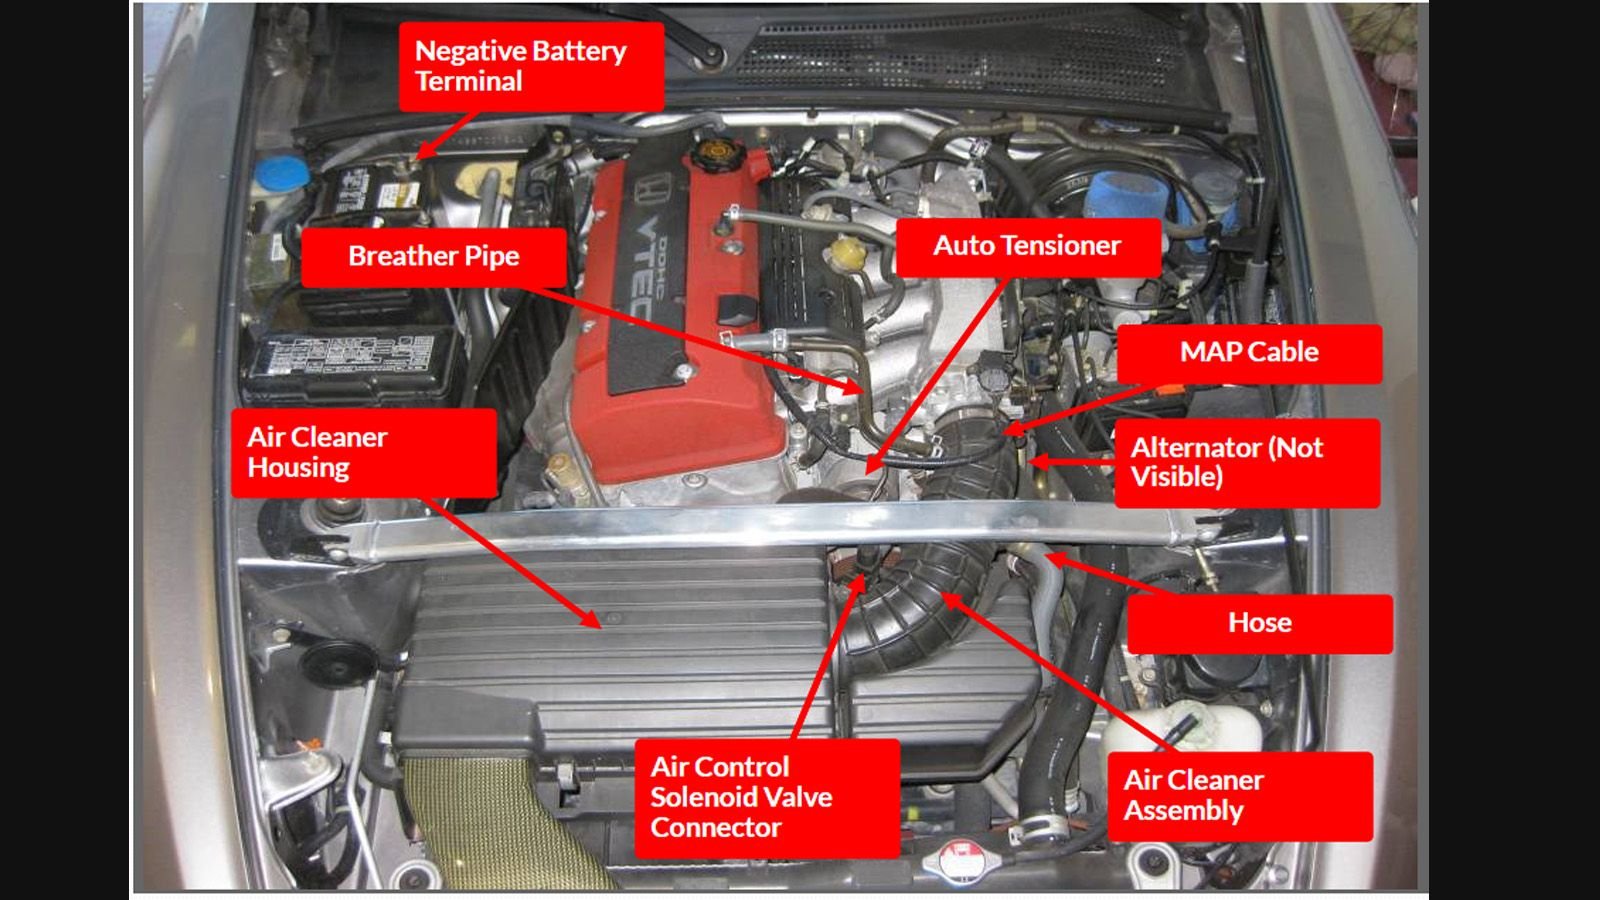
The alternator is located near the front of your engine. It works with your S2000'ss battery to generate power for your electrical components. Dim lights and flickering gauges are a sign of failing alternator. When the alternator completely fails, your car could start slowly or not start at all.
Required Tools
- Metric socket wrenches and/or Metric wrenches
- Phillips head screwdriver
- Breaker bar or a pipe for removing tight bolts (Optional)
Required Parts
- Alternator for a 1999-2005 (Honda Part #31100-PCX-J02): Denso (OEM), DB Electrical, Quality-Built, AC Delco, Remy
- Or, alternator for a 2006-2009 (Honda Part #31100-PZX-003): Premier Gear, Quality-Built, AC Delco, Remy
Step 1 - Remove Negative Battery Cable
First off, unhook the negative battery terminal to avoid any electrical safety issues. If you are still working with a factory radio unit then make sure you know the anti-theft codes for the radio.
>>Join the conversation about changing the alternator in an AP1 S2000 right here in S2Ki.com.
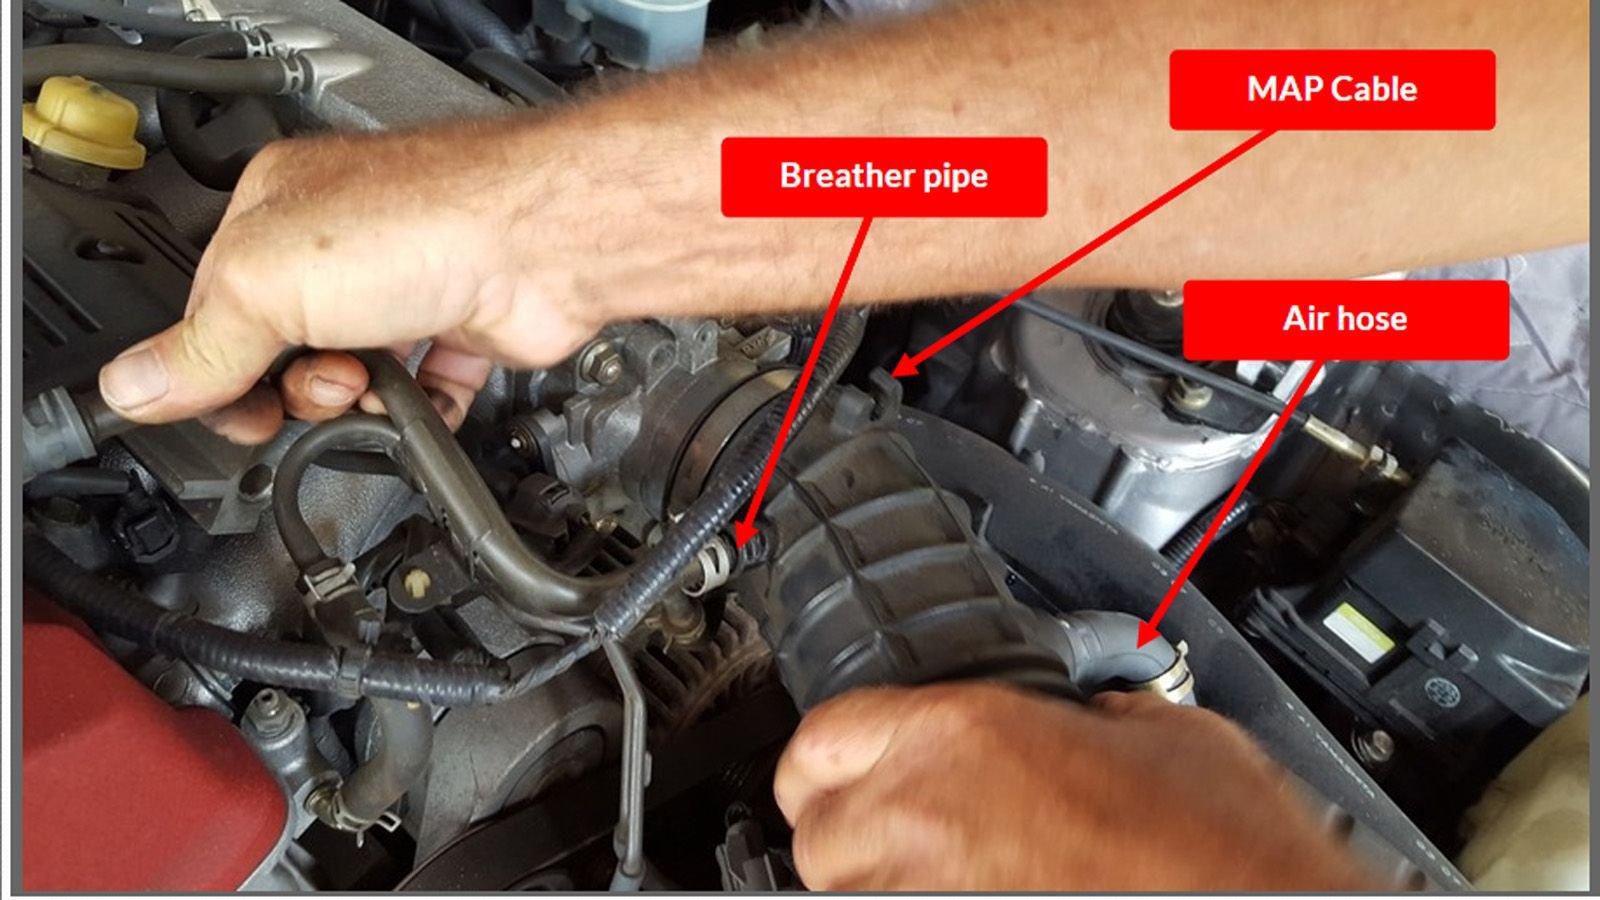
Step 2 - Air Cleaner Assembly Clamps
The air cleaner assembly needs to be moved or straight up removed for this job. Go ahead and start loosening the clamps that hold the air cleaner assembly in place. Then disconnect the air hose, breather pipe, and cable from the air cleaner assembly.
>>Join the conversation about changing the alternator in an AP1 S2000 right here in S2Ki.com.
Step 3 - Remove Air Cleaner Housing
Now undo all six of the latches that hold the air cleaner housing cover to the box and then remove the cover.
>>Join the conversation about changing the alternator in an AP1 S2000 right here in S2Ki.com.
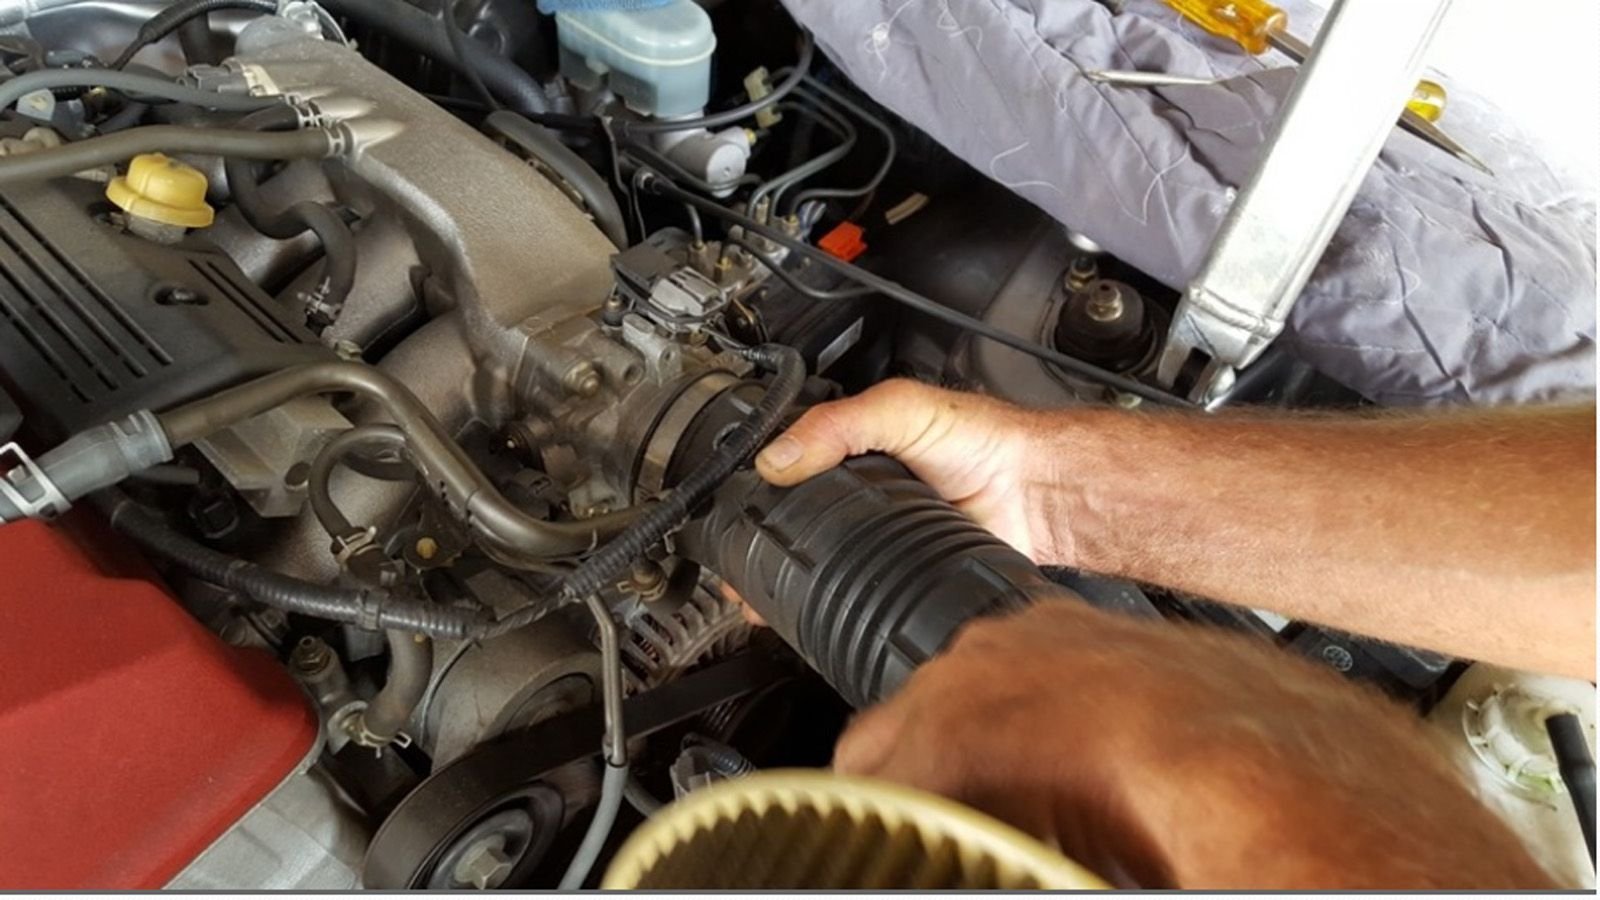
Step 4 - Move or Remove Air Cleaner Assembly
You should now be able to grab and twist the air cleaner assembly to put it to the side. Or, if you so choose, you can remove it completely from the bay.
>>Join the conversation about changing the alternator in an AP1 S2000 right here in S2Ki.com.
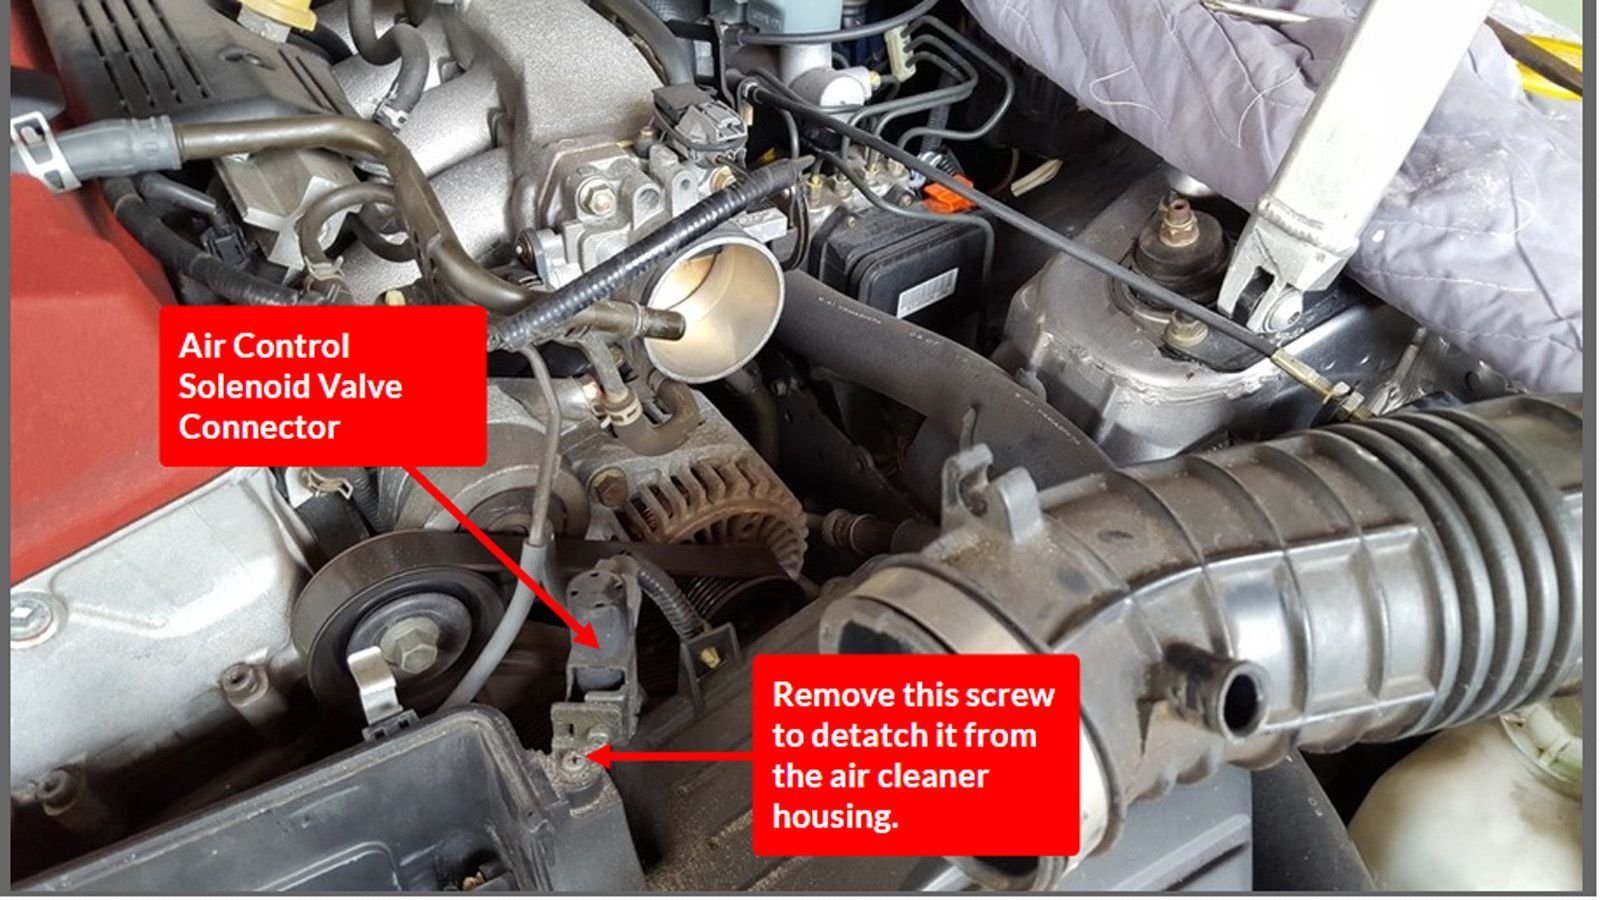
Step 5 - Disconnect Air Control Solenoid
Now you are free to disconnect the air control solenoid valve connector from the air cleaner housing.
>>Join the conversation about changing the alternator in an AP1 S2000 right here in S2Ki.com.
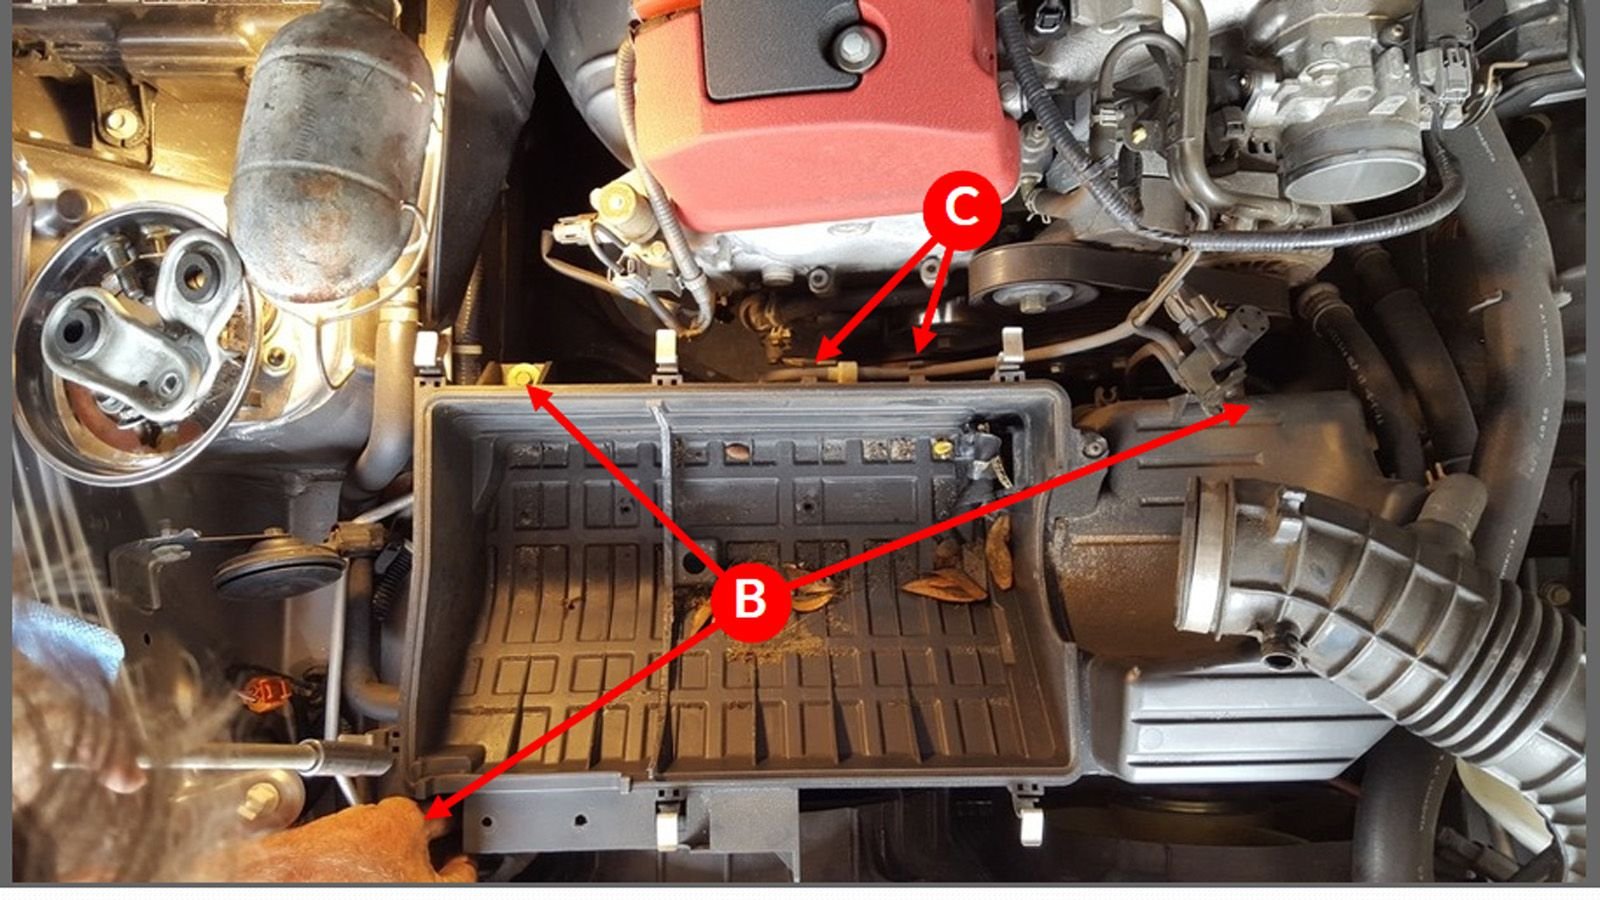
Step 6 - Remove Bolts and Clamps
There are three bolts pointed out as B on the slide above and two clamp points marked as C. Undo the three bolts and detach the hose at the clamp points. Afterwards, you can remove the bottom tray of the air cleaner housing which will allow you to finally access the alternator.
>>Join the conversation about changing the alternator in an AP1 S2000 right here in S2Ki.com.
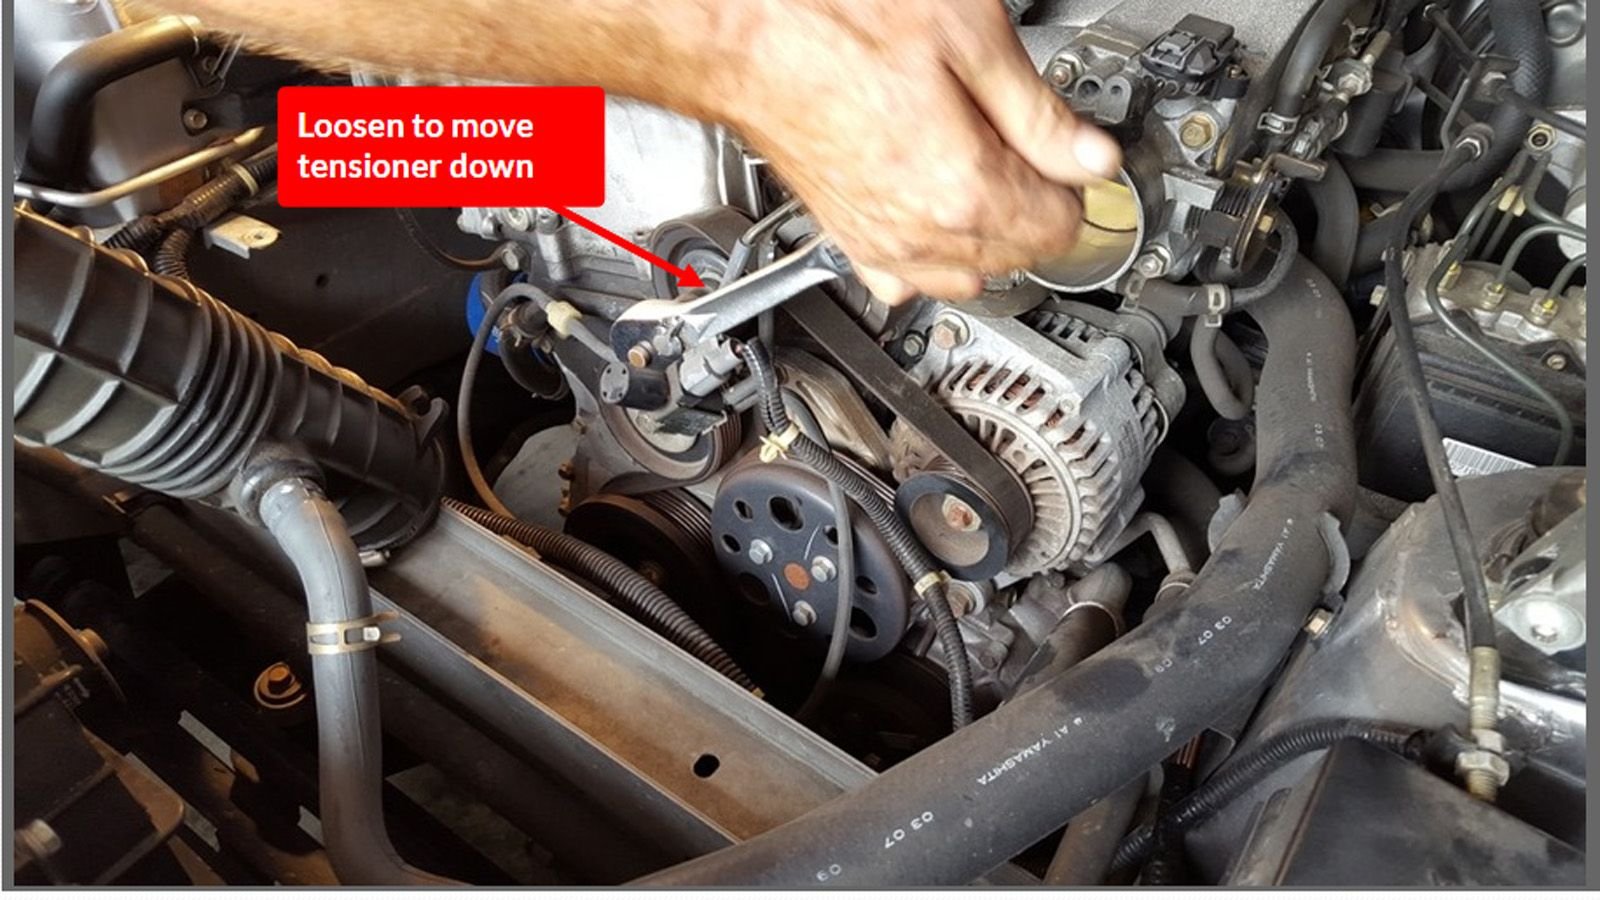
Step 7 - Loosen the Tensioner
See that tensioner on the picture? Get some slack on the belt by loosening the tensioner and then moving it down.
>>Join the conversation about changing the alternator in an AP1 S2000 right here in S2Ki.com.
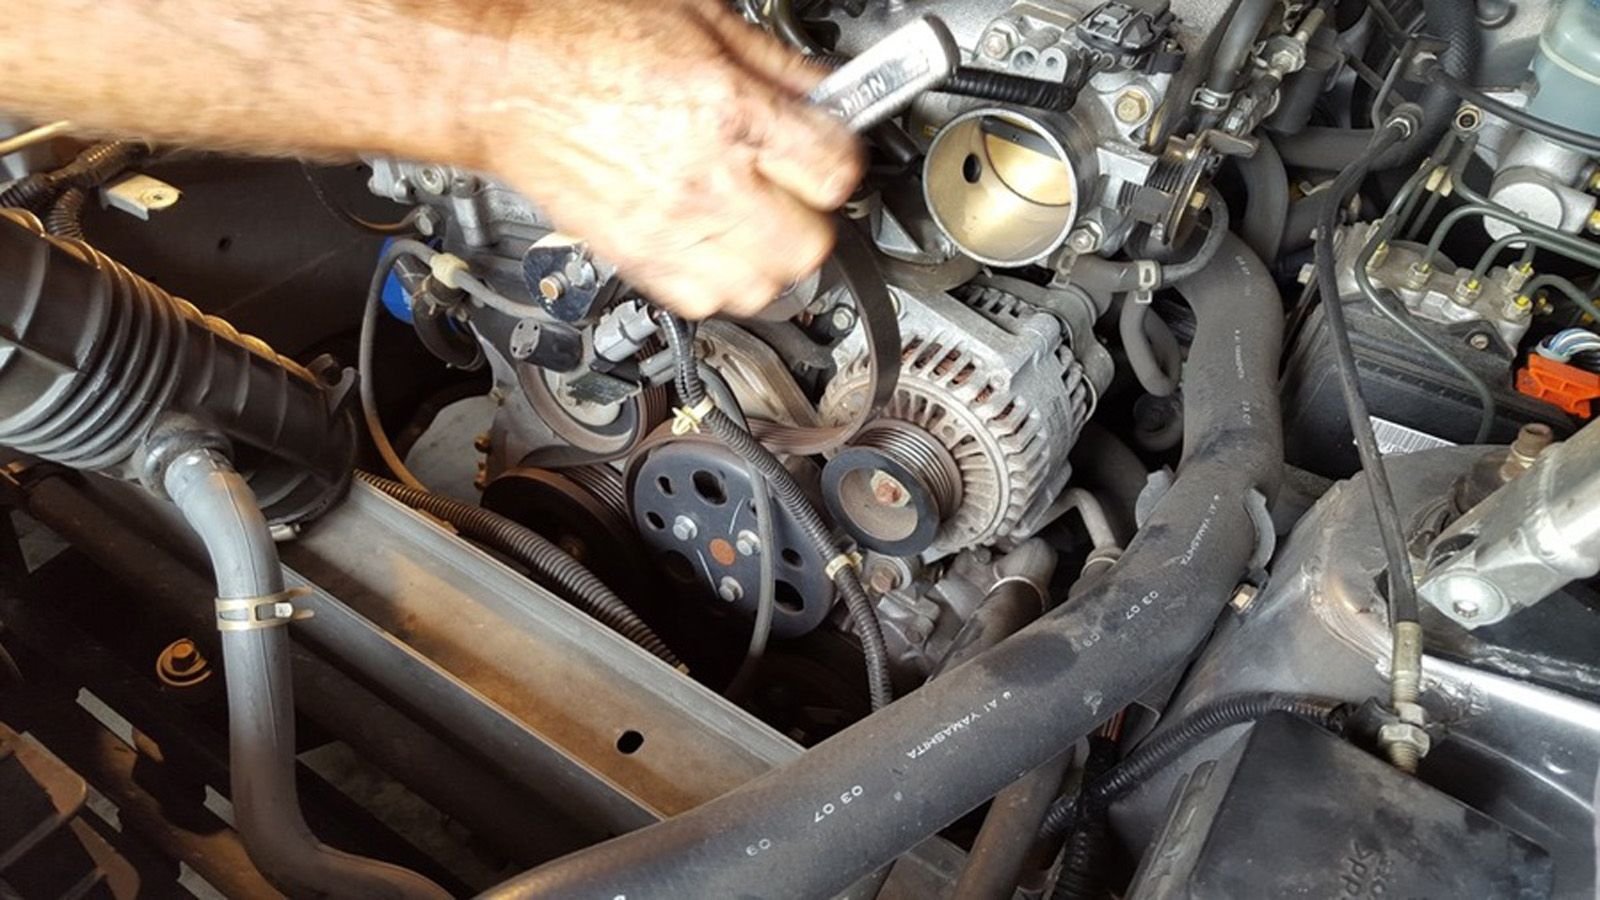
Step 8 - Remove Tensioner from Alternator
With the necessary slack on the belt go ahead and loop it off of the alternator.
>>Join the conversation about changing the alternator in an AP1 S2000 right here in S2Ki.com.
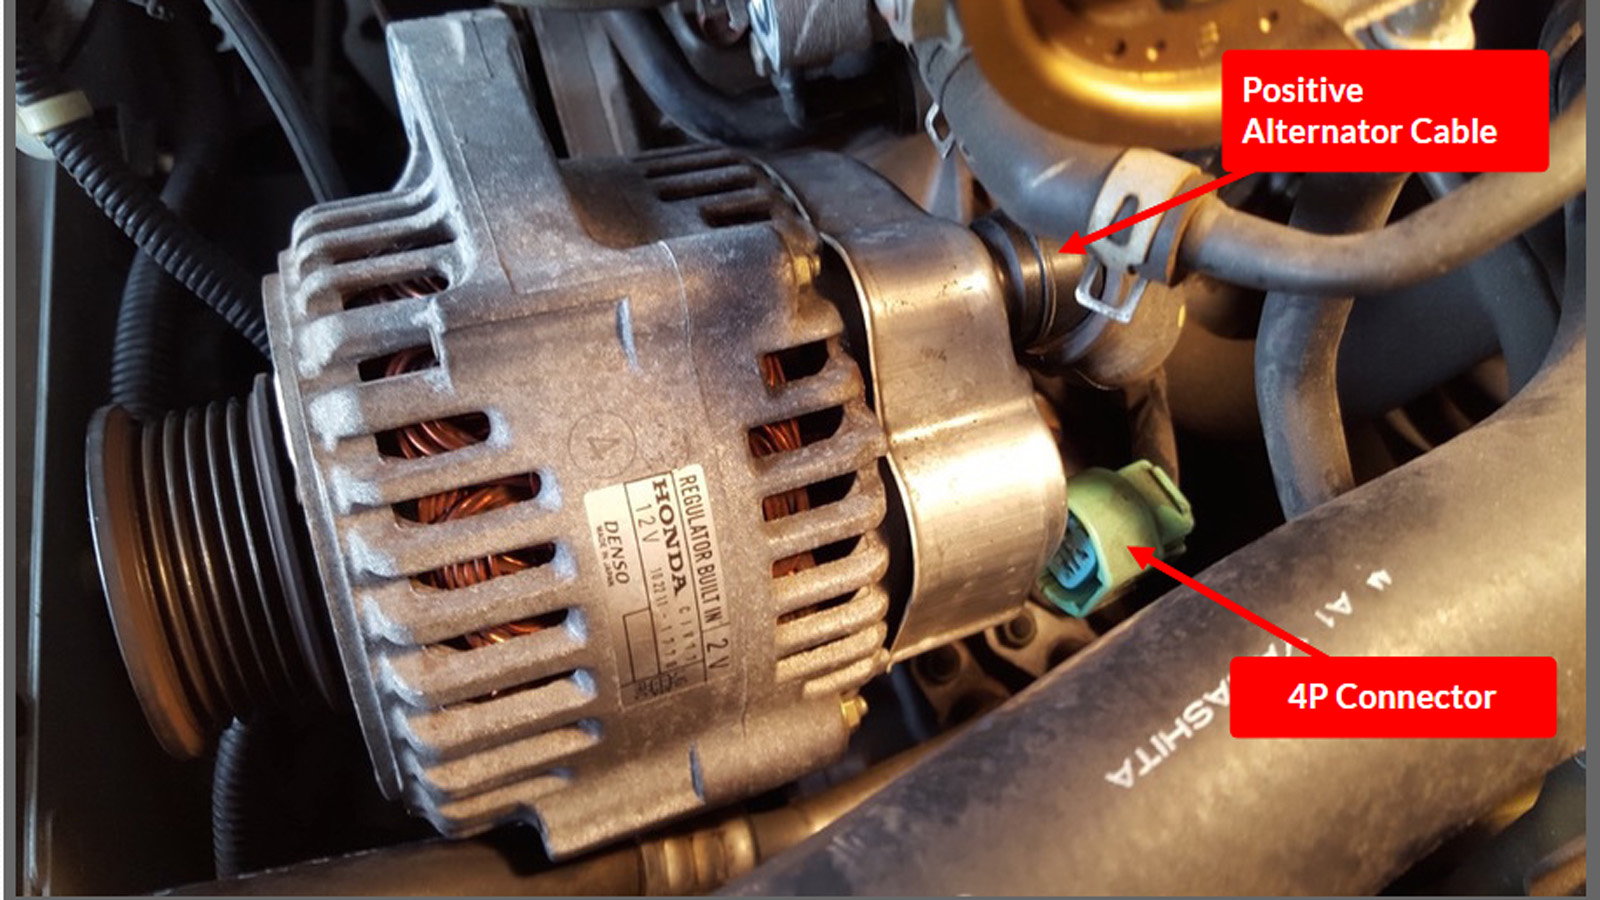
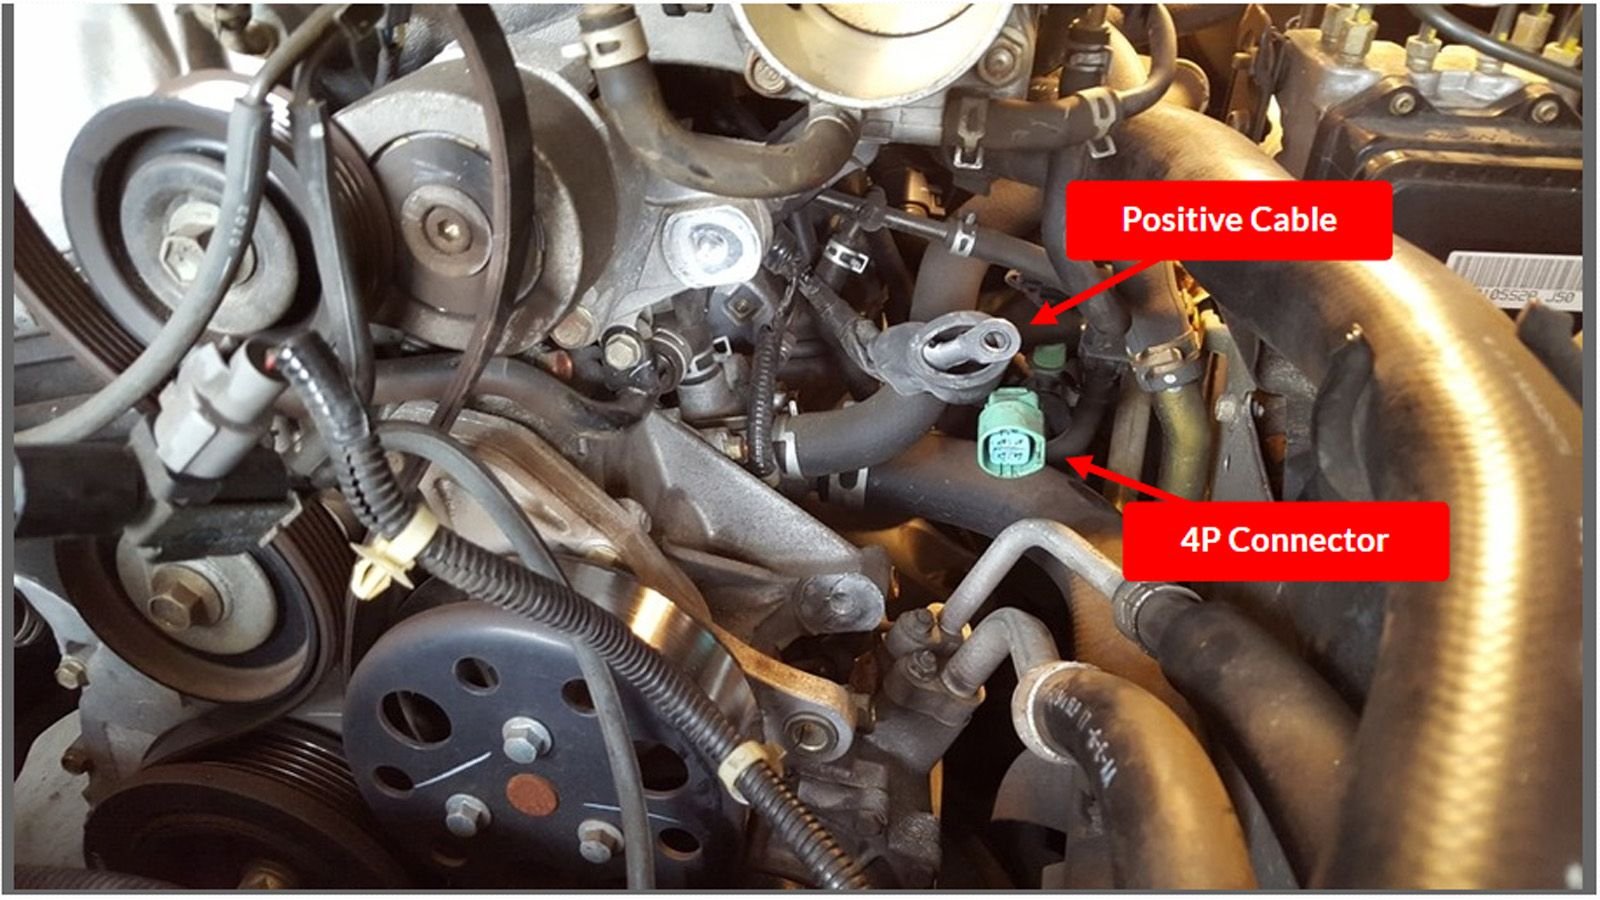
Step 9 - Remove Alternator Connector and Cable
Look to the back of the alternator and disconnect the 4P connector and the positive alternator cable. In order to remove the positive alternator cable first remove the boot on the cable and then undo the 8mm nut underneath, attaching the cable to the alternator.
>>Join the conversation about changing the alternator in an AP1 S2000 right here in S2Ki.com.
Step 10 - Continue removing Alternator Connectors
Here is another view of the connectors but with the alternator out of the way to give you a better look.
>>Join the conversation about changing the alternator in an AP1 S2000 right here in S2Ki.com.
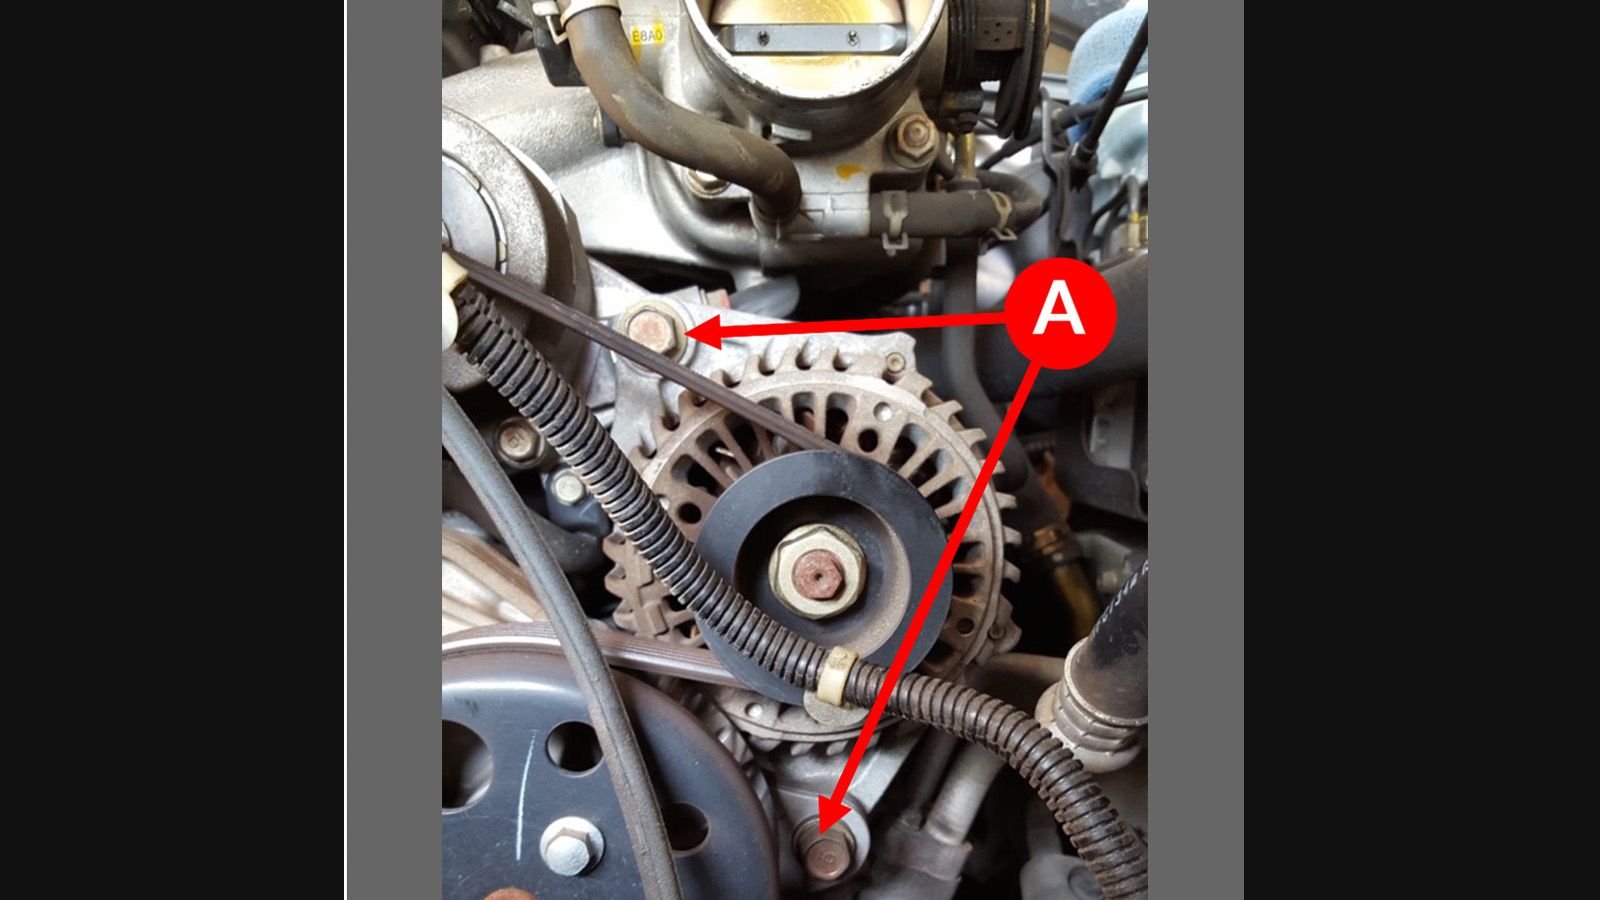
Step 11 - Remove Alternator Mounting Bolts
Finally, remove the alternator mounting bolts which will need a 10mm wrench. If this is the first time your alternator is being worked on then you'll probably need a breaker bar or a torque wrench to get the job done.
>>Join the conversation about changing the alternator in an AP1 S2000 right here in S2Ki.com.
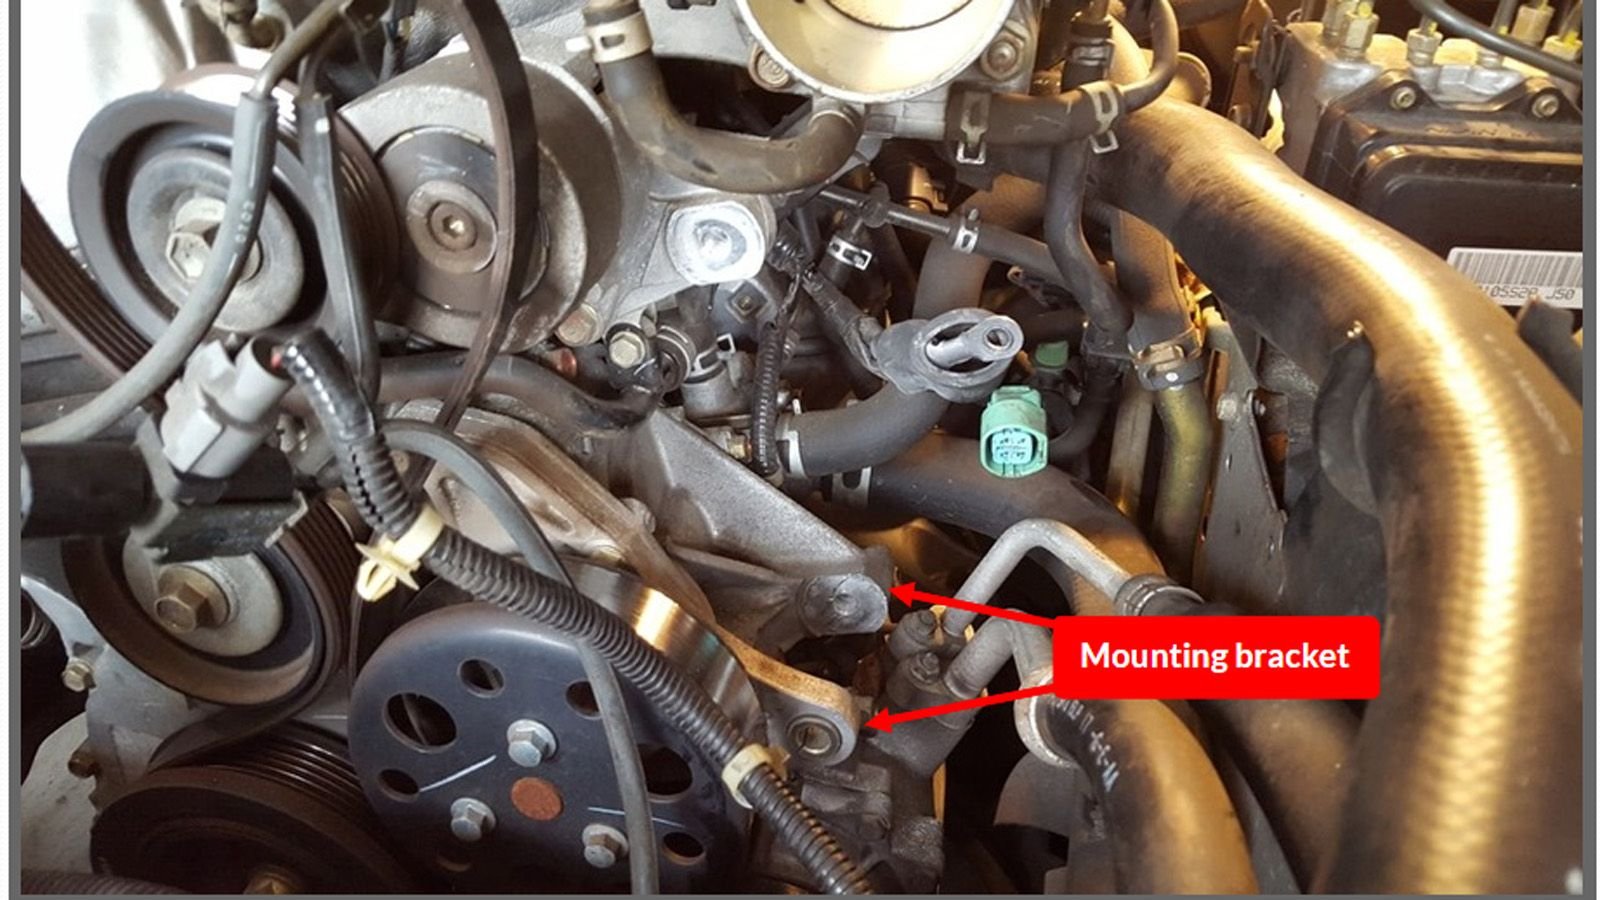
Step 12 - Remove Alternator
You are now free to remove the alternator after working the unit back and forth in a gentle sawing motion to free it from the mounting bracket.
Now install your new alternator and just do the reverse of the removal to get everything back together again.
>>Join the conversation about changing the alternator in an AP1 S2000 right here in S2Ki.com.