Installing a Robbins Top for Your Convertible - Part One, The Removal
In the first of a two-part guide on how to remove your old convertible top and install a new Robbins top, we dug back into the S2Ki forum archives for this comprehensive step-by-step guide written by forum member Cyclon36. Part One will show you how to remove your old top. Part Two will show you how to install the new one.


Cyclon36 has your back (er, top)
Back in 2006, S2KI forum member Cyclon36 put together a how-to guide on installing a brand new Robbins top on your S2000. His instructions and images were extremely comprehensive and appreciated by forum members. Twelve years later, we are bringing it back for anyone who may have missed it. A lot can happen to your S2000 over twelve years and it seems probable that a few of you have been dying to swap out your convertible top for a new one. So, without further adieu, here's an encore republishing of Cyclon36's project, in slideshow format.
From Cyclon36:
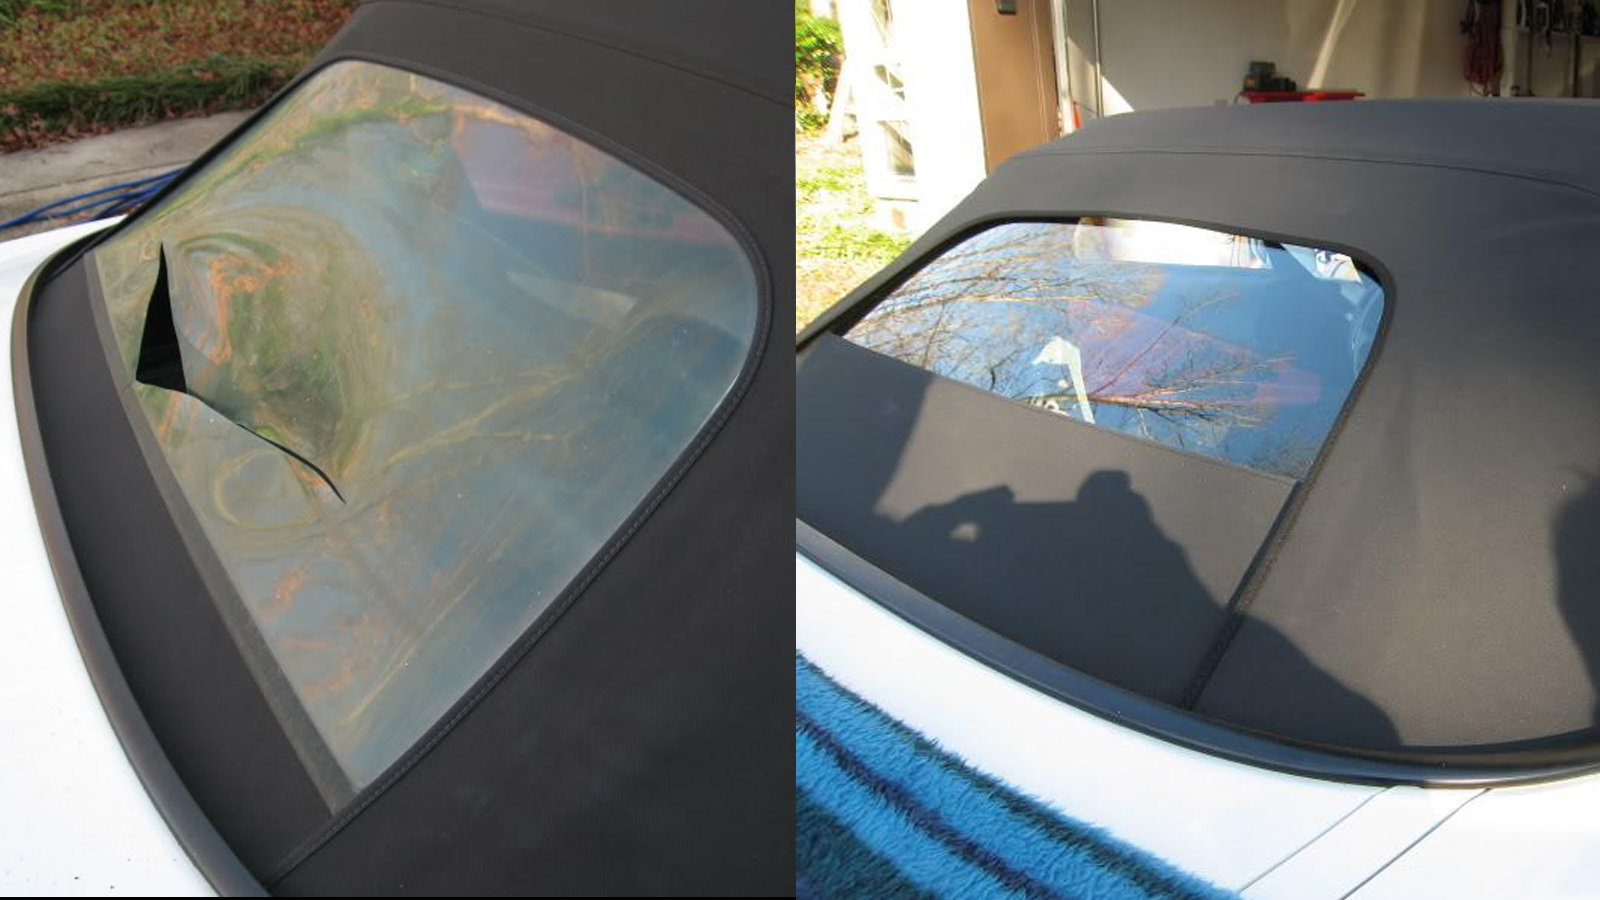
A few weeks ago, a local S2k owner stops by with a rather big problem. For those that don't know, it's very bad to raise and lower the convertible top with a plastic rear window when it's cold outside (below 50 °F or so). The plastic gets very brittle and will crack right in half. That's pretty much what happened with this owner.
There were two options for him at this point, buy a Honda OEM replacement for $800 or so, or get a Robbins replacement top with a glass rear window for a lot less. I offered to do the install at a discounted price since this was going to help me out as well. The following is a complete walk-through. Some tiny details are missing due to forgetting to take a picture every time I took something apart, but anybody that's fairly handy can handle this. I will say that while it is possible to do the install completely on your own, it is a HUGE lifesaver to have one extra person even if they have no mechanical skills at all.
Tools needed
Let's start by taking inventory of what tools you will need to complete the job:
- Phillips screwdriver
- Flathead screwdriver
- 10mm, 12mm, &14mm sockets and ratchets with extension
- 10 and 14mm wrenches
- Rivet gun
- Small sideways ratcheting screwdriver (usually $10 at home depot)
- Drill and bits
- Razor/knife
The Robbins kit includes some rivets, silver buttons, new elastic straps and retrofit straps if you're doing an upgrade to a glass back. I recommend having extra 1/4" long 4mm ( 5/32") rivets handy.
You will not be able to use the silver button snaps that Robbins includes unless you have a snap setting tool. An alternative would be to use rivets and washers to do the job. Recently I stumbled upon these from McMaster car though:
Part# 99024A327
http://www.mcmaster.com/#catalog/115/3064/=1r8xeg
They work perfectly for attaching the rain rail and are easy to install with a flathead. A pack of 25 will be more than enough.
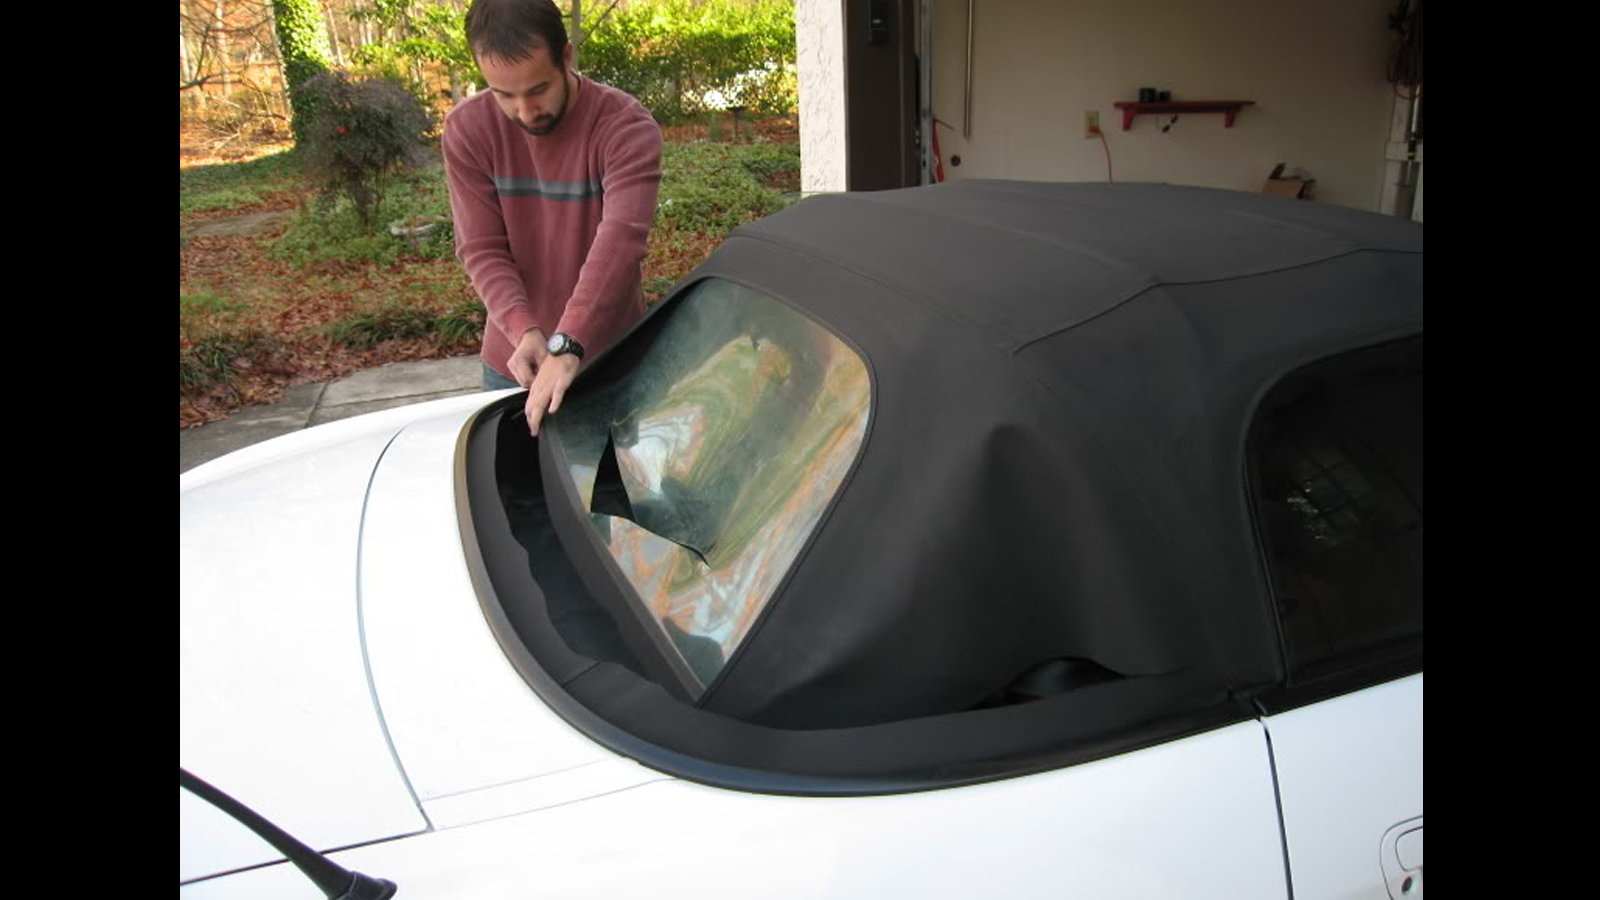
Step 1 - Remove the old top
Now that you have all the tools we can start removing the old top. No need to be fancy here. Just grab a razor and slice it up.
Step 2 - Cutting the top
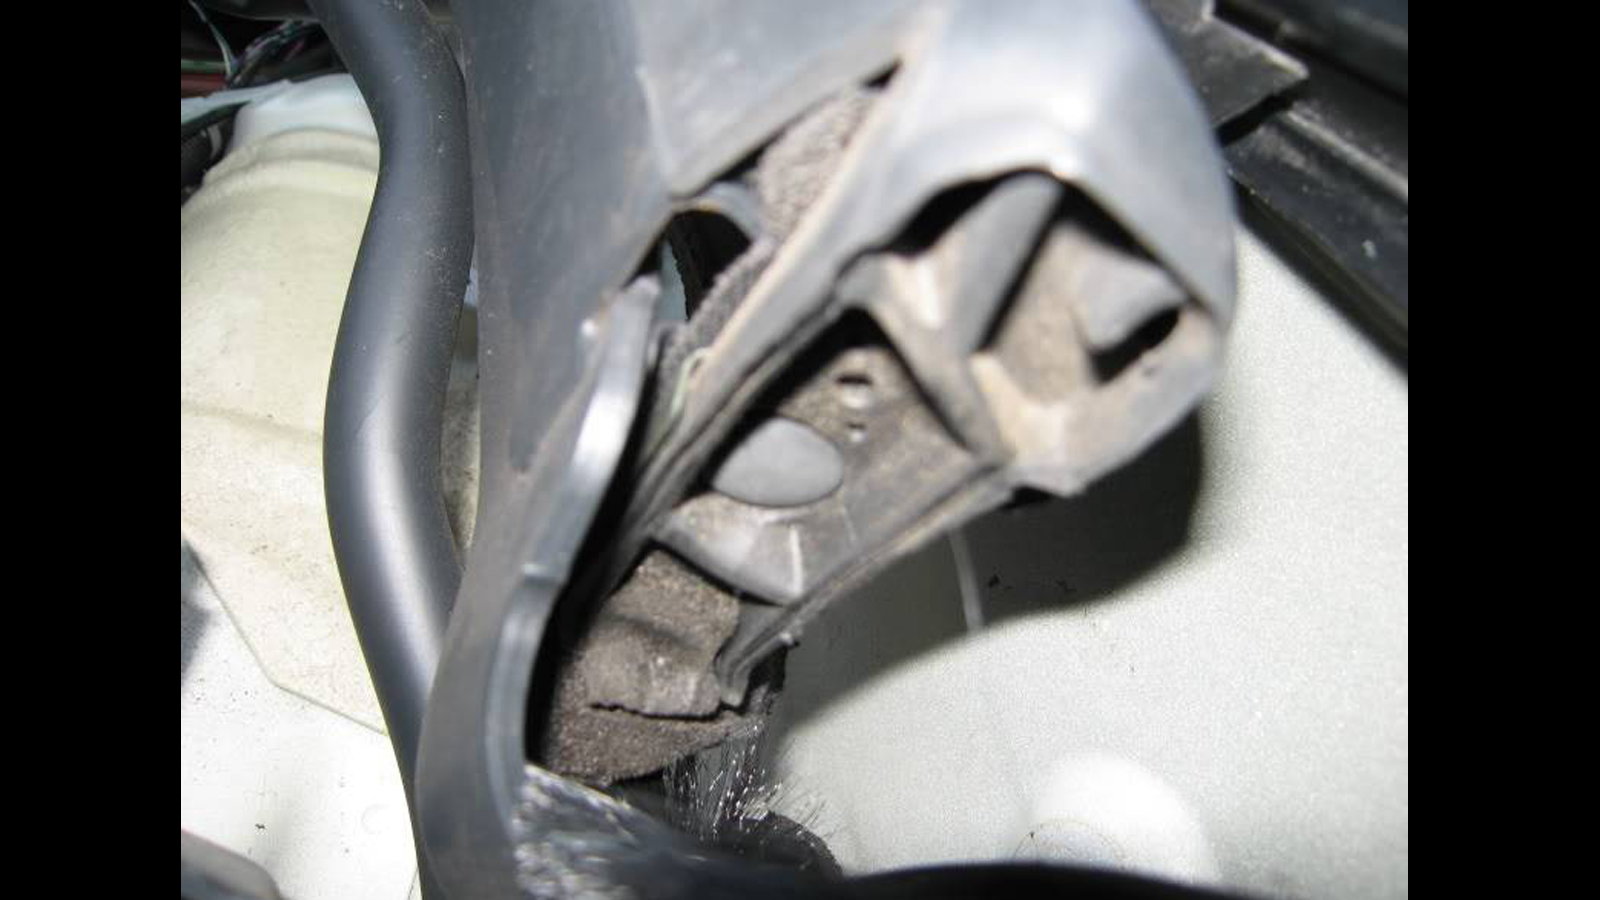
While cutting behind the window, you'll notice the plastic guard behind the top. This is the cause for the small wear holes that are common on our cars. You can see the start of the wear hole in the photo above.
Step 3 - Preventing future wear marks
Before putting the new top on, I cut two squares of material off the old top and put them between this plastic guard and the new top with adhesive. This can be done to existing tops as well and is highly recommended to prevent these wear marks from forming.
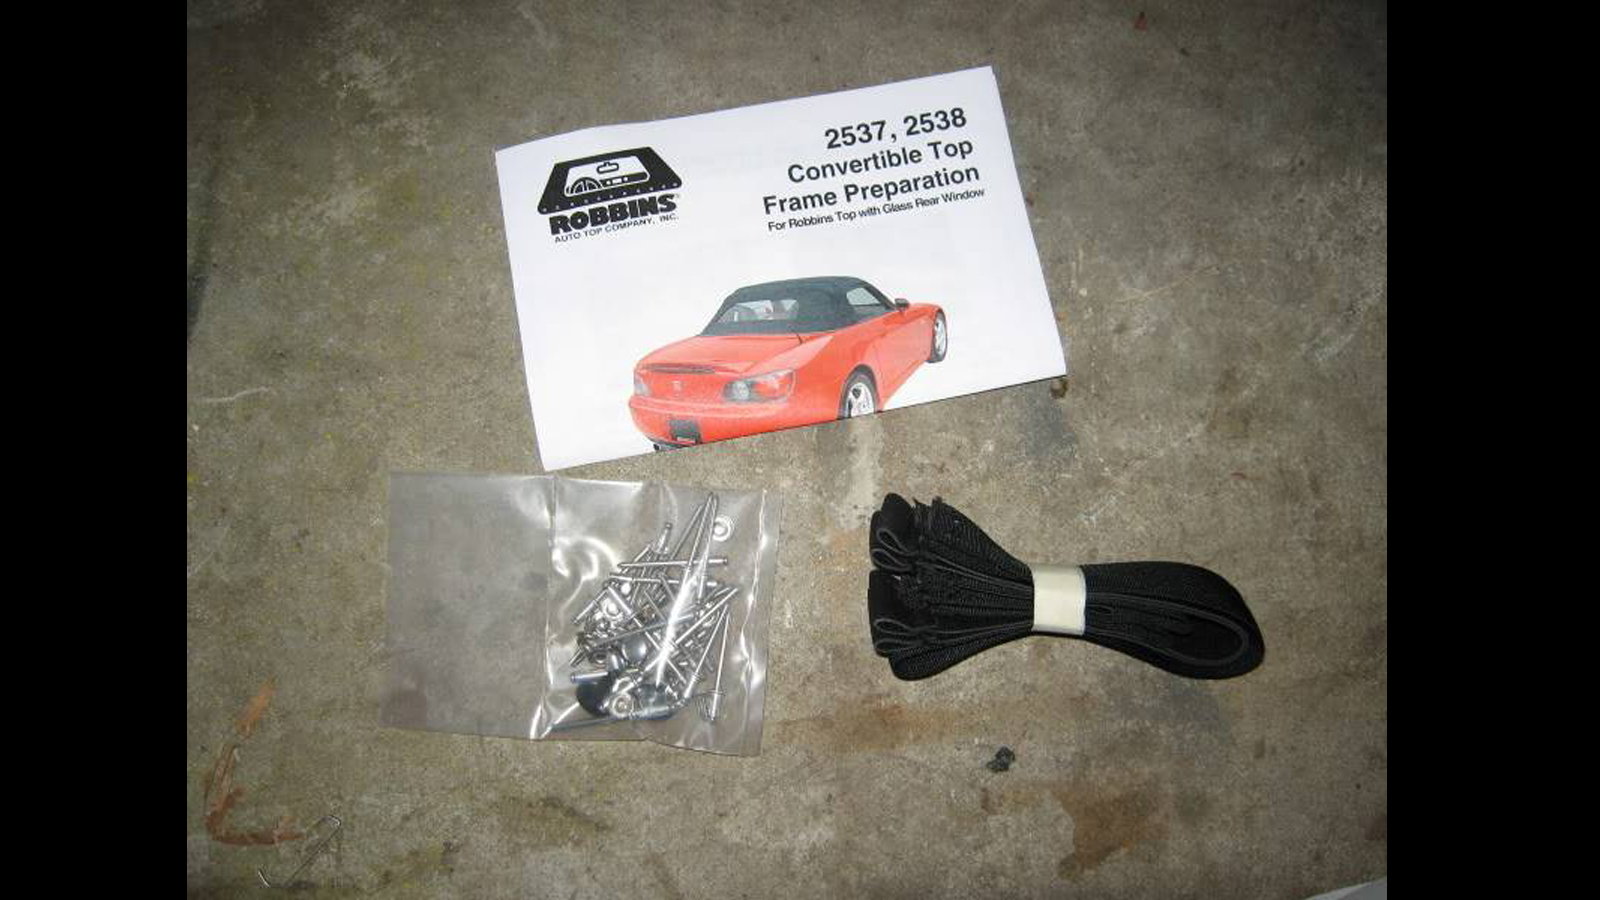
After the top is cut off (still no hardware removed), I unpacked the new Robbins top with glass window.
Step 4 - Unpacking the new Robbins top
The Robbins top comes with retrofit straps for the 00-01 frames to accepts a glass window and a bunch of rivets and some buttons that won't get used.
Step 5 - Remove the seats
Next, I remove the seats. 12mm bolts on the front and 14mm for the rear. Very simple.
Step 6 - Remove center console
Be careful when taking out the driver's seat as there is a grey harness that needs to be disconnected from the bottom. This is your seatbelt sensor. Also, if you have an OEM alarm, your alarm module will be on the underside of the driver's seat and will need to be disconnected as well.
Next, remove the center console. The console is held on completely with clips and should be taken off by prying the rear up with your fingers and moving forward slowly. Take off the shift knob first of course. When the console is unsnapped, disconnect the two harnesses for the emergency lights and top switch.
Step 7 - Remove roof switch and vent panels
After the console is removed, take the roof switch off by removing the two screws and reconnect it to the harness. You'll need to work the roof while doing the install and the whole console will just get in the way.
Start removing the two vent panels under the roll hoops. This is done by unsnapping the cover on the two hooks and unscrewing them using either a Phillips or 8mm socket. The panels then just unsnap out of their location.
Step 8 - Remove door moldings and rear jamb trim
Go ahead and remove the two screws at the base of the roll hoop trim while you're at this step. Make sure to keep inventory of all the screws. Most of them are identical. Pay attention to the ones that are smaller or different so you know where they go back later.
Remove the two door sill moldings. They snap off. It's easiest to start towards the front of the car and move backwards. They are held on with three white clips and interlock with the surrounding trim. Then, remove the rear door jamb trim. This is done by removing one phillips screw at the base and pulling the panel forward. The is one white clip towards the inside edge of the panel.
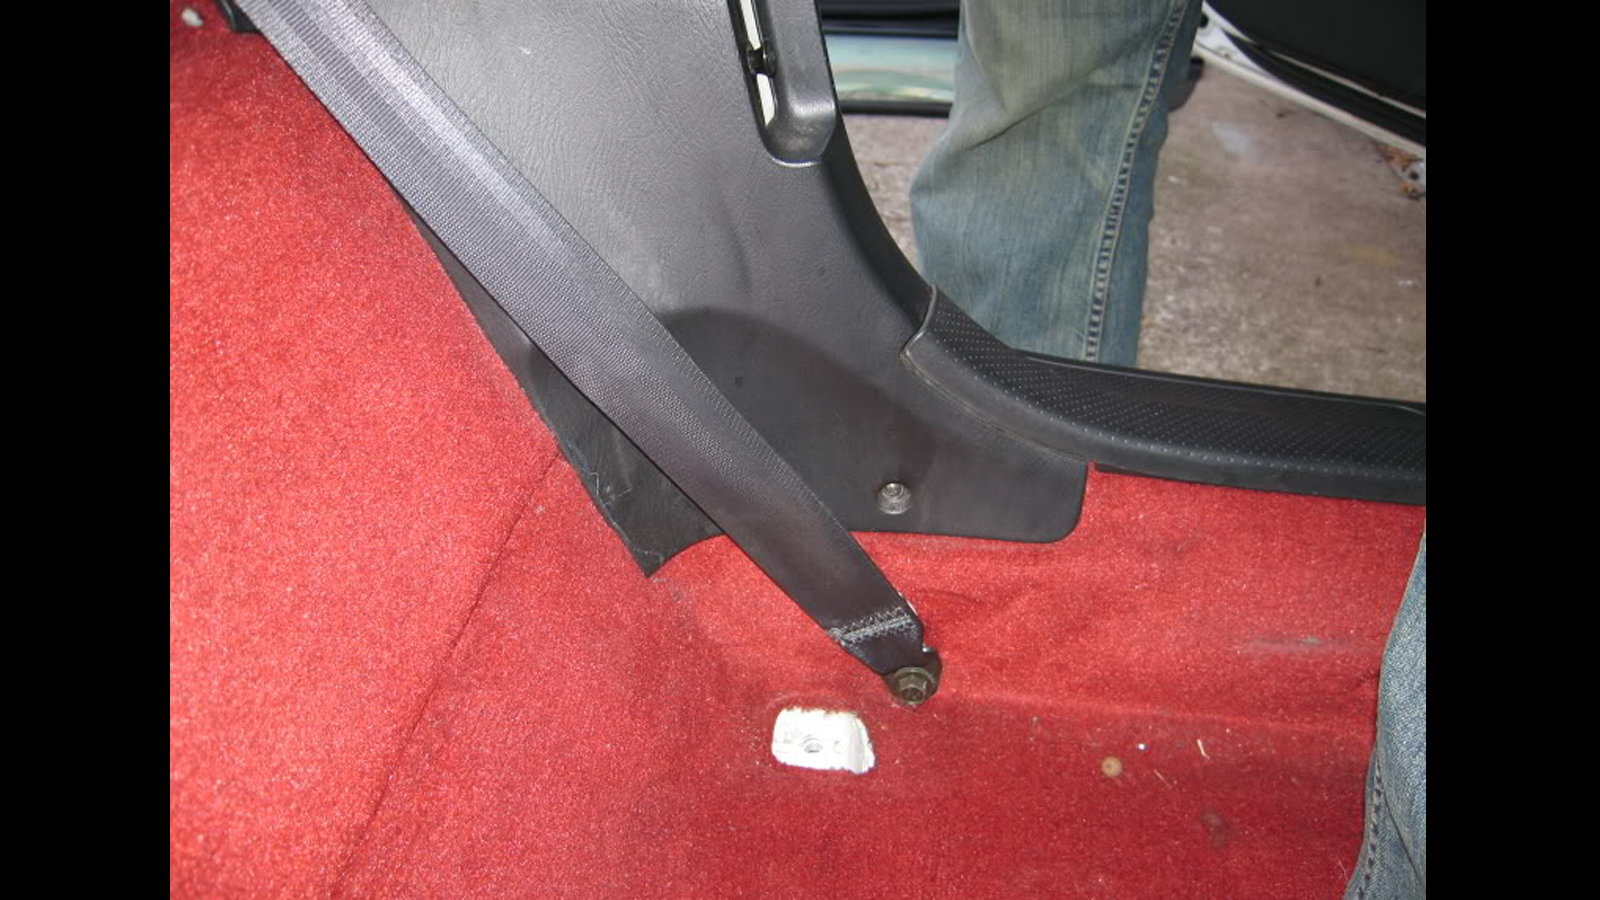
Step 9 - Remove seat belt bolt
While you're there, go ahead and unbolt the seatbelt bolt on the bottom. Remove the screw joining the roll hoop trim and side trim on either side. The tiny screw in the corner of the roll hoop can stay in place as the two halves of the roll hoop do not separate:
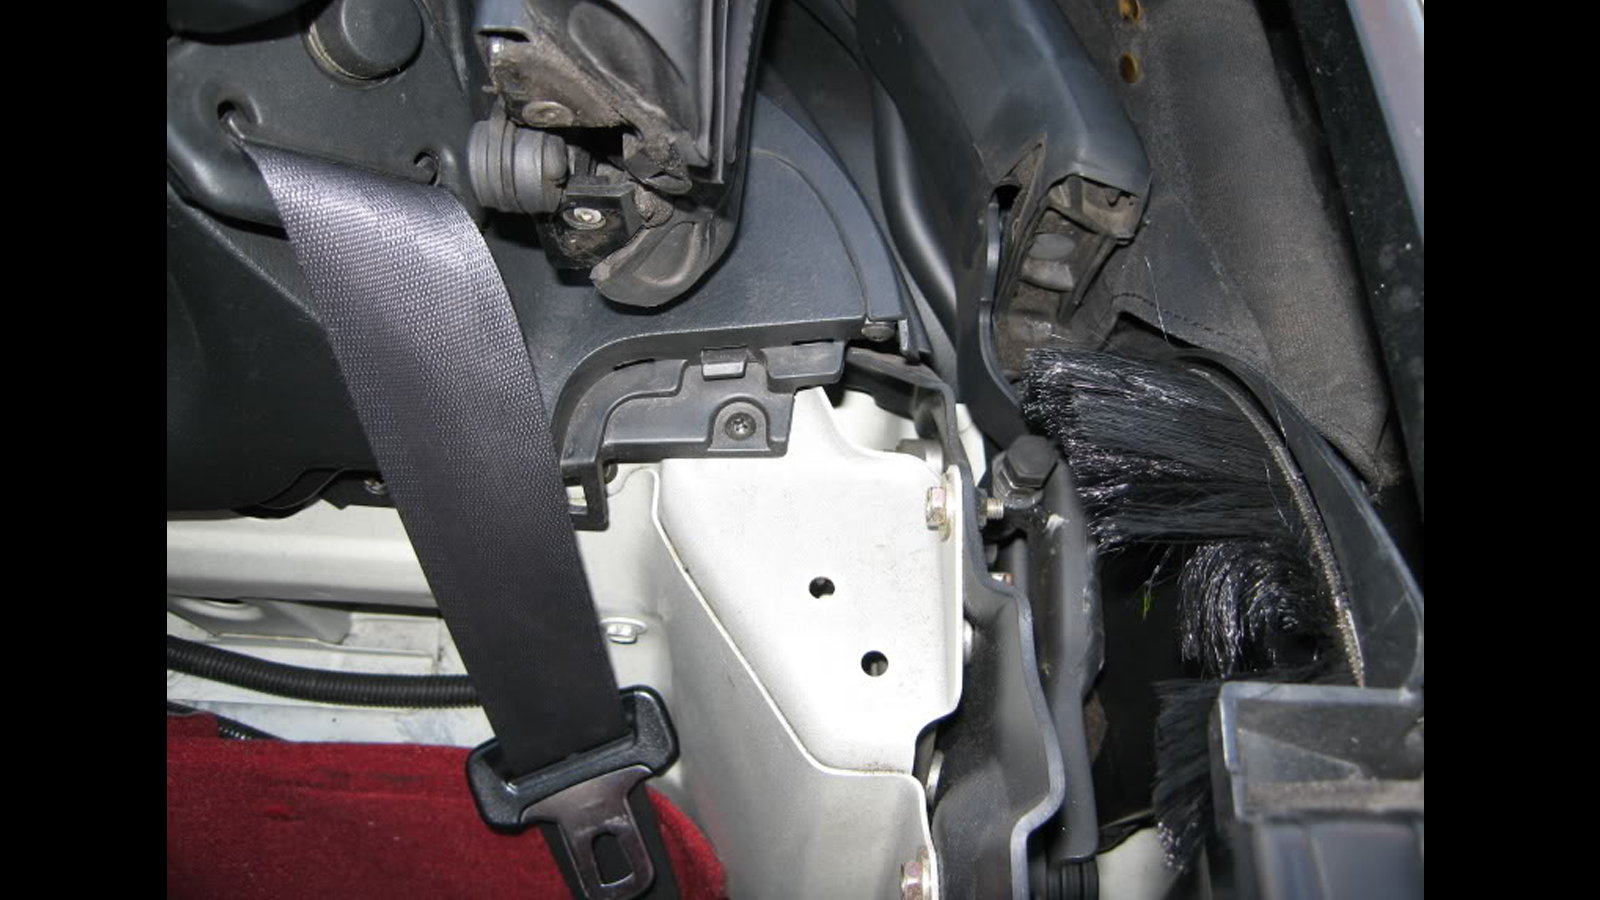
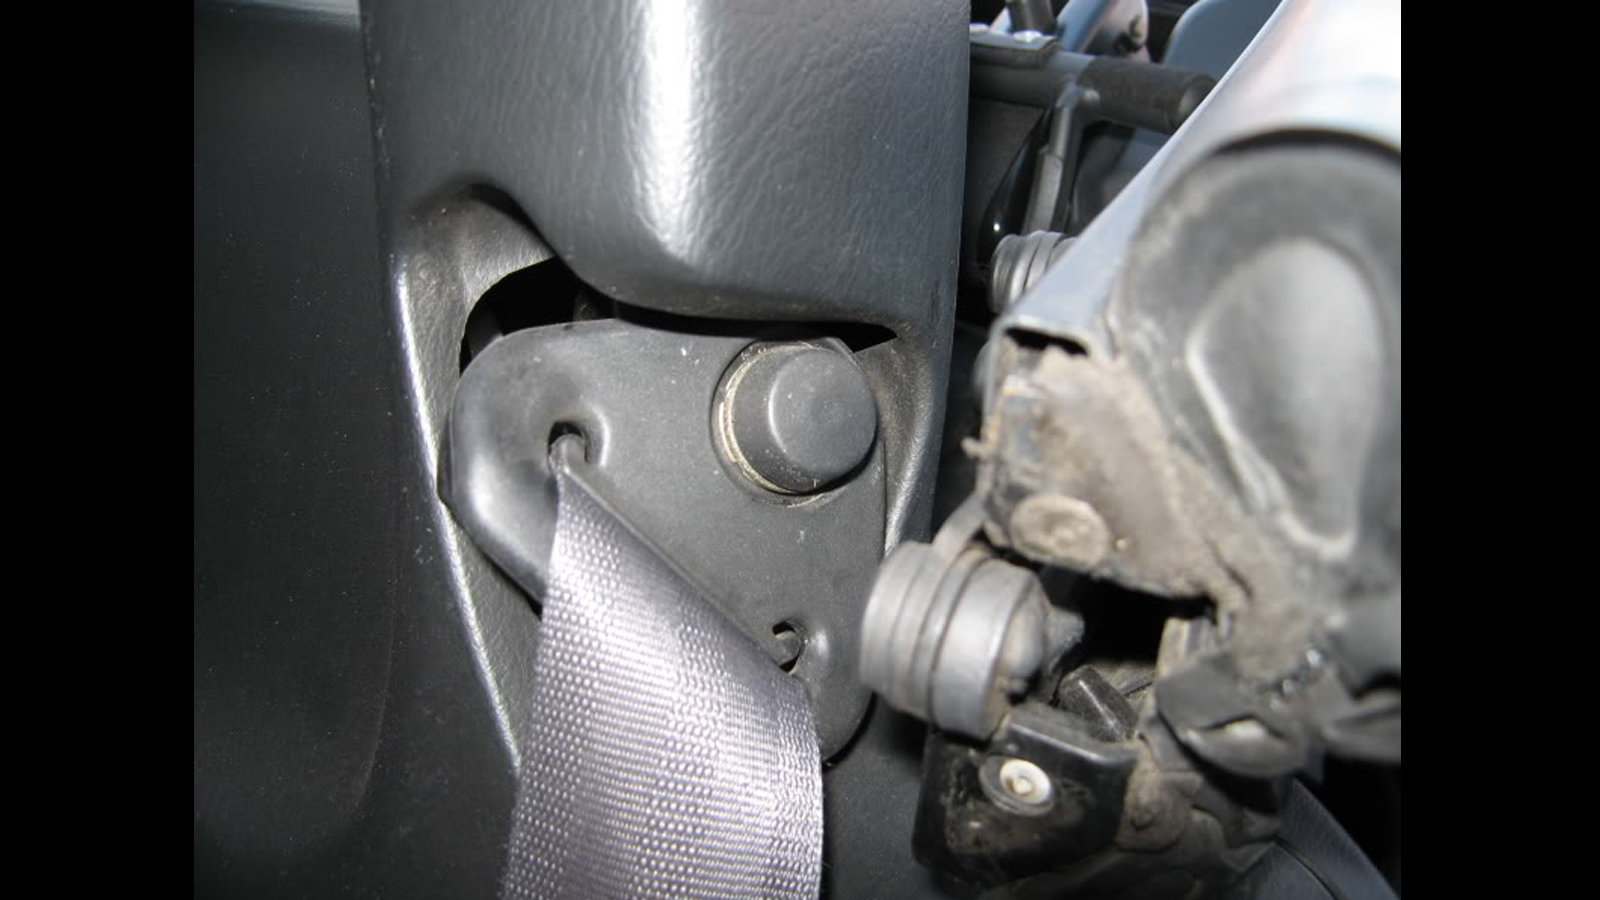
Step 10 - Remove seat belt holder
Remove the seat belt holder on the roll hoop. Take the black rubber plug off first and unbolt the assembly.
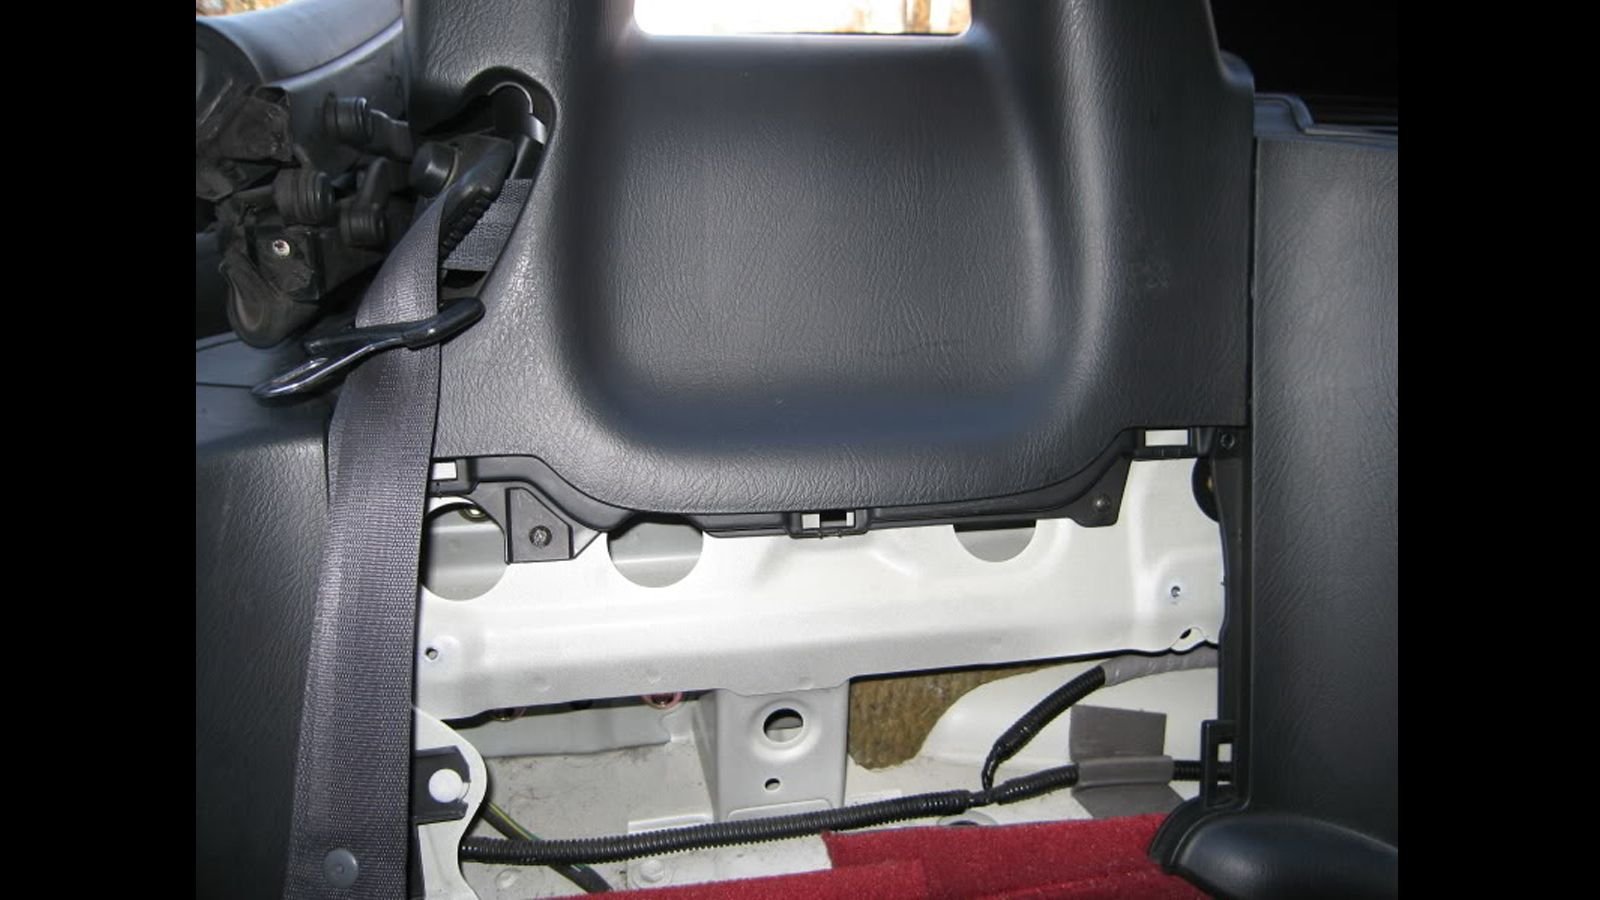
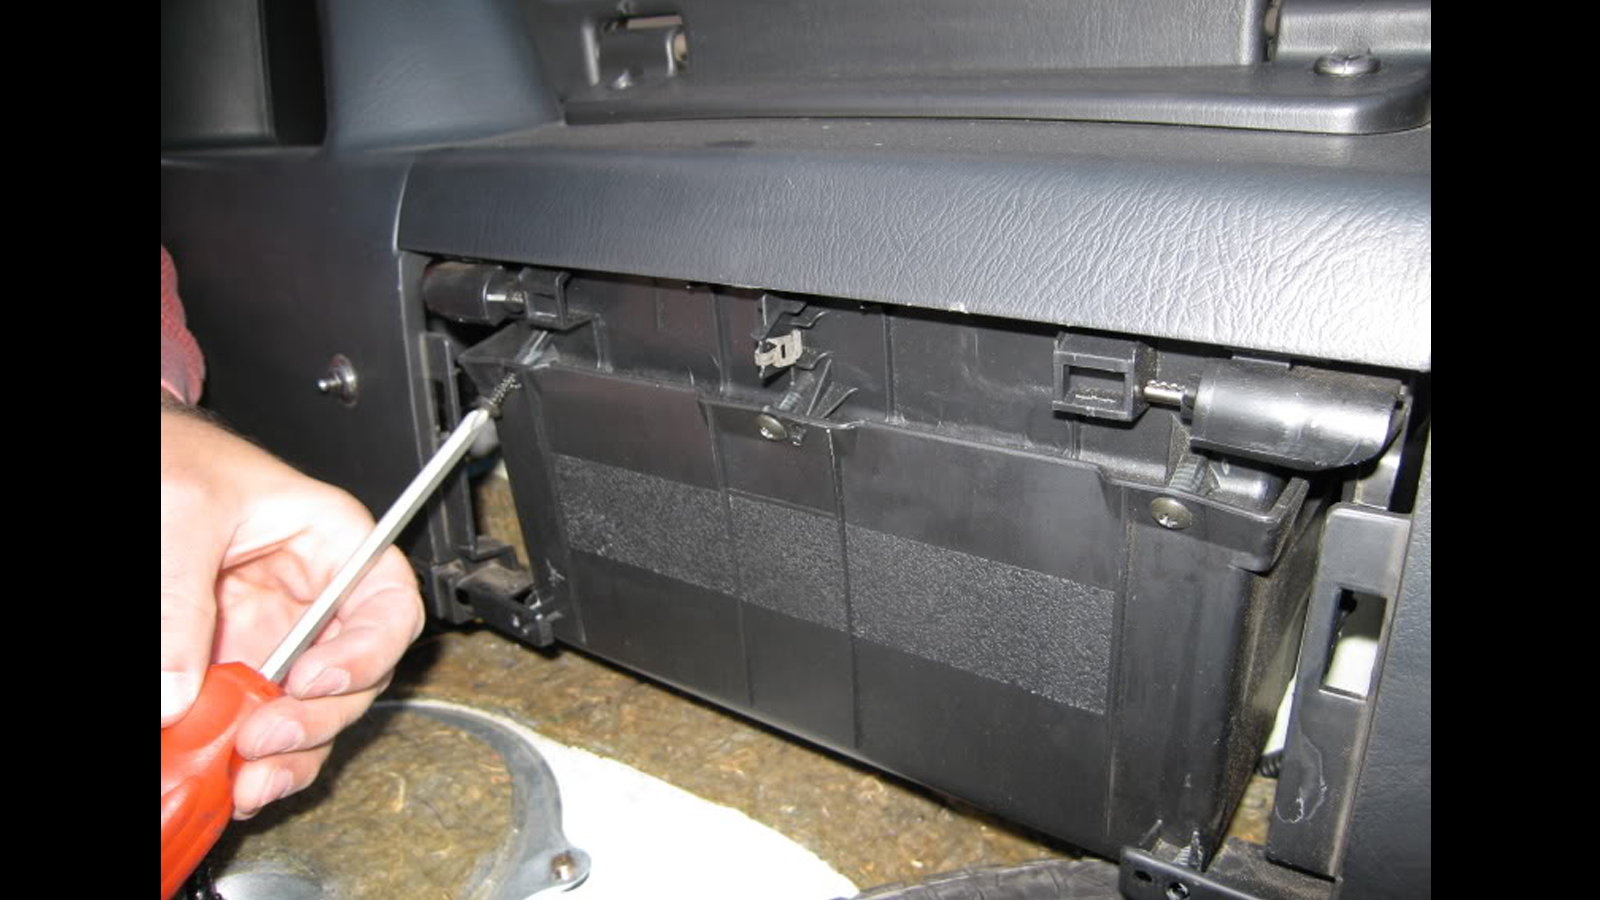
Step 11 - Remove storage compartment bolts
Remove the four screws at the top of the storage compartment and one on the inside of the lower compartment and the two at the bottom of the unit.
Step 12 - Remove rear roll bar trim
Remove the plastic plugs that hold the rear tray in and parts of the rear roll bar trim. These are removed by pressing the center inward and pulling the button out.
Step 13 - Remove rear tray
The rear tray can then be removed by prying the rear upwards using a flathead screwdriver.
Step 14 - Remove surrounding trim
Once the tray is removed, start removing the screws holding the surrounding trim and any other plastic plugs. Some have to be removed by unscrewing the center instead of pushing it in.
Step 15 - Remove console storage screws
Also, remove the two screws securing the center panel on the back of the console storage.
Step 16 - Remove storage compartment screws
Then, remove the screws attaching the storage compartment to the storage door and housing.
Step 17 - Remove center console and roll hoops
Now you can remove the whole center storage section. You'll need to reach behind and unplug the harness for the trunk release and the cigarette lighter. The console should then just lift away
Start removing the roll hoops. This is done by removing the eight bolts on each one. Four bolts hold on each side of the hoop. THE ROLL HOOPS DO NOT SEPARATE IN HALF!!! YOU WILL BREAK THEM IF YOU FORCE THEM APART. There is also some debate on whether or not you can complete the installation without removing these. The left and right rain channel trim is below these hoops. You cannot install the top with those in place and you cannot remove those with the roll hoops in. Removing and reinstalling 8 bolts on each side is far less of a pain than breaking parts and installing the top with these in the way.
Step 18 - Remove the seatbelts and rear top trim
The roll hoops should just lift out. Watch out for any extra screws that you might have missed. Also, remove the seatbelt through the hole in the hoop housing.
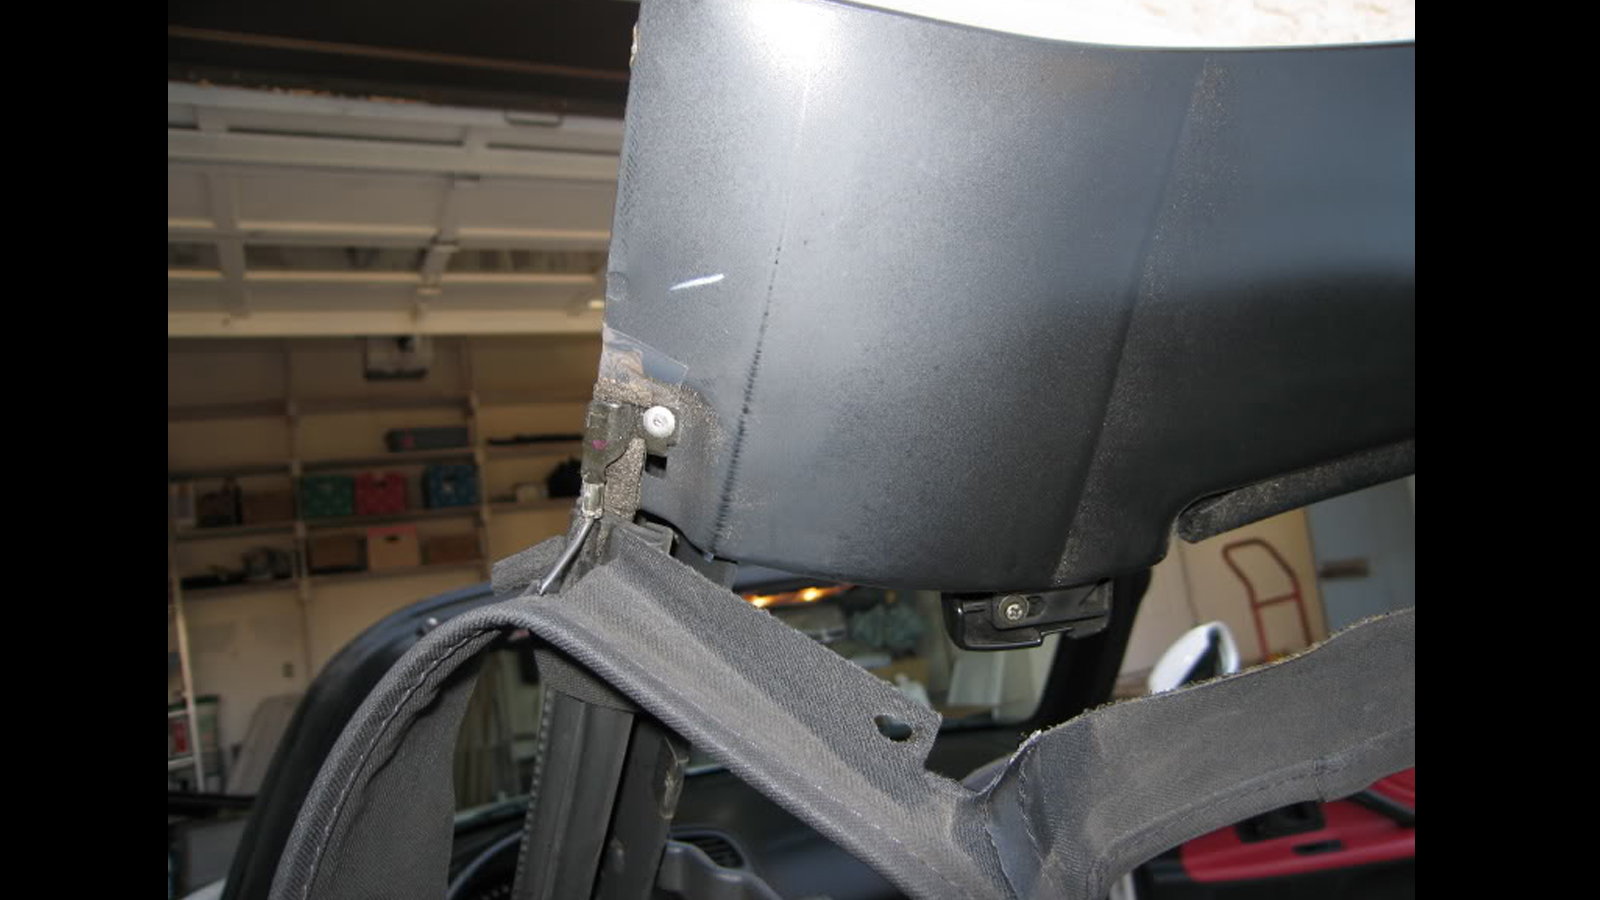
Next, remove the rear top trim by removing the nuts that hold on the three metal trim plates. Remember the orientation of the pieces for reassembly as it's easy to reinstall them upside down by mistake.
Step 19 - Remove rubber pieces
Remove the rubber water channel and place it on the side as you will reuse this. Remove the trim pieces on the top of the roof. You might need to fold the top back halfway. The rubber window trim will come out next. This just pulls off.
Step 20 - Remove plastic plug
The bottom piece is anchored on with a long plastic plug on the bottom side of the rubber piece (which is the round grey part in the center of the photo above). Make sure to remove this first before removing the bottom trim piece. Be extra careful when removing this plug. Use needle nose pliers to slowly wedge it out as it's easy to break.
Step 21 - Remove chrome screws and mounting plates
Once the window trim is removed, unscrew the chrome screws and mounting plates.
Step 22 - Removing old top from bottom of window trim
Then, focus back on the bottom section of the window trim area where the long plug was removed. There will be a metal plate holding the corner of the top material down. Remove the one screw holding this in and remove the one screw below the plate (most likely covered in foam and hard to see).
Step 23 - Peel away remaining material
Remember how the top is folded in this area as you'll have to duplicate the fold when installing the new top.
Start peeling away the remainder of the top material. Grind or drill out the rivet at the front of the top, and any other rivets that might hold the trim on. Be careful not to lose the pieces in your car as they will rattle later.
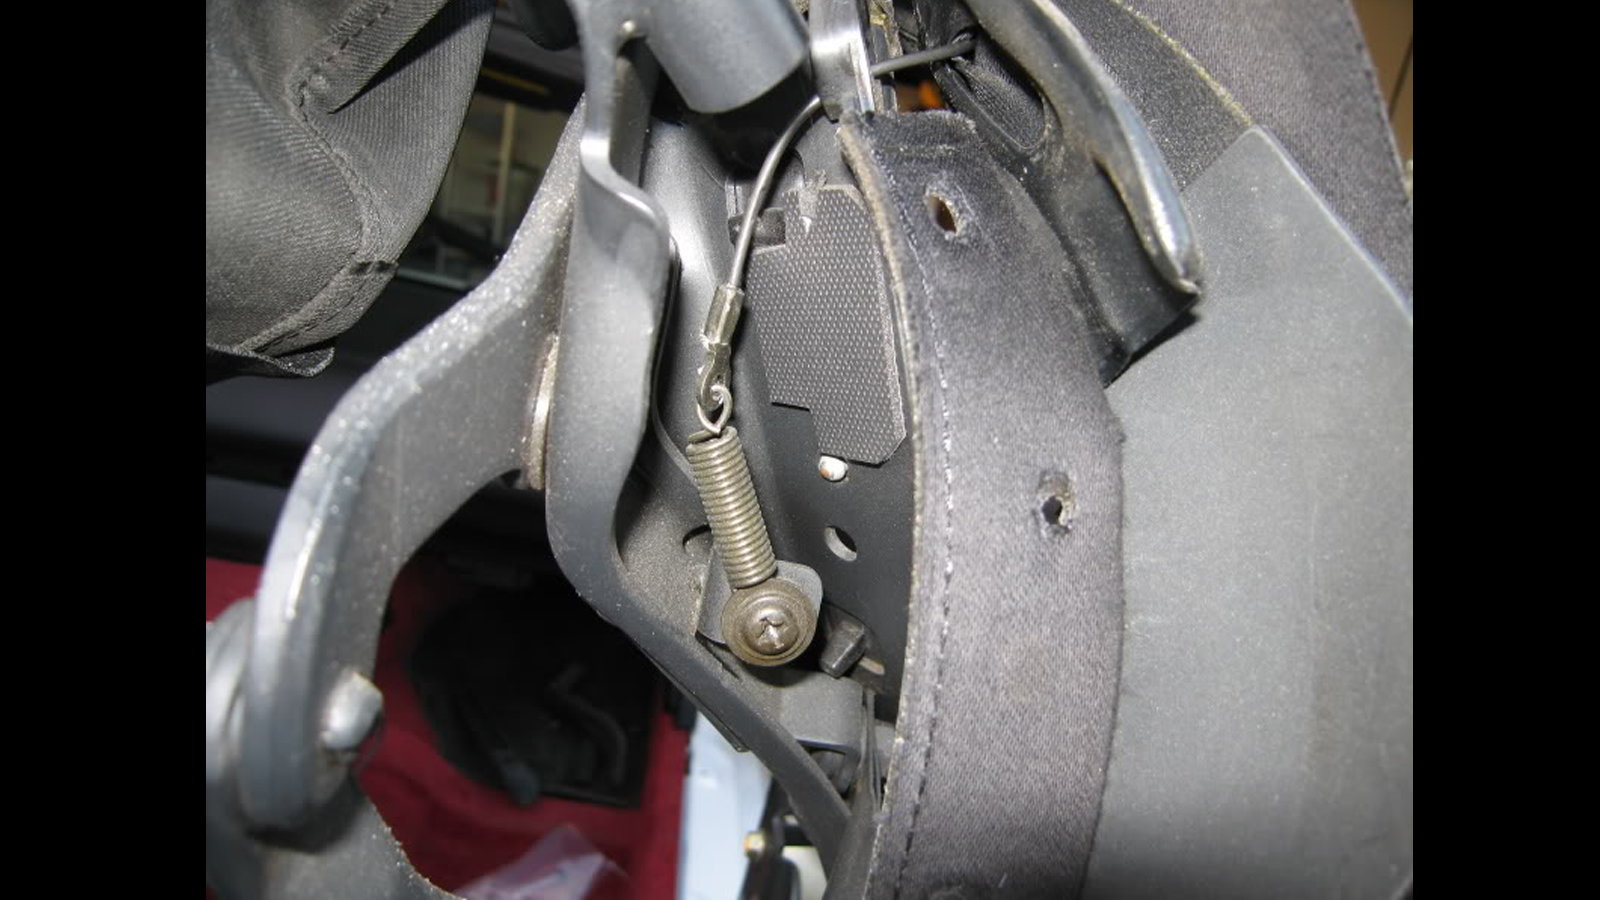
Step 24 - The final step
Pull the tension cable through the top and remove it by unscrewing the fat screw at the base of the spring holding the cable. (IMG:http://i3.photobucket.com/albums/y79/cyclon36/topinstall/IMG_2725.jpg). There should now be no remnants of the old top on your car.
Keep your eyes open for the Part 2, The Installation, coming soon to s2ki.com.