DIY, Spoon Sports rear diffuser install
 04-14-2009, 04:34 PM
#1
Registered User
Thread Starter

Join Date: Dec 2007
Posts: 1,992
Likes: 0
Received 0 Likes
on
0 Posts
yeah yeah I could have REALLY gone into detail but this will show most people the simple answers to the questions they keep asking.
You get zero instructions with it and a bag full of hardware.
So here goes nothing!
Oh there are 3 different brackets and 12 bolts total and a few washers.
Step 1, take it out of it's box or unwrap it from its bubble wrap and here is the long waited spoon rear diffuser!

Step 2, jack up it's ass end and get something nice to lay/work on
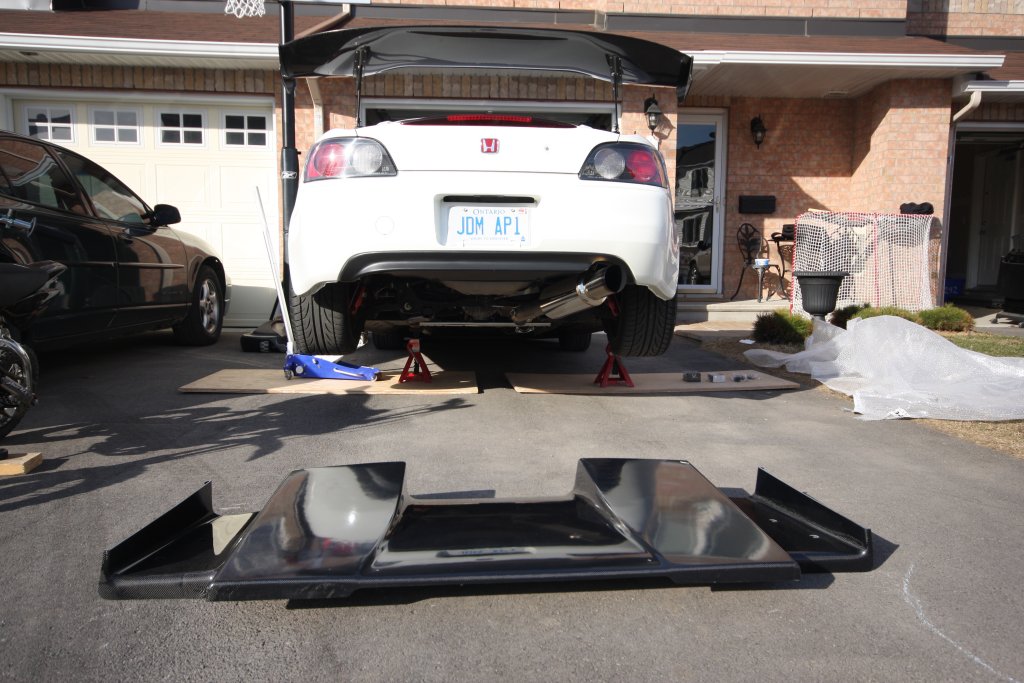
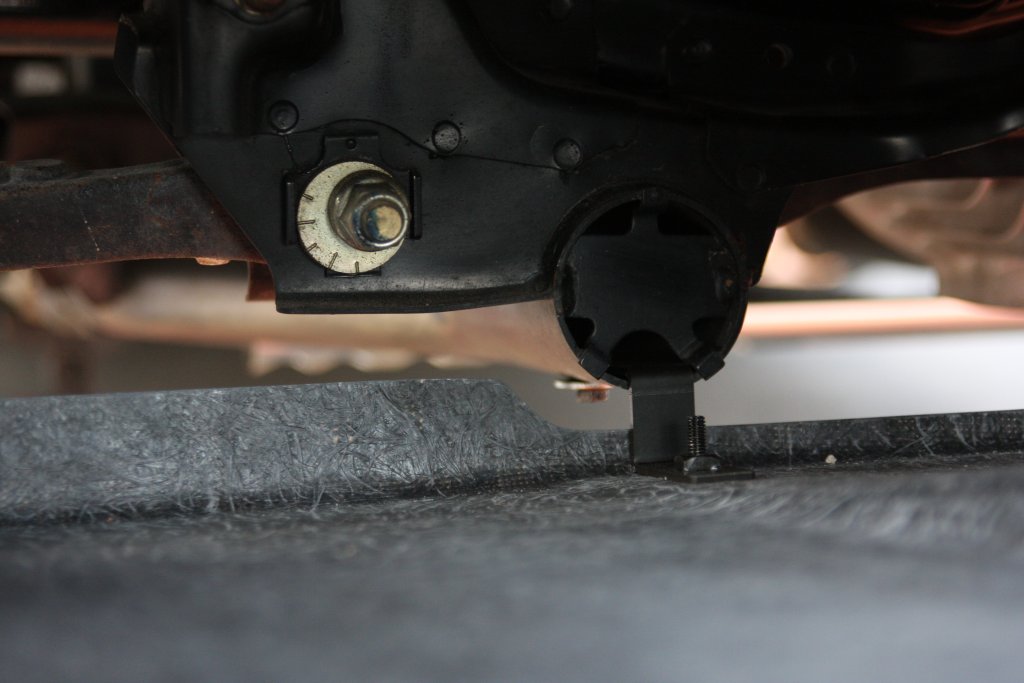
Step 3, I really dont show this but with my brothers help I got him to hold it up to the car to test fitment, Seemed good to bumper fit. I went and got my dewalt cordless and drill bit set. I picked the bit that matched the size of the pre drilled holes in the diffuser. I then drilled out the 4 holes to mount it to the car. I then mounted the 4 corners to hold it so I could now work alone with ease. There is a longer metal bracket here thet sits on top of the bumper so when you fasten down the nuts, they sit on the bracket and not dig into the plastic bumper
(all bolts are secure but very loose to give play while they all get bolted up)!!
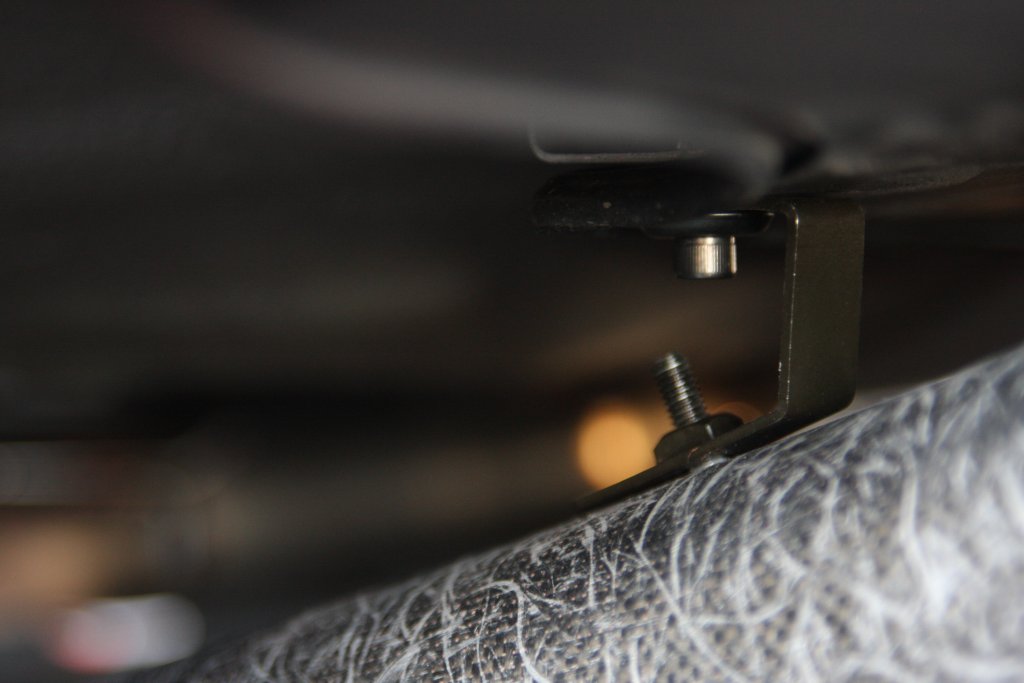
This shows the bracket that mounts closest to the back and how I choose to do it, Not the hardware supplied but I liked it better this way!
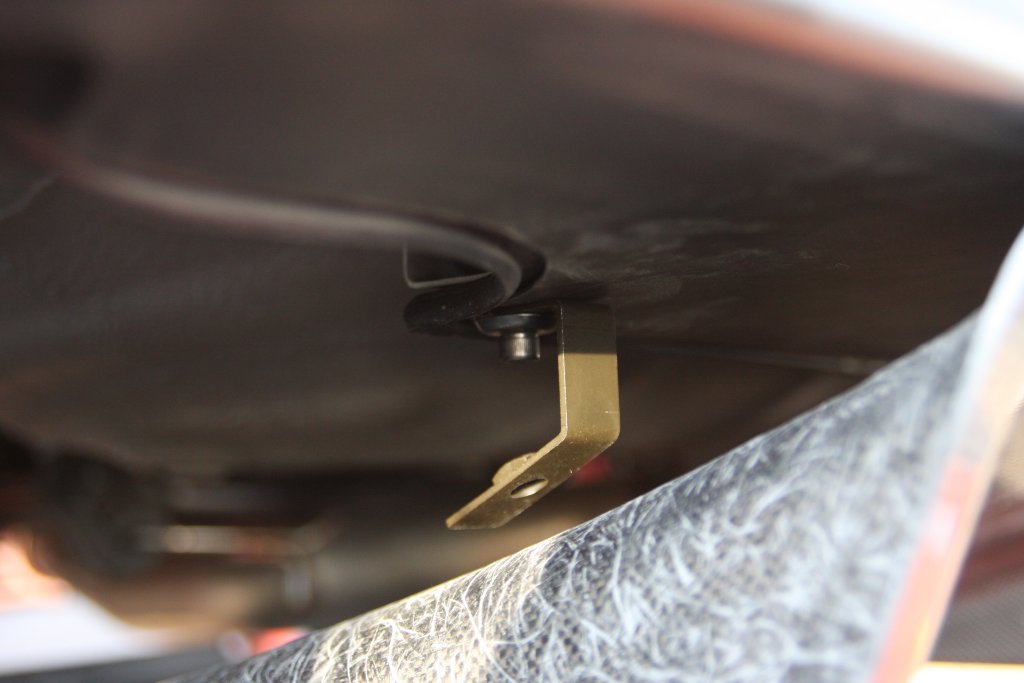
This shows the back bracket, close to the diff
Another shot of the rear bracket and,
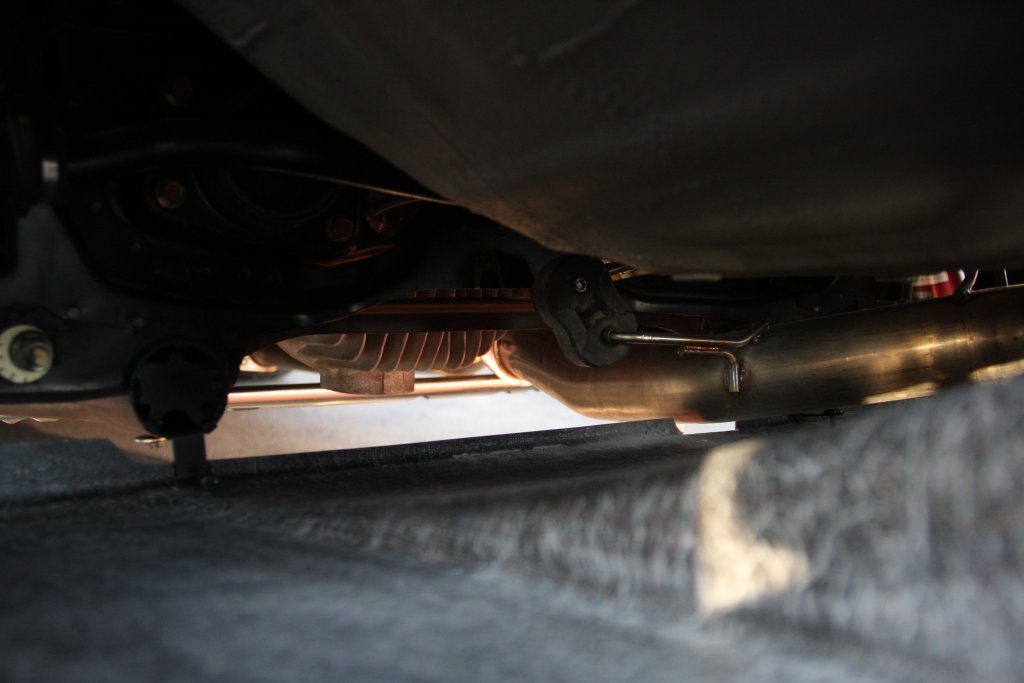
Due to my large single muffy I had to trim the diffuser so it would not sit against the exhaust piping. I simply made a small cut using my dewalt grinder with cutting blade. Simple and easy (wear safety glasses)

Step 4, tighten everything!
and 45 mins later after a 4 hour drive to get it and a 4 hour drive back


real photoshoot to come during weekend.
Not the best diy but it will guide anyone that has question of you can always shoot me a pm
Ken
You get zero instructions with it and a bag full of hardware.
So here goes nothing!
Oh there are 3 different brackets and 12 bolts total and a few washers.
Step 1, take it out of it's box or unwrap it from its bubble wrap and here is the long waited spoon rear diffuser!
Step 2, jack up it's ass end and get something nice to lay/work on
Step 3, I really dont show this but with my brothers help I got him to hold it up to the car to test fitment, Seemed good to bumper fit. I went and got my dewalt cordless and drill bit set. I picked the bit that matched the size of the pre drilled holes in the diffuser. I then drilled out the 4 holes to mount it to the car. I then mounted the 4 corners to hold it so I could now work alone with ease. There is a longer metal bracket here thet sits on top of the bumper so when you fasten down the nuts, they sit on the bracket and not dig into the plastic bumper
(all bolts are secure but very loose to give play while they all get bolted up)!!
This shows the bracket that mounts closest to the back and how I choose to do it, Not the hardware supplied but I liked it better this way!
This shows the back bracket, close to the diff
Another shot of the rear bracket and,
Due to my large single muffy I had to trim the diffuser so it would not sit against the exhaust piping. I simply made a small cut using my dewalt grinder with cutting blade. Simple and easy (wear safety glasses)
Step 4, tighten everything!
and 45 mins later after a 4 hour drive to get it and a 4 hour drive back
real photoshoot to come during weekend.
Not the best diy but it will guide anyone that has question of you can always shoot me a pm
Ken


Trending Topics
 04-14-2009, 05:48 PM
#9
Registered User
Thread Starter
Join Date: Dec 2007
Posts: 1,992
Likes: 0
Received 0 Likes
on
0 Posts
Originally Posted by Integra21,Apr 14 2009, 05:45 PM
i would be all over this but scared about speed bumps 
let me know how that goes!
CAR LOOKS GOOD!
let me know how that goes!
CAR LOOKS GOOD!
Im low, I tuck all around so ill tell you but im sure Ill be fine. If it hits, it hits, no biggie! I actually want to go lower in the rear but ill wait for a week of driving to see

