Service Bulletin
.
2001 American Honda Motor Co., Inc. û All Rights Reserved
ATB 22579 (0103)
1 of 2
CUSTOMER INFORMATION:
The information in this bulletin is intended for use only by skilled technicians who have the proper tools, equipment,
and training to correctly and safely maintain your vehicle. These procedures should not be attempted by ôdo-it-yourselfers,ö and you should not assume
this bulletin applies to your vehicle, or that your vehicle has the condition described. To determine whether this information applies, contact an
authorized Honda automobile dealer.
March 27, 2001
01-038
Applies To:
2000
û
01 S2000 û ALL
Convertible Top Cover Comes Loose
SYMPTOM
The rear par t of the conver tible top cover does not stay
tucked in.
PROBABLE CAUSE
The stops that determine the conver tible topÆs lowered
position are adjusted too high.
CORRECTIVE ACTION
Adjust the convertible top lowered position stops.
WARRANTY CLAIM INFORMATION
In warranty: The normal warranty applies.
Operation Number : 814306
Flat Rate Time: 0.5 hour for both sides
Failed Par t:
P/N 86024-S2A-003
H/C 6244230
Defect Code: 074
Contention Code: B99
Template ID:
01-038A
Skill Level:
Repair Technician
Out of warranty: Any repair performed after warranty
expiration may be eligible for goodwill consideration by
the District Service Manager or your Zone Office. You
must request consideration, and get a decision, before
starting work.
REPAIR PROCEDURE
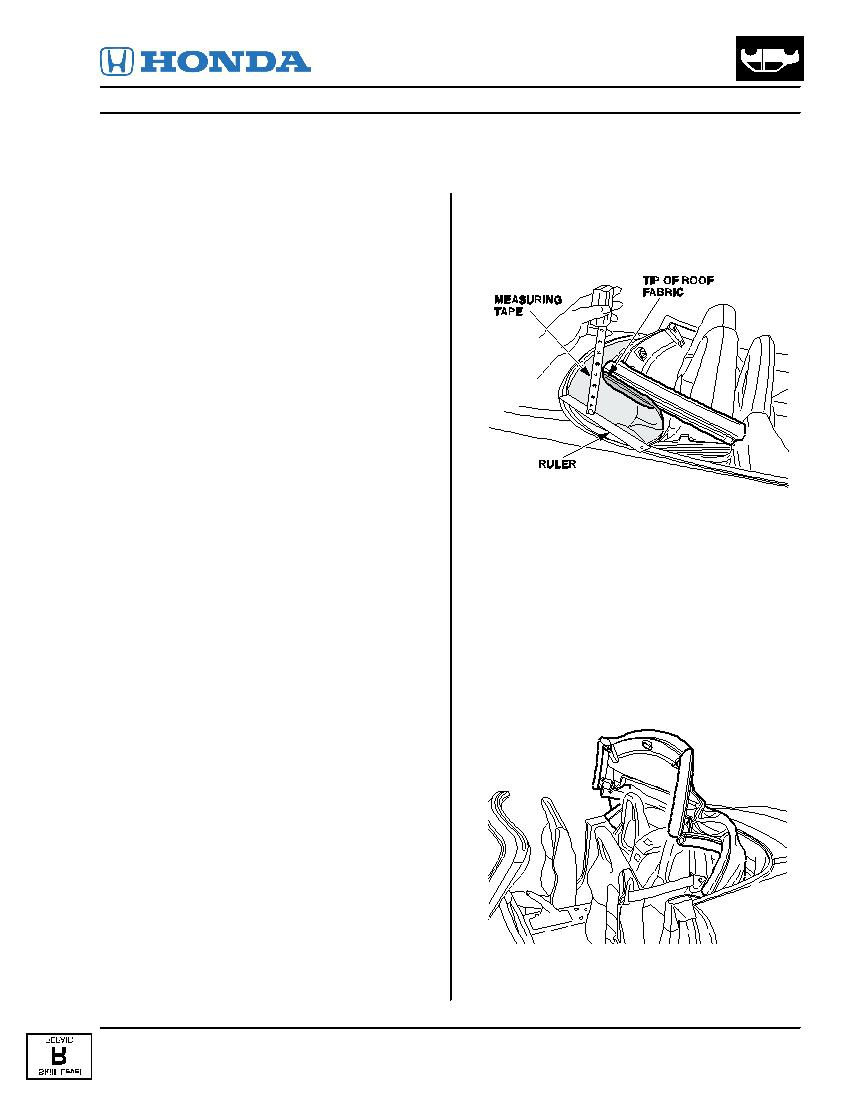
1. Lower the convertible top fully. With a ruler and a
measuring tape, measure the distance from the
quarter panel molding to the tip of the roof fabric.
ò If the measurement is 2 inches or more, go to
step 2.
ò If the measurement is 1-7/8 inches or less, do not
continue with this repair procedure. However,
inspect the conver tible top cover for war page due
to improper storage. If necessary, lay the top
cover in the sun to allow the material to relax
before reinstalling the cover.
2. Remove the door sill trim and the rear side trim on
both sides. Refer to section 20 of the service
manual.
3. Raise the convertible top halfway.