
the beginning of my installation with tutorials


Thread Starter
Registered User
Joined: Dec 2005
Posts: 244
Likes: 0
hahaha so where should i start.
plans
the system that i am building in my s2k will be my new competition car in the 2006 IASCA season. although i am kinda late in the season, my old car was stolen back in january and i have not yet opted for a solution so, i said what the hell, s2k is a shitty car for a system but either way ill give it a shot. plus, i was invited to world finals last year, so i am automatically in this year. if it doesnt work out, ill buy a honda fit for next year and kick some serious ass. for those of you that dont know, the honda fit is widely used in car audio competition in asia and europe.
the equipment:
radio: alpine cda-7990
processor: alpine pxa-h900
speakers: seas lotus reference
subwoofers: 2 12'' seas lotus
amps: torn between dls ultimate a3 or tru technology billet series
wiring: will be all custom except for the power wires which is the audison sonus stuff.
in my first part of the installation
- i made a custom mount for the pxa-h900 display
- door deadening/wiring
- made some custom speaker wires
- deadened the interior
- going to take out my convertible top and motor(i have a mugen hardtop in case
you were wondering why i would do that).
so lets start off with the custom display mount.
the display is the size of din sized radio but is more like a radio faceplate. i decided to mount it where the driver side sun visor is located. custom work needed to be done to make it work. my techniques in the tutorial can be used for almost any small projects thats need some fiberglassing done. it consists of 2 parts. making the housing for the display and mounting it to the plastic pillar that holds the sunvisors.
first off, the display has a nice curved shape when looking from above. i could modify any trim to match the shape, but as you know, that would be more work. so i opted for a solution and went to my buddies shop to look for a trim that matched that shape.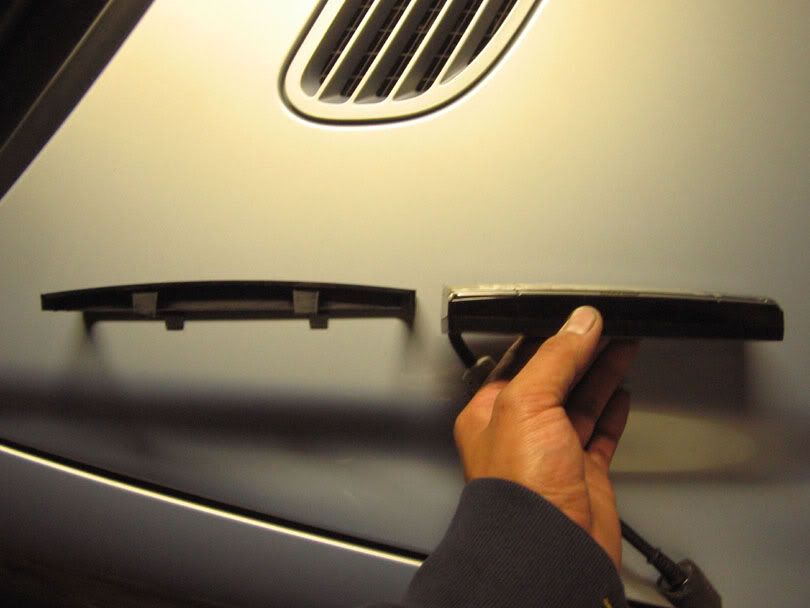
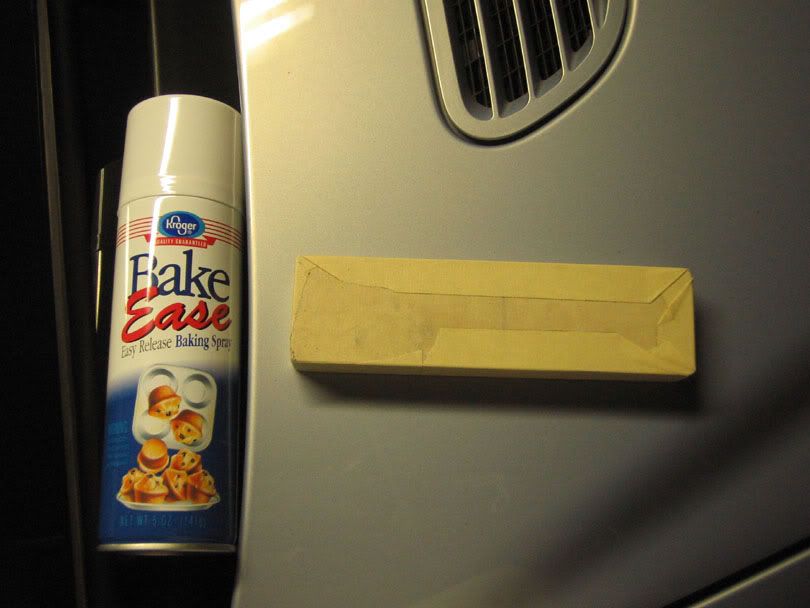
now, since display needs to be screwed from the back and is thicker than the trim itself, i had to modify the trim so the display fits snug inside of it and can be screwed in from the back. my solution for this was to create something that was exactly the same shape as the display, so i took some mdf and cut it to the same shape as the display. since fiberglass needed to be done, i masked off the mdf piece and sprayed some pan spray as a mold release.

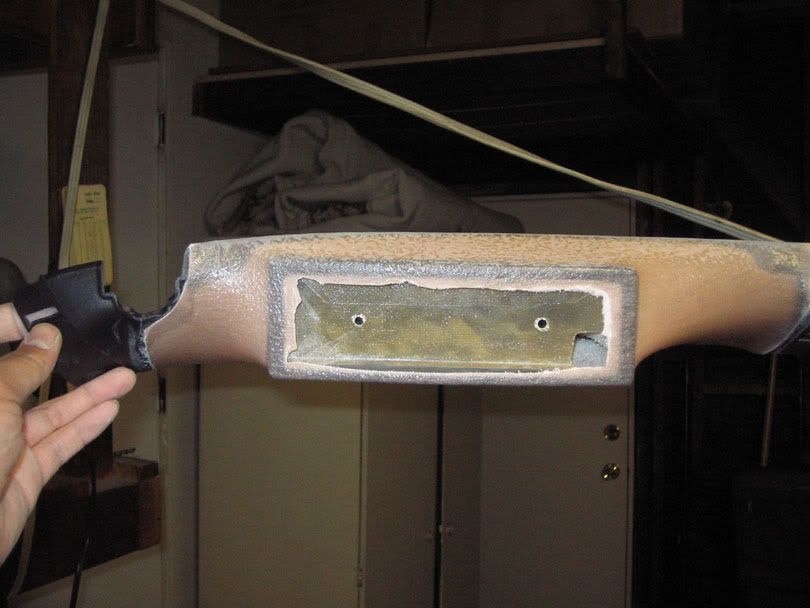
next i cut some regular cheap fiberglass cloth (the cheap one is good because its thin) to size of the area i wanted to cover in the back. also, i took some fiberglass mat and i cut it very small about 1/4" so it comes out like shavings. notice how the brush has been cut to a shorter length. this helps in increasing the stiffness of the brush so it can be used to push out bubbles.


once it cured, it came out liek this.


next, i needed to glass the display housing to the plastic pillar. i used some hard styrafoam since it is light. when using styrafoam, make sure not to get resin onto the foam, it will eat it up. you can however buy some special foam or mask or foil it. unfortunately, i forgot to take pictures so all i have are pictures once i put the resin on. i used a t shirt material because it is thin and works great on projects like this. te pink had a used too. light colored fleece works well, because once the resin soaks in and makes contact, you can see where the resin has touched the plastic.


i accidently bought rage lightweight filler instead of rage gold extreme lightweight filler, but either way any lightweight filler will do. so i applied the filler and got this.
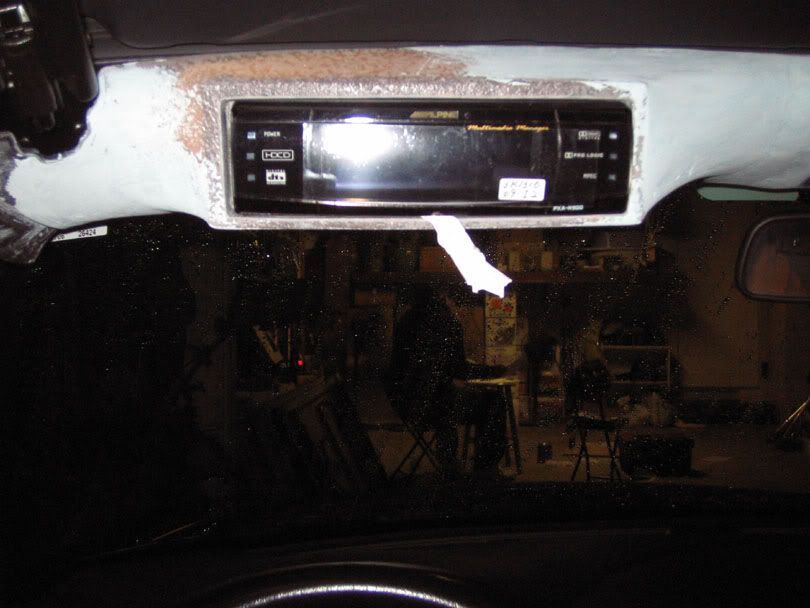
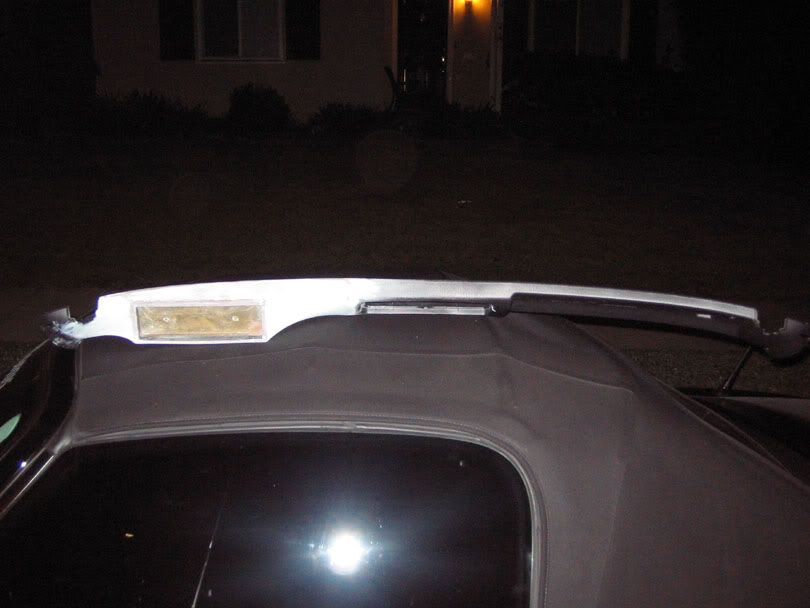
once i finished the piece, i took it to my upholstery shop(he will be doing all my custom interior pieces including a custom headliner for my mugen hardtop) and here is how it came out. its not straight because the a pillar needs to be installed for it to sit straight.


here are the radio shots.

dc convertor

radio


the power wire that i am using is the Audison connection sonus 0ga retails for about $14 per ft. the wires are the shit because of the flexibility and thickness. i can literally tie knots with it.

with some sleeving i get that high end professional look

for speaker wires, i bought some 13 gauge, yes 13 ga. speaker wire and added my own custom look to it.


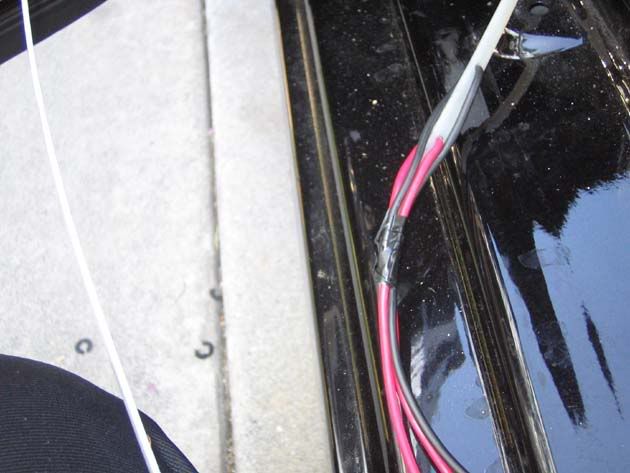
running the speaker wire through the door took me literally no more than 5 mins per side. you just need a snake/fish. the one i use can be purchased from your local DEI dealer or metra dealer. about 40" long flat shaped with holes at the end to stick wire through it. first on the inside portion of the door grommet, there is black tape that seals with the plastic wire loom. take a blade and cut open the tape, careful not to cut the wires inside or you'll have a real problem. next, get some wd-40 and spray on the first half of the snake. then stick it in and push. it will literally glide right in. once you have the half in, take the speaker wires and stick into the hole of the snake and fold in half. then tape so it stays folded. then on the door side, grab the snake and pull. i have read before that some of you had problems getting speaker wire through. try this and you will be amazed how quickly you can have it done.

door deadening, no need to explain, it is pretty straight forward stuff. i did however deaden the inside of the door and finish with some ensolite foam over the deadening. ensolite is a closed cell foam so it acts as a sound barrier. great for road noise and i will be applying ensolite in the entire car.


here is the interior stripped. it has been deadened, but havent applied the ensolite yet, so no finished pictures.
in the next part of my installation, should have finished of the cabin deadening, metal amp rack, all wires ran, hopefully a pillar tweeter mounted, h900 mounted.
thanks for looking.
plans
the system that i am building in my s2k will be my new competition car in the 2006 IASCA season. although i am kinda late in the season, my old car was stolen back in january and i have not yet opted for a solution so, i said what the hell, s2k is a shitty car for a system but either way ill give it a shot. plus, i was invited to world finals last year, so i am automatically in this year. if it doesnt work out, ill buy a honda fit for next year and kick some serious ass. for those of you that dont know, the honda fit is widely used in car audio competition in asia and europe.
the equipment:
radio: alpine cda-7990
processor: alpine pxa-h900
speakers: seas lotus reference
subwoofers: 2 12'' seas lotus
amps: torn between dls ultimate a3 or tru technology billet series
wiring: will be all custom except for the power wires which is the audison sonus stuff.
in my first part of the installation
- i made a custom mount for the pxa-h900 display
- door deadening/wiring
- made some custom speaker wires
- deadened the interior
- going to take out my convertible top and motor(i have a mugen hardtop in case
you were wondering why i would do that).
so lets start off with the custom display mount.
the display is the size of din sized radio but is more like a radio faceplate. i decided to mount it where the driver side sun visor is located. custom work needed to be done to make it work. my techniques in the tutorial can be used for almost any small projects thats need some fiberglassing done. it consists of 2 parts. making the housing for the display and mounting it to the plastic pillar that holds the sunvisors.
first off, the display has a nice curved shape when looking from above. i could modify any trim to match the shape, but as you know, that would be more work. so i opted for a solution and went to my buddies shop to look for a trim that matched that shape.
now, since display needs to be screwed from the back and is thicker than the trim itself, i had to modify the trim so the display fits snug inside of it and can be screwed in from the back. my solution for this was to create something that was exactly the same shape as the display, so i took some mdf and cut it to the same shape as the display. since fiberglass needed to be done, i masked off the mdf piece and sprayed some pan spray as a mold release.
next i cut some regular cheap fiberglass cloth (the cheap one is good because its thin) to size of the area i wanted to cover in the back. also, i took some fiberglass mat and i cut it very small about 1/4" so it comes out like shavings. notice how the brush has been cut to a shorter length. this helps in increasing the stiffness of the brush so it can be used to push out bubbles.
once it cured, it came out liek this.
next, i needed to glass the display housing to the plastic pillar. i used some hard styrafoam since it is light. when using styrafoam, make sure not to get resin onto the foam, it will eat it up. you can however buy some special foam or mask or foil it. unfortunately, i forgot to take pictures so all i have are pictures once i put the resin on. i used a t shirt material because it is thin and works great on projects like this. te pink had a used too. light colored fleece works well, because once the resin soaks in and makes contact, you can see where the resin has touched the plastic.
i accidently bought rage lightweight filler instead of rage gold extreme lightweight filler, but either way any lightweight filler will do. so i applied the filler and got this.
once i finished the piece, i took it to my upholstery shop(he will be doing all my custom interior pieces including a custom headliner for my mugen hardtop) and here is how it came out. its not straight because the a pillar needs to be installed for it to sit straight.
here are the radio shots.
dc convertor
radio
the power wire that i am using is the Audison connection sonus 0ga retails for about $14 per ft. the wires are the shit because of the flexibility and thickness. i can literally tie knots with it.
with some sleeving i get that high end professional look
for speaker wires, i bought some 13 gauge, yes 13 ga. speaker wire and added my own custom look to it.
running the speaker wire through the door took me literally no more than 5 mins per side. you just need a snake/fish. the one i use can be purchased from your local DEI dealer or metra dealer. about 40" long flat shaped with holes at the end to stick wire through it. first on the inside portion of the door grommet, there is black tape that seals with the plastic wire loom. take a blade and cut open the tape, careful not to cut the wires inside or you'll have a real problem. next, get some wd-40 and spray on the first half of the snake. then stick it in and push. it will literally glide right in. once you have the half in, take the speaker wires and stick into the hole of the snake and fold in half. then tape so it stays folded. then on the door side, grab the snake and pull. i have read before that some of you had problems getting speaker wire through. try this and you will be amazed how quickly you can have it done.
door deadening, no need to explain, it is pretty straight forward stuff. i did however deaden the inside of the door and finish with some ensolite foam over the deadening. ensolite is a closed cell foam so it acts as a sound barrier. great for road noise and i will be applying ensolite in the entire car.
here is the interior stripped. it has been deadened, but havent applied the ensolite yet, so no finished pictures.
in the next part of my installation, should have finished of the cabin deadening, metal amp rack, all wires ran, hopefully a pillar tweeter mounted, h900 mounted.
thanks for looking.


Trending Topics


Thread Starter
Registered User
Joined: Dec 2005
Posts: 244
Likes: 0
thanks for all the comments. i will also be making my own RCA's so there will be a tutorial for that as well in the next segment.
yes i will be using suede for most of the finishing.
hahaha the benzo wasnt my work bench, it had the best lighting for pictures so it was my picture bench that day. how the hell did you guys know it was a benzo anyway?
yes i will be using suede for most of the finishing.
hahaha the benzo wasnt my work bench, it had the best lighting for pictures so it was my picture bench that day. how the hell did you guys know it was a benzo anyway?