DIY subwoofer enclosure and amp rack
 04-24-2015, 12:28 AM
#1

Thread Starter
Sup s2ki!
I have been lurking in the forums for the last few years, and it's finally time to make my first contribution to the community. Before I was modding cars, I was into modding some rather esoteric shit. I've always admired any breed of nice car, but I never delved into the engineering/modding aspect of cars until a few years ago. This mod combines my knowledge of audio engineering and my new favorite pastime--the S2k!
I have built a few enclosures myself in the past, including a regular old box and a badass horn-loaded enclosure with the speaker in the very middle. The goals I had for the enclosure were the following:
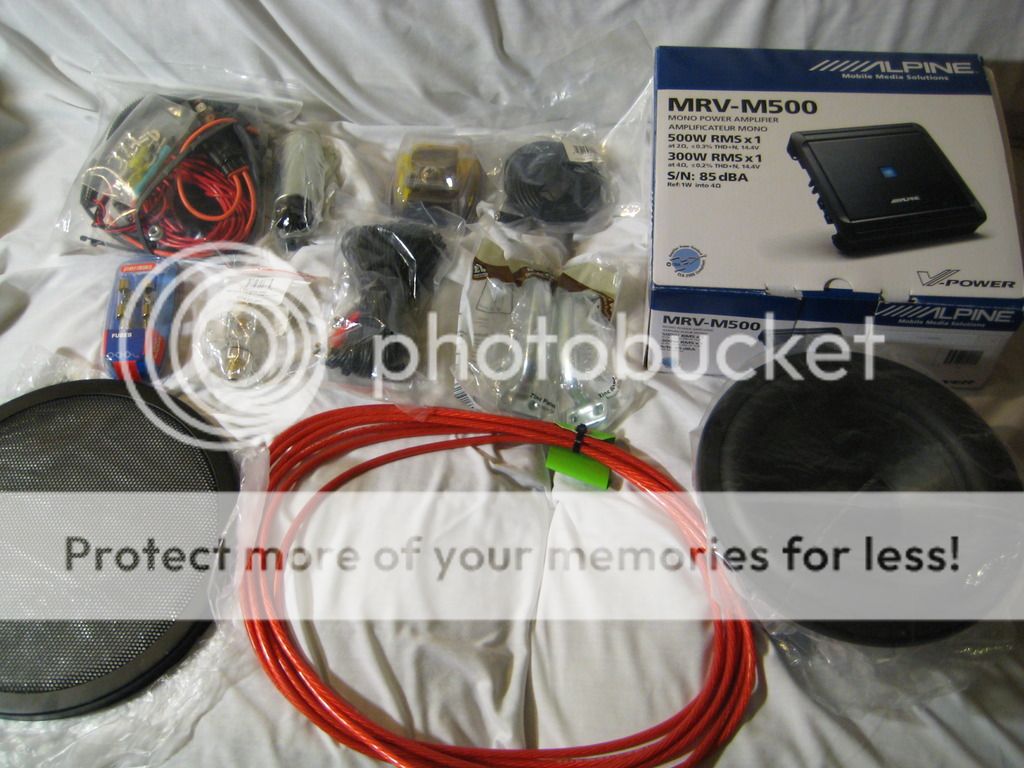
Top row: ScienceOfSpeed fuel pump wiring kit, Walbro 255 fuel pump, triple ring terminal adapter for battery positive terminal (not going to be used), Aux (3.5mm) cable for remote power on/off for amp, amp
Middle row: 80A drop-in fuses, waterproof fuse holder, RCA cables, handles for sub/amp mount for easy insertion/removal (Home Depot)
Bottom row: 10'' Protective grill (ebay), 8AWG wire for amp power, 8'' Dayton Audio subwoofer (RSS210HF-4)
In addition to the four items mentioned above, you will need the following:
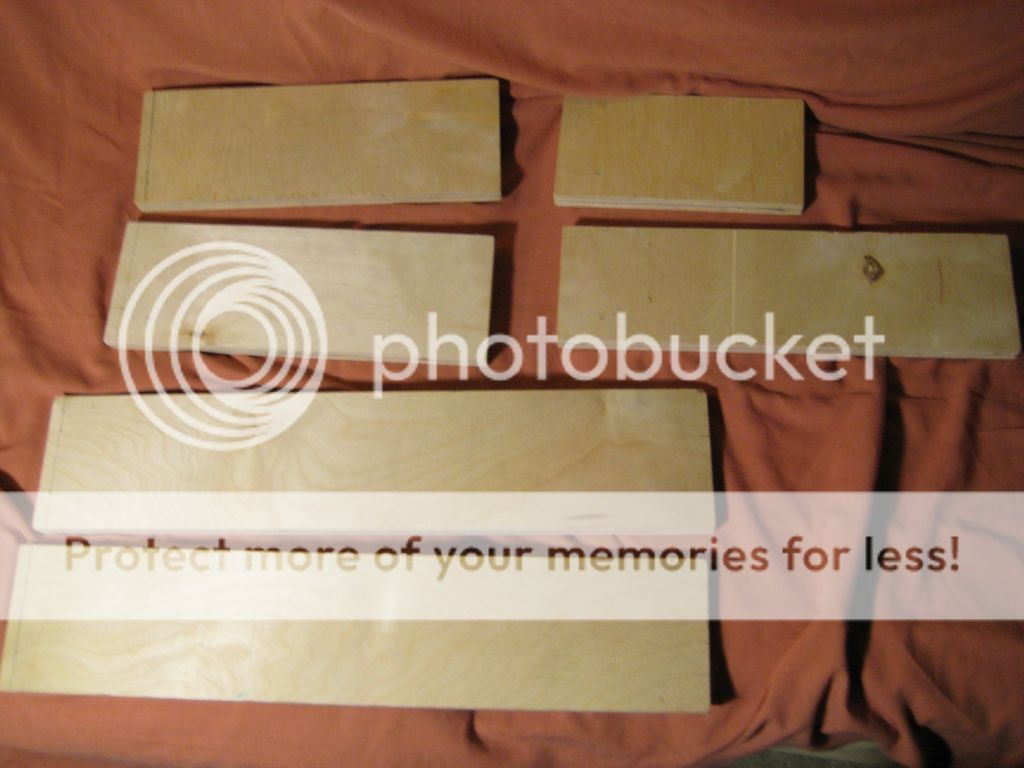
Start out by chopping some birch. Here are the sizes needed:
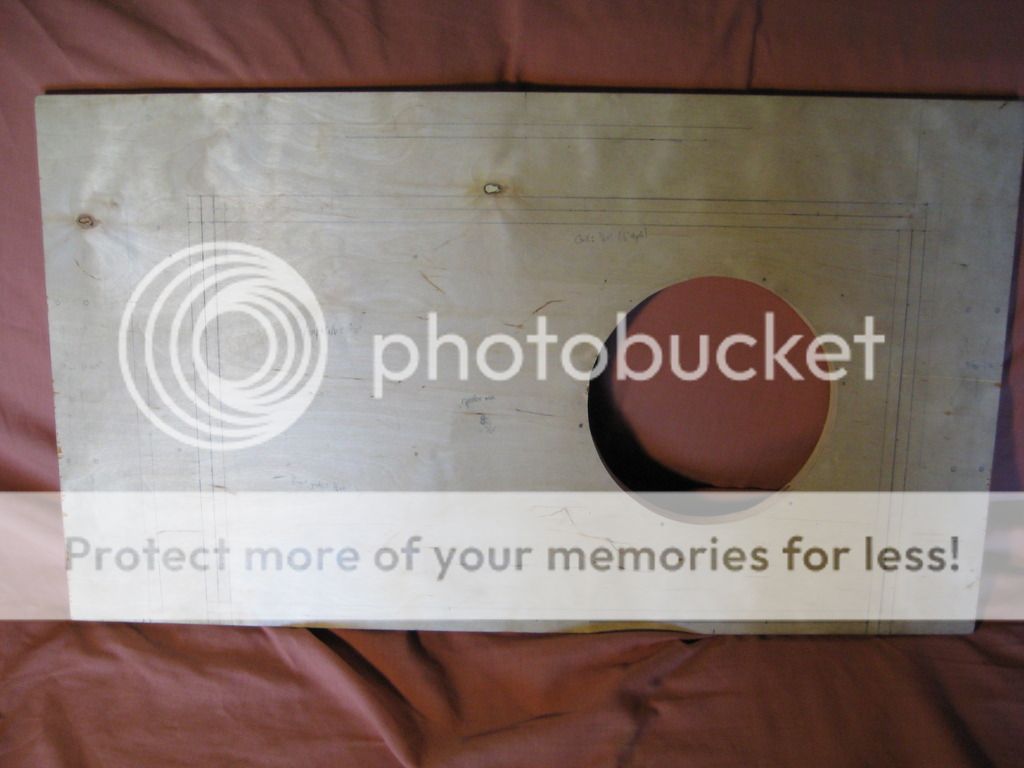
Next is to draw the outline of the 21'' x 13'' box on top of the large top cover piece (28'' x 15 7/8'').

Since the subwoofer box doesn't fill the entire niche in the AP2 trunk, you will also need to mark the edges of the two "guide" pieces that serve to keep the whole apparatus stable. Here is a picture of the two guide pieces in place later in the mod:
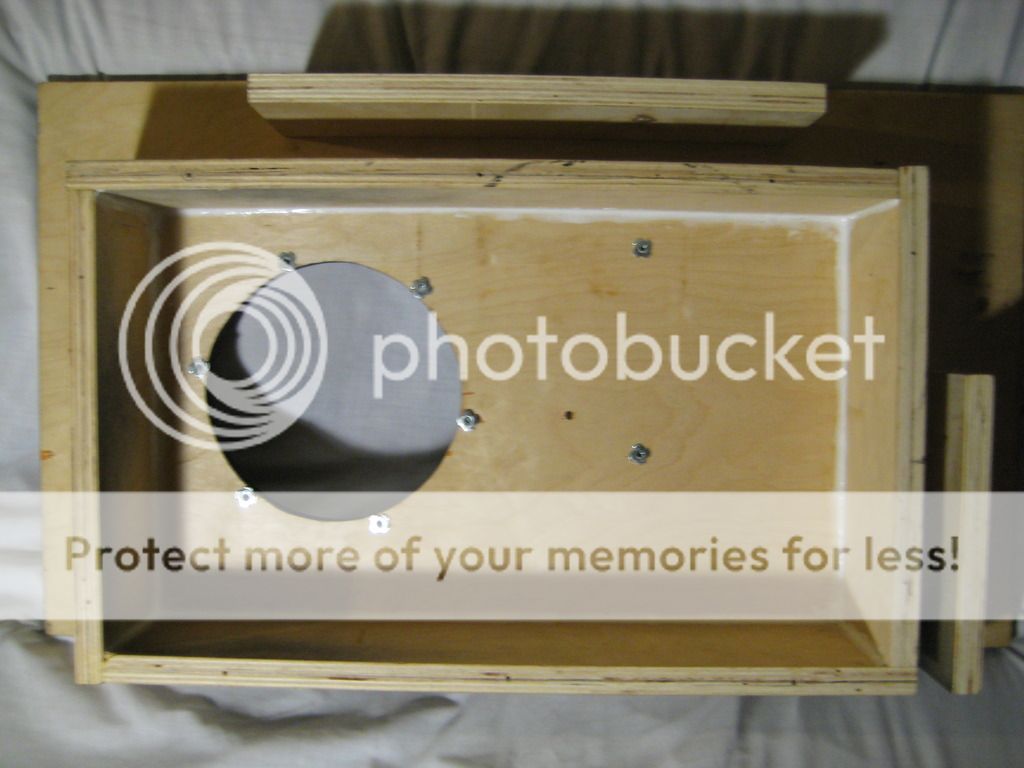
My side guide piece ended up being 2 11/32'' from the edge and my top guide piece was 7/8'' from the top edge. To figure out where to mark the edges of the guides, take the big cover piece into your trunk, lean it up against the spare tire, then use a square pointed straight up the niche walls to mark the guide edges. It's also a good time to cut out the speaker hole. I found a round tupperware lid that was a perfect 7 1/4'' for my sub. Mark all holes for drilling. The screw holes for the long walls were 7'' from the midpoint, and 4'' for the short walls. The short guide had its holes 2'' from the midpoint--5'' for the longer guide.


Drill them out like so:
Guides, top and bottom of box, and box sides: 5/32''
Amp and sub holes: 7/64''
Handles and grill holes: 3/32''
Top and bottom of box sides and box sides: 5/64''


Now mark the sides of the box for drilling:


This is how the walls of the box will fit together:

Now it's time to glue and screw the box walls and guides into place:

Caulk the cracks to make sure no air can escape:

At this point I decided to paint the enclosure so it didn't just look like wood. I used vinyl dye with a gloss clear coat finish (it's all I had on me).
Hammer in the tee nuts to insure that the sub and amp don't vibrate free in the future.
Glue and screw the bottom of the box on, then caulk the last remaining seams by hand:


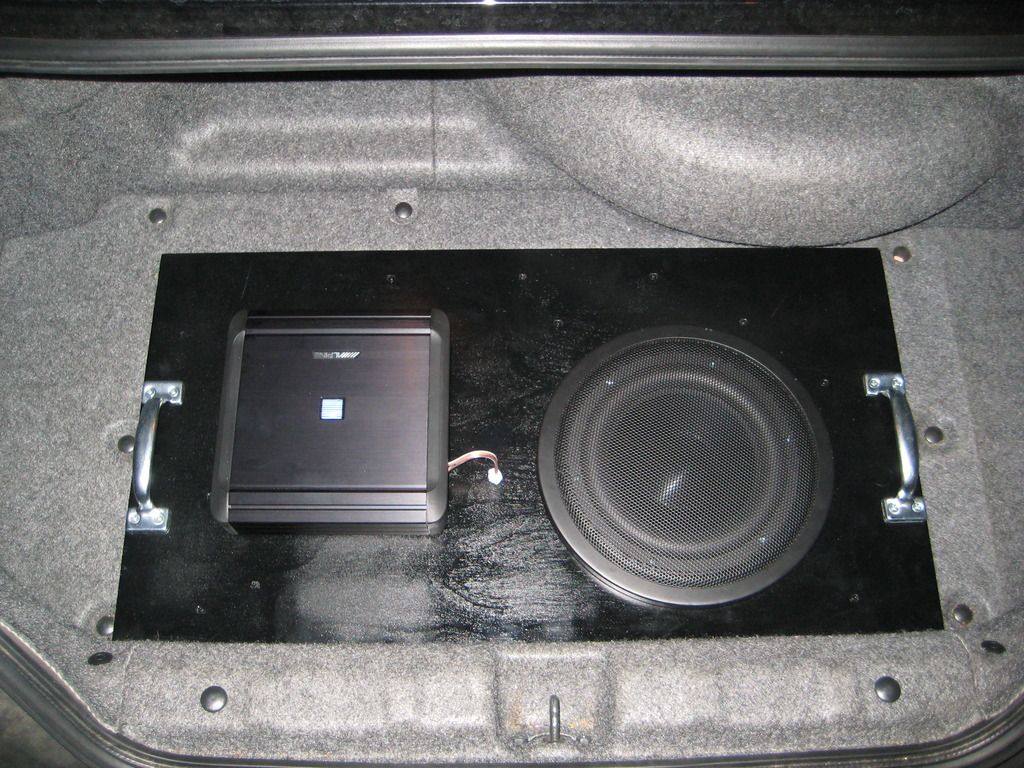
At this point, all that's left is assembling everything! Hook up a + and - wire to the subwoofer and feed it through a hole in between the subwoofer and amp. Caulk around the wire to plug the last potential air leak. Pretty sweet!

My enclosure shifts left and right a bit, but it's nothing that can't be fixed with a little foam or rubber padding. The wires will eventually be fed into a gap in the trunk liner--hopefully I won't have to cut anything. In any case, I hope you guys enjoyed this backyard special! I've gained so much through these forums that I might as well give back at least a little.
Cheers,
Tom
I have been lurking in the forums for the last few years, and it's finally time to make my first contribution to the community. Before I was modding cars, I was into modding some rather esoteric shit. I've always admired any breed of nice car, but I never delved into the engineering/modding aspect of cars until a few years ago. This mod combines my knowledge of audio engineering and my new favorite pastime--the S2k!
I have built a few enclosures myself in the past, including a regular old box and a badass horn-loaded enclosure with the speaker in the very middle. The goals I had for the enclosure were the following:
- Regular old box geometry for compactness and
- Fits snugly into the rectangular depression in the trunk of my AP2
- Easily removable with metal handles
- Box volume matches the subwoofer's optimum sealed cabinet volume perfectly
- Paint it so it doesn't look fugly
Top row: ScienceOfSpeed fuel pump wiring kit, Walbro 255 fuel pump, triple ring terminal adapter for battery positive terminal (not going to be used), Aux (3.5mm) cable for remote power on/off for amp, amp
Middle row: 80A drop-in fuses, waterproof fuse holder, RCA cables, handles for sub/amp mount for easy insertion/removal (Home Depot)
Bottom row: 10'' Protective grill (ebay), 8AWG wire for amp power, 8'' Dayton Audio subwoofer (RSS210HF-4)
In addition to the four items mentioned above, you will need the following:
- 2'' #6 wood screws (33)
- 1'' #8 machine screw (10)
- #8 Tee nuts (10)
- wood glue
- silicone caulk and caulking gun
- Flat black vinyl dye, or any paint that works on wood
- Clear coat
- 3/4'' Birch plywood
- 16AWG speaker wire
Start out by chopping some birch. Here are the sizes needed:
- 12 1/4'' x 4 1/4'' (2)
- 20 1/4'' x 4 1/4'' (2)
- 28'' x 15 7/8''
- 21'' x 13''
- 8'' x 4''
- 14'' x 4''
Next is to draw the outline of the 21'' x 13'' box on top of the large top cover piece (28'' x 15 7/8'').
Since the subwoofer box doesn't fill the entire niche in the AP2 trunk, you will also need to mark the edges of the two "guide" pieces that serve to keep the whole apparatus stable. Here is a picture of the two guide pieces in place later in the mod:
My side guide piece ended up being 2 11/32'' from the edge and my top guide piece was 7/8'' from the top edge. To figure out where to mark the edges of the guides, take the big cover piece into your trunk, lean it up against the spare tire, then use a square pointed straight up the niche walls to mark the guide edges. It's also a good time to cut out the speaker hole. I found a round tupperware lid that was a perfect 7 1/4'' for my sub. Mark all holes for drilling. The screw holes for the long walls were 7'' from the midpoint, and 4'' for the short walls. The short guide had its holes 2'' from the midpoint--5'' for the longer guide.
Drill them out like so:
Guides, top and bottom of box, and box sides: 5/32''
Amp and sub holes: 7/64''
Handles and grill holes: 3/32''
Top and bottom of box sides and box sides: 5/64''
Now mark the sides of the box for drilling:
This is how the walls of the box will fit together:
Now it's time to glue and screw the box walls and guides into place:
Caulk the cracks to make sure no air can escape:
At this point I decided to paint the enclosure so it didn't just look like wood. I used vinyl dye with a gloss clear coat finish (it's all I had on me).
Hammer in the tee nuts to insure that the sub and amp don't vibrate free in the future.
Glue and screw the bottom of the box on, then caulk the last remaining seams by hand:
At this point, all that's left is assembling everything! Hook up a + and - wire to the subwoofer and feed it through a hole in between the subwoofer and amp. Caulk around the wire to plug the last potential air leak. Pretty sweet!
My enclosure shifts left and right a bit, but it's nothing that can't be fixed with a little foam or rubber padding. The wires will eventually be fed into a gap in the trunk liner--hopefully I won't have to cut anything. In any case, I hope you guys enjoyed this backyard special! I've gained so much through these forums that I might as well give back at least a little.
Cheers,
Tom


Thread
Thread Starter
Forum
Replies
Last Post