Automotive builds Got an automotive build you want to want to document? Post it here!

haga888's Silverstone AP2 build

Thread Tools
 
Old 01-18-2017, 06:25 PM
  #51  

Thread Starter
 
haga888's Avatar
 
Join Date: Apr 2015
Posts: 1,269
Received 14 Likes on 14 Posts
Default

Picked up a few things for the track:

Name:  B971CA72-6562-4DC0-AD4F-8EB5F9F80F1E_zpsupfsg3on.jpg
Views: 347
Size:  317.0 KB

Before:
Name:  BE57891D-2CF3-42E9-8C06-3C8954D69512_zpsnt84wlex.jpg
Views: 358
Size:  170.6 KB

After:
Name:  5509FA31-C5FE-4894-921F-1FF354FF46F9_zps45belcfy.jpg
Views: 344
Size:  144.3 KB
Name:  6C6E8DCF-2D92-45B0-B735-7D2FC610EDD0_zpsfa6inb6y.jpg
Views: 328
Size:  156.2 KB
Name:  C76661D7-C724-40EE-9F6E-A86A8FDF5794_zpsx3kpw6ur.jpg
Views: 354
Size:  145.3 KB
Name:  2CBF7F3C-30D6-4ABF-9DCC-23886CFEB5E8_zpsljn1gv7l.jpg
Views: 366
Size:  156.6 KB

Also picked up a 340mm Spoon wheel with Works Bell short hub and quick release:
Name:  A1057F02-5FDD-44C8-A583-E6C4B16982CD_zpsd82dfivr.jpg
Views: 346
Size:  204.8 KB
Old 01-18-2017, 07:10 PM
  #52  
Registered User

 
longdrive's Avatar
 
Join Date: Jan 2015
Location: 44057
Posts: 54
Likes: 0
Received 0 Likes on 0 Posts
Default

Hi Chuck,
What do you have your car perched on in the garage? Commercially available? Seems more stable than jack stands!
Thanks, longdrive
Old 01-22-2017, 05:19 PM
  #53  

Thread Starter
 
haga888's Avatar
 
Join Date: Apr 2015
Posts: 1,269
Received 14 Likes on 14 Posts
Default

Originally Posted by longdrive
Hi Chuck,
What do you have your car perched on in the garage? Commercially available? Seems more stable than jack stands!
Thanks, longdrive
I think he's got an EZ Lift.
Old 01-22-2017, 05:32 PM
  #54  

Thread Starter
 
haga888's Avatar
 
Join Date: Apr 2015
Posts: 1,269
Received 14 Likes on 14 Posts
Default

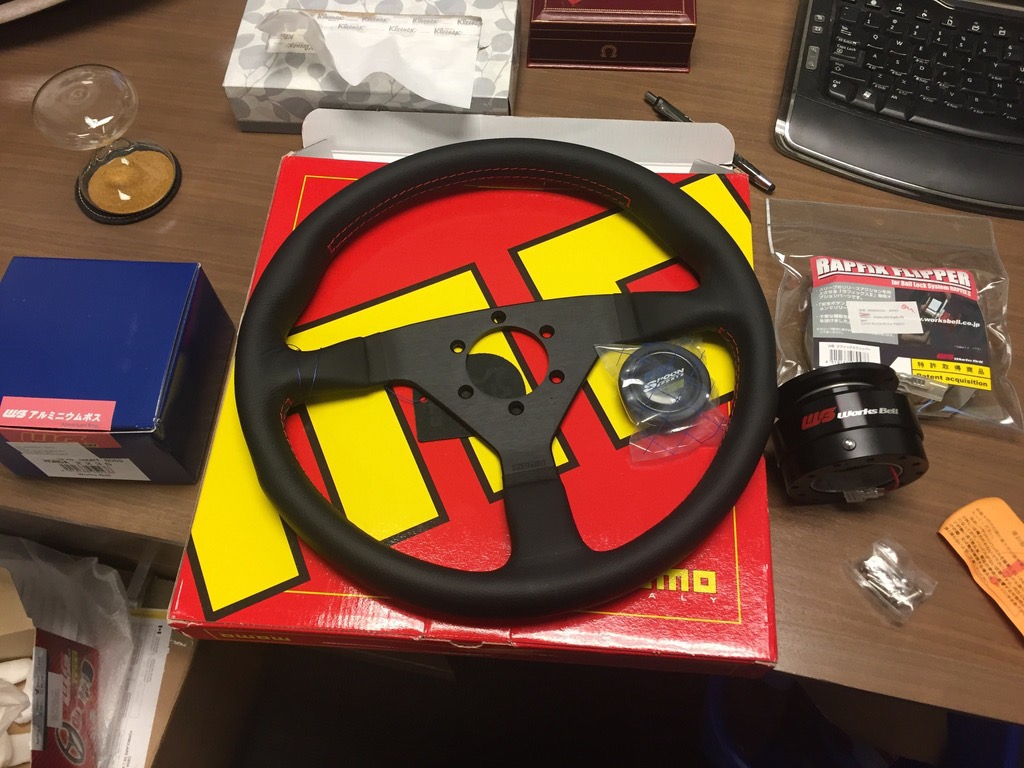
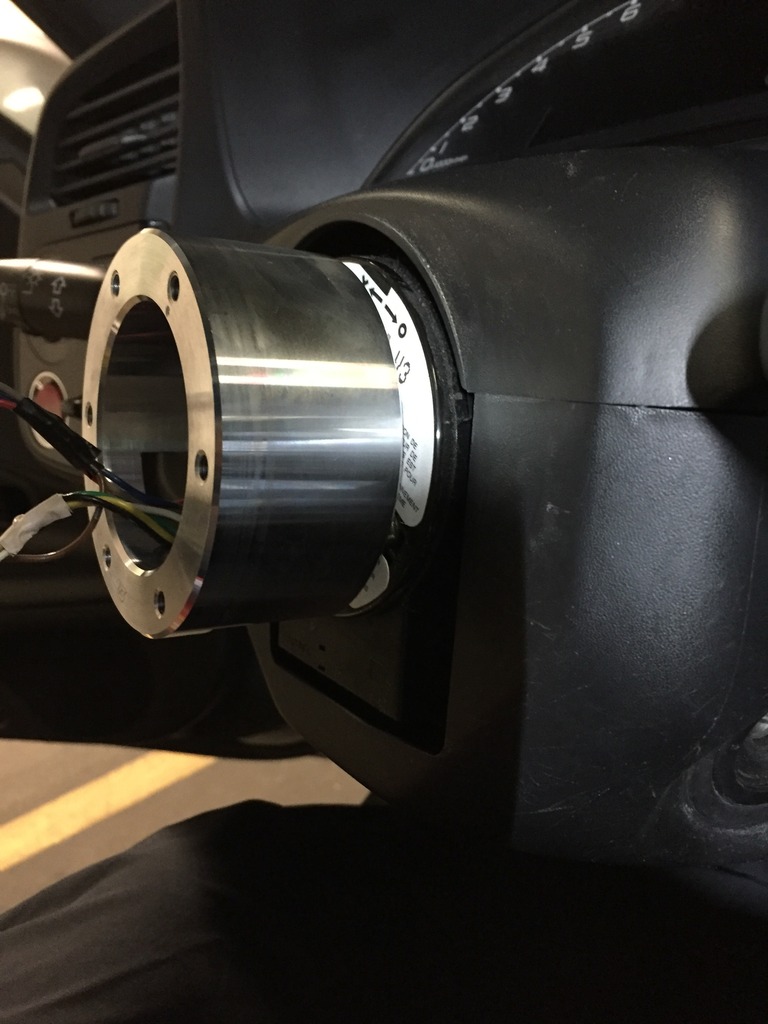
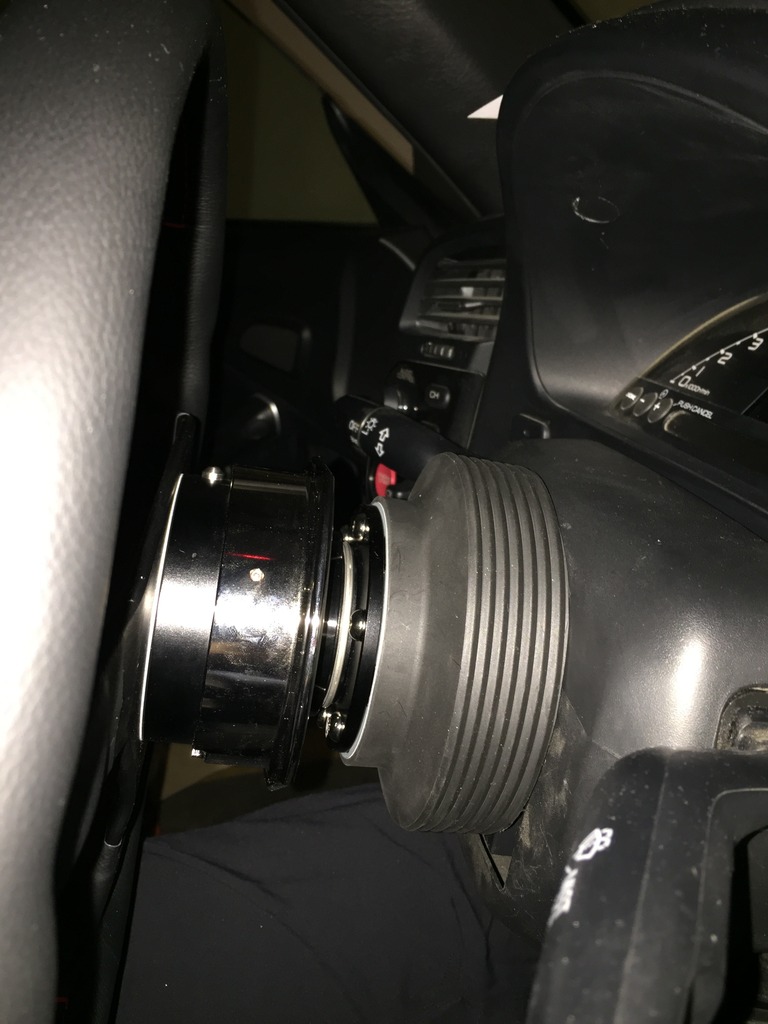
Threw the steering wheel on. I was expecting to have to pull the SRS reel but the Works Bell short hub just goes right over it. So pretty simple install. I have my passenger seat out so my SRS light is on anyways so can't tell if the included bypass are working. Oddly they are two 2A fuses and not ohms resistors which I was expecting. Assuming it works. Also couldn't get the horn to work so have to figure that out. I'll do it when I wire the cruise control back in.

Name:  665EC8C9-A229-4736-A29B-98E022D2AC69_zpsusg8xqhy.jpg
Views: 327
Size:  141.3 KB
Name:  47182C6B-7EA0-46DB-AF73-F48D98687D4E_zps2izu5rix.jpg
Views: 324
Size:  171.4 KB
Name:  3231E6BD-BDC7-4471-A09F-068D8B0901C0_zpscy4yfpqq.jpg
Views: 349
Size:  140.2 KB
Name:  7DB6A335-08D8-4DEE-8131-D46874B1B8E5_zps0taygucg.jpg
Views: 339
Size:  165.0 KB
Name:  BEDD0325-1EE9-4711-9DE6-C8CAE6786B92_zpsdp5mmaai.jpg
Views: 344
Size:  169.2 KB

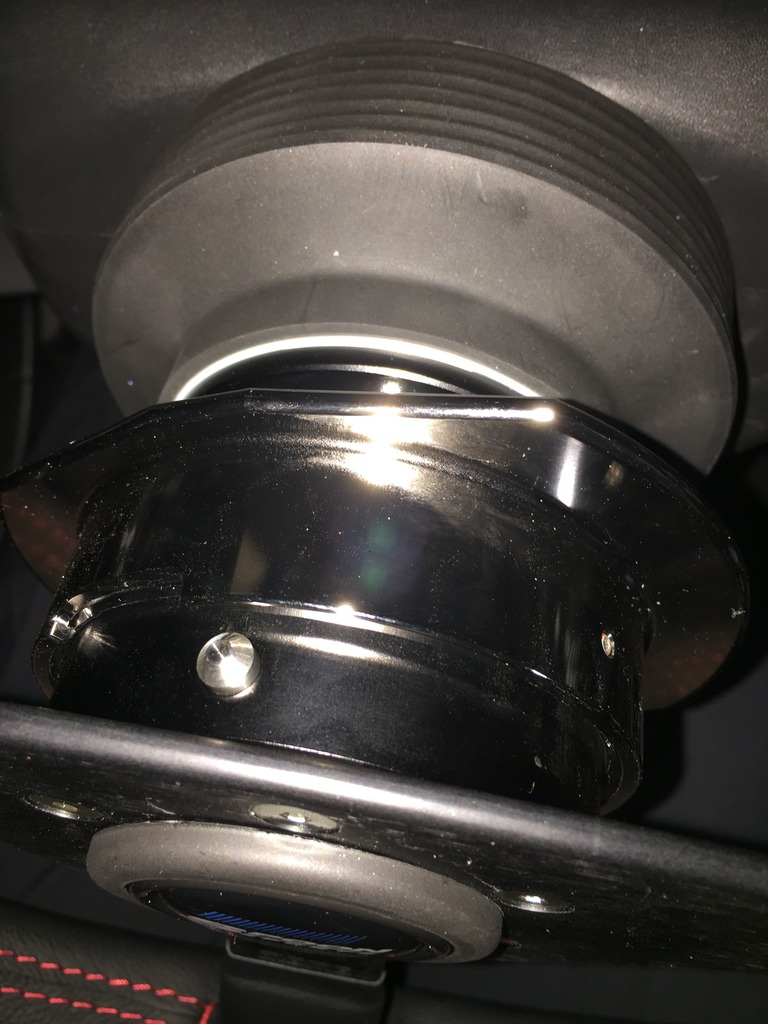
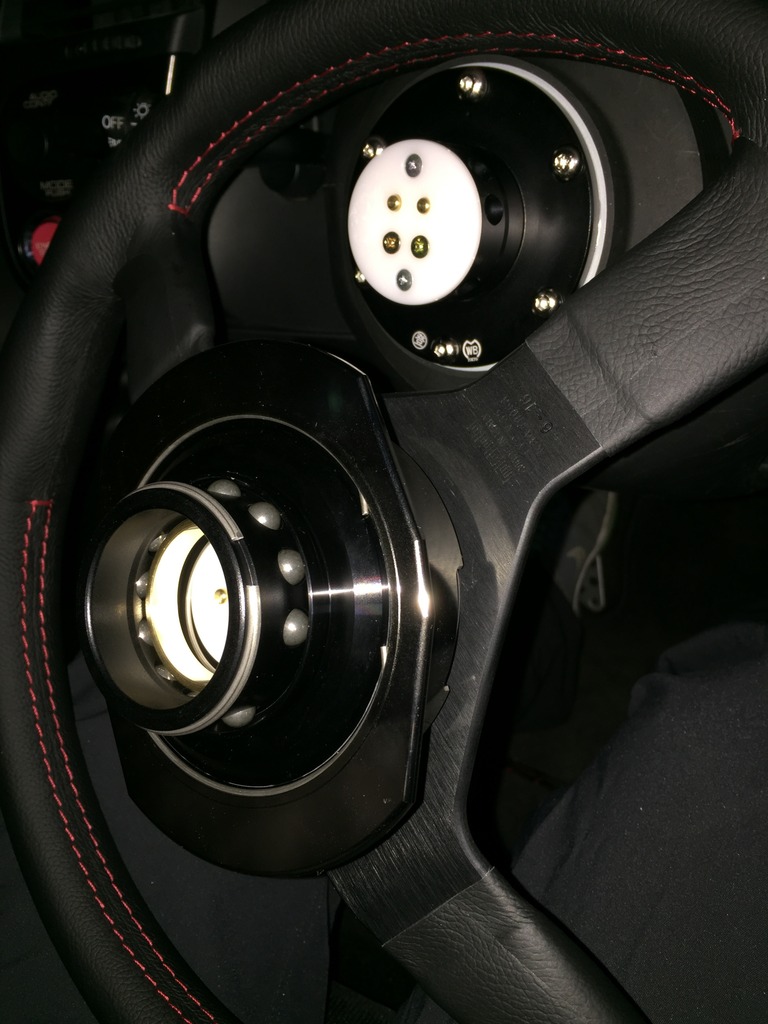
This is a 5'7" eye level shot on a slightly lower than stock seat. The 340mm wheel doesn't block any of the cluster for me.

Name:  B6942F20-500A-47AC-9729-1B8EFFD41E2E_zpsp33m7ylp.jpg
Views: 336
Size:  180.8 KB
Old 01-22-2017, 05:39 PM
  #55  

Thread Starter
 
haga888's Avatar
 
Join Date: Apr 2015
Posts: 1,269
Received 14 Likes on 14 Posts
Default

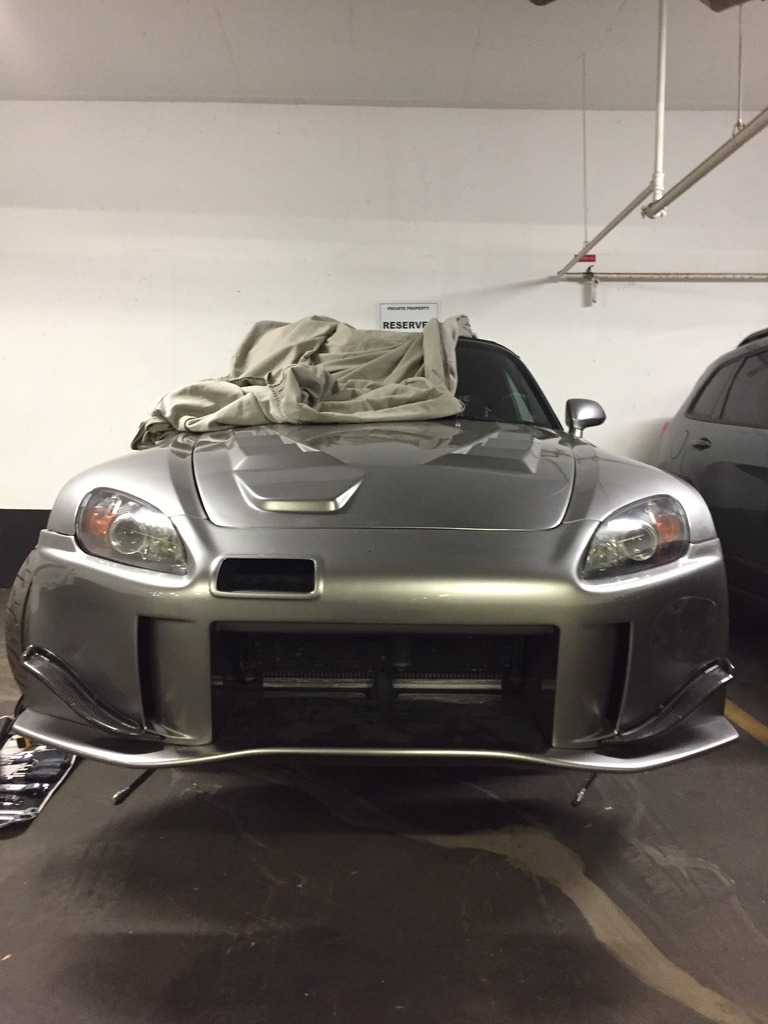
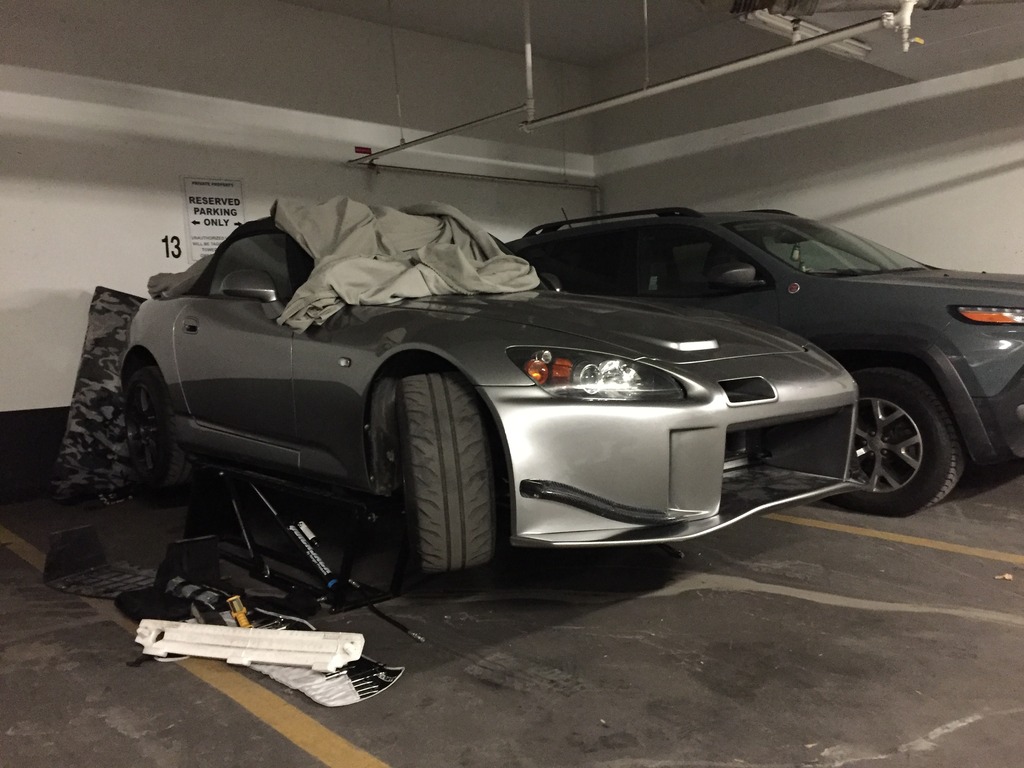
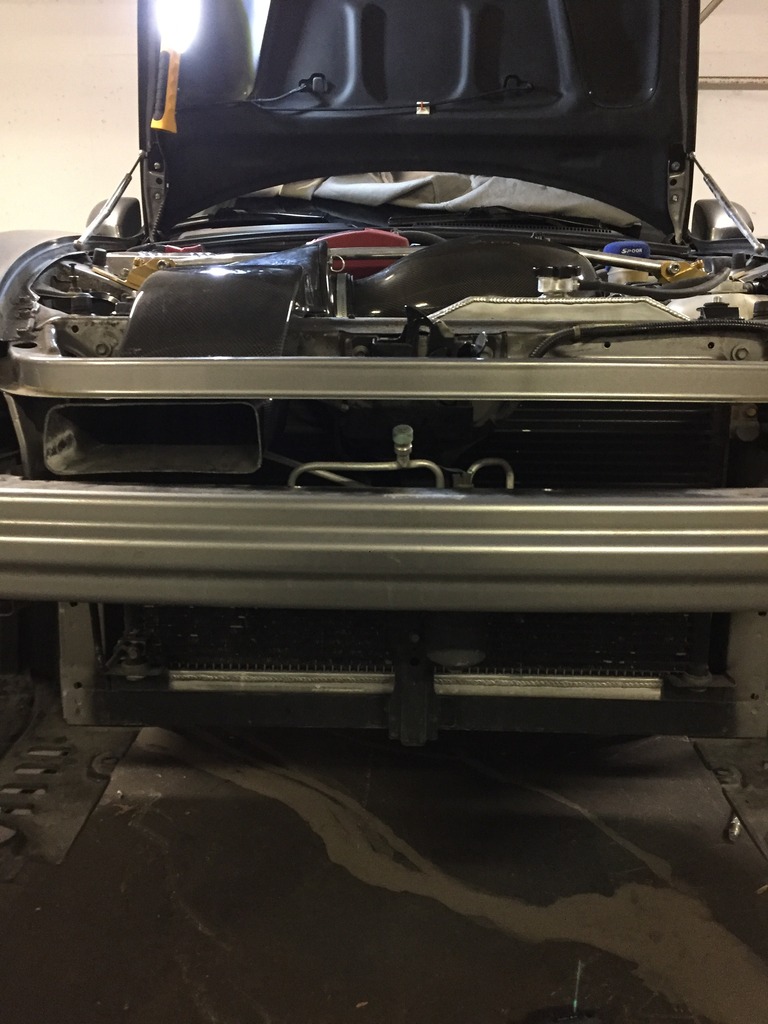
Pulled the OEM bumper off and test fitted the J's bumper. Not the prettiest, but I like it. Way heavier than the OEM ABS. I need to install the brake ducts before I bolt it in properly.

Name:  A6AAF017-DF12-4B29-AE07-D7CE2806DBDF_zpsi0p8kdzu.jpg
Views: 302
Size:  159.5 KB
Name:  E7ED7406-9694-4682-9291-F3661B461E86_zpseaejfabr.jpg
Views: 355
Size:  145.8 KB
Name:  AC9F9F1F-4D04-4B07-8388-E6107834626B_zpsw813vjaq.jpg
Views: 347
Size:  176.5 KB
Old 01-22-2017, 05:50 PM
  #56  

Thread Starter
 
haga888's Avatar
 
Join Date: Apr 2015
Posts: 1,269
Received 14 Likes on 14 Posts
Default

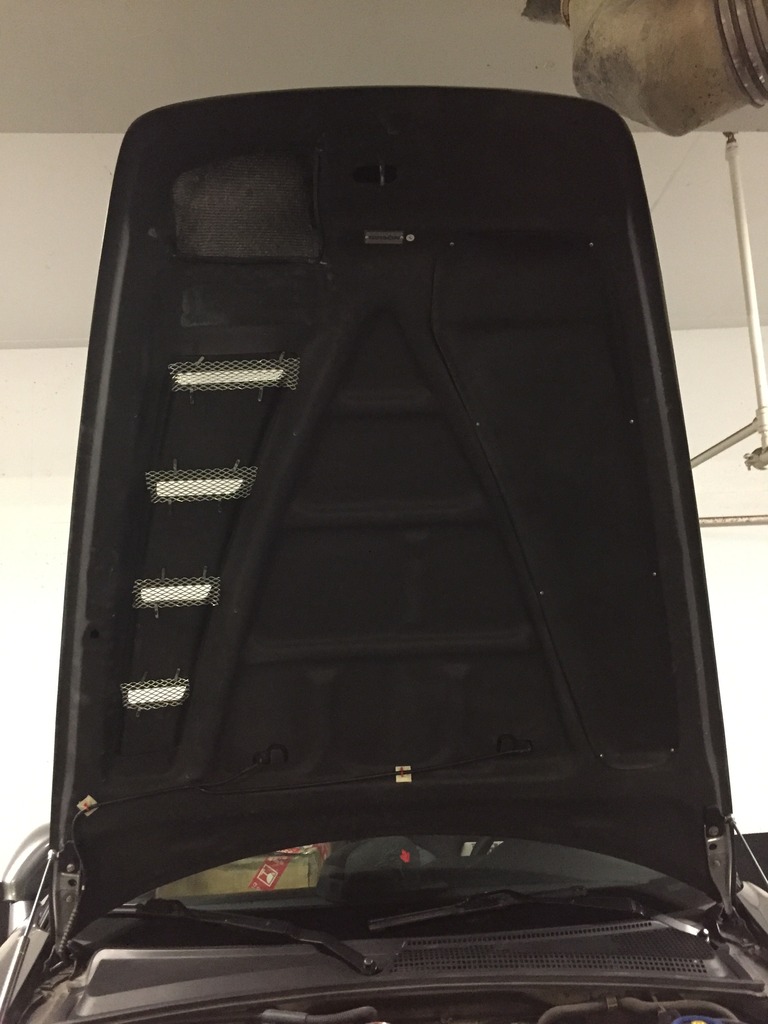
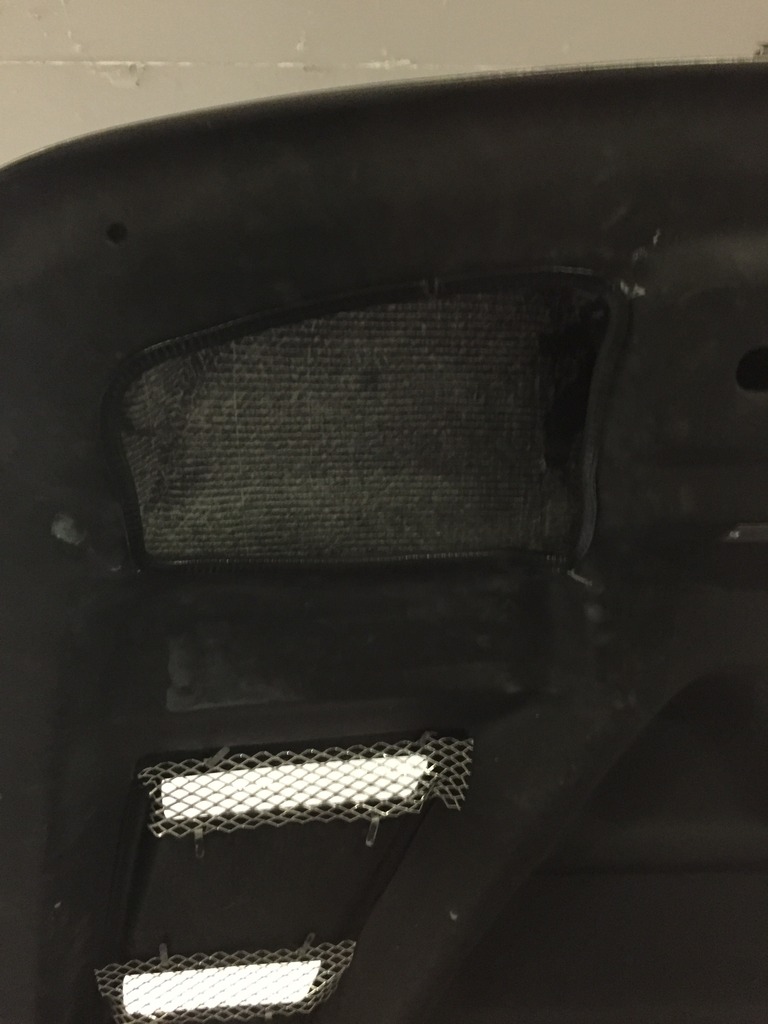
Pulled the K&N FIPK off to install the J's Tsuchinoko intake. Fairly straightforward except I'm missing the coupler to the TB so I need to pick one up before I can finish it up. Also, I assumed that since the Seibon hood had that big hump that the liner would follow the same lines but the liner shape is basically the same as stock so I need to cut that as well.

Name:  5A01590F-8825-4D57-A328-82CF6FFA9D24_zpsjzpshbyx.jpg
Views: 333
Size:  203.2 KB
Name:  310582B6-5BA5-424F-A91A-A1644A7AA590_zpsghikkelt.jpg
Views: 352
Size:  165.4 KB
Name:  5ADAC337-48C0-48F5-AAE3-F3F93A0BED3B_zpsphl9c2oy.jpg
Views: 344
Size:  226.2 KB

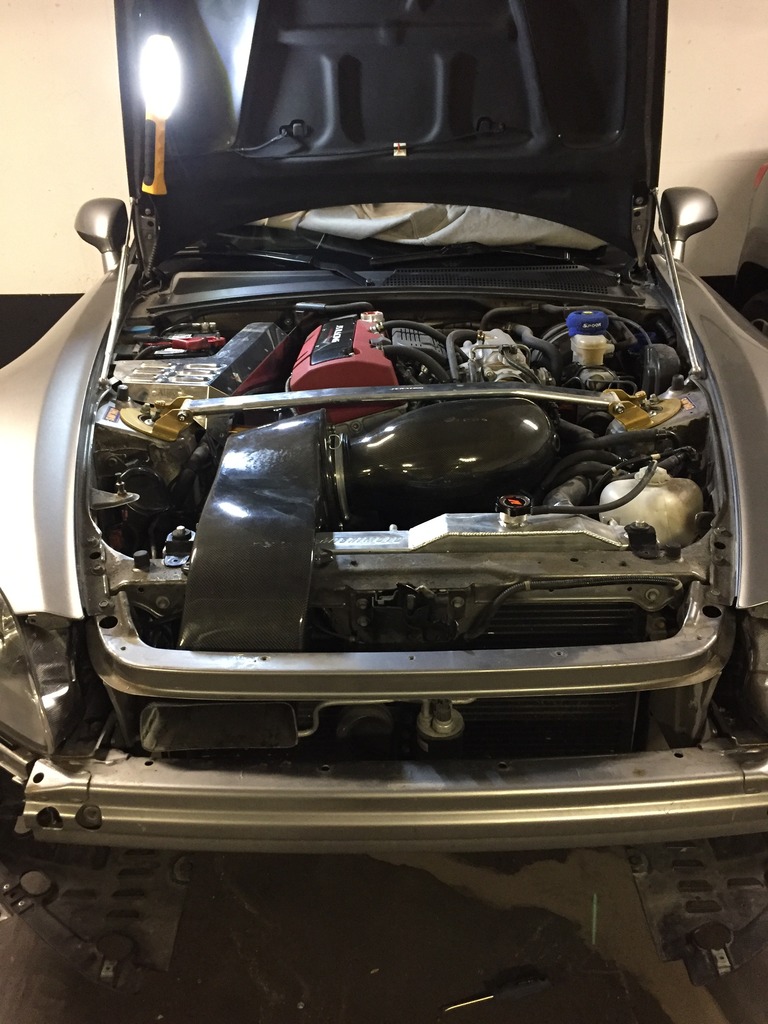
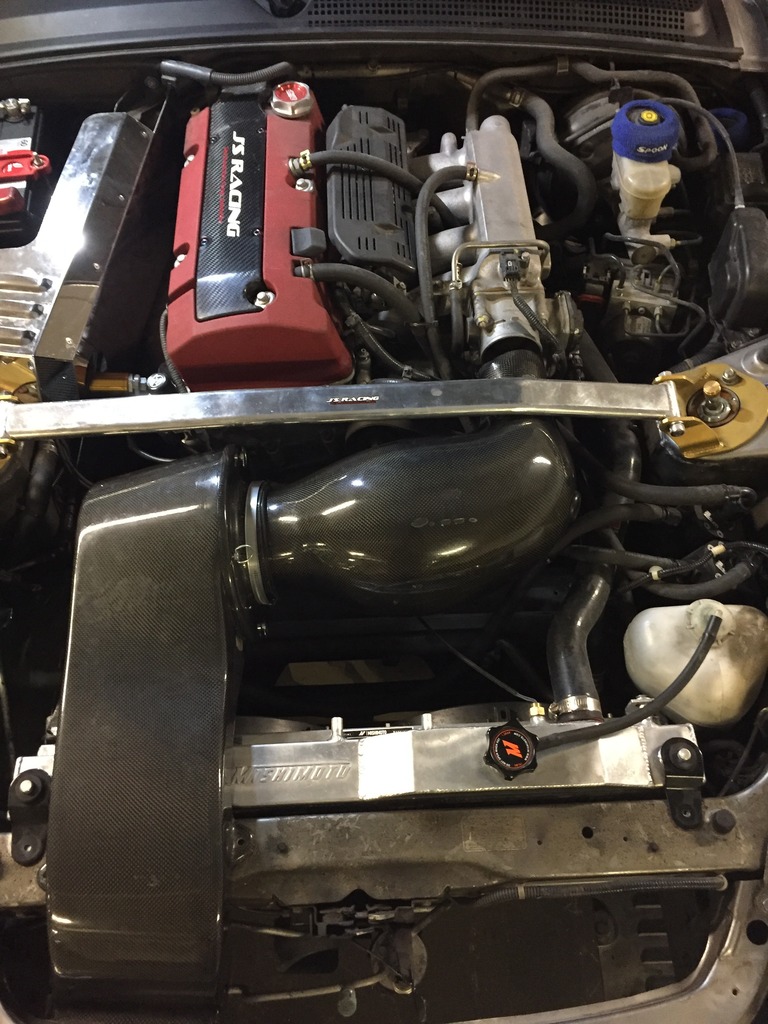
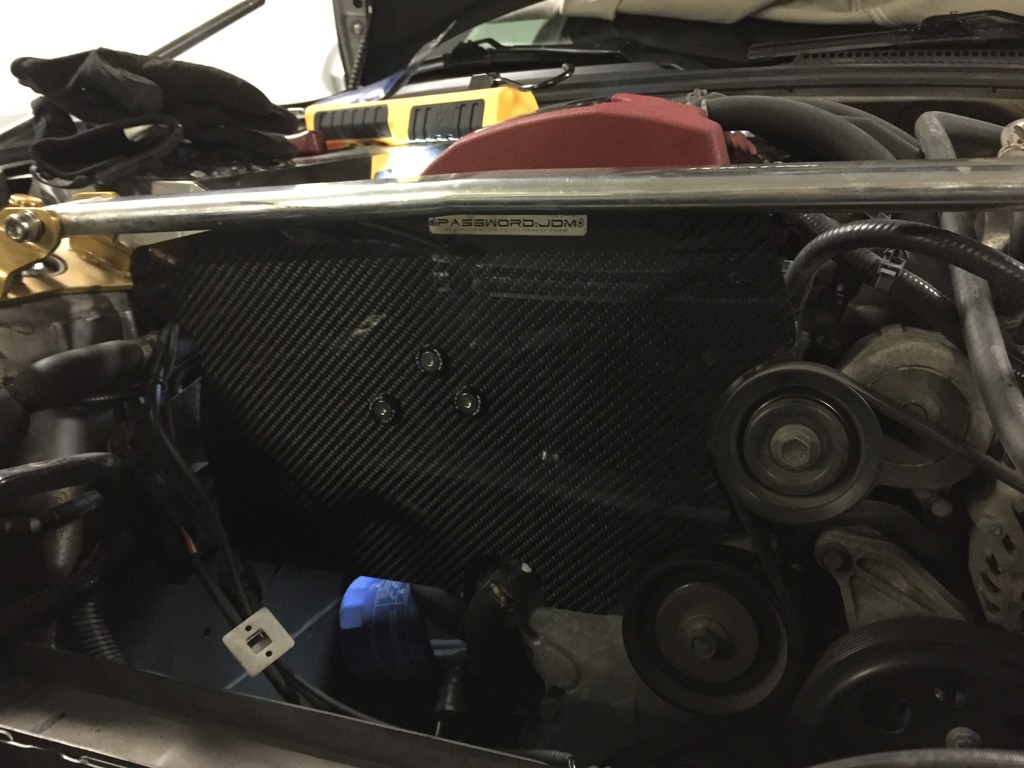
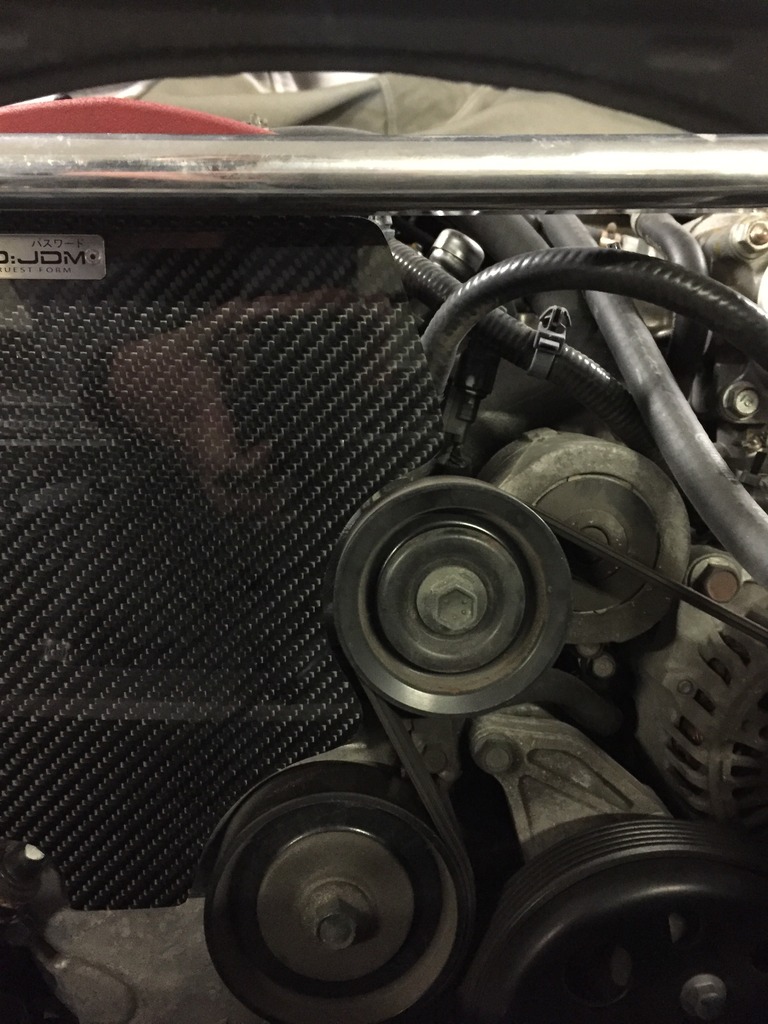
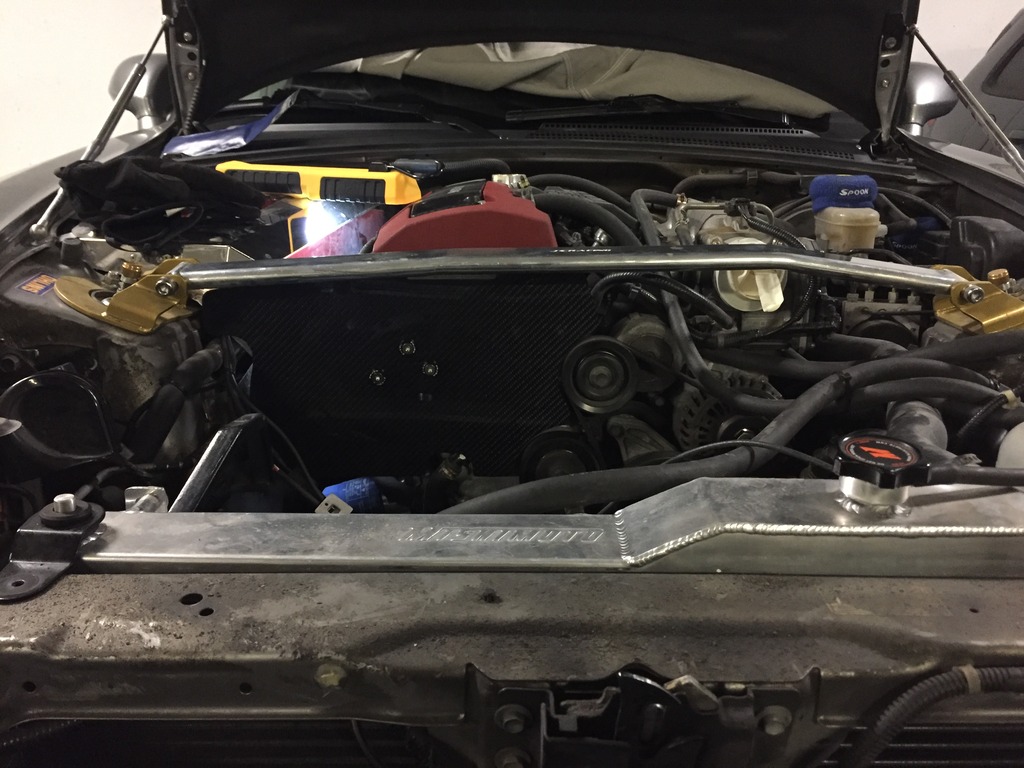
Also installed this P:JDM heat shield that I've had for awhile.

Name:  11D30019-F0E8-4FC1-B108-8C21741FBFAD_zpslyjwmcjc.jpg
Views: 315
Size:  167.6 KB
Name:  CB3F79DC-D863-43E7-803C-A72475C7D761_zpsw5qqbrna.jpg
Views: 324
Size:  202.1 KB
Name:  8BCBB708-7D18-42EB-893E-043F4B482743_zpsgoywy36d.jpg
Views: 315
Size:  210.2 KB
Name:  B567CE54-A342-418A-90FA-55884E06C260_zpsrqezcbbl.jpg
Views: 339
Size:  202.1 KB
Old 01-22-2017, 06:13 PM
  #57  

 
zeroptzero's Avatar
 
Join Date: Oct 2009
Location: Ontario Canada
Posts: 25,393
Received 3,373 Likes on 2,452 Posts
Default

Looks great Norm, the project keeps getting better and more track ready !
Old 01-30-2017, 05:28 PM
  #58  

Thread Starter
 
haga888's Avatar
 
Join Date: Apr 2015
Posts: 1,269
Received 14 Likes on 14 Posts
Default

Picked up some Toda pulleys and a Toda TCT.

Name:  66ACA003-6A15-40C2-91A5-C1C4DC8682ED_zps63sdatlk.jpg
Views: 320
Size:  176.7 KB
Name:  40286447-8462-4748-A6A5-F7066D8E43C2_zpsvvqxwtru.jpg
Views: 342
Size:  195.7 KB
Name:  67DF687E-30C2-407F-846F-8A696AD1237E_zpsq7hdgous.jpg
Views: 319
Size:  195.6 KB
Old 01-30-2017, 05:31 PM
  #59  

Thread Starter
 
haga888's Avatar
 
Join Date: Apr 2015
Posts: 1,269
Received 14 Likes on 14 Posts
Default

Found some time to cut the hood liner to clear the J's intake.

Name:  7E5AFFB4-3EA4-4126-B973-B2E21419854A_zpsnupur1m1.jpg
Views: 362
Size:  132.7 KB
Name:  6FD1E1E4-A5E9-45FC-A27F-2FC27510154D_zpsibxosurm.jpg
Views: 306
Size:  113.1 KB
Old 01-30-2017, 05:58 PM
  #60  

Thread Starter
 
haga888's Avatar
 
Join Date: Apr 2015
Posts: 1,269
Received 14 Likes on 14 Posts
Default

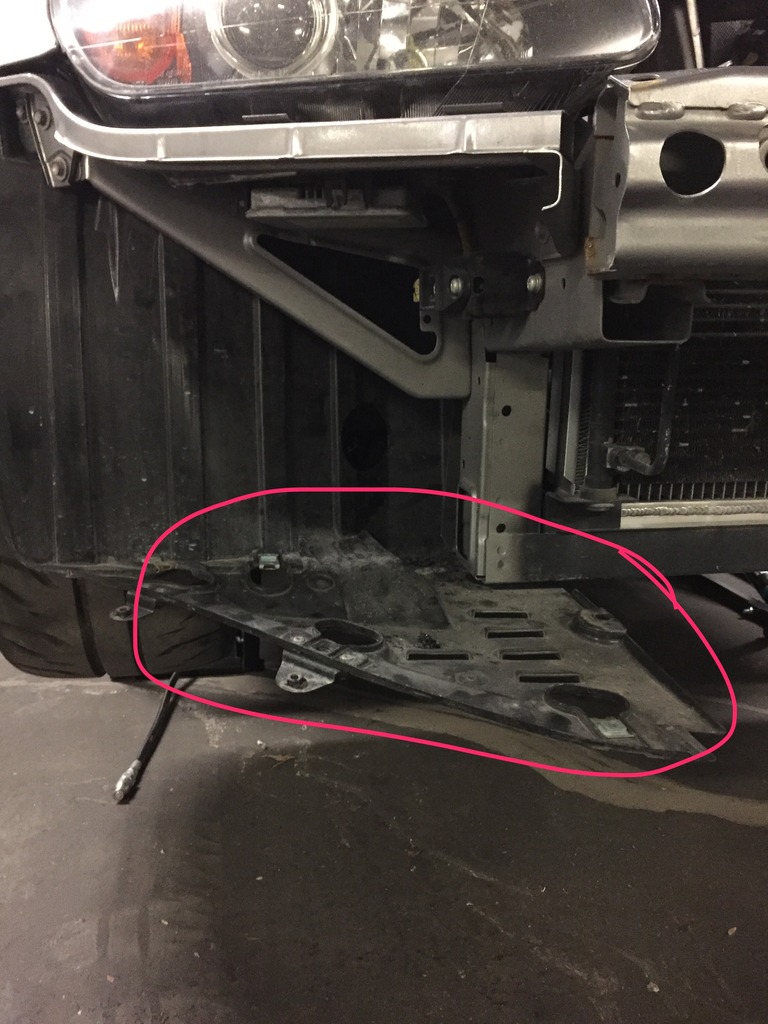
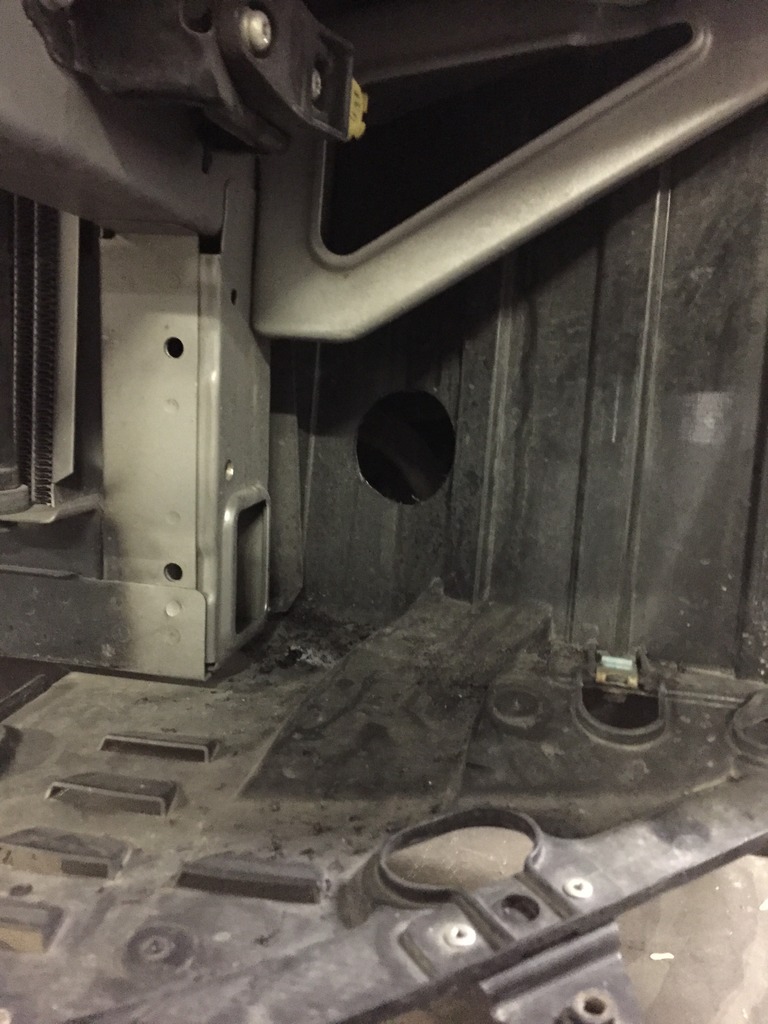
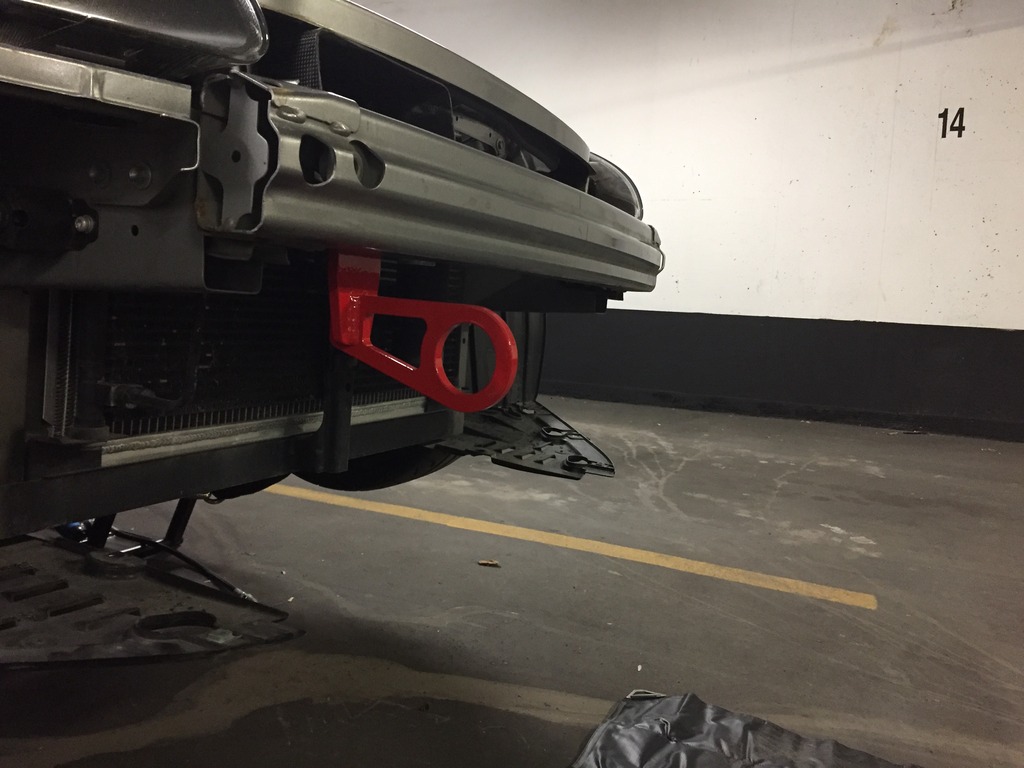
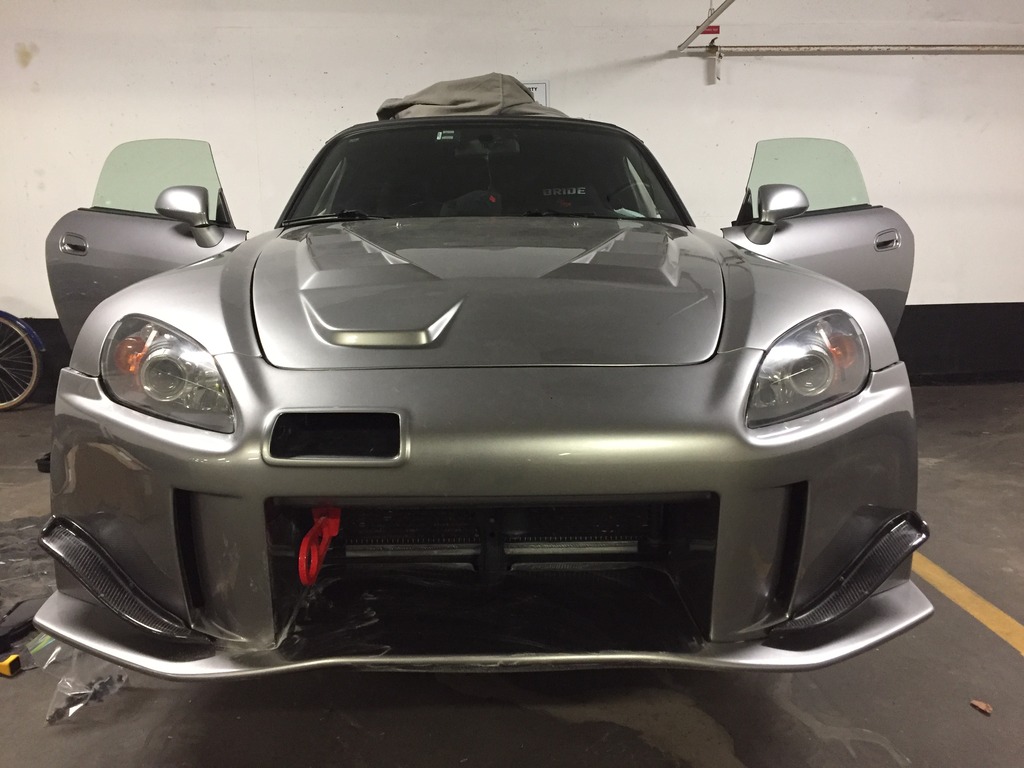
Thought I'd be able to knock of the brake duct install in a couple of hours over the weekend. Didn't quite work out that way. Installed the tow hook first. Easy. Slid the brake ducts onto the bumper and zip tied them to the splitter. Easy. Cut the high temp silicone ducting hose to the right length. Easy. Went to attach the hose to the brake duct. Won't fit. The hose is 2.5" ID and the brake duct just slightly larger so couldn't squeeze it on. No biggie, I just ordered a reducer to fit. So I decided to just button it up and call it a night. Went to put the bumper back on and first thing that hits is the OEM fender liner extension against the brake duct. Ok, something I need to trim. Pull the brake ducts back off and try again. Bumper now hits the tow hook. So had trim a bit of the radiator box to clear the tow hook. Basically the two hours I thought it would take to install the brake ducts all I got done was installed the tow hook.

Name:  A5B635CC-F74B-4559-92E3-37582FD01B60_zps1gapbgty.jpg
Views: 358
Size:  195.6 KB
Name:  CA19CEC8-8F13-4376-9457-5055BD379983_zpsykulxyi6.jpg
Views: 406
Size:  182.1 KB
Name:  97B06242-3DC0-4E9A-A5F4-067F8C6CC0C6_zpsthzxqcyi.jpg
Views: 317
Size:  178.4 KB
Name:  B247A14E-41BF-4483-AADE-7A1580474CFB_zpsoxbwamrd.jpg
Views: 362
Size:  147.9 KB
Name:  9BDBE72D-A88B-47DF-987B-997A25A7F8C1_zpshbftdtzh.jpg
Views: 320
Size:  155.2 KB


Quick Reply: haga888's Silverstone AP2 build


All times are GMT -8. The time now is 01:15 PM.