

TB spacer DIY


Thread Starter
Registered User
Joined: Feb 2008
Posts: 265
Likes: 0
From: Marlton, NJ
few people have asked about the spacer I have on my car. here's a little sumthin i threw together.....
got my TB spacer from rob little bit ago. Here's a few pics of what is needed to modify for install.
I didn't take pics of the first few steps but they are pretty self explanitory.
step 1: remove upper intake tube that goes into TB
step 2: remove the sensor clips and lower coolant line from TB
step 3: remove the TB cable by losening the lock nut, you have to losen the bottom nut all the way down so the cable will come out of the bracket, you'll see what I mean when you do it.
step 4: remove the two bolts and two nuts that hold the TB on
step 5: remove the TB
step 6: scrape the old TB gasket off the manifold or TB whichever it sticks to.
step 7: remove the two studs in the manifold that held the TB on,these will be replaced my the bolts p2r supplied with the kit. can use pliers or "double nut" method.
step 8: reinstall the TB with the gaskets on each side, make sure to line them up so they match the ports on the TB. Use the four bolts and four washers supplied with the spacer.
step 9: plug all the sensors back in the TB
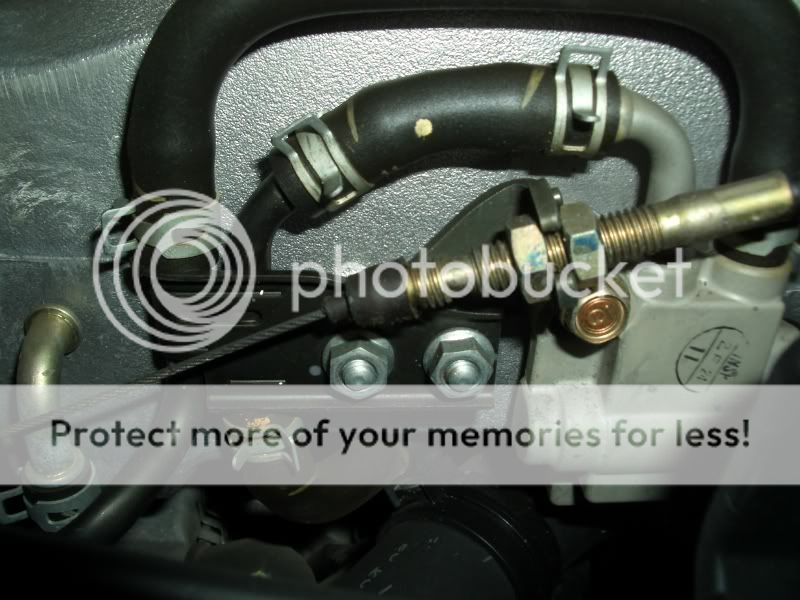
step 10: you have to remount the TB cable bracket so the cable will reach. here's some pics....
how it is stock.....
how i moved it. p2r says there is a replacement bracket in the works, and should be released shortly. for now this is what i did.....

you can see i basically took the bracket and slid it down one post and moved it to the outside of the bracket that holds the coolant lines. i have been running it this way for a while now and it doesn't move at all.
step 11: you have to extend the lower coolant line. i just used some hose i had laying around in my "honda parts box" here's a pic

step 12: replace the intake, I have the injen cold air and mine fit fine with a little adjusting.
here's how it should look when complete.....notice the p2r engraving is on the side and the nitrous port is on the bottom(not seen)

got my TB spacer from rob little bit ago. Here's a few pics of what is needed to modify for install.
I didn't take pics of the first few steps but they are pretty self explanitory.
step 1: remove upper intake tube that goes into TB
step 2: remove the sensor clips and lower coolant line from TB
step 3: remove the TB cable by losening the lock nut, you have to losen the bottom nut all the way down so the cable will come out of the bracket, you'll see what I mean when you do it.
step 4: remove the two bolts and two nuts that hold the TB on
step 5: remove the TB
step 6: scrape the old TB gasket off the manifold or TB whichever it sticks to.
step 7: remove the two studs in the manifold that held the TB on,these will be replaced my the bolts p2r supplied with the kit. can use pliers or "double nut" method.
step 8: reinstall the TB with the gaskets on each side, make sure to line them up so they match the ports on the TB. Use the four bolts and four washers supplied with the spacer.
step 9: plug all the sensors back in the TB
step 10: you have to remount the TB cable bracket so the cable will reach. here's some pics....
how it is stock.....
how i moved it. p2r says there is a replacement bracket in the works, and should be released shortly. for now this is what i did.....
you can see i basically took the bracket and slid it down one post and moved it to the outside of the bracket that holds the coolant lines. i have been running it this way for a while now and it doesn't move at all.
step 11: you have to extend the lower coolant line. i just used some hose i had laying around in my "honda parts box" here's a pic
step 12: replace the intake, I have the injen cold air and mine fit fine with a little adjusting.
here's how it should look when complete.....notice the p2r engraving is on the side and the nitrous port is on the bottom(not seen)


Thread Starter
Registered User
Joined: Feb 2008
Posts: 265
Likes: 0
From: Marlton, NJ
hey guys. its made by p2r racing. http://www.powerrevracing.com/ i installed the spacer/gaskets and manifold gasket at the same time and i def noticed a improvement. no inner swirl and i am not 100% sure on the inner diameter you'll have to contact them for that. my friend rob who owns teamxxxracing.com can get them with the gaskets. i mainly put it on cause it has a port for nitrous which i am currently getting toegther to put on the car, but they have been dyno proven on k motors for a solid 5whp.


Trending Topics
Thread Starter
Registered User
Joined: Feb 2008
Posts: 265
Likes: 0
From: Marlton, NJ
the spacer combined with the two gaskets on each side and the manifold gasket registered loud and clear on the butt dyno. do either of you two have these on your car? if not then your opinion really doesnt matter. just my $.02. and I am all about adding every little thing possible a few horse here and there is still horsepower.

