
Inline Pro 6265E Build - Mase Tuned

Thread Starter


Joined: Feb 2008
Posts: 3,964
Likes: 7
From: USA
*Updated*
List of Parts & Changes
Mechanical
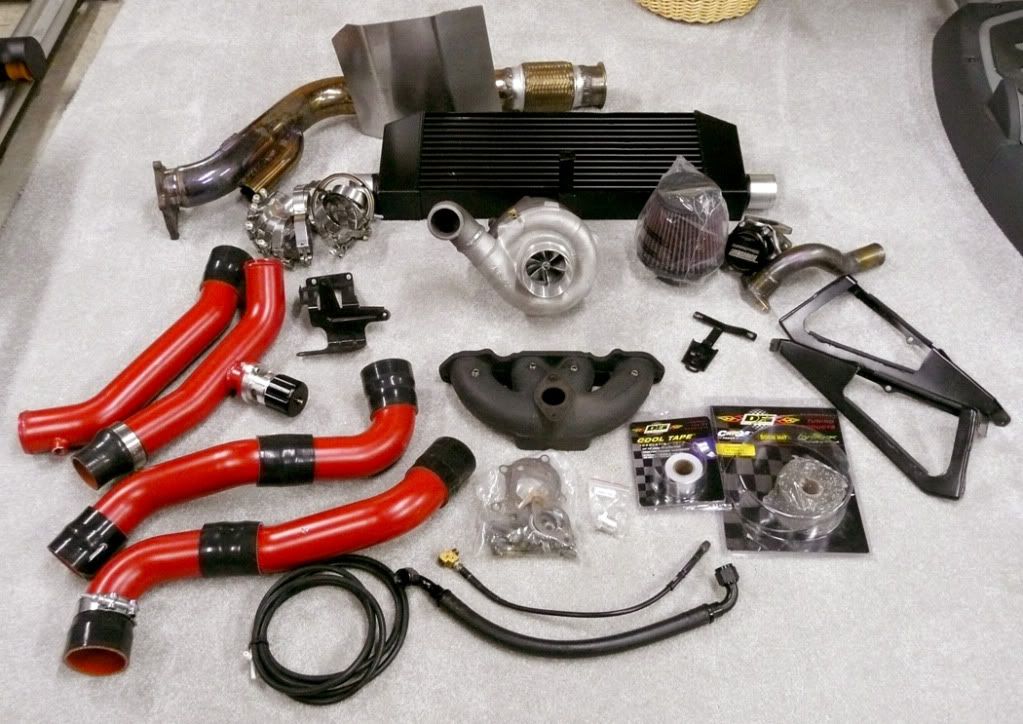
InlinePro Kit Cast Manifold
Precision 6265E Journal Bearing Turbo - E Cover - 0.60 Compressor / 0.63 Hotside
InlinePro Intercooler and Piping (600HP Core 2.5" Piping)
TurboSmart 38mm UltraGate
InlinePro St Stl Dump Tube Recirced into Downpipe
InlinePro Turbo Oil Drain System (-10AN Tapped in the Front of the Pan)
InlinePro Oil Turbo Oil Feed (-3AN w/ Restrictor)
InlinePro Blowoff Valve (It works very well)
InlinePro Oil Filter Relocation Kit
Jegs Oil Temperature Gauge
DEI Titanium Turbo Blanket
DEI Hose Sleeve for Coolant Lines and Turbo oil Supply
Custom Made St-Stl 430 Heat Shield
Asura 3” St-Stl Exhaust
ARP Hardened Exhaust Studs
AEM Dry Flow Filter
Turbo Inlet and Outlet Gaskets
Studs and Lock Nuts for Wastegate and Downpipe
5 Star T-bolt Clamps
HPS Manifold Coating
Powder Coated the IC Piping
Welded a Bracket to the Downpipe to Fasten it to the Block
6” St-Stl Flex Joint Added to the Downpipe
3” St-Stl V-band Clamp between DP and Catback
Relocated the 02 bung ( It was positioned so that the 02 hit the transmission)
Gasket Matched the Exhaust Manifold to the Turbo Gasket
Ignition Coil Bracket Used to Relocate the Receiver to allow the IC to fit Behind the Radiator
Custom Welded IC Brackets
PatS4P Flexible AC Relocation Lines
HD PCV Valve
All New Extruded Silicone Vacuum Tubing
Throttle Body Coolant Bypass
Contoured and Sanded Pistons
New Thermostat
AP2 Exhaust Cam
Fuel
Injector Dynamics 1000cc Injectors
AEM Fuel Pressure Regulator
InlinePro Fuel Rail
Walbro 255LPH Pump
Custom -6AN Dual Fuel Supply Lines
Jegs St-Stl Fuel Pressure Gauge
*Not Installed Yet* Fuel Pump Voltage Stepper/Regulator
Cylinder Head
Mild Head Porting
Gasket Matched to Intake and Exhaust Manifold
Ferrea Intake and Exhaust Valves
InlinePro Valve Springs and Retainers
New Valve Seals
Sealed the Air Injection Ports
Decked the Surface
SCE ICS 2.3mm Gasket (O-ring Seal)
Electrical
AEM 30-1052-U Fuel Management Unit
AEM Serial Gauge
Custom Pillar Mounted Led and Buzzer Warring Indicator
Modifry ECT Fix
Modifry Seal Belt Lock (It is SWEET)
GM Air Intake Temperature Sensor
Omni 4 Bar Map Sensor
Custom Made Ignition Coil System
About 18 Miles of Wire
Serial Splitter to Allow the Serial Gauge to Operate and Have a Tuning Port
Custom Made Battery Relocation Kit
Industrial Truck Mounted Enclosure
One Gauge Supply
100 A Breaker
Under Hood Mounted Disconnect
New Trunk Cover Plate
Custom Made Knock Detector
AEM (MAC) Boost Solenoid
Innovate Individual Cylinder EGT Sensors
Drivetrain
*Not Installed* ACT HD Pressure Plate
Factory Clutch Disc
InlinePro R200 Differential Kit
Drive Shaft Shop 2.9 Axles
Drive Shaft Shop Drive Shaft
Nissan Viscous Differential
Other
Stainless Breaded Break Lines
CR Sway Bar
CR Rack Brace
AP2 Tail Lights
AP2 Wheels
Complete Interior Dynomat
IPod Input to Factory Head Unit
Ported Intake Manifold
Powder Coated Intake Manifold
Removed TB Coolant Lines
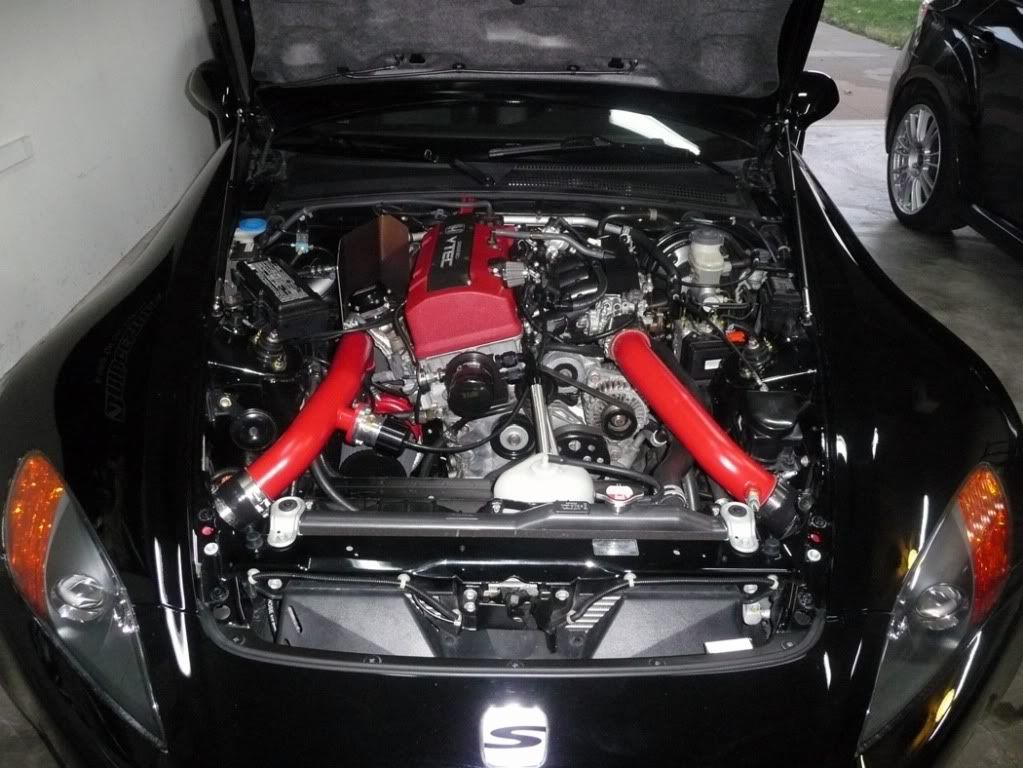
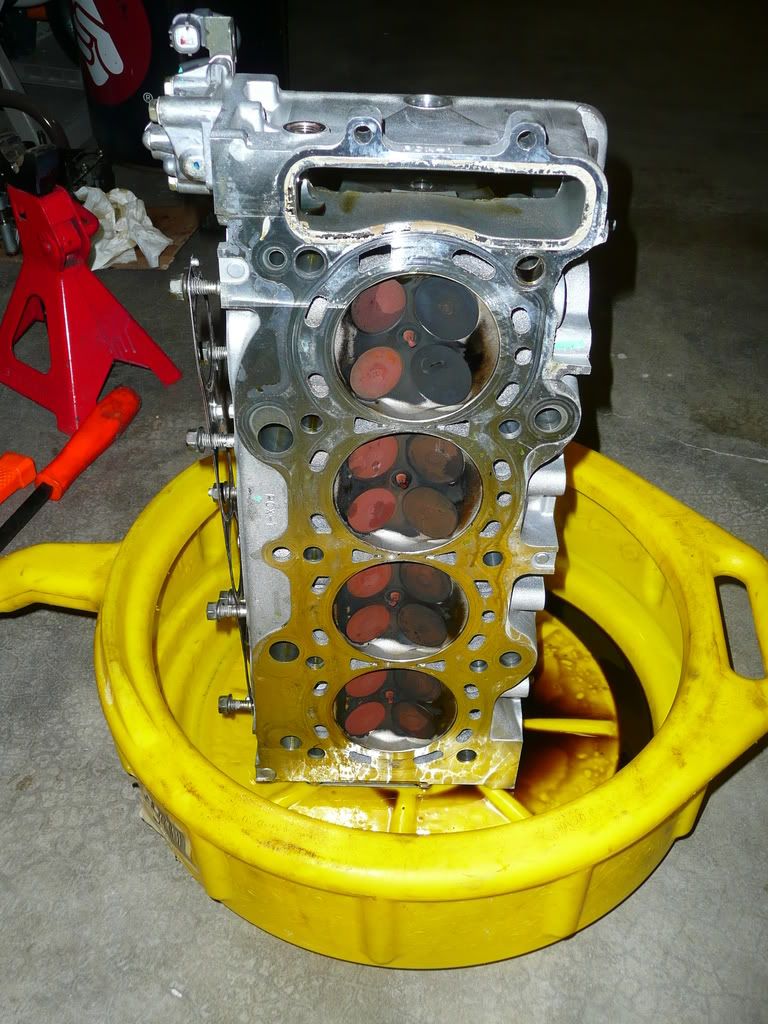
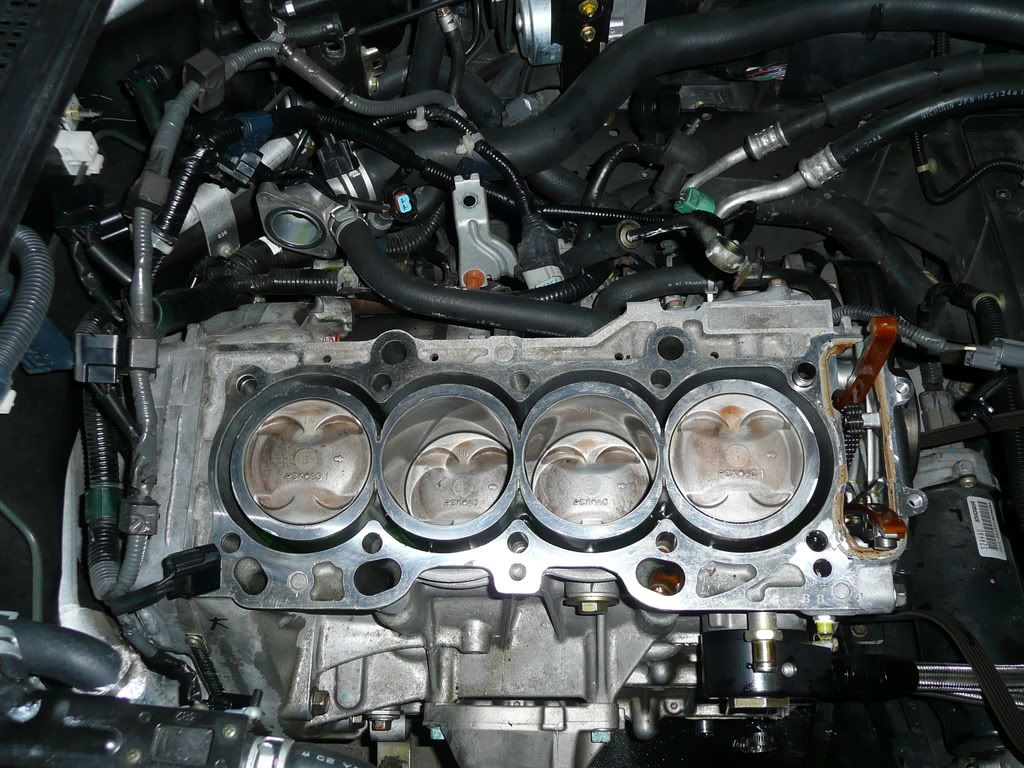
So here is day one. I was a real anoyed taking off the intake. That was much harder than it needed to be. There has to be an easier way to take the manifold off. I stripped all the extra junk out but I have some cleaning to do.
I am sending the head to the porter in the next few days.

List of Parts & Changes
Mechanical
InlinePro Kit Cast Manifold
Precision 6265E Journal Bearing Turbo - E Cover - 0.60 Compressor / 0.63 Hotside
InlinePro Intercooler and Piping (600HP Core 2.5" Piping)
TurboSmart 38mm UltraGate
InlinePro St Stl Dump Tube Recirced into Downpipe
InlinePro Turbo Oil Drain System (-10AN Tapped in the Front of the Pan)
InlinePro Oil Turbo Oil Feed (-3AN w/ Restrictor)
InlinePro Blowoff Valve (It works very well)
InlinePro Oil Filter Relocation Kit
Jegs Oil Temperature Gauge
DEI Titanium Turbo Blanket
DEI Hose Sleeve for Coolant Lines and Turbo oil Supply
Custom Made St-Stl 430 Heat Shield
Asura 3” St-Stl Exhaust
ARP Hardened Exhaust Studs
AEM Dry Flow Filter
Turbo Inlet and Outlet Gaskets
Studs and Lock Nuts for Wastegate and Downpipe
5 Star T-bolt Clamps
HPS Manifold Coating
Powder Coated the IC Piping
Welded a Bracket to the Downpipe to Fasten it to the Block
6” St-Stl Flex Joint Added to the Downpipe
3” St-Stl V-band Clamp between DP and Catback
Relocated the 02 bung ( It was positioned so that the 02 hit the transmission)
Gasket Matched the Exhaust Manifold to the Turbo Gasket
Ignition Coil Bracket Used to Relocate the Receiver to allow the IC to fit Behind the Radiator
Custom Welded IC Brackets
PatS4P Flexible AC Relocation Lines
HD PCV Valve
All New Extruded Silicone Vacuum Tubing
Throttle Body Coolant Bypass
Contoured and Sanded Pistons
New Thermostat
AP2 Exhaust Cam
Fuel
Injector Dynamics 1000cc Injectors
AEM Fuel Pressure Regulator
InlinePro Fuel Rail
Walbro 255LPH Pump
Custom -6AN Dual Fuel Supply Lines
Jegs St-Stl Fuel Pressure Gauge
*Not Installed Yet* Fuel Pump Voltage Stepper/Regulator
Cylinder Head
Mild Head Porting
Gasket Matched to Intake and Exhaust Manifold
Ferrea Intake and Exhaust Valves
InlinePro Valve Springs and Retainers
New Valve Seals
Sealed the Air Injection Ports
Decked the Surface
SCE ICS 2.3mm Gasket (O-ring Seal)
Electrical
AEM 30-1052-U Fuel Management Unit
AEM Serial Gauge
Custom Pillar Mounted Led and Buzzer Warring Indicator
Modifry ECT Fix
Modifry Seal Belt Lock (It is SWEET)
GM Air Intake Temperature Sensor
Omni 4 Bar Map Sensor
Custom Made Ignition Coil System
About 18 Miles of Wire
Serial Splitter to Allow the Serial Gauge to Operate and Have a Tuning Port
Custom Made Battery Relocation Kit
Industrial Truck Mounted Enclosure
One Gauge Supply
100 A Breaker
Under Hood Mounted Disconnect
New Trunk Cover Plate
Custom Made Knock Detector
AEM (MAC) Boost Solenoid
Innovate Individual Cylinder EGT Sensors
Drivetrain
*Not Installed* ACT HD Pressure Plate
Factory Clutch Disc
InlinePro R200 Differential Kit
Drive Shaft Shop 2.9 Axles
Drive Shaft Shop Drive Shaft
Nissan Viscous Differential
Other
Stainless Breaded Break Lines
CR Sway Bar
CR Rack Brace
AP2 Tail Lights
AP2 Wheels
Complete Interior Dynomat
IPod Input to Factory Head Unit
Ported Intake Manifold
Powder Coated Intake Manifold
Removed TB Coolant Lines
So here is day one. I was a real anoyed taking off the intake. That was much harder than it needed to be. There has to be an easier way to take the manifold off. I stripped all the extra junk out but I have some cleaning to do.
I am sending the head to the porter in the next few days.


Registered User
Joined: Sep 2007
Posts: 1,490
Likes: 0
yeah there is an easier way. take the intake manifold off after the head is off. I dont know why so many people on here feel you need to remove the intake manifold before removing the head? you dont. leave it on, the head comes off very easy with it attached. same goes for when you put the head back on. leave the intake manifold attached to put it on the car also.

Thread Starter
Joined: Feb 2008
Posts: 3,964
Likes: 7
From: USA
Originally Posted by spdracerut,Feb 7 2009, 10:30 PM
Did you run some octane booster or some weird race gas or something through there? Curious as to the redish tint on the plugs and valves.
Trending Topics
Thread Starter
Joined: Feb 2008
Posts: 3,964
Likes: 7
From: USA
Originally Posted by 03silver2000,Feb 7 2009, 08:19 PM
What are you doing to the head port and polish? or just having it resurfaced?..3mm hg?
Thread Starter
Joined: Feb 2008
Posts: 3,964
Likes: 7
From: USA
Originally Posted by rob!,Feb 8 2009, 07:23 AM
yeah there is an easier way. take the intake manifold off after the head is off. I dont know why so many people on here feel you need to remove the intake manifold before removing the head? you dont. leave it on, the head comes off very easy with it attached. same goes for when you put the head back on. leave the intake manifold attached to put it on the car also.

Registered User
Joined: Jun 2004
Posts: 4,712
Likes: 0
From: Phillips Ranch 909!
looks good so far. are you going to use the gasket with the built in ring or the one without that was being discussed?
cant wait to see how this works out for you, the car is going to be a monster.
Im next but not for a few months.
cant wait to see how this works out for you, the car is going to be a monster.
Im next but not for a few months.