

How to: Wire cruise control buttons with an aftermarket wheel

Thread Starter


Joined: Nov 2010
Posts: 6,322
Likes: 206
From: Ballston Spa, NY
Thought this may help a few people as it see it being asked a lot.
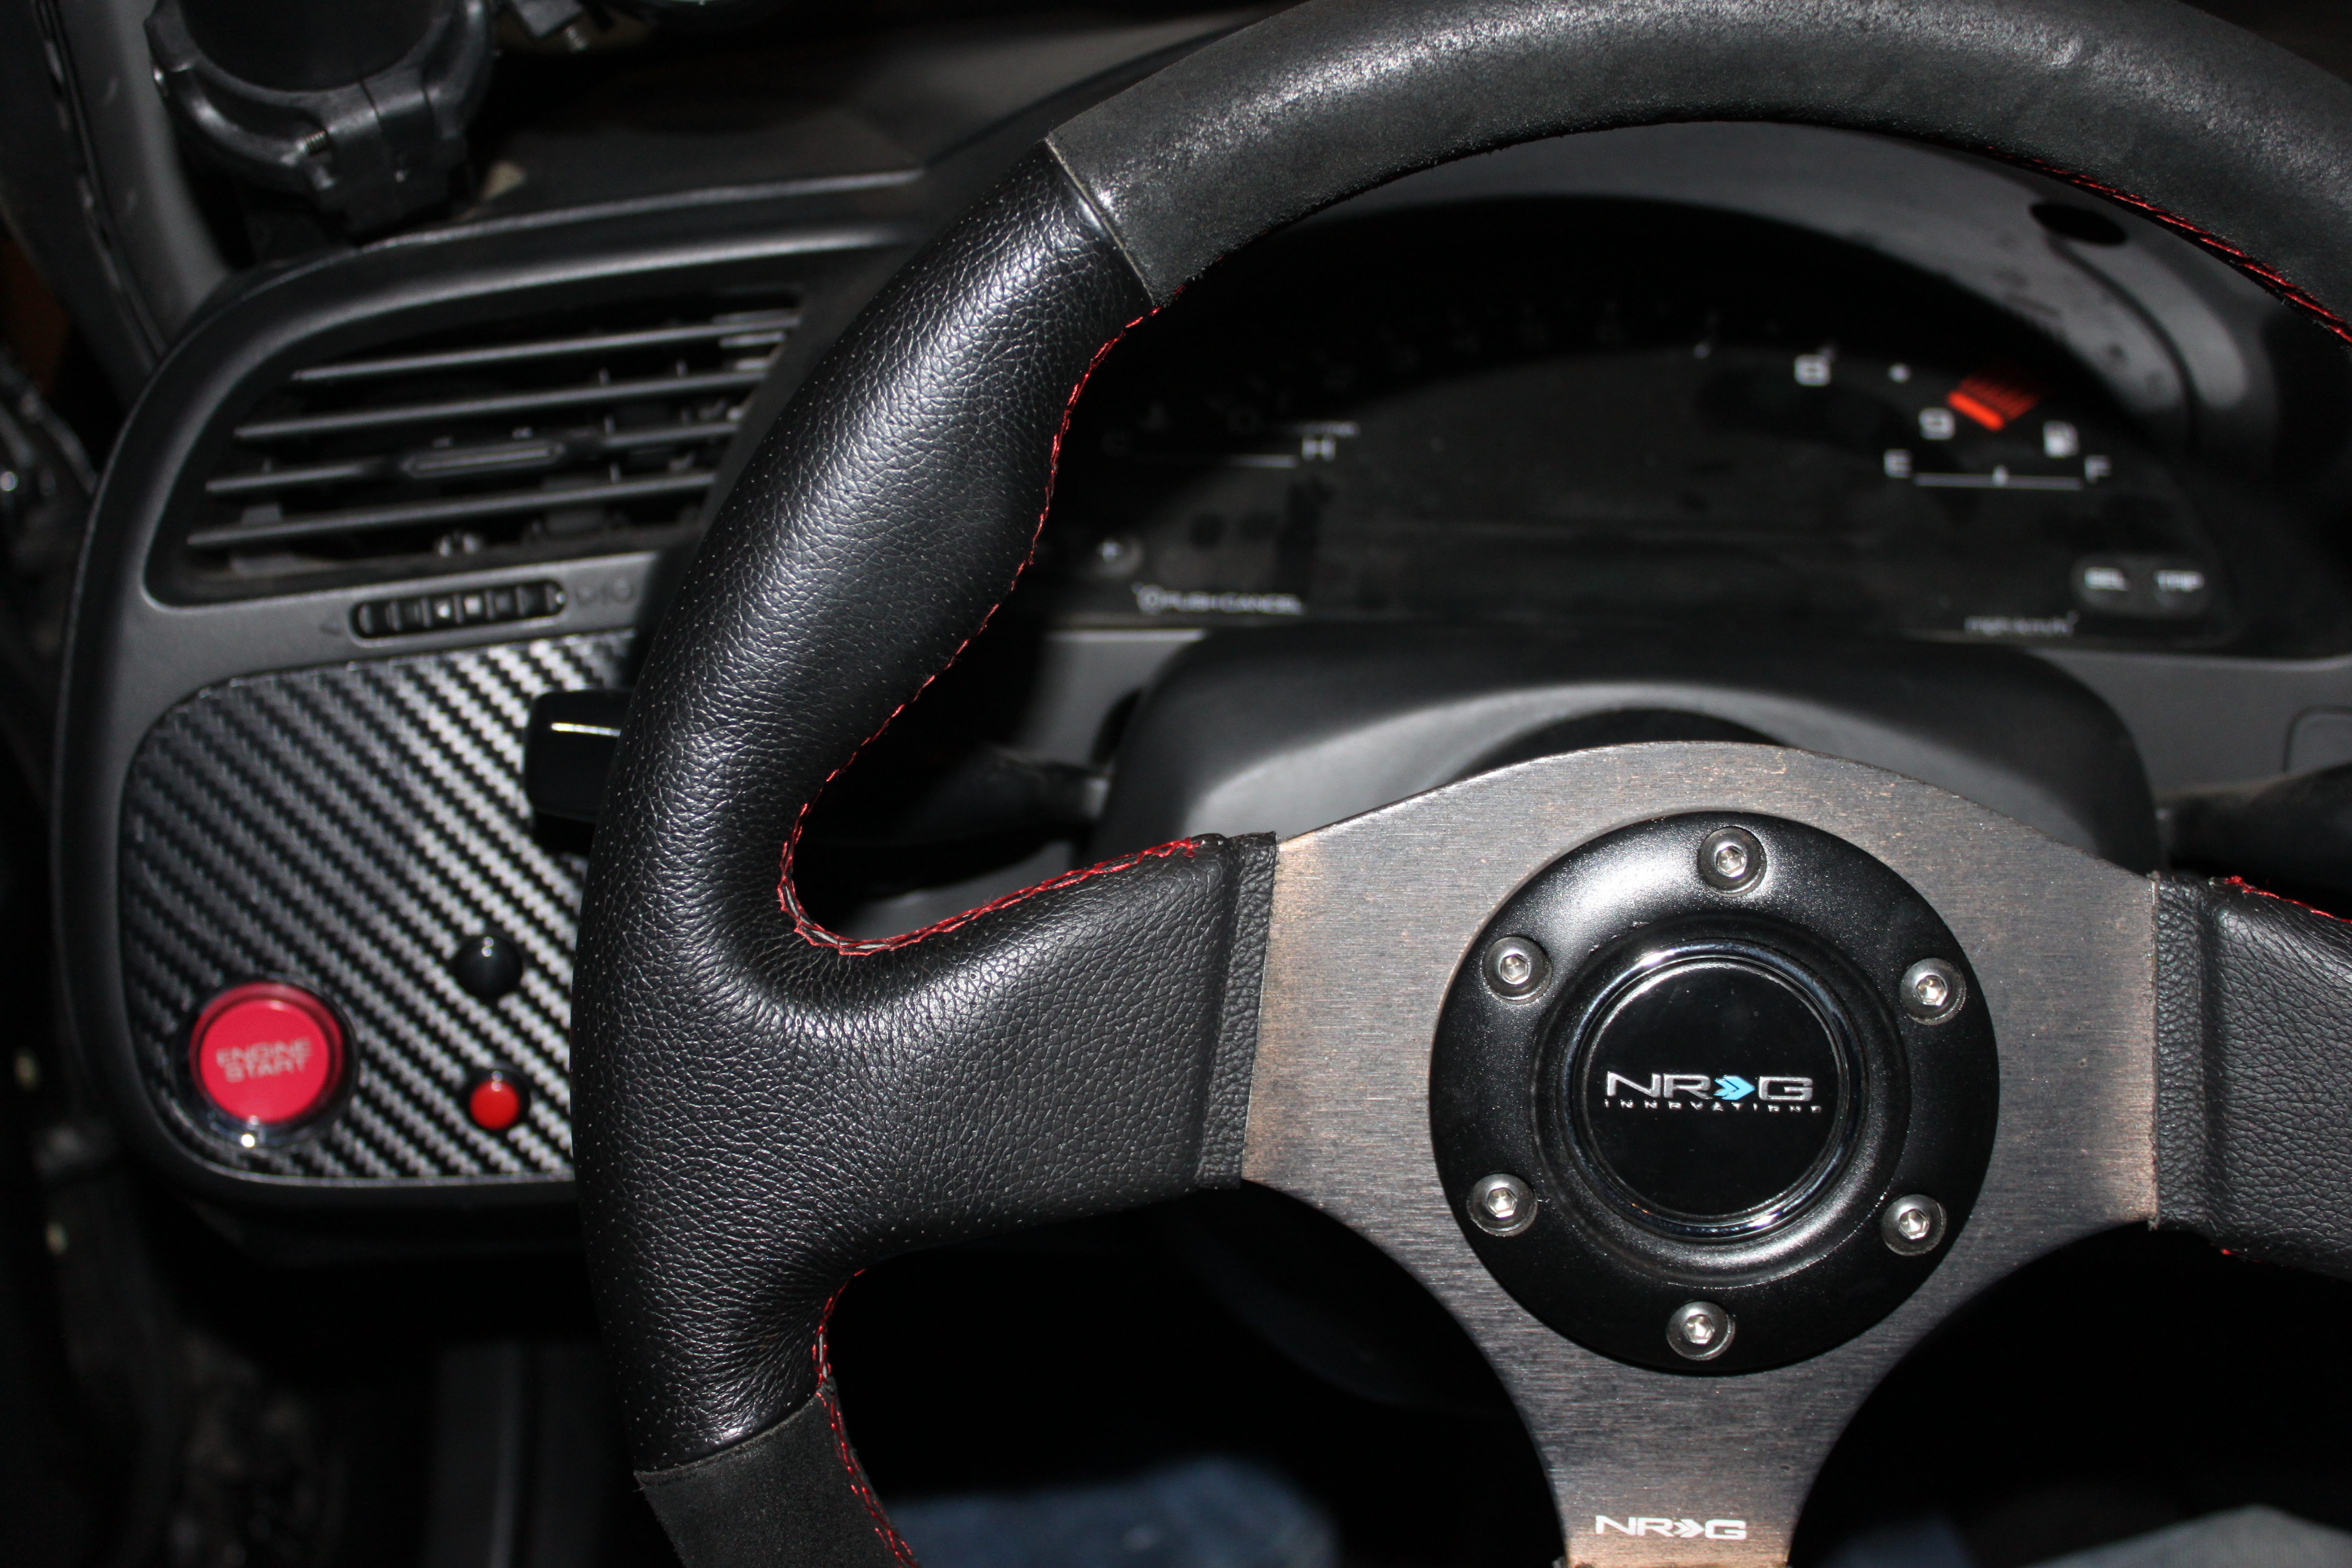
I lost the cruise control buttons a while ago with the install of an aftermarket steering wheel. A while back I modded and installed some momentary buttons in my engine start panel and wrapped it in carbon. Last friday i spent a ton of time searching (and confirming in the honda manual) and figured out which wires i needed to tap into. Well, i finally did the wiring and now i've got the cruise control functioning again.
Here is now the wiring works, this clip plugs into the clock spring (which i lost with the nrg short hub). It's located right above your ingition.
orange = common (wire this to one terminal of each momentary button)
light green with red stripe = set (wire this to the other terminal of your set button)
light green with black stripe = resume (wire this to the other terminal of your cancel button)
The orange wire also makes contact to the rear of the nrg hub for your horn button
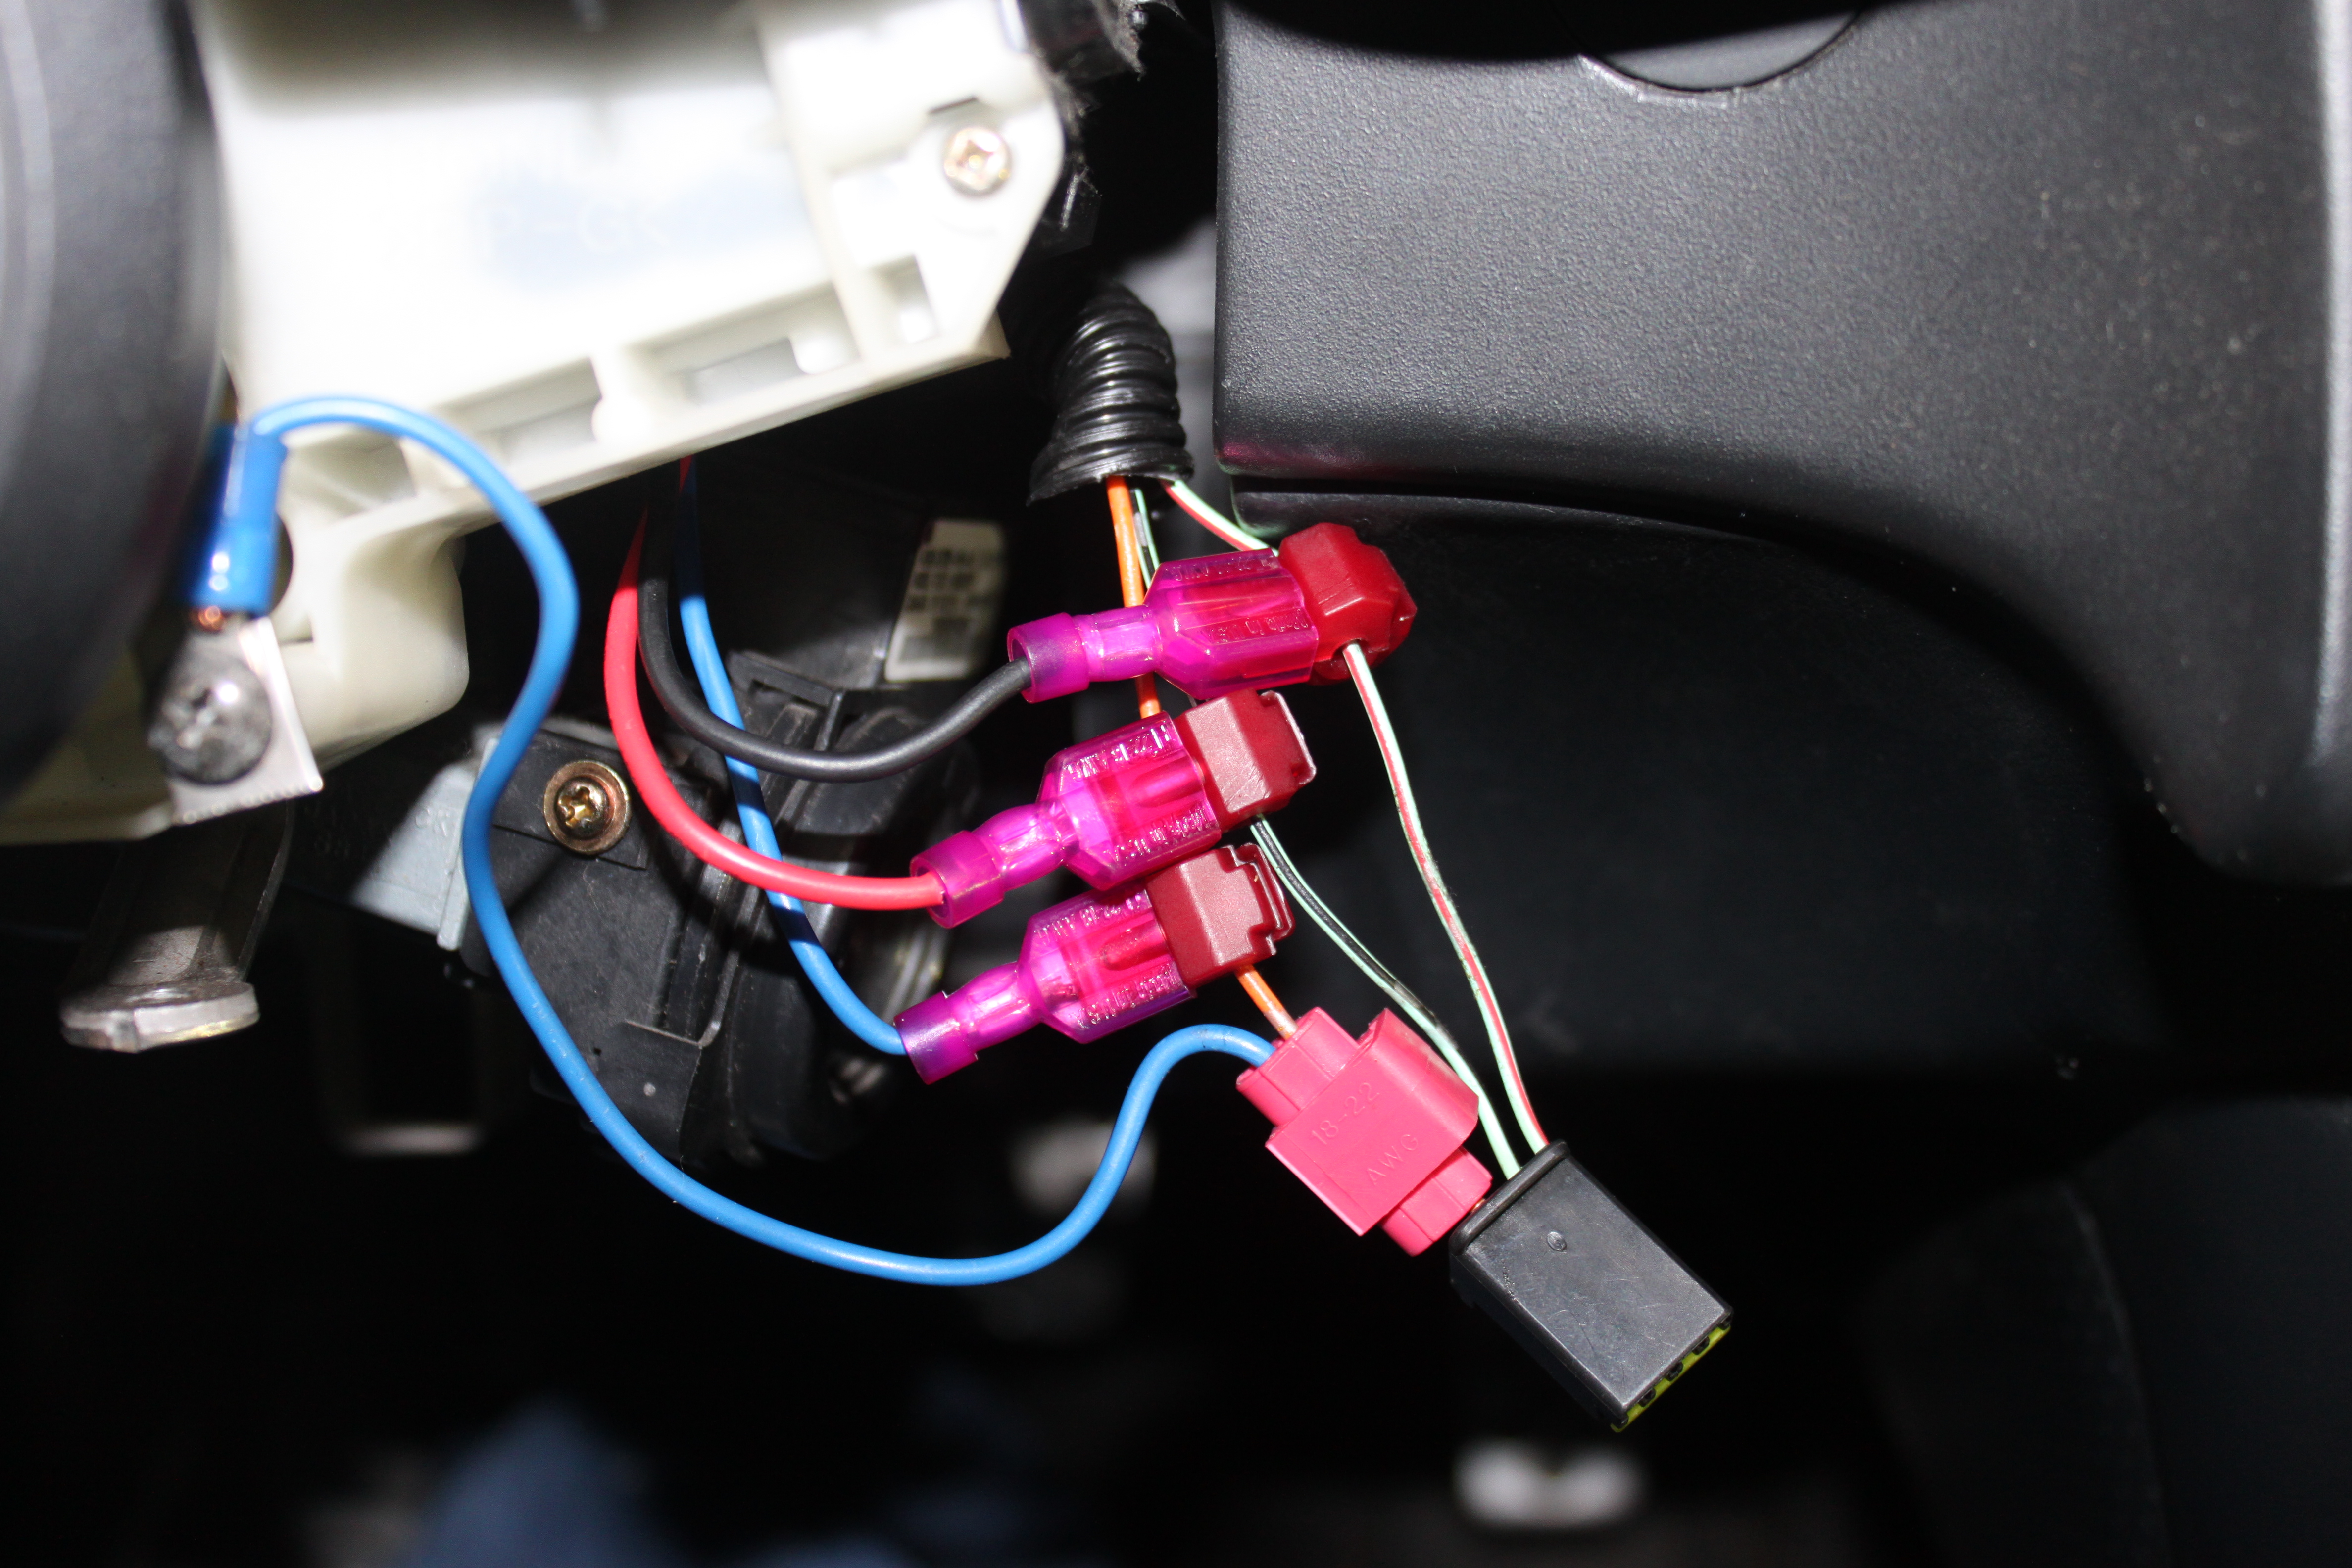
tucked back up under the steering column

cruise control buttons in the start button panel
I wired the black button as set and the red button as cancel.

I lost the cruise control buttons a while ago with the install of an aftermarket steering wheel. A while back I modded and installed some momentary buttons in my engine start panel and wrapped it in carbon. Last friday i spent a ton of time searching (and confirming in the honda manual) and figured out which wires i needed to tap into. Well, i finally did the wiring and now i've got the cruise control functioning again.
Here is now the wiring works, this clip plugs into the clock spring (which i lost with the nrg short hub). It's located right above your ingition.
orange = common (wire this to one terminal of each momentary button)
light green with red stripe = set (wire this to the other terminal of your set button)
light green with black stripe = resume (wire this to the other terminal of your cancel button)
The orange wire also makes contact to the rear of the nrg hub for your horn button
tucked back up under the steering column
cruise control buttons in the start button panel
I wired the black button as set and the red button as cancel.
Last edited by jsenclosure; Dec 20, 2023 at 09:01 AM.
Thread Starter
Joined: Nov 2010
Posts: 6,322
Likes: 206
From: Ballston Spa, NY
Here is how i modded my DCI panel:
First, i removed the dci buttons and hit it with a dremel on the back side to give the fiberglass something to stick to, then i taped up the cluster to fill all the holes with fiberglass. Laid down 2 layers of glass mat and waited for it to dry. Then i just hit it with some light filler, drilled some holes, wrapped it in 3m carbon and mounted and wired the buttons. Then i re-installed the back panel for the DCI button cluster. I picked up the small momentary buttons from radio shack, momentary black for 'set' and red for 'resume'.


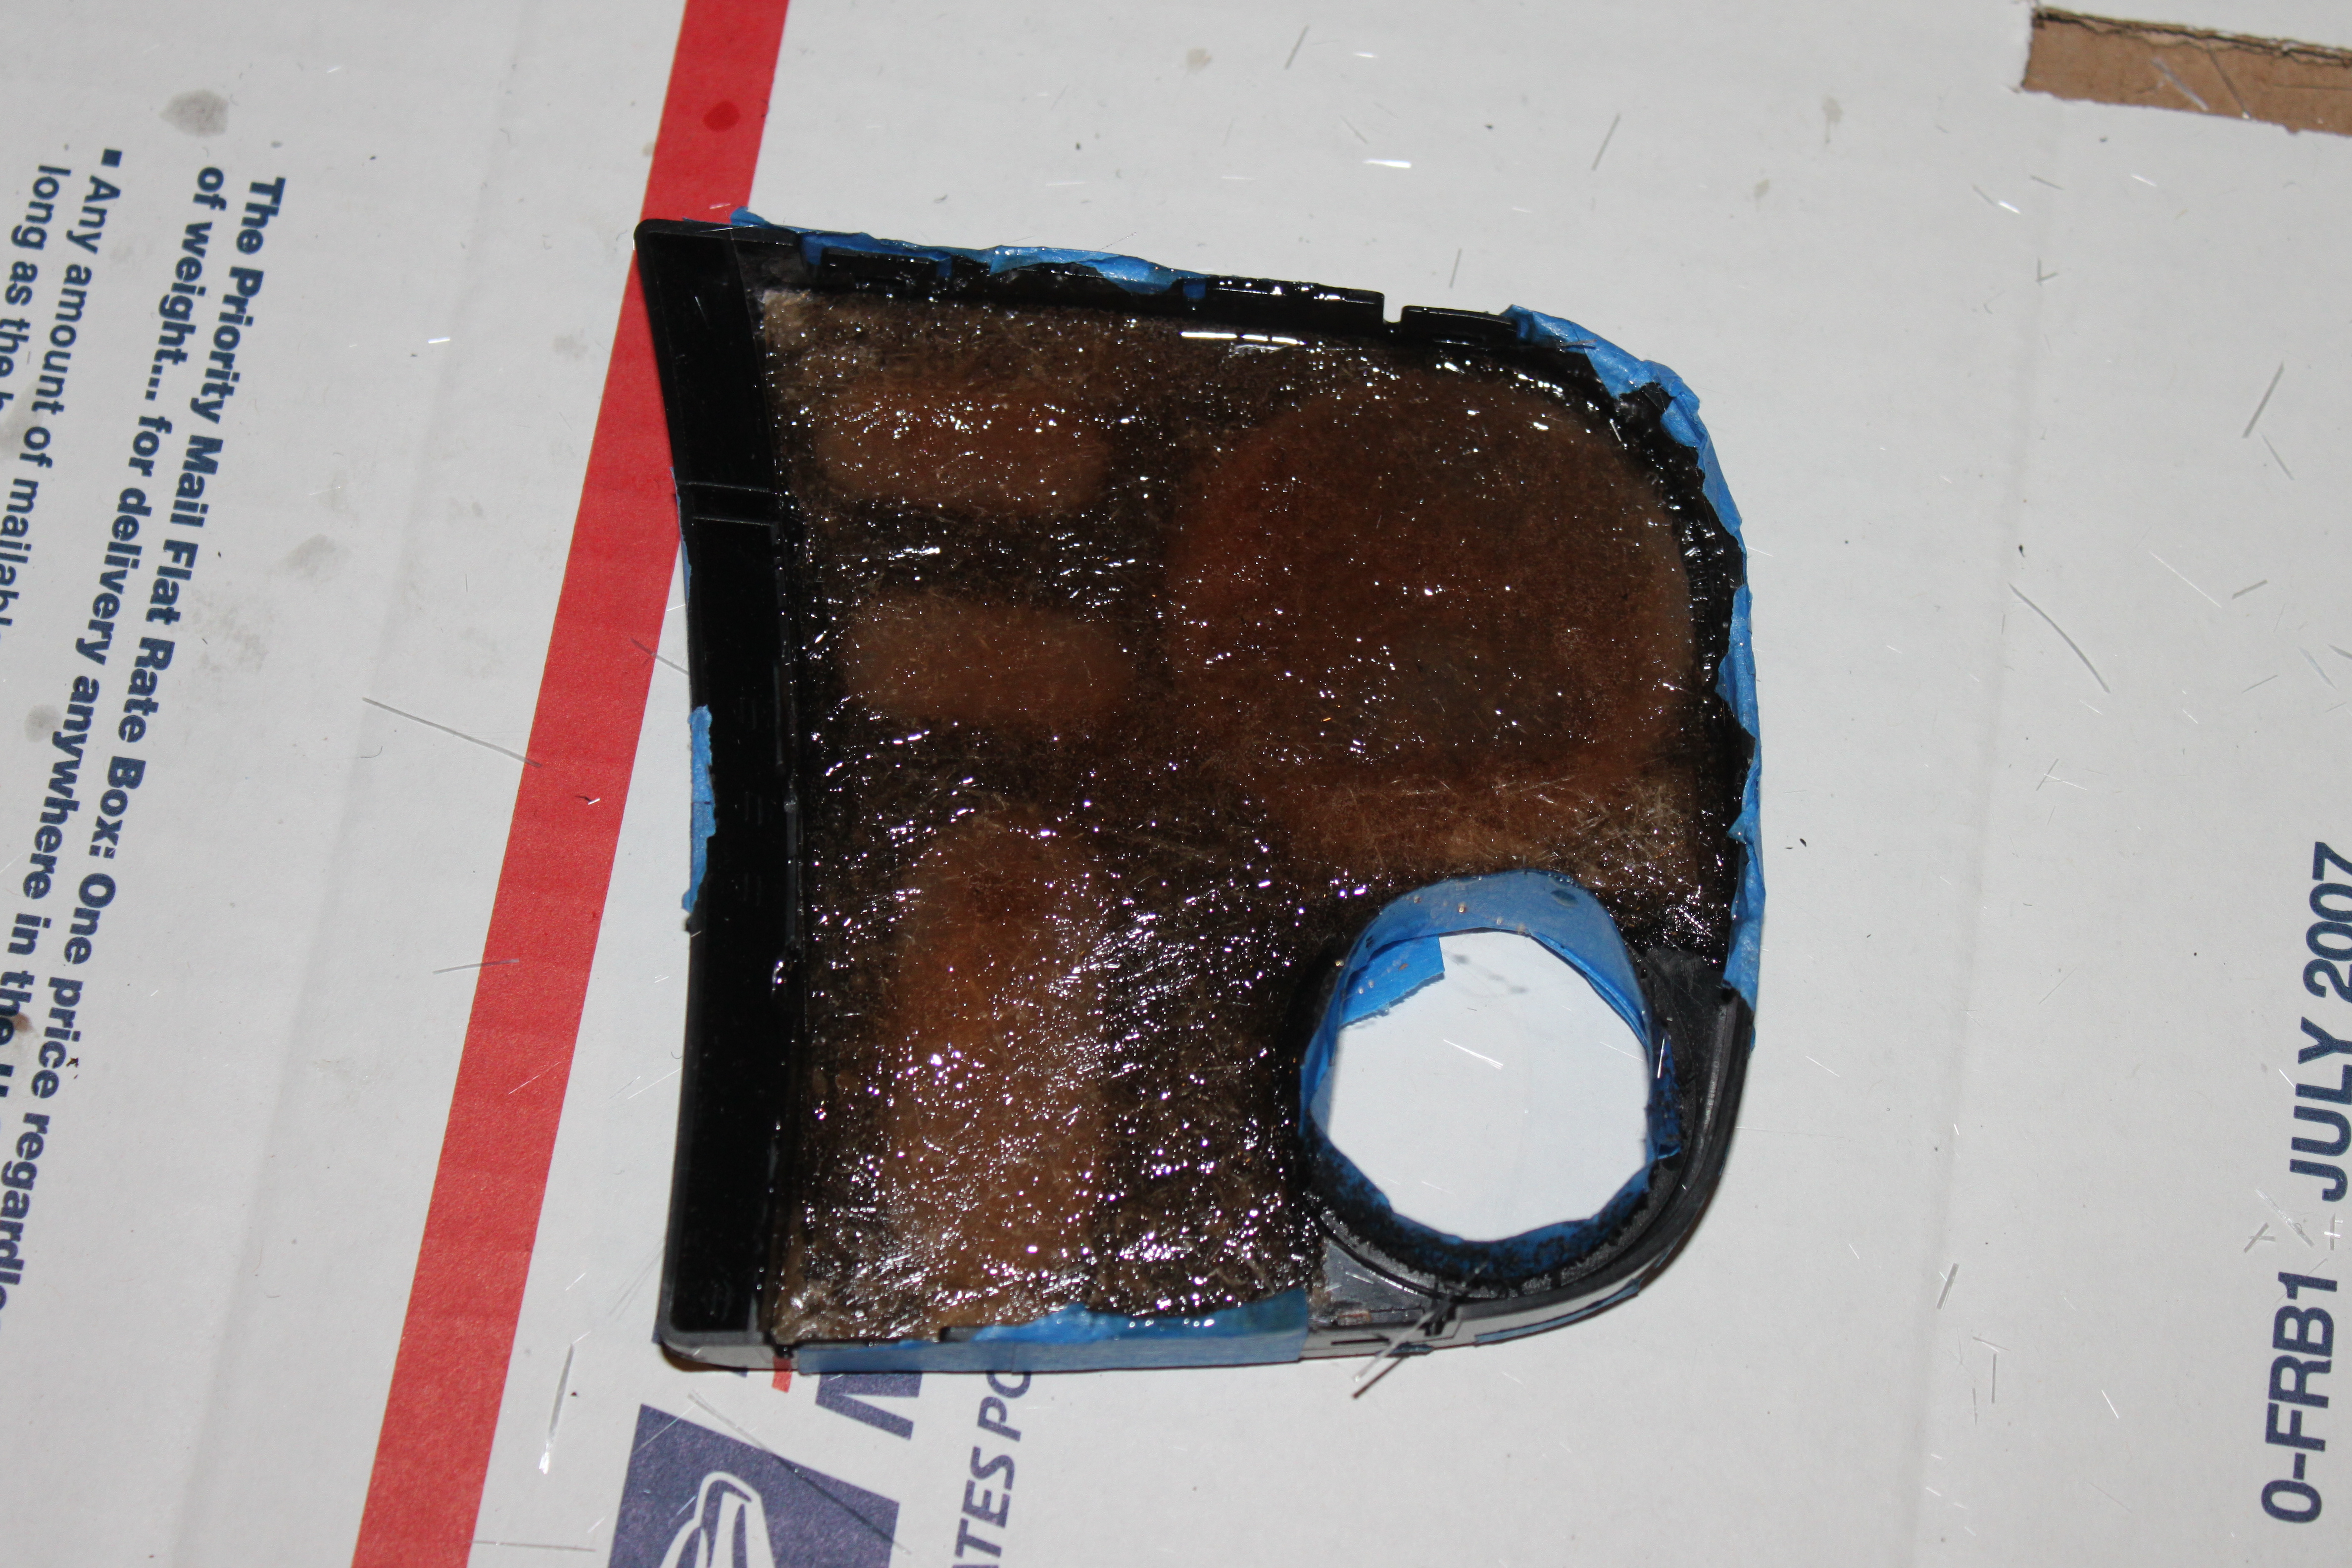

Time for some filler


First, i removed the dci buttons and hit it with a dremel on the back side to give the fiberglass something to stick to, then i taped up the cluster to fill all the holes with fiberglass. Laid down 2 layers of glass mat and waited for it to dry. Then i just hit it with some light filler, drilled some holes, wrapped it in 3m carbon and mounted and wired the buttons. Then i re-installed the back panel for the DCI button cluster. I picked up the small momentary buttons from radio shack, momentary black for 'set' and red for 'resume'.
Time for some filler


Trending Topics
Thread Starter
Joined: Nov 2010
Posts: 6,322
Likes: 206
From: Ballston Spa, NY
thanks


